The good news is that my GS30 got back from the repair shop in excellent condition, everything is working nicely so I opened her up and popped in the two samsung 850 evo drives:
(Overclockers sell them here: https://www.overclockers.co.uk/showproduct.php?prodid=HD-204-SA&groupid=701&catid=2104)
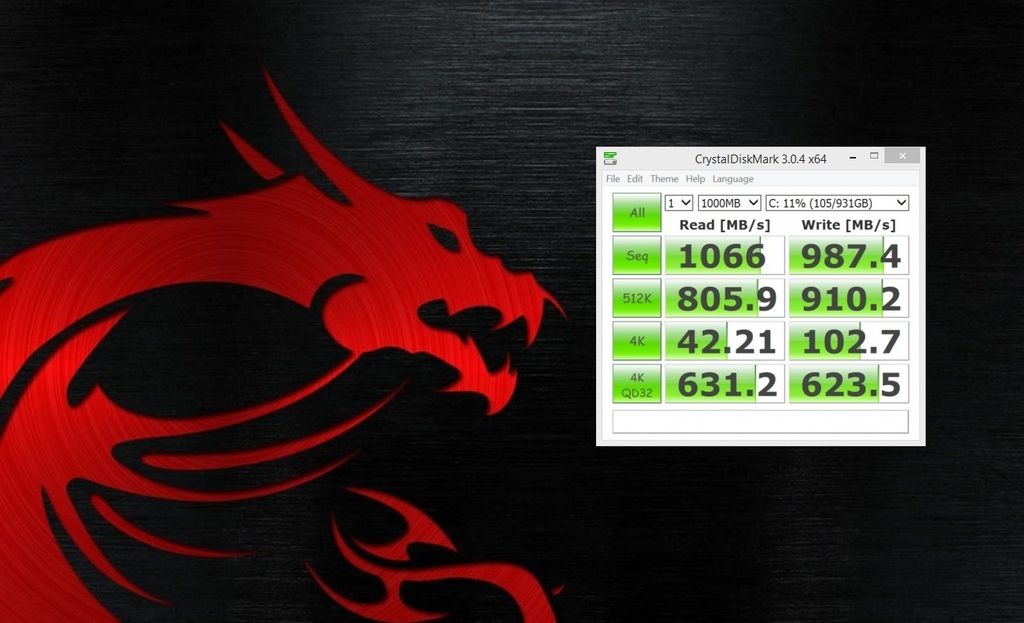
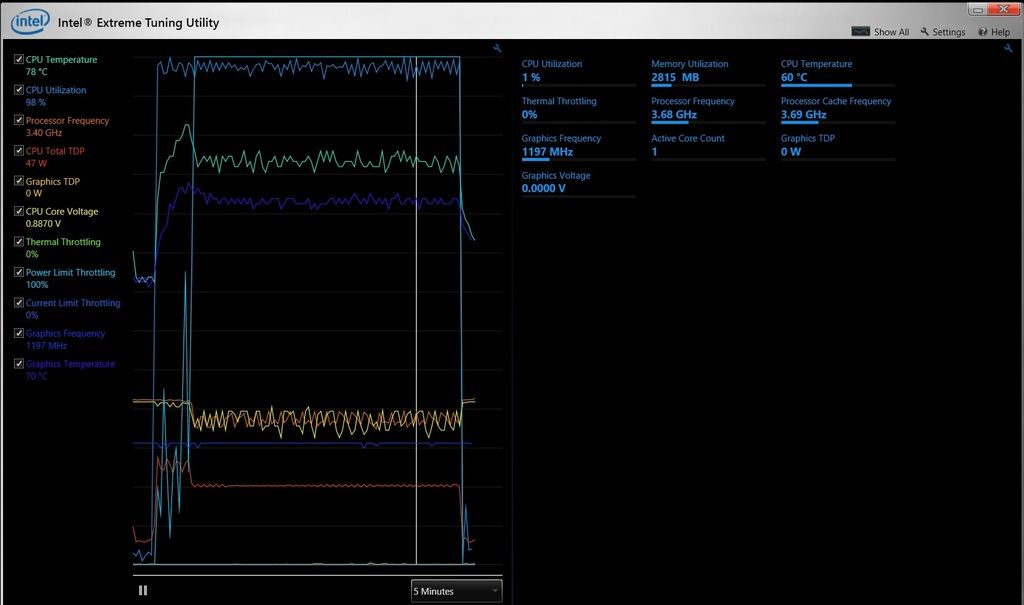
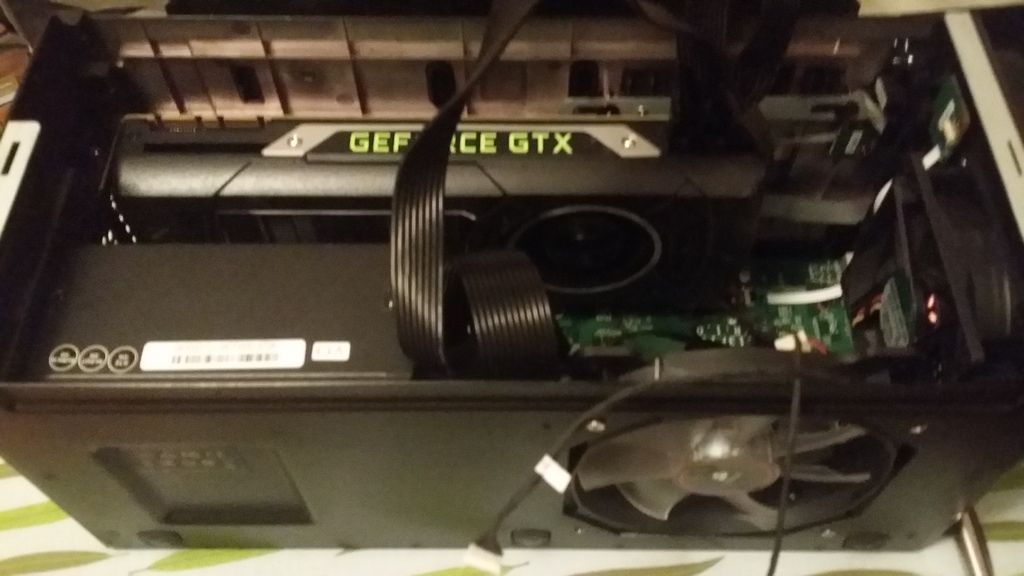
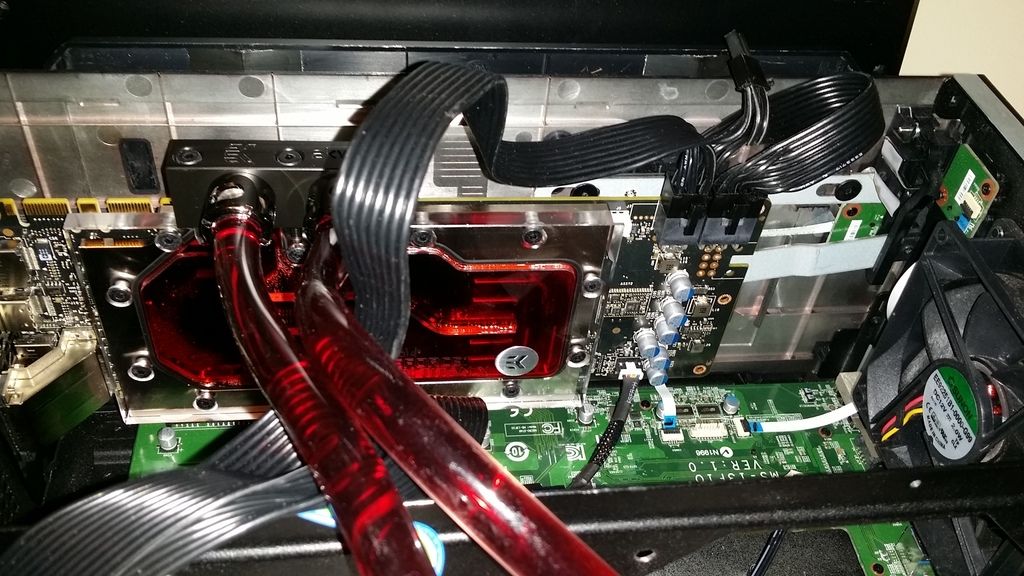
So my GPU box is in the mod shop getting ready for the really cool stuff but for now it's silly fast for day to day tasks and can still play the odd game (GTA V at 720p is perfectly playable).
I'll edit this post with more details as I get everything recorded and pictured")
Ok so you want to replace the SSD in the GS30 yourself, you need to be an expert to perform this kind of work right? Nope. MSI have embarrassed some of the larger machines out there for ease of access *You know who you are") *
*
If you are re-installing windows after replacing the drives (remember both are in raid 0 and are both required to boot) then make sure your media is set up before hand, either create the restore disks OR grab windows 8.1 media here for a clean install:
http://windows.microsoft.com/en-us/windows-8/create-reset-refresh-media
Make sure you select the 8.1 (core, no tags on the end) edition and 64 bit. I have this on my USB stick for super fast installs, no key needed as it is embedded in the bios and will auto activate
Simply remove the 8 screws on the bottom:
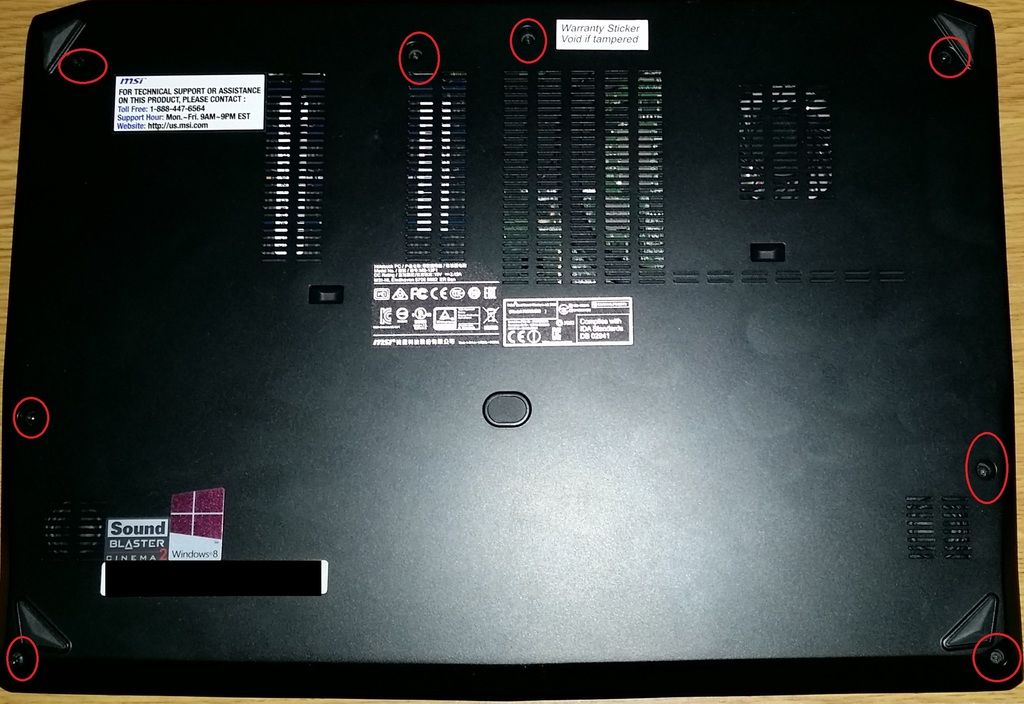
You will break the warranty sticker, by breaking this you are accepting responsibility for any physical damage inside the unit, your warranty should be intact otherwise though
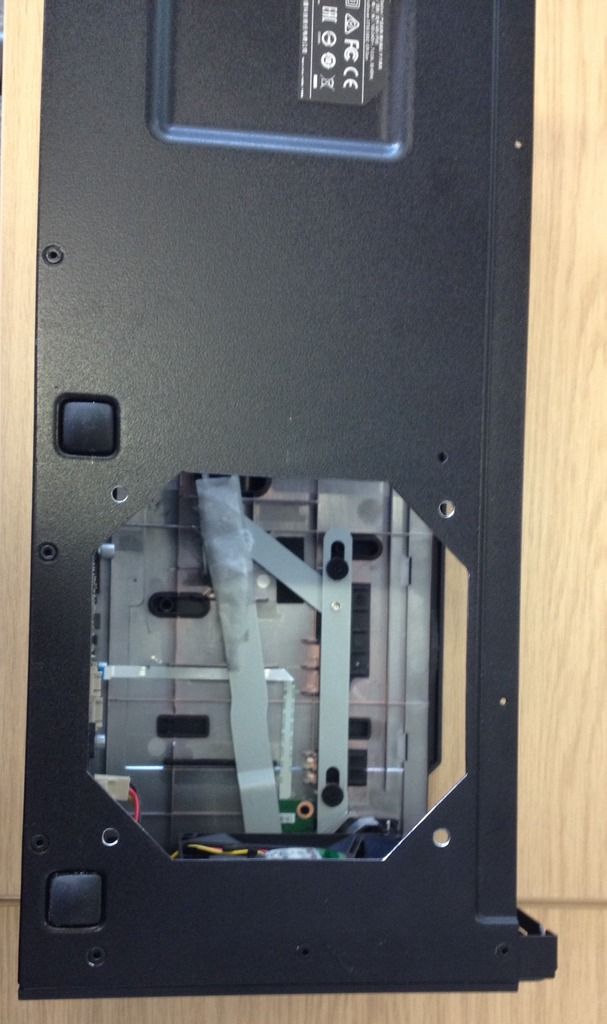
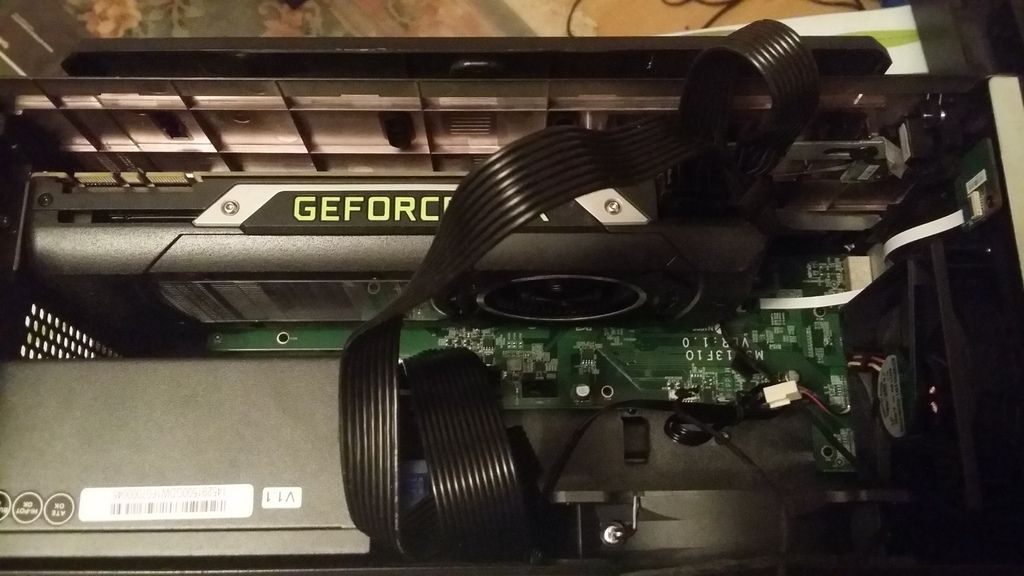
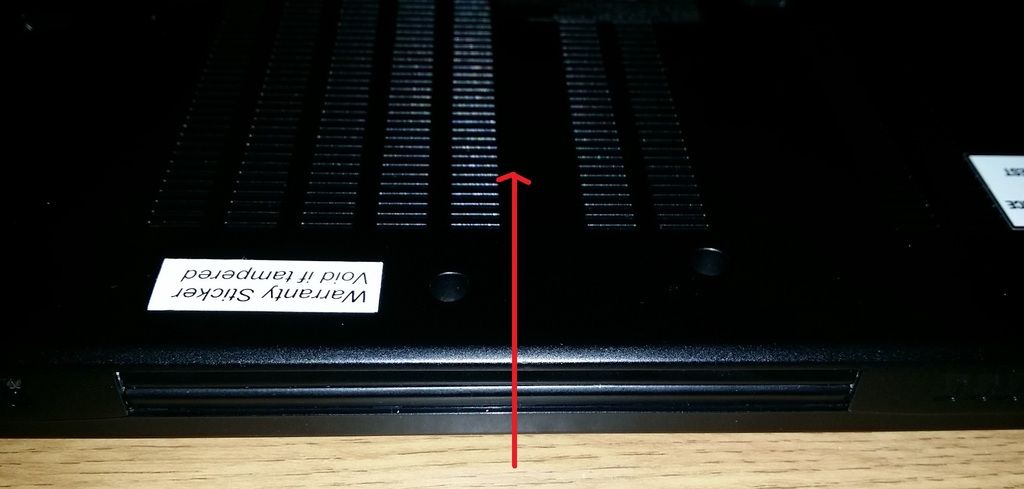
Now lift the casing up from the edge sitting over the dock connector, it should easily lift up:
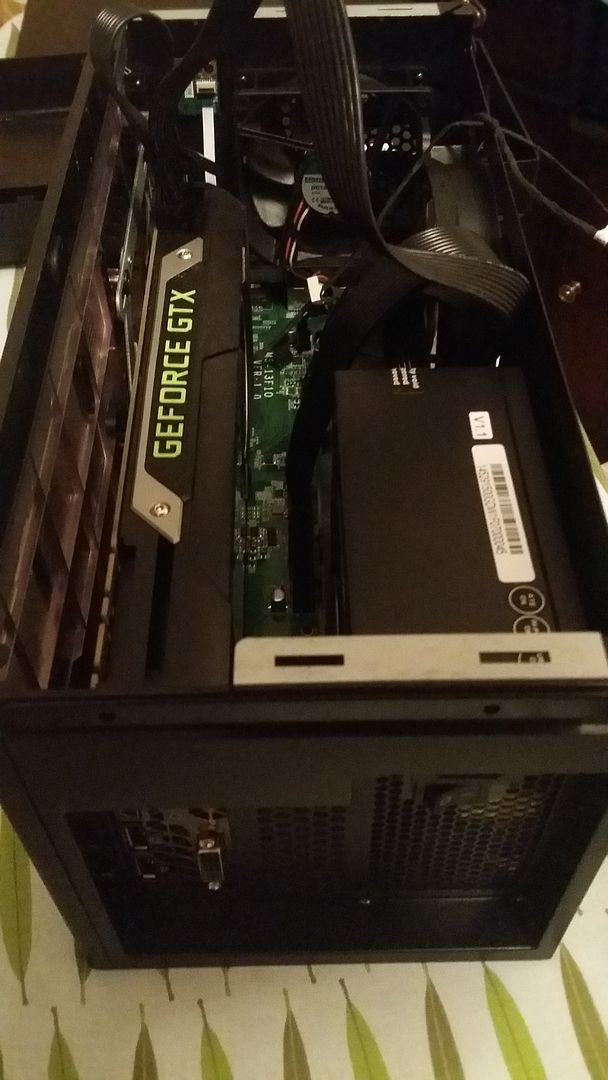
Revealing EVERYTHING:

Now is an excellent time for a repaste if you were going to do it
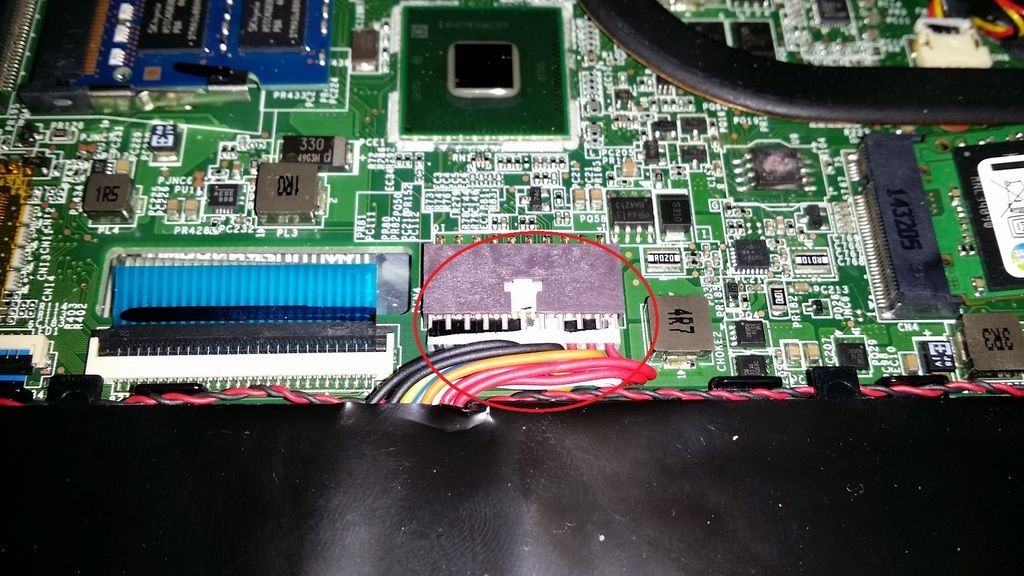
Now for the SSD, i'd advise removing the battery connector while handling any of the internal parts:
Wearing an anti static device is also recommended Otherwise make sure you ground yourself at least before touching the parts, a desktop computer case of a machine that is plugged into the wall is usually a good bet.
Next unscrew the screw holding down the drive:
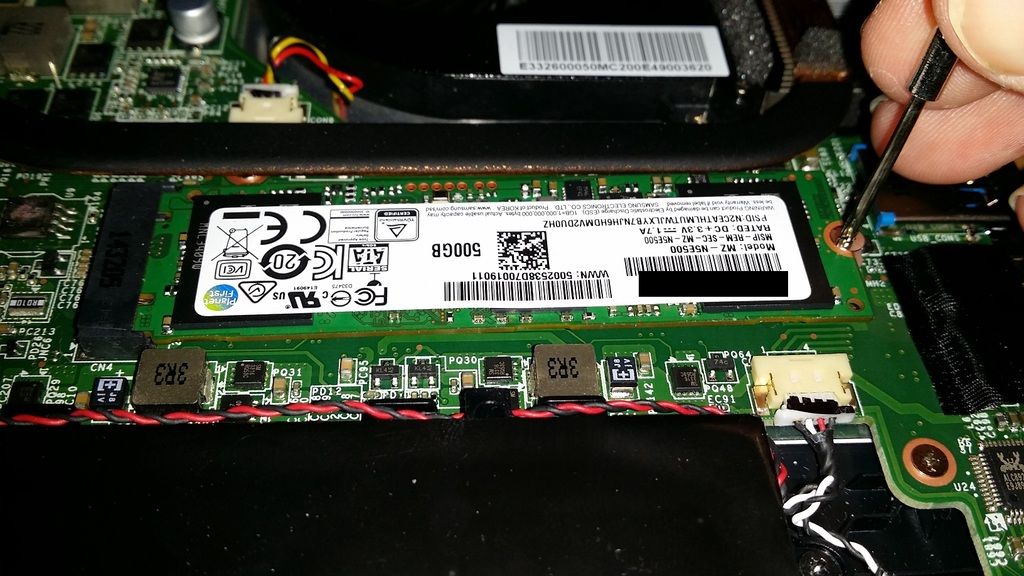
It will pop up at an angle:
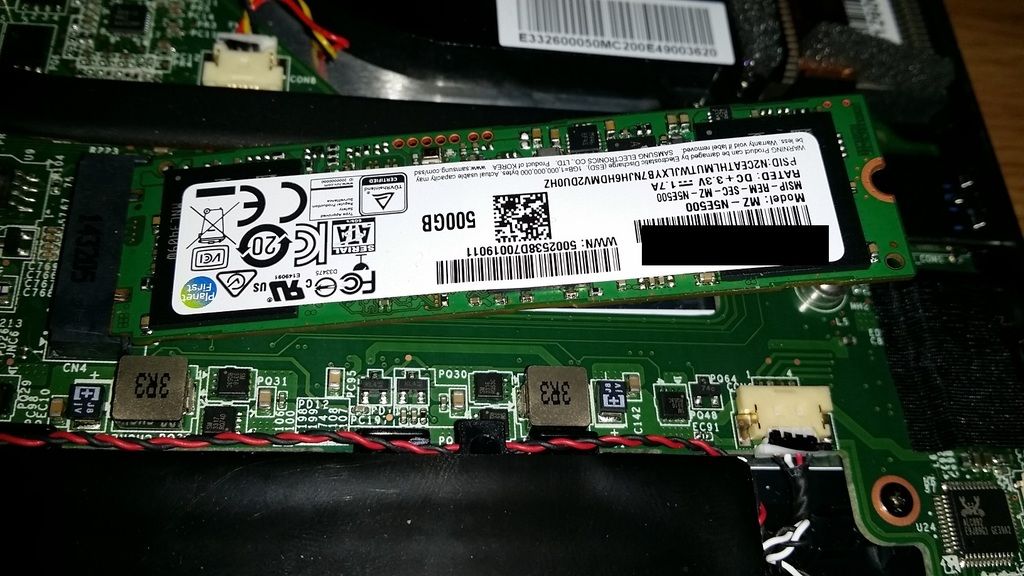
Pull it straight out at this angle and there is no force required. Simply Insert the new one at the same angle, press down to meet the screw hole like in the picture before last and put the screw back in and make sure the drive is secure.
Don't forget to reconnect the battery!
Now just snap the casing back together and do up the screws, inspect the edges to make sure it is all flush and all connectors and in place.
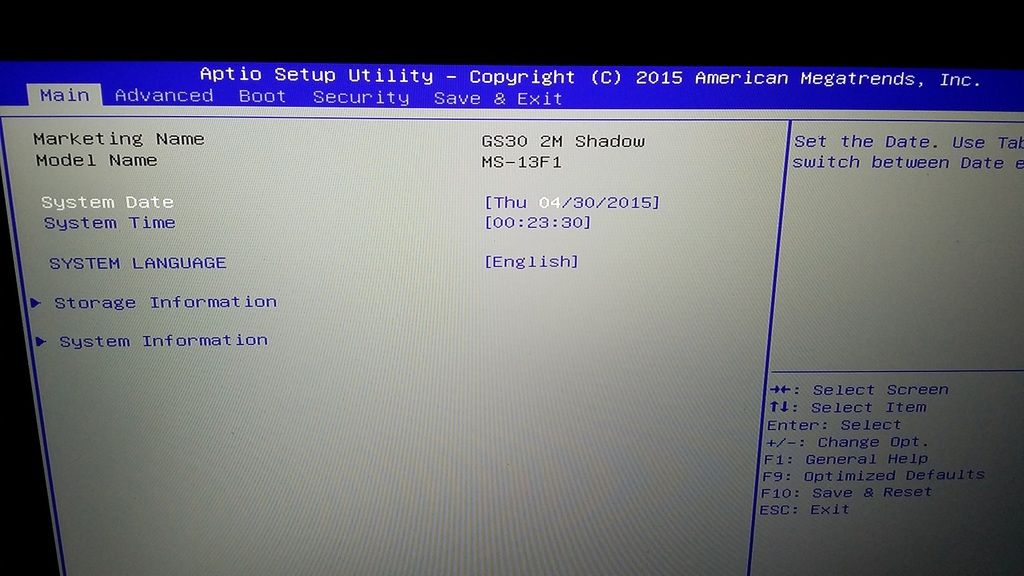
To configure the new drives into a raid array press the delete key after you have powered the machine (you must start pressing quick as this device boots REALLY fast), you will be shown the main screen:
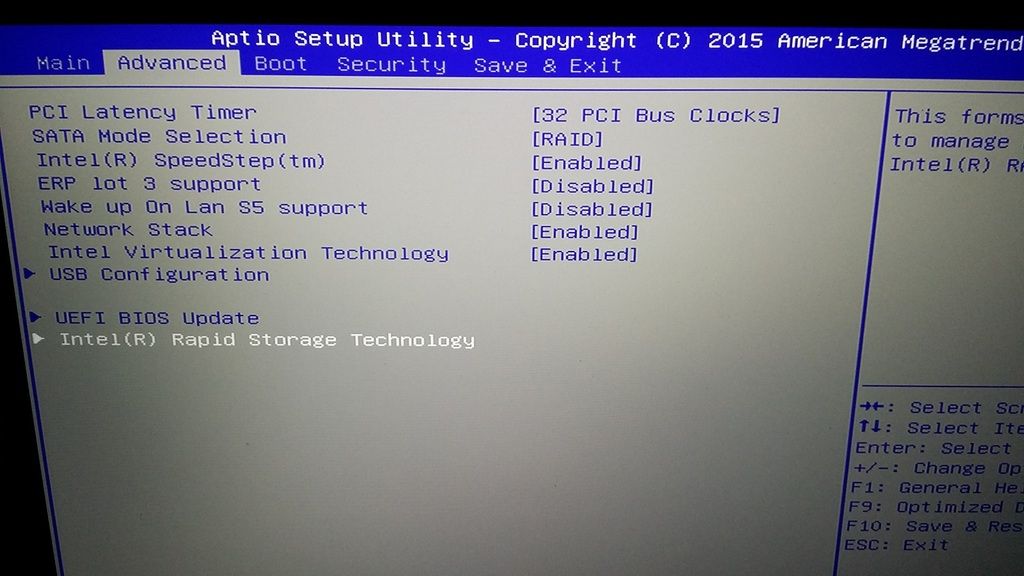
Move to the advanced tab and press enter on the "Intel(R) Rapid storage Technology" option.
As my RAID array is set up I see this screen:
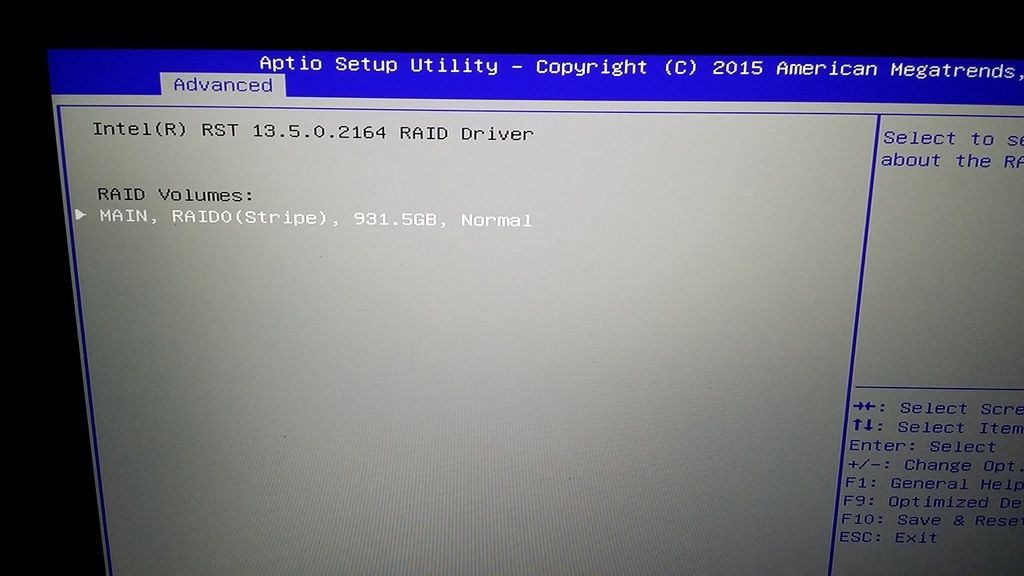
Here is how I set up mine:
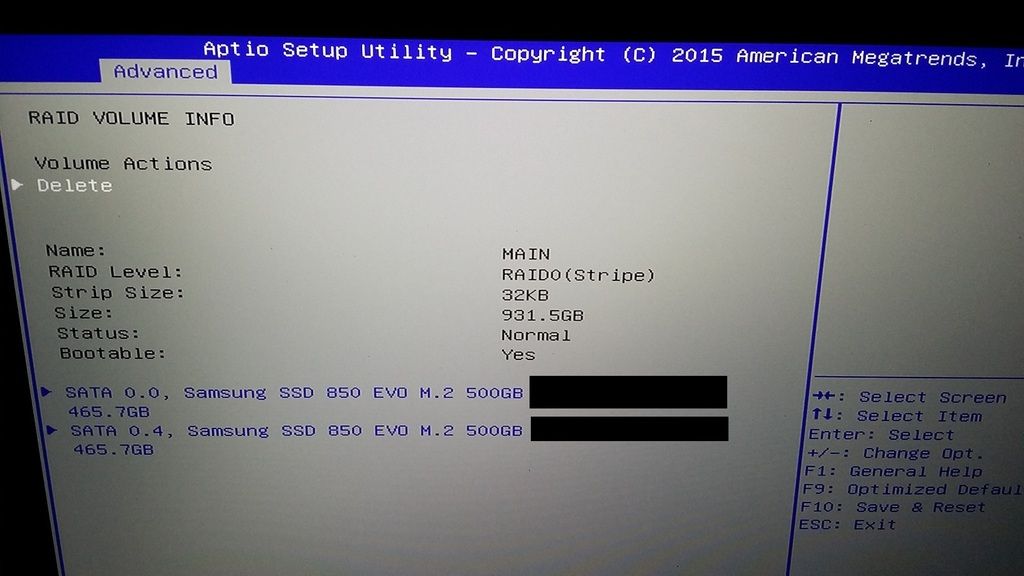
You will be able to select each drive and stripe size, once the array has been created you will be able to boot from your windows media and install your OS
(Overclockers sell them here: https://www.overclockers.co.uk/showproduct.php?prodid=HD-204-SA&groupid=701&catid=2104)
So my GPU box is in the mod shop getting ready for the really cool stuff but for now it's silly fast for day to day tasks and can still play the odd game (GTA V at 720p is perfectly playable).
I'll edit this post with more details as I get everything recorded and pictured
Ok so you want to replace the SSD in the GS30 yourself, you need to be an expert to perform this kind of work right? Nope. MSI have embarrassed some of the larger machines out there for ease of access *You know who you are
*If you are re-installing windows after replacing the drives (remember both are in raid 0 and are both required to boot) then make sure your media is set up before hand, either create the restore disks OR grab windows 8.1 media here for a clean install:
http://windows.microsoft.com/en-us/windows-8/create-reset-refresh-media
Make sure you select the 8.1 (core, no tags on the end) edition and 64 bit. I have this on my USB stick for super fast installs, no key needed as it is embedded in the bios and will auto activate
Simply remove the 8 screws on the bottom:
You will break the warranty sticker, by breaking this you are accepting responsibility for any physical damage inside the unit, your warranty should be intact otherwise though
Now lift the casing up from the edge sitting over the dock connector, it should easily lift up:
Revealing EVERYTHING:
Now is an excellent time for a repaste if you were going to do it
Now for the SSD, i'd advise removing the battery connector while handling any of the internal parts:
Wearing an anti static device is also recommended
Otherwise make sure you ground yourself at least before touching the parts, a desktop computer case of a machine that is plugged into the wall is usually a good bet.Next unscrew the screw holding down the drive:
It will pop up at an angle:
Pull it straight out at this angle and there is no force required. Simply Insert the new one at the same angle, press down to meet the screw hole like in the picture before last and put the screw back in and make sure the drive is secure.
Don't forget to reconnect the battery!
Now just snap the casing back together and do up the screws, inspect the edges to make sure it is all flush and all connectors and in place.
To configure the new drives into a raid array press the delete key after you have powered the machine (you must start pressing quick as this device boots REALLY fast), you will be shown the main screen:
Move to the advanced tab and press enter on the "Intel(R) Rapid storage Technology" option.
As my RAID array is set up I see this screen:
Here is how I set up mine:
You will be able to select each drive and stripe size, once the array has been created you will be able to boot from your windows media and install your OS
Last edited: