


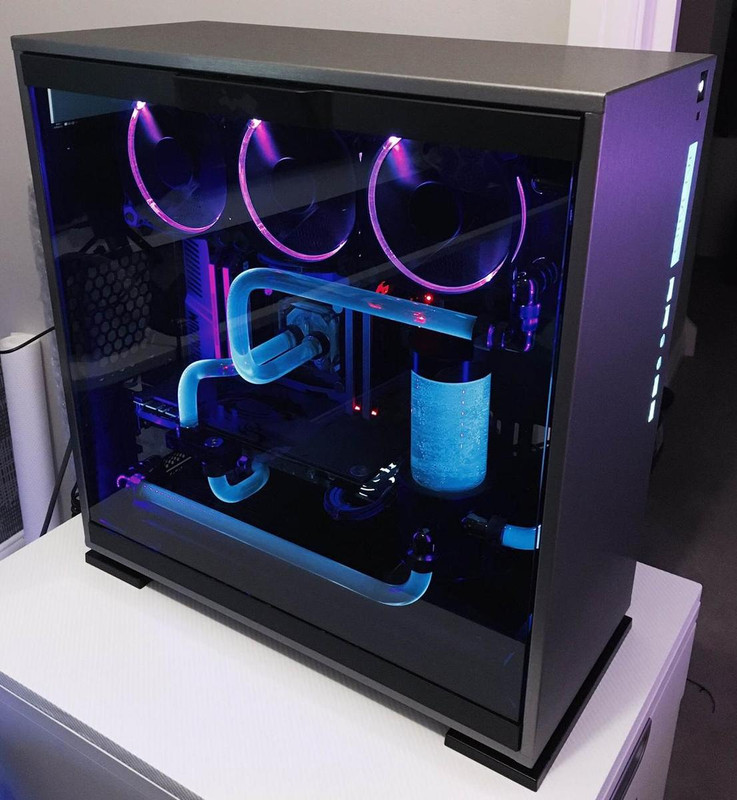
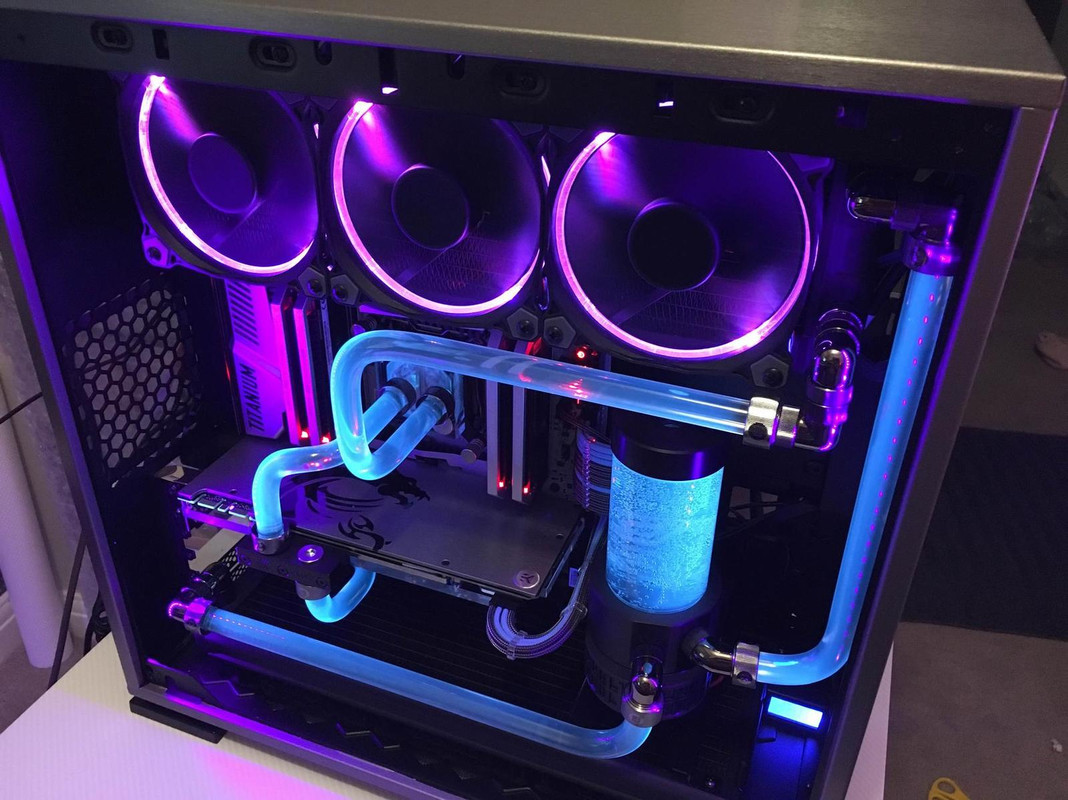
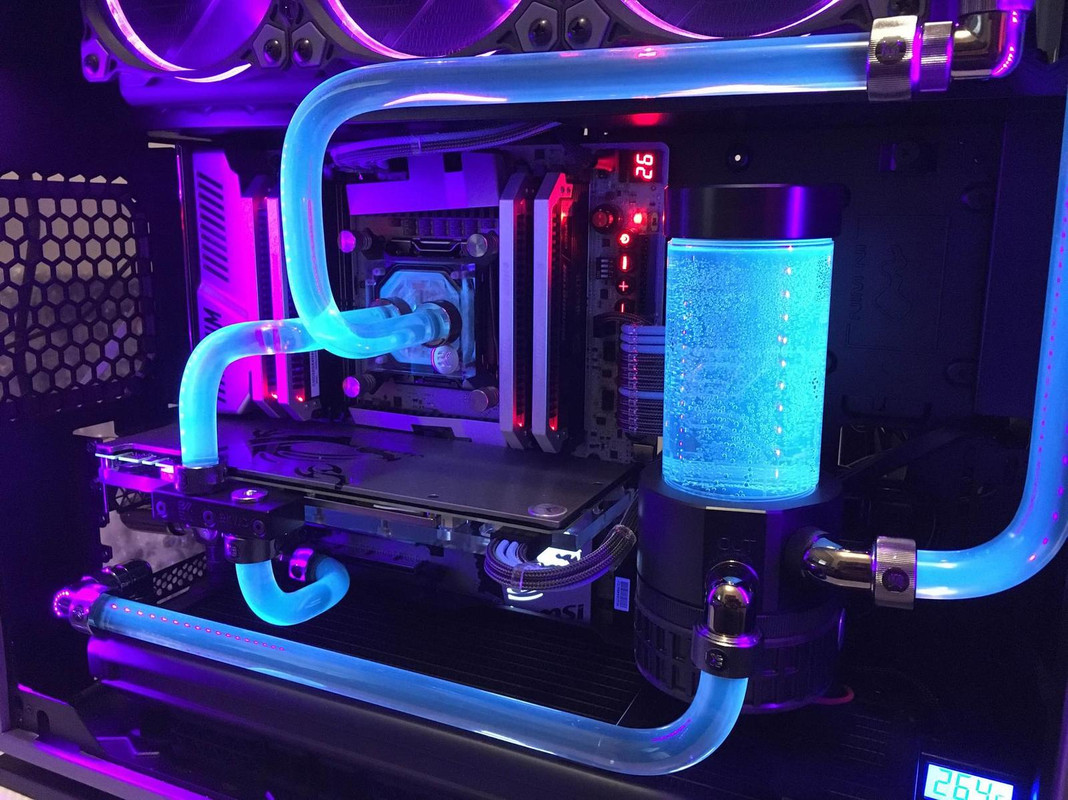
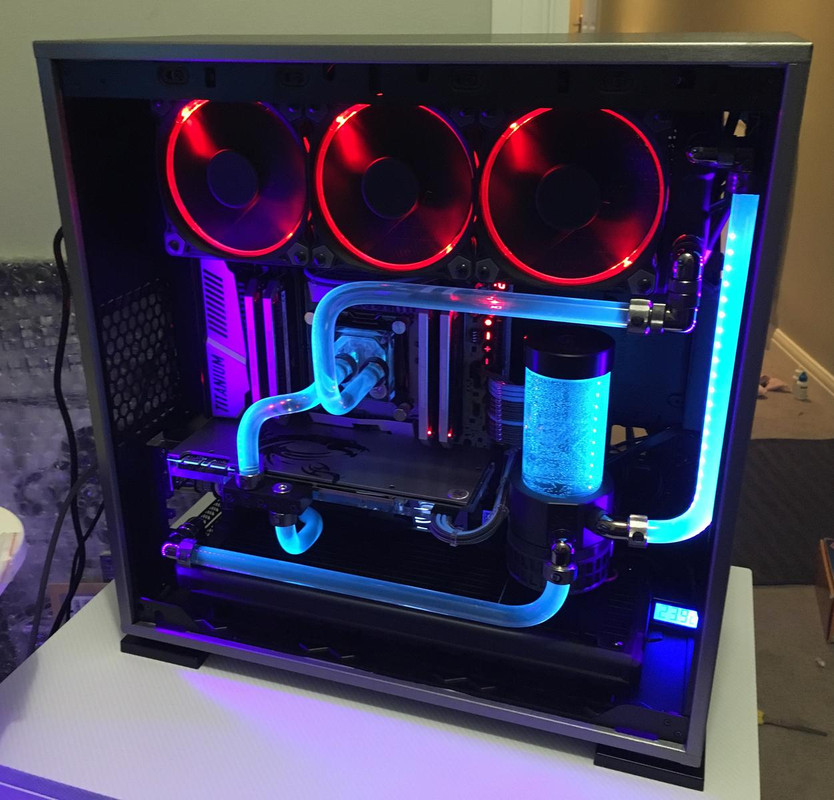
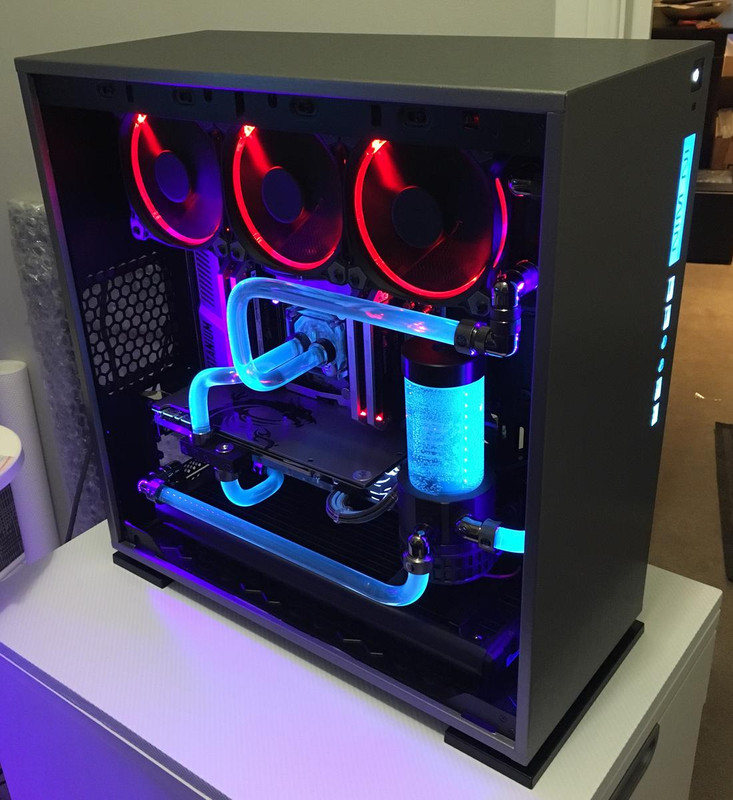
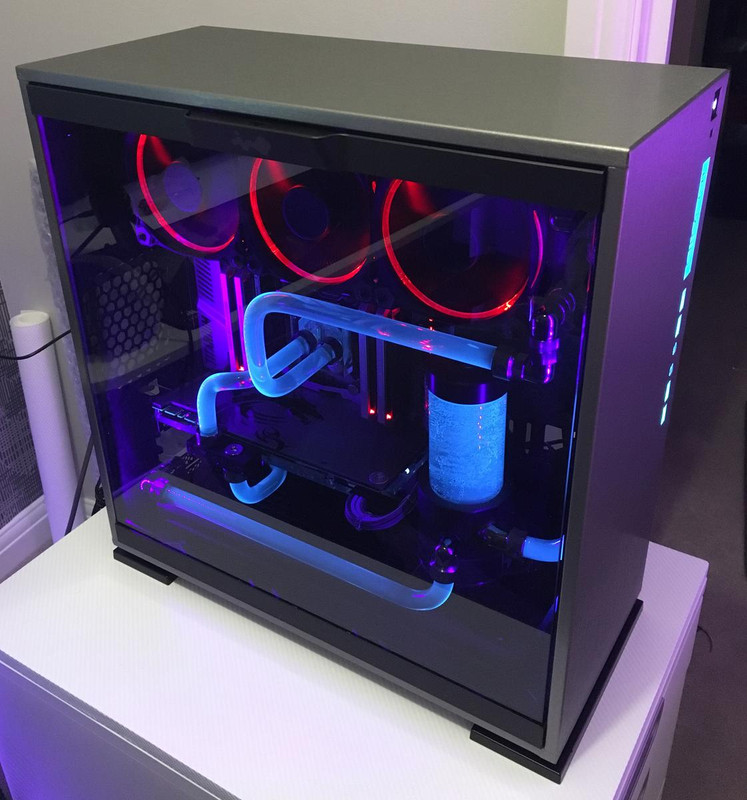
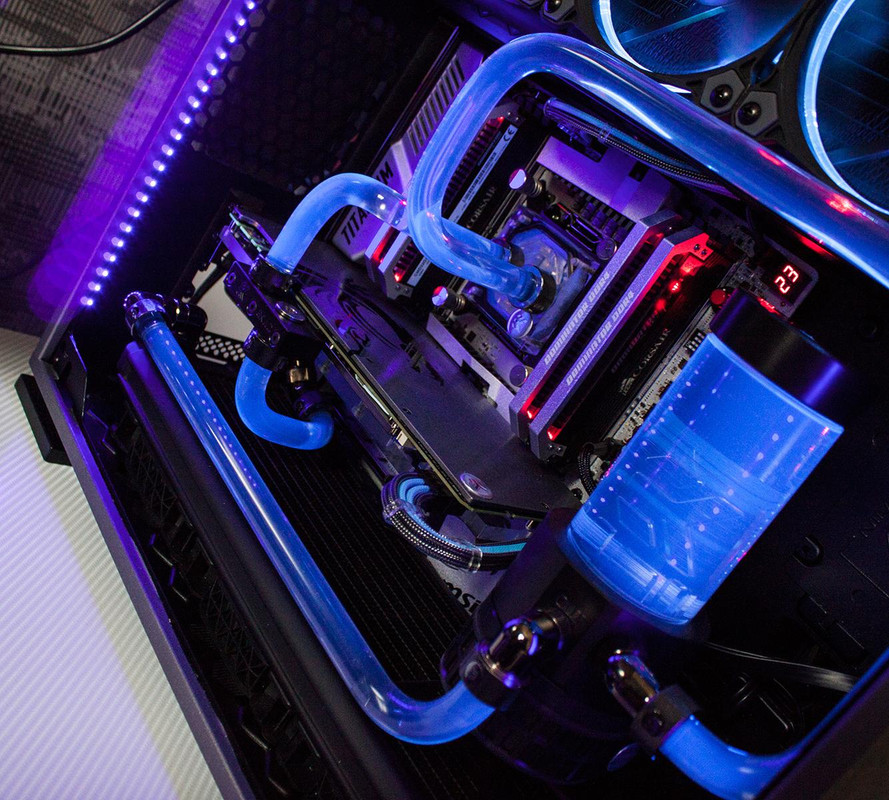
OK, not sure how long this is going to take me, but I at least have all my bits now which consist of the below components with a custom loop (this is my first watercooled build).
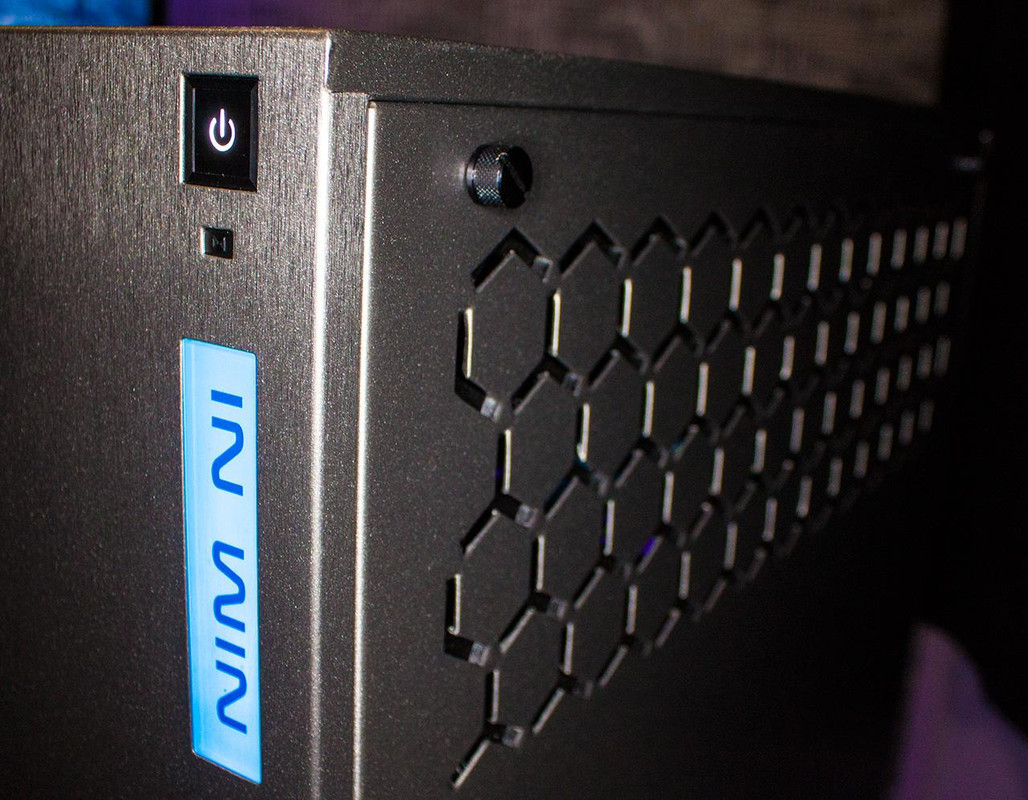
• InWin 303 which will wrapped in 3M 1080 BR230 Brushed Titanium (made a start on this already)
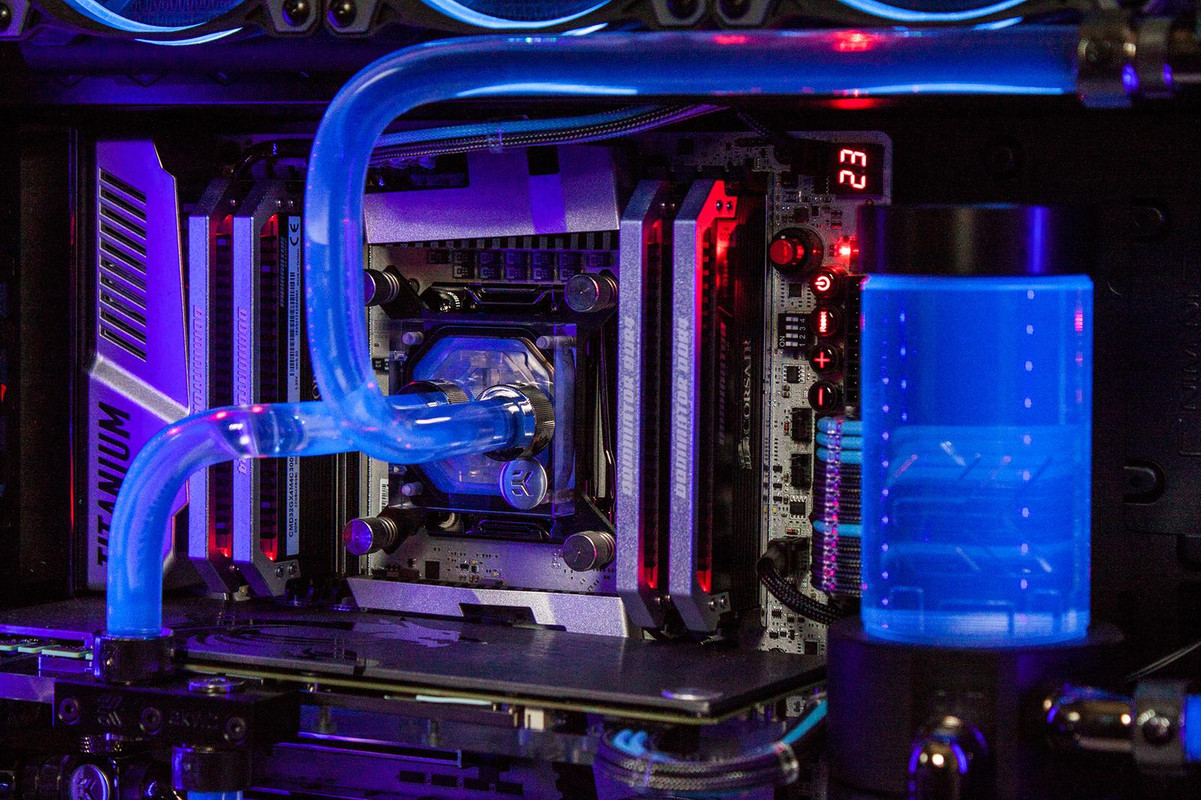
• MSI X99A Titanium motherboard (natch
") )
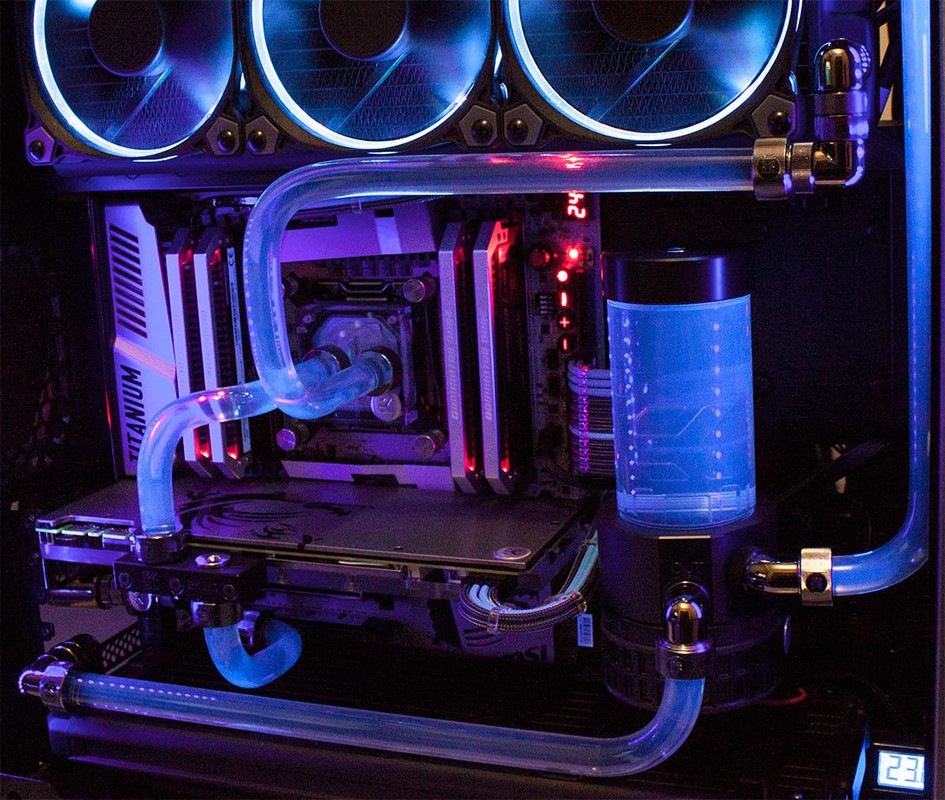
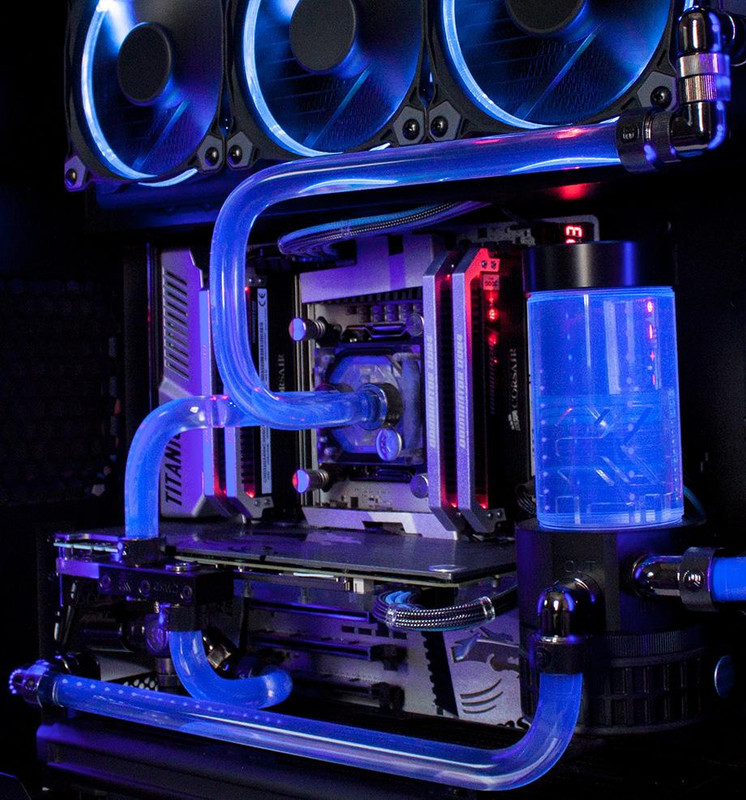
)• Intel 6800K w/EK-Supremacy EVO X99 block
• GTX 1080 w/EK-FC1080 GTX - Nickel+Plexi
• 1080 Nickel backplate (probably going to wrap this in the same vinyl as the case to tie it altogether, as I don't think the nickel will quite match)
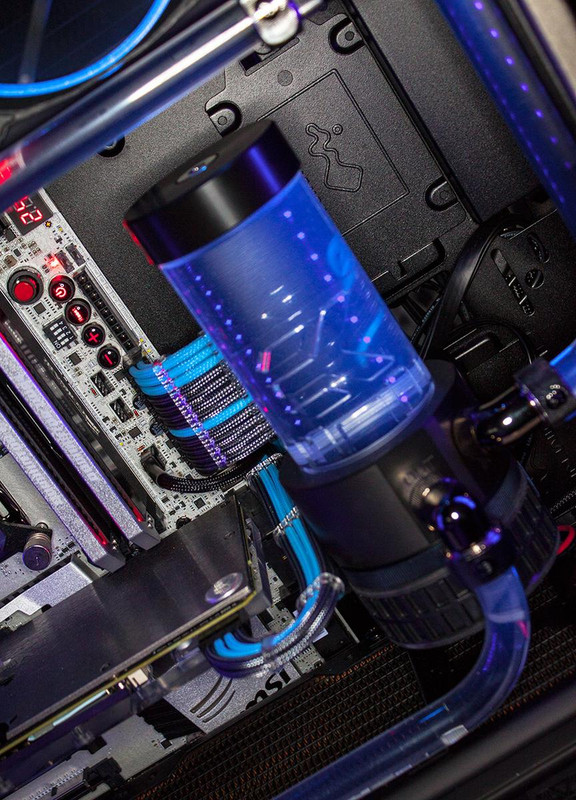
• EK-XRES 140 Revo D5 PWM pump/res
• 16mm PETG and EK black nickel fittings
• Mayhems X1 Clear Blue UV
• Darkside UV light strips
• x2 Nemesis Black Ice 360 GTS radiators
• x3 Corsair ML120 fans (bottom mounted intake)
• x3 Thermaltake Riing Premium RGB fans (top exhaust)
• Custom cable extensions using Teleios Carbon Fibre sleeving
I've only just started wrapping the case which I need to do before anything else... very fiddly cutting out the hexagon vents at the rear, as you can't actually get to them on the inside due to the design (see photo)... definitely going to be a lot of work getting this right as I don't want to just cut out the shape and leave a rough edge, I will do my best to wrap it around. I have some 3M primer which should help but I don't have much vinyl to work with and in a very awkward space. Fingers crossed this works out!
Must say though, this vinyl looks AMAZING! Totally would not know it wasn't metal when applied.
COMPLETED PHOTOS


Last edited:


")


