Project: Silent Overkill

Associate
Joined
22 Nov 2015
Posts
997
Location
Wales
Very impressive skills on SketchUp mate if you're claiming to be a noob! Daren't go near it myself as A) I don't have ANY skill with 3D modelling and B) Dread how expensive things could get in a very short length of time... Direct line through to Parvum within a month I reckon :D

Good to see the Aquaero back up and running, looking forward to seeing how sleek he looks in his new and improved house!
 
Soldato
OP
Joined
4 Jun 2007
Posts
2,617
Location
Watford, UK
Cheers. First time but I started on the 'easy' bits - the outer panels - and worked up from there. Plenty of mistakes along the way. Like a number of holes that didn't line up. The only saving grace is that when they don't line up at least you know you've screwed up somewhere!
Wanted to get the learning curve (partly) done before I tackle the block but now I need to get my finger out and stop procrastinating over things like the rad feet.
Bought myself a longer vernier caliper, a decent steel rule and an engineers square so I think it's block designing time next :D

Just need to find out how thick the layers I can/should work with cab be now! Comments from people who have done this before are MORE than welcome!
 
Soldato
OP
Joined
4 Jun 2007
Posts
2,617
Location
Watford, UK
A couple of minor updates. Just ordered some Aerocool Dark Forces to try on the rad. I think I should complain; OCUK took a whole 11 minutes to ship my order! ;)

Also ordered some other stuff:
  • Mayhems glass tube as an option for the riser (needs to be larger OD to give enough ID)
  • a length of 16/12 acrylic to play with tapping a G1/4 thread into it. Gotta find out if the practice matches the theory - even if I don't end up using it :rolleyes:
  • a length of 13/10 acrylic to see whether it works better for threading a G1/4 on the outside of it. I know, obsession is not a good thing!
  • some more fittings for 16/12 and 13/10 soft.

Took delivery of some Javelin Blue, Bluebird and Arctic White 550 Paracord. Have already sleeved up some of the front panel cables. One of them needs pins crimped back on the end (couldn't get it through with them still on) so those are on order too.


Might need to re-shrink the ends so they're a more even length...but I'll wait until I get as far as having some to plug them into first! :D
 
Soldato
OP
Joined
4 Jun 2007
Posts
2,617
Location
Watford, UK
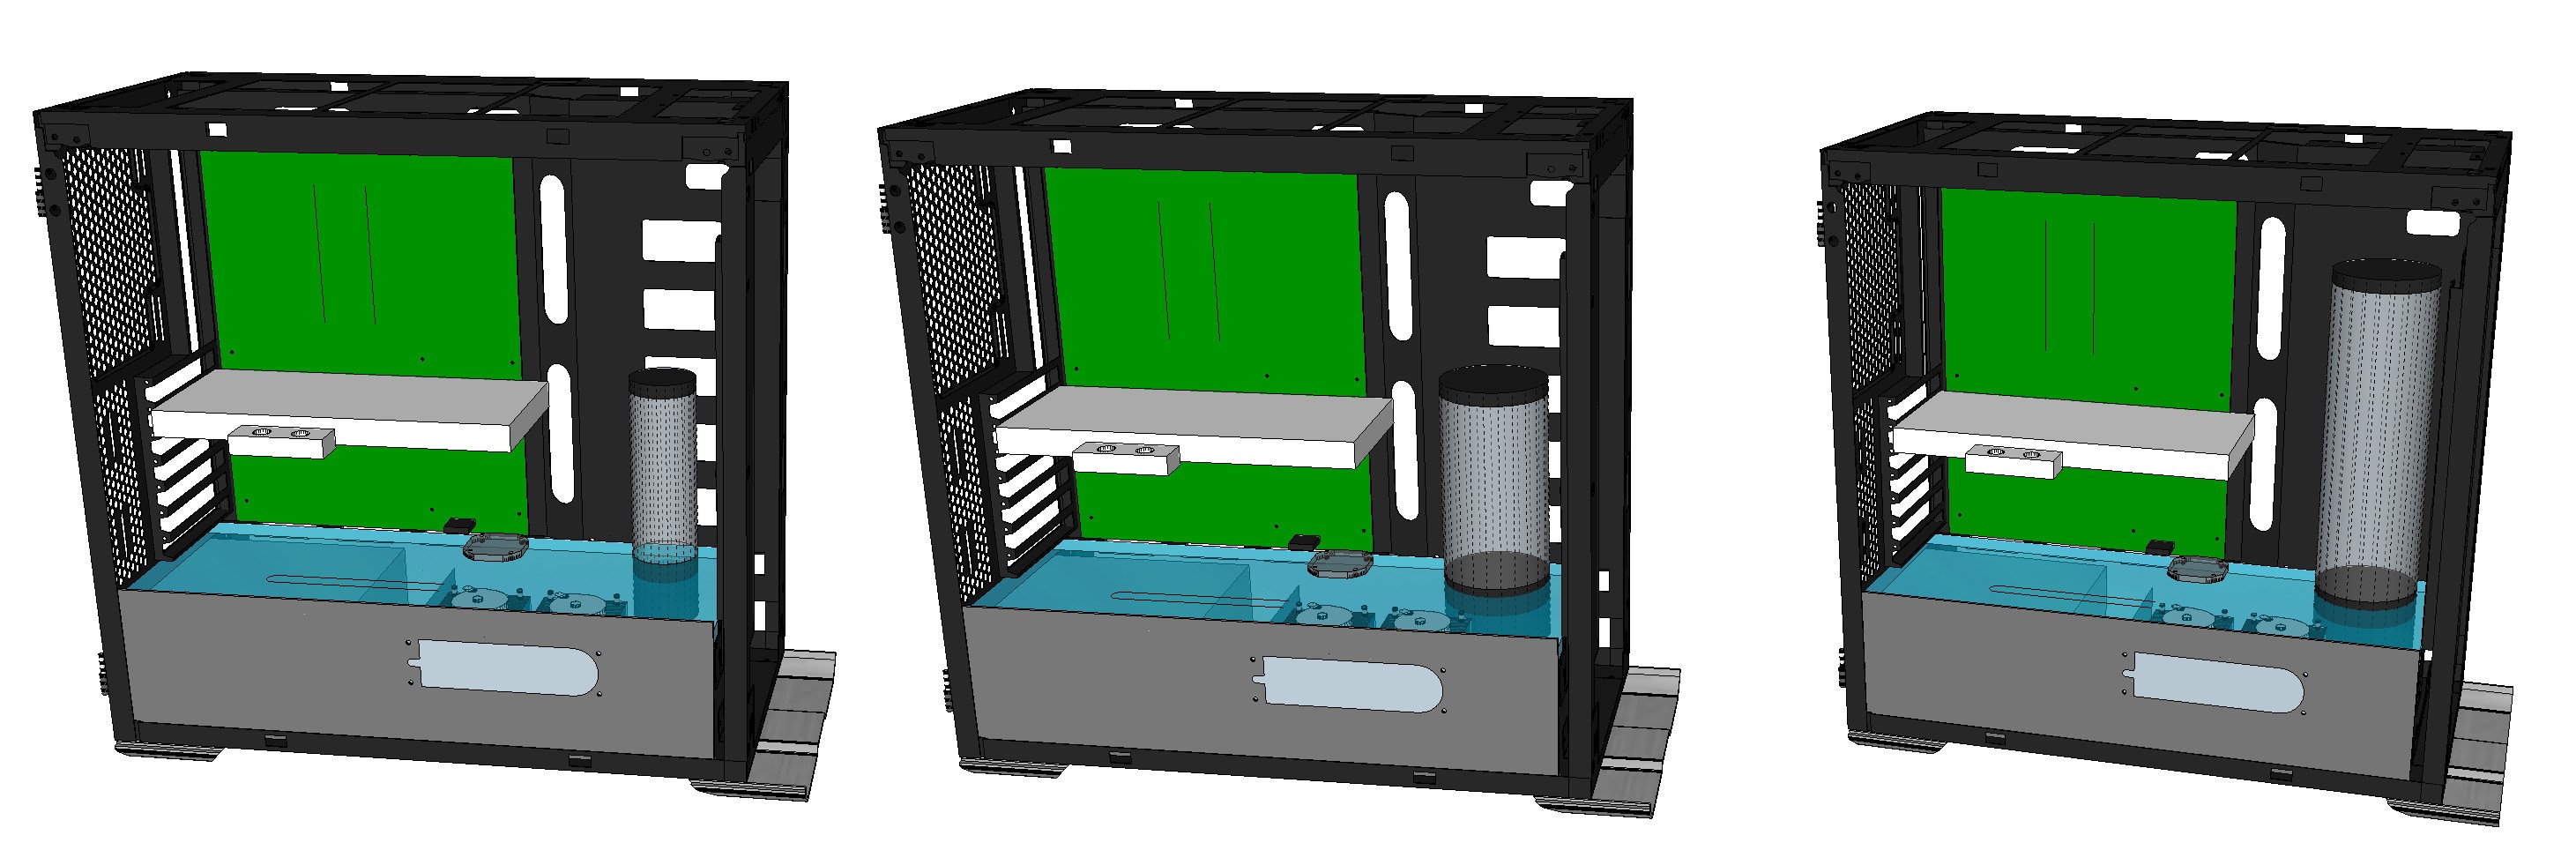
So, continuing in the 'I can...but should I?!' vein I give you:

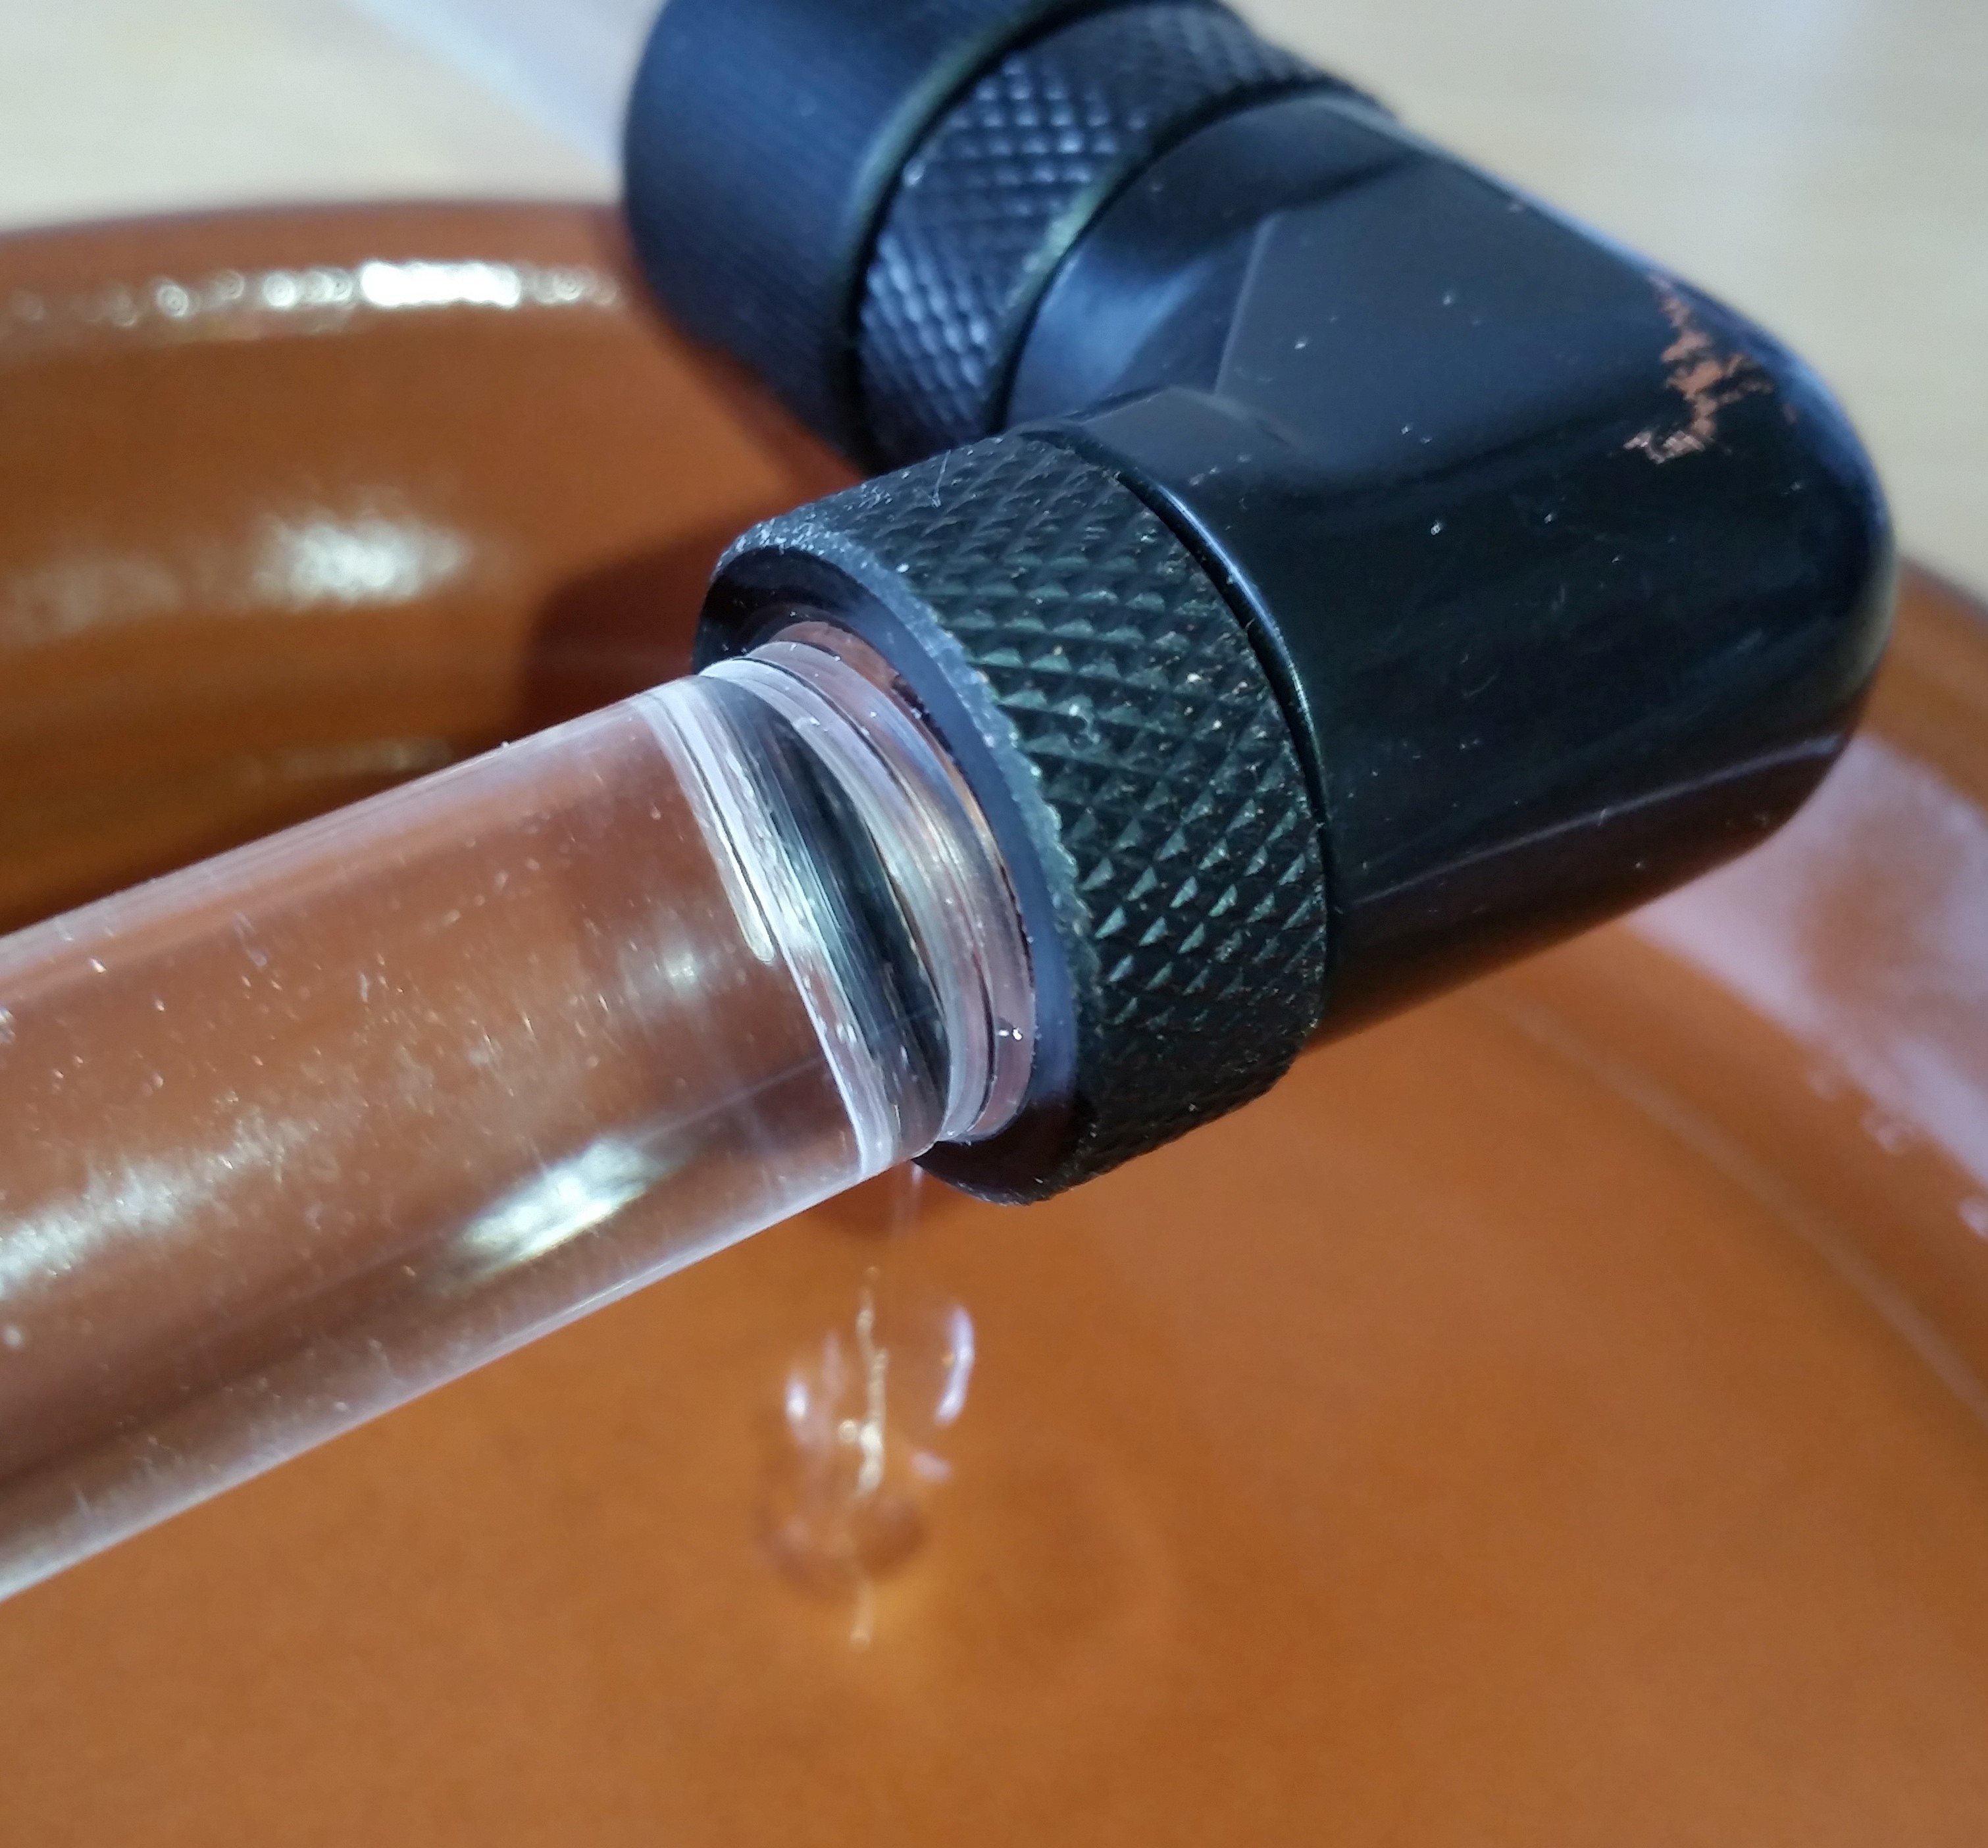
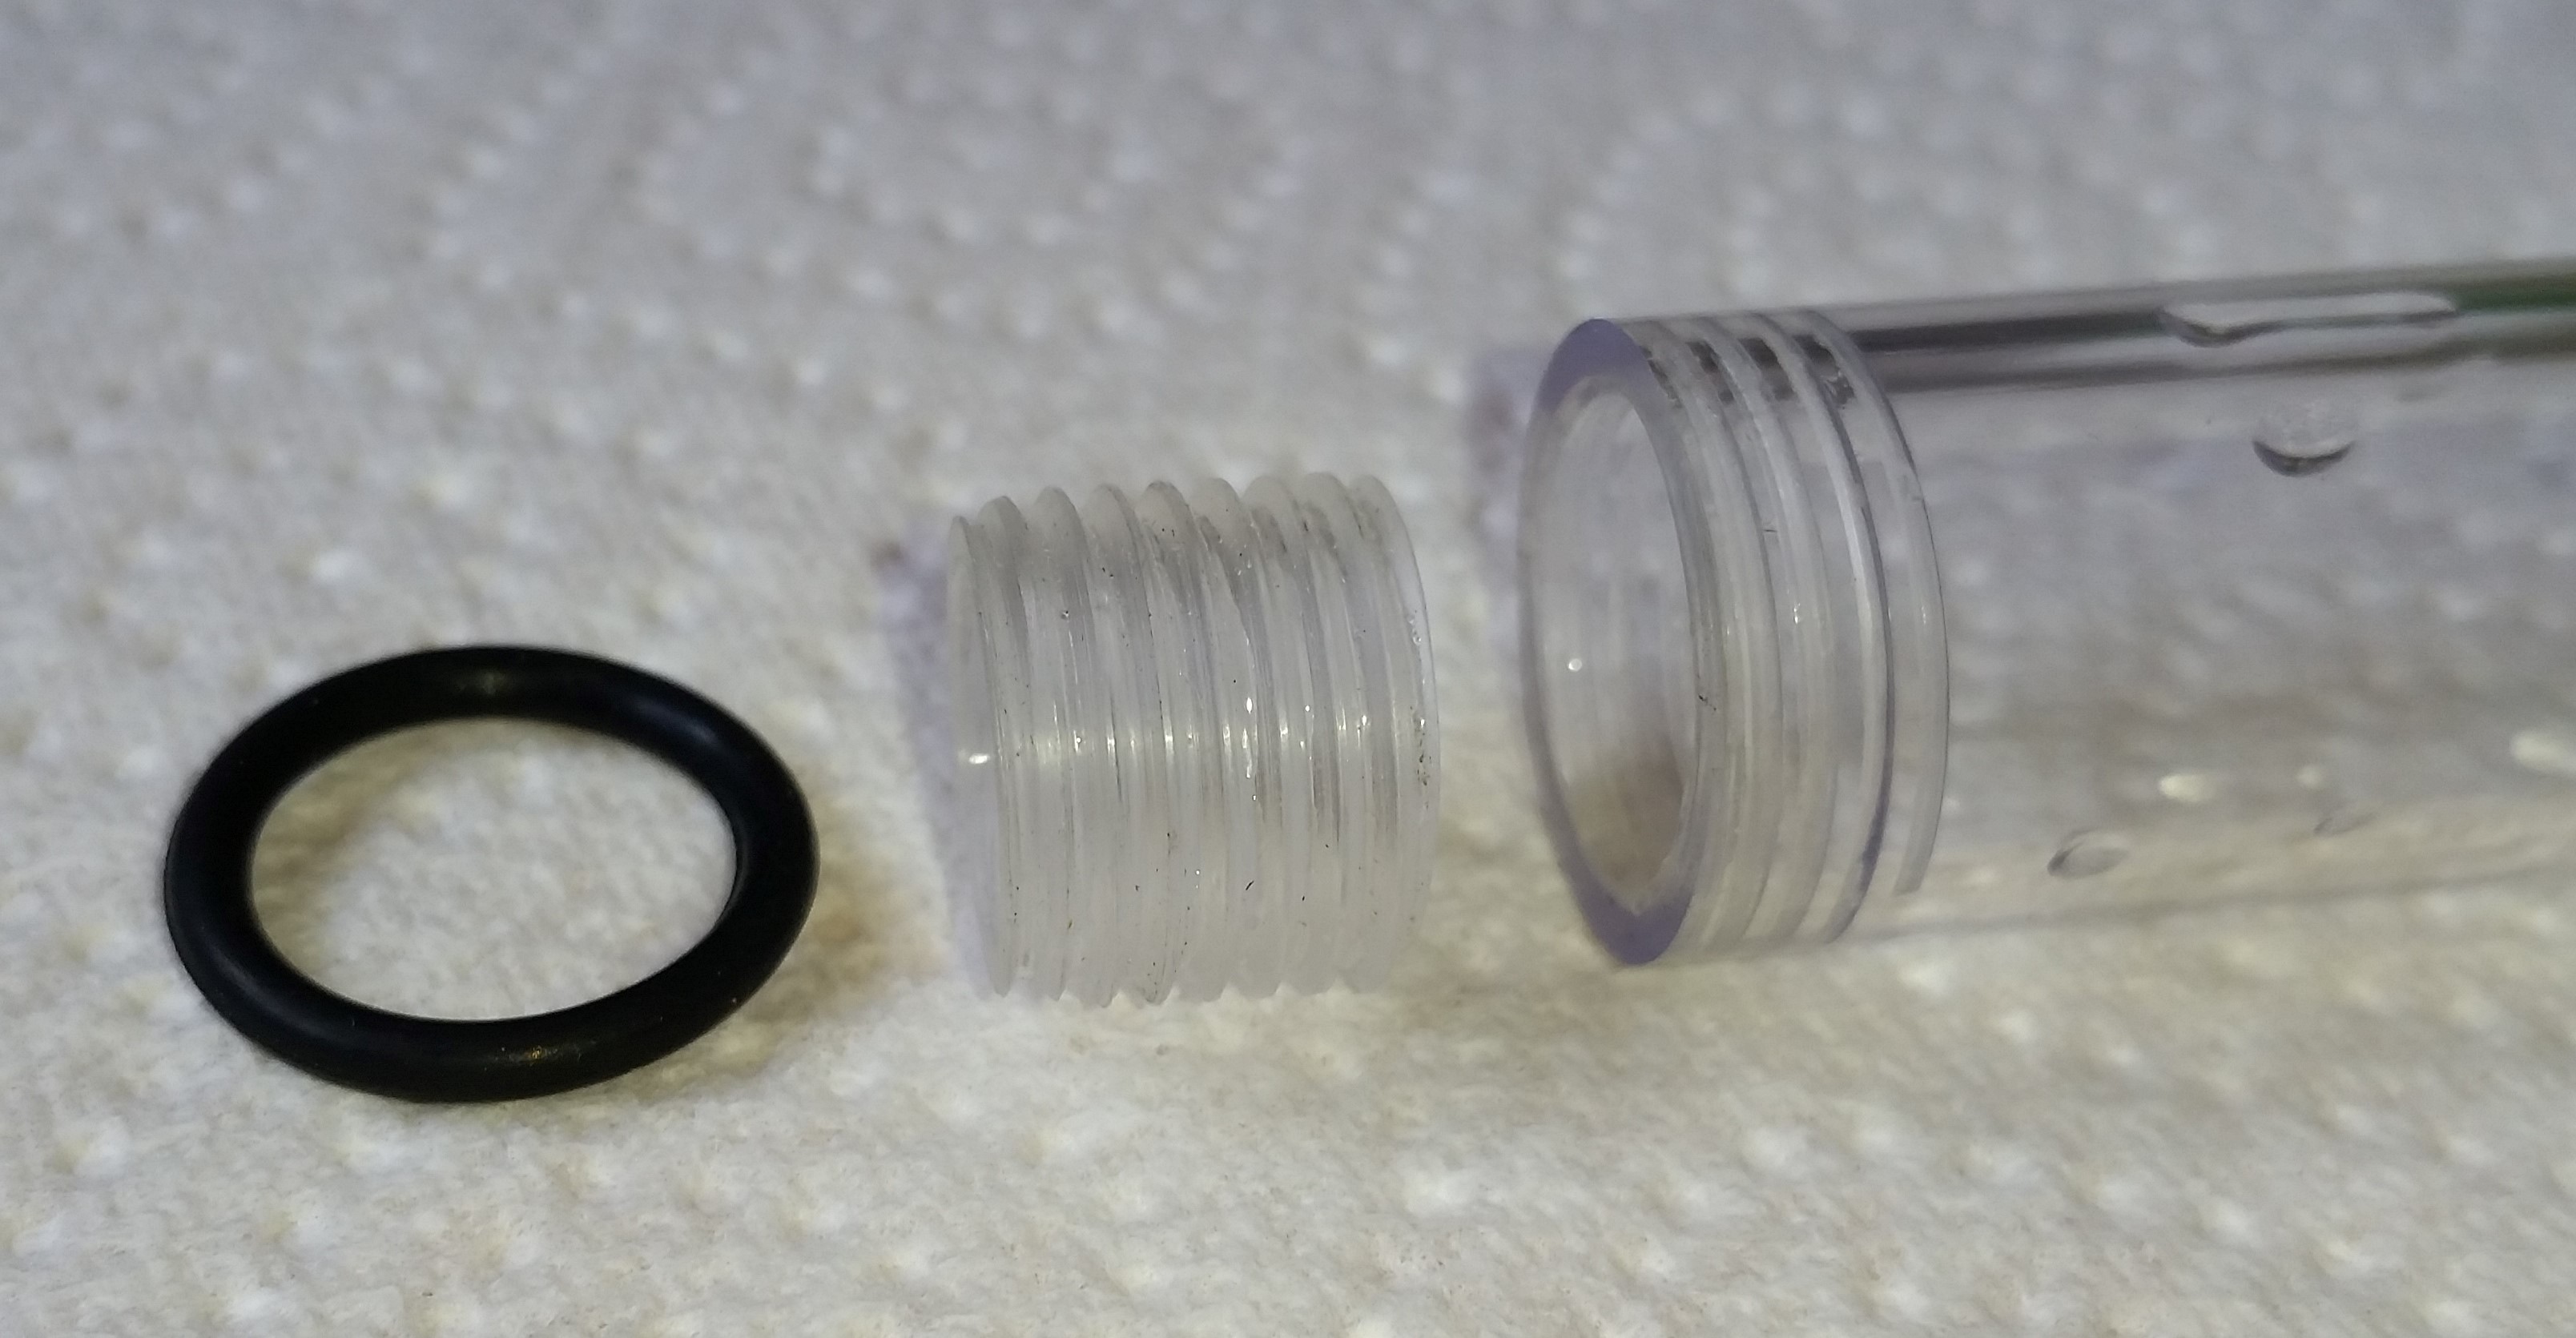
Primochill 13/10 acrylic threaded (hastily) to G1/4:


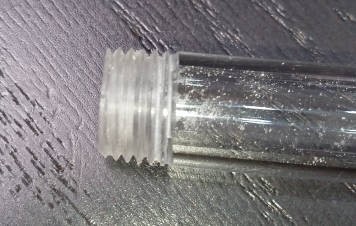
Not as easy to thread (requires more force) as 12/10 but the thread is more complete. A little cutting oil improved things. I'm not sure whether this will be helpful as I suspect it wouldn't seal (no shoulder for an o-ring) but in the spirit of spraying water all over the kitchen, I plan to give it a try when I have some spare time. Also, not just before the wife's parents arrive to stay :eek: :D


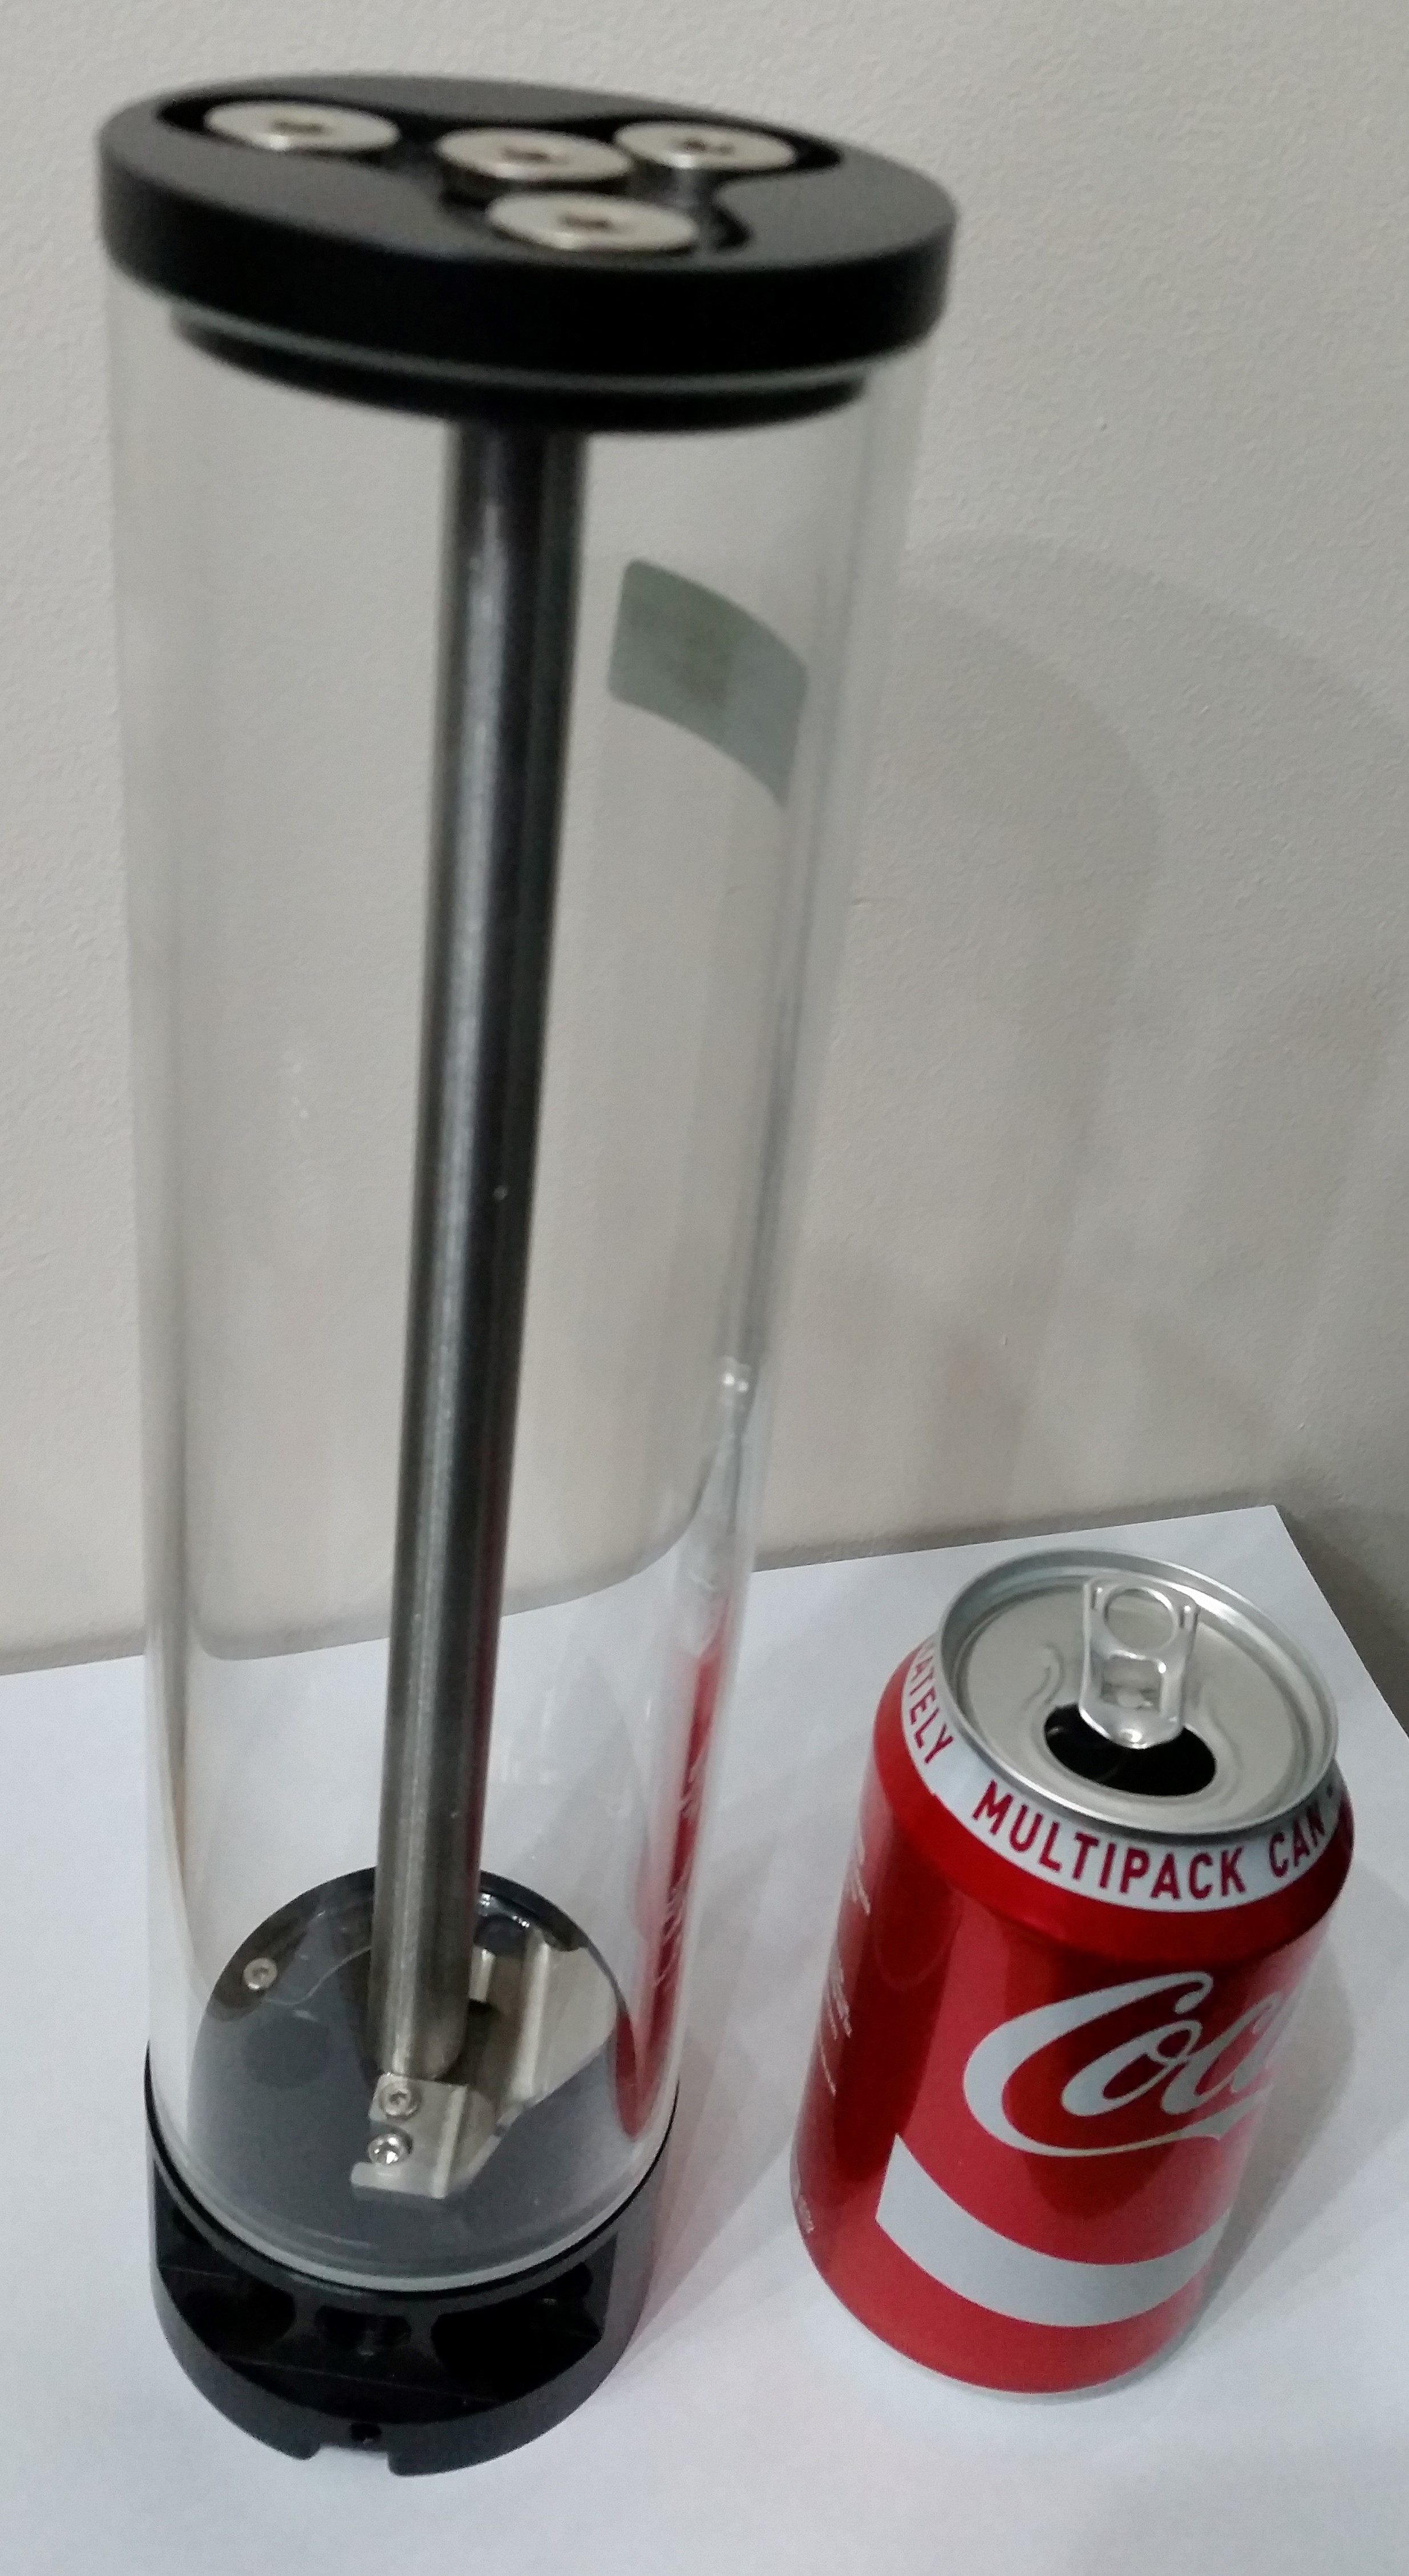
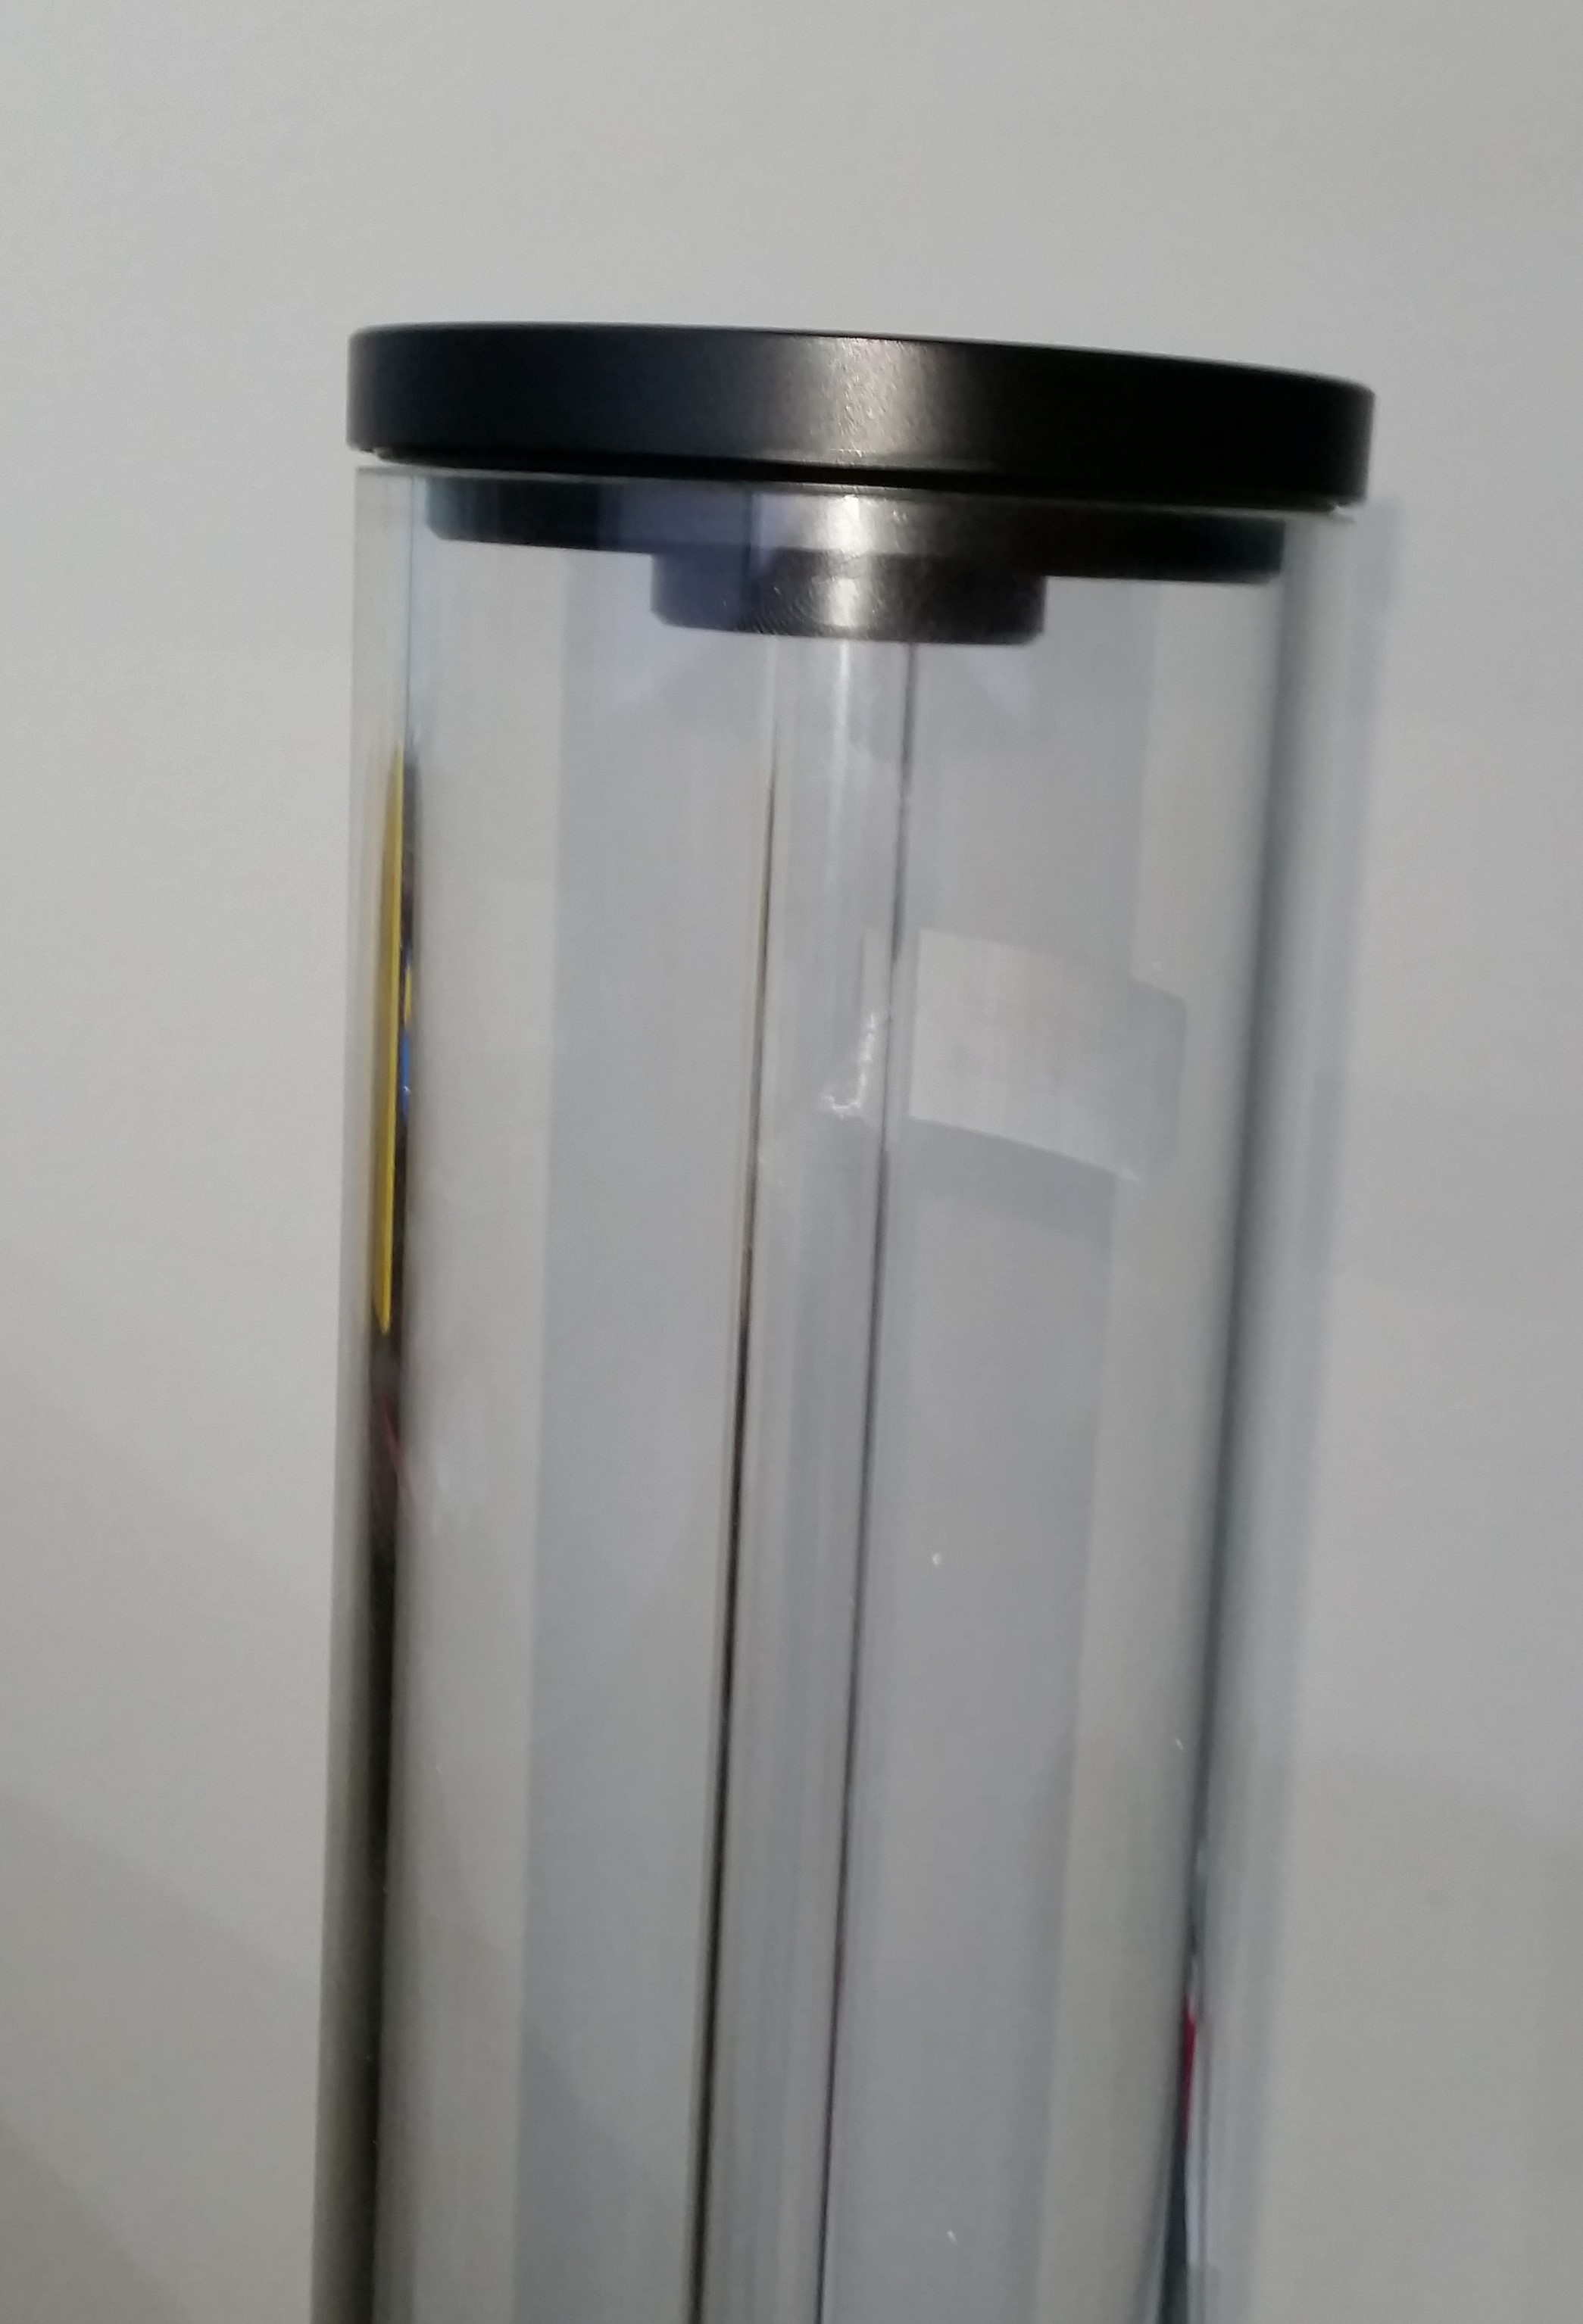
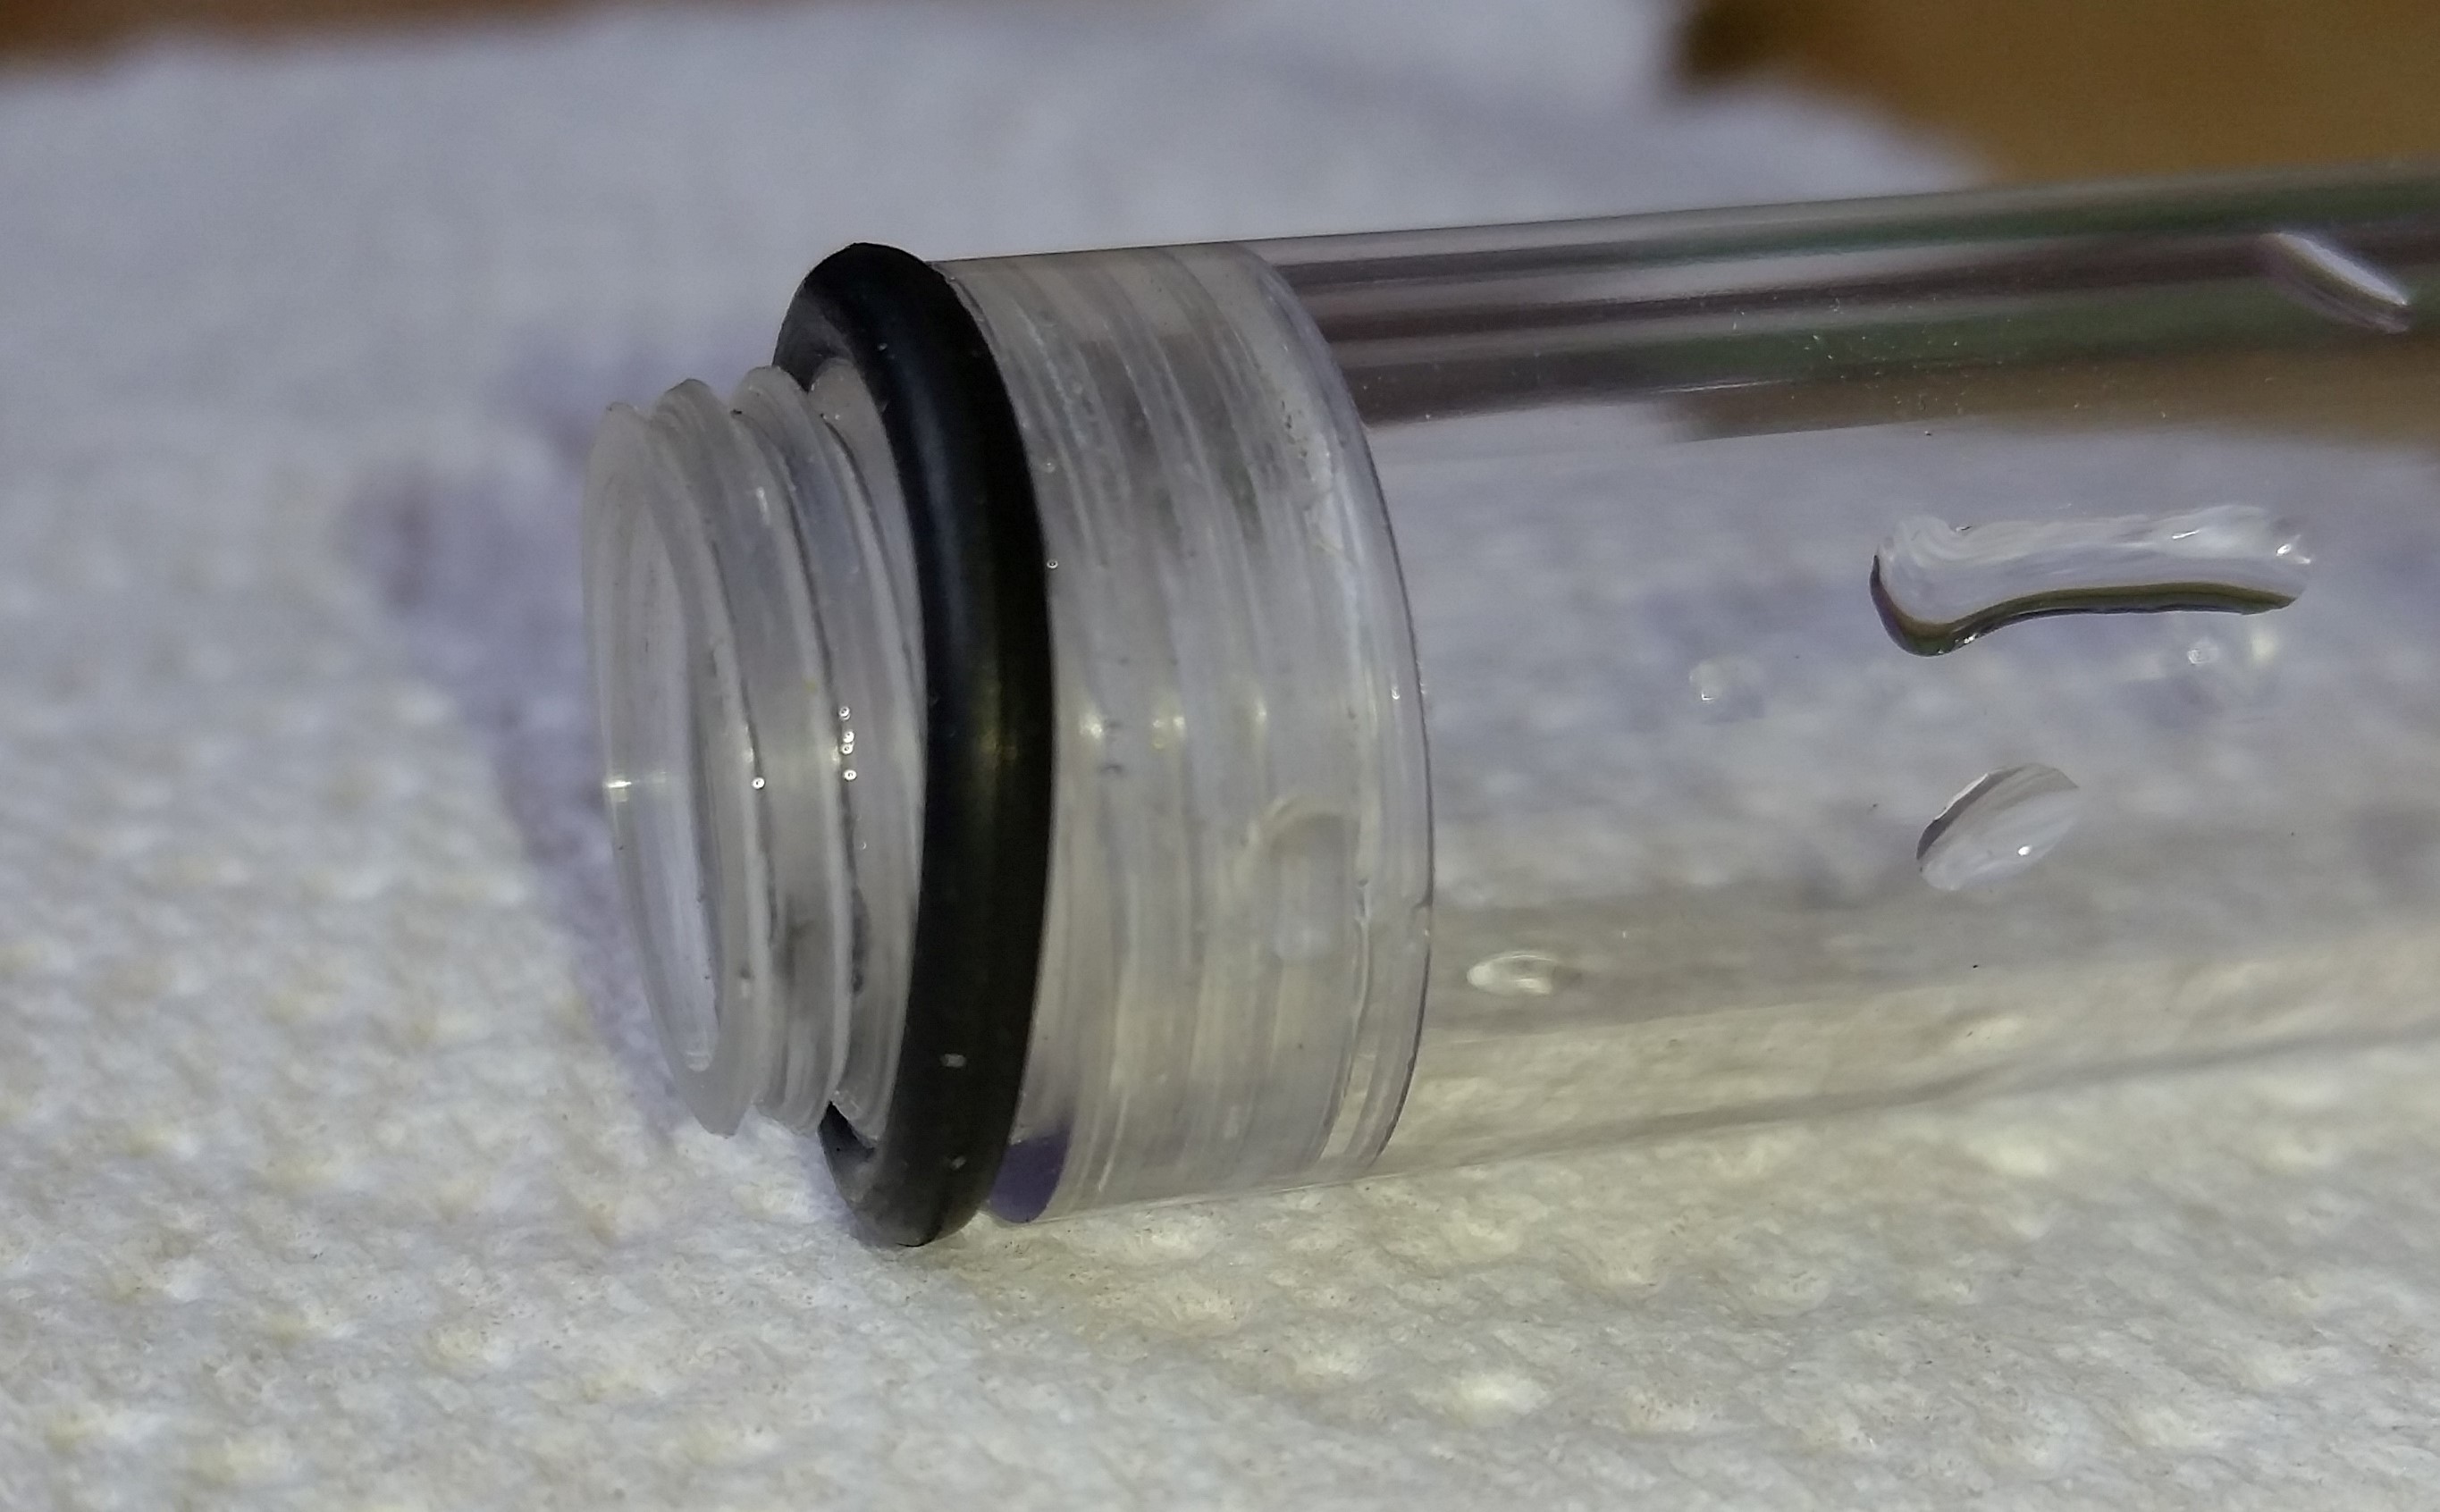
and EK 16/12 tapped to G1/4:


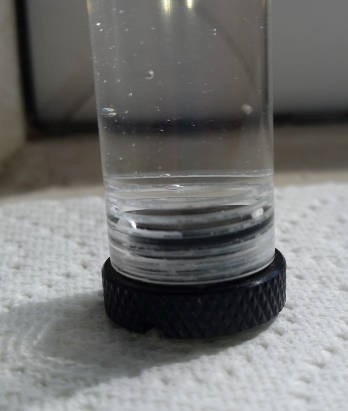
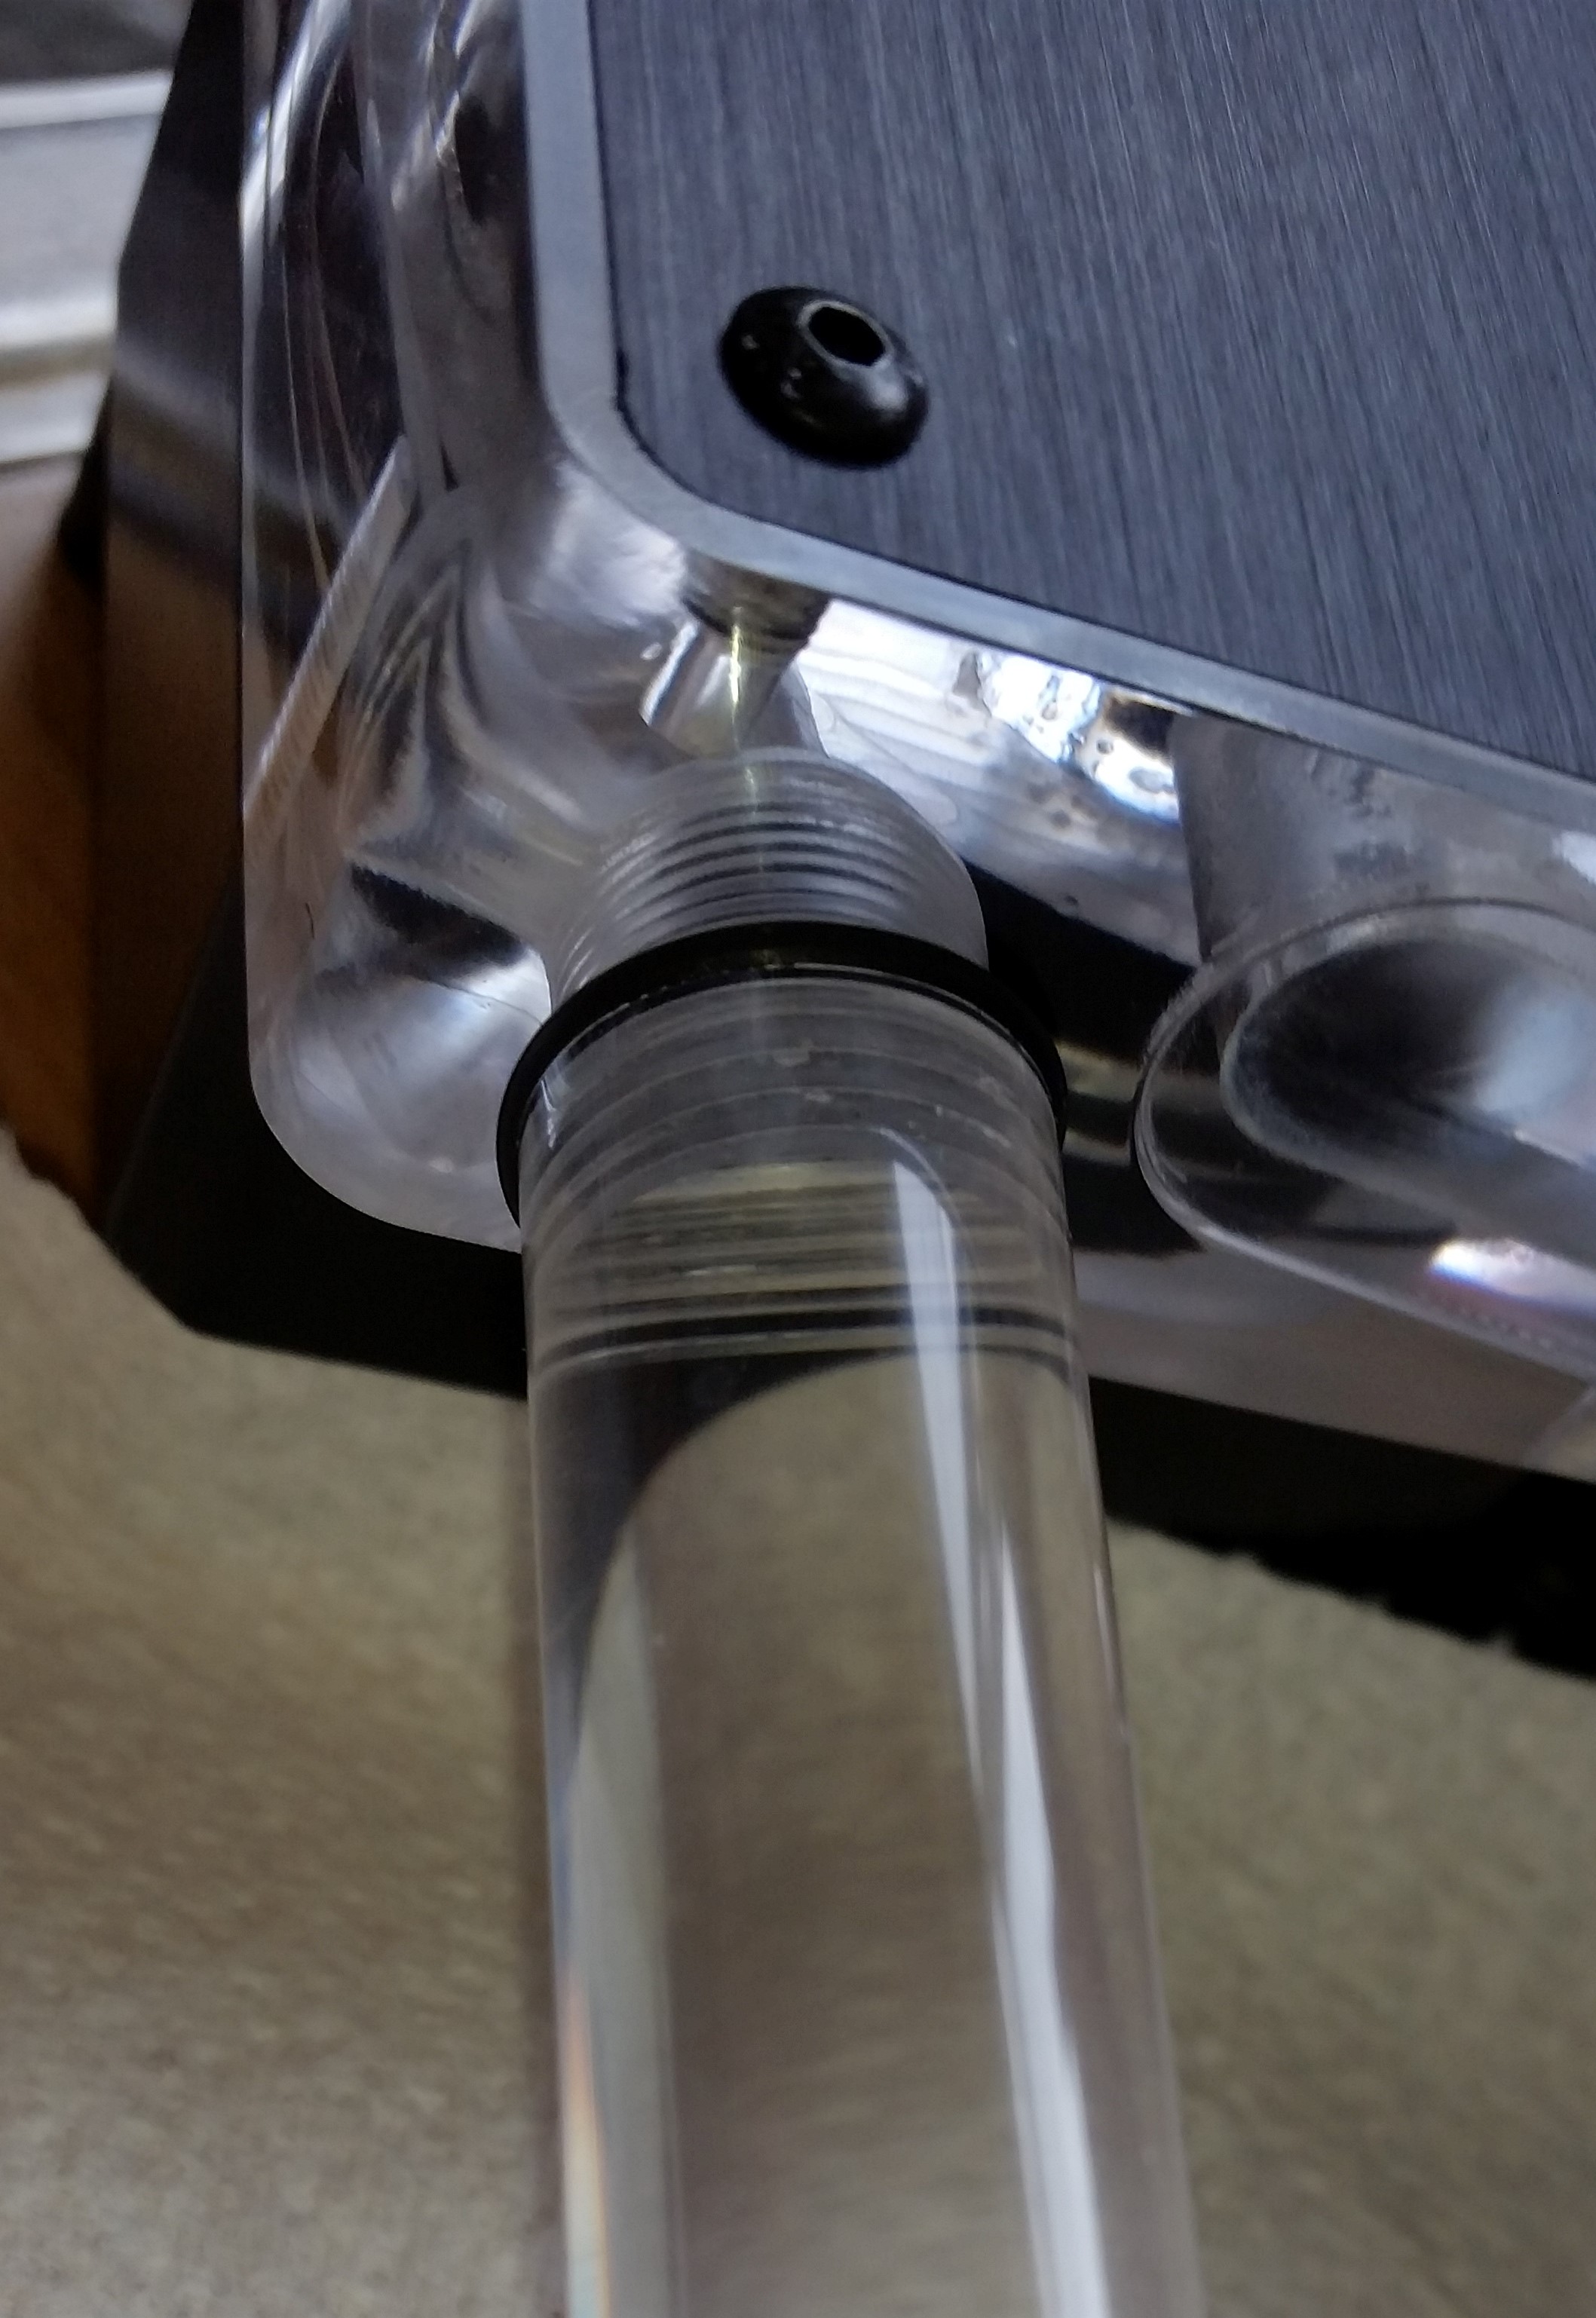
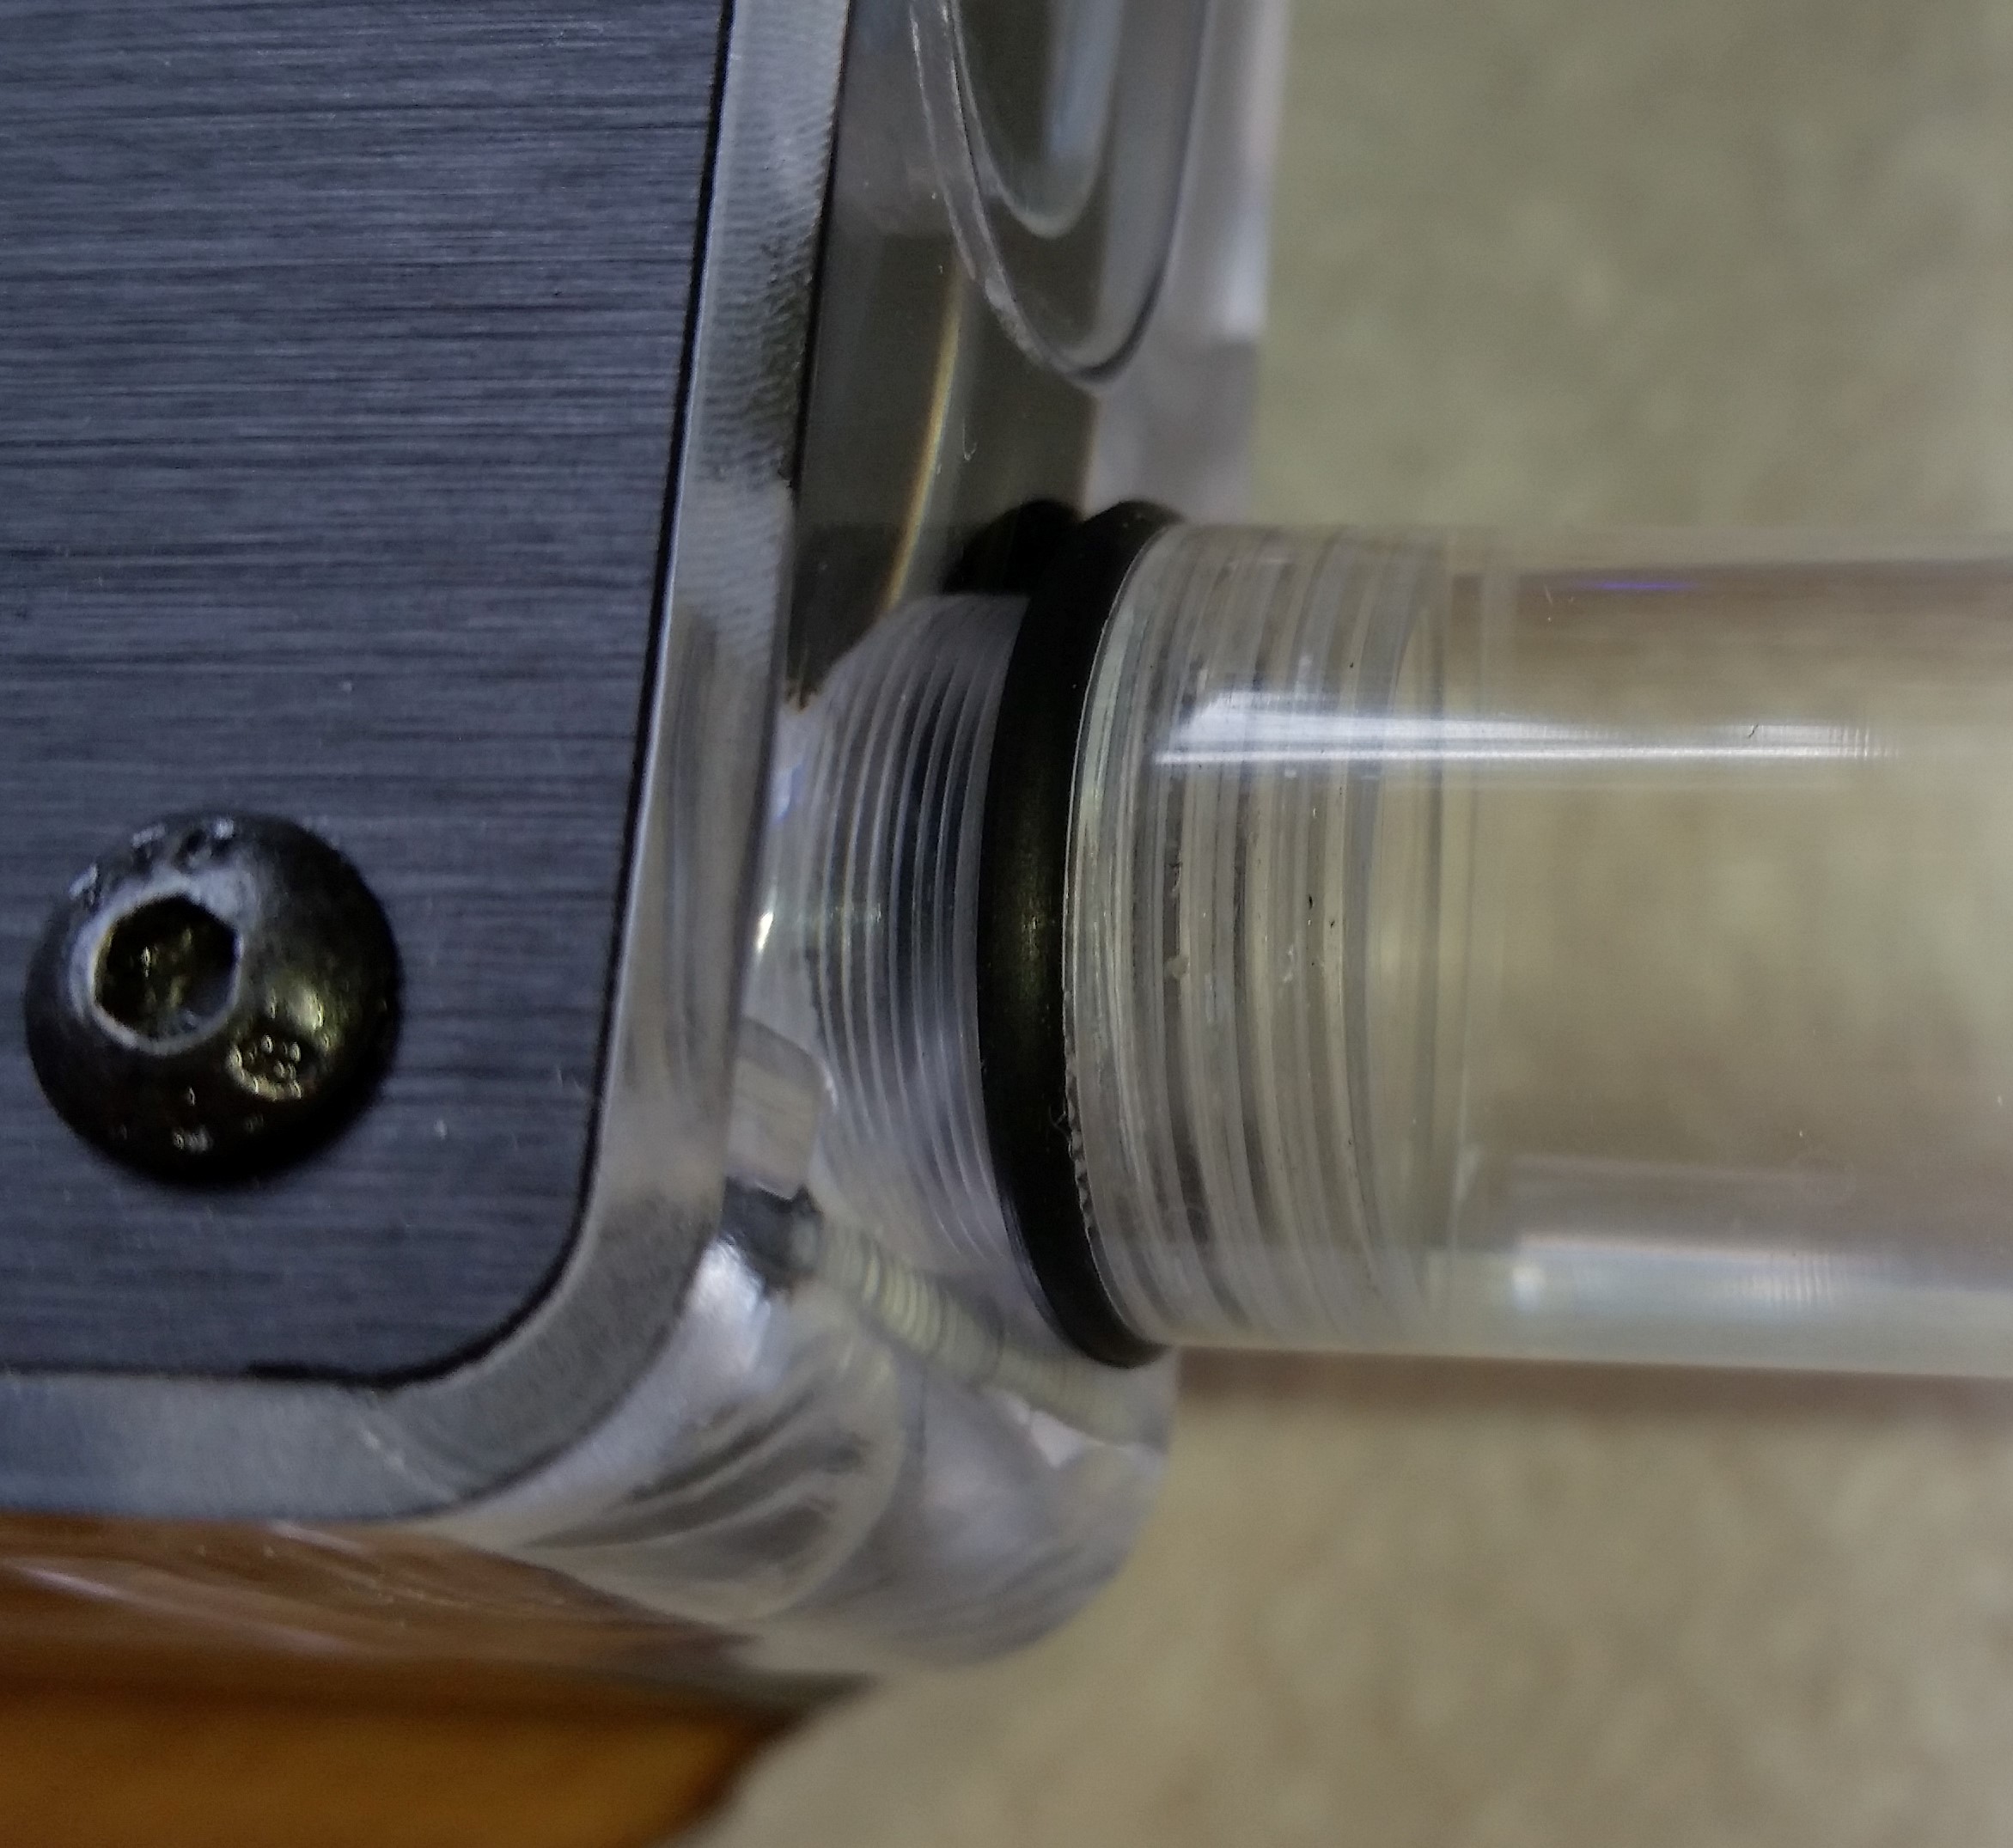
This was so easy to cut the thread I thought it was just way too big and wasn't going to work. Pic is with a standard G1/4 stop plug in and the tube full of tap water. No pressure to speak of (other than 0.9m head) but I did try blowing as hard as I could into the top and it didn't leak at the bottom. Again, I'll try and get a pump on this for giggles when I have a chance. As long as it doesn't blow the thread out, it might actually work as the o-ring seats on the flat end of the tube. EK cut theirs to a nice flat end. Primochill leave a jagged edge that looks more like they snapped it.

Last update I have is round two of fans. I need (unless I want to buy, mount and wire 9x140mm fans) 200mm fans with a max depth of 25mm or the fan grill won't fit. This rules out the majority of 200mm fans out there as they're 30mm thick. Tried the Bitfenix Spectre Pro and hated it. Noisy, wonky bearing, horrible quality to the sound. Also, when I put the fan grill on, it made the nastiest wailing I've heard from a fan that wasn't cooking its bearings. So next try is the Aerocool Dark Force:


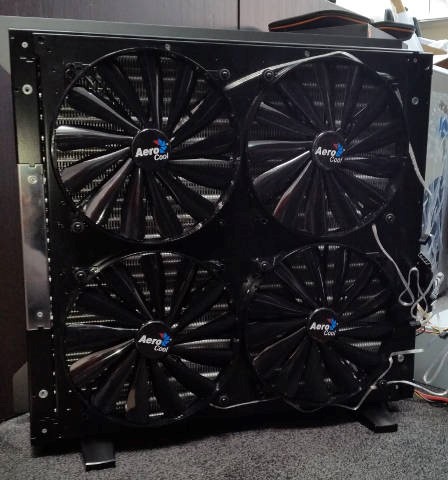
I think I'll stick with them at least for now - yes, I'm that enamoured of them! They're really cheaply made, not perfectly circular (you can see and feel them wobble as they go round) and there's enough flex that if you turn them from vertical to horizontal while they're spinning, the blades hit the case.....but they don't look offensive and they're quiet. They don't push a massive amount of air even at full speed but it's enough for a silent setup I hope! They should last me until Noctua get their 200mm offering to market - which is delayed again. I'm guessing that if I want those when they come out, I may have to work out a nice looking way of spacing the fan grill away from the case by 5 to 10mm though. Can you say "Follow-on project!"? ;)
 
Soldato
OP
Joined
4 Jun 2007
Posts
2,617
Location
Watford, UK
Well my wife was particularly amused when I took over the kitchen for a couple of hours to test things. It went fairly predictably to be honest; some good, some bad.

The 13/10 directly screwed into a fitting leaked. I was expecting it to but you've got to try it, maybe you'll be pleasantly surprised. I did try it into an acrylic block too in case acrylic thread sealed better against acrylic thread....it doesn't. Also tried PTFE tape but four turns was only just beginning to get water tight and apart from running out of the stuff, it wasn't going to give me a seal I would have confidence in. It might work given the right size of o-ring or washer stuffed in the end of the fitting - there is a slight shoulder there. Another alternative would be some sort of shoulder machined out of acrylic and then acrylic-glued on. That could carry an o-ring which, if the glue is strong enough, would give a seal. This does increase the complexity by an order of magnitude though.


EK fitting screwed directly into the end of tapped EK 16/12. Sits nicely thanks to the very flat end on the cut end of the tube. No drops here and I was testing with a dual DDC running full pelt - no point in half-arsed testing :D Also added some restriction to the loop after this point which would have raised the pressure. Not a drip :cool:


Now this one's the most interesting. From right to left: 16/12 tapped (internal or female) with a G1/4 thread, 13/10 threaded (external or male) with a G1/4 thread and an o-ring pinched from an EK fitting.


Put them together and you get this:


...which allows you to directly screw acrylic tube onto a block without a metal fitting. If I had a clear o-ring it would be as close to invisible as it gets. I had to take care not to squash the o-ring so much that it was squeezed out of the join but there were no drips at all from this joint.


I'm thinking that this would be a nice joint to have from the acrylic manifold to the vertical riser that goes to the graphics card. The top of that would have to have a male-to-male rotary fitting to allow it to be screwed in - that or find a left-handed G1/4 tap and die :D

What do you think? Would this be a look you'd like?
 
Soldato
OP
Joined
4 Jun 2007
Posts
2,617
Location
Watford, UK
Cheers. Have to take it all off again now to route fan power out the side of the case and through the rad. You'd think I'd have thought of it earlier! Going to try to hide the wiring by running it inside the rad box but it's going to be sleeved anyway.
 
Associate
Joined
29 Dec 2014
Posts
2,331
Location
The "North"
That's quite impressive with the tube running straight into the fittings, how do you tap the tube without it cracking/fracturing as I wouldn't have thought it would cope under the pressure it would need to work?

Also, just wondering (Sorry if you state earlier) why are you tapping the tube instead of using the fittings? Is there a functional purpose or is it just for the aesthetics :)
 
Soldato
OP
Joined
4 Jun 2007
Posts
2,617
Location
Watford, UK
To be brutally honest it's just something that came to mind and I had to try it. You know how these things go. Mainly aesthetic and because I could but I guess you could claim a reasonable cost saving.

The EK 16/12 taps really easily - like a knife through butter. It could do with being a little smaller on ID in an ideal world but it holds well. Couldn't pull a fitting out straight but could break the thread by levering it out at an angle - not easily though. You do have to be careful the o-ring doesn't get squished out though - although the EK fitting screwed in was fine as the hidden o- ring design contains it.

The 13/10 was harder to thread but a little cutting oil and it was fine - just more effort. Didn't seal though. Maybe with the right o-ring/washer stuffed in the fitting to seal over the flat end of the tube.
 
Soldato
OP
Joined
4 Jun 2007
Posts
2,617
Location
Watford, UK
I wonder if a tapered thread on the 13/10 would seal...?
R1/4 die ordered from a reputable oriental source *cough* Delivery any time in the next month. For a fiver it's worth a punt.
 
Soldato
OP
Joined
4 Jun 2007
Posts
2,617
Location
Watford, UK
Ok, a little progress with designing the block but I need to make a decision on the res and I'd appreciate your thoughts and comments. I've got an Aqualis XT 150ml res and I want to retain the fill-level functionality. Thing is that on the model it just looks lost. Should I replace it and if so, should it be the 450ml (middle) or the 880ml (right)?


I was originally thinking of sinking the res into the acrylic as you can see in the pic but, after seeing the pump top/res combo in TerabyteMike's Black Suppressor, I was thinking that it might be possible to cut the function of the bottom segment of the res into the block, transfer the electronics and just have the glass and central rod screw into the top for instant res-mount and simplified connections - at the cost of more milling complexity....but that road's already been crossed I feel! :D To do this, I need to buy one and study it....hence why I need to decide which one!

The 880 fills the space nicer but I can't help feeling that it's just 3/4 litre of coolant sitting there for no particular reason. I might even have to fill-port it so I can get to the top - although a funnel and bit of tube would probably be fine with no top rad in the way. What do you guys think?
 
Soldato
Joined
26 Sep 2010
Posts
7,154
Location
Stoke-on-Trent
Yes, it may be a load of coolant sat there for no reason, but I think you need to have your components in visual proportion, and for me the only res that works is the 880.

Unless you can raise the 450 up to be vertically-middle you just have a lot of empty space throwing the balance off.
 
Soldato
OP
Joined
4 Jun 2007
Posts
2,617
Location
Watford, UK
Cheers. Good to know that I haven't just gone crazy :D The 450 is mainly just wider - or harder to fit in as it's also known! The height, as you say, needs the 880. Looks like there may well be an order going in.

Might have to get some liquid metal too. Ready to try a de-lid/re-lid when I eventually get round to moving hardware over :rolleyes: :D
 
Associate
Joined
22 Nov 2015
Posts
997
Location
Wales
I'd say definitely the 880ml, as without a 360mm rad + fans in the roof of the case there's going to be a lot of empty space above it otherwise and as LePhuronn says, it looks a lot more in proportion in relation to the motherboard with the larger reservoir :)
 
Soldato
OP
Joined
4 Jun 2007
Posts
2,617
Location
Watford, UK
880 on order. Shipping from Germany as OCUK don't carry it. Did manage to get an OCUK order in for some Kryonaut and CLU for a delid when I move things round - no point before. Also got the additional coolant I'll be needing:D Must stop telling people that clear EC6 is good....it's always out of stock when I want some!

Coloured coolant would look good but I've seen what a mess it can make with staining and given that I'm going for custom acrylic, I don't want it wrecked when it's not easily replacable. Will have to light it instead :D
 
Soldato
OP
Joined
4 Jun 2007
Posts
2,617
Location
Watford, UK
Extra coolant: delivered
CLU and Kryonaut: delivered - but that's for later :D
Aqualis 880ml XT with nano coating: delivered.... and taken to pieces :D

Does it fit the Overkill theme? You could say that, yes!


I'm hoping that I can lose the bottom and cut that part out of the acrylic. Should be a case of four holes:

Inlet
Outlet
Fill level sensor (works on differential pressure)
Central column
(plus some LED lighting holes, of course)

The first two are easy (says the man with no experience!) and the third shouldn't be too hard as long as it seals! The central column is the metal shaft that screws in top and bottom and holds the end caps firmly on the glass tube. I was figuring that it'd be just a G1/4 thread....but no. It's similar but about 1mm larger in diameter. A G1/4 fitting will screw into the hole but the column won't screw into a G1/4 hole. So do I:

1. Find out what thread this is and tap that into my block to keep the column.

2. Replace it with some G1/4 threaded acrylic rod which seems to fit the top ok. This will kill off the fountain effect but I'm not sure that constantly aerating my coolant is a good plan anyway...?

3. Replace it with some G1.4 threaded 13/10 tube either to keep the fountain or because it would be less visible than solid rod.

Best mock-up I can do at the moment:


What do you think?
 
Associate
Joined
22 Nov 2015
Posts
997
Location
Wales
What colour coolant were you planning on using? One random idea (bit love or hate I guess!) would be to light up the reservoir from the bottom as per the standard setup, then use a different colour to light the acrylic inner tube from the top... Brilliant or awful, it's always fun to put more random ideas into your head ;)
 
Soldato
OP
Joined
4 Jun 2007
Posts
2,617
Location
Watford, UK
Random ideas are always welcome :D
I was planning colourless coolant because I'm a coward and don't want to stain the block I'm working on. I've worked on systems that have had coloured coolant in and it took ages to scrub some of the staining out.

Not sure about top lighting the central column as it would mean running cables to the top and also modding the top. Could probably light it from the bottom though.
Winder if there are any good RGB controllers designed for individual LEDs rather than strips. Might have to check out the Aqua Computer offering. I know I can run one off the Aquaero as it's in my current res but I don't think one LED is going to cut it for m-m-M-Monster res!

Checked a while back and you can't get controllable RGB LEDs in 3mm for the CPU and GPU blocks. So, to leave them static or drill 'em out to 5mm? That is the question. It's always dangerous when you go putting random ideas in my head! ;)
 
Back
Top Bottom