

Soldato
Hi guys,
Parts ordered just waiting on delivery cant blooming wait.
Thought I’d do a build log as haven’t done one in ages + excited about this one.
Will be upgrading to IvyBridge once released, depending on performance improvement. For time being will stick to SandyBridge.
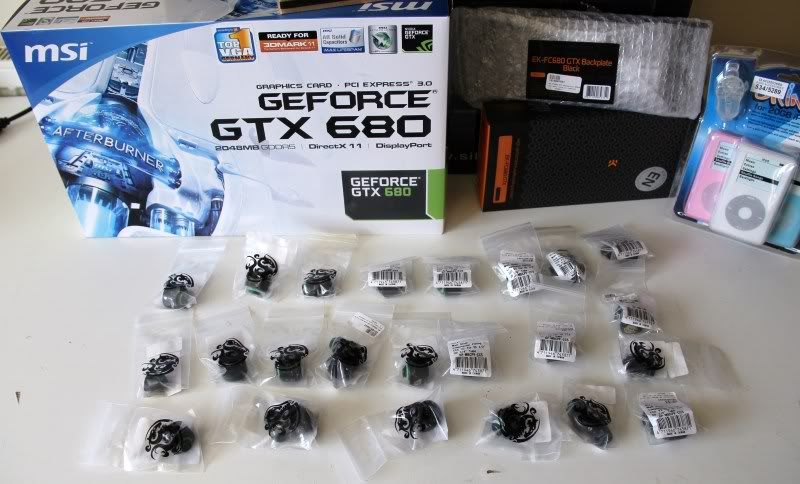
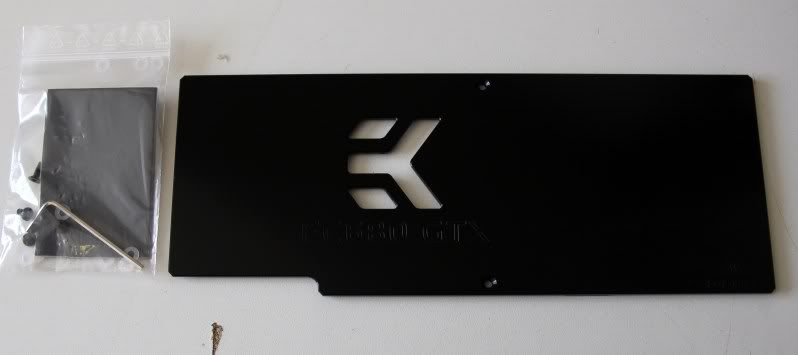
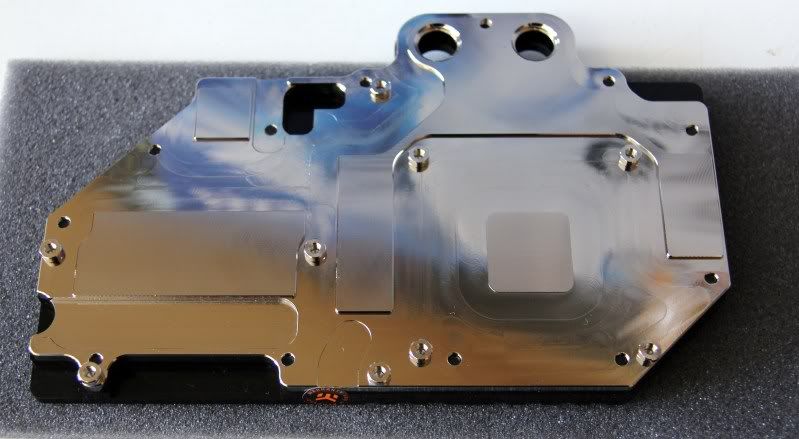
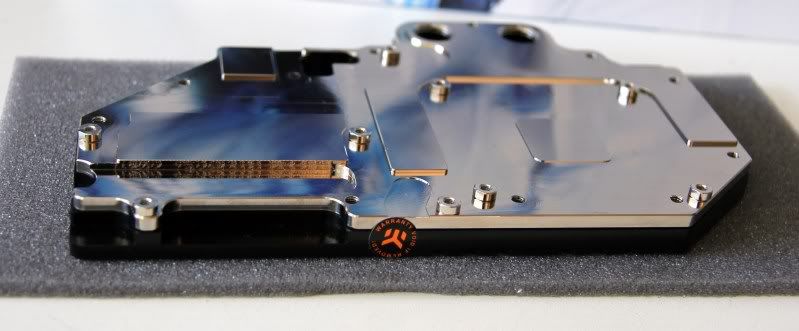
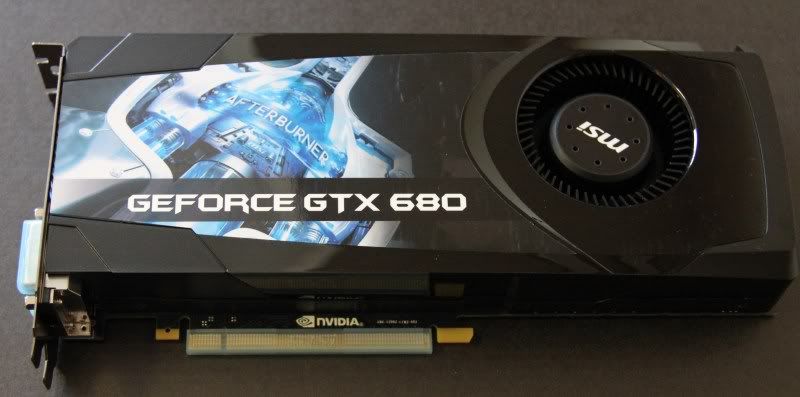
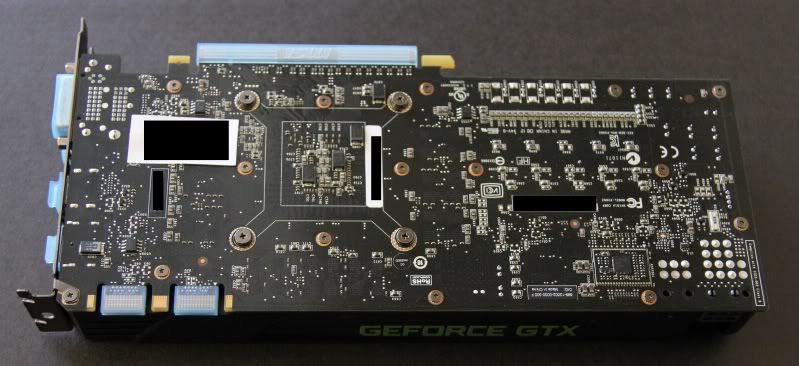
Just to start I’ve gone with the GTX 680 Hydro Copper (feel like a massive tool) my reasoning behind this being a decent branded GTX 680 is around £440 + EK Block + Backplate is £100 + 2 x BP comp fittings - So all in all its only £50ish difference between custom fitted and the Hydro Copper. Plus no voiding warranty, 8+6Pin power and if, same as last gen, a better block. This is all if said e-tailer actually does have stock, ordered this morning but still showing as awaiting stock today. if they don’t have them by Thursday will switch back to MSI GTX 680 + EK blocks.
Anyhow on to the specs, pics and updates to follow once received.
System Spec
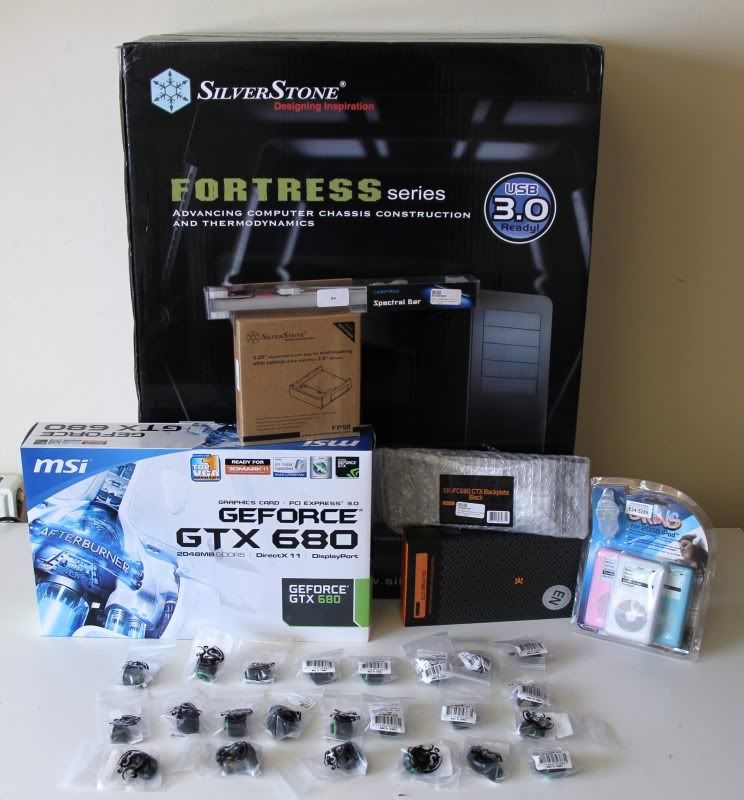
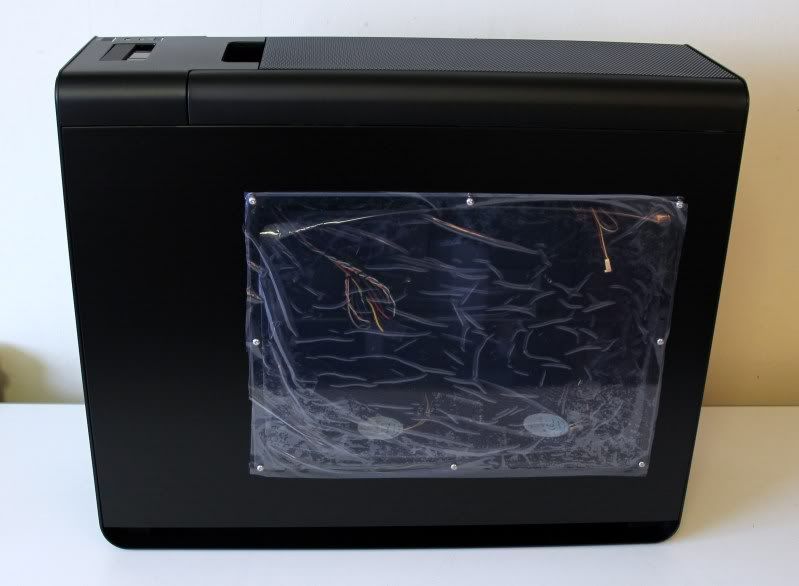
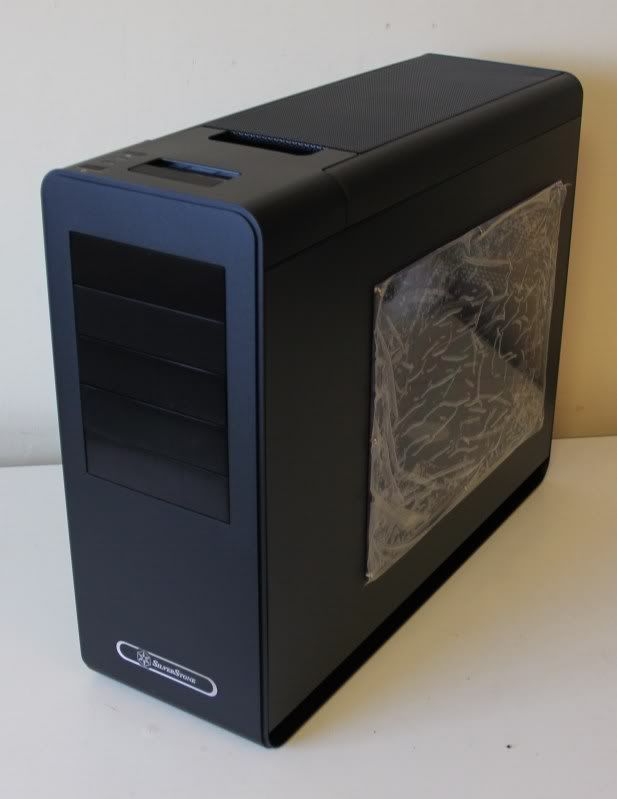
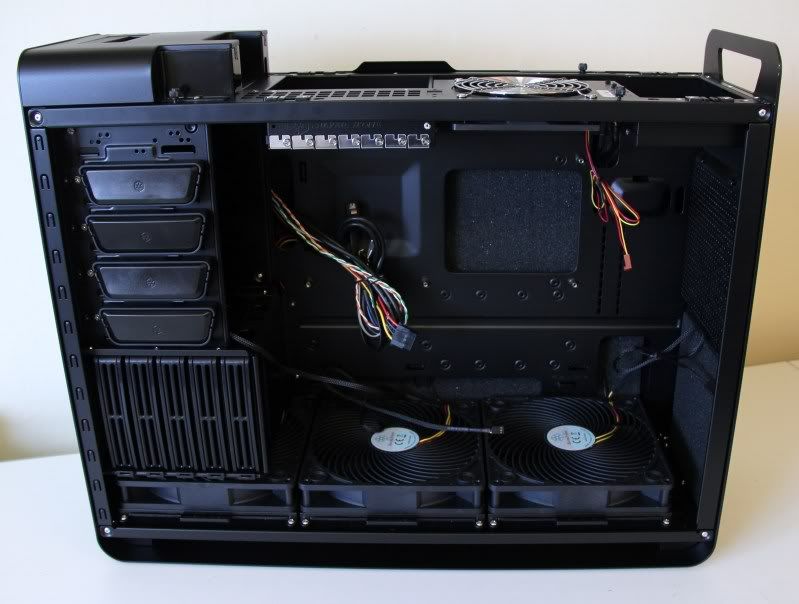
Silverstone SST-FT02B-W Black Full
SilverStone SST-FP58B, Bay Device 5
Sony AD-7800H Slot Loading 8xDVD+/-R, 6xDVD Slim Drive
Intel i7 2600K
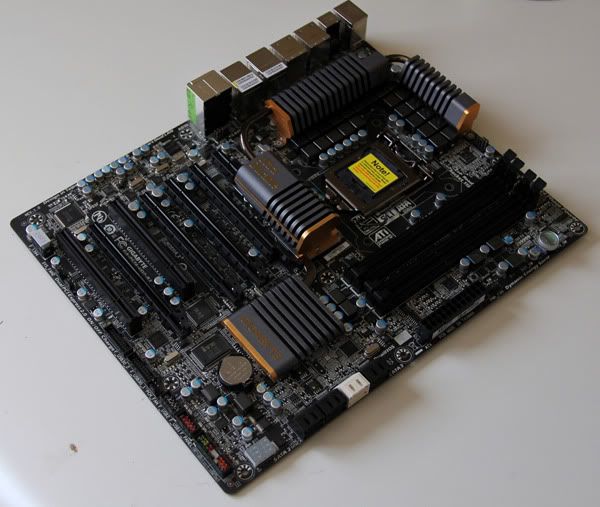
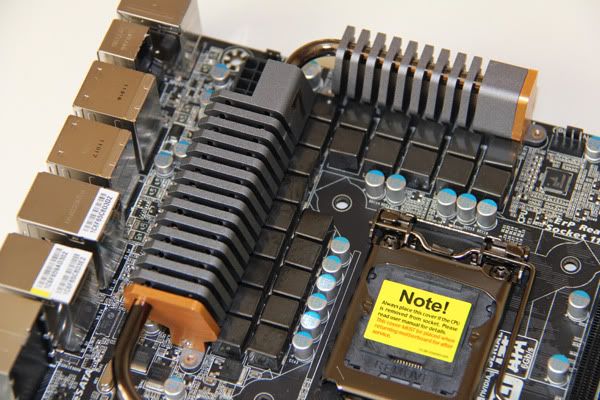
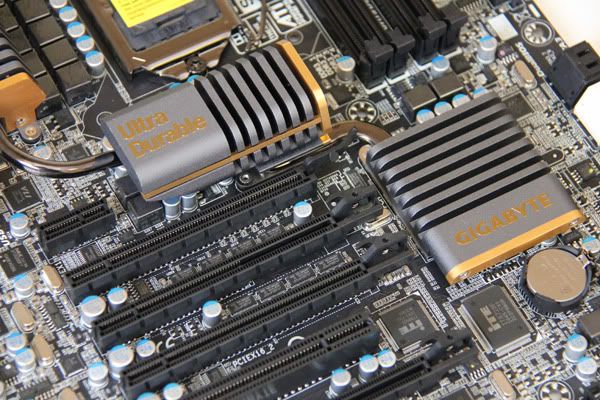
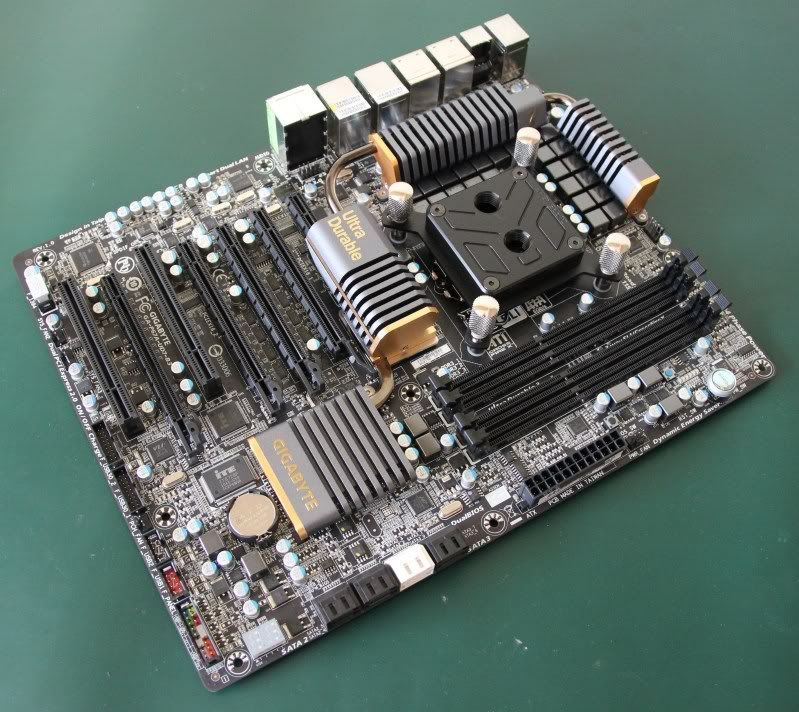
GigaByte P67A-UD7-B3
16GB Corsair Vengeance DDR3 Black
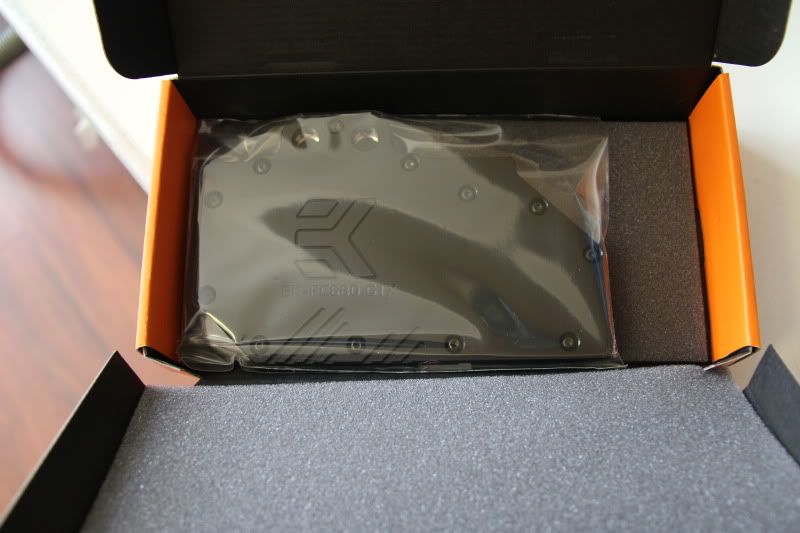
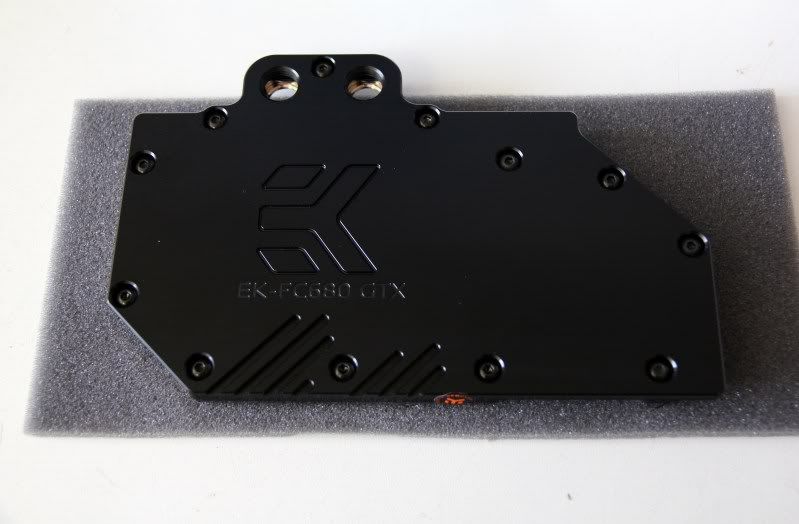
EVGA GTX 680 Hydro Copper
Corsair AX850 PSU
1TB Samsung SpinPoint
120GB OCZ Agility 3 SSD
Scythe Gentle Typhoon 120mm Case Fan 1850 RPM: D1225C12B5AP-15
Scythe KazeMaster Pro Fan Controller
Parracord Braiding
Water Cooling Parts
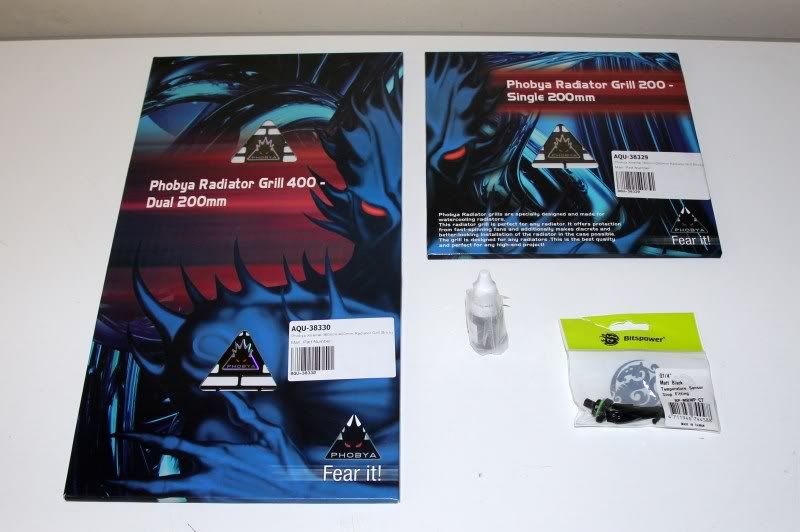
1 x Magicool Slim 180mm Triple Radiator : Black
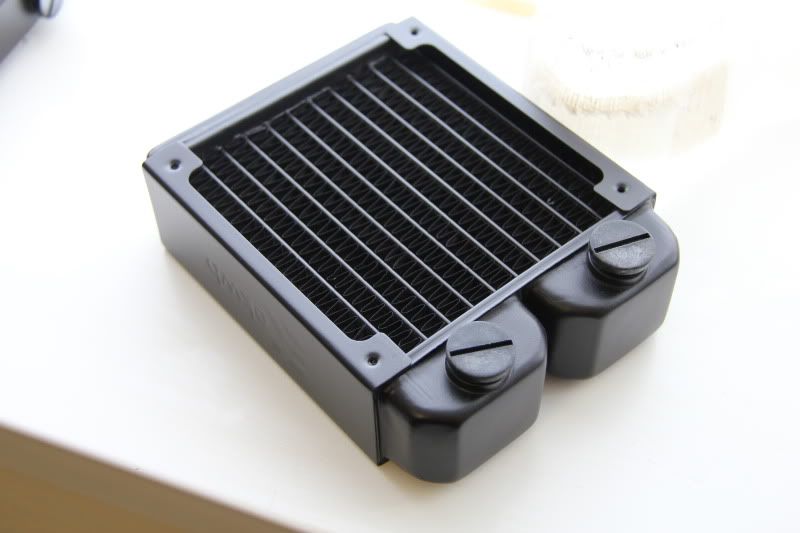
1 x EK CoolStream XT 120mm Single Radiator Black : XT120
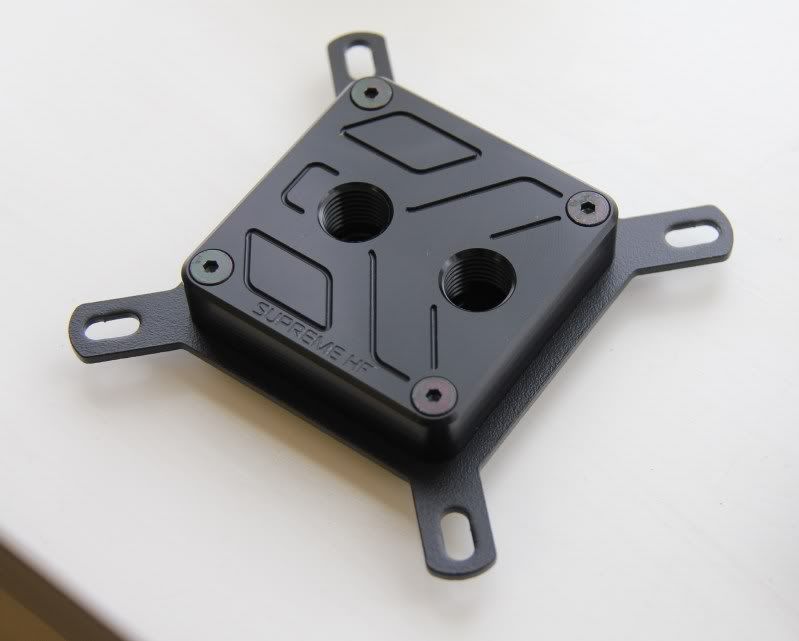
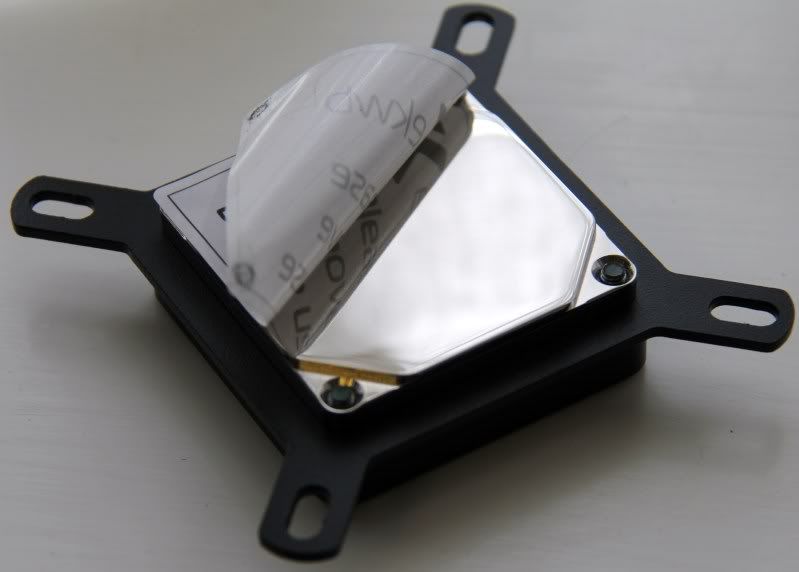
1 x EK Supreme HF Easy Mount Universal CPU Waterblock : EN Nickel Acetal
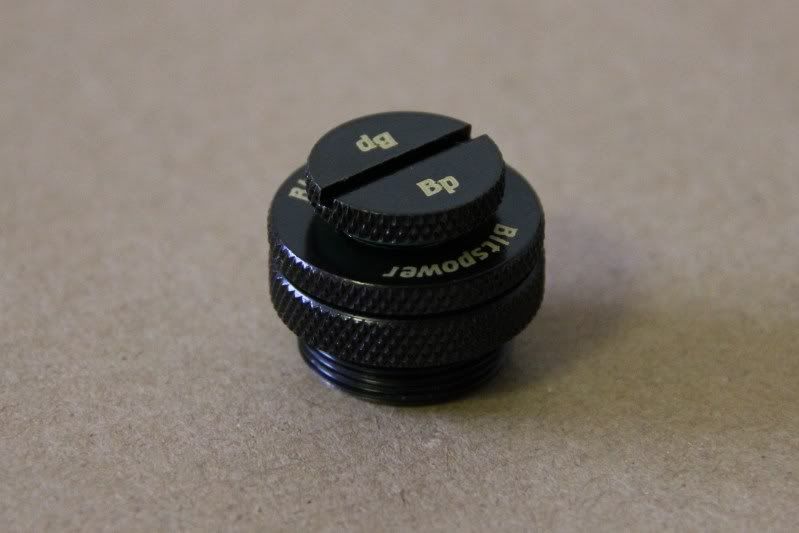
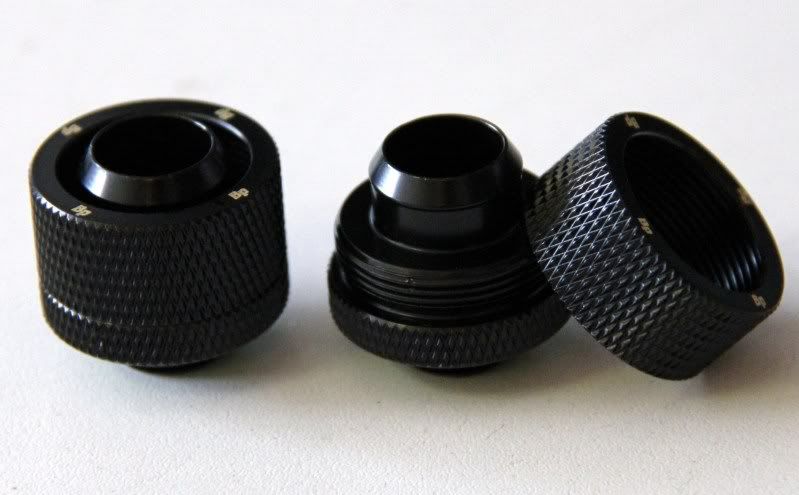
13 x Bitspower BP-MBCPF-CC5 G1/4" Matt B
1 x Bitspower 1/4" BSPP - 1/2" ID - 3/4
2 x Bitspower 1/4" Thread Blanking Plug Matt Black : BP-MBWP-C09
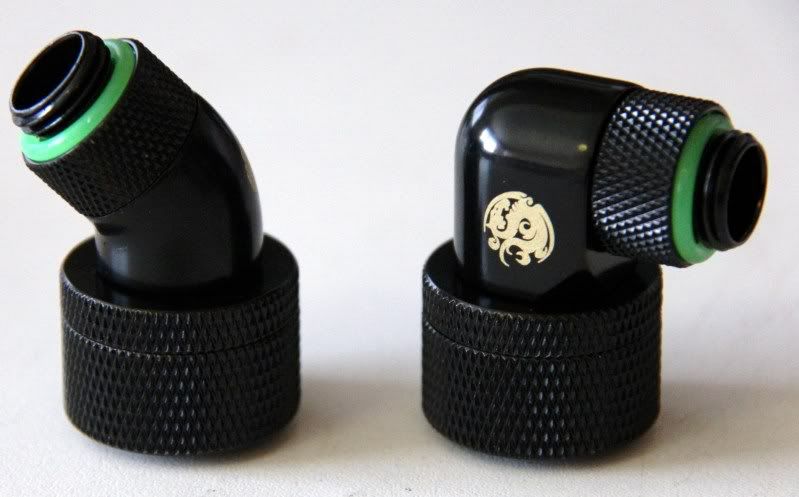
2 x Bitspower G1/4 Matte Black Dual Rotary 90 Degree
1 x Bitspower BP-MBWP-C30 G1/4" Black 45 Degree
2 x Bitspower BP-MB45R G1/4" Matt Black Rotary 45 Degree
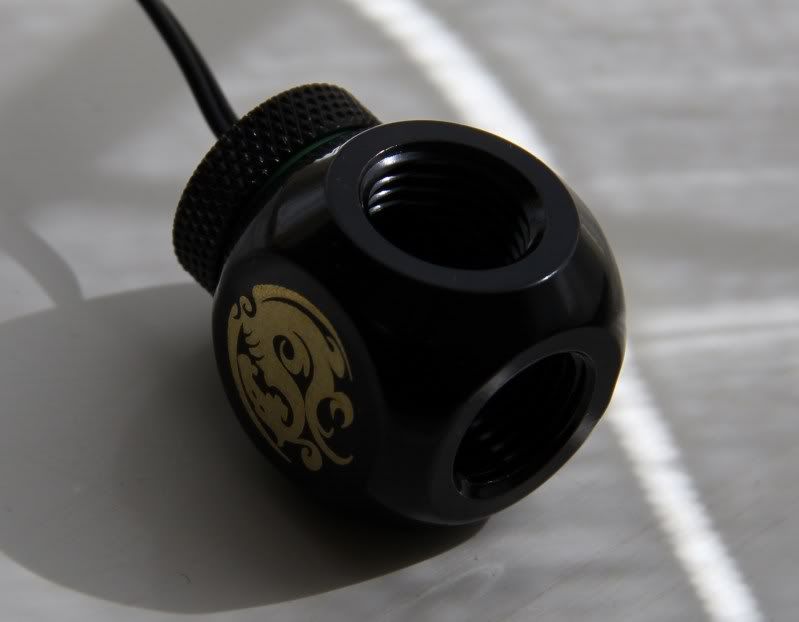
1 x Bitspower BP-MB90R3D G1/4" Matte Black Tripple rotary
1 x Bitspower BP-MBTMB Matt Black T-Block
1 x Bitspower 1/4" Case Top Water Fill Set / Fill Port Matt Black : BP-MBWP-C04
3 x Primochill PrimoFlex Pro LRT 1/2" ID - 3/4" OD (13-19mm) Tubing : Clear
2 x Mayhems Pastel Fluid for Water Cooling 1 Litre : Sunset Yellow
1 x De-ionised Water 5 Litres - Ideal for watercooling / flushing
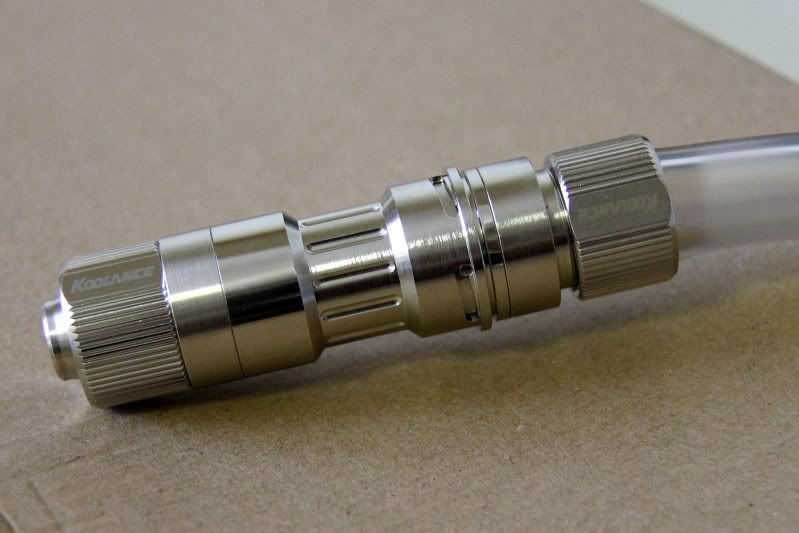
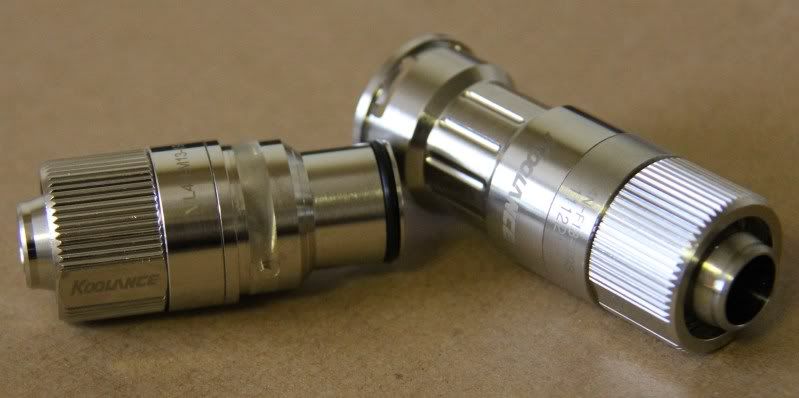
3 x Koolance QDC Extreme Flow No-Spill Shutoff Male for 1/2" ID - 3/4" OD (13-19mm) : VL4N-M13-19S
3 x Koolance QDC Extreme Flow No-Spill Shutoff Female for 1/2"ID - 3/4" OD (13-19mm) Tubing : VL4N-F13-19S
2 x Laing D5 Pumps
1 x Koolance RP452-X2 Reservoir
1 x EK-FB KIT GA P67A (UD7) - Acetal + Nickel Water Blocks (Might not use these)
Fair to say budget has gne out of window, will cry myself to sleep later on when thinking about cost of fittings!! Why are they so bloody expensive??
Parts ordered just waiting on delivery
cant blooming wait.Thought I’d do a build log as haven’t done one in ages + excited about this one.
Will be upgrading to IvyBridge once released, depending on performance improvement. For time being will stick to SandyBridge.
Just to start I’ve gone with the GTX 680 Hydro Copper (feel like a massive tool) my reasoning behind this being a decent branded GTX 680 is around £440 + EK Block + Backplate is £100 + 2 x BP comp fittings - So all in all its only £50ish difference between custom fitted and the Hydro Copper. Plus no voiding warranty, 8+6Pin power and if, same as last gen, a better block. This is all if said e-tailer actually does have stock, ordered this morning but still showing as awaiting stock today. if they don’t have them by Thursday will switch back to MSI GTX 680 + EK blocks.
Anyhow on to the specs, pics and updates to follow once received.
System Spec
Silverstone SST-FT02B-W Black Full
SilverStone SST-FP58B, Bay Device 5
Sony AD-7800H Slot Loading 8xDVD+/-R, 6xDVD Slim Drive
Intel i7 2600K
GigaByte P67A-UD7-B3
16GB Corsair Vengeance DDR3 Black
EVGA GTX 680 Hydro Copper
Corsair AX850 PSU
1TB Samsung SpinPoint
120GB OCZ Agility 3 SSD
Scythe Gentle Typhoon 120mm Case Fan 1850 RPM: D1225C12B5AP-15
Scythe KazeMaster Pro Fan Controller
Parracord Braiding
Water Cooling Parts
1 x Magicool Slim 180mm Triple Radiator : Black
1 x EK CoolStream XT 120mm Single Radiator Black : XT120
1 x EK Supreme HF Easy Mount Universal CPU Waterblock : EN Nickel Acetal
13 x Bitspower BP-MBCPF-CC5 G1/4" Matt B
1 x Bitspower 1/4" BSPP - 1/2" ID - 3/4
2 x Bitspower 1/4" Thread Blanking Plug Matt Black : BP-MBWP-C09
2 x Bitspower G1/4 Matte Black Dual Rotary 90 Degree
1 x Bitspower BP-MBWP-C30 G1/4" Black 45 Degree
2 x Bitspower BP-MB45R G1/4" Matt Black Rotary 45 Degree
1 x Bitspower BP-MB90R3D G1/4" Matte Black Tripple rotary
1 x Bitspower BP-MBTMB Matt Black T-Block
1 x Bitspower 1/4" Case Top Water Fill Set / Fill Port Matt Black : BP-MBWP-C04
3 x Primochill PrimoFlex Pro LRT 1/2" ID - 3/4" OD (13-19mm) Tubing : Clear
2 x Mayhems Pastel Fluid for Water Cooling 1 Litre : Sunset Yellow
1 x De-ionised Water 5 Litres - Ideal for watercooling / flushing
3 x Koolance QDC Extreme Flow No-Spill Shutoff Male for 1/2" ID - 3/4" OD (13-19mm) : VL4N-M13-19S
3 x Koolance QDC Extreme Flow No-Spill Shutoff Female for 1/2"ID - 3/4" OD (13-19mm) Tubing : VL4N-F13-19S
2 x Laing D5 Pumps
1 x Koolance RP452-X2 Reservoir
1 x EK-FB KIT GA P67A (UD7) - Acetal + Nickel Water Blocks (Might not use these)
Fair to say budget has gne out of window, will cry myself to sleep later on when thinking about cost of fittings!! Why are they so bloody expensive??
Last edited:
") Looking to do something similar with SLI 680s when IvyBridge is out. 3 weeks and counting!
Looking to do something similar with SLI 680s when IvyBridge is out. 3 weeks and counting!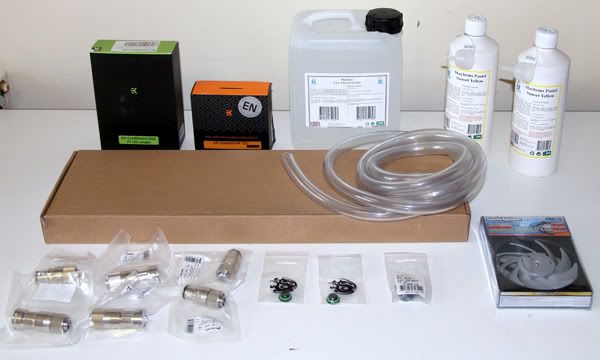


 Spent about 4-5 hours last night trying to braid PSU. Don’t know if it’s the parracord or what but only managed 4 cables and this

 got a few hundred feet of the stuff


")


