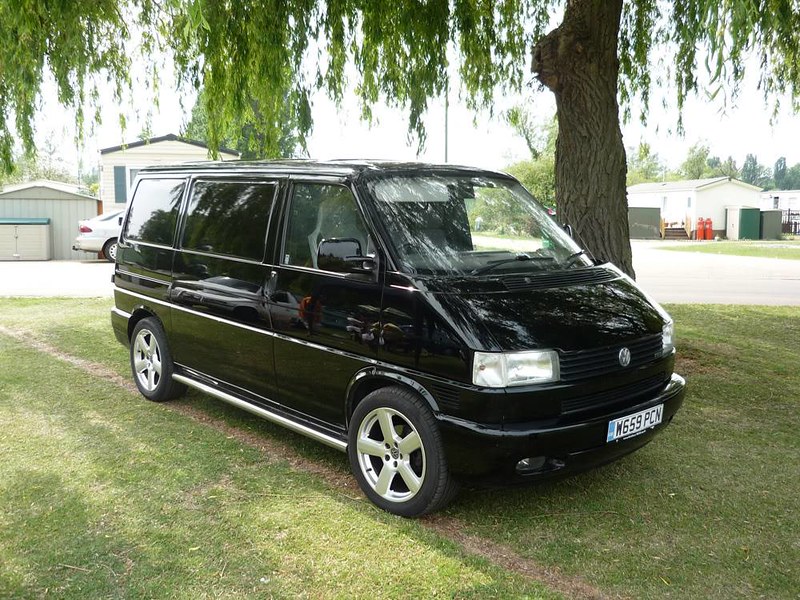
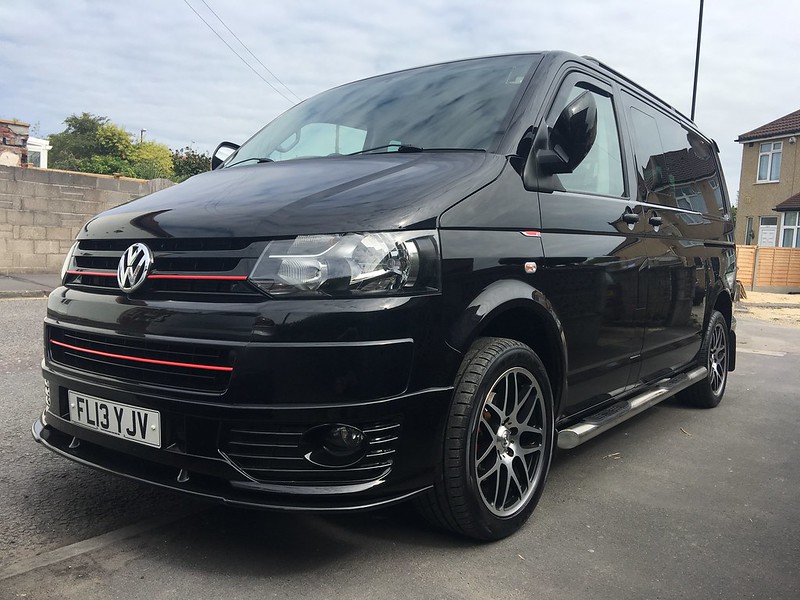
VW T4 related camper van content...

Soldato
Joined
27 Nov 2002
Posts
3,112
So, after my wedding last year, my other half and I went on a two-pronged honeymoon. Part one was a great week in NYC, soaking up all the sights, shows and jazz clubs we could. Part two was secretly my most looked forward to part when we hired a new T6 camper and went exploring the islands and ferries of the Outer Hebrides in Scotland.

We had a totally fantastic week, and both got seriously bitten by the small camper "bug". For me, at this stage in life, they're a good compromise between the touring caravan holidays we both went on with our families as children, and the larger motor homes that are around more and more these days. A driveway awning and a small van gives pretty much the best of both worlds.

So, ever since, we've been on the lookout for a van. A limited budget (£4K at a stretch) and the desire for a bit of a project (and the fact that I've always liked them) meant we started looking at T4s... Yes I know theyre expensive/scene tax/etc etc, but they hold their value well and there's a myriad of camper conversion parts available, and the Vivaro/Trafic/Boxer/Relay/Transit/Sprinet options just didn't do it for either of us. T5 would work for us too, but our budget was right at the lower end of the market, and you're running into dual-mass flywheel issues etc. It had to be a T4.

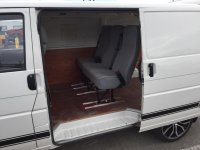
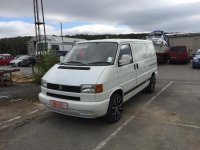
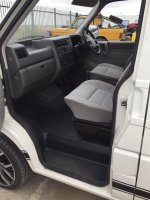
6 months of looking, and this pops up on gumtree, spotted by my OH. One previous owner, basically used as a car, 156k miles at 22 years old, 2.4d (no turbo, no ECU, simple for DIY maintenance), and from what I could make out, minimal rust. £3k (yes, I paid three *thousand* pounds for a 22 year old white panel van....) it was ours!

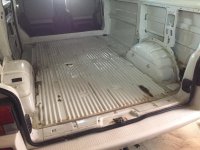
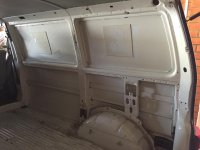
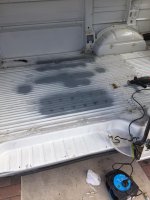
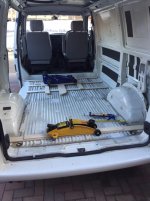
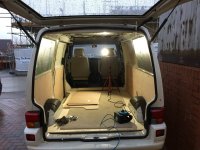
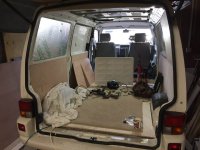
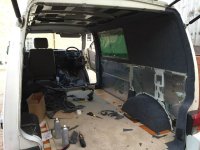
Few photos from when we viewed it, followed by getting it home, and the initial tear out inside. The bolt holes from the seats which were mounted by the previous owner are now primed/sprayed and filled, door cards, dash and seats all been given a good scrub and have come up nicely. Few scabby areas of bodywork have been sanded back, treated, primed and sprayed. Waiting on availability for the chap who's doing the welding now before really getting going :)

Plans:
- Get the necessary patches welded in the rear floor. Cavity wax spraying.
- Engine/gearbox oil change and service. Cam belt was done at time of purchase.
- Clean, insulate, ply and carpet the rear, put a floor down.
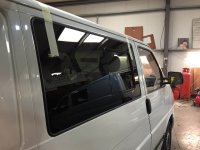
- One window in each side.
- Wire brush/clean and seal the underside.
- Run of units down the offside.
- Standard layout 3/4 width rock and roll bed to install.
- When funds allow, pop top!
q11VCzx.jpg

d7pHwDJ.jpg

Uy4JOdZ.jpg

gr34b9l.jpg

VnVNAtr.jpg

DkzMIpL.jpg

IXd2mrk.jpg
 
Last edited:
Soldato
Joined
7 Aug 2003
Posts
8,030
Location
Bedfordshire
Fantastic!

I am looking forwards to seeing how this will turn out and your ongoing conversion! I have always considered such a conversion in response to the expense of housing.

Looks like a good solid base you're starting from and cavity wax is a must. I have Bilt Hamber which I will be using on my project as a cavity wax.
 
Associate
Joined
13 Mar 2010
Posts
503
Nice, Look forward to seeing how this goes :D

Ours:

31220550278_683c8f1b2a_c.jpg


and just recently:

43237741050_c678628fd3_c.jpg

(Now hit with a -50mm lowering stick)
 
Soldato
OP
Joined
27 Nov 2002
Posts
3,112
Progress!

Managed to spend a couple of days in a friend's workshop, making best use of their expertise - patches cut out and welded up so the floor is now solid. One rear arch repair as well where a rubber grommet had gone hard, let moisture in and started to rust.

7e2NP9E.jpg

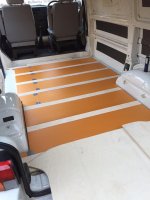
Patches primed and painted. Cut some battens from 12mm ply, bonded these to the floor at 14 inch intervals. Wanted to get some insulation under the floor, but didn't want to raise the floor too much by using 25mm battens.

aGwwjV0.jpg

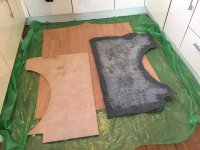
Underfloor heating underlay/insulation cut to size and laid in between battens. Floor cut from 12mm birch ply from template I made from the old floor in two strips. The join runs down the offside and will be hidden under the units eventually. Traced the outlines of the battens onto the top of the floor and will use some 20mm screws to secure. Not that it needs much securing - it sits in just fine at the moment, and will be even more of a tight fit when the arches are carpeted etc.

tByJgtr.jpg

BDEsHJE.jpg

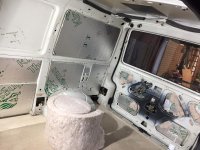
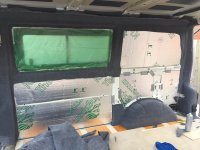
One inch insulation cut to fit the top panels, spray adhesive to hold in place. Will be held in by the ply as well. Two inch stuff cut to fit the lower panels. Fluffy recycled plastic bottle for the various fiddly voids etc. I've done so much bloomin' reading about insulation, vapour barriers etc etc, but have come to the conclusion that it's basically impossible to seal in the insulation. There's too many holes. The pillar above the rear light leads up to the top, and the same void runs all the way along the top, down the middle pillar, and "leaks" out into each of the main areas. So unless you're filling the whole lot with spray foam and block access to your light clusters and lock mechanisms, it's not happening.

tNQylE9.jpg

So this is as it will be, with carpeted ply over the top. I've used plenty of Dinitrol down the bottom of the cavities, and any condensation should be able to dry fairly quickly if I pay attention to ventilation.

prUxVGo.jpg

Got all the side ply panels cut to shape now, experimenting with ways of fixing them up, and it turns out rubber rivnut type inserts for M4 setscrews fit the original trim clip holes perfectly, screws and screw cups look nice and neat (though not invisible), and I don't need to go drilling a hundred sell tappers into my van's metalwork. Windows soon!

KZ8nU0V.jpg
 
Last edited:
Soldato
Joined
18 Oct 2002
Posts
5,730
Location
Birmingham
1.9 or 2.4? Edit - just reread OP. The turbo conversion for a 2.4 is pretty easy and you get 2.5TDI power with none of the electronics.

I went through exactly the same thought process last year and bought a 2001 1.9 TD that had been part converted, not very well but with good bits like a gas night heater and proper split charge.

They're overpriced for what you get, but someone will always buy it and pretty much anything goes. I didn't know what I wanted at the time hence going for the "safe" option. if I was doing it again id definitely go LWB and probably T5, but I wouldn't have got the night heater and split charge already installed.

My needs were rather "different" as its being used as sailing event accommodation for two blokes so r&r beds weren't an option. The bunk arrangement we did works quite well, though the top bunk is a bit tight - not a problem for me :D (My van, my rules)
 
Last edited:
Soldato
Joined
3 Oct 2009
Posts
19,892
Location
Wales
Very interested in this. I've been considering a van for some time for mountain bike trips away and just general exploration. You're right about the VW scene tax but ultimately it doesn't matter unless it goes pop as you can sell it with the same tax.
 
Soldato
Joined
31 Jan 2004
Posts
11,298
Location
Matakana New Zealand
Thiss is something i've always wanted to do with a LWB hi roof transit or something.

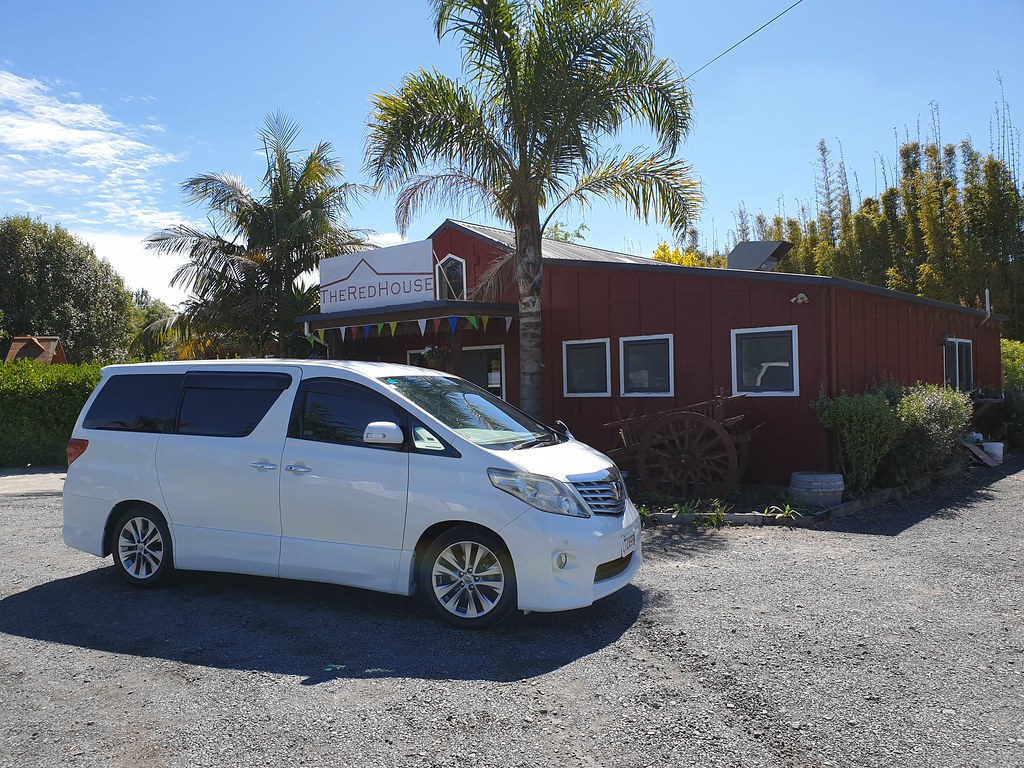
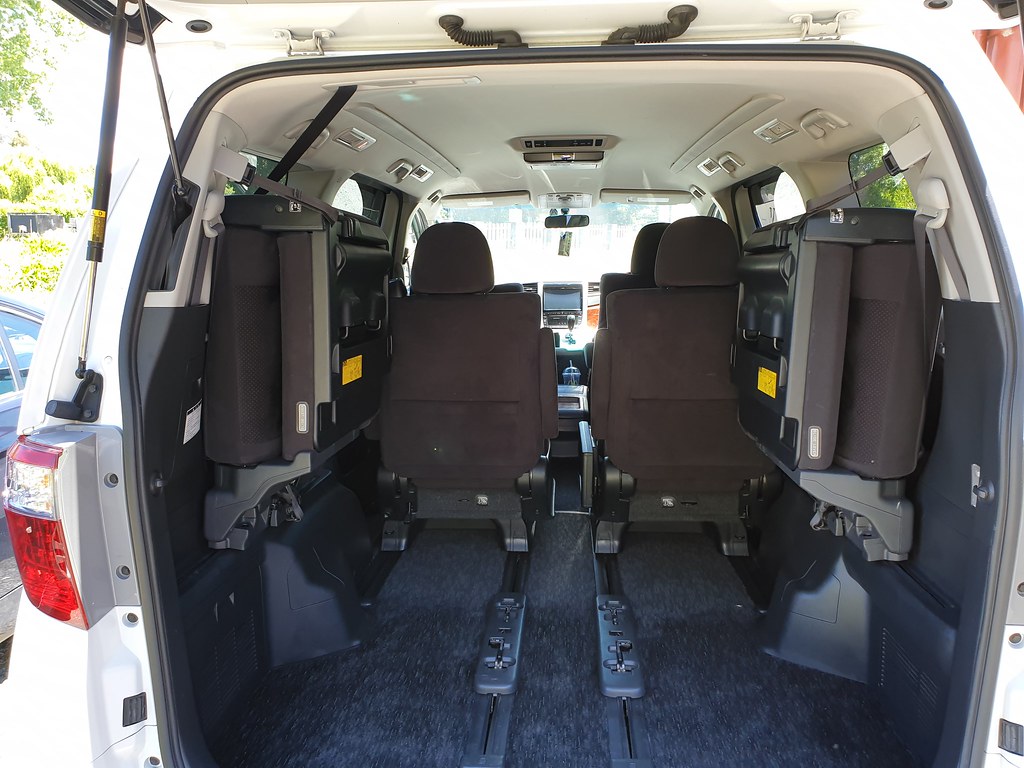
In the mean time, i've bought a Toyota Alphard 3.5 V6 here in New Zealand and am looking for a way to temporarily convert into a camper for nights away. all the rear seats fold away or lay flat so maybe a frame over the seats with a mattress.

44190806900_cd44e760f5_b_d.jpg


44190805050_0f31045b53_b_d.jpg
 
Soldato
OP
Joined
27 Nov 2002
Posts
3,112
Thanks for all the comments folks - I’ll keep the updates coming :) Once the rear is fully lined and carpeted with windows and curtains, things might slow down a bit whilst we save for a bed/roof and design and build the side run if cabinets.

I don't really get the VW camper scene, especially the non-classic vans. Interested in seeing progress though.

I didn’t before either! Always wanted a classic VW camper.

However the T4s are sensible money in comparison to splitties or bay window vans (or even the newer T5/T6s) for a small, classless, go anywhere, park anywhere campervan. For us it’s a good compromise between camping and the pros and cons between a motor home or a touring caravan (all of which we have family experience with). When they’re smartly done and in good condition I think the T4 looks good. It’s an older proper “van” (comedy steering, floor mounted gearshift and handbrake etc) rather than the newer generation of vans which all feel like driving a tall car. Might even be considered classic itself at some point - quite a bit of square 1990s stuff feels classic these days.

There’s also loads of choice with camper related kit/fittings, pop top roofs, aftermarket windows, seats, custom fit pull our beds etc etc etc. And they hold their value well.
 
Soldato
OP
Joined
27 Nov 2002
Posts
3,112
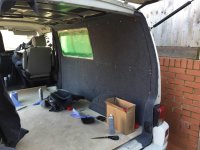
Just a minor update - progress was delayed in the lead up to Xmas due to work, bad weather, and a slight lack of fundage... However the interior is now fully ply lined. In the end I went for rubber rivnut type inserts to fasten the ply panels in. The M4 threaded rubber nuts have the exact 8mm diameter of the predrilled trim clip holes in all the bodywork, so there was no major drilling required (except for the rear upper panels, where there were no holes).

I went down this route rather than the usual "bung a load of self tapping screws straight through the ply into the bodywork", as doing that seemed a bit daft. The self tappers might screw in nice and tight on the first go, but when you've test fitted and removed, then carpeted and put back, then taken off again for something you forgot, removed annually (or whatever) for maintenance or to check for condensation etc - the holes are just going to open up and the screws will never take as well. Various people recommend cutting holes in the carpet, hiding your screwheads and then gluing the carpet back over the top - again, not a particularly futureproof solution.

I decided I'd have showing screwheads and use screwcups for a tidy solution. I thought about full on rivnuts, but they were a pain to install and there isn't an 8mm diameter rivnut. The 7mm M5 ones are too small for the holes, and the 9mm ones are M6 threaded which means huge screwheads. The rubber nut inserts seem like a decent reusable solution that will hold the panels securely.

Got them all installed by cutting and trimming the ply panels to fit, screwing some screws into the rubber inserts, bunging in the holes, colouring the screwheads with permanent marker, offering the panel up and pressing into place, then drilling where the ink marked the wood.

No pictures with the upper rear sections in place as it started raining more and I forgot...

FHayQYY.jpg

lFXltik.jpg

Now the new year has rolled around and the bank balance is looking a little healthier, I've just ordered a pair of front sliding opening windows, a set of rubber door seals, and some front window wind deflectors (to allow the windows to be opened at night for ventilation without letting rain in). Once the missus and I have agreed on a colour for the interior carpeting to be, I'll get that ordered as well.

Busy researching the various options for leisure battery/split charge systems as well. Plan is to have a plain carpeted interior which will be usable as a warm and insulated metal tent on wheels by Easter (to use with camping mattress and stove etc), and to design/build/install a run of units and have a rock and roll bed fitted for use in the summer. I've had 2 1/2 weeks annual leave approved for July into August, and we've got the north coast and islands of Scotland in our sights!
 
Last edited:
Soldato
OP
Joined
27 Nov 2002
Posts
3,112
Long overdue update time!

I've also fixed some of the broken links from earlier in the thread...

Progress has been steady over the last few months. The usual issue of rest days coinciding with it tipping down with rain, and seem to have been relentlessly busy. Never mind - the target of having a warm, lined, carpeted and insulated metal tent on wheels to go away in at Easter has been met! :)

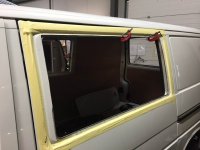
One thing I wasn't keen on doing myself was cutting holes and putting the windows in. The T4 is quite a bit more work to put windows in as the blank window apertures on panel vans aren't totally recessed and flat - the metal is indented around the edge but the main blank panel comes back out to bodywork height again. This needs dressing back and bonding in order to get the windows to fit flush. I travelled over to Van Doc near Worcester, who've done a fantastic job:

1.jpg

AGhUAwo.jpg

OWWE0O9.jpg
18.jpg.html


Next up - carpeting. Mega van mats mega stretch carpet and spray glue ordered - 12 meters of the stuff. Spent a good few afternoons trimming the various ply panels and then a messy weekend trimming the interior metal work. Tried to do it properly, removing all the interior plastics, carpeting and then replacing. All new rubber knock on door trims as well.

Trimming panels in the kitchen:

tpexefu.jpg

Van interior carpeting in progress. Messy work!

frvOCWk.jpg

Looking much neater as the carpeted ply panels go back on. Pretty pleased with the screws and screw cups. They catch the light in photos, but in real life aren't quite so noticeable. They sink beneath the level of the carpet when screwed down, so are not sitting proud of the surface. Pretty pleased with them to be honest - given how easy it has been to remove and refit panels and to get just as secure a fit as before. They also don't rattle as there's a rubber buffer effectively. It all feels nice and solid.

1wgW676.jpg

Hv66FNU.jpg

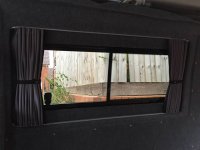
Given how flush the windows were, there was no space for rubber knock-on U trim on the inside metal edge. Didn't want to tuck the carpet over the white metal edge you can see in the picture above, as the carpet would just soak up any condensation. So, I measured up and made myself a ply O-ring to go in the window aperture to cover the exposed edge of the window. Carpeted that and glued in place. Van-X curtains are expensive but are really good quality and fit well. The curtain rails hold the O-ring securely in place as well. Dead pleased with how this part has turned out:

ozz27rQ.jpg

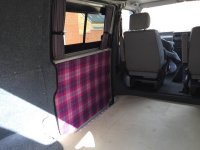
Bit of genuine Harris Tweed on the sliding door panel. 2mm of closed cell foam (neoprene type stuff) glued and trimmed to the wooden panel to give it a bit of soft touch, and to avoid a hard surface with the fabric just glued to the wood. Genuine stress getting the super sticky contact adhesive covered panel glued onto an £80 piece of spray glued fabric straight, true and not creased on the one and only attempt...! Again, super pleased with how it's turned out though - a good splash of colour. The other half loves purple, so that'll be the highlight colour theme for the interior:

TIRNXTj.jpg

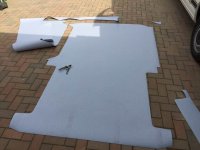
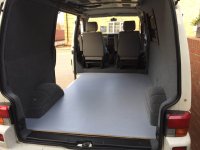
Bit of Altro flooring ordered and cut to place (with garden shears - it blunts brand new stanley knife blades every 20cm of cutting!!). Floor out for a template, cut, refit and trim to fit. The 12mm ply floor is now screwed down to the battens below, and the Altro flooring is spray glued on top. Fitted it in place, rolled one half back, spray glued both sides, unrolled it back into place, and then rolled back the other side and repeated to ensure it went in flat, level and in place. The one-piece ply roof has now also been carpeted and fitted. Awkward job, working upside down, but the carpeting is complete now.

TCdlXeV.jpg

6pbz9l6.jpg

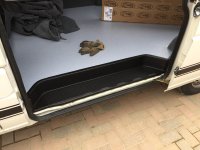
Last bit of progress up till now - a fibreglass moulded sliding door step. Expensive at £45, but a good quality and well fitted part. Needed a bit of experimenting to get the packing right underneath due to the raised and insulated floor, but went in easily. Sikaflax adhesive stuff to glue it down. Finishes off the doorway nicely!

OSo9KRZ.jpg

That's it for now - almost ready for our inaugural weekend away. We'll effectively be using it as a tent with a self-inflating camping mattress, sleeping bags, and outdoor stove cooking type stuff for a few days away to Norfolk in a fortnight's time. But it's warm, carpeted and insulated. We'll use our old self contained camping electric hookup for power and just pack a load of cushions, pillows and blankets along with a cheap 1 or 1.5KW electric oil filled radiator for heat - should be plenty cosy. Even with no heat, it's noticeably warmer working inside it at the moment compared to the 10-12 degree temps outside this weekend :)
 
Last edited:
Back
Top Bottom