

Associate
Space/Flight sim pod (WIP):
Please note that this is currently WIP and stalled for a short time due to my daughter becoming very ill. I'm hoping to pick it up again soon.
Materials and Tools:
List of materials:
Wood Strips
Backing board
Hardwood
Screws / Bolts
Rubber sheet
Blackboard vinyl
Acrylic
Artwork
Cabling / Neutrik connectors
Velcro
Aluminium plate, strips, edging
Mesh
Leather material
Paint and Varnish
Accessories (various badges and stickers)
Glues (wood / epoxy / contact)
LEDs
Wire Switches Connectors
Tools:
Workbench
Clamps
Router
Jigsaw
Power drill / driver
Foam roller
I always wanted a dedicated space for flight sims so when Elite Dangerous came along, I decided to start on one. This is more space sim than flight sim though. I will use this with a Rift when the consumer version becomes available.
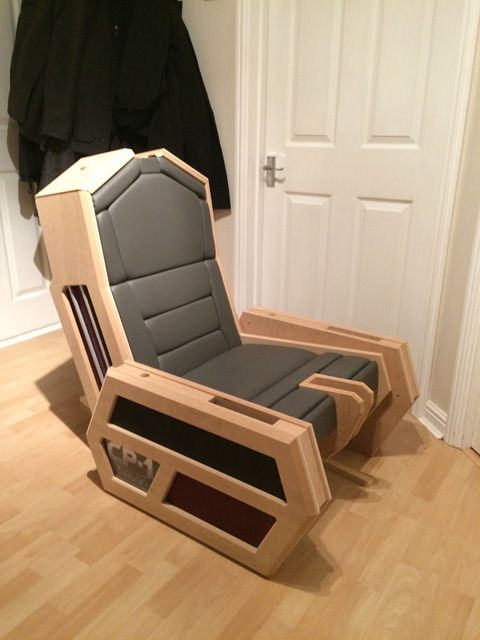
I wanted to build something suitable spacey so elected to build my own seat rather than buying one. This also allowed me to chose the exact design I wanted to achieve. It was a very interesting and long winded process but quite satisfying also.
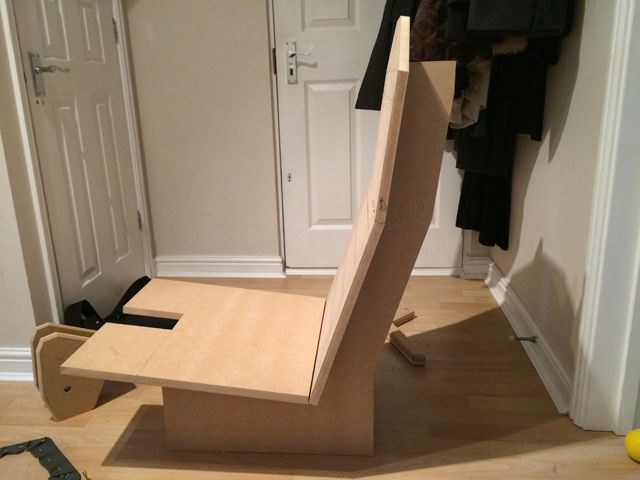
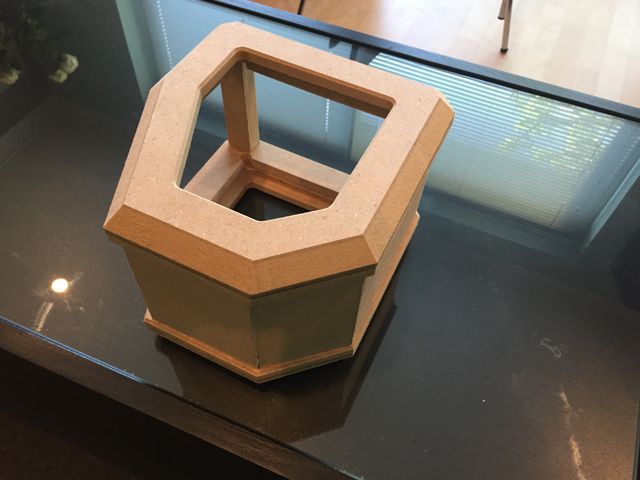
The basic seat shape was built with a lot of time cutting and re-cutting the shape until I felt it would be comfortable. The angled/split upper section was essential to get this right.
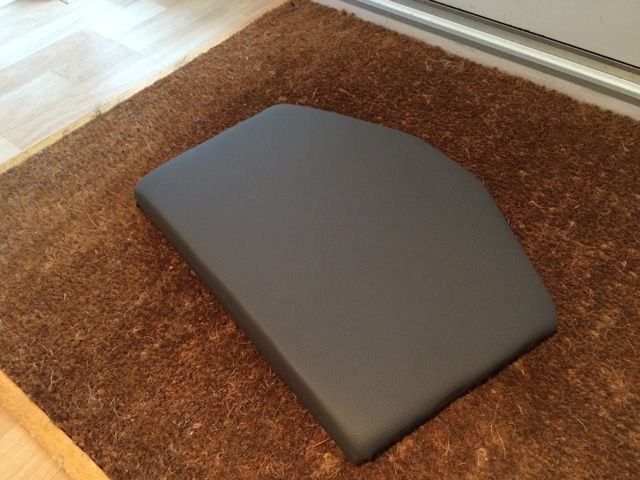
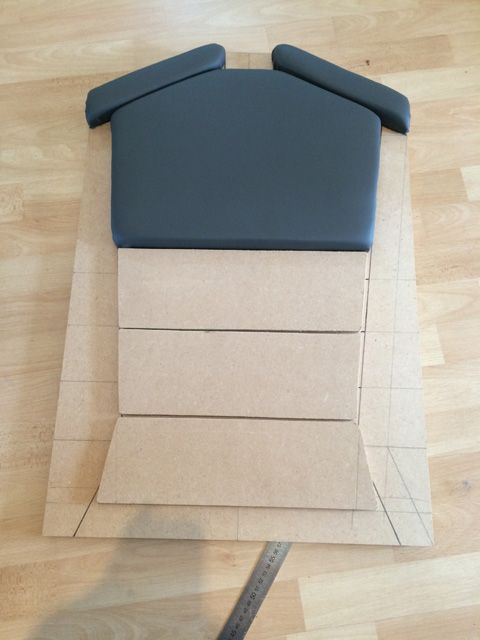
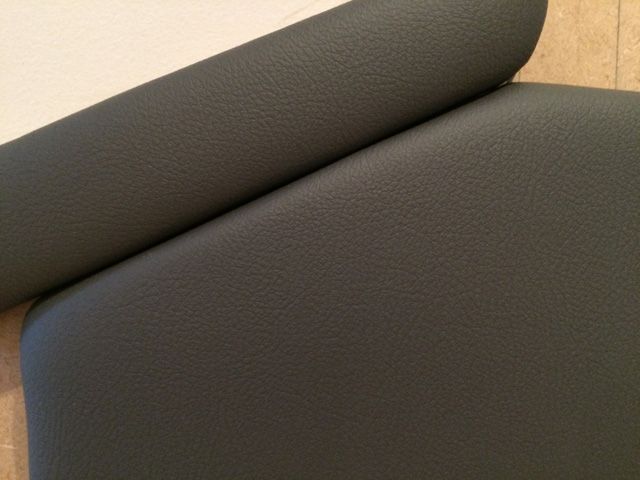
I then set about making the paneling and padding for the seat, each piece cut to size and upholstered in grey leather vinyl. I wanted to achieve something similar to the aesthetic used in 2001:
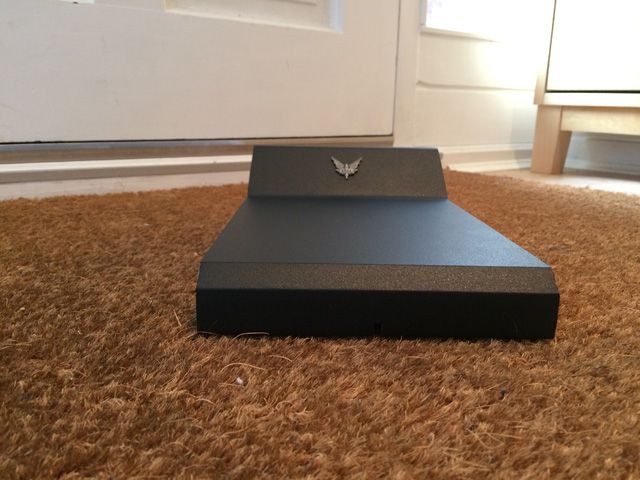
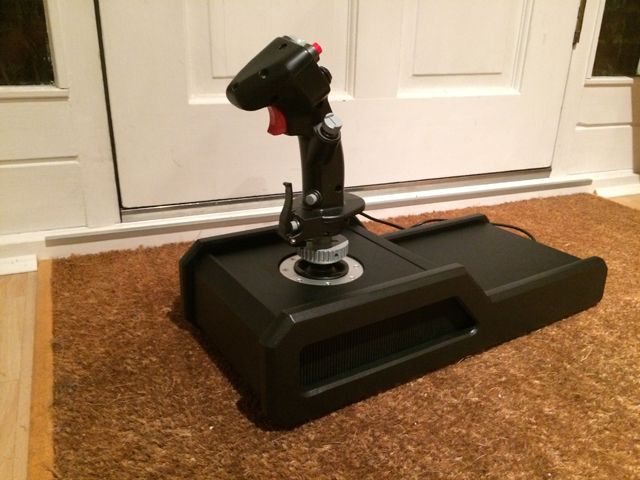
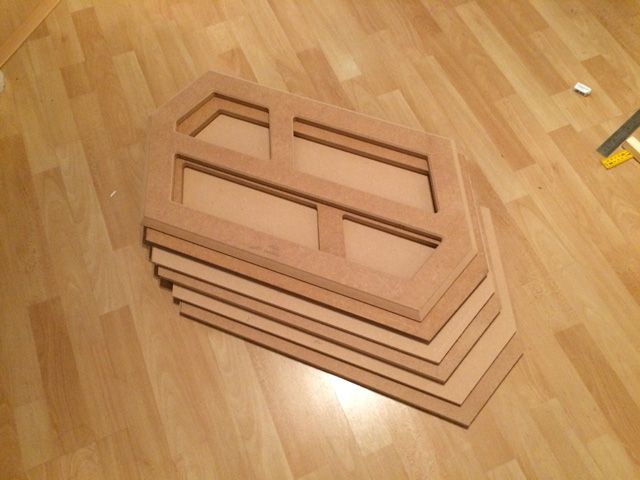
Whilst making progress with this, I also made the cases for the Warthog HOTAS - I wanted something in-keeping with the design rather than taking the simple option and mounting them as they were:
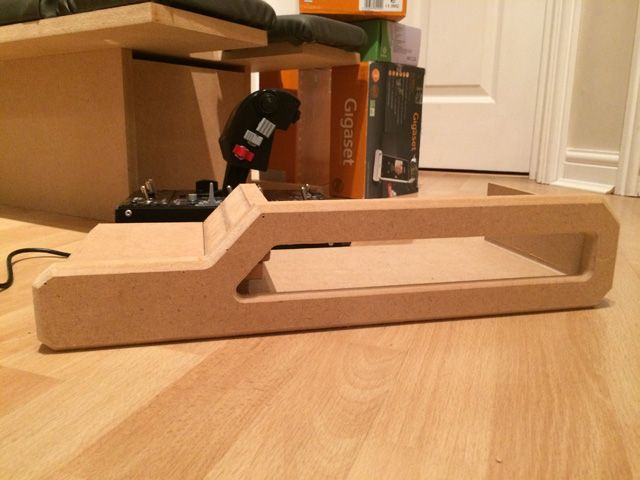
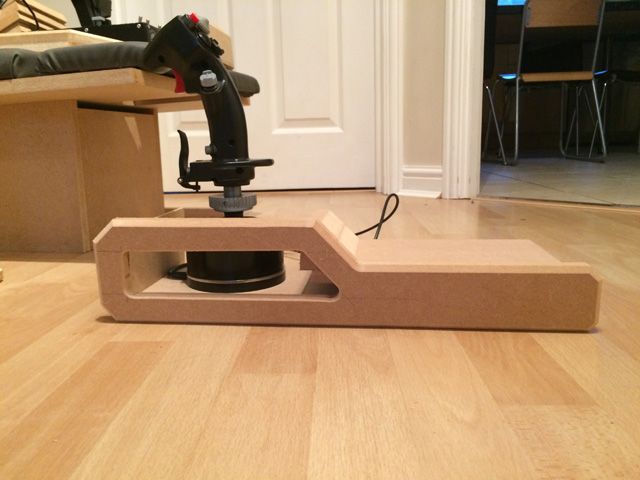
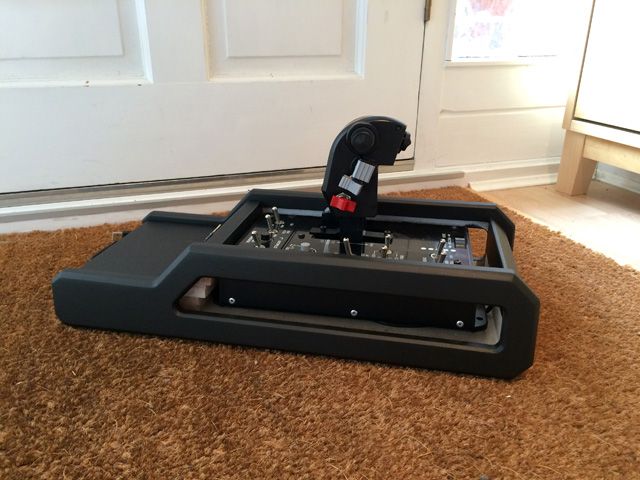
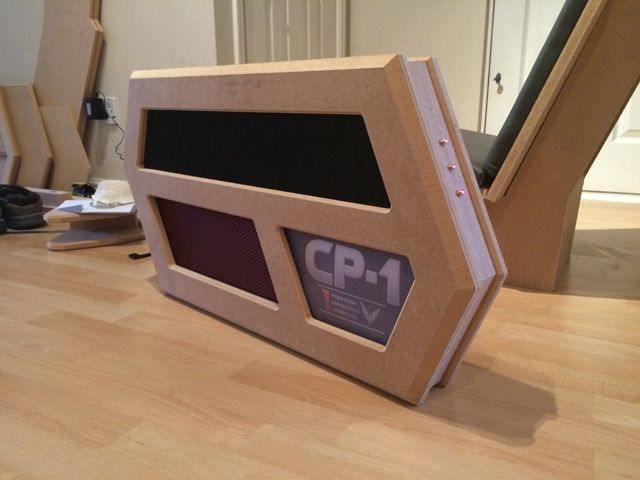
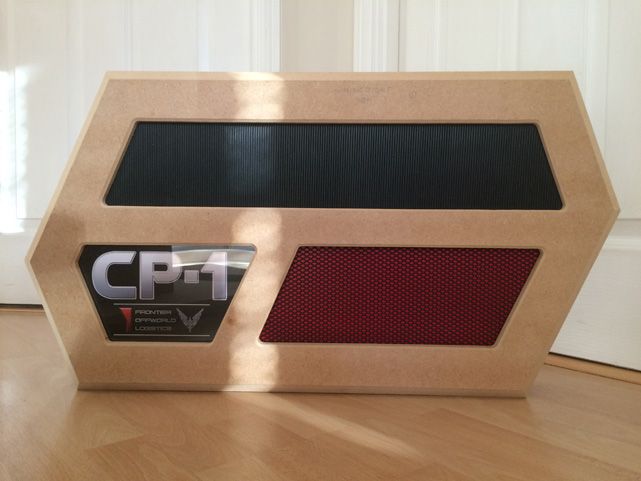
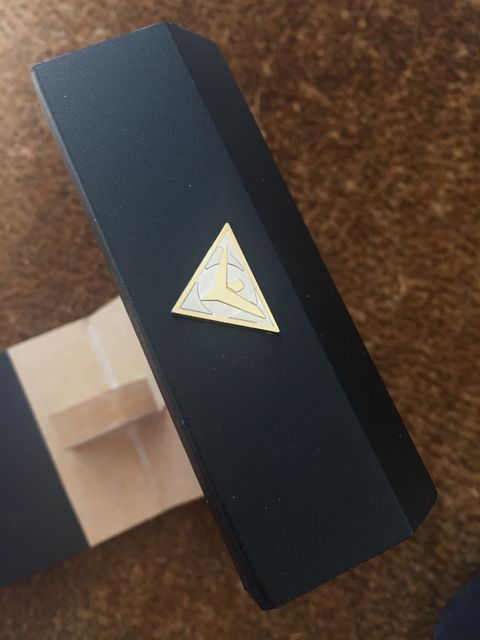
The main sections were covered in vinyl and an E: D badge embedded into the upper case section:
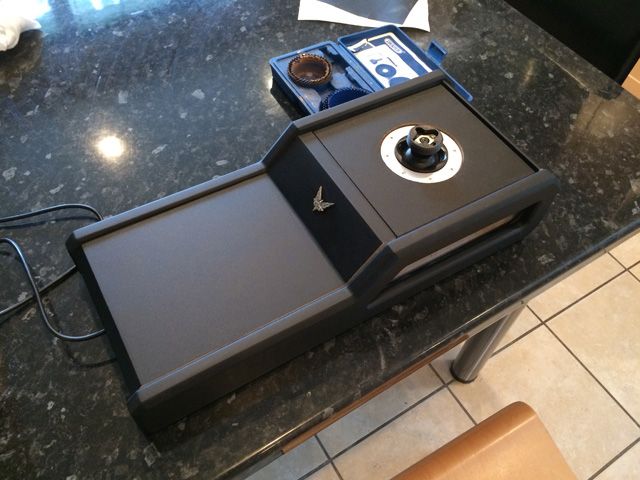
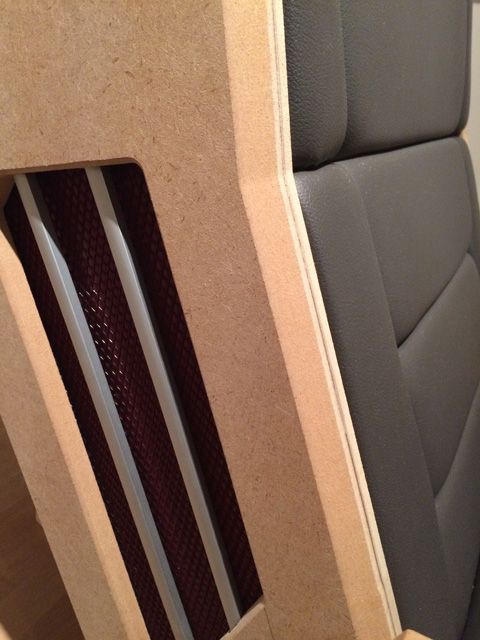
The throttle and stick cases will be attached to the side pods of the seat:
The side pods were then built which are to be attached to the sides of the main seat. They have pulsing LEDs on the rear sections:
Similar to the R-Pod design, these incorporate ribbed rubber, mesh and artwork behind acrylic:
The remaining seat paneling was completed:

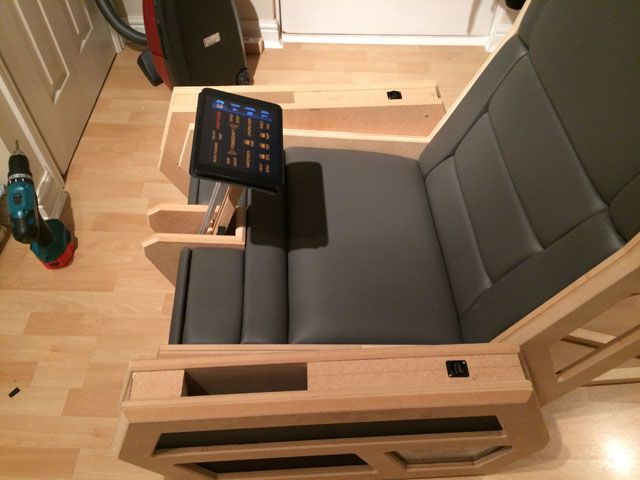
A section for a stowable console was also built into the design:

The sides were made, again using embedded aluminium tubing:
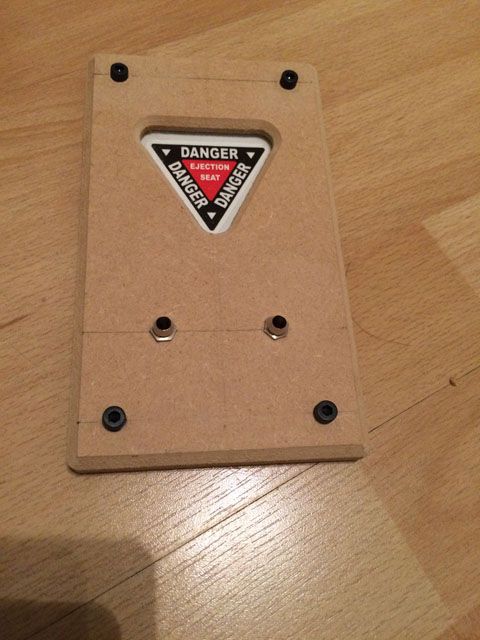
The last pieces to be made were the panels to attach to the sides of the seat. An ejector seat panel with integrated LEDs and cap bolts for a more military look:
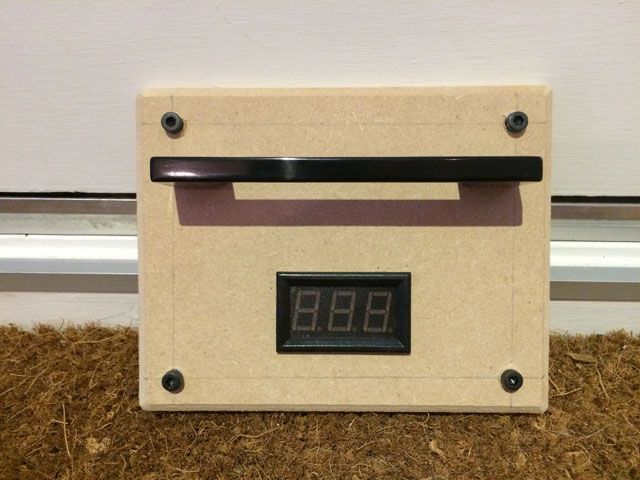
A digital display / grab handle panel for the upper shoulder area:
The stowable console is WIP but has a retractable mechanism to accommodate an iPad mini:
Work has started on the headrest section:
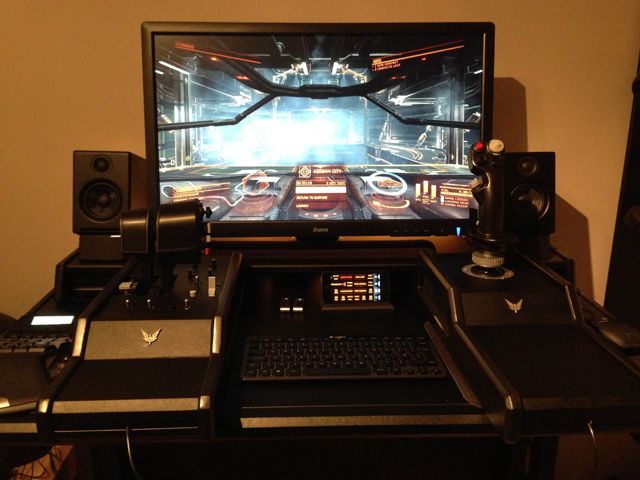
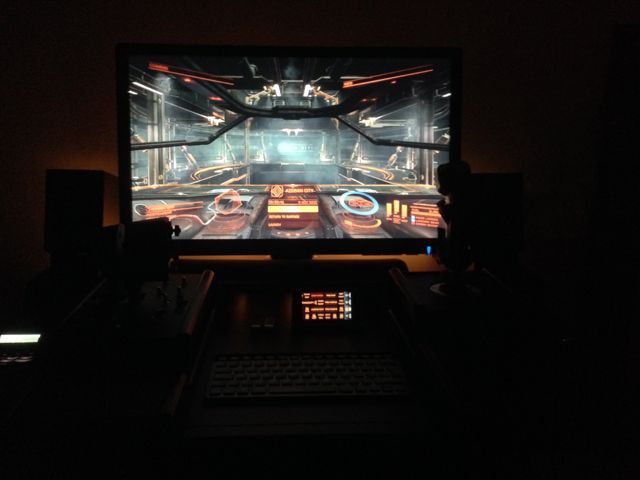
Current state of the build:
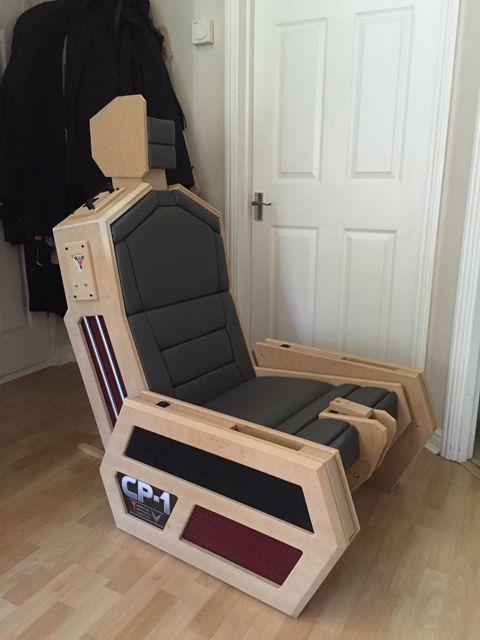
There's obviously quite a bit to do to complete including a base, complete the headrest and fabricate mechanism for the rudder pedals.
Please note that this is currently WIP and stalled for a short time due to my daughter becoming very ill. I'm hoping to pick it up again soon.
Materials and Tools:
List of materials:
Wood Strips
Backing board
Hardwood
Screws / Bolts
Rubber sheet
Blackboard vinyl
Acrylic
Artwork
Cabling / Neutrik connectors
Velcro
Aluminium plate, strips, edging
Mesh
Leather material
Paint and Varnish
Accessories (various badges and stickers)
Glues (wood / epoxy / contact)
LEDs
Wire Switches Connectors
Tools:
Workbench
Clamps
Router
Jigsaw
Power drill / driver
Foam roller
I always wanted a dedicated space for flight sims so when Elite Dangerous came along, I decided to start on one. This is more space sim than flight sim though. I will use this with a Rift when the consumer version becomes available.
I wanted to build something suitable spacey so elected to build my own seat rather than buying one. This also allowed me to chose the exact design I wanted to achieve. It was a very interesting and long winded process but quite satisfying also.
The basic seat shape was built with a lot of time cutting and re-cutting the shape until I felt it would be comfortable. The angled/split upper section was essential to get this right.

I then set about making the paneling and padding for the seat, each piece cut to size and upholstered in grey leather vinyl. I wanted to achieve something similar to the aesthetic used in 2001:


Whilst making progress with this, I also made the cases for the Warthog HOTAS - I wanted something in-keeping with the design rather than taking the simple option and mounting them as they were:


The main sections were covered in vinyl and an E: D badge embedded into the upper case section:


The throttle and stick cases will be attached to the side pods of the seat:


The side pods were then built which are to be attached to the sides of the main seat. They have pulsing LEDs on the rear sections:


Similar to the R-Pod design, these incorporate ribbed rubber, mesh and artwork behind acrylic:

The remaining seat paneling was completed:

A section for a stowable console was also built into the design:

The sides were made, again using embedded aluminium tubing:


The last pieces to be made were the panels to attach to the sides of the seat. An ejector seat panel with integrated LEDs and cap bolts for a more military look:

A digital display / grab handle panel for the upper shoulder area:

The stowable console is WIP but has a retractable mechanism to accommodate an iPad mini:

Work has started on the headrest section:


Current state of the build:

There's obviously quite a bit to do to complete including a base, complete the headrest and fabricate mechanism for the rudder pedals.
Last edited:


") It's all done by hand, outside with a respirator.
It's all done by hand, outside with a respirator.  I had a number of things going on in my life and have also moved and lost my man cave as a consequence.