Random 3D printing chatter

Soldato
OP
Joined
4 Jun 2007
Posts
2,618
Location
Watford, UK
Hey guys. A sanity check if you please. PETG, 235°C, 0.4mm brass nozzle. Black filament: plastered all over the nozzle by the end of the print. Grey filament by same manufacturer with same settings: clean. Green filament, different brand, same settings: nada. Black filament previously by other brands and probably slightly different settings: climbs all over the nozzle.

Is it just me? Am I imagining it?
Got any suggestions on how to stop it? I need to re-build with a better extruder, hot-end, BLTouch and board.....but I've been too lazy so far :rolleyes:
 
Soldato
Joined
30 Jan 2007
Posts
15,435
Location
PA, USA (Orig UK)
Drove 25 mins tk
Hey guys. A sanity check if you please. PETG, 235°C, 0.4mm brass nozzle. Black filament: plastered all over the nozzle by the end of the print. Grey filament by same manufacturer with same settings: clean. Green filament, different brand, same settings: nada. Black filament previously by other brands and probably slightly different settings: climbs all over the nozzle.

Is it just me? Am I imagining it?
Got any suggestions on how to stop it? I need to re-build with a better extruder, hot-end, BLTouch and board.....but I've been too lazy so far :rolleyes:

1) Make sure filaments are dry
2) Up the temp.
3) Check your belts (do you also get blobs and layer shifts?
4) What does your first layer look like?
5) What is your offset?

How do you clean your nozzle?
 
Soldato
OP
Joined
4 Jun 2007
Posts
2,618
Location
Watford, UK
1. I don't have a dryer but this happens with a black eSun spool fresh out the sealed bag with dessicant and doesn't happen with an eSun grey spool that's been out a while.
2. I'll have a go - I was trying to stay on the lower side to avoid ooze as much as possible. Last time I printed a temp tower, 235 was about the best.
3. Blobs and zits yes. Definitely at layer joins (eg on a printed cylinder) and the odd tiny sphere. Plenty of angel hair on this last one too - some shrivelled up with a heat gun and some was just awkward.
4. First layer is very slow to get it to stick to the glass - about 30mm/s for internal perimeter and infill, 20 for outer perimiter and 0.25 multiplier for 1st layer. 1st layer height 0.3mm. Could maybe do with being re-levelled as there's a bit too much gap between strands but after 1st layer it's perfect.
5. No idea. I'm using Fusion 360 as a slicer and I don't think it has that setting that I'm familiar with

Tend to clean nozzle hot with tweezers to scrape any plastic stuck to it off. Takes it back to clean brass. If it needs it, I have a cleaning needle too.
 
Soldato
Joined
30 Jan 2007
Posts
15,435
Location
PA, USA (Orig UK)
Received my returned by another customer QQ-S Pro delta printer today. What a mess. Missing the extruder, many screws and bolts, the spool holder, the auto level sensor and the plate is all scratched up.
 
Soldato
Joined
30 Jan 2007
Posts
15,435
Location
PA, USA (Orig UK)
1. I don't have a dryer but this happens with a black eSun spool fresh out the sealed bag with dessicant and doesn't happen with an eSun grey spool that's been out a while.
2. I'll have a go - I was trying to stay on the lower side to avoid ooze as much as possible. Last time I printed a temp tower, 235 was about the best.
3. Blobs and zits yes. Definitely at layer joins (eg on a printed cylinder) and the odd tiny sphere. Plenty of angel hair on this last one too - some shrivelled up with a heat gun and some was just awkward.
4. First layer is very slow to get it to stick to the glass - about 30mm/s for internal perimeter and infill, 20 for outer perimiter and 0.25 multiplier for 1st layer. 1st layer height 0.3mm. Could maybe do with being re-levelled as there's a bit too much gap between strands but after 1st layer it's perfect.
5. No idea. I'm using Fusion 360 as a slicer and I don't think it has that setting that I'm familiar with

Tend to clean nozzle hot with tweezers to scrape any plastic stuck to it off. Takes it back to clean brass. If it needs it, I have a cleaning needle too.

Sometimes, a spool or batch is just utter crap. Settings that can help.

Zhop.
Combing (within skin)
Retraction speed and distance. 6mm is about right for a bowden tube setup, less if all metal hotend, much less if direct drive (under 2mm for that).
Increase your travel speed to reduce ooze time.
235 seems too low.
What fan speed are you using?
 
Soldato
OP
Joined
4 Jun 2007
Posts
2,618
Location
Watford, UK
definitely got Z-hop turned on already.
I don't think that Fusion's slicer has combing as an option yet....but they're getting there. Quite convenient to be a slice straight out of a design.
I'm at about 4.5mm for retraction at the moment. I had previously had to lower it because my extruder tends to chew the filament and if you get many retracts close together, it gets chewed enough that it won't fit down the bowden tube. It's less of an issue with PETG as it's a bit less inclined to deform. I'll have to try being a bit braver and see what happens there....although if I could get my backside in gear and just replace the extruder, that would help too!
I'll try dialing up the temp a bit and see if it helps.
I'm running my hotend fan - Noctua 40x20 - at full and that does spill over onto the part a bit. My layer fan is off as although I've replaced it with a Noctua and ducted it, the Creality board controls the fan speed with a crude form of PWM that's really noisy. It does the PWM on the ground line rather than the power and it's really course so it makes the noise rather irritating. Board swap will fix that when I get round to it.
 
Soldato
Joined
30 Jan 2007
Posts
15,435
Location
PA, USA (Orig UK)
that sucks, did it say it was that damaged?

Partially mentioned. Basically they are customer returns they don't open and then just resell. They make it very clear, and replace anything that is damaged or missing. It is cheaper because you (me) have to diagnose any issues and ask them to send you the parts.

I got mine for 182 which is not bad. 329 new i think.

They are sending me a new bed assembly, extruder, screws/bolts, spool holder as requested.

I plan on modding it anyway (already ordered optical end switches), so I am not that worried as long as I can get it working.
 
Soldato
Joined
9 Jan 2003
Posts
21,022
Location
Cornwall
Partially mentioned. Basically they are customer returns they don't open and then just resell. They make it very clear, and replace anything that is damaged or missing. It is cheaper because you (me) have to diagnose any issues and ask them to send you the parts.

I got mine for 182 which is not bad. 329 new i think.

They are sending me a new bed assembly, extruder, screws/bolts, spool holder as requested.

I plan on modding it anyway (already ordered optical end switches), so I am not that worried as long as I can get it working.
where did you get it?
 
Soldato
Joined
30 Jan 2007
Posts
15,435
Location
PA, USA (Orig UK)
where did you get it?
e bay. FLSUN themselves. They are listed as returns. (EDIT update: .... andddd all the parts are being sent from China lol. It'll be a while. I am still stunned that a customer pretty much just threw the machine back in the box, and it was rattling around loose, and missing so many parts.

Full list of parts being re-issued to me (which is crazy, and pretty impressive of flsun.):
1. QQ leveling switch kit*1
2. QQ side plate screw *12
3. QQ extruder + motor kit*1
4. A set of QQ filament bracket*1
5. QQ hot bed kit *1
6. M4 hand-tightened nut*3
7. Air ducts on Affector*2

)

In other news, I also just ordered 330mm x 8mm aluminium linear rod I need for the Ender 3V2 dual Z belt conversion (no lead screws). I have about 70% of the parts I need to complete this mod now.

I also ordered 4X TMC2209 drivers for the delta printer so it can run quiet, but mainly for the extruder, as apparently in retractions it makes hell of a noise if you don't.


EDIT: Optical sensor mount and activator printed. Just waiting for the parts arrival now. My TMC2209's have arrived as well :)
 
Last edited:
Soldato
Joined
30 Jan 2007
Posts
15,435
Location
PA, USA (Orig UK)
Asked my daughter if she would be interested in creating things with a printer of her own. Answered flat out "no". I was surprised as she had been talking about making a mask/helmet of a popular YouTuber.
 
Commissario
Joined
16 Oct 2002
Posts
2,815
Location
In the radio shack
I still know practically nothing about the mechanics behind 3D printing but I'm really pleased with the things I'm getting off my Prusa MINI+ that I've only had for about three weeks.

I wanted something I could plug in and use with the minimal of fuss and this is exactly that.

W8yCIF8.jpeg

vK1tgGo.jpeg
 
Commissario
Joined
16 Oct 2002
Posts
2,815
Location
In the radio shack
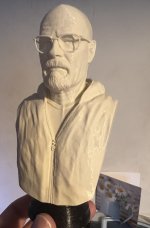
Thanks - I notice when I look at the first picture that it appears as though there's a seam down the forehead - There isn't, it's just reflections. I used Fillamentum ivory colour which is quite reflective.

Looking to find a filament that's looks like stone for this sort of thing.
 
Soldato
Joined
30 Jan 2007
Posts
15,435
Location
PA, USA (Orig UK)
Found since I put my direct drive in the cables are in danger of being ruined/pulled/cut. Went underneath my Ender 3 V2, and snipped the cable tie so I can run the cables out the side to give much more slack, then run them around the front of the frame.

I'm also going to do the board fan mod. I print in PETG, and the board fan being linked to the cooling fan is just ridiculous. Going to hook it into the hotend fan instead that's always on, so hopefully remove the Z-banding I've been getting from overheating drivers.

Also.. had my first heat break leak today, so started my strip down ready for the parts to come on Saturday for my dual Z-belt install. I'm a little ****** off that 3DFused STILL hasn't shipped my Y-axis linear rail bed that I ordered a month ago though. Sitting there with a postal tracking number, with the parts not actually having been picked up.
 
Soldato
Joined
30 Jan 2007
Posts
15,435
Location
PA, USA (Orig UK)
Finally got my dual belt Z axis working. No more lead screws wooooh!!! One minor issue... my Z-axis is inverted LMAO. Will rewire motor tomorrow and get my first print done.

Got impatient with other pieces, so ordered a 300mm linear rail and carriage for the X-axis, and a Micro Swiss linear rail mounting system to replace my MSDD POM wheel version. Ordered some silica G5 ball bearings to replace all the ones in the almost certainly trash carriage. Ordered 40x40x11mm heatsinks for the Z stepper motor, since it is no longer touching the frame to dissipate heat.

Soon as my darn 3dfused Y axis kit comes (coming close to cancelling order now!!), I'll be able to measure accurately to determine whether I need 330mm or 350mm linear rails for the Z-axis. At that point I will be POM wheel free.

Update: bed level is slanted. Low left, high right. Just going through the steps to ensure it isn't a frame square issue
 
Last edited:
Soldato
Joined
30 Jan 2007
Posts
15,435
Location
PA, USA (Orig UK)
Quality of prints from Octoprint is a bad (arc's/circles) due to the really slow usb connection (why it is so slow is beyond me). Likely to move to klipper, even if it means losing UBL which has been wonderful for me.

Calibration prints are great (they normally use flat sides). It is literally the slow connection between octoprint and the ender 3.

I am going to try pre-slicing with 'arc welder' in Cura first and see if it can handle it. I am HOPING (About to run a test) that octoprint can handle it, without needing to have the plugin installed on there, as my small octowrt box can't install arc welder directly.
 
Last edited:
Back
Top Bottom