Second Build - University

Soldato
Joined
13 Mar 2011
Posts
7,485
Location
Bada Bing
Project Othello

I would like to thank my sponsors, Mr Schultze and Mrs Kogan, I really appreciate your support throughout my project

phobyalogofinal.jpg


enermaxlogo.jpg


Project Othello


specs are:

- i7 2600
- MSI H67 E45
- 4GB OCZ Platinum
- TX650
- CM 690 lite
- 5850 Extreme
- H50
- Sharkoon white ccfl
- E700 tv card
- two sata dvd drives

I bought the components AGES ago, but due to family commitments, am starting the build today!

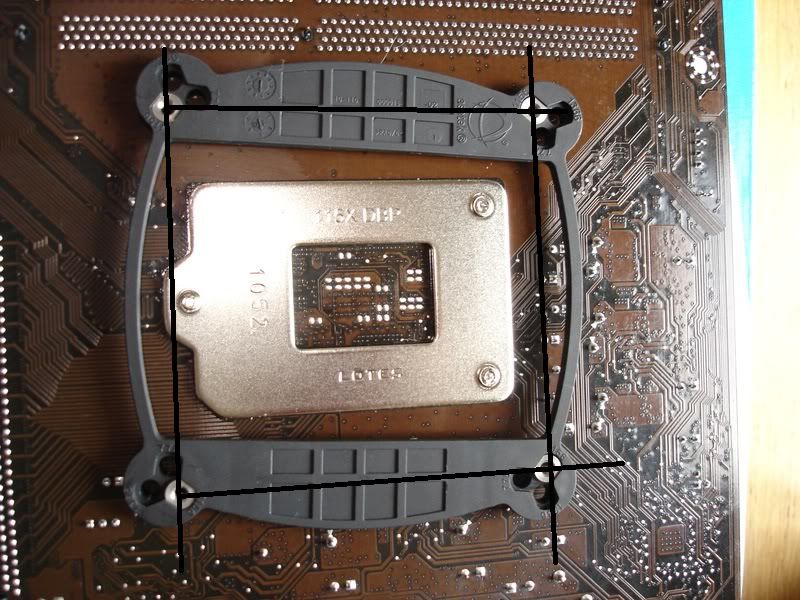
Right then, ive printed off the guide, got the cat out of the room and here are the pics so far:

DSC00004.JPG


DSC00005.JPG


DSC00006.JPG


I had a PITA replacing the 120mm coolermaster fan with the 140mm Xigmatel because the screws were of such poor quality that the teeth were gone in seconds - i need to see where i can get more of these :(

DSC00007.JPG


DSC00009.JPG


Got the bottom drive from MM, when i test it, ill leave feedback :)

DSC00010.JPG
 
Last edited:
Soldato
Joined
25 Sep 2009
Posts
3,630
Out of interest, why not a 2500K and P67/Z68 build? Would have allowed overclocking and for most purposes, the Hyper-Threading on the 2600(K) is negligible.
 
Soldato
OP
Joined
13 Mar 2011
Posts
7,485
Location
Bada Bing
Out of interest, why not a 2500K and P67/Z68 build? Would have allowed overclocking and for most purposes, the Hyper-Threading on the 2600(K) is negligible.

because i got a deal on the 2600 and H67 board i could not say no to!

Also, because this is a uni rig, i wanted COMPLETE stability and my home rig, which has OC 2500K and p67 bluescreens every once-in-a-while :)
 
Last edited:
Soldato
OP
Joined
13 Mar 2011
Posts
7,485
Location
Bada Bing
update 2:

right then, ive relocated and finished the first half of building


i had to really think about the order of installation because of the h50 with push/pull

i ended up doing it like this:
1) screw rad into case with standard case fan
2) ram, and backplate onto mobo
3) install mobo into case
4) install cpu and h50 retention plate
5) connect h50 pump block and screw down
6) connect other fan for push/pull

it was quite hairy at times with such a small board, but here are the pics so far :)

dsc00023pq.jpg


dsc00024twj.jpg


dsc00025bzw.jpg


dsc00027gs.jpg


dsc00037y.jpg


dsc00046rq.jpg


dsc00049uk.jpg


dsc00050px.jpg


dsc00051xwh.jpg


dsc00058od.jpg


i think it is looking good now, but one thing i dont like is the h50 backplate - why is it wonky with 1155/1156!?

also, i bought a spare set of h50 screws from the bay for the push/pull config :)

the h50 isnt set an an intake, still as an exhaust, but from my readings, it will make little difference, especially with pushpull
 
Last edited:
Soldato
OP
Joined
13 Mar 2011
Posts
7,485
Location
Bada Bing
just a quick update for this morning

i have put in the hard drives

ill be contacting coolermaster about the drive bays though as the rubber grommets have started to disintegrate already :confused::mad::confused:

i had a few thoughts about the ssd:

1) stick it under the mobo so that it could be seen - but becuase of where the leads go, it would have to updise-down.... nope

2) stick it on the psu somewhere - trailing leads aroung?... nope

3) stick it on the hdd cage - the nobules were in the way... nope

4) no 2.5/3.5 bay adapter so just used double-sided tape - result below :)

dsc00062bb.jpg

dsc00063be.jpg

dsc00064va.jpg

dsc00065qy.jpg


the reason for the backup OS drive is that this will my uni machine and i really need stability so if the ssd starts to BSOD or whatever, i can just swap the cables to the backup drive and get back to work
 
Soldato
Joined
22 Mar 2008
Posts
4,208
Nice rig, all that for ~ £475 !!!

If you still need screws for your fan, i have 4 of the rubber fan mounts (as long as the fan has open corners). Trust me your address and i will stick them in the post.

Good idea about fitting the ssd.
 
Last edited:
Associate
Joined
2 Jan 2009
Posts
1,737
Location
Lincolnshire coast
Coming along nicely.

Built into one of these a few months back and found it very nice to work with.

That wonky back plate thing is a bit of a concern though. looks like the retaining nuts are in the wrong holes to me.

Edit...

Had a bit of a closer look, hope you don't mind, it was bugging me, and I can see that all is fine. A bit clever really as by placing the holes as they have they can minimise the size of the back plate.

By drawing between the back plate holes we can see that although the plate is slightly rotated the holes are square with each other and parallel to the long and cross axis.

dsc00037y.jpg
 
Last edited:
Soldato
OP
Joined
13 Mar 2011
Posts
7,485
Location
Bada Bing
Coming along nicely.

Built into one of these a few months back and found it very nice to work with.

That wonky back plate thing is a bit of a concern though. looks like the retaining nuts are in the wrong holes to me.

Edit...

Had a bit of a closer look, hope you don't mind, it was bugging me, and I can see that all is fine. A bit clever really as by placing the holes as they have they can minimise the size of the back plate.

By drawing between the back plate holes we can see that although the plate is slightly rotated the holes are square with each other and parallel to the long and cross axis.

dsc00037y.jpg

yeah, the first thing i checked was that the nuts are in the right places, then i googled and apparently is is like that for 1155...

thanks for confirming it though :)
 
Soldato
Joined
22 Mar 2008
Posts
4,208
Posted the fan mounts, should be with early next week.

Shame about the hdd grommets, hope CM sort you out.

Good luck with the rest of the build. :)
 
Back
Top Bottom