

This build will be replacing the one in my signature
Case: Aerocool P7-C1 (white)
Threadripper 1950X
Gigabyte Aorus Gamin 7
32gb Trident Z
980Ti (From current build)
EVGA G2 750w (From current build).
My current machine is way too loud so I'm going for watercooling with lots of rads (overkill!) with fans on low RPM.
The case has been modded to enable it to fit a thicker rad in push/pull. I have 2x XSPC RX360 rads (front/rear) and a XSPC EX240 (top).
I currently have the CPU, RAM, CPU block and motherboard on order. Hopefully they will be arriving soon. At the moment, I've been designing the look and planning where I need to drill holes for my pump/watercooling.
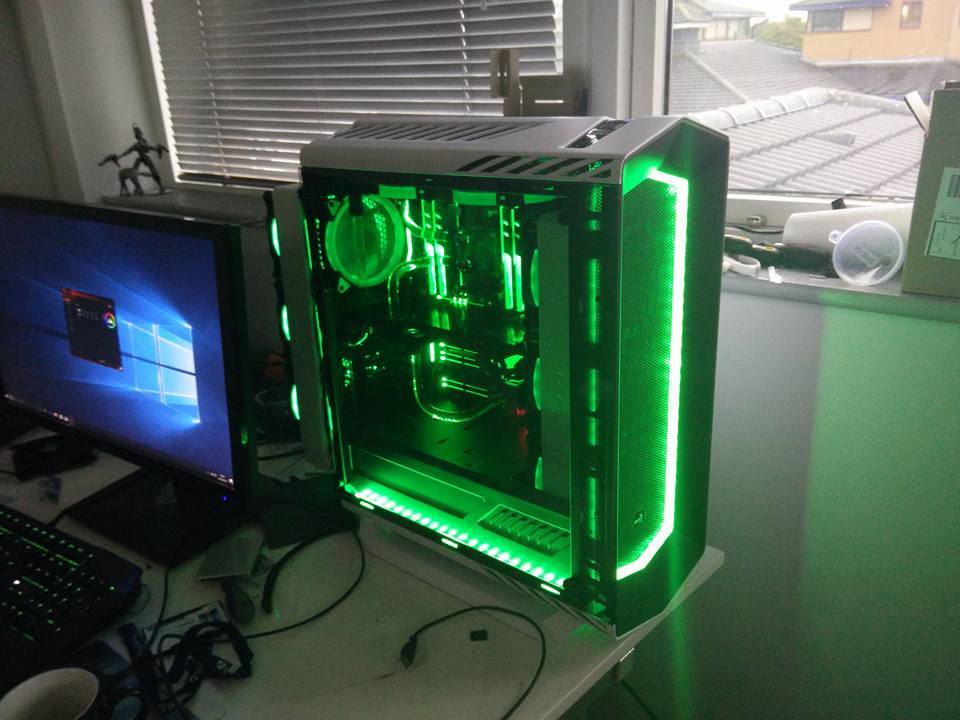
The colour scheme is black/white with green lights/accents:
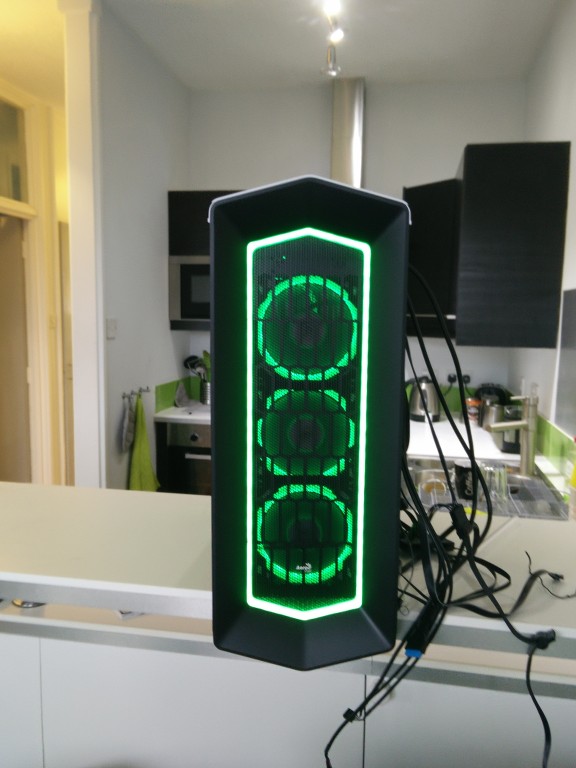
One of my pet peeves with cases is the rear IO cables. If you want the window visible so you can see in, you can see the cables coming out the rear. However you try to manage it, it looks messy.
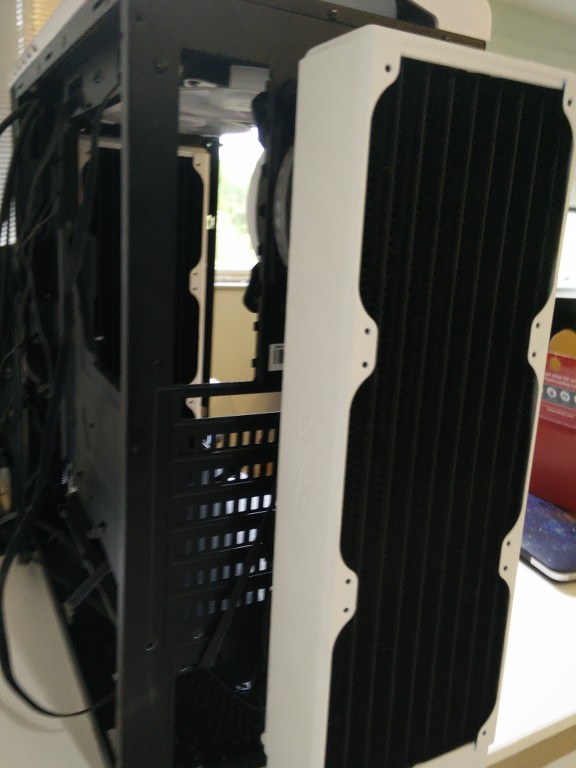
Solution: Radiator on rear:
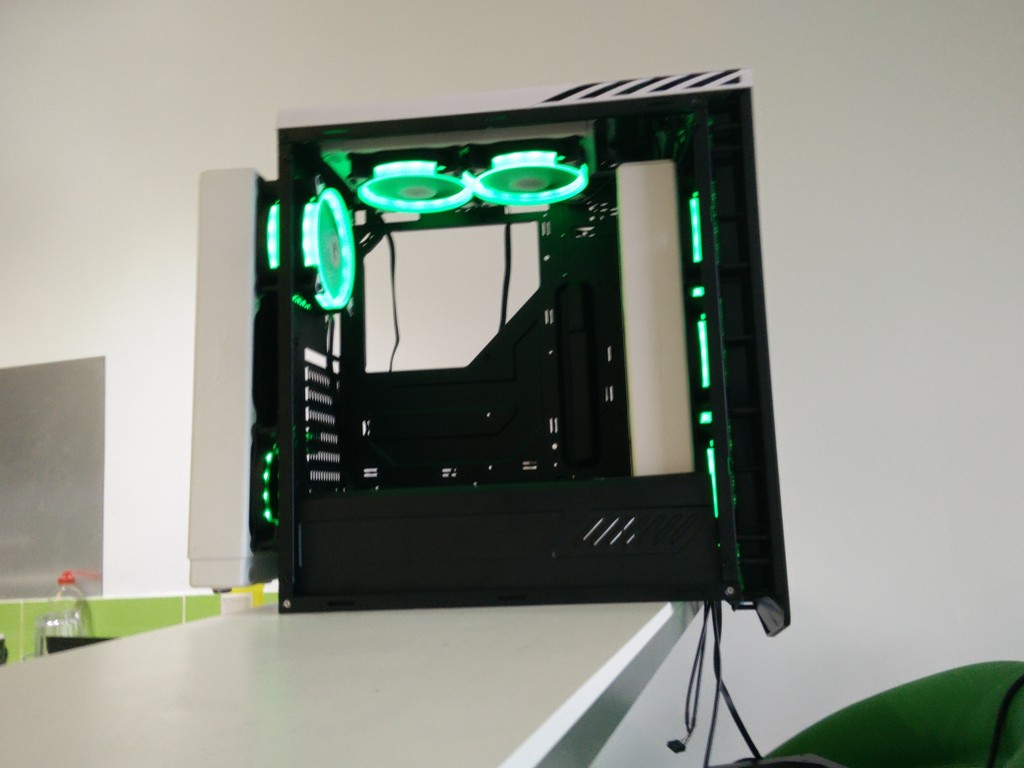
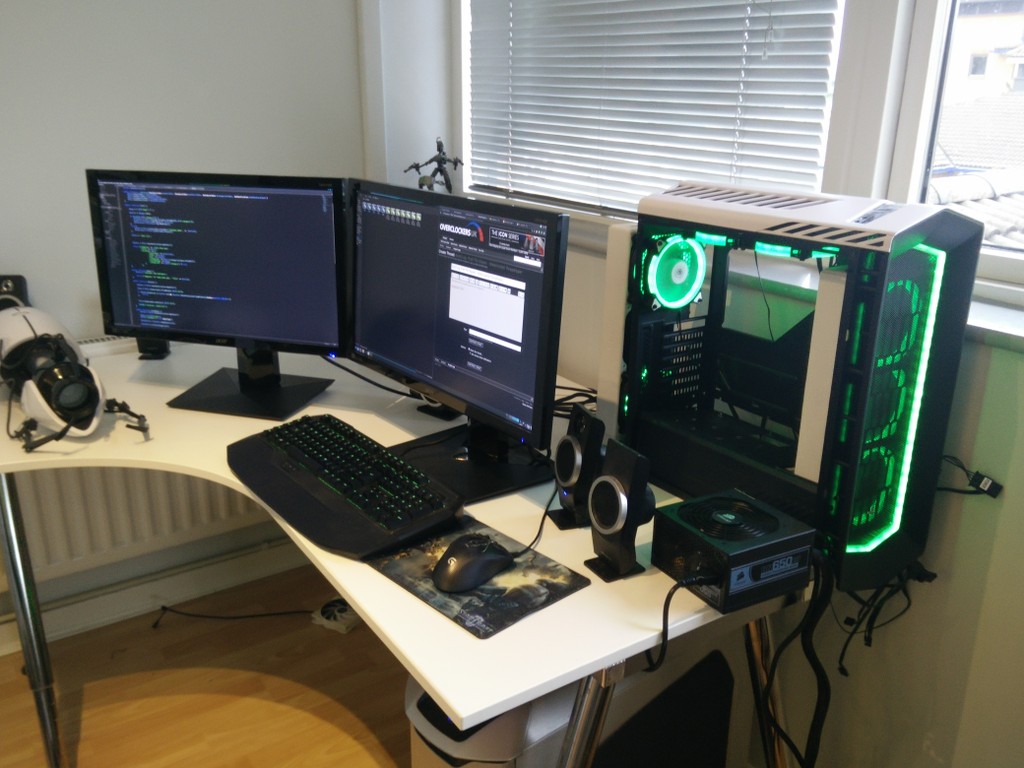
Here's how I will be positioning the case on my desk (note: I have not attached the bottom panel, it will be on its white stand)
With the extra radiator on the rear, all the rear IO cables can be run down and hidden behind it. I'm going to drill some holes in the rear of the case to pass tubes through. I'm going to have three (or six) fans on the rear radiator...
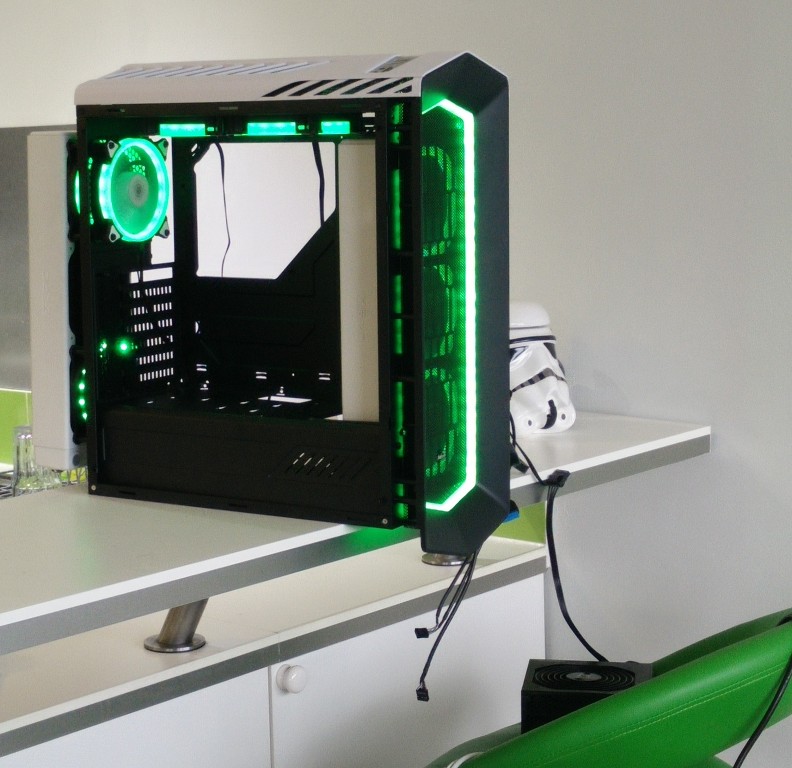
And this causes a problem: I cannot plug things into the GPU if it's behind the fan, and I cannot pass the watercooling tubes back up into the case as the connectors are where the PSU is. I want all drains at bottom so I can fill by turning the case upside down, my pump/res will be under the shard.
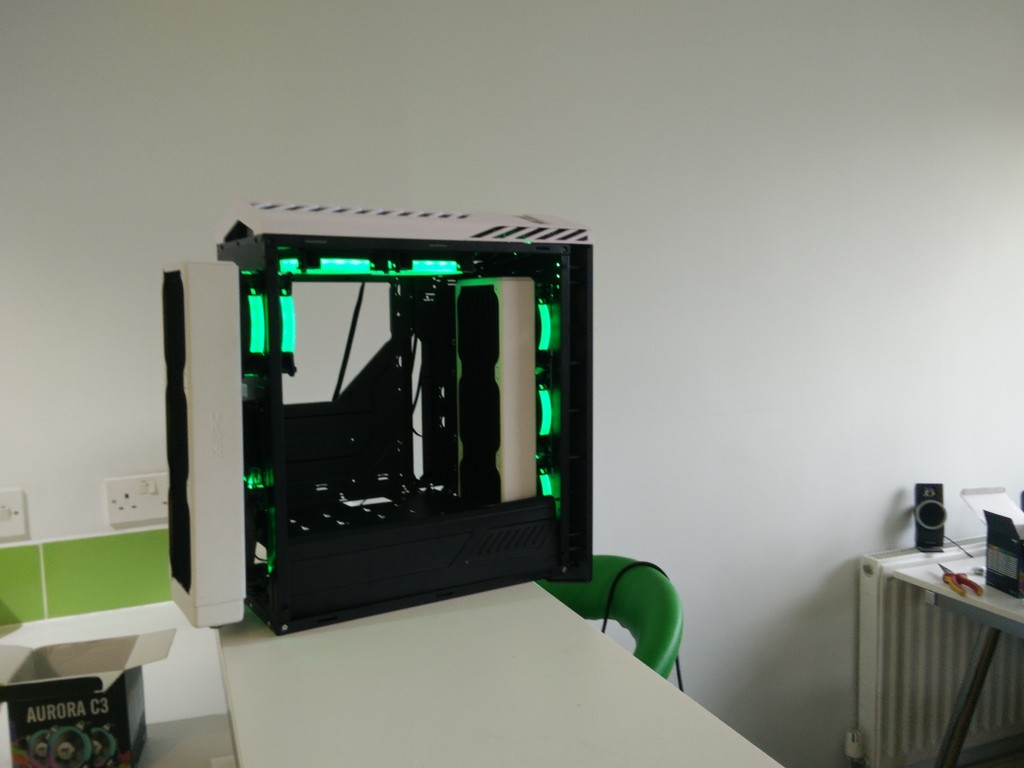
My solution: Wait a minute, those are fake fans!

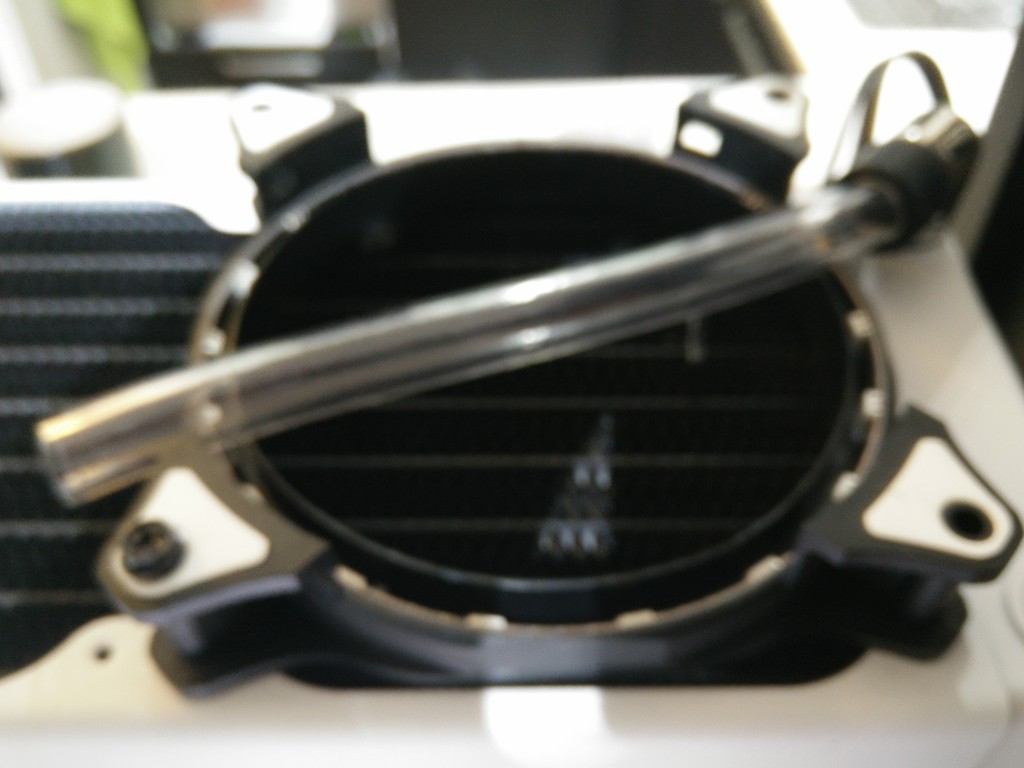
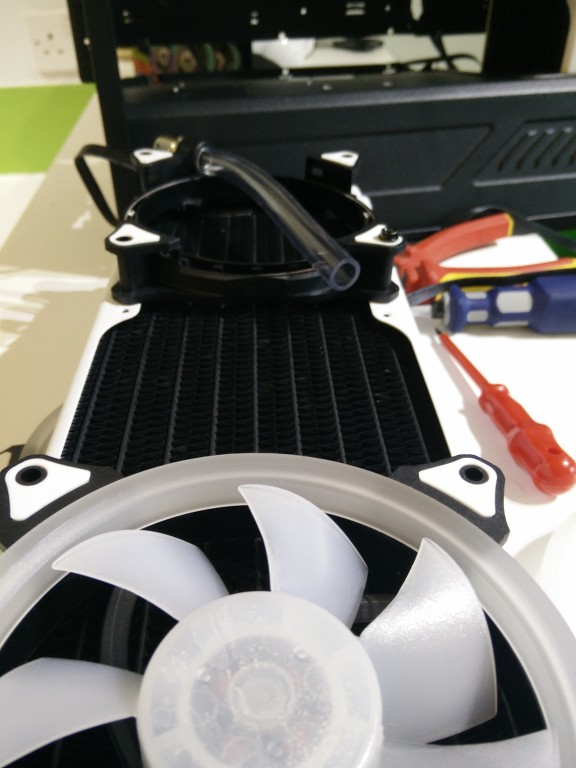
I was able to pop out the RGB LED's shroud and I have removed the fan blades/motor from the casing. There's enough room to run a tube inside the fan. I'll hacksaw out the bottom and top sections of the translucent plastic ring to allow tubes and cables run behind the radiator, "inside" the fan, with it looking the same as the rest. I'm going to do this for the two bottom fans on the rad. What's more, the LED lights still work and I can put back the parts of the clear ring that will be visible.
I have some more (different) fans arriving for pull fans on both 360 rads, as these don't look very nice from behind as the lighting is lost.
Will post updates once the rest of my build arrives. I expect the last thing to be the EK threadripper block which is arriving at OcUK on the 25th.
Case: Aerocool P7-C1 (white)
Threadripper 1950X
Gigabyte Aorus Gamin 7
32gb Trident Z
980Ti (From current build)
EVGA G2 750w (From current build).
My current machine is way too loud so I'm going for watercooling with lots of rads (overkill!) with fans on low RPM.
The case has been modded to enable it to fit a thicker rad in push/pull. I have 2x XSPC RX360 rads (front/rear) and a XSPC EX240 (top).
I currently have the CPU, RAM, CPU block and motherboard on order. Hopefully they will be arriving soon. At the moment, I've been designing the look and planning where I need to drill holes for my pump/watercooling.
The colour scheme is black/white with green lights/accents:
One of my pet peeves with cases is the rear IO cables. If you want the window visible so you can see in, you can see the cables coming out the rear. However you try to manage it, it looks messy.
Solution: Radiator on rear:
Here's how I will be positioning the case on my desk (note: I have not attached the bottom panel, it will be on its white stand)
With the extra radiator on the rear, all the rear IO cables can be run down and hidden behind it. I'm going to drill some holes in the rear of the case to pass tubes through. I'm going to have three (or six) fans on the rear radiator...
And this causes a problem: I cannot plug things into the GPU if it's behind the fan, and I cannot pass the watercooling tubes back up into the case as the connectors are where the PSU is. I want all drains at bottom so I can fill by turning the case upside down, my pump/res will be under the shard.
My solution: Wait a minute, those are fake fans!
I was able to pop out the RGB LED's shroud and I have removed the fan blades/motor from the casing. There's enough room to run a tube inside the fan. I'll hacksaw out the bottom and top sections of the translucent plastic ring to allow tubes and cables run behind the radiator, "inside" the fan, with it looking the same as the rest. I'm going to do this for the two bottom fans on the rad. What's more, the LED lights still work and I can put back the parts of the clear ring that will be visible.
I have some more (different) fans arriving for pull fans on both 360 rads, as these don't look very nice from behind as the lighting is lost.
Will post updates once the rest of my build arrives. I expect the last thing to be the EK threadripper block which is arriving at OcUK on the 25th.
Last edited:


")