You are using an out of date browser. It may not display this or other websites correctly.
You should upgrade or use an alternative browser.
You should upgrade or use an alternative browser.
O11 Dynamic XL On Steroids
- Thread starter OC2000
- Start date
More options
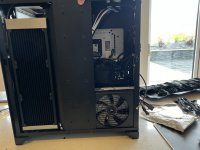
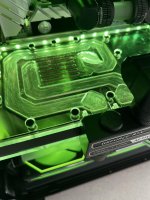
View all postsThe new Distroplate has come with a load of its own problems. Due to the lower rad G1/4 ports the distroplate comes with a replacement radiator bracket that shifts the rad to the left a bit.


Installation of the Distroplate was easy enough though.


Unfortunately the new bracket does not fit this radiator. Time to get the dremmel out! bye bye warranty lol

More to come in a bit


Installation of the Distroplate was easy enough though.


Unfortunately the new bracket does not fit this radiator. Time to get the dremmel out! bye bye warranty lol

More to come in a bit
Case and rad manufacturers need to get together over a beer or three and discuss this kind of thing. "Fits a 360 in the roof and a 360 in the front" ahh, but not at the same time and not if you want a motherboard in the case *facepalm*
Is the rad going on the side (last pic but one) or directly on the back of the distro where it would have a lot of flow blocked by the distro..?
My amazing Dremmel Skills


It will go at the bottom.


Spent the last part of 4 hours working out how to connect all the parts. Finally sorted it and need 7 new fittings to make it work. So those are ordered. Will have to wait a few days for those to come.
The actual tubing is the last part, but wanted to ensure it all worked together first.
The hardest one was this one, which is now sorted and straight.


That's enough for today.
No, they designed it so that the ports should be on the other side so it connects directly to the distro plate without running a tube over the fans. My radiator is a multiport too with ports on the top side and bottom which they wouldn't have designed it for. I have to do it this way as this is how it will connect to the MO-RA3 external rad. It's sorted though and all works. The hardest part is now done.Coming along nicely. So what you really needed there were some really low profile stop plugs; I though you needed tubing in/out there. Works though
I'll put the tubing on at the end. Next up is the wiring and fans, which ill start tomorrow.


Last edited:
Shopping for plants tomorrow lol.I’m disappointed you’ve not got the plants on show.
Looking really good though. How long before the final unveiling?
Hopefully all done by early next week as I have to do the loop flush which is 24 hours and wait for more fittings to complete the jigsaw tubing. Thought the EK matrix 7 was meant to make things easy
Last edited:
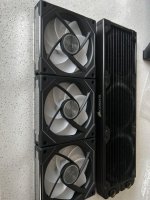
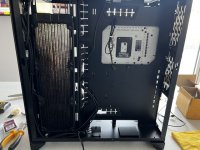
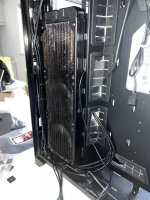
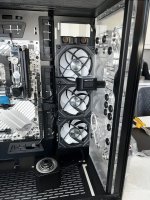
Today I have started on the basic cable management for the Chassis cables and prepared to add the side fans on. Realised the new Matrix 7 distroplate is highly optimised for 3 radiators making my existing 2 radiator setup impossible as the top rad outlet clashes with the NVME extension card.
I have now had to Make a new order to get 3 radiators in there using all compatible parts. EK is like the Apple of technology. Their parts or your life is hell!!
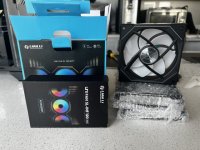
I have a slim Corsair radiator which fits down the side but because its no EK the inlet and outlet holes are 5mm offset meaning I need to use yet 2 more 5mm offsets!
Annoying too that of all weeks OC UK decide to do a warehouse move so everything is delayed a few days. Probably won't get any new parts now until next week!
I have now had to Make a new order to get 3 radiators in there using all compatible parts. EK is like the Apple of technology. Their parts or your life is hell!!


I have a slim Corsair radiator which fits down the side but because its no EK the inlet and outlet holes are 5mm offset meaning I need to use yet 2 more 5mm offsets!


Annoying too that of all weeks OC UK decide to do a warehouse move so everything is delayed a few days. Probably won't get any new parts now until next week!
Last edited:
Yeah I bought these months ago. Are they all out of stock now? I don't have much time really during the day, plus im limited on how much I can do until I get the new parts I need to finish it. Spending longer than normal trying to plan the wiring at the back out so I don't need to use force to close it like last timeLian li infinity fans very hard to come by, I'm waiting on the 140mm ones, your getting there slow but sure.

Last edited:
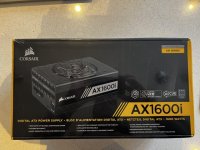
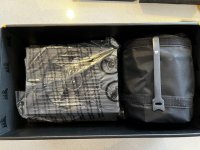
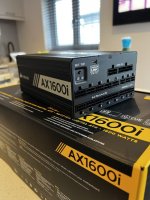
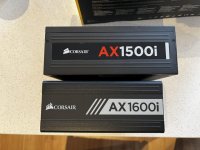
Yep had nothing but great support with Corsair. They replaced my first AX1600i PSU and swapped 8 QL120 fans that had broken RGBs 1 month out of warranty.Great customer support with corsair, they sorted me out with a free upgrade, cable management can take forever as you sit there and something bugs you then you have to start over again.
Cable management is time consuming, but all I have now is time while I wait for the parts so I can spend time making it as neat as possible. I've ordered a Faberwerk 360 RBG controller now, so need to wait for that too lol.
Received what I had hoped would be the final parts today, but had to scrap that idea as the Corsair Rad on the side just would not connect to the Distroplate. So have used the EK P360 instead which connects to the distroplate with the following fittings.
Right side (closest to Distroplate)
(All EK Torque fittings)
1x 28mm EK extender
1x EK 90 degree
1x 7mm EK extender
1x EK Push in Adapter (The metal insert has to be removed from the Distroplate. took awhile to work out that one lol)
Left side furthest from the Distroplate
1x 28mm EK extender (ordered only 1 so had to order another)
2x EK 90 degree
2x regular hard tube fittings with tubing in between
I have ordered another EK P 360 to go on top and those will require 1x 90 degree and 1x Push in adapters to connect to the Distroplate.
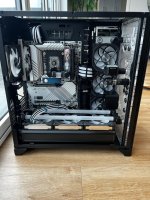
The EK P 360 fits very nicely in the Lian Li OD11 D XL as you will see in the following pics
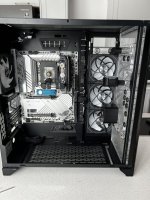
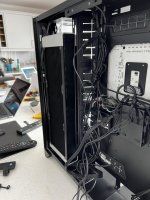
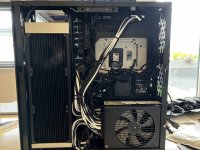
Still a bit of wiring needed, but will all tidy up tightly and relatively neatly. Here you can see the Faberwerk 360 RGB / Octo Fan controller / Lian Li Controller and Hubby 7
The wiring hanging outside will connect the MO-RA 3 and im planning on using the LED strips to go on the back panel of the case which will be against a wall.
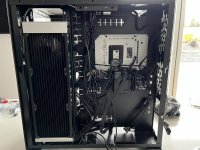
All closes nicely with loads of room to spare
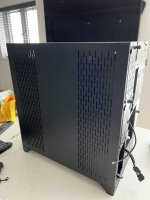
Need to wait now a few days for the next load of parts to arrive. Hopefully the last time!
Right side (closest to Distroplate)
(All EK Torque fittings)
1x 28mm EK extender
1x EK 90 degree
1x 7mm EK extender
1x EK Push in Adapter (The metal insert has to be removed from the Distroplate. took awhile to work out that one lol)
Left side furthest from the Distroplate
1x 28mm EK extender (ordered only 1 so had to order another)
2x EK 90 degree
2x regular hard tube fittings with tubing in between
I have ordered another EK P 360 to go on top and those will require 1x 90 degree and 1x Push in adapters to connect to the Distroplate.
The EK P 360 fits very nicely in the Lian Li OD11 D XL as you will see in the following pics


Still a bit of wiring needed, but will all tidy up tightly and relatively neatly. Here you can see the Faberwerk 360 RGB / Octo Fan controller / Lian Li Controller and Hubby 7
The wiring hanging outside will connect the MO-RA 3 and im planning on using the LED strips to go on the back panel of the case which will be against a wall.

All closes nicely with loads of room to spare

Need to wait now a few days for the next load of parts to arrive. Hopefully the last time!
todays leson.... how to kill rubber seals
You were right about never ultra sonic cleaning disconnects. Going to have to bin those now. the amount of leakage they produced after disconnecting them made it very difficult

With the right parts to complete the bottom Rad, I decided to get it done today. My intention was to do all the tubing at the end, however with parts coming in drips and drabs, I have no choice, but to complete what I can with what I receive.
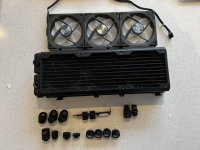
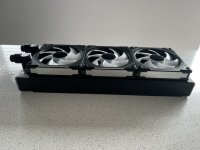
These are all the parts necessary for the bottom rad. I did however use an additional 2x 90 degree angles for the quick disconnects to tighten the external tubing. Pics of this are shown further down.
Following pics are the assembly of the bottom rad.
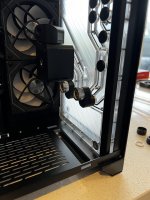
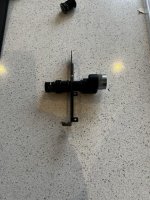
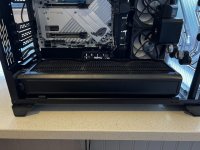
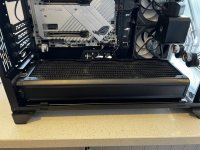
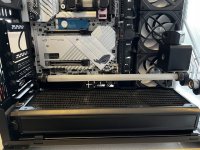
I had to use a small screw to attach the external tube bracket as the normal one interfered with the fittings.
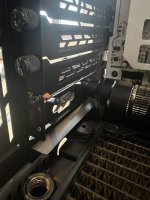
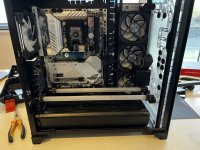
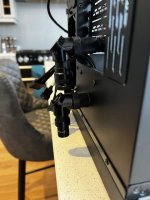
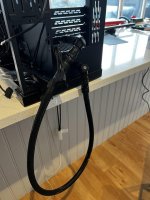
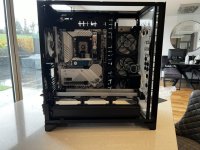
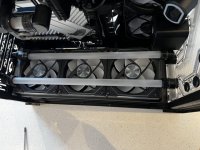
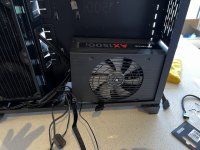
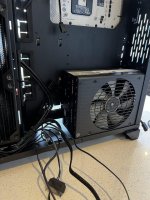
Next up some more cable tidying in the back, PSU added and PSU cables plugging in
These are all the parts necessary for the bottom rad. I did however use an additional 2x 90 degree angles for the quick disconnects to tighten the external tubing. Pics of this are shown further down.

Following pics are the assembly of the bottom rad.


I had to use a small screw to attach the external tube bracket as the normal one interfered with the fittings.


Next up some more cable tidying in the back, PSU added and PSU cables plugging in
A few more parts arrived today. So started piecing the fittings together and installed the top rad. I'll have to install the top rad fans later as I can't access the side radiator fittings with them on. The last fitting typically is for the side radiator!
GPU not installed yet as I am changing the M.2 cover to black as blue doesn't look right. Unfortunately there's nothing I can do about the blue brackets on the GPU Cable as Im not going to order another from Cable Mod.
The Micro USB on the Aquacomputer Flow meter decided to break off too, and the only place selling them is in Germany, so waiting now on one of those, however its not needed to get the PC up and running, so Ill add that later when it arrives.
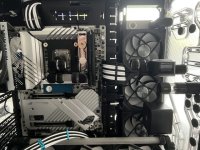
This is how I connect the CPU inlet to the Distroplate with the AC flow meter attached.
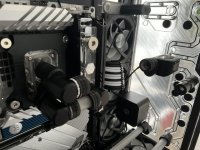
Here is how I connect the Ram outlet to the Distroplate
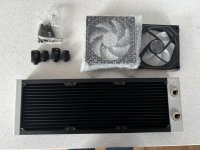
Parts needed for the Top Rad
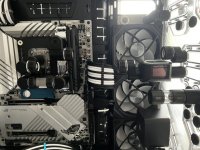
Top rad assembly complete however I had to remove the fans as it wouldn't fit with them on, plus I need them off for the final Side Rad fittings.
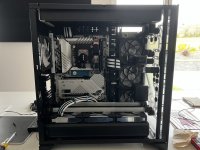
Top Rad installed. Not a fan of the Z790 Apex colour, but hopefully it will look good when its complete.
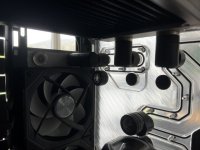
Thas all I can do now until the final part (28mm M/F extender arrives. It's still not yet shipped!!) Then Leak testing can begin.
GPU not installed yet as I am changing the M.2 cover to black as blue doesn't look right. Unfortunately there's nothing I can do about the blue brackets on the GPU Cable as Im not going to order another from Cable Mod.
The Micro USB on the Aquacomputer Flow meter decided to break off too, and the only place selling them is in Germany, so waiting now on one of those, however its not needed to get the PC up and running, so Ill add that later when it arrives.
This is how I connect the CPU inlet to the Distroplate with the AC flow meter attached.


Here is how I connect the Ram outlet to the Distroplate

Parts needed for the Top Rad

Top rad assembly complete however I had to remove the fans as it wouldn't fit with them on, plus I need them off for the final Side Rad fittings.

Top Rad installed. Not a fan of the Z790 Apex colour, but hopefully it will look good when its complete.


Thas all I can do now until the final part (28mm M/F extender arrives. It's still not yet shipped!!) Then Leak testing can begin.
Last edited:
Tubing time,
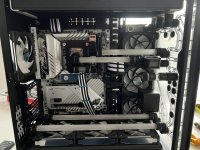
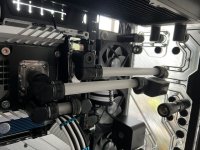
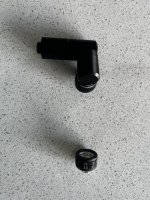
Parts needed to connect the side rad to the Distroplate
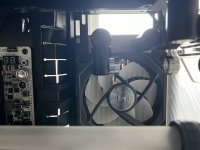
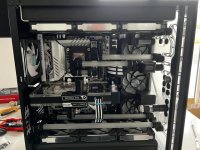
Tubing complete
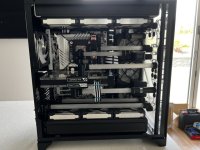
Leak testing for a few hours since I have to go out anyway.
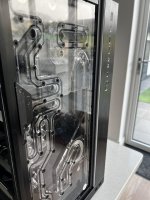
Still have cabling to do in the back, but tomorrow I'll be able to fire the system up for the first time in what seems like forever. Fingers crossed no 00 code lol


Parts needed to connect the side rad to the Distroplate


Tubing complete

Leak testing for a few hours since I have to go out anyway.

Still have cabling to do in the back, but tomorrow I'll be able to fire the system up for the first time in what seems like forever. Fingers crossed no 00 code lol
Last edited:
All good and working fine. Spent today trying to bleed the system, but gave up and added an extra 2 pumps on to get it done in an hour. this method will make the final Mystic fog edition quick too. Still waiting for a replacement USB cable for the AC Next flow. I'll his thing needs 2.5post a next update when its in the new office.
This thing needs 2.5 litres of water and the Mo Ra 3 needs about 1.5 litres. so 4 litres in total!
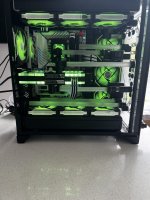
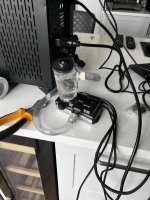
Addition of a dual pump to help get bleeding done faster.
Took an hour to get rid of the air bubbles
This thing needs 2.5 litres of water and the Mo Ra 3 needs about 1.5 litres. so 4 litres in total!

Addition of a dual pump to help get bleeding done faster.

Took an hour to get rid of the air bubbles

Last edited:


