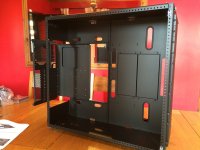
[Project Black hole] - CaseLabs TH10A

Soldato
Joined
13 Mar 2004
Posts
4,712
Location
Norwich
2022 Update to Project Black Hole

J5XWa9u.png


Welcome to my build :)

Background
Last year when I visited the OcUK HQ I was given a tour of the facility I was lucky enough to get a sneak peek at the first 8Pack System, now the Supernova. That was my first time seeing a CaseLabs case in person and I knew then I would have to have one!

With my current system being over 2 years old now (3960X, GTX 680 3-Way SLI) it is due for an upgrade and with X99 and Maxwell cards on the horizon I thought I would do things right this time and have the case and cooling system well sorted before the hardware arrives.

So this build will be inspired by the 8Pack Systems and if it looks like I am trying to copy them a bit, well I am :D

I started off with the idea of doing one big loop but have since changed my mind and will be doing two separate loops, for aesthetics with different coolent colours and I will only have to drain half of it to change something.

The colour scheme I am going for is all black with purple and blue coolants and matching MDPC braided power cables.

I am open to suggestions with the remaining TBD parts of the Cooling system and am open to sponsorship if any manufacturer thinks they would like to see their products used in this system. :)

Planned Hardware:
Intel Haswell-E Core i7-5960X
Asus X99-E WS Motherboard
G.Skill Ripjaws 4 3000MHz 15-15-15 16GB
3x Nvidia GTX Titan X
Corsair AX1500i
Samsung 1TB SSD 850 PRO

Cooling
Dedicated GPU and CPU/Mobo Water Cooling Loops
Aqua Computer Aquaero 6 XT
16x Noiseblocker eLoop B12-3 fans
2x Aqua Computer D5 Aquabus Pumps with Aqualis pump top Adapters
2x Aqua Computer Aqualis 450ml Reservoirs - Glass with Nano coating
2x Aqua Computer Flow Meters
4x XSPC RX480 V3 Radiators
EK Supremacy EVO Nickel Plexi I2/J3
EK FC Titan X Nickel Plexi
EK FC Bridge Triple Serial Plexi
Bitspower Matte Black 7/16 Fittings
PrimoChill Advanced LRT 7/16 Clear
Coolant: Mayhems Pastel with Mayhems Dye

Links to main log updates as I go:
1. CaseLabs TH10A Assembly
2. Aquaero 6 XT Heat Sink & Bezel
3. Painting bits and mounting Aqualis combos
4. Making Radiator Fan Harnesses
5. Radiator Cleaning with Mayhems Blitz Pro Kit
6. Filter, Fan and Rad Mounting
7. Full Custom Corsair AX1500i Cables by James at Pexon PCs
8. Blocks Arrive
9. Hardware in the house!
10. A few more bits ;)
11. It's alive!
12. Block and Tubes = Watercooling
13. Project Black hole 2022 Update!
 
Last edited:
CaseLabs TH10A Assembly

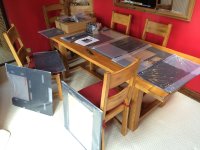
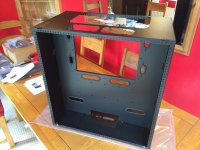
Every part was wrapped in thick plastic and the box was full of packing materials to protect everything.
Very impressive service from CaseLabs and anyone who is on the fence about ordering one should do it!

31J8FFi.jpg

I actually made a small mistake early on which I didn't realise until doing the front switches and then had to go back and sort it out.
10 Points if anyone notices what it is :p

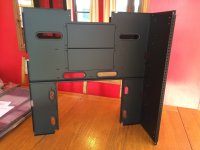
Central divider attached to the Lower Panel

6lNVlrn.jpg

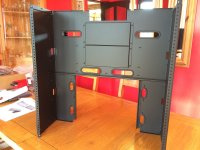
Then attach the Upper Panel

I5BtZmI.jpg

Front Panel next

ABVkKkC.jpg

And the Rear Panel

rmZIMDi.jpg

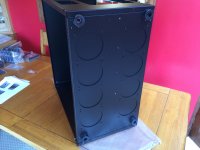
I opted to use the rubber feet and not casters due to desk height and not wanting the top of the case too close to the underside of my desk.

hMHuzyq.jpg

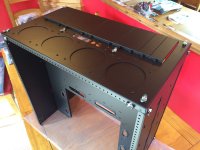
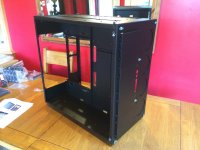
Starting to have something that looks like a case now!

VbGrBxm.jpg

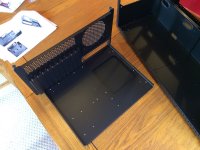
Lovely removable motherboard tray! Also comes with some extra feet to use as a test bed outside the case!

pcMewuu.jpg

Checking the fit and adjusting the slide rails

6MjabNg.jpg

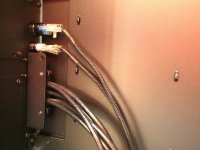
Front Panel Switches, USB 3.0 and Audio ports going in.
Not bad braided cables but I will probably redo the switch contacts and braid the other cables I use to match.

bW1jojb.jpg

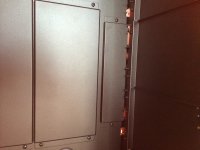
Plate to hide them from the window side

Pf6fDK1.jpg

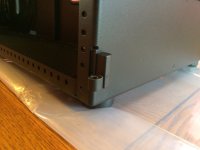
Hinge points for the doors are beefy!

IthYWKM.jpg

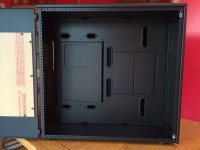
Doors are on and motherboard tray area is looking great!

wrILD8L.jpg

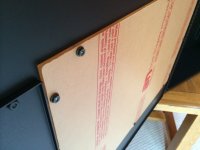
Top quality acrylic window, I will leave the protection on until the project is finished.

ce24yOS.jpg

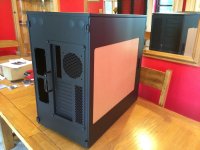
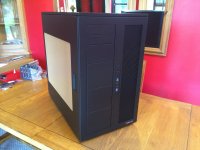
Pretty much finished, HDD cage and other mounting bits will be done later.

yuZ7OBF.jpg

Going to get some dust covers for the USB and Audio ports to tidy them up a bit.

UwnW71o.jpg
 
Yes very happy with it!

As for the castors, I measured and it will be too tight a fit for where I want it.

The case is only 14kg, I think the finished build with water will be around the 40kg mark so still easy enough to move about and once it is in position that shouldn't be too much.
 
Thanks guys, more to come on the cooling side of things, just working some bits out.

Hardware wise who knows! I guess next month some things may become available.

But to get exactly what I would like and water blocks (motherboard especially) could be a while off?
 
What a lovely case - may I ask how much it was? Sorry if you have already said

Thanks,

Here is the breakdown from CaseLabs:

Magnum TH10A w/ XXL Window, USB 3.0 and Dual Res mounts as cost options. $641.95
Flex-bay 5.25 Device Mount - Short Nonconforming (To use if the Aquearo 6 has fitting issues) $10.95
Flex-Bay 5.25 Device Mount - Standard Anti-Vibration (For Optical drive if I use one) $12.95
PSU Support Mount - Magnum (Not needed but may as well) $11.95
International Shipping Charges Fedex 3-5 Day $147.00

Total: $824.80 or £490

It went straight through at customs also but that doesn't mean I won't get an invoice from Fedex with additional charges in a few days or so time.

I know 500 quid for a case is a lot and I know it has been said before and will be said again but for me the case and cooling system is my "end game" setup.

Can't see myself needing to change it for years to come.
 
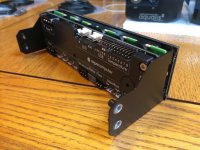
Aquaero 6 XT Heat Sink & Bezel

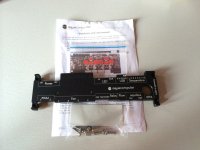
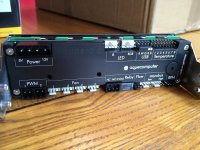
First the Passive heat sink in Black.
Not at all necessary given that each fan header already supports up to 30 Watts but it really cleans up the rear of the Aquaero!

JXpTEl5.jpg

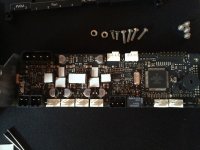
Remove the 4 screws in the corners of the PCB and peal off the sticker.

WpJILF3.jpg

Cut up the thermal pads and apply to the indicated components.

EeNB0Bb.jpg

Slide the heat sink on and screw down with the longer supplied screws .
The extra holes are for the addition of a water block for if you really want a lot of fans connected!

wbG46jF.jpg

So clean!
Will probably paint the brackets if they are visible when installed.

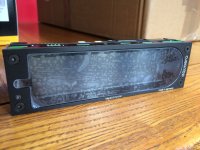
Also swapped out the front bezel for the black version and use some black countersunk screws to match.

Z1aj00o.jpg

Don't worry, the screen is perfect under that sheet of protection :)
 
Thanks, I will check the fit in a while. I know mine is one of the newer ones as it has the 47K Ohm resistors, it also has the latest firmware already.
 
Lucky or not, turns out as mine is updated I didn't need the "Nonconforming" mount after all!

Going to get a standard short mount so I don't have to shim it out or use a long mount.
 
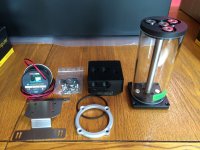
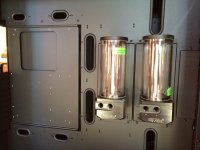
Quick look at a D5 Pump, Aqualis Base (Pump Top) and Aqualis Res.

Jm3PSap.jpg

Everything looks very good, great machined finish on the Delrin parts.
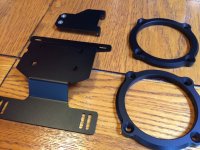
I will be spraying the mounting brackets and the rings that hold the pumps in with black metal paint to match.

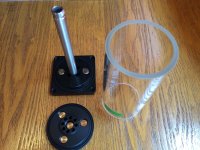
Look at how thick the Aqualis borosilicate glass is! It is the same glass as "Pyrex" which means it can stand up to thermal stress without cracking and being glass it won't be affected by any dyes in fluids.

Pxhzi7W.jpg

I lined everything up with the res mounts in the case and the fit is perfect :)
 
Thanks, I would love to use an SLR but don't own one, my brother is a "photographer" so I will get some better pictures towards the end even if I have to borrow his camera gear!

Right now just using an iPhone 5s in a well lit diningroom and resize in paint to 1280px wide :p

btw, I enjoyed looking through your build log, lots of nice details with the gold theme.
 
Painting bits and mounting Aqualis combos

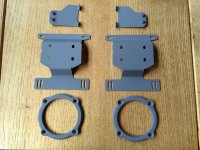
Decided I would paint the bare metal bits including the Aquaero mounts with some Satin Black.

Primed with Grey first.

vjgCjZP.jpg

Not a bad finish for Halfords aerosol!

BV8F4HG.jpg

Aquaero back together, even if you don't see the mounts I am happier :p

kxXD9k4.jpg

Next up, marking out the mounting positions for the Aqualis combos

kUGpxuX.jpg

Wish I had a pillar drill but made do with a cordless

eIvloVH.jpg


Perfect fit! Plenty of space above and below for access to everything, I did think about getting the bigger 880ml reservoirs instead of these 450ml units but I measured up and they would look a bit too big in my opinion.
The glass tubes would have been almost the height of a motherboard.

zdA1lau.jpg
 
Last edited:
Radiator Fan Harnesses

So I spent the afternoon watching Football and crimping :D

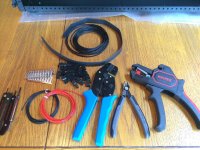
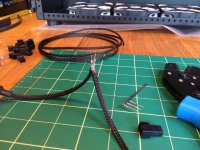
Some bits and tools! The Knipex auto stripper is worth its weight in gold!

FM8KX7T.jpg

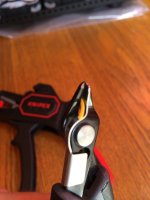
And the Knipex Super Knips with lead catcher is brilliant, this little spring catches the end bit you cut off so it doesn't go flying across the room (or get stuck in your electronics and short things out!)

BC0Xb7t.jpg

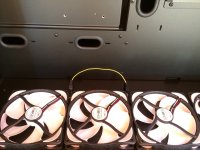
I laid out some fans to get a measure for the wires

4InfOHm.jpg

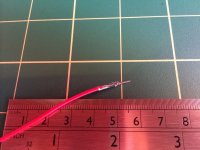
Hard to get the iPhone 5s to focus on the tiny connector but the 20 quid crimper does a nice job, good enough for fans anyway.

9J57GRf.jpg

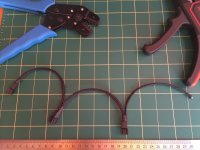
Doing two wires per connector for the daisy chain was more difficult, I had to strip two mm more insulation and not crimp into the insulation.
Not recommended for a good crimp but I know I won't be wiggling them around too much so risking it. Using 20 AWG wire for ~16 fans per harness so there is good amount of core to grab onto.

G7mrh80.jpg

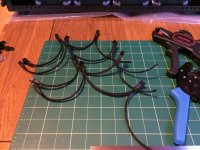
One done

cfmD4so.jpg

Four done! They will hardly be visible once installed but I hate to pay for pre made ones that are not the correct size.

ob5J3gR.jpg

I have left the last connector off each harness as I don't know just yet how I will be connecting everything up.
Will take an RPM signal from one fan per harness with the last connector.

I am going to do an upper and lower rad per loop and not both lower and both upper together on the same loop.

I haven't made my mind up if I want each rad to have its own fan channel on the Aquaero or if I want to link rad fans together and assign them to each loop.
 
Last edited:
Very nice :-)
Can you post full name of the black paint you used, maybe with a photo of a can?
I will need to pain some stuff in black myself in my new rig and that pain looked superb.

Exact paints are these:
http://www.halfords.com/motoring/paints-body-repairs/car-spray-paints/halfords-primer-grey-500ml

http://www.halfords.com/motoring/pa...paints/halfords-satin-black-spray-paint-500ml

Two coats of primer with 15min between coats, left 24 hours in the warm then two coats of the Black.
 
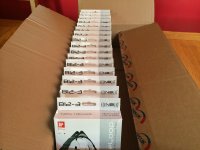
Forgot to post my box of fans image here :D

uoYy166.jpg

Radiators are now ordered so more to come when they arrive.

Next big decision is tube and fittings. Just don't know what I want to do!
 
Back
Top Bottom