Project: Fractal S, dual 360 hardline loop in Blue/White

Soldato
Joined
8 Oct 2006
Posts
5,695
Location
Midlands
Project: Fractal Define S, All EK dual 360 hardline loop in Blue/White

I had my first watercooling loop many years ago, a primochill kit I think. The rad never fit in the case so it just hung out the back though I never had any issues. Since then (over 10 years) I've been on air. Now its time to go back to water but this time a custom hardline loop!

A few weeks ago I jumped from a 2500k in an old Akasa 62 Eclipse case. The upgrade was largely done since I'd had the 2500k since launch, and the new case was with a view to a custom loop later.

The plan is for a dual 360mm rad hardline loop, blue coolant and white fittings with blue and white cable extensions to match.

Existing PC Parts
CPU: 6700k @ 4.7Ghz
Mobo: Gigabyte Z170x-UD3
RAM: 32GB Kingston Fury 2400 DDR4
GPU: Zotac Amp! 980ti @ 1450/2000
Case: Fractal Define S
PSU: Corsair HX520 (many years old!)
SSD: 1x 1TB Samsung Evo 840 1x 512GB Samsung Evo 840

What's being added

Big bits
1x EK-XRES 100 Revo D5 PWM (incl. pump) Arrived
1x EK-RES X3 - TUBE 250 Arrived
2x EK-CoolStream PE 360 (Triple) Arrived
6x EK-Vardar F4-120 (2200rpm) Arrived
1x EK-Supremacy MX - Acetal Arrived
1x EK-FC Titan X - Acetal Arrived
1x EK-FC Titan X Backplate - Black Arrived

Little bits
1x XSPC LCD Temperature Sensor (White) V2 + G1/4" Plug Sensor Arrived
1x EK-AF X-Splitter 4F G14 - Nickel Arrived
1x EK-AF Ball Valve (10mm) G14 - Black Arrived
2x EK-Cable Y-Splitter 3-Fan PWM (10cm) Arrived
2x EEK-HD PETG Clear Tube 1012mm 500mm (2pcs) Arrived
14x EK-HDC Fitting 12mm G1/4 - White Arrived

EK-HD Tube D.I.Y. Kit 10&12mm Arrived
EK Water Blocks EK-Ekoolant Pastel BLUE Arrived
Mayhems Ultra Pure H2O 5Ltr Arrived
Mayhems Blitz Pro cleaning kit Arrived

BitFenix Alchemy 2.0 20cm Blue/White cables made up by myself. Arrived


and for good measure
1x Samsung SM951 512GB M.2 PCI-e 3.0 x 4 NVMe SSD Arrived

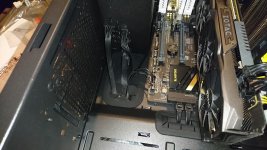
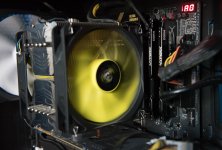
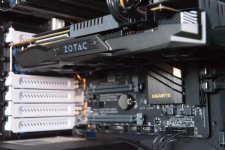
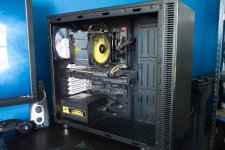
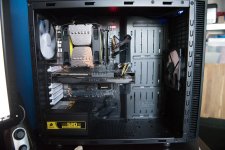
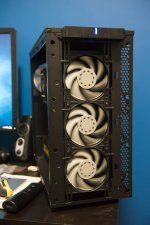
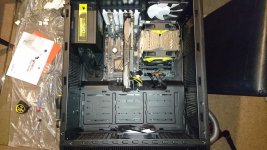
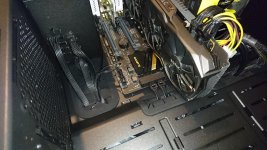
Right now by quick lash together of my current parts on air looks like this. I love this Fractal Define S case, it's so roomy and nice to work in with no old 5.25" bays getting in the way. All the cables get well out of the way too.
n0HsqWn.jpg
WDxsHw0.jpg
cz2s9P9.jpg

The build won't be happening for a week or so as I'm working and have a few parts left to get. But it'll give me a chance to look over the stuff I've already ordered and order any missing parts.
 
Last edited:
Soldato
OP
Joined
8 Oct 2006
Posts
5,695
Location
Midlands
Looking forward to seeing how you run the tubes with the two 360s.

You and me both!

I'll probably mount both rads up to have a look at options before I do the full build.

I've seen one build that managed it with a 420 (top) and a 360 (front) but because he didn't check it properly first, he couldn't put the third fan on the top.

If he'd put the front fans on the outside of the chassis (behind the front panel) he could have done it though.
 
Soldato
OP
Joined
8 Oct 2006
Posts
5,695
Location
Midlands
So the majority of the parts have arrived and the OP updated. Just waiting on another 360 rad, bending rubber, new res tube and the remaining fittings.

Rather annoyingly I had ordered the XSPC bending rubber but it doesn't fit the EKWB PTGE pipe! One more thing to add to the list of bits to sell.

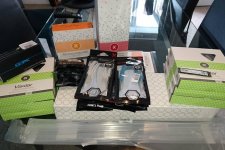
Had a quick look at all the bits that are here already, really like the packaging on all the EK stuff, they seem to have taken their time over it all. Also didn;t realise just how small one of the m.2 drives was until I held it in my palm. Crazy!

Might try some rad/res positioning out this week so will have a few pics of that, however I do have a bathroom to rip out first so it might get delayed till next week.

One thing I've noticed is that both the pump and the temp monitor both need a molex for power. Its 2016. Death to molex.

For now, just a pig of the fun bits!

92yO8Eb.jpg
 
Associate
Joined
12 Jun 2016
Posts
145
Location
Aberdeen
Ohh this is very similar to my own upgrade project! Hope you dont mind if I steal anything you do better than me!!! :D

I know what you mean about the XSPC bending rubber. I bought the kit and it was only after i ordered it and was reading more about it I found out it was for the 16mm tubes not the 10's i was going for!!!

Sad to see about the pump molex :S I hope my stand alone pump doesnt do that to me!!!!
 
Soldato
OP
Joined
8 Oct 2006
Posts
5,695
Location
Midlands
Ohh this is very similar to my own upgrade project! Hope you dont mind if I steal anything you do better than me!!! :D

I know what you mean about the XSPC bending rubber. I bought the kit and it was only after i ordered it and was reading more about it I found out it was for the 16mm tubes not the 10's i was going for!!!

Sad to see about the pump molex :S I hope my stand alone pump doesnt do that to me!!!!

Ha, no problem at all! Though it could well be the other way around!

Make up my first cable last night from the Alchemy 2.0 wires. Need some combs but they were all out of stock.

The wires are nice and stiff and the braiding is decent. You sure as hell won't be pulling the wires back out of the connectors!

Will get some pics once I've done all of them.

Also plugged up the temperature sensor just to check it works ok. All seems good!
 
Soldato
OP
Joined
8 Oct 2006
Posts
5,695
Location
Midlands
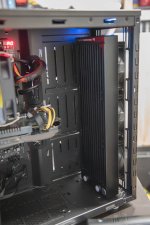
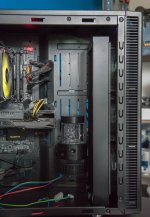
So I had a very brief measure up with the one PE360 rad I have, needless to say its going to be snug in there with 2! The tanks of each will overlap a few mm, but there should be space for the fans to be fitted.

Should just barely fit but it would fit better if the top edge of the existing 140mm rear fan was shaved off about 2mm, or if I just put a 120mm there instead. I'll see properly once the second rad arrives next week.

Another option is to mount the front rad with the fans on the outside of the case but still behind the front shroud. The shroud has an internal depth of 36mm so should allow enough airflow through if needed, though it would mean losing the filter.

I reckon I can make it all fit as standard though.
 
Associate
Joined
12 Jun 2016
Posts
145
Location
Aberdeen
how have you gone about mounting your pump?

none of the pre drilled spots inside the Define S really fit the EK-XTOP, so i think im gonna fit by drilling 2 holes in like with the leftmost 3.5 bay "line" for lack of a better term.
 
Soldato
OP
Joined
8 Oct 2006
Posts
5,695
Location
Midlands
how have you gone about mounting your pump?

none of the pre drilled spots inside the Define S really fit the EK-XTOP, so i think im gonna fit by drilling 2 holes in like with the leftmost 3.5 bay "line" for lack of a better term.

Not head a measure up for that yet so not sure, but I've got the D5 Revo so the mountings might be different. If I gotta drill, I gotta drill!
 
Soldato
OP
Joined
8 Oct 2006
Posts
5,695
Location
Midlands
slightly scary as that is i feel the same way. Im also wondering if I might put a bulkhead fitting in the back and take the drain section out there. But I dont wanna consider that till i have my rads and can size it all up

It's one of those things. Why be fine with taking a heatsink off a £500 GPU and putting a block on, but not about sticking a few extra holes in a £80 case that I'll probably keep for a decade like the last one!

As for the drain option, I'm going with a 4 way block (EK-AF X-Splitter 4F). Temp sensor on 1, loop on 2 and ball valve for drain on the 4th.
 
Associate
Joined
12 Jun 2016
Posts
145
Location
Aberdeen
As for the drain option, I'm going with a 4 way block (EK-AF X-Splitter 4F). Temp sensor on 1, loop on 2 and ball valve for drain on the 4th.


Arrgh why didnt i think of that!!! I couldn't work out where to put a temp sensor without it being inline and slightly unsightly!!! I've went for a EK-AF T splitter and ball valve arrangement.
 
Soldato
OP
Joined
8 Oct 2006
Posts
5,695
Location
Midlands
Arrgh why didnt i think of that!!! I couldn't work out where to put a temp sensor without it being inline and slightly unsightly!!! I've went for a EK-AF T splitter and ball valve arrangement.

Ahh, I spent ages working out exactly what I wanted to do while I was bored at work!

All the parts have now arrived bar the new res tube which should have been posted today but for some reason wasn't (OCUK have had stock today).

Anyway, It means that hopefully by Tuesday (working nights this weeked) I'll have some pics of a quick lash up of the rads and pump which will give me a chance to see exactly how to plumb it all up and how well it fits in there.

I can then make a start on getting the first pipes done to join the front rad to the pump and the temp sensor and drain point.
 
Last edited:
Soldato
OP
Joined
8 Oct 2006
Posts
5,695
Location
Midlands
Ok, finally managed to make a start really late last night!

So far just the front rad and pump are in place to help me get an idea of spacing and what I might need to do with the tubing.

The Revo D5 pump mounts do not line up with the holes in the case so I'll have to get my drill out to make 2 new holes. Fortunately the pump comes with a sticky template that you can use to get the right spacing.

Also I found that with the front rad/fans in place and my existing heatsink, it's impossible to get the top rad in place. I am certain it will fit having measured both up though.

Strangely the EK Vardar fans don't seem to have direction indicators anywhere I could see. No major issue though.

My longer res tube finally got posted out very late yesterday so it'll be here in time for actually adding fluid to the loop.

So now I'm going to pop this rad out and run the blitz cleaning system through them both before remounting. Then hopefully later I can get my first bit of bending done to make the piece to connect the front rad to the 4way block, drain point and pump inlet.

Of course, some pics!

The old!
v0GvXuD.jpg
CR1loCK.jpg
zIZe5eh.jpg
1viFZu1.jpg

The new!
YKvw4js.jpg
bpSVmax.jpg
6Ep5yvQ.jpg
IVRvHlS.jpg
 
Associate
Joined
12 Jun 2016
Posts
145
Location
Aberdeen
While I've not tried to place my front panel back on yet, I've mounted my front fans on the "outside" of the case so the radiator is in contact with the mount points. So looking into the case from left to right you have a sandwich of :

radiator | case | fans

With my 240 mounted high and 360 up top I can fit both but the 240s inlet are orientated at the bottom
 
Soldato
OP
Joined
8 Oct 2006
Posts
5,695
Location
Midlands
Yeah I've considered doing that but I'd lose the nice magnetic fan filters and since I'ts just about possible to get both of these 360s in with the fans inside too, that's what I'll be going for.

There is enough room behind the front panel to not restrict airflow though, its about 36mm deep and with the fans able to pull air in from the sides of the front panel it should be just fine.

One thing I forgot to mention earlier. Little disappointed with EK and the Revo D5 for not braiding the power and PWM cables (they are brightly coloured), and for using a molex connector. Surely they could have used a SATA connector. I'll have to remove the molex so that I can route the cable through an available hole to get it out of the way.

Just rinsed my rads out with tap water before starting the clean. Both emptied and no loose bits fell into the coffee filter so EK get some extra points for that.

Both 360s are now bathing in the Blitz Pro. I calculated that the PE360 radiator takes about round 225ml of fluid to fill to the brim so only made up half of the Stage 1 liquid.

Very pleased with my purchase of a 1000ml wash bottle which is making this far less messy than it otherwise would be!

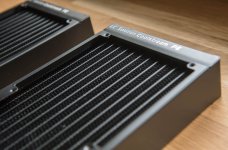
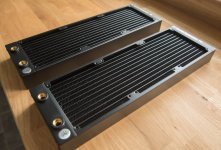
Couple more pics of the rads.
J7K0wbb.jpg
Q7GVPjA.jpg
 
Soldato
Joined
4 Jun 2007
Posts
2,618
Location
Watford, UK
While I've not tried to place my front panel back on yet, I've mounted my front fans on the "outside" of the case so the radiator is in contact with the mount points. So looking into the case from left to right you have a sandwich of :

radiator | case | fans

You might want to try that front panel on and see how much gap you have between the panel and the fan - it could overly restrict the amount of air that can get into the fan leading to increased noise and decreased flow. You'll have to - as the saying goes - suck it and see.
 
Back
Top Bottom