

- Joined
- 13 Mar 2006
- Posts
- 6,712
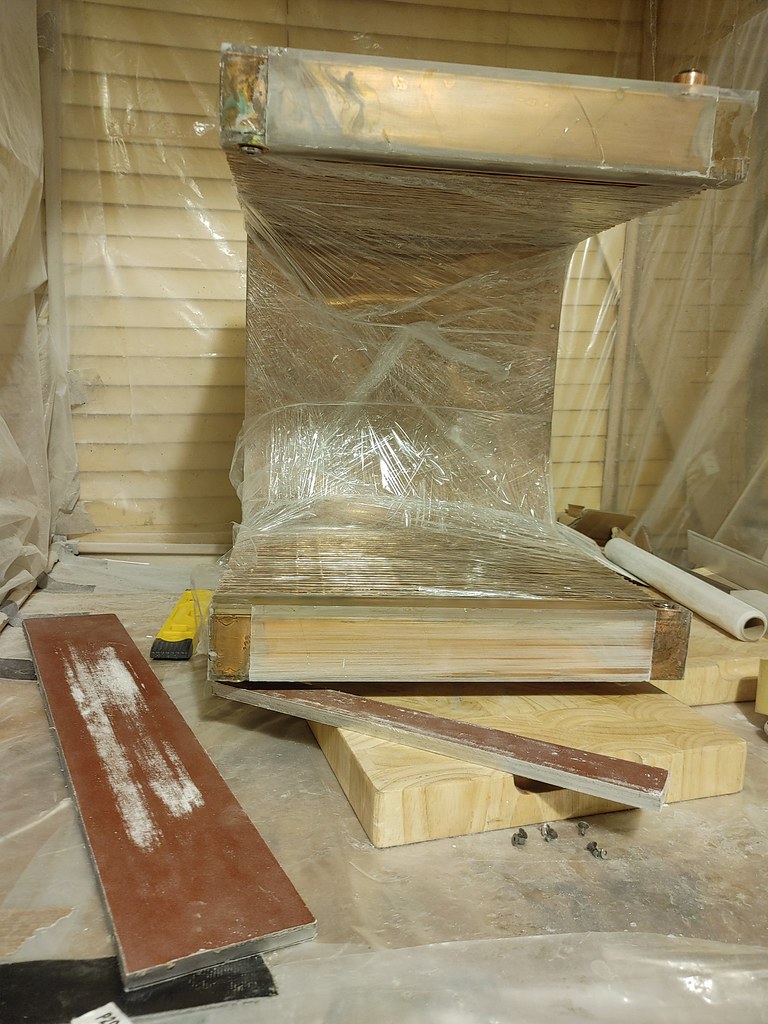
Next up is sorting out the 2 cast polyester-coated water distributor boxes that the 48 copper pipes connect to, at the top and bottom of the case. In making them originally, I had made a mold from acrylic sheet to cast the polyester resin, and the heat from the polyester resin had heated the protective sheet on the acrylic so much that it shrunk and caused wavy valleys in the cast polyester.
 20220430_230310_HDR by
https://www.flickr.com/photos/144843676@N04/
What looks like spiders webs there is scoring with a craft knife/scalpel to aid with the new resin bonding to the old.
https://www.flickr.com/photos/144843676@N04/
 20220506_211505_HDR
 20220507_012942_HDR
 20220507_012947_HDR
 20220507_160239_HDR
https://www.flickr.com/photos/144843676@N04/
https://www.flickr.com/photos/144843676@N04/
https://www.flickr.com/photos/144843676@N04/
The mold is acrylic panels, attached and sealed with silicone glue, or with Copydex (latex glue - much less nessy and easier to clean-up and remove afterwards). Holes and slots were blanked with Copydex or Bluetac where needed, and the aluminium rubbed with candlewax to aid release after casting.
https://www.flickr.com/photos/144843676@N04/
20220507_012947_HDR
https://www.flickr.com/photos/144843676@N04/
Lots of bits needed recasting of resin to tidy up and then sand down to flat and sharp edges to then veneer with walnut (with pressure-sensitive adhesive backing). To get the veneer to sit flush with the copper ports the surrounding resin was sanded 0.4mm deeper than the ports, and similarly for the resin box sides to sit flush with the aluminium angle 'legs' of the supporting frame.
https://www.flickr.com/photos/144843676@N04/
 20220503_182137_HDR
To make sanding easier I made several plane sanding blocks by gluing a roll of p280 sandpaper to a large thick steel plate (~50cm x 15cm) and a smaller 1cm thick piece of aluminium plate.
 20220529_224929_HDR
20220529_224929_HDR
 20220505_194216_HDR
Sanding to get flat surfaces and sharp edges for tge veneer:
 20220515_045720_HDR
 20220513_185219_HDR
 20220513_185202_HDR
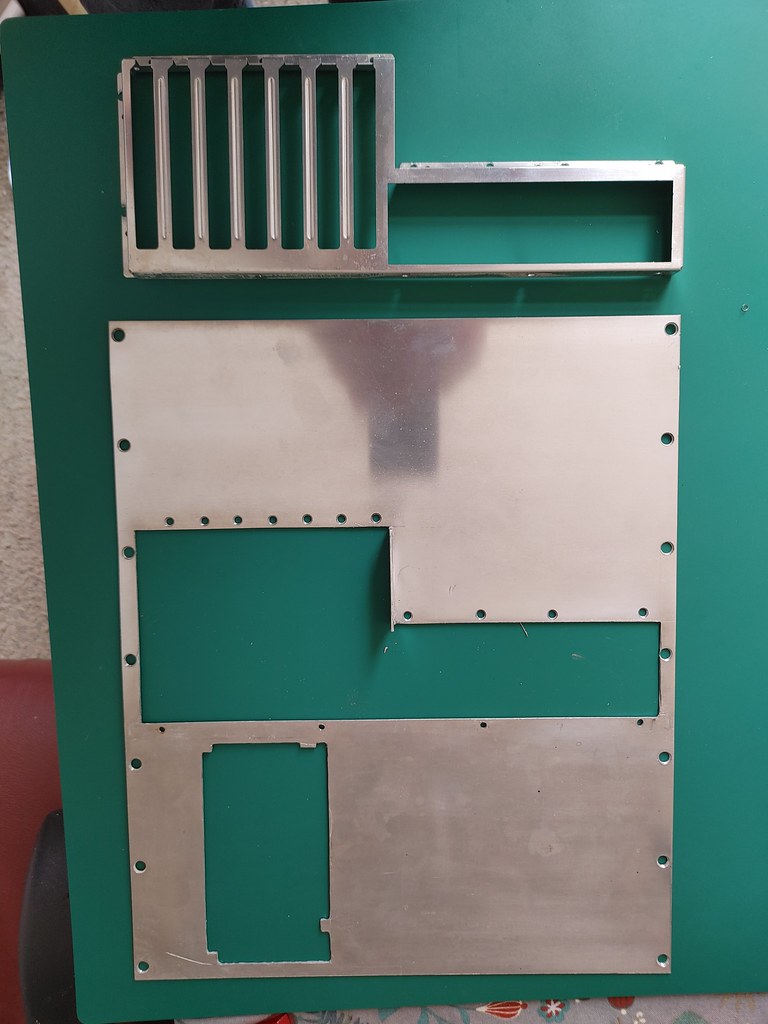
Disassembled aluminium wall with IO/PCI slot bracket.
https://www.flickr.com/photos/144843676@N04/
 20220424_135249_HDR
https://www.flickr.com/photos/144843676@N04/
Below: Making a veneer skin for the wall the IO panel attaches to. I decided to make life difficult and cut holes for all the countersunk bolts, partly to keep the slightly industrial look of countersunk bolts, and partly to allow disassembly, and partly because I found a cheap manufacturer of grade 5 titanium bolts to replace the stainless steel ones, and machined titanium bolts are very attractive. To make the holes in the veneer I used hole-punches (8mm diameter for m4, and 6mm diameter for the m3 countersunk bolt heads). The next issue will be getting the countersunk bolt heads to sit flush with the ~0.4mm thick veneer - either with countersunk collars for the bolts or by sanding down the whole aluminium sheet by 0.4mm.
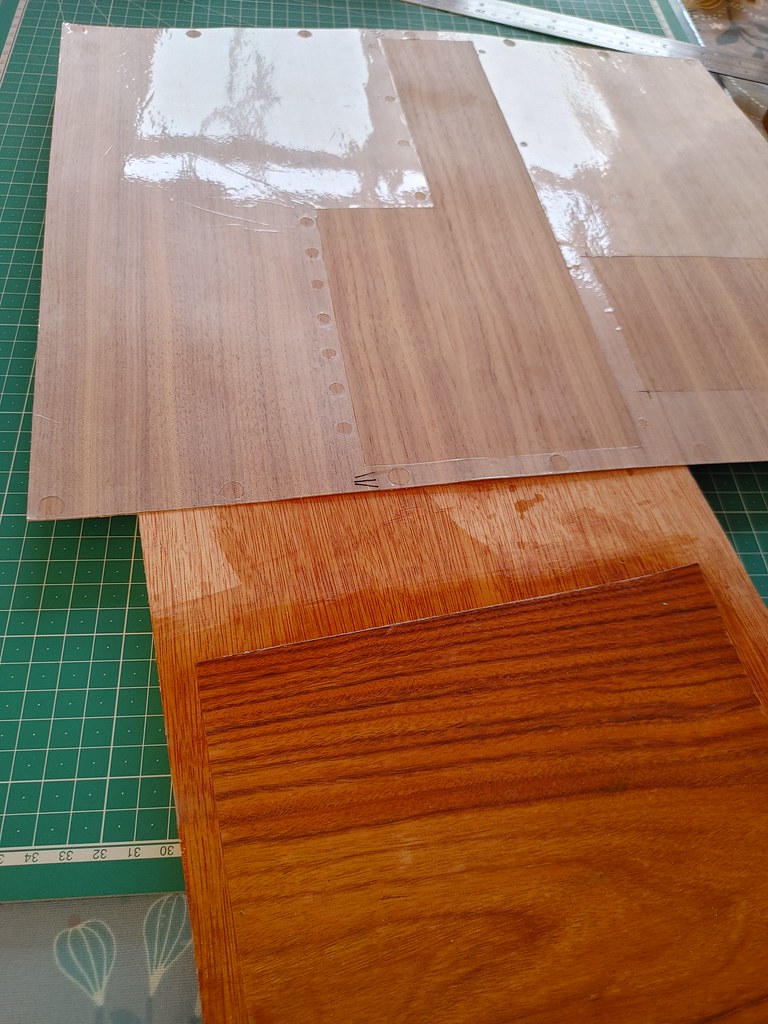
To mark out the hole positions etc for the veneer I used a sheet of low tack plastic adhesive sheet, which I could score the edges of the countersunk holes to cut the holes from the plastic sheet, then transfer to veneer to guide cutting and hole-punching. (On that board is a test veneer piece of rosewood stained with Shellac/French polish - didn't like the colour).
 20220425_174310_HDR
 20220425_164457_HDR by
https://www.flickr.com/photos/144843676@N04/
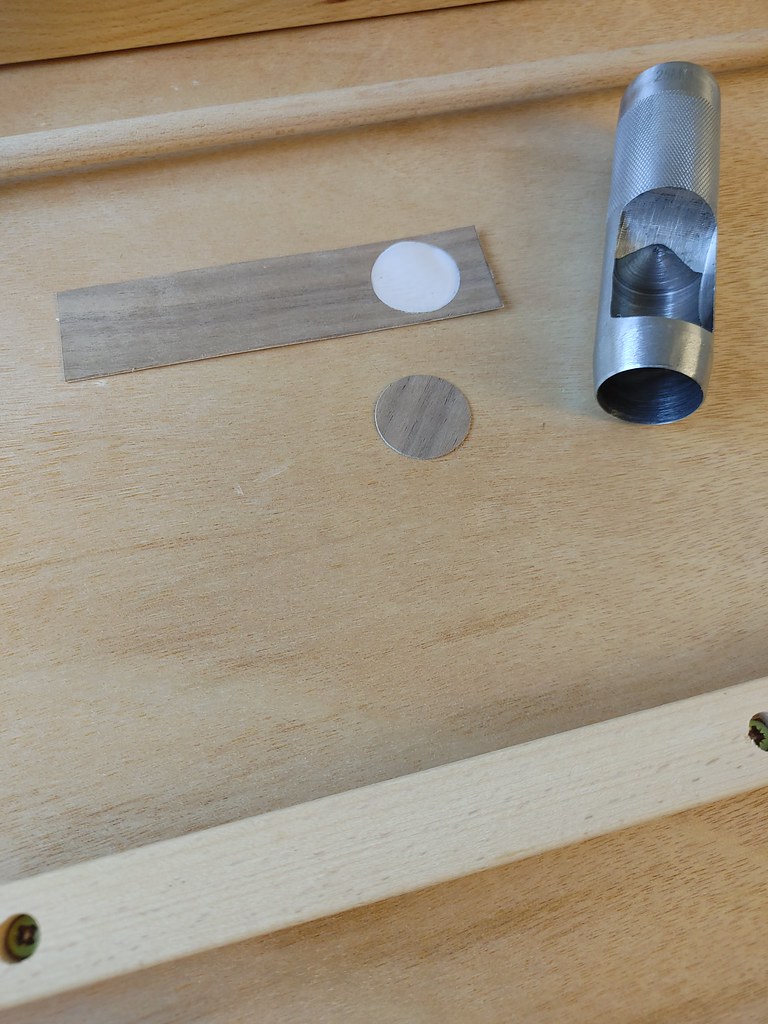
Large 25mm diameter hole punch for cutting holes in the veneer cladding for the copper g 1/4" BSP ports to poke through/sit flush with, on a test piece of veneer.
https://www.flickr.com/photos/144843676@N04/
 20220423_175214_HDR
https://www.flickr.com/photos/144843676@N04/
One of the veneer pieces to clad the resin boxes. Fiddly!
https://www.flickr.com/photos/144843676@N04/
 20220428_144829_HDR
https://www.flickr.com/photos/144843676@N04/
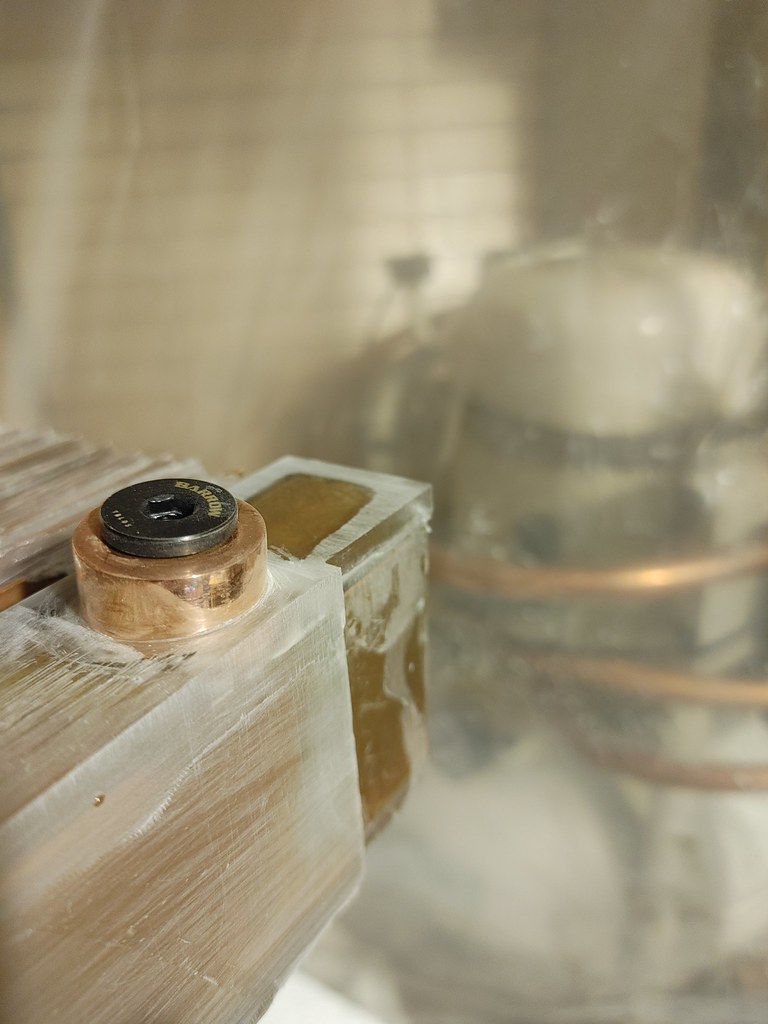
Mock-up of the veneer on the top resin box - that's the fill-port with a gold plug screwed in. Quite finickity cutting the walnut veneer precisely - probably need to redo this one as I shaved off a little too much at the bottom right. I also need to sort out the gap in the aluminium sections by milling the thicker plate (it was unfortunately milled a little short for the step for the right-angle aluminium in the bottom right to sit flush, and is a little inaccurate anyhow)
https://www.flickr.com/photos/144843676@N04/
 20220430_134501_HDR
Below: Early mock-up of unstained and unattached veneer panels for a rough view of how it will look.
 20220430_134519_HDR
 20220430_134538_HDR
20220430_230310_HDR byhttps://www.flickr.com/photos/144843676@N04/
What looks like spiders webs there is scoring with a craft knife/scalpel to aid with the new resin bonding to the old.
https://www.flickr.com/photos/144843676@N04/
20220506_211505_HDR20220507_012942_HDR20220507_012947_HDR20220507_160239_HDRhttps://www.flickr.com/photos/144843676@N04/
https://www.flickr.com/photos/144843676@N04/
https://www.flickr.com/photos/144843676@N04/
The mold is acrylic panels, attached and sealed with silicone glue, or with Copydex (latex glue - much less nessy and easier to clean-up and remove afterwards). Holes and slots were blanked with Copydex or Bluetac where needed, and the aluminium rubbed with candlewax to aid release after casting.
https://www.flickr.com/photos/144843676@N04/
20220507_012947_HDRhttps://www.flickr.com/photos/144843676@N04/
Lots of bits needed recasting of resin to tidy up and then sand down to flat and sharp edges to then veneer with walnut (with pressure-sensitive adhesive backing). To get the veneer to sit flush with the copper ports the surrounding resin was sanded 0.4mm deeper than the ports, and similarly for the resin box sides to sit flush with the aluminium angle 'legs' of the supporting frame.
https://www.flickr.com/photos/144843676@N04/
20220503_182137_HDRTo make sanding easier I made several plane sanding blocks by gluing a roll of p280 sandpaper to a large thick steel plate (~50cm x 15cm) and a smaller 1cm thick piece of aluminium plate.
20220529_224929_HDR20220529_224929_HDR
20220505_194216_HDRSanding to get flat surfaces and sharp edges for tge veneer:
20220515_045720_HDR20220513_185219_HDR20220513_185202_HDRDisassembled aluminium wall with IO/PCI slot bracket.
https://www.flickr.com/photos/144843676@N04/
20220424_135249_HDRhttps://www.flickr.com/photos/144843676@N04/
Below: Making a veneer skin for the wall the IO panel attaches to. I decided to make life difficult and cut holes for all the countersunk bolts, partly to keep the slightly industrial look of countersunk bolts, and partly to allow disassembly, and partly because I found a cheap manufacturer of grade 5 titanium bolts to replace the stainless steel ones, and machined titanium bolts are very attractive. To make the holes in the veneer I used hole-punches (8mm diameter for m4, and 6mm diameter for the m3 countersunk bolt heads). The next issue will be getting the countersunk bolt heads to sit flush with the ~0.4mm thick veneer - either with countersunk collars for the bolts or by sanding down the whole aluminium sheet by 0.4mm.
To mark out the hole positions etc for the veneer I used a sheet of low tack plastic adhesive sheet, which I could score the edges of the countersunk holes to cut the holes from the plastic sheet, then transfer to veneer to guide cutting and hole-punching. (On that board is a test veneer piece of rosewood stained with Shellac/French polish - didn't like the colour).
20220425_174310_HDR20220425_164457_HDR byhttps://www.flickr.com/photos/144843676@N04/
Large 25mm diameter hole punch for cutting holes in the veneer cladding for the copper g 1/4" BSP ports to poke through/sit flush with, on a test piece of veneer.
https://www.flickr.com/photos/144843676@N04/
20220423_175214_HDRhttps://www.flickr.com/photos/144843676@N04/
One of the veneer pieces to clad the resin boxes. Fiddly!
https://www.flickr.com/photos/144843676@N04/
20220428_144829_HDRhttps://www.flickr.com/photos/144843676@N04/
Mock-up of the veneer on the top resin box - that's the fill-port with a gold plug screwed in. Quite finickity cutting the walnut veneer precisely - probably need to redo this one as I shaved off a little too much at the bottom right. I also need to sort out the gap in the aluminium sections by milling the thicker plate (it was unfortunately milled a little short for the step for the right-angle aluminium in the bottom right to sit flush, and is a little inaccurate anyhow)
https://www.flickr.com/photos/144843676@N04/
20220430_134501_HDRBelow: Early mock-up of unstained and unattached veneer panels for a rough view of how it will look.
20220430_134519_HDR20220430_134538_HDR
")
")
 20220611_141658_HDR
 YouCut_20220611_143450686
 20220611_141225_HDR
 20220611_141237_HDR
 Screenshots_2022-06-11-14-58-51
 20220612_161121_HDR
 20220612_220702_HDR
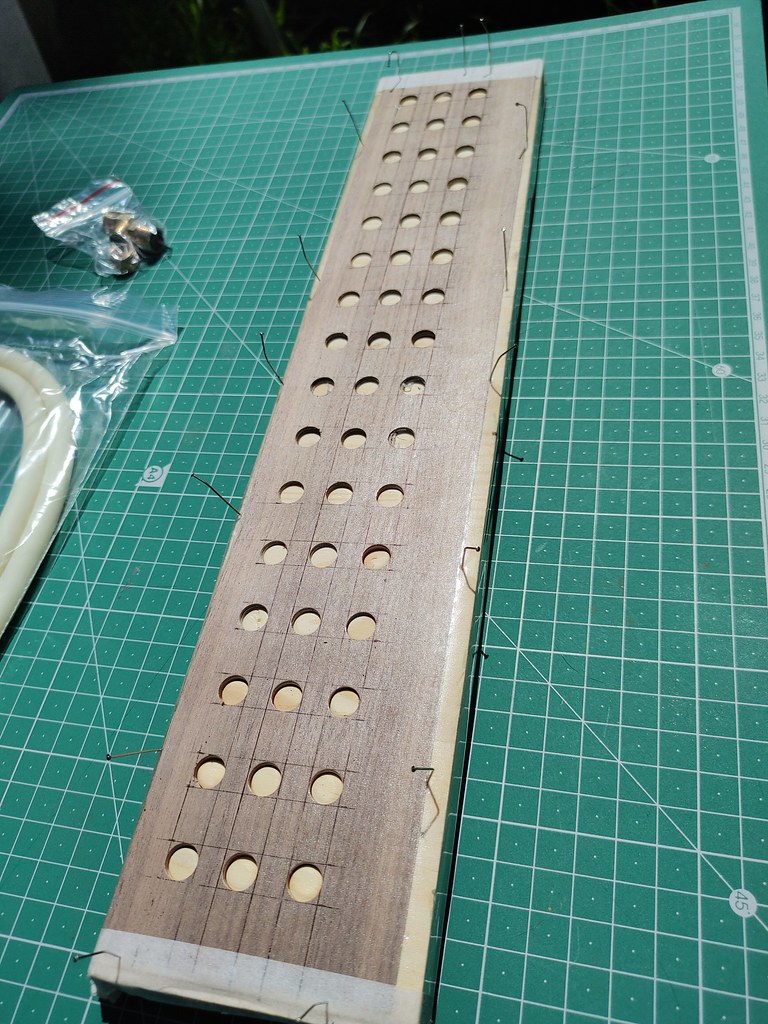 20220614_130533_HDR
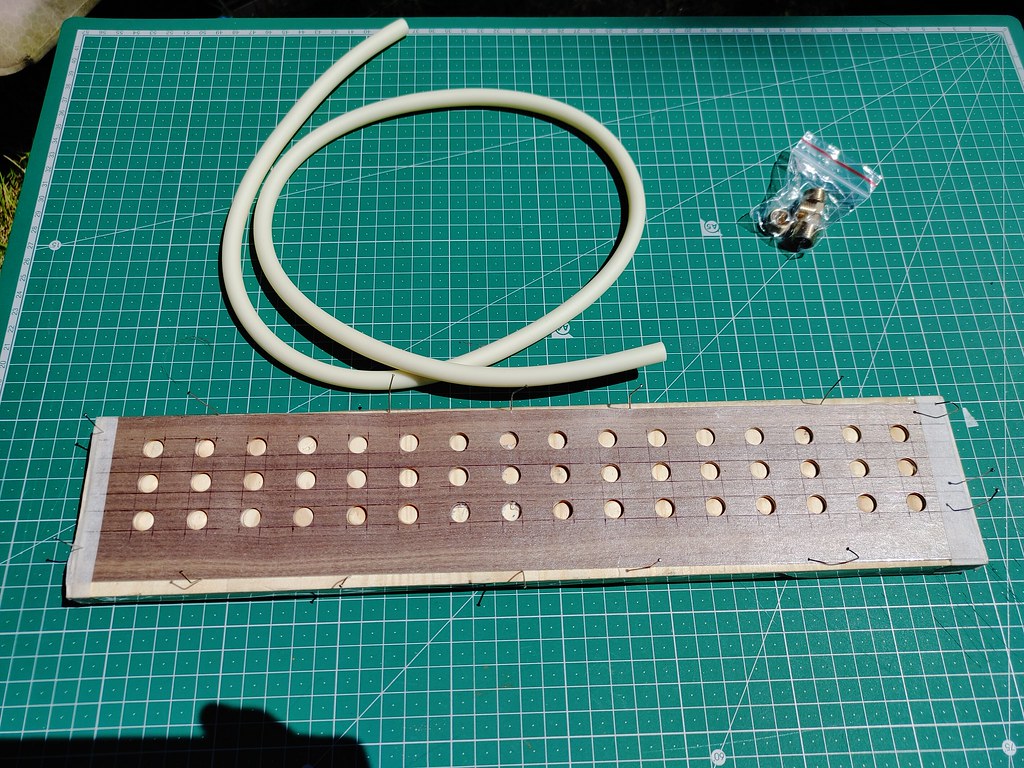 20220614_130643_HDR
 20220614_130845_HDR
 20220614_130850_HDR
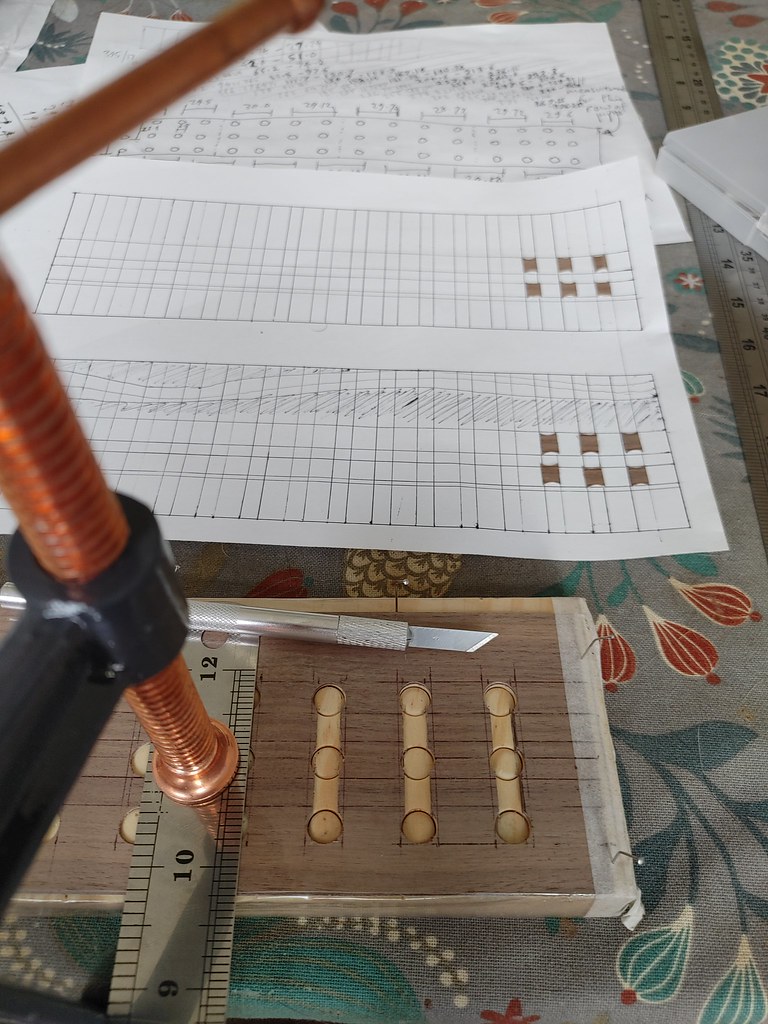 20220616_161425_HDR
 20220616_211119_HDR
 20220616_214328_HDR
 20220616_214143_HDR
 20220616_230049_HDR