Associate
Hey, decided to try to watercool my RVO2 case after messing up my previous attempt (Lian-li 351), which was abit too hard for a beginner. Wanting to keep the price down as low as possible but not foolishly low, so went after some MM watercooling cheap bits. It took several weeks to collect the right parts for my build and to figure out how to fit it all in this very unquie case.
So, project Raven 2
Insperation from:
Born To Kill - RVO2 Watercooled
Unamed pictures from the US evga forums of a - RVO2 Watercooled
Watercooling by rjkoneill - Watercooled TJO7
Not wanting to do anything fancy with braiding the psu wires and an entire coulor scheme, i went with the standard blue&black that works well with the stuff i have at the moment. And having not documented my privous build very well i fear i may have gone overboard with pictures this time
Apologies first for the poor camera skills
First the parts:

PA120.4
Yate Loon 120mmx38mm x4
Bitspower 5870/5850 nickel gpu block
D5 Vario pump
EK 150 v2 Res
EK HF Supreme full nickel cpu block
EK D5 Top
EK 7/16 comp fittings x10
Xigmatek blue led 120mm fan x2
Kama bay
NZXT 100mm LED braided strip
Mayhem pre-mixed blue coolant x2
Blue braid x10mm x2.5mm
Black heatshrink
+ The parts allready installed in my computer
Silverstone RVO2
ATI5850
Intel i5
4Gig OCZ Reaper 1600 RAM
GIGABYTE P55A UD4
Corsair AX750
Samsung spinpoint 1tb
OCZ Solid 2 128 SSD
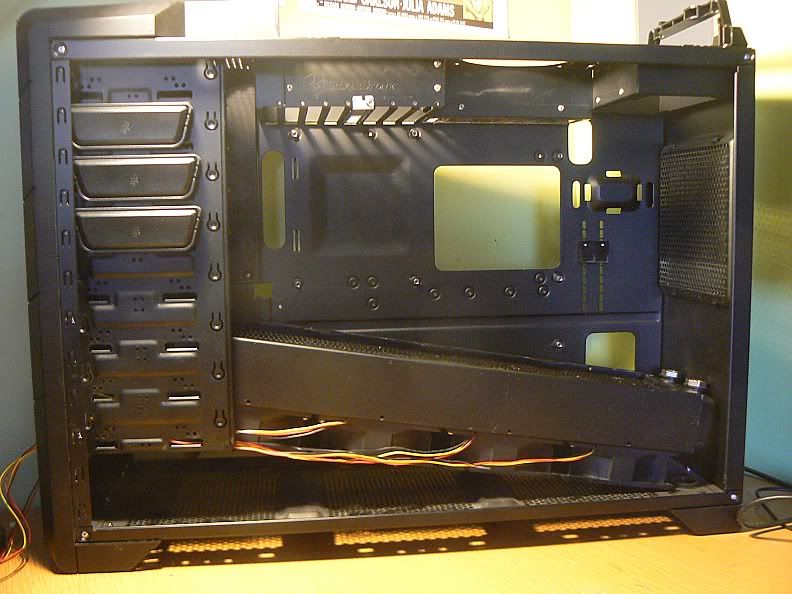
Right, now thats done, time for the build. First the before pics.


The only cuting i need to do to this case and most importantly to my to make my big radiator fit, is to cut into the hard drive+5 1/4 bay area marked here.

But first i need to get all the parts out of the case.

As you can see, thats the bit of the drive bay i need to cut out for the pa 120.4 to fit.


Cut out and with some u-channel added

Now to the motherboard to add the EK HF block.

The block looks just a fantastic as all the pictures i have seen taken of it.

Adding the HF plate, whilst allmost going crazy trying to fit the rubber ring around the block (pictuered), but it seems i forgot to add that black mounting plate which actually makes it fit.

Fitting perfectly and looking great.

Unfortunatly not the same for the backplate, the double thickness padding makes it fit un-evenly (poor design on the part of silverstone for such a small space)

The hard-drive cage ready to house the D5 pump (was thinking of adding some pading)

But it seems their would not be enough room for full thickness, so i cut it in half and it fits fine.

Next to the 5850 and Bitspower block, which look great together


The motherboard with both the gpu/cpu blocks aswell as the pa 120.4 +Yate fans installed and fitting great.
Next to test fit the kama bay with the Xigmatek fan+fan filter installed to add abit of air through the front of the case over both the D5 and hard-drive.


Had a bad feeling, with the HD-cage being so low, and with a test fit with tubing and fittings i was right. Abit too tight for my likeing so..


..moving it up afew inches leaves plenty of room.
Time for abit of break to think over the rest of the build, to braiding!


I did'nt have enough braid to encompass the entire length of some of the cables so i went sneaky and just braided the bts that you can see


Really impressed to be honest.


Adding the powersupply, only now am i 100% sure that the 5850+Rad+Fans and cables will fit. And it does, with abit of space to spare
Onto the Res, the last bit before test fitting the tubing.

Trying to find the right orientation for the bewilderingly large amount of options for the res.

After being kinda disapointed with the pathetic griping power of the vanilla res holders, i thought of adding a tiny nut into the space where the screw goes to give abit more grip.
Works really well, unfortunatly it woudnt fit in the space i needed it too, fearing the worst i had a brainwave.


Behold the might power of braid and heatshrink! Glad i didnt use all the braid on those cables no-one would see


Fitted in the case, added some cable ties just to be sure too

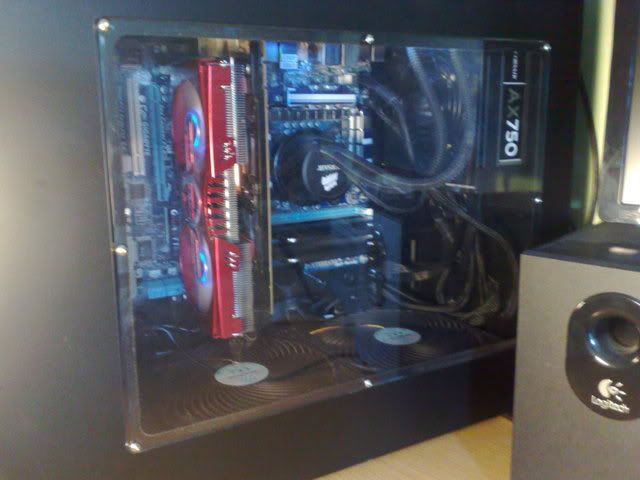
The view from the outside through the window, fitting beautifully.


Time to start test fitting the tubing.

Wrong ^
IMPORTANT: The above is very wrong, the pump is pushing water into the res (i will discover this later )
)


Filling the loop....dont do it!
..discovering the ill-fitted tubing/res...


...draining the loop...

Re-fitting the tubing the right way. I did discover whilst draining that one of the phyoba 30 degree extenders was leaking so i went looking for the tfc tape ( i think thats what its called?)

No more leaks ( it was pushed into the cap that was leaking i didnt leave it hanging out like that )
)


Re-filling, didnt need as much liqud the second time, seems the rad ate up most of the liquid.

Alive! And no leaks ..

..but lots of mess...

..much better

Adding NZXT lights, wishing i had gone for the 200mm length now, but it lights up the case well enough.
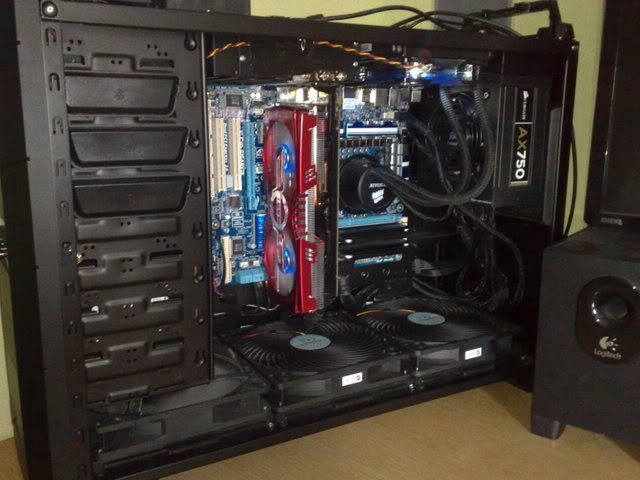
Final shots for now...


Been overclocking today, with 20 runs of IBT i have settled with 3.5ghz for my i5 with the temps not reaching passed 55 degrees whilst stressing. With the 5850, 920 on the core and 1100 with the RAM is what its set at , for the moment. With the temps hovering around 39-40 degrees in ATItool,Heaven,Stalker and Furmark stress testing benchmarks.
Really impressed with the noise and temps so far, its incredibly quiet considering the overclocks i have done, just a nice hum from the case. 28 degrees idle for the i5 at 3.5ghz and 20 degrees idle for the gpu (30 degrees in 3d clock with no load). Really happy with it and cant see me upgrading anything for a while.
Any question feel free to ask.
So, project Raven 2
Insperation from:
Born To Kill - RVO2 Watercooled
Unamed pictures from the US evga forums of a - RVO2 Watercooled
Watercooling by rjkoneill - Watercooled TJO7
Not wanting to do anything fancy with braiding the psu wires and an entire coulor scheme, i went with the standard blue&black that works well with the stuff i have at the moment. And having not documented my privous build very well i fear i may have gone overboard with pictures this time

Apologies first for the poor camera skills

First the parts:

PA120.4
Yate Loon 120mmx38mm x4
Bitspower 5870/5850 nickel gpu block
D5 Vario pump
EK 150 v2 Res
EK HF Supreme full nickel cpu block
EK D5 Top
EK 7/16 comp fittings x10
Xigmatek blue led 120mm fan x2
Kama bay
NZXT 100mm LED braided strip
Mayhem pre-mixed blue coolant x2
Blue braid x10mm x2.5mm
Black heatshrink
+ The parts allready installed in my computer
Silverstone RVO2
ATI5850
Intel i5
4Gig OCZ Reaper 1600 RAM
GIGABYTE P55A UD4
Corsair AX750
Samsung spinpoint 1tb
OCZ Solid 2 128 SSD
Right, now thats done, time for the build. First the before pics.


The only cuting i need to do to this case and most importantly to my to make my big radiator fit, is to cut into the hard drive+5 1/4 bay area marked here.

But first i need to get all the parts out of the case.

As you can see, thats the bit of the drive bay i need to cut out for the pa 120.4 to fit.


Cut out and with some u-channel added

Now to the motherboard to add the EK HF block.

The block looks just a fantastic as all the pictures i have seen taken of it.

Adding the HF plate, whilst allmost going crazy trying to fit the rubber ring around the block (pictuered), but it seems i forgot to add that black mounting plate which actually makes it fit.


Fitting perfectly and looking great.

Unfortunatly not the same for the backplate, the double thickness padding makes it fit un-evenly (poor design on the part of silverstone for such a small space)

The hard-drive cage ready to house the D5 pump (was thinking of adding some pading)

But it seems their would not be enough room for full thickness, so i cut it in half and it fits fine.

Next to the 5850 and Bitspower block, which look great together


The motherboard with both the gpu/cpu blocks aswell as the pa 120.4 +Yate fans installed and fitting great.
Next to test fit the kama bay with the Xigmatek fan+fan filter installed to add abit of air through the front of the case over both the D5 and hard-drive.


Had a bad feeling, with the HD-cage being so low, and with a test fit with tubing and fittings i was right. Abit too tight for my likeing so..


..moving it up afew inches leaves plenty of room.
Time for abit of break to think over the rest of the build, to braiding!


I did'nt have enough braid to encompass the entire length of some of the cables so i went sneaky and just braided the bts that you can see


Really impressed to be honest.


Adding the powersupply, only now am i 100% sure that the 5850+Rad+Fans and cables will fit. And it does, with abit of space to spare

Onto the Res, the last bit before test fitting the tubing.

Trying to find the right orientation for the bewilderingly large amount of options for the res.

After being kinda disapointed with the pathetic griping power of the vanilla res holders, i thought of adding a tiny nut into the space where the screw goes to give abit more grip.
Works really well, unfortunatly it woudnt fit in the space i needed it too, fearing the worst i had a brainwave.


Behold the might power of braid and heatshrink! Glad i didnt use all the braid on those cables no-one would see


Fitted in the case, added some cable ties just to be sure too


The view from the outside through the window, fitting beautifully.


Time to start test fitting the tubing.

Wrong ^
IMPORTANT: The above is very wrong, the pump is pushing water into the res (i will discover this later
 )
)


Filling the loop....dont do it!
..discovering the ill-fitted tubing/res...


...draining the loop...

Re-fitting the tubing the right way. I did discover whilst draining that one of the phyoba 30 degree extenders was leaking so i went looking for the tfc tape ( i think thats what its called?)

No more leaks ( it was pushed into the cap that was leaking i didnt leave it hanging out like that
 )
)

Re-filling, didnt need as much liqud the second time, seems the rad ate up most of the liquid.

Alive!
 And no leaks ..
..but lots of mess...

..much better


Adding NZXT lights, wishing i had gone for the 200mm length now, but it lights up the case well enough.
Final shots for now...


Been overclocking today, with 20 runs of IBT i have settled with 3.5ghz for my i5 with the temps not reaching passed 55 degrees whilst stressing. With the 5850, 920 on the core and 1100 with the RAM is what its set at , for the moment. With the temps hovering around 39-40 degrees in ATItool,Heaven,Stalker and Furmark stress testing benchmarks.
Really impressed with the noise and temps so far, its incredibly quiet considering the overclocks i have done, just a nice hum from the case. 28 degrees idle for the i5 at 3.5ghz and 20 degrees idle for the gpu (30 degrees in 3d clock with no load). Really happy with it and cant see me upgrading anything for a while.
Any question feel free to ask.
Last edited:


 And thankyou for the nice comments


