Tabletop Warhammer?

Soldato
Joined
3 May 2012
Posts
8,594
Location
Wetherspoons
Right, so its been about two years exactly since I painted anything.

I painted 3 armies in a row, in about a year and a half, and whilst I got them all done and I am pleased with them, I got some serious burn out.

But I am ready to get back into it, still have all the gear barring maybe a paint or two drying up, we will see.

I have a load of Cadians that need doing, I painted some of them the second time I got back into it, about 15 years ago, but I will strip those and there are quite a few unpainted anyway.

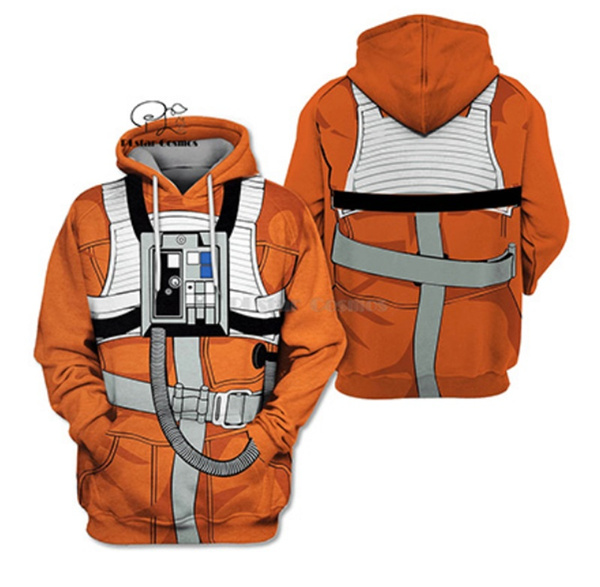
I went with silver armour and green overalls, but I am not that fussed on those colours, and actually trying to steer away from camo/army colours in general and want something brighter and maybe more fantasy. Was half thinking maybe going for orange overalls and white armour, like a rebel pilot from star wars.

I also have some space marines, but not many, those are from the first time, so probably 25 years ago lol. Metal servitor model is very cool although I painted him with enamel airfix paint, so hope I can get that off.

I just gotta relearn a bit, if I am honest its a little bit daunting just to get going again.
 
Soldato
Joined
3 May 2012
Posts
8,594
Location
Wetherspoons
Infact, I am after some advice on colours.

I found this one: Vajello 70.911 Light Orange - which I think would be a great base coat.

5f33b5b50f5116003f3b4da7-large.jpg

s-l1600.jpg


I could use Agrax Earthshade as a wash, or Reikland Fleshshade maybe, either I think could work. But not sure of a highlight colour, the Light Orange is already pretty light. Any ideas?

Or maybe go a bit darker as a base coat (VH Orange Fire 72.008 which I already have) and use the light orange as a highlight? I also have cadmium skin (VH 72.099) which could use as a second very light highlight.
 
Soldato
Joined
18 Dec 2004
Posts
9,832
Location
NE England
After much sawing and cutting I managed to kitbash a push fit aggressor using some BA Terminator Captain parts. The Aggressors really carry the torch for the Terminators in the Primaris age so I thought this was a pretty cool homage. I also struggle to say no to gaudy pointless freehand sometimes.

 
Soldato
Joined
20 Mar 2004
Posts
4,430
^ Gorgeous looking model.

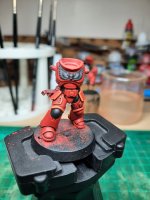
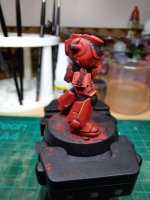
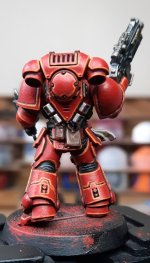
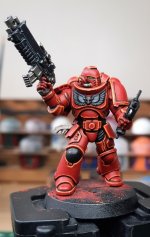
Trying to do a 2nd highlight on my my Blood Angel, but I'm struggling.

F7aFgTV.jpg

nXzJO2b.jpg

Trying to do some of the bigger, easiest parts of the model at the moment, but there are already bits that need cleaning up.

It's not so bad when I can use the side of the brush to do it, but it's when I need to use the tip of the brush.
Either I get nothing or a nasty uncontrolled blob.

Any tips on how to make the paint flow better when using the tip?
 
Last edited:
Soldato
Joined
18 Dec 2004
Posts
9,832
Location
NE England
The only really sucky answer is to practice practice practice. I can see the little amuse of evil sunz under the box-shape below the black knee pad - simply touch up with Mephiston and you’re golden. Even when you get to a higher level of painting you’ll always make mistakes and have to go back and adjust. You’ll learn the angles you’re more comfortable painting at, and the bracing positions your body allows you to keep a steady hand with as time goes on :)
 
Soldato
Joined
18 Dec 2004
Posts
9,832
Location
NE England
Another obnoxious freehand exercise for the shoulder pad of my Redemptor Dreadnought.


Just a few things to finish off and I can call this model finished. Actually started it over a year ago and it sat half finished for ages, figured I should finish it off before building the new Storm Speeder!
 
Soldato
Joined
18 Dec 2004
Posts
9,832
Location
NE England
Never got round to posting the finished Redemptor Dreadnought:


and I’ve also started on one of the new Primaris Storm Speeders. Fully magnetised this thing so all the weapons can be attached, will take a while to paint though :p

 
Soldato
Joined
20 Mar 2004
Posts
4,430
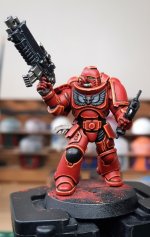
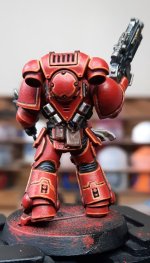
Taken me over a year, but finally finished painting 1 model.

lI600df.jpg

SCcakSe.jpg

All the other models posted here put it to shame.

That damn Fire Dragon Bright highlight was such a test on my sanity.
Not matter how thin I watered down the paint, it just didn't do what I wanted. And when it dried sometimes, it would get *flakey* and come off when you touched it.

I would pay a fortune for pre-thinned paints.
 
Commissario
Joined
17 Oct 2002
Posts
33,018
Location
Panting like a fiend
That looks good, one of the things I learned a long time ago (and most of my gaming group seem to have the same conclusion), is that no matter how good a job you've done with a model, you'll always spot bits you're not happy with because you've spent days/weeks looking at it closely but others will likely not spot, especially if it's on the table as part of a squad:)
You'll probably find that the moment the base is painted it will look better to your eye as well, even if you just do a classic GW graveyard earth rim with goblin green top.

Re the watering down paints, I try to use Vallejo acrylic thinner (something like £8 for 200ml*), it thins it down much like water but without affecting the adhesion anything like as much.

I think you've beaten me for models painted, I've not managed to finish one for about 2 years:( I've got a couple of warlord titans (epic scale) looking at me forlornly from their really useful box, along with a team of Necromantic Horros for Blood Bowl that I intended to paint for Halloween.

On a hobby related note, we've managed to more or less zero in my brothers 3d printer (a Saturn) after about 6 months of him having it, and 4 months not firing it up as he got fed up of it not working very well**, so we're starting to print some of Grim Dark Terrain's stuff for Titanicus, I think he's just about finished doing some form of anti-aircraft gun emplacement, which looks to be a bunker comples with radar, several big guns, and may be looking at trying to print the titan shield wall or trench system next.

*I think they do a larger 500ml bottle as well as they supply paints with the same base for wargaming, military modelling/model cars/trains etc, and canvas painting so do the bottles in "wargamer", "big models" and "huge canvas" sizes ;) (IIRC 17, 200 and 500ml).

**A firmware update seems to have helped, as did increasing the exposure time from 2.5 to 3 seconds for the water washable grey goo.
 
Caporegime
Joined
23 Dec 2011
Posts
32,917
Location
Northern England
Oh BTW, they always look worse in photos unless you're damn good at taking photos!

I would say you've made one potential error though. Highlighting and shading without decals. Put the decals on and use your shading to blend them in.
 
Soldato
Joined
18 Dec 2004
Posts
9,832
Location
NE England
Everyone here discussing unflattering close ups, and here’s me spending far too much time highlighting buttons :p


broken the back of this model now, but got all the weapon options to paint too.
 
Associate
Joined
1 Dec 2015
Posts
1,194
Taken me over a year, but finally finished painting 1 model.

lI600df.jpg

SCcakSe.jpg

All the other models posted here put it to shame.

That damn Fire Dragon Bright highlight was such a test on my sanity.
Not matter how thin I watered down the paint, it just didn't do what I wanted. And when it dried sometimes, it would get *flakey* and come off when you touched it.

I would pay a fortune for pre-thinned paints.

I think that looks very good.

I'm happy with my painting when looking with my eyes but I'm never happy once I talk a photo and blow it up to 10x life size on screen.
I could easily clean things up in Photoshop but that would be cheating.

I found using a wet pallet incredibly helpful for thinning paints.
 
Soldato
Joined
18 Dec 2004
Posts
9,832
Location
NE England
Thanks man, to be fair this is hours upon hours of work - and even then I’ve neglected smoothness just to get it finished in a reasonable time. Few more pics of the whole thing, still a ton of details to go before I start adding the same wear and tear that the Redemptor got:


Associate
Joined
16 Aug 2011
Posts
1,107
Location
Reading, Berks
Looks really nice, love the shading/glazing down into the purples.
Thanks man, to be fair this is hours upon hours of work - and even then I’ve neglected smoothness just to get it finished in a reasonable time. Few more pics of the whole thing, still a ton of details to go before I start adding the same wear and tear that the Redemptor got:


Back
Top Bottom