So I had the bright idea of.... initially... replacing the front speakers because one had blown. So I figured "may as well just upgrade them while I'm at it"..... This turned into sound damping, upgrading every speaker, amp, and sub...... I have a problem  Learned a lot during the process though... namely, car audio is expensive - and Ford are actual ******** for integrating data signals into every single thing, even when it in NO POSSIBLE WAY needs it.... Will stick a parts list at the bottom for anyone who makes it that far.
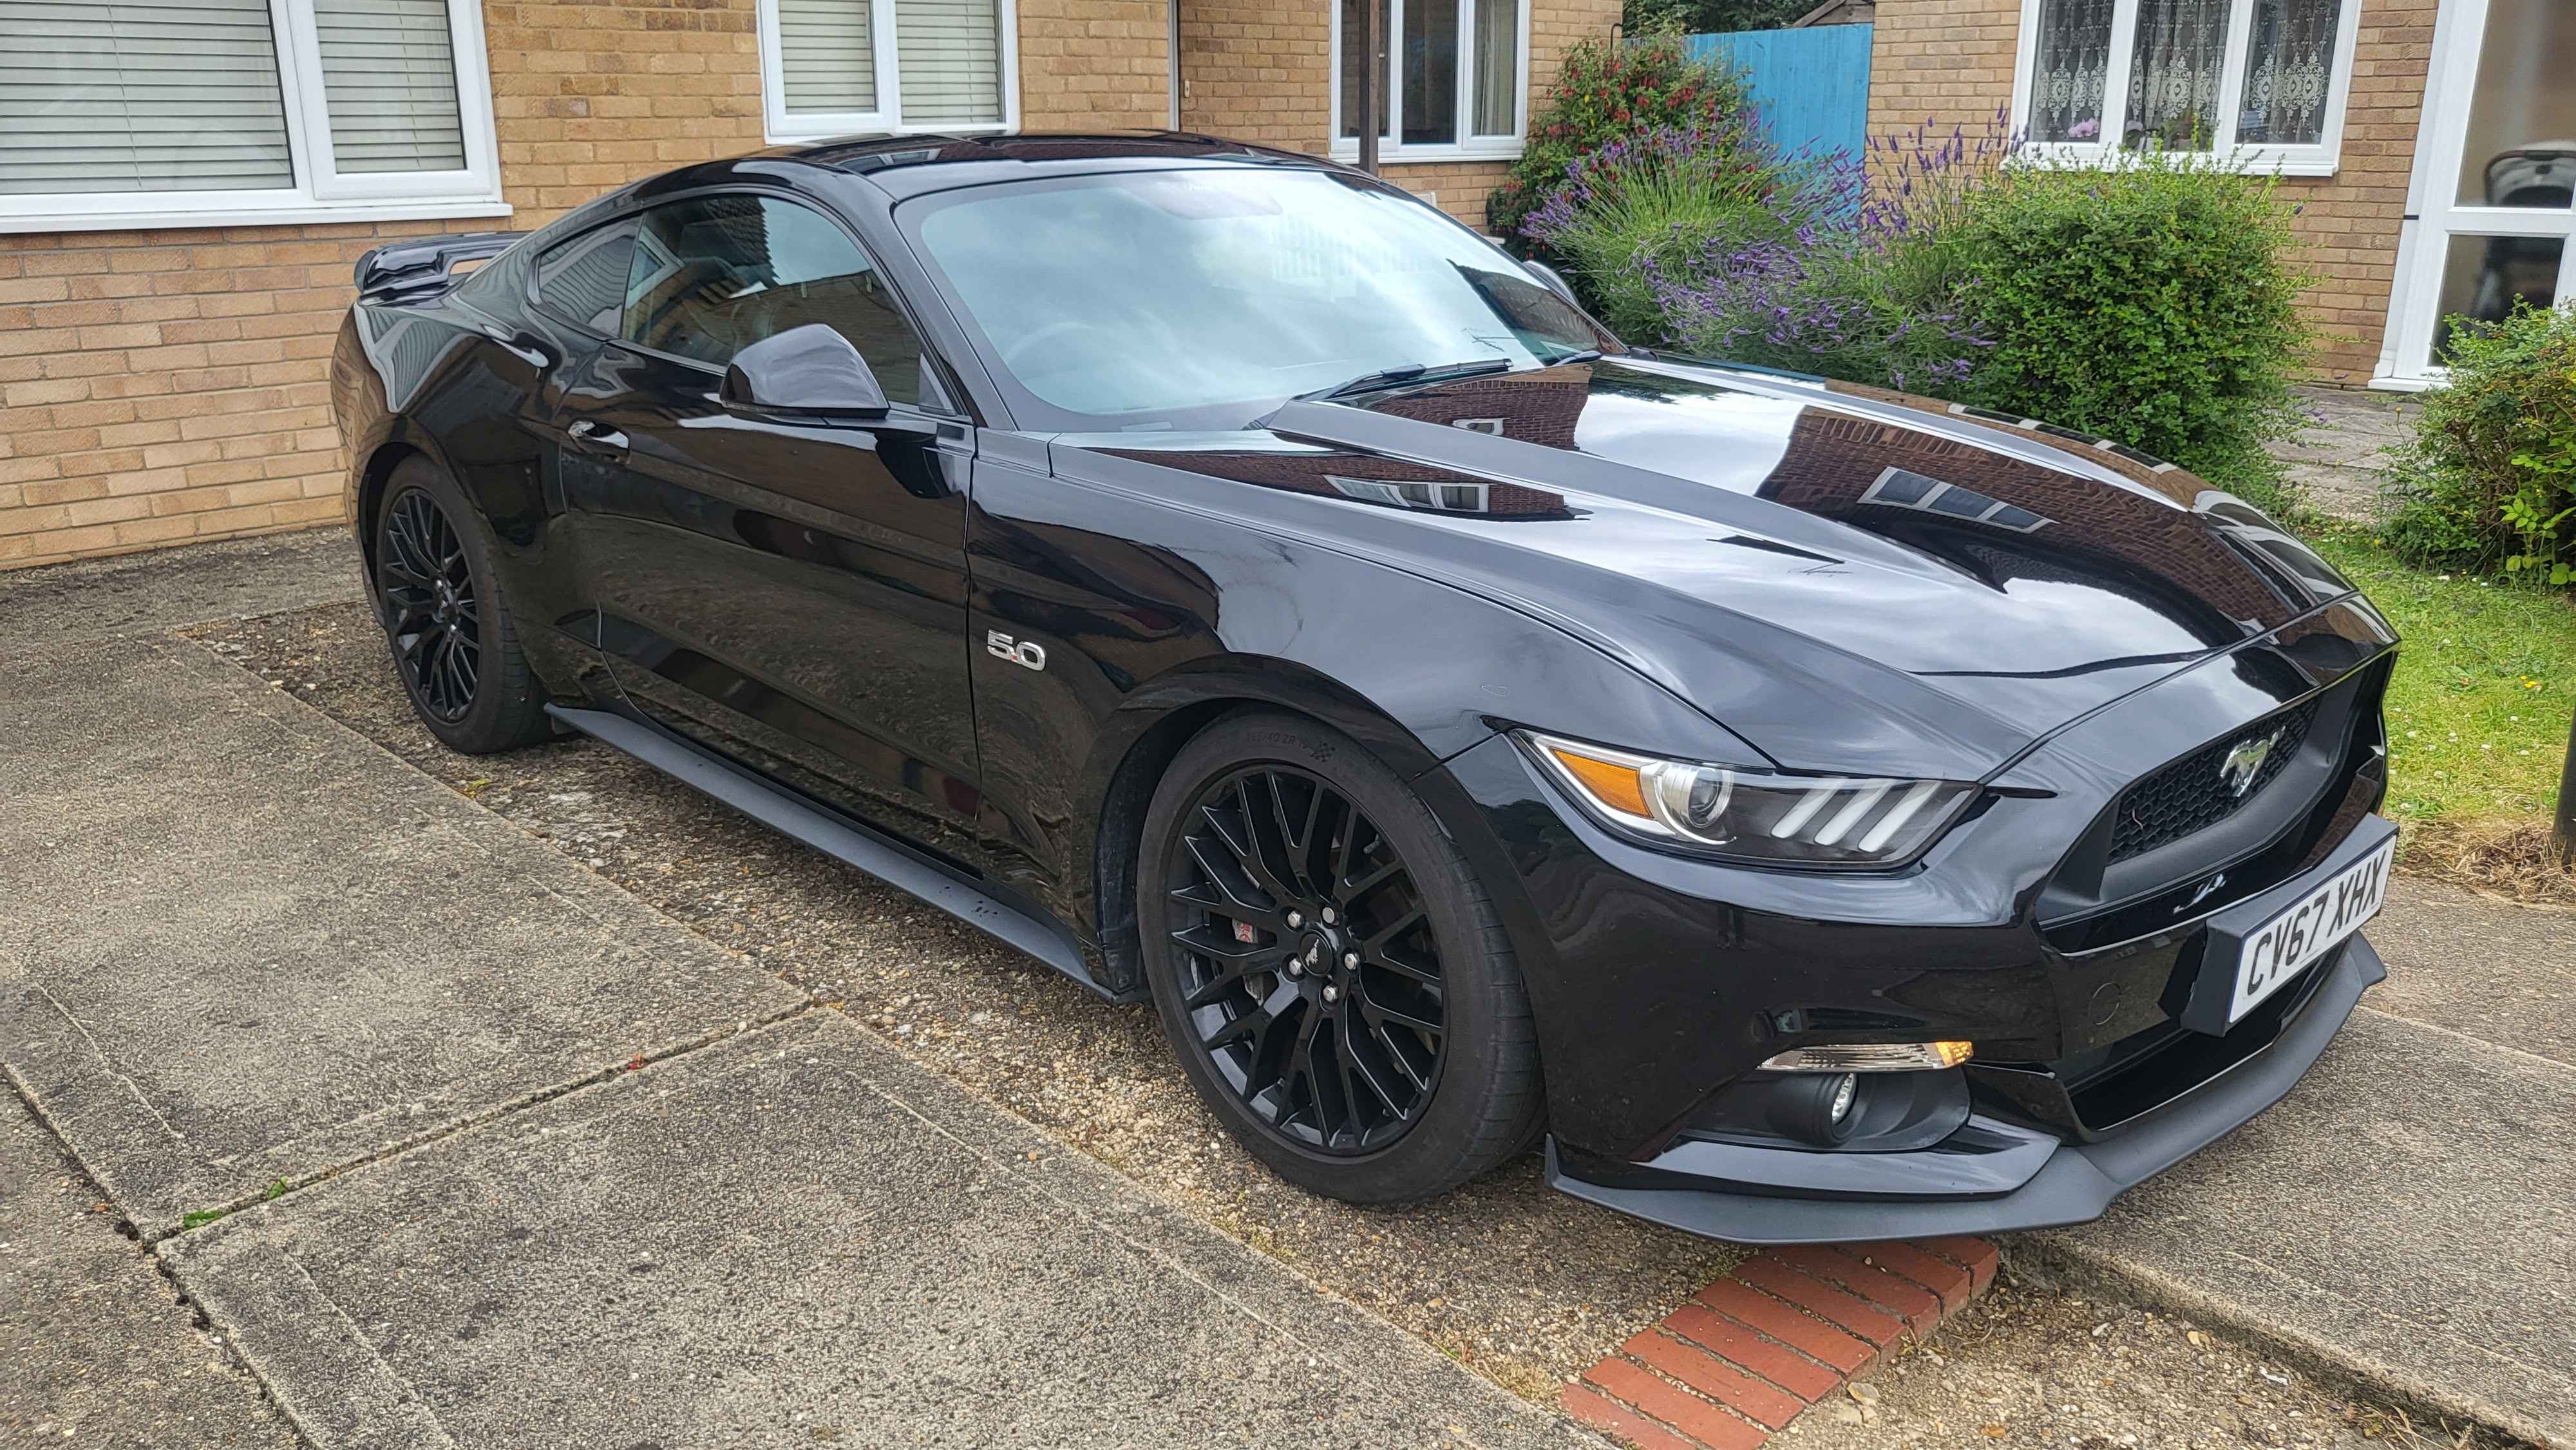
1. Take basic ass Mustang
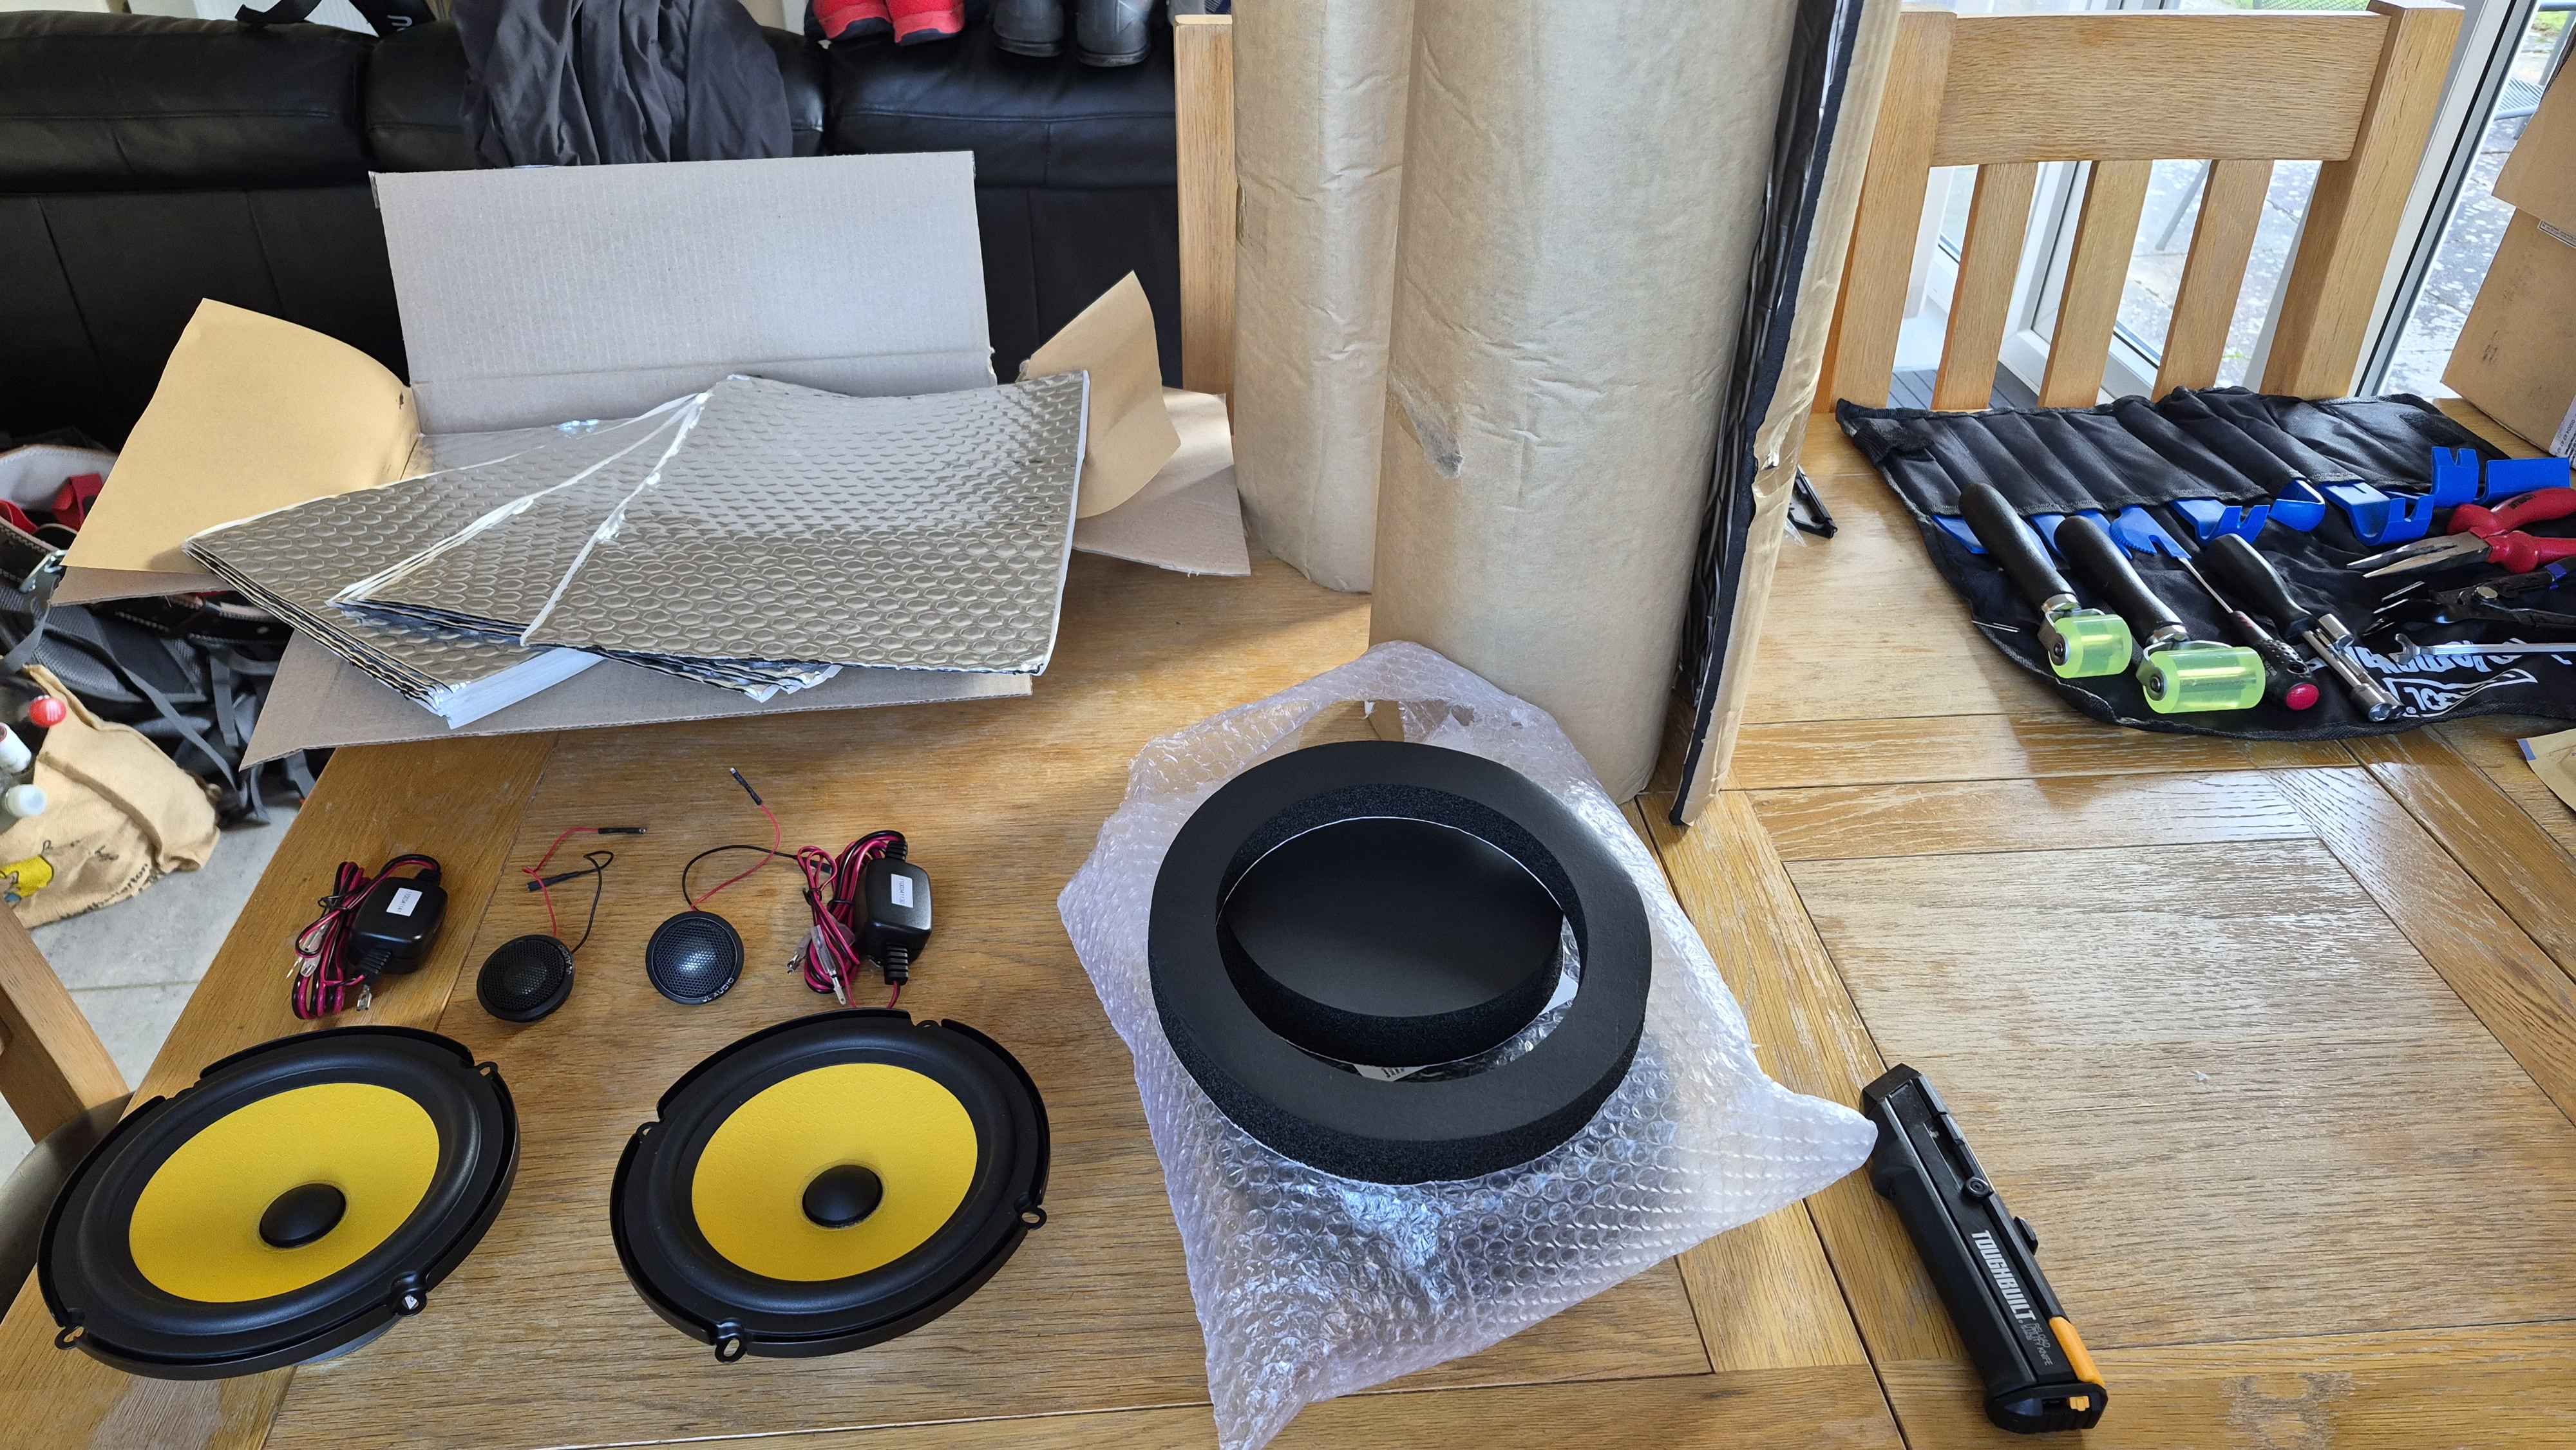
2. Take some basic upgrade parts (Front Component speakers and sound deadening/damping)
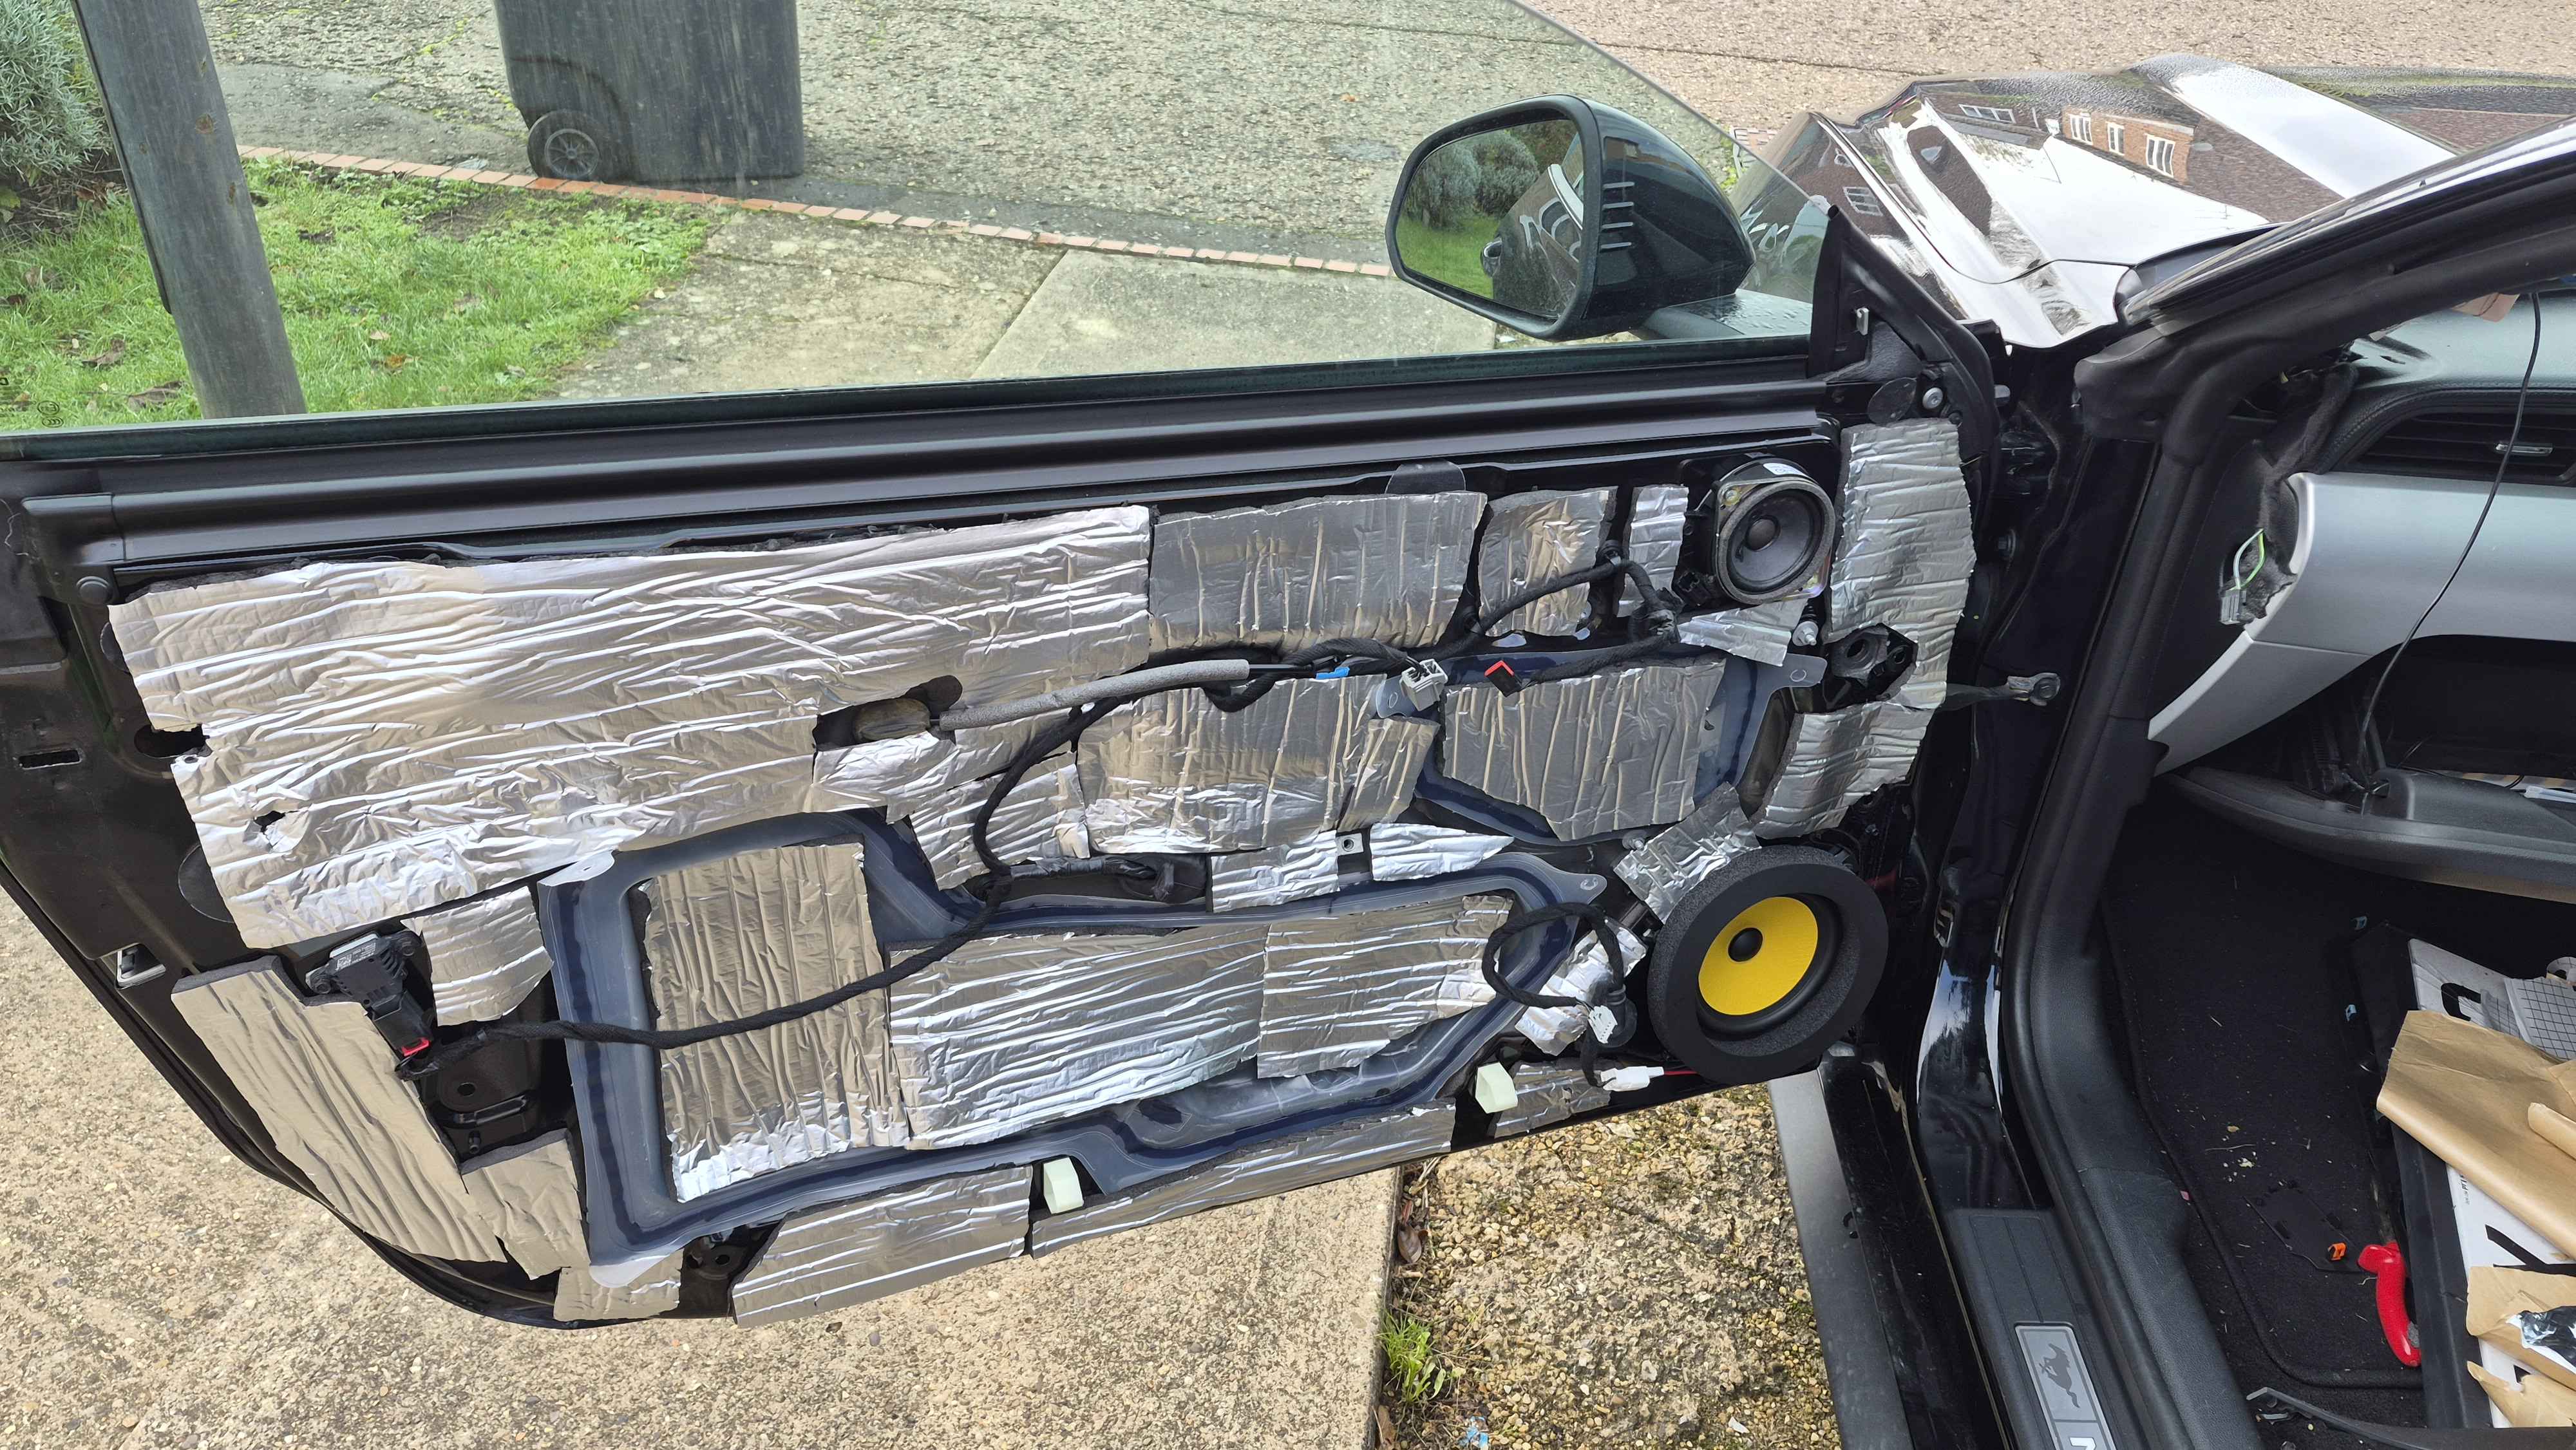
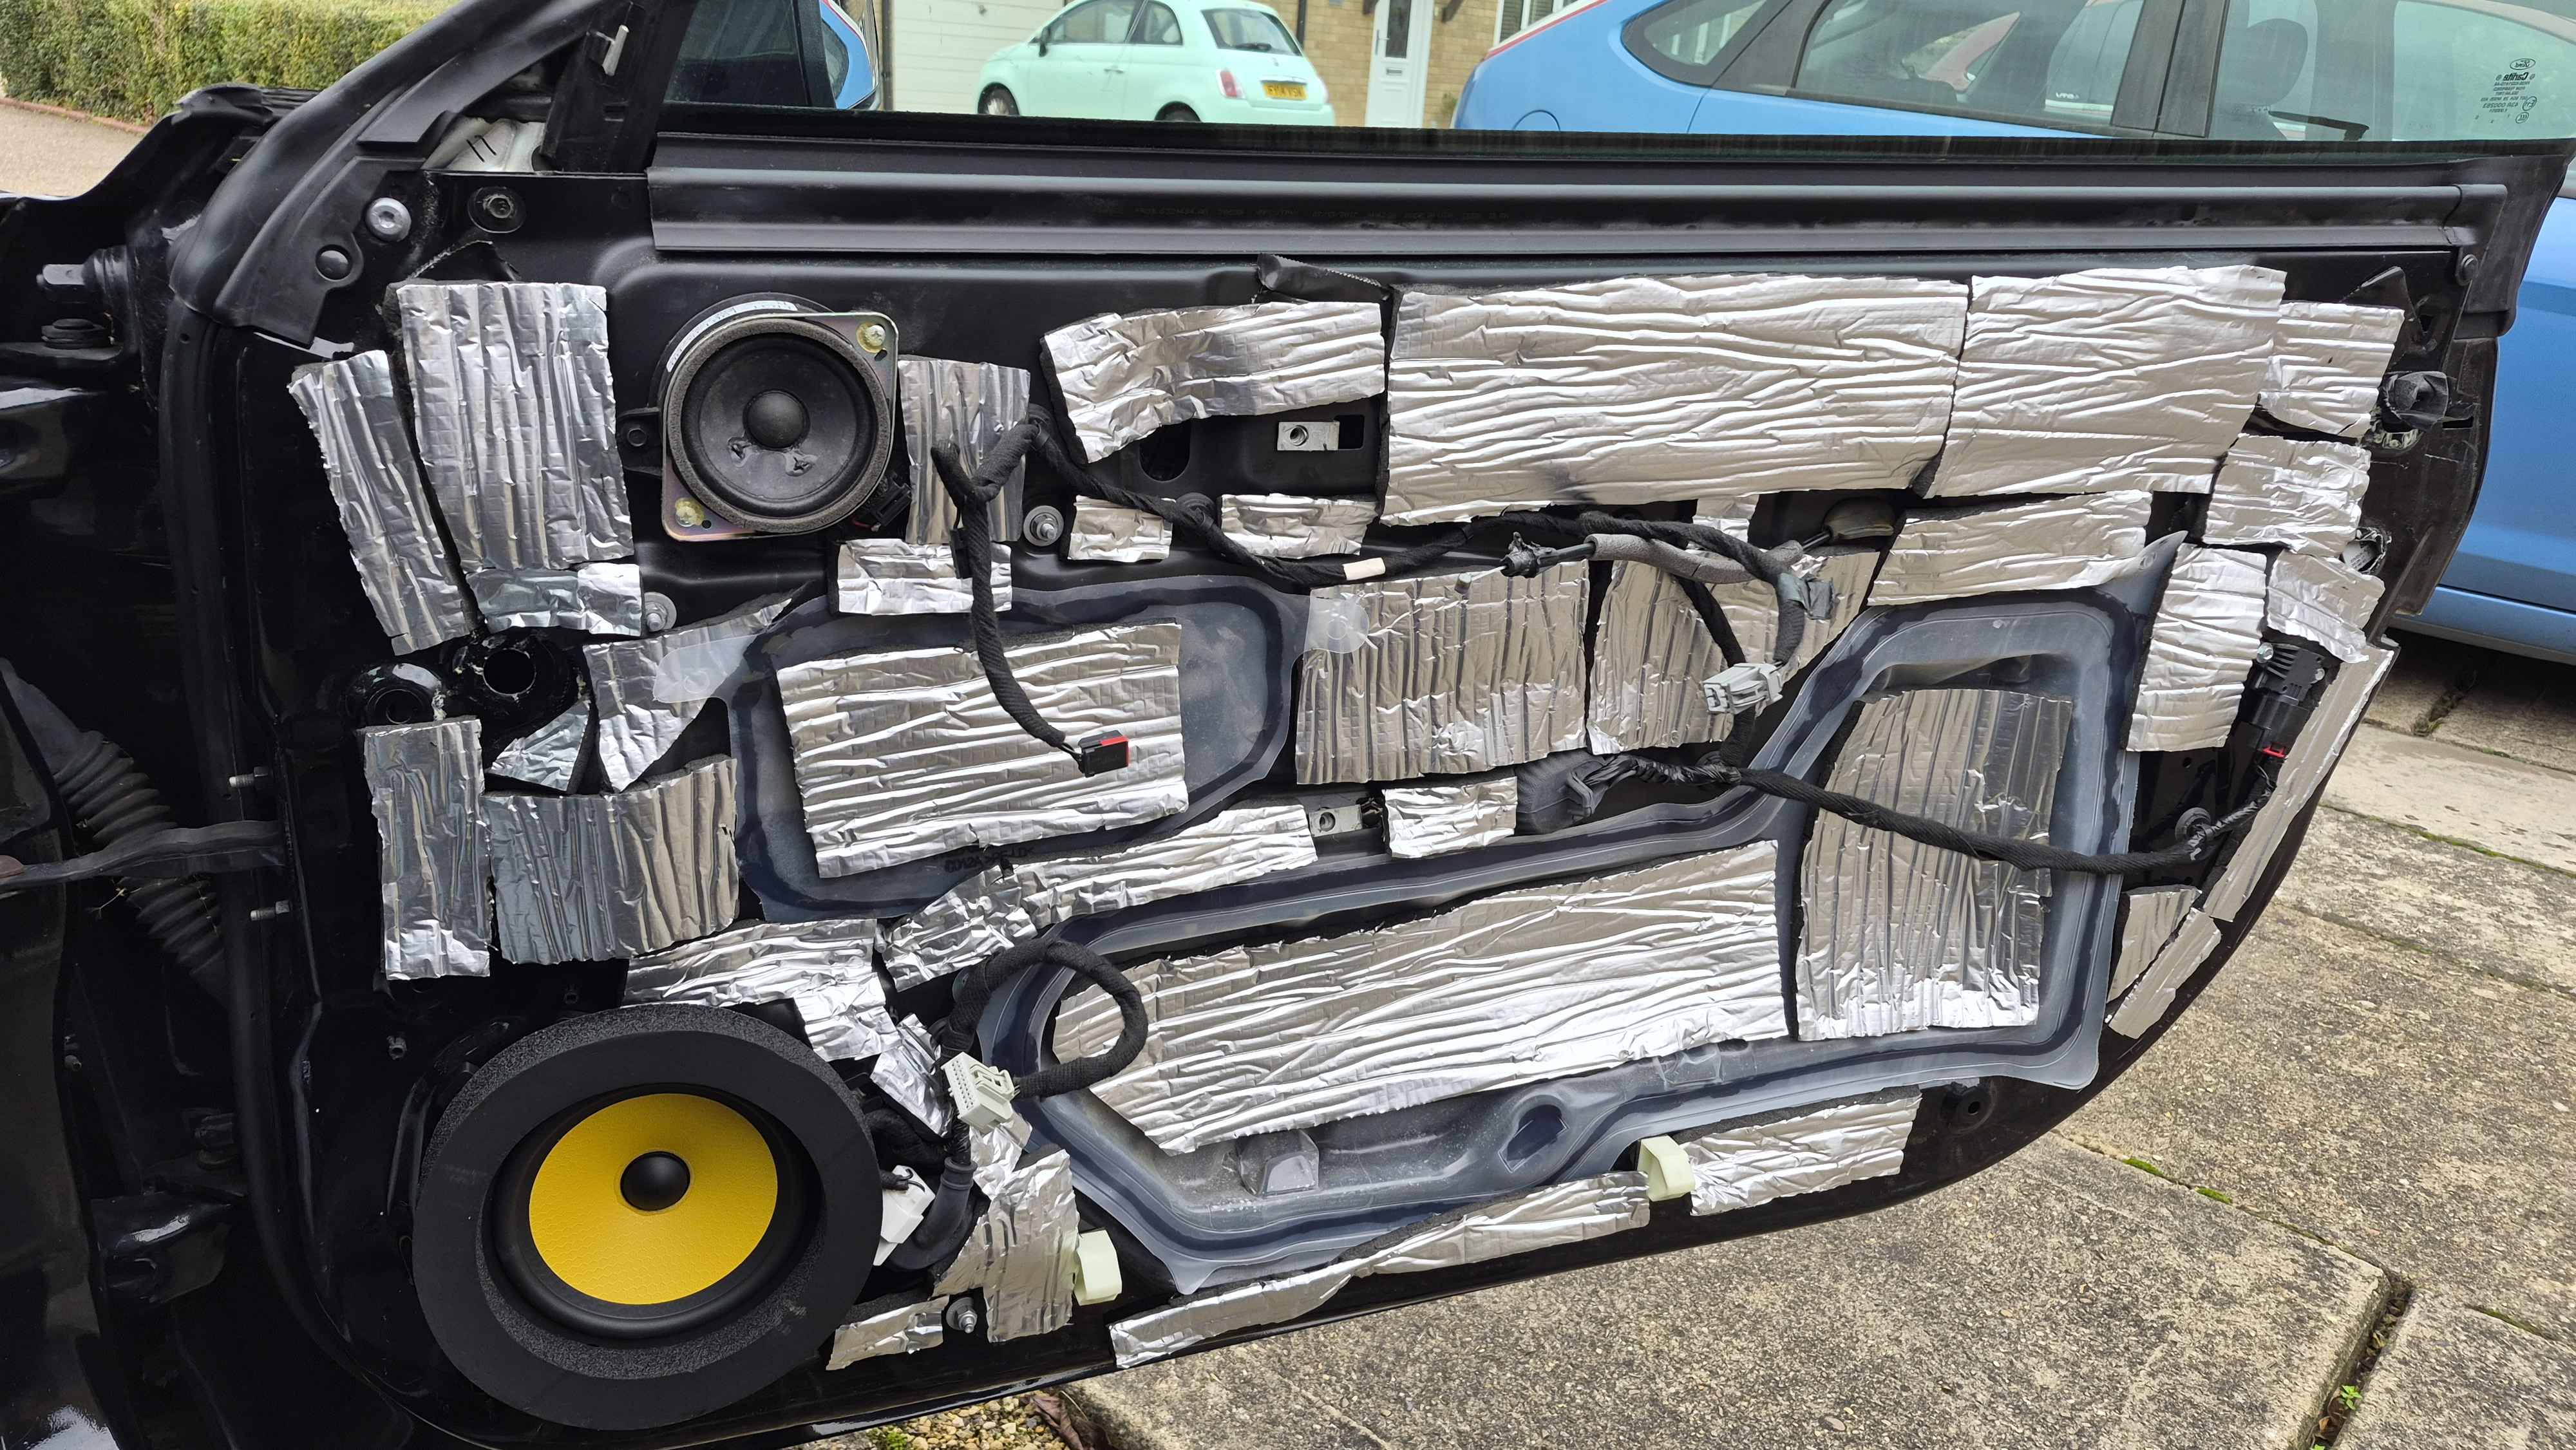
3. Strip doors and put in Deadening material on external panels (outer skin of the doors) and replace speakers
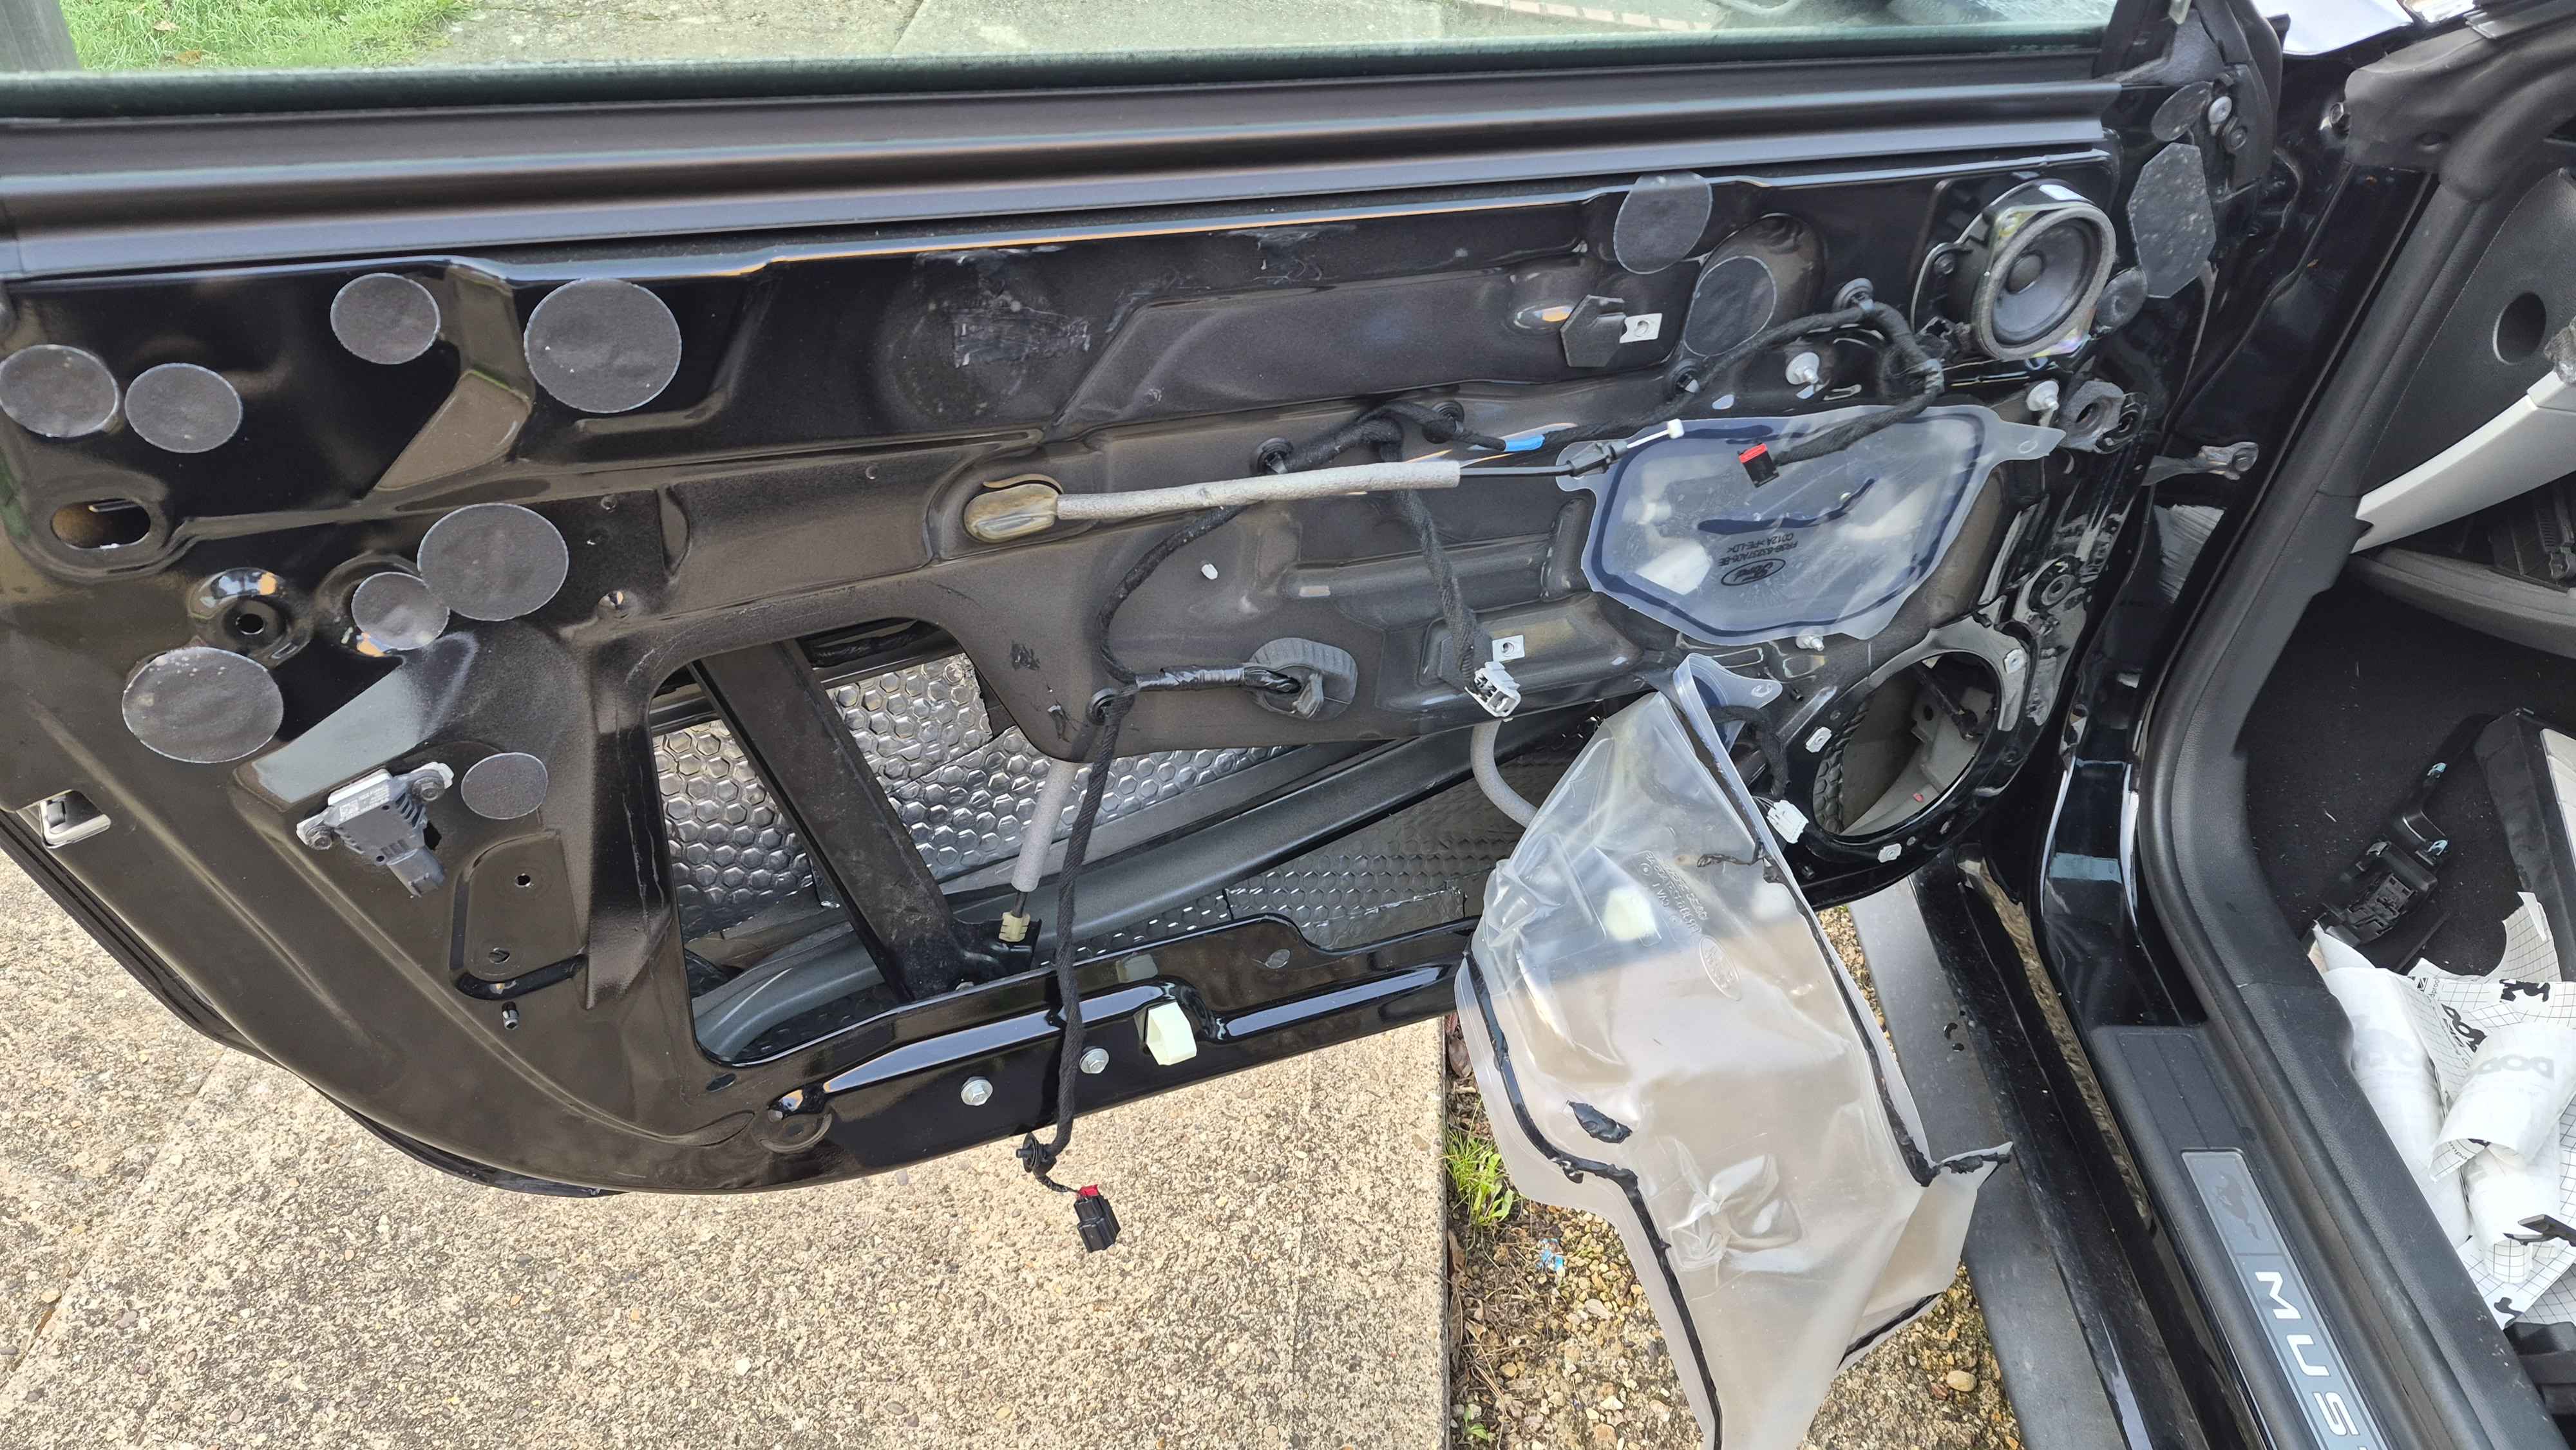
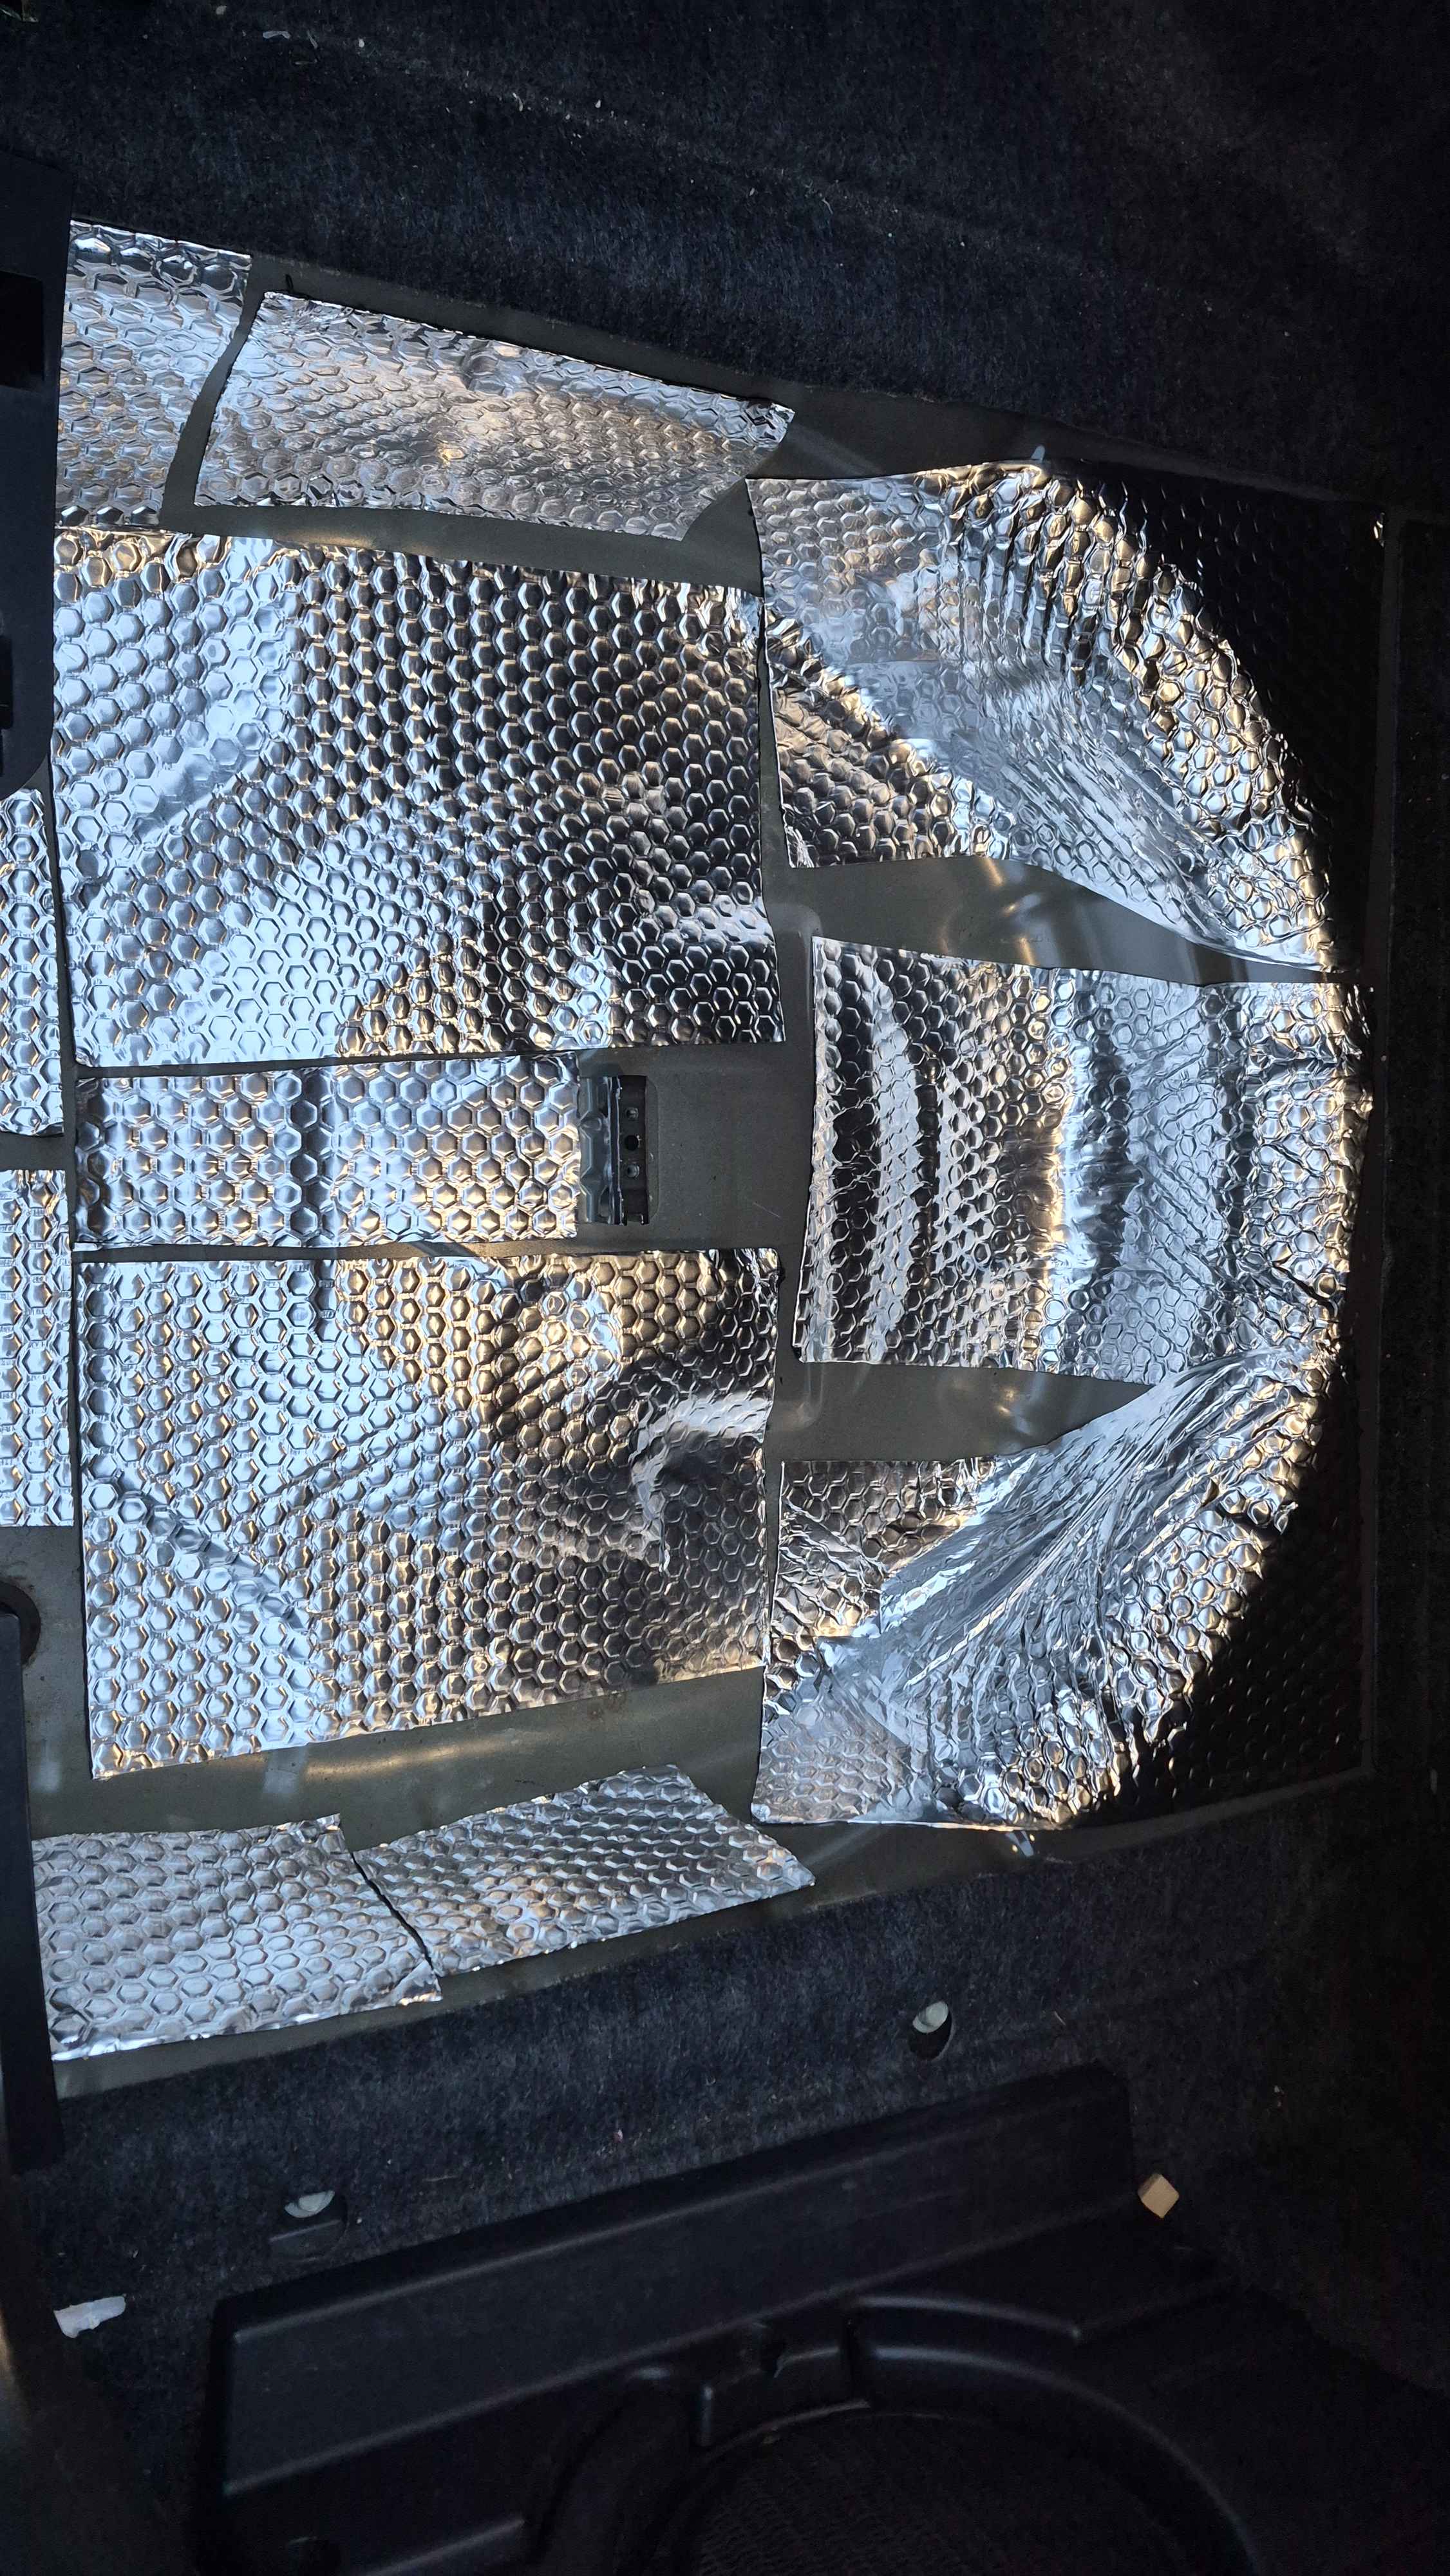
I overshot the foam insulation on this one... and working with large pieces to try and cut holes out the middle was a real pain in the ass... so the next door I used smaller pieces
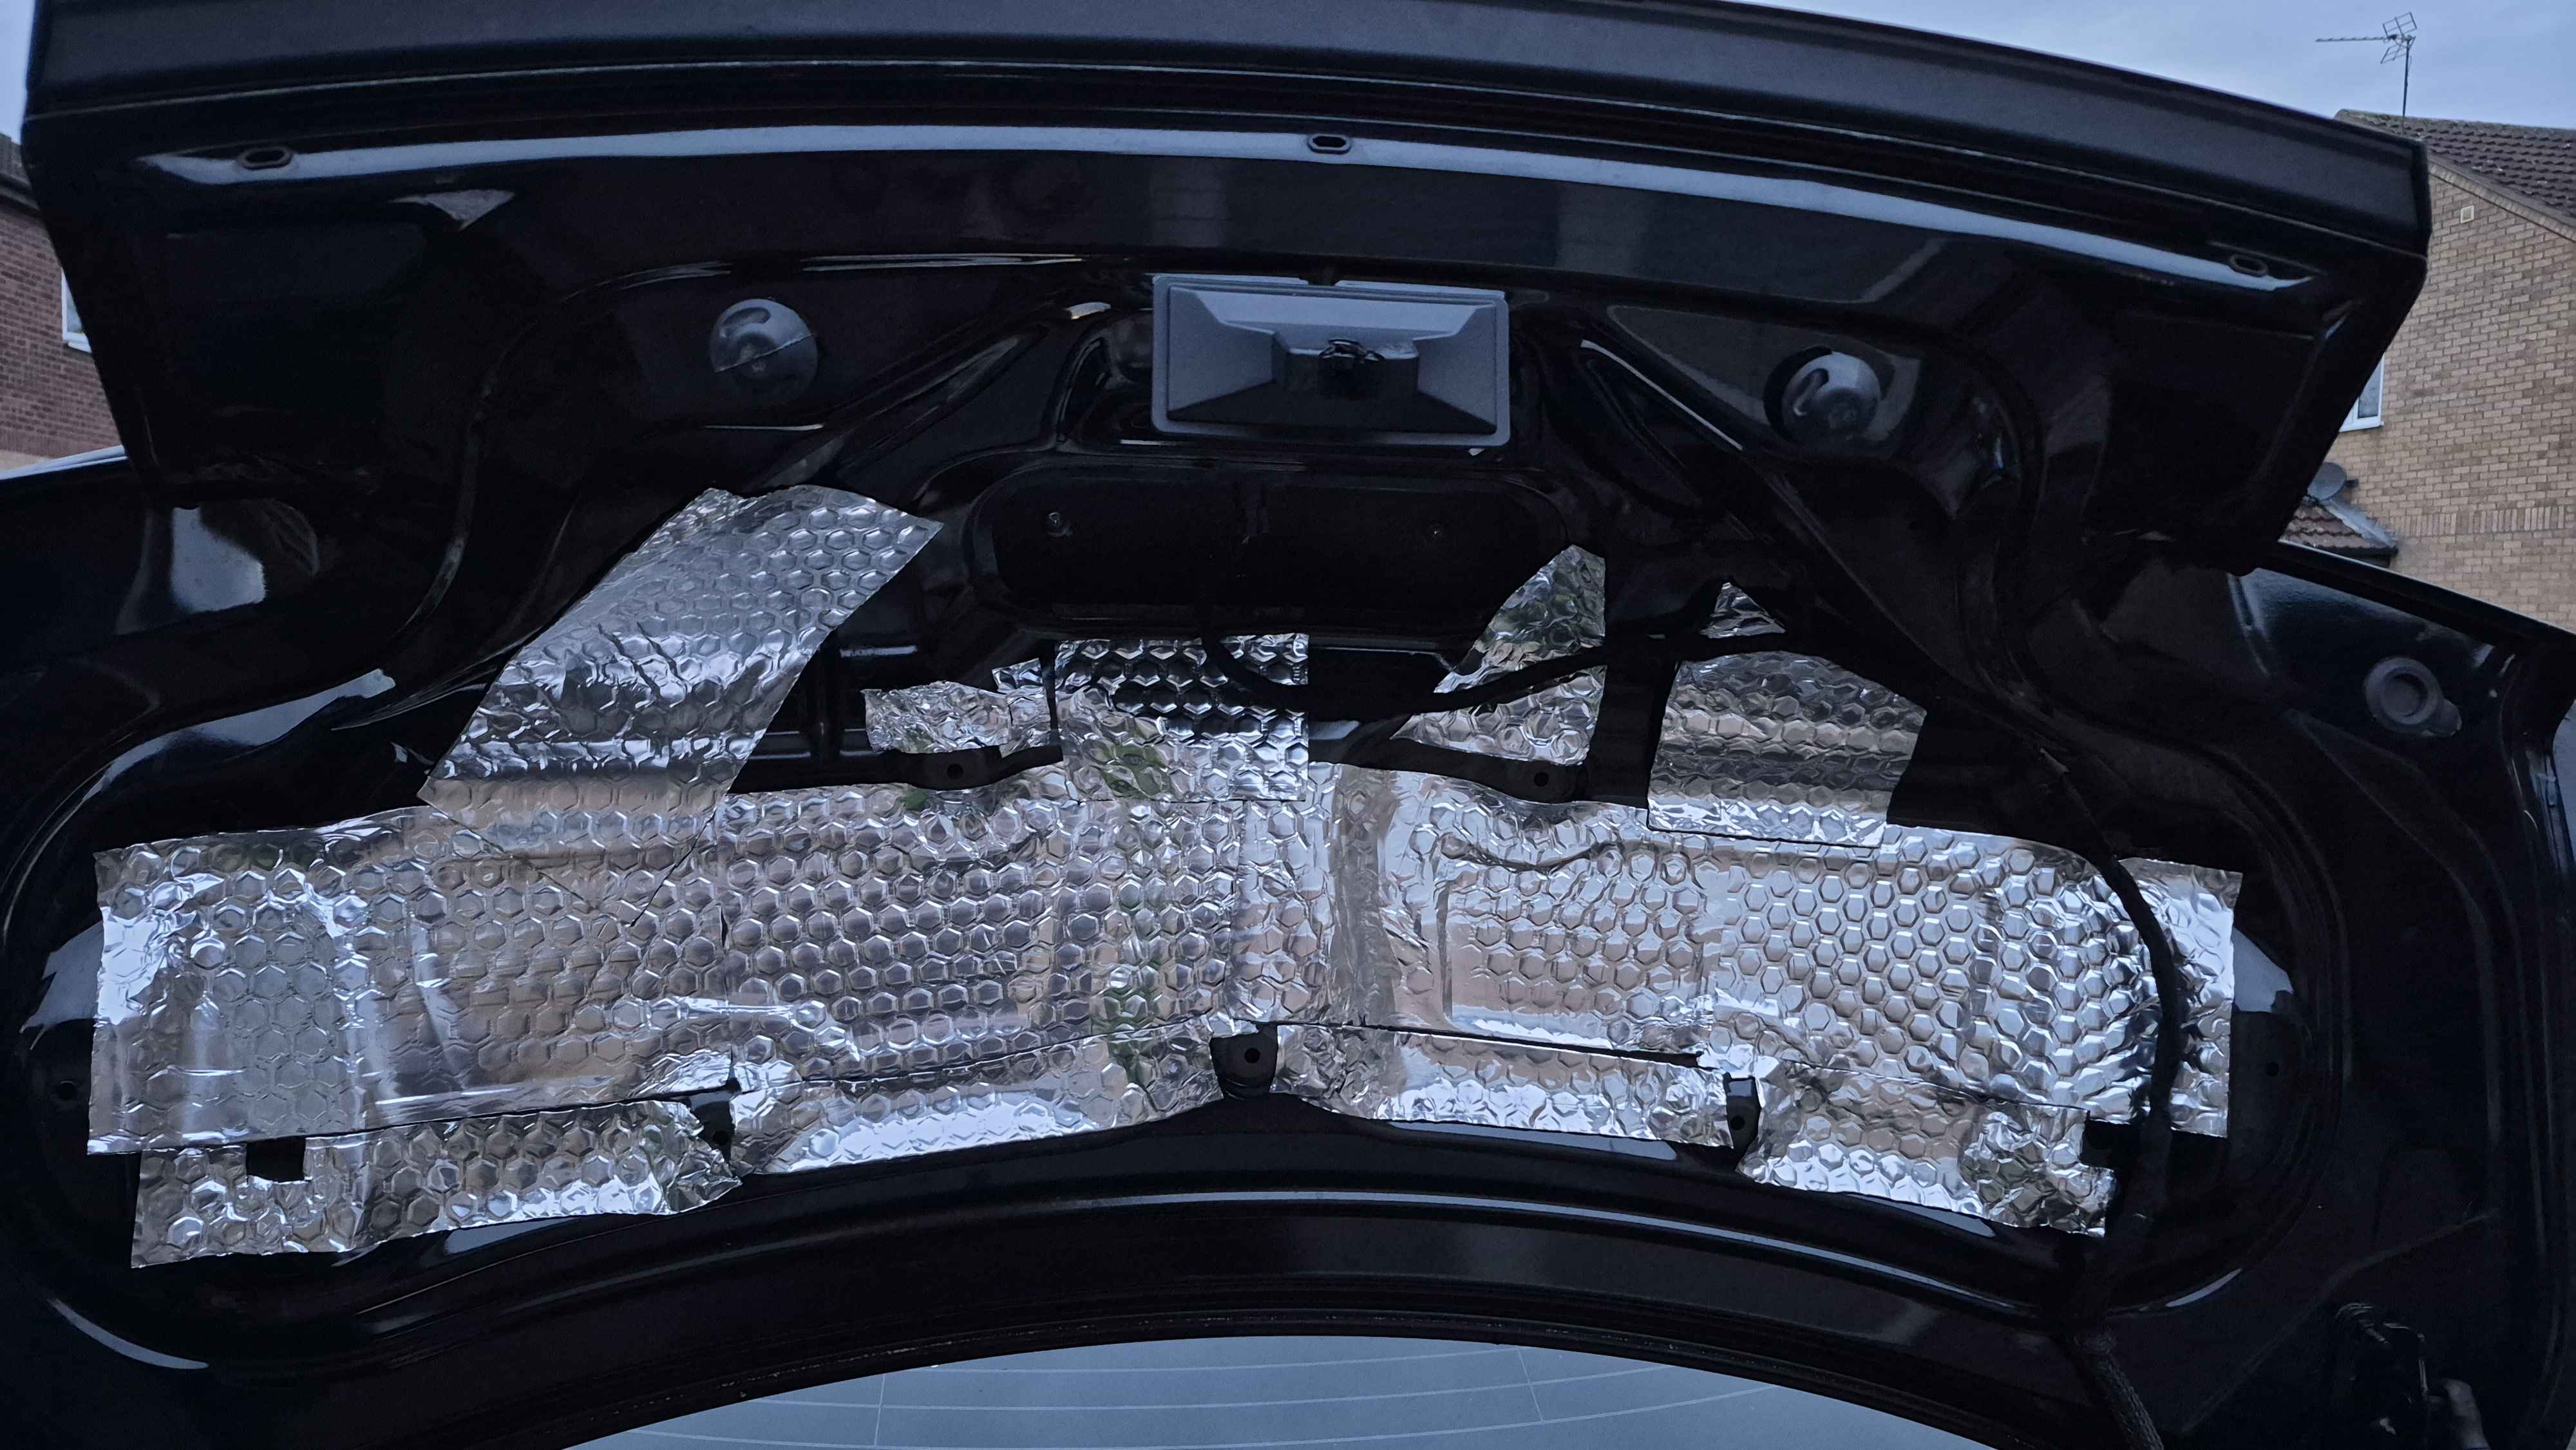
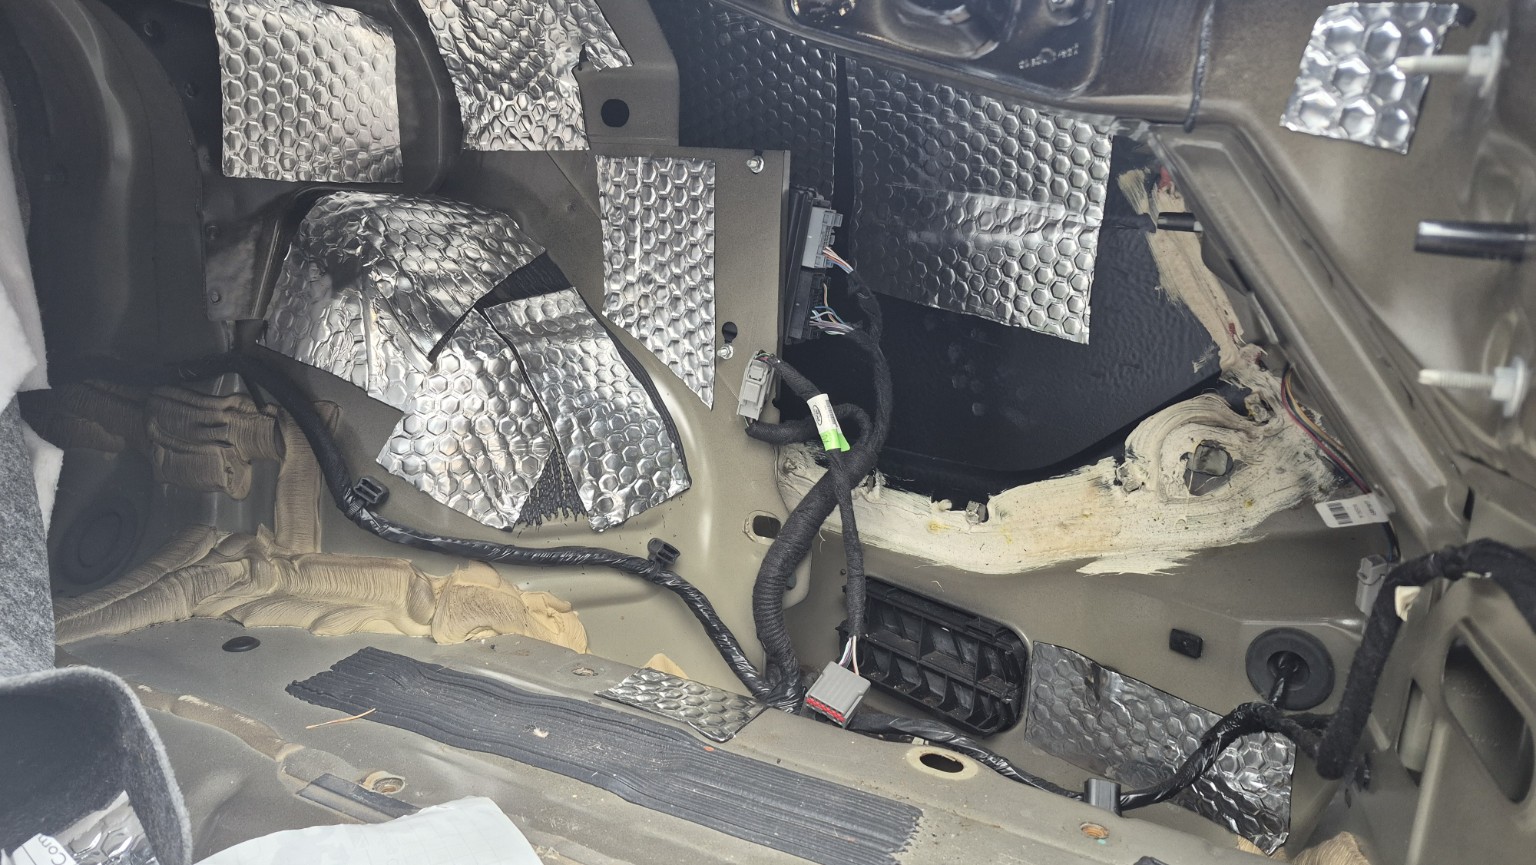
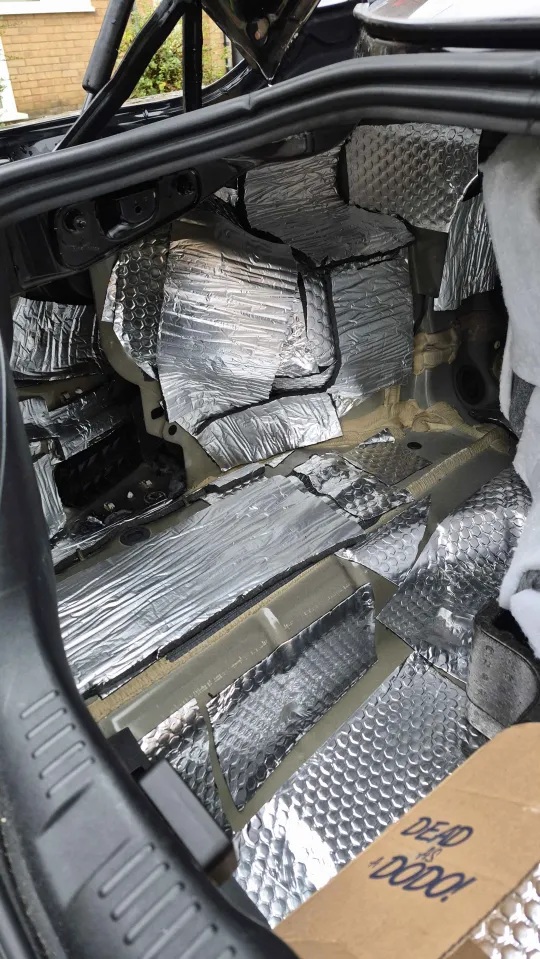
4. Use the extra deadening material in high value areas: Spare wheel well, Boot lid, Rear quarter panels (wheel arches especially)

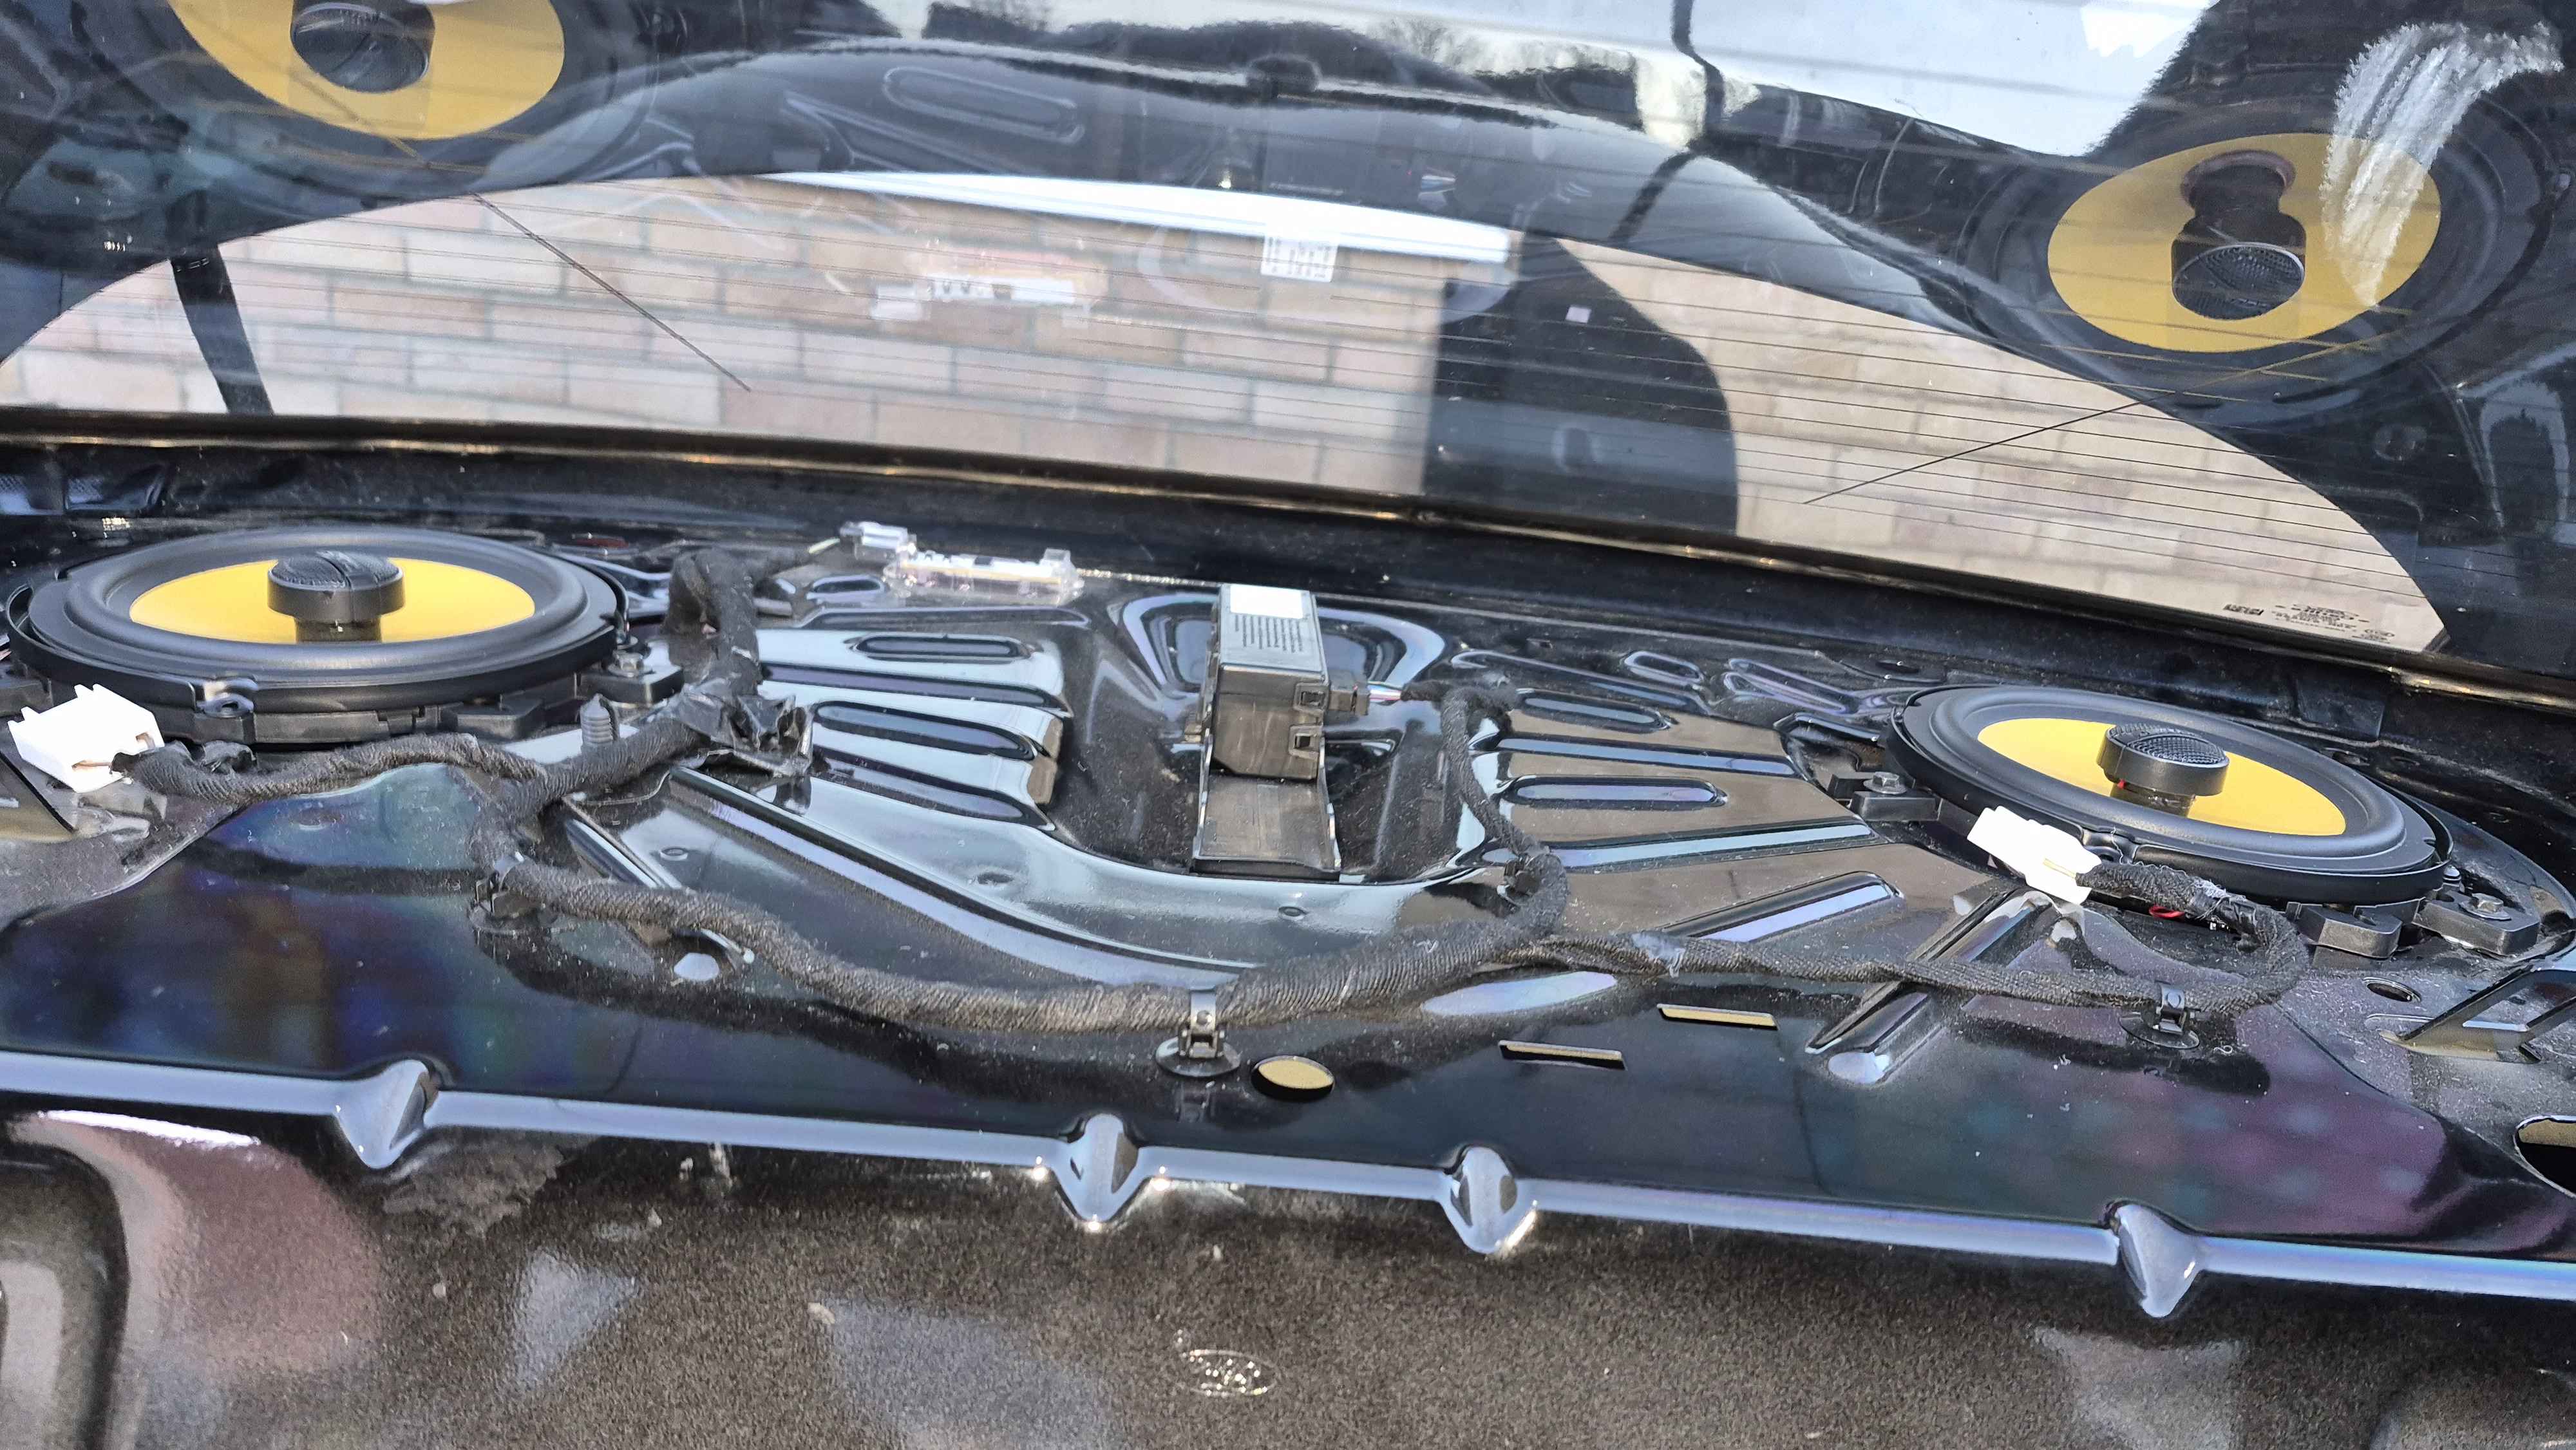
5. New parcel shelf speakers in
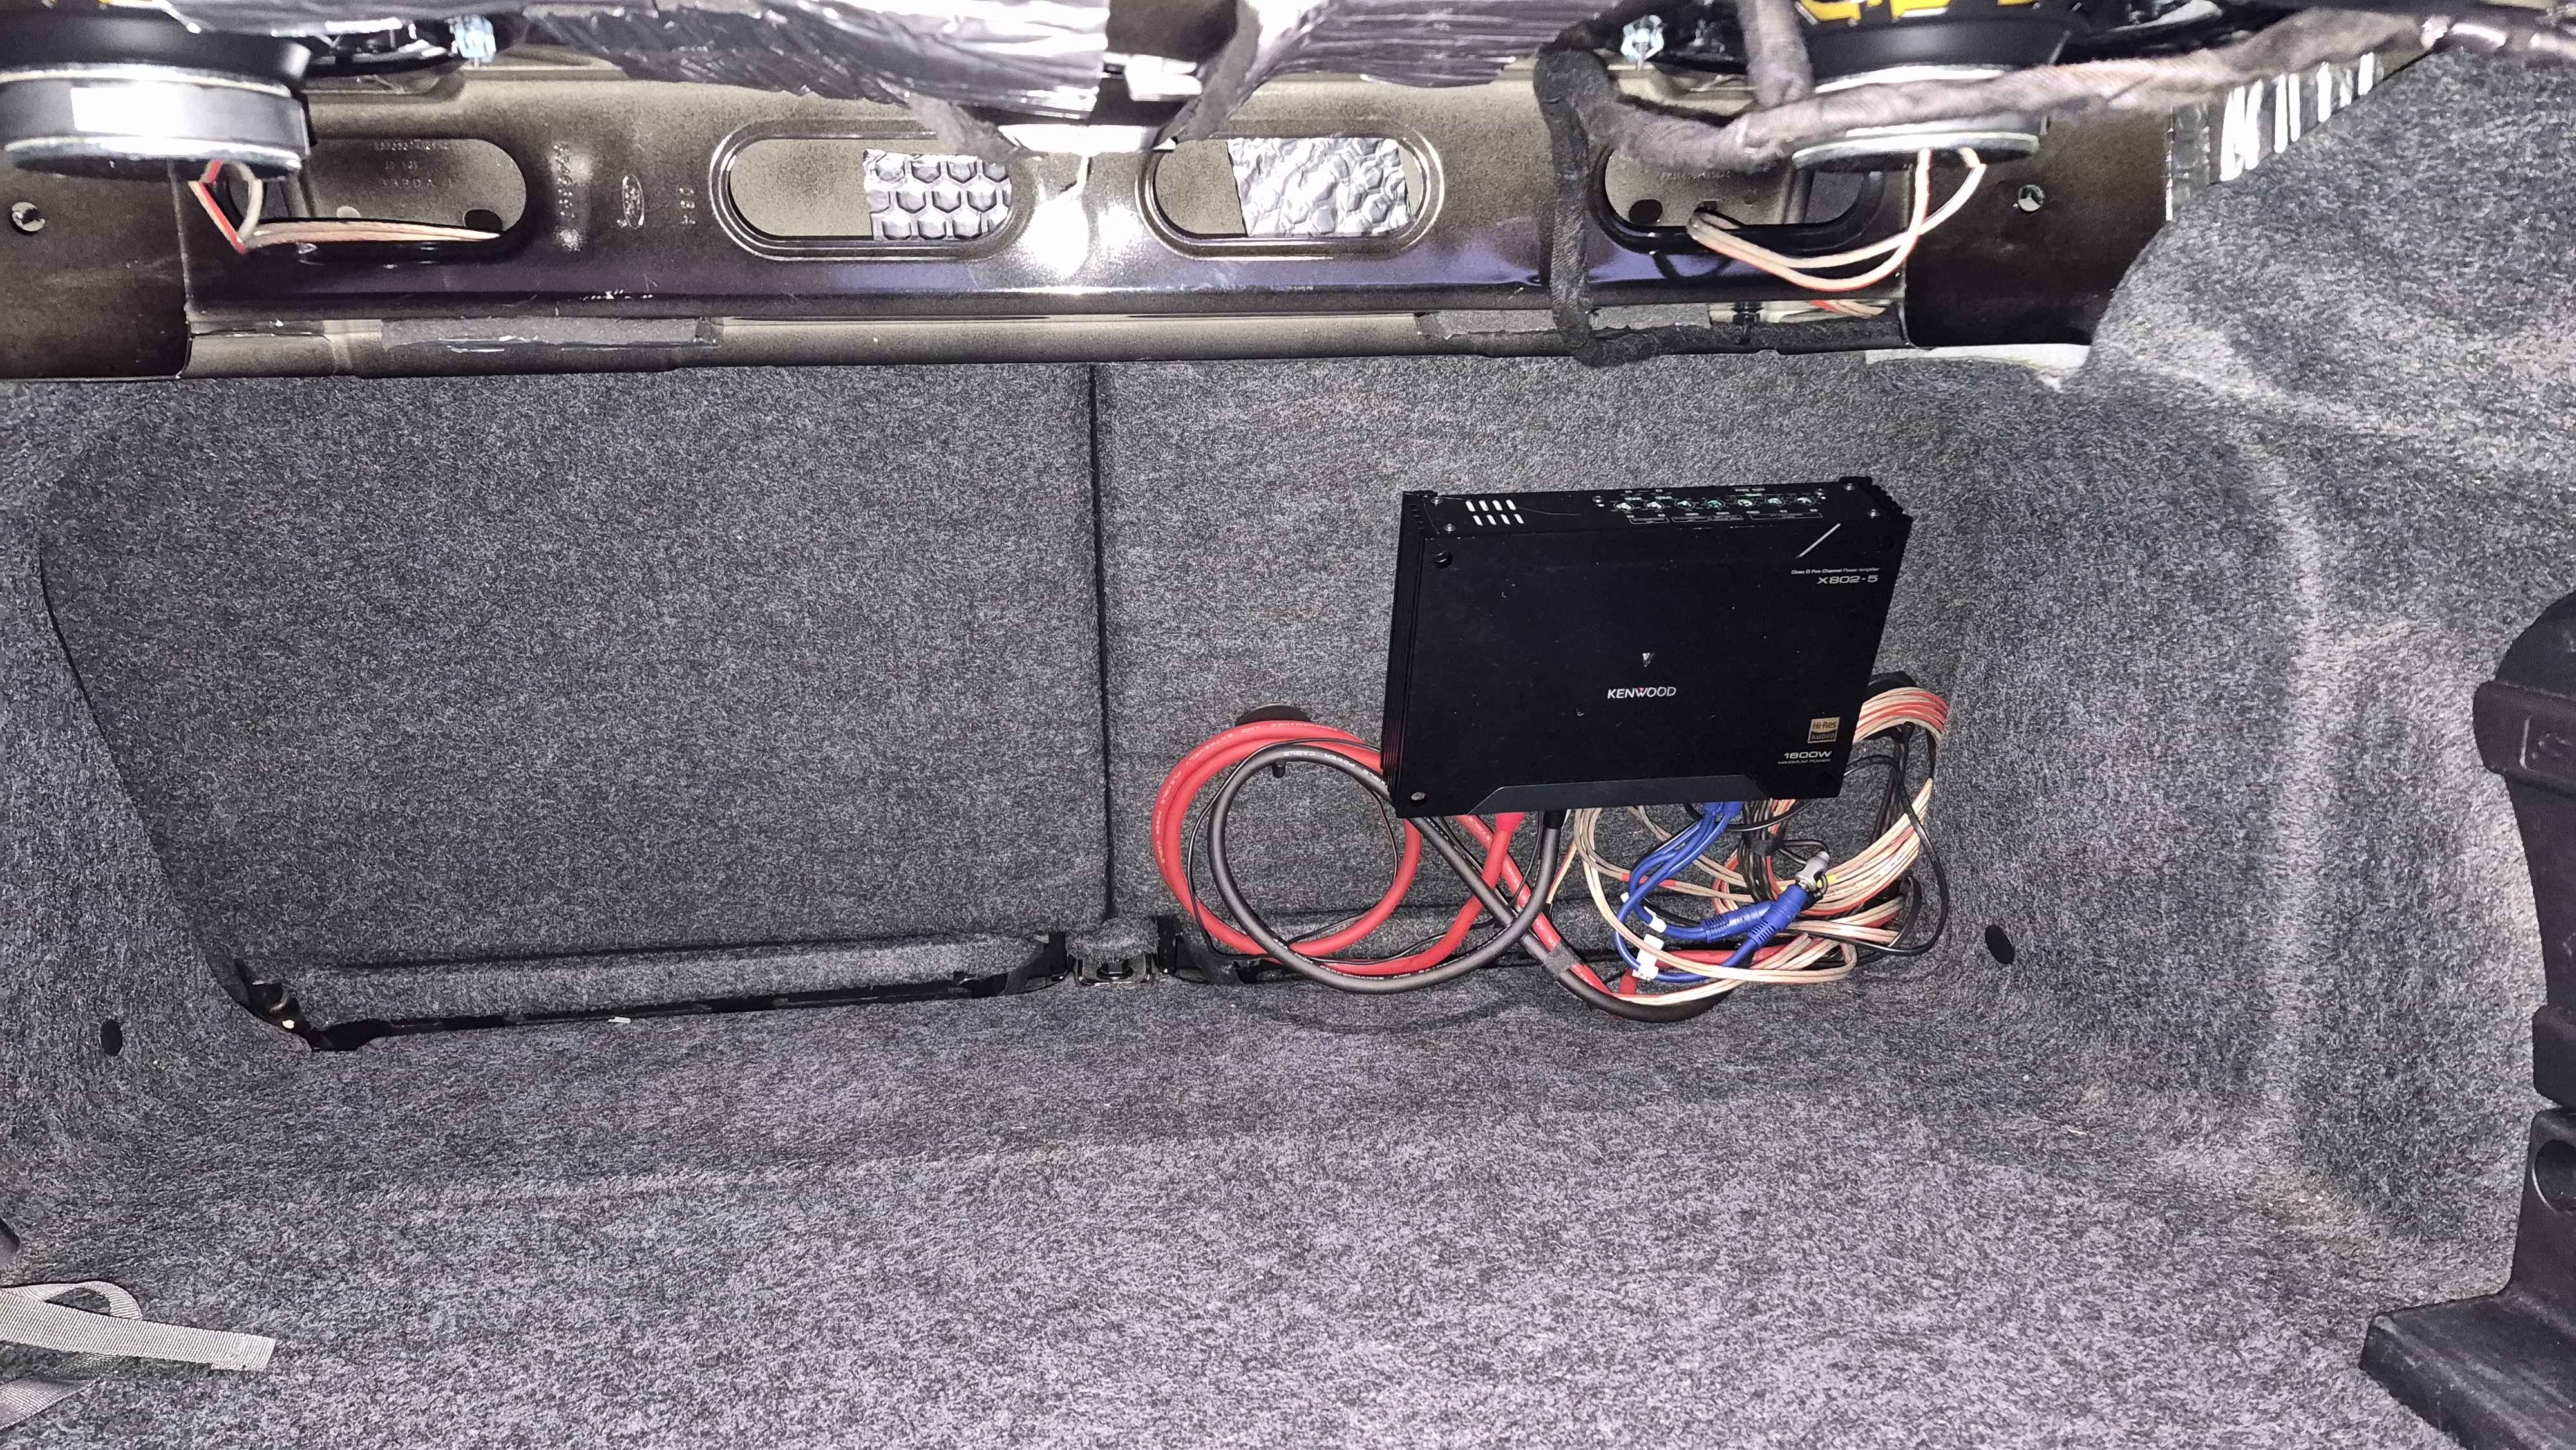
6. Amp in, mounted on the rear seat so it's easy to work on (you'll see)

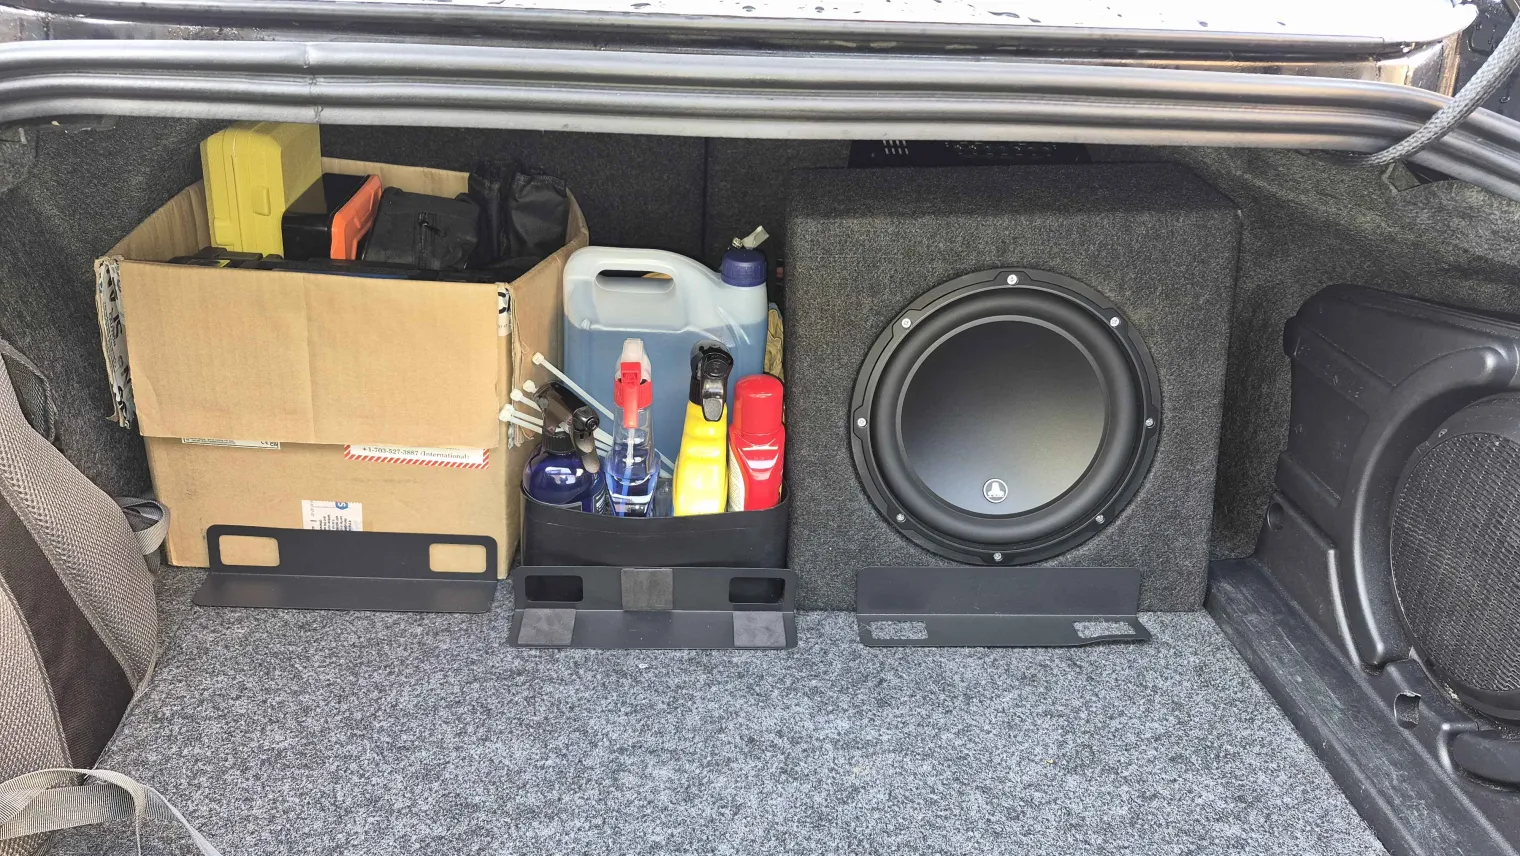
7. Subwoofer in and my tools and **** neatly stored (I don't have a garage)
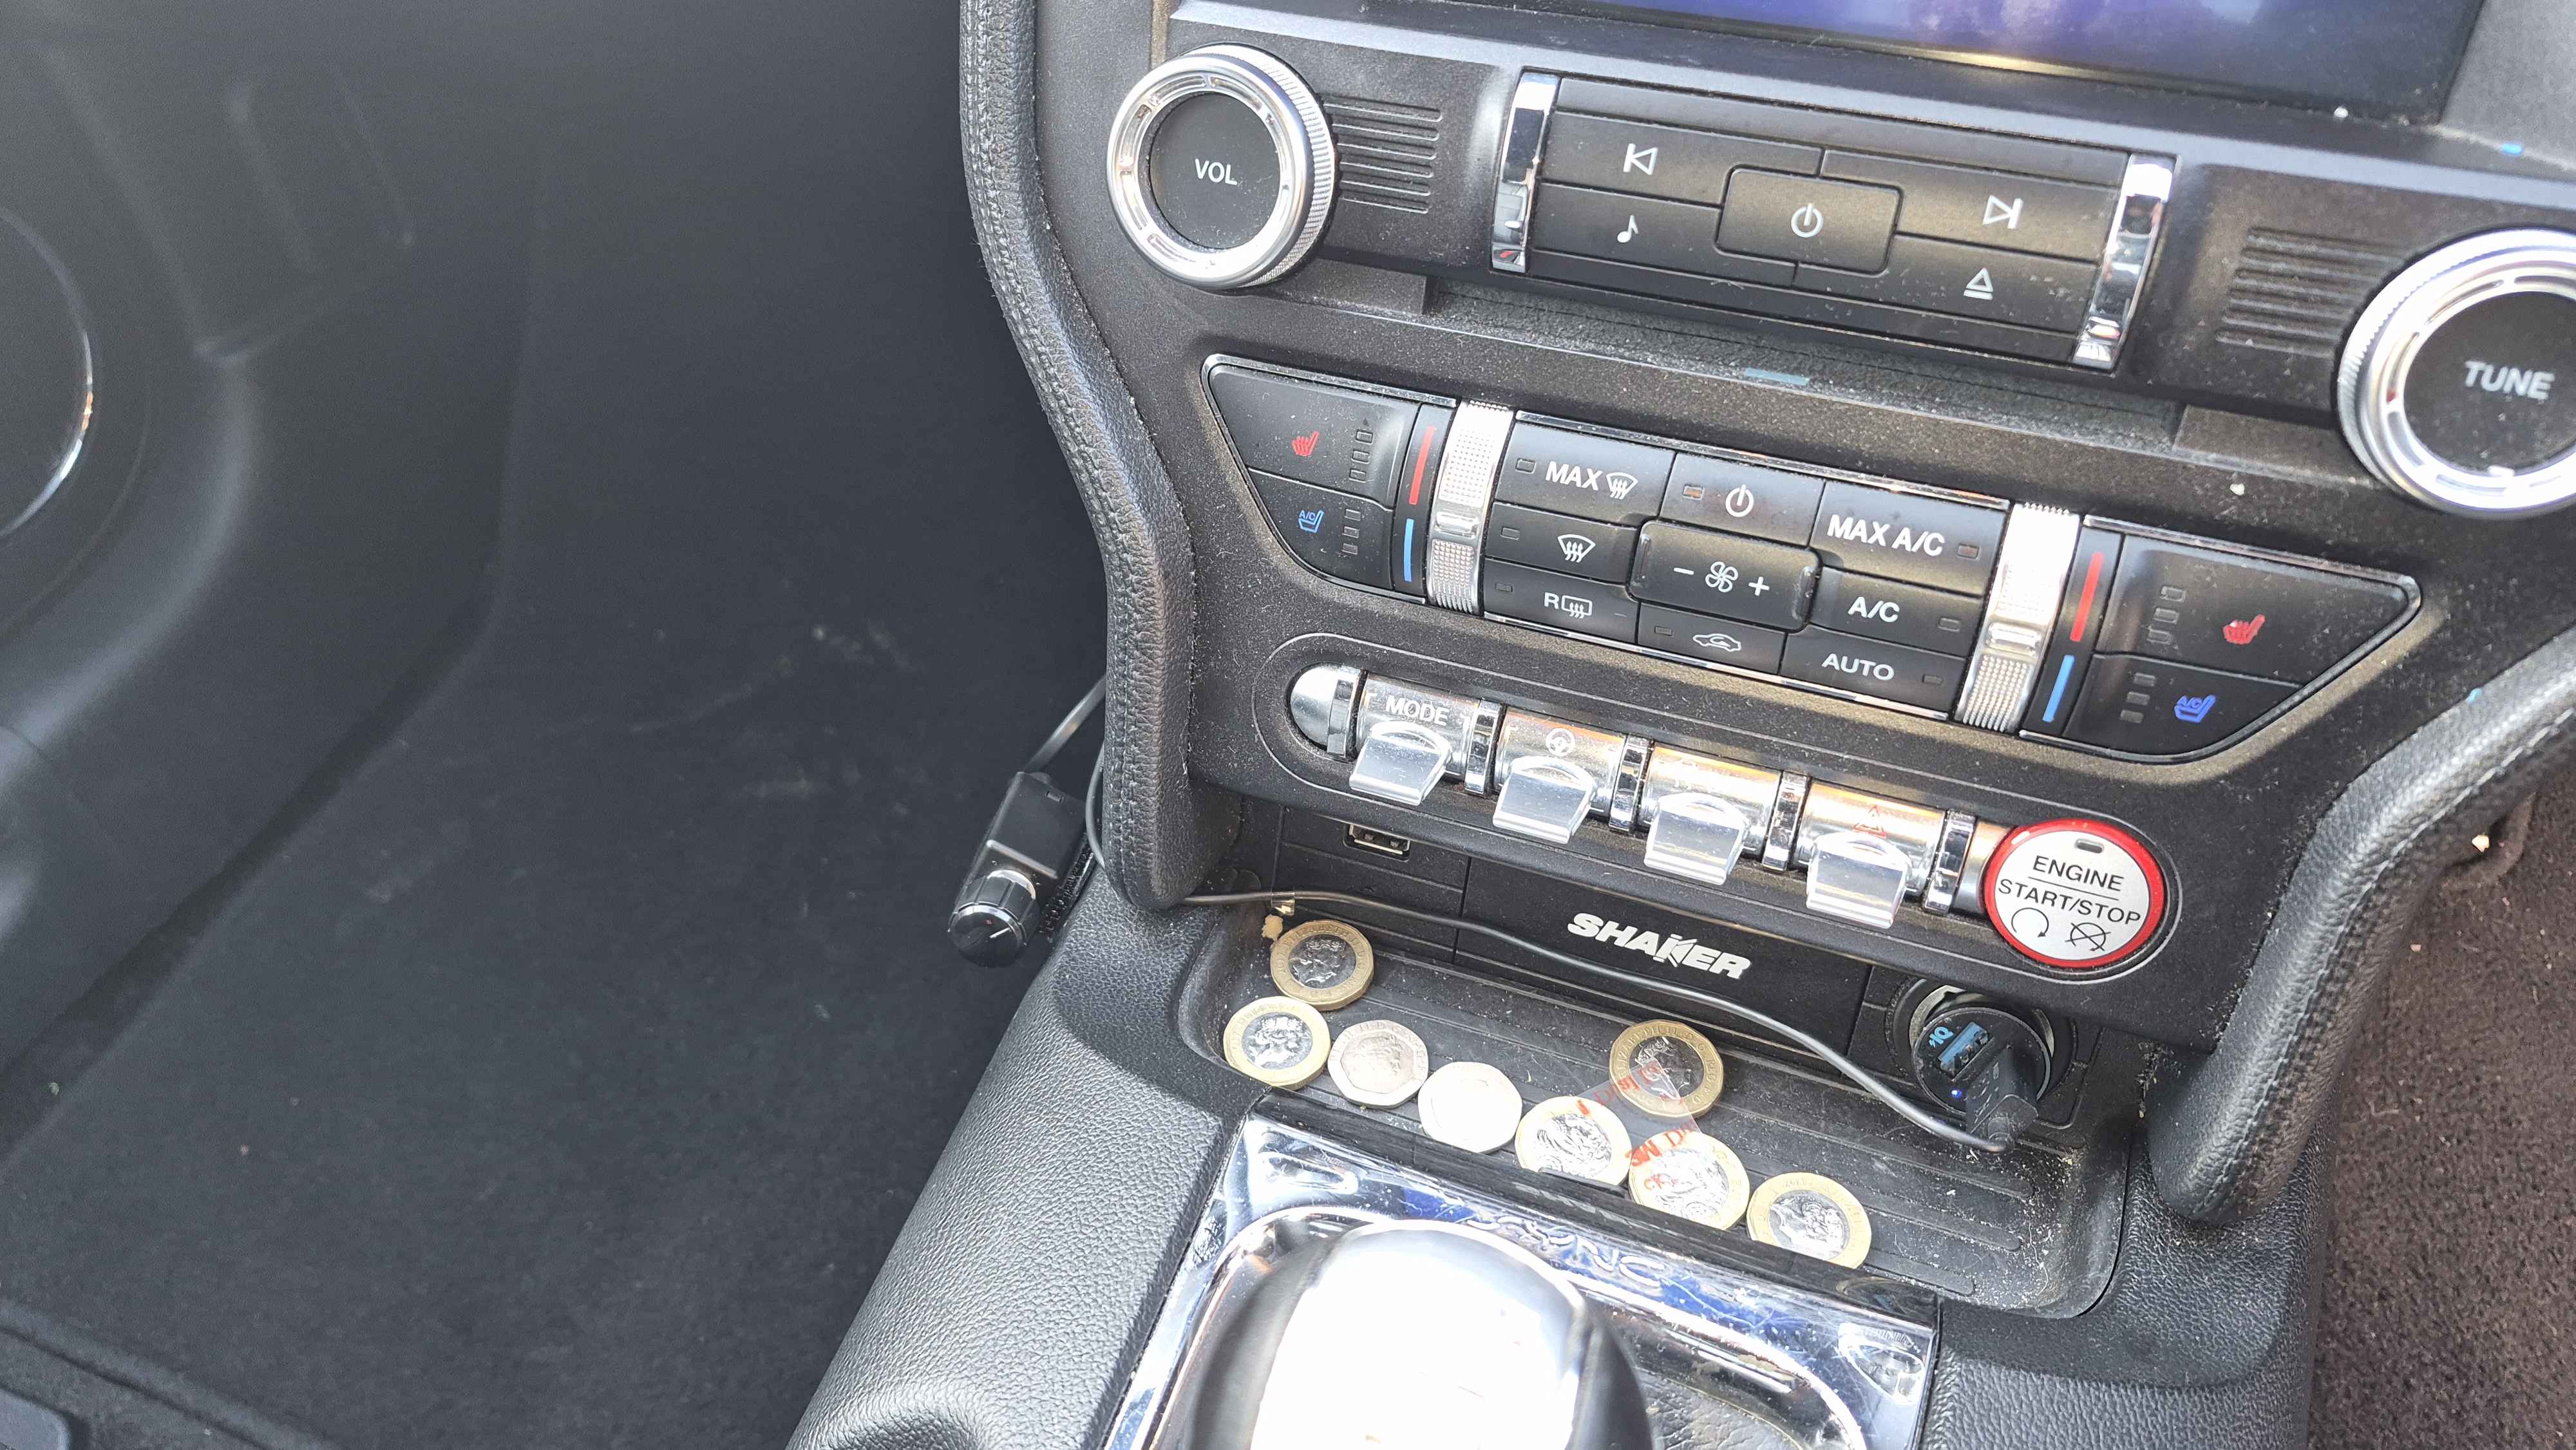
8. Bonus Subwoofer Volume knob installed
Parts list:
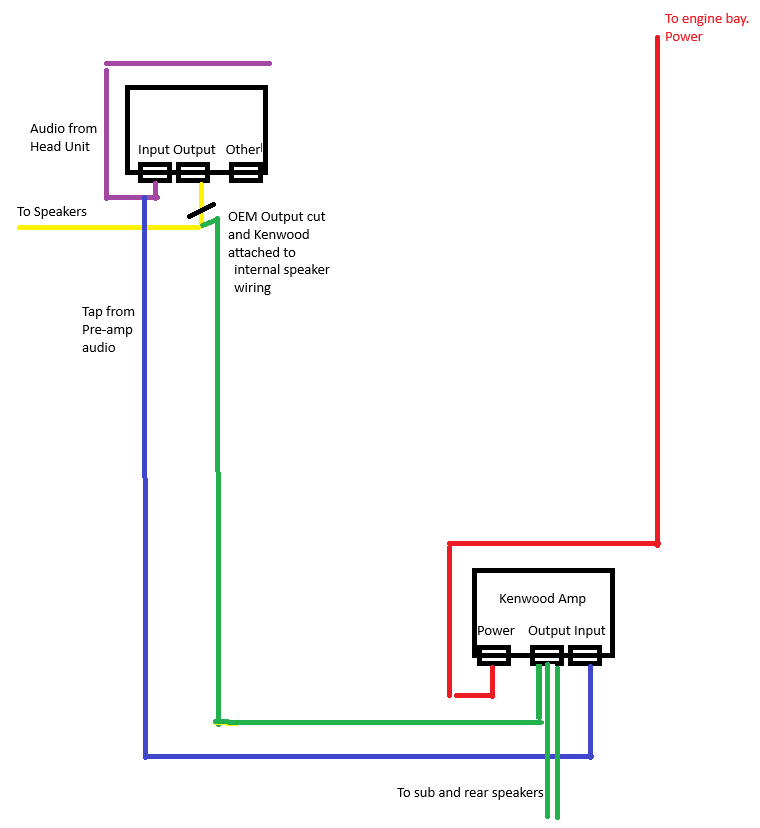
Amp: Kenwood X802-5
Sub: JL Audio 10W3V3-4 (In custom 20L sealed enclosure)
Front Speakers: JL Audio C1-650 Components
Rear Speakers: JL Audio C1-650X Coaxials
Centre speaker and 3.5" OEMs are disconnected. They were just blasting low quality audio and would just add interference to the C1s. The OEM shaker sub is also disconnected, I just left it in place as it leaves a carpet-less hole in the boot otherwise
If you're interested, the Butyl deadening was Dodo Deadn Hex (x30) and the 10mm closed-cell foam was Lifemaison Deadener Mat 50cmx200cm Roll (x2)
Learned a lot during the process though... namely, car audio is expensive - and Ford are actual ******** for integrating data signals into every single thing, even when it in NO POSSIBLE WAY needs it.... Will stick a parts list at the bottom for anyone who makes it that far.1. Take basic ass Mustang
2. Take some basic upgrade parts (Front Component speakers and sound deadening/damping)
3. Strip doors and put in Deadening material on external panels (outer skin of the doors) and replace speakers
I overshot the foam insulation on this one... and working with large pieces to try and cut holes out the middle was a real pain in the ass... so the next door I used smaller pieces
4. Use the extra deadening material in high value areas: Spare wheel well, Boot lid, Rear quarter panels (wheel arches especially)
5. New parcel shelf speakers in
6. Amp in, mounted on the rear seat so it's easy to work on (you'll see)
7. Subwoofer in and my tools and **** neatly stored (I don't have a garage)
8. Bonus Subwoofer Volume knob installed
Parts list:
Amp: Kenwood X802-5
Sub: JL Audio 10W3V3-4 (In custom 20L sealed enclosure)
Front Speakers: JL Audio C1-650 Components
Rear Speakers: JL Audio C1-650X Coaxials
Centre speaker and 3.5" OEMs are disconnected. They were just blasting low quality audio and would just add interference to the C1s. The OEM shaker sub is also disconnected, I just left it in place as it leaves a carpet-less hole in the boot otherwise
If you're interested, the Butyl deadening was Dodo Deadn Hex (x30) and the 10mm closed-cell foam was Lifemaison Deadener Mat 50cmx200cm Roll (x2)
Last edited:
")