

Ever since getting my Asus HD6950 I've been concerned about the noise it makes, especially at idle but also while gaming. Temperatures would often hit and go over 90 degrees with the little blower fan screeching away (comparitively so).
I've been looking at aftermarket coolers and decided that I'd go with something at the top end of air cooling.
Thermalright seemed to fit the bill and with a couple of coolers available I chose the Thermalright Shaman because it was a little more sensible than the frankly funny looking Thermaltight Spitfire.
The Shaman comes with a selection of RAM heatsinks, VRM type heatsinks and some low profile heatsinks enough for most cards I imagine and certainly more than enough for a 6950/6970. Each heatsink comes pre-applied with adhesive thermal pad. You also get some Chill factor 3 thermal paste, case sticker, booklet and fan clips. I didn't take pictures of everything as this is more a man on the street tutorial/review of fitting the cooler and not so much an unboxing. Needless to say there are videos/guides/tutorials about what comes with the kit.
So this post is a kind of build log from before fitment to fully installed and working.
Here's what the inside of my PC looked like 5 minutes before taking the card out.

As usual the Thermalright products come in a plain cardboard box.

The TY-140 fan. I wasn't quite prepared for the colour of this thing, despite reading it was a green colour.

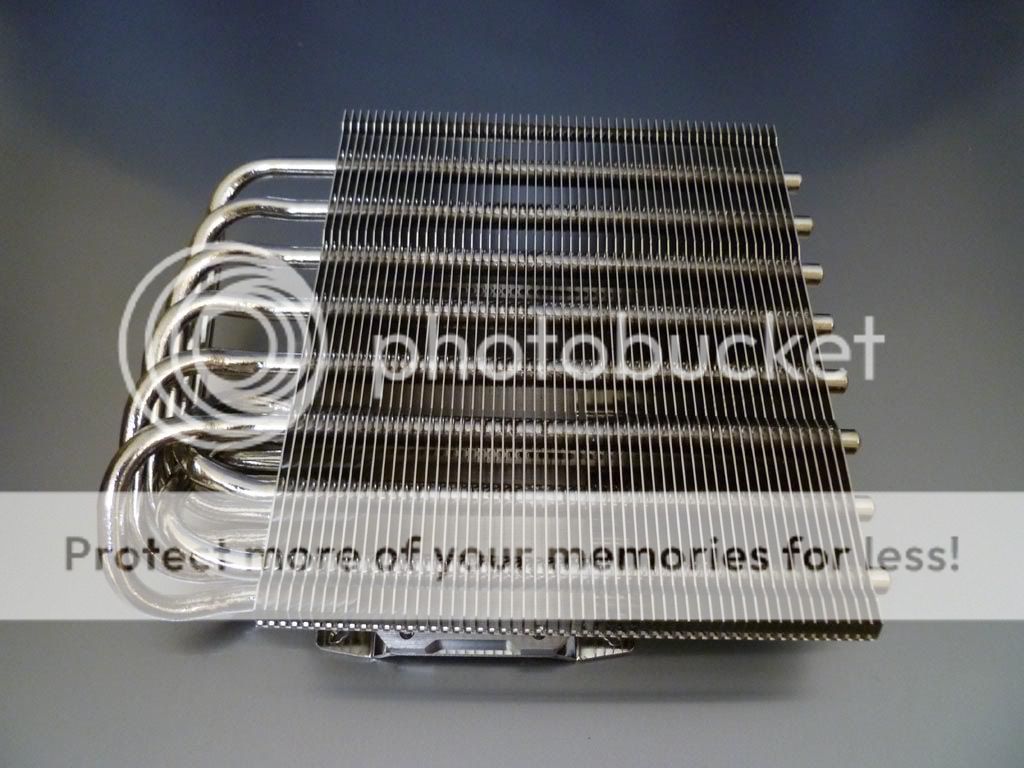
The heatsink itself
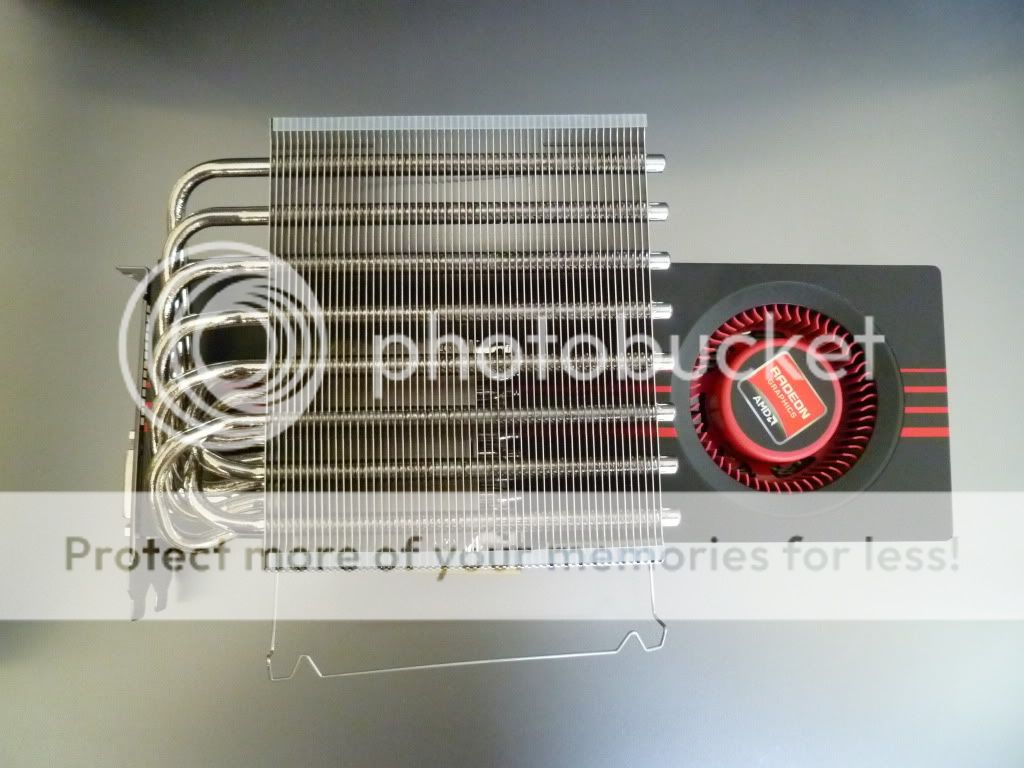
A quick comparison shot of the Shaman on top of the stock card.
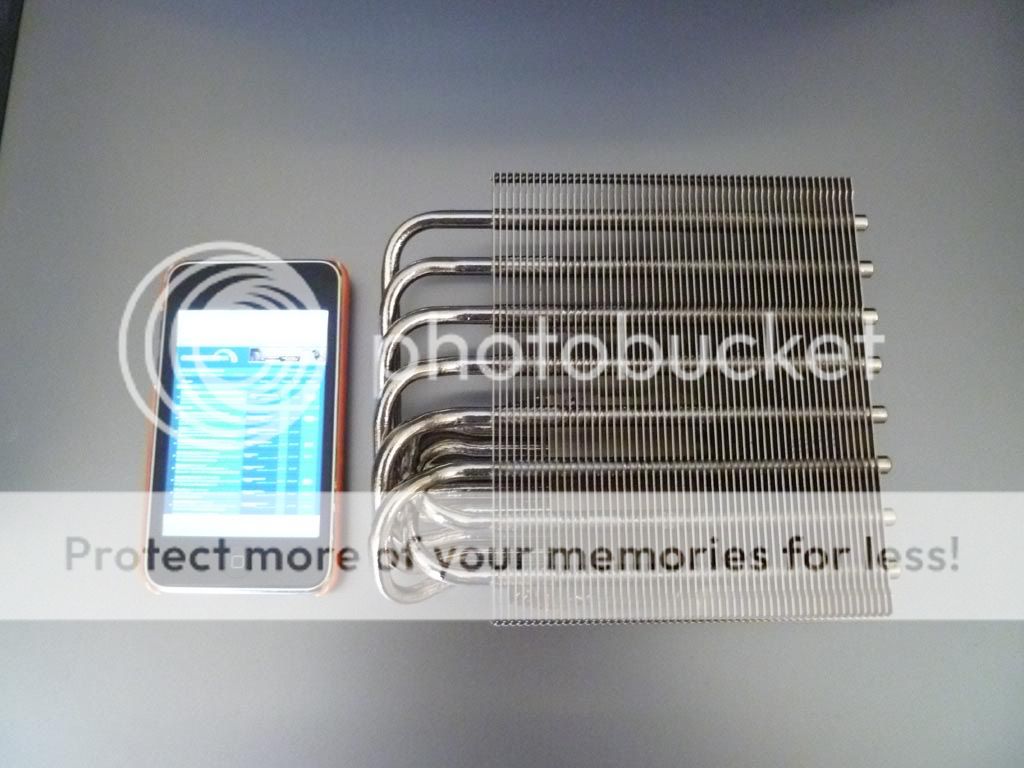
Next to my iPod
On the backplate of the 6950 there are a bunch of screws. 10 holding the metal plate to the cooler assembly, 2 in the side of the side plate and 4 holding the cooler to the GPU die.
I undid the 10, then the 2 and finally the 4 holding the cooler to the die. I was careful to undo the screws for the retention bracket a bit at a time until all four were loose.
Then I gave a little tug to the cooler assembly and off it popped.
The GPU die was a little messy where the TIM had been applied.
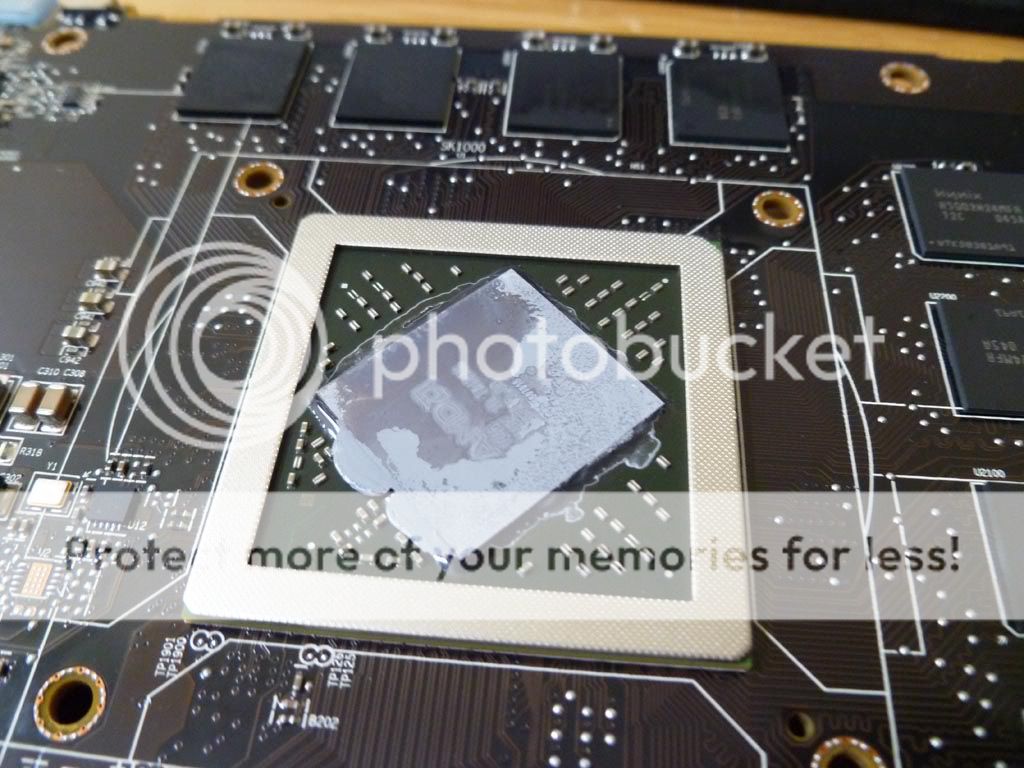
The TIM remaining on the stock cooler.

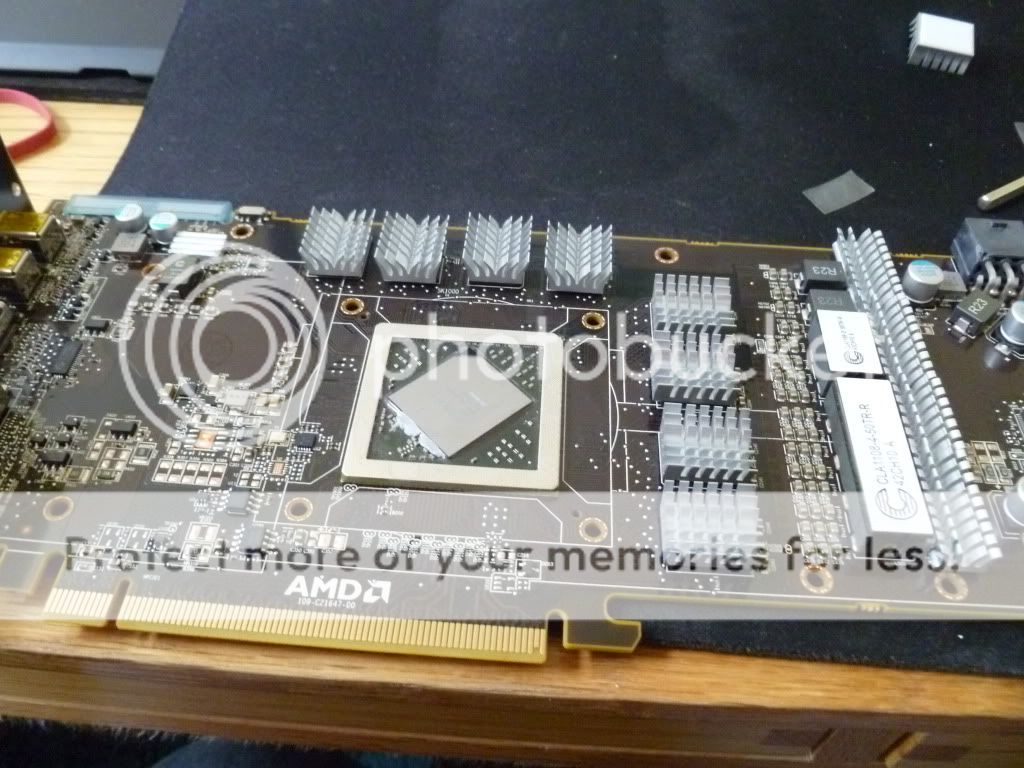
Fitting the RAM and VRM heatsinks was a simple enough process. The VRM sinks didn't work out perfectly and I didn't want a heatsink straddling a chip so I cut one of them down a bit. This gives 3.75 heatsinks instead of 3 so may give better heat dissipation. I also used one of the Thermalright supplied low profile heatsink trimmed a bit for a mysterious chip to the left of the RAM, not sure what it's for but it had a thermal pad on it.
I decided not to remove some of the hardened stock TIM from the edge of the GPU as I didn't want to risk popping off one of those SMD capacitors as I was gouging out rock hard TIM.
Then it's a simple matter of applying TIM to the GPU die and the contact plate of the Shaman. I used MX-3 rather than the Chill factor that came with the Thermalright simply because I had a new tube of MX-3 in my draw. I used the finger in some cling film trick and a plastic card to evenly spread.
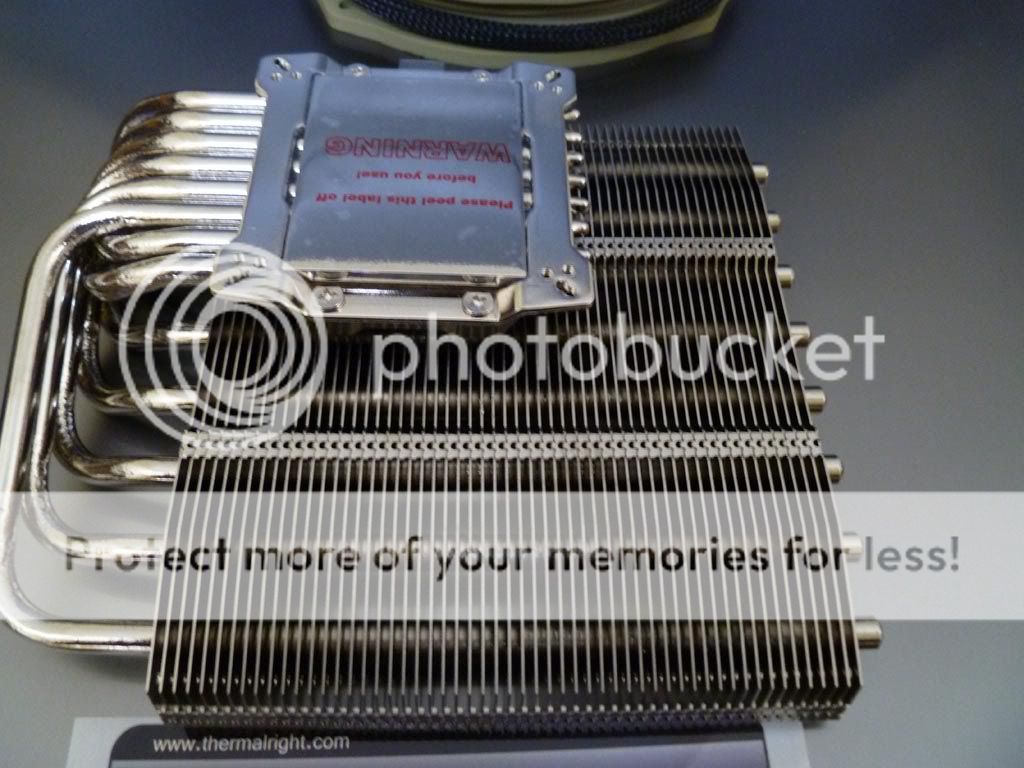
Then following the instructions it's time to turn the card over and sit it atop the cooler, adding washers and stuff and tighten down carefully.
And hey presto we have a mammoth cooler on the card.

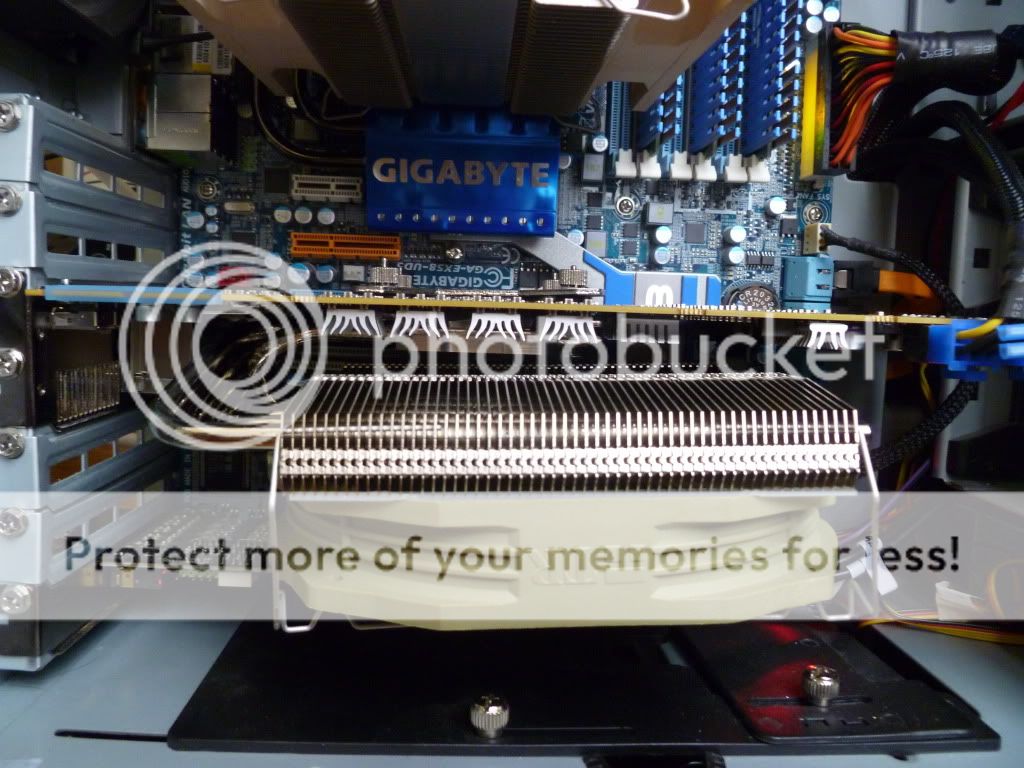
And finally installing into my machine.
Stock speed of the fan is 1300 rpm which is a tad noisy. At the moment I have a Noctua U.L.N.A. resistor wire sitting on the end of the 4 pin PWM cable and into my motherboard (not pictured here). The fan now spins at 760 rpm.
I did a run of Kombustor for a while and noted top temperatures were 65, 60, 64 for the three GPU readings in GPU-z. This is at 760 rpm. This compares with the 90s I was getting before along with a noise some order of magnitude higher.
I have a further mod planned where I will be taking the PWM signal of the card and feeding it into the standard fan connector. I have some of the mini fan connectors which fit fine and will do some magic soldering to realise this. I may also get my case exhaust fan wired up to the same PWM signal as typically it's needed to run faster when the graphics runs fast.
Many thanks to Skid34 who gave lots of good advice and pointers via Trust before I started.
I'm also thinking of a way I can make this look a little better, maybe covering the green fan in something (paint perhaps) and getting some LED action in and through that heatsink.
I've been looking at aftermarket coolers and decided that I'd go with something at the top end of air cooling.
Thermalright seemed to fit the bill and with a couple of coolers available I chose the Thermalright Shaman because it was a little more sensible than the frankly funny looking Thermaltight Spitfire.
The Shaman comes with a selection of RAM heatsinks, VRM type heatsinks and some low profile heatsinks enough for most cards I imagine and certainly more than enough for a 6950/6970. Each heatsink comes pre-applied with adhesive thermal pad. You also get some Chill factor 3 thermal paste, case sticker, booklet and fan clips. I didn't take pictures of everything as this is more a man on the street tutorial/review of fitting the cooler and not so much an unboxing. Needless to say there are videos/guides/tutorials about what comes with the kit.
So this post is a kind of build log from before fitment to fully installed and working.
Here's what the inside of my PC looked like 5 minutes before taking the card out.
As usual the Thermalright products come in a plain cardboard box.
The TY-140 fan. I wasn't quite prepared for the colour of this thing, despite reading it was a green colour.
The heatsink itself
A quick comparison shot of the Shaman on top of the stock card.
Next to my iPod
On the backplate of the 6950 there are a bunch of screws. 10 holding the metal plate to the cooler assembly, 2 in the side of the side plate and 4 holding the cooler to the GPU die.
I undid the 10, then the 2 and finally the 4 holding the cooler to the die. I was careful to undo the screws for the retention bracket a bit at a time until all four were loose.
Then I gave a little tug to the cooler assembly and off it popped.
The GPU die was a little messy where the TIM had been applied.
The TIM remaining on the stock cooler.
Fitting the RAM and VRM heatsinks was a simple enough process. The VRM sinks didn't work out perfectly and I didn't want a heatsink straddling a chip so I cut one of them down a bit. This gives 3.75 heatsinks instead of 3 so may give better heat dissipation. I also used one of the Thermalright supplied low profile heatsink trimmed a bit for a mysterious chip to the left of the RAM, not sure what it's for but it had a thermal pad on it.
I decided not to remove some of the hardened stock TIM from the edge of the GPU as I didn't want to risk popping off one of those SMD capacitors as I was gouging out rock hard TIM.
Then it's a simple matter of applying TIM to the GPU die and the contact plate of the Shaman. I used MX-3 rather than the Chill factor that came with the Thermalright simply because I had a new tube of MX-3 in my draw. I used the finger in some cling film trick and a plastic card to evenly spread.
Then following the instructions it's time to turn the card over and sit it atop the cooler, adding washers and stuff and tighten down carefully.
And hey presto we have a mammoth cooler on the card.
And finally installing into my machine.
Stock speed of the fan is 1300 rpm which is a tad noisy. At the moment I have a Noctua U.L.N.A. resistor wire sitting on the end of the 4 pin PWM cable and into my motherboard (not pictured here). The fan now spins at 760 rpm.
I did a run of Kombustor for a while and noted top temperatures were 65, 60, 64 for the three GPU readings in GPU-z. This is at 760 rpm. This compares with the 90s I was getting before along with a noise some order of magnitude higher.
I have a further mod planned where I will be taking the PWM signal of the card and feeding it into the standard fan connector. I have some of the mini fan connectors which fit fine and will do some magic soldering to realise this. I may also get my case exhaust fan wired up to the same PWM signal as typically it's needed to run faster when the graphics runs fast.
Many thanks to Skid34 who gave lots of good advice and pointers via Trust before I started.
I'm also thinking of a way I can make this look a little better, maybe covering the green fan in something (paint perhaps) and getting some LED action in and through that heatsink.
Last edited:
 and put a artic turbo pro on the temps are amazing ,don't know what amd are about putting a blower on these cards tbh
") Will probably need a BIOS amendment though as the fan doesn't spin much at 65 degrees.
Will probably need a BIOS amendment though as the fan doesn't spin much at 65 degrees. ")


