

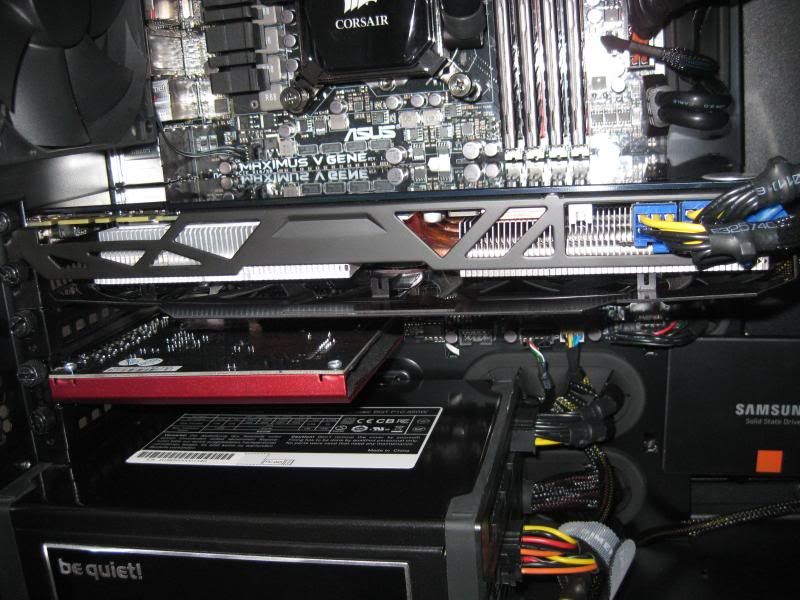
Thought I'd share this as I know people love the looks of there cards when in a windowed case but cant stand the back of the PCB, also who have cards that droop.
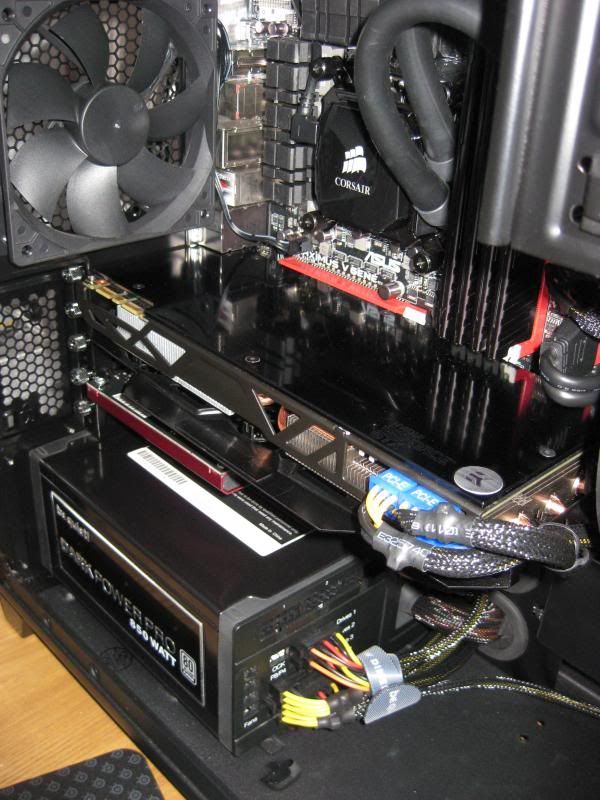
I've been wanting to put a plate over the back of the PCB for looks & to strengthen the card from sagging as all of my WF3 have drooped on the end since I got my HD 7970 WF3 & this GTX 780 but could never find one to fit !
So I went ahead & bought a EK GTX TITAN SE Back plate, the EK SE has embossed "Nvidia Geforce GTX" & is more relevant to the lower end GTX range !
http://www.ekwb.com/shop/ek-fc-titan-se-backplate-black.html
I knew it wasn't going to fit straight away but I didn't know how much modding it would take ?
Here's what I did & what you'll need.
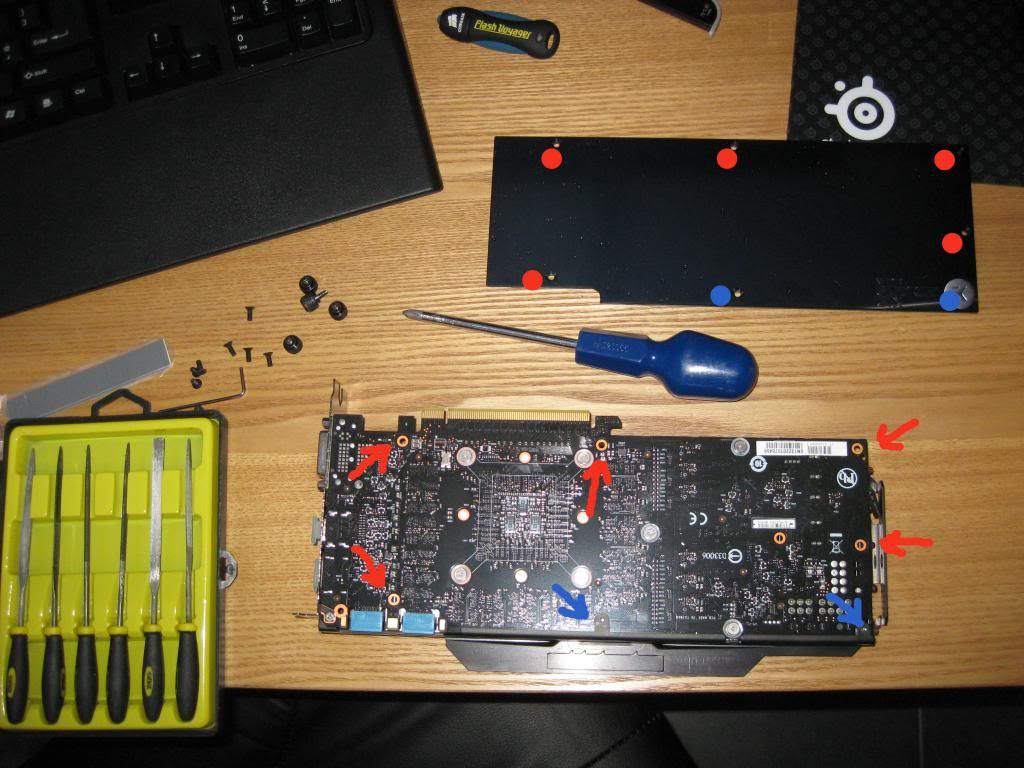
1.You can see there are 5 free holes on the PCB (Red arrows) & you'll see the ones in blue that are not, the EK plate takes 5 of these to attach & leave's one free & the other covered up. You can see the bottom right & centre bottom are taken by the cooler, that are only removed by taking the cooler off.
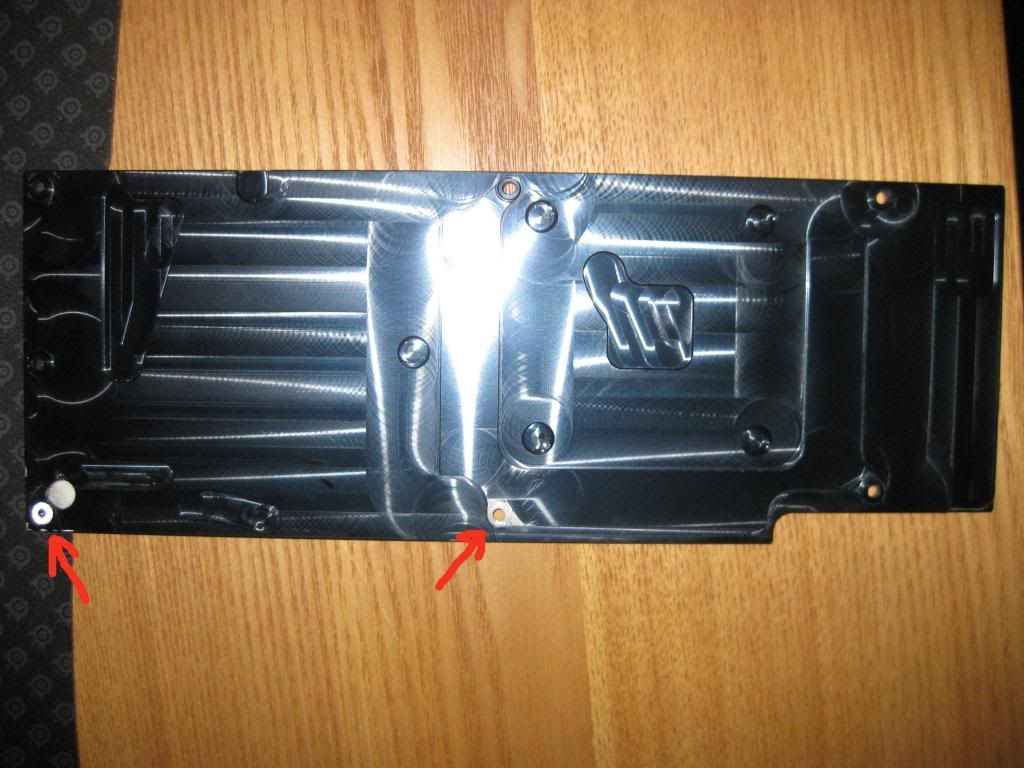
2. Place the EK plate on a cloth or something that wont scratch the top side as it will very easily ! File off the two raised threaded parts shown (bottom left & centre bottom or the silver parts in the photo), this is where the front of the cards PCB is attaching the cooler & supporting the card (not very well I have found), don't worry about marking up the bottom as it wont show ! Doing this will make the plate sit flat so the PCB wont bend with the force of raised part of the plate on the front bar.
3. You will need to get 5 M3 bolts for the 7 provided screws within the EK packet, I had some from my RC car but you can get them from Maplins, thin nosed pliers or small spanner.
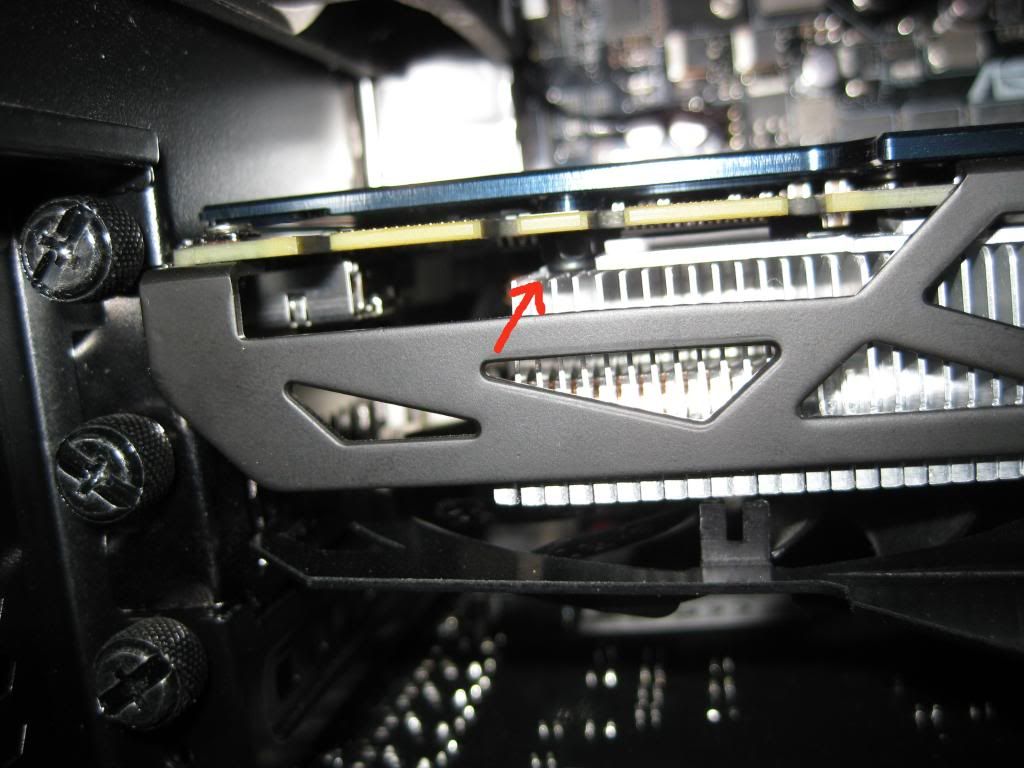
The only one that's a pain is the one between the PCB as its set back, close the cooler & the PCB shown below. Use the Pliers to hold the nut in place.
4. Work your way around but leave loose until you have them all in, once you have them in you will notice that there's one left in the centre front ? With that one you will need to cut the screw's thread off leaving the head & glue it in place so it won't come out if you remove you card ! You can see it in the 1st photo...
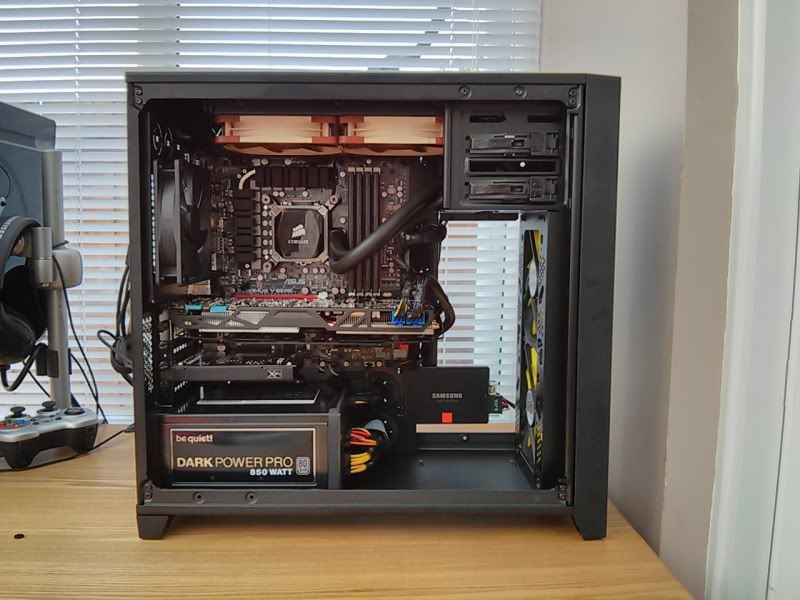
The end result I think look's much better !
Thanks for looking !
I've been wanting to put a plate over the back of the PCB for looks & to strengthen the card from sagging as all of my WF3 have drooped on the end since I got my HD 7970 WF3 & this GTX 780 but could never find one to fit !
So I went ahead & bought a EK GTX TITAN SE Back plate, the EK SE has embossed "Nvidia Geforce GTX" & is more relevant to the lower end GTX range !
http://www.ekwb.com/shop/ek-fc-titan-se-backplate-black.html
I knew it wasn't going to fit straight away but I didn't know how much modding it would take ?
Here's what I did & what you'll need.
1.You can see there are 5 free holes on the PCB (Red arrows) & you'll see the ones in blue that are not, the EK plate takes 5 of these to attach & leave's one free & the other covered up. You can see the bottom right & centre bottom are taken by the cooler, that are only removed by taking the cooler off.

2. Place the EK plate on a cloth or something that wont scratch the top side as it will very easily ! File off the two raised threaded parts shown (bottom left & centre bottom or the silver parts in the photo), this is where the front of the cards PCB is attaching the cooler & supporting the card (not very well I have found), don't worry about marking up the bottom as it wont show ! Doing this will make the plate sit flat so the PCB wont bend with the force of raised part of the plate on the front bar.

3. You will need to get 5 M3 bolts for the 7 provided screws within the EK packet, I had some from my RC car but you can get them from Maplins, thin nosed pliers or small spanner.
The only one that's a pain is the one between the PCB as its set back, close the cooler & the PCB shown below. Use the Pliers to hold the nut in place.

4. Work your way around but leave loose until you have them all in, once you have them in you will notice that there's one left in the centre front ? With that one you will need to cut the screw's thread off leaving the head & glue it in place so it won't come out if you remove you card ! You can see it in the 1st photo...
The end result I think look's much better !


Thanks for looking !
Last edited: