1st time water cool and 1st build log

Associate
Joined
29 Sep 2011
Posts
104
Location
London, uk
OK so i'm in the process of building my 1st water rig and thought it as good a time as any to also do my 1st build log, i'm not great at writing and explaining things so it'll probably most be pictures but we shall see how we go.

So I've finally got almost all my parts after much help from forum members and the vast array of information on the forums.

current rig is
sabertooth x58 motherboard
i7 950 @ 4ghz
6gb dominator gt ram
asus 7970 dc2t
HAFX case

kit to add to rig
2nd asus 7970 dc2t
seasonic 850w gold
XSPC dual bay res / pump combo and d5
XSPC EX360
XSPC raystorm
Zalman fan controller
Koolance quick release
ek compression fittings
some mayhems X1
Phobya xtreme 200
ek 7970 waterblocks
masterkleer uv blue tubeing
L22 silverstone fans

Please keep images to below 1280px - Rilot

http://i.imgur.com/9jzMJjS.jpg

radiators are all flushed so will probably start with fitting the ex360 in the roof of the case with 3 gentle typhoons pushing and 2 200mm fans pulling to see how that works out. Trying to use as much as i can of the kit i already own otherwise i would have maybe got 3 more gentle typhoons to pull.
 
Last edited:
ok so changed my mind on what to do 1st and have decided to put the water block on the gpu that's already out my case.
http://i.imgur.com/779M78S.jpg

managed to get all the screws out the back and side without any trouble
http://i.imgur.com/XNxcaoB.jpg

got the back plate off fine
http://i.imgur.com/JD45ISy.jpg

but I've now come across an issue i didn't expect. I'm struggling to remove the power cable that feeds the fans on the current cooler.
http://i.imgur.com/qxB4s24.jpg

after looking on the forums and watching some videos befor i started i was imagining it would easily unplug like fan connectors on my a motherboard etc but it seems stuck firm, i'm quickly running out of ideas and afraid i may have to resort to cutting the wires but don't really want to do this so does anyone have any ideas?
 
so managed to get the power cable of with a bit more force. The rest of the water block install has gone fine until i got half way through screwing the back plate back on and realized i hadn't put thermal paste on the chip, big DOH! moment so off comes the block again.

One thing i will say so far though is that the instructions that came with the block aren't as easy to follow as i hoped as they mention m3x4, m3x6 and m3x8 screws yet in the box there only seems to be a lot of m3x4 screws a few m3x6 and no m3x8 which has been confusing me a bit.
 
ok so finally got my 1st water block on TIM and all :-)
http://i.imgur.com/9z0db6a.jpg

surprising sense of accomplishment and feeling keen to get cracking on the rest now. I had one issue with the stock back plate when i got part way through fitting it. i had used 2 washers on the inner screws going into the waterblock which meant the back plate wouldn't fit in flush.
http://i.imgur.com/X7sgmnp.jpg

i think this is something i'm just going to have to live with on both cards as the screw will stick out that far regardless of the washers and hopefully once in the case it won't be too noticeable and worse case scenario i just remove the back plates.

I think next i'll try and get the phobya rad and fans in the bottom of the case.

i'm aiming to put it here (excuse the mess) and as you can see the cage is already gone so hopefully it should be pretty straight forward but you never know.
BEjkrUo.jpg

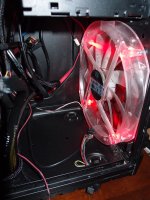
also the red fan is going and being replaced with the 2 silverstone fans
 
Thanks and will do. Got a bit carried away last night and pc is now in bits so guna be updating from my phone for a while. Just need to work out how to upload pics from here. One small issue ice come across though is that my planned phobya / silverstone combo at the front has hit a bump as the fans don't line up with the mounting options on the case so going to have to have a think about how to get around the problem, maybe dremel some new mounting holes but not sure how strong that will be.
 
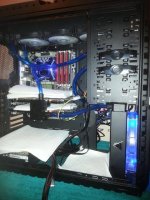
So another quick update, again without pictures in afraid, though taken a lot so will upload them when I can ( and within the pixel limit). Had to mod the bottom of the hard drive bays as the radiator is too big, came out better than expected and radiator now fits though I haven't come up with a way to secure it yet, though it is fairly stable in lose. Also got water blocks and bridge on gpu and cpu and now all fitted to motherboard and in the case. Just need to start fitting tubing then ready for the leak test :-/
 
I found the problem and it was 100% my fault. I had put the wrong screws in so they were just too big, got the right ones in and fits great :-/

On a positive I'm now leak testing and 3.5 hours in and all looks good.
WYGqy9Jl.jpg

e58Cwvml.jpg

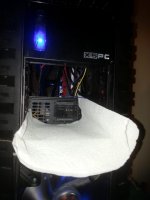
I've gone for the approach that there's no such thing as too much kitchen roll. Got a lot more pics too but only just worked out how to upload from mobile so will wait as I've got to adjust all the pic sizes too.
 
Back
Top Bottom