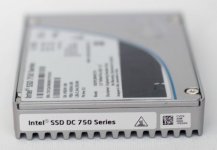
ASUS X99 Deluxe, ASUS ARES III, 1.2TB Intel 750 SSD... Need I say more?

Soldato
Joined
17 Sep 2012
Posts
4,275
Location
Derby
Well, this is going to be a bit of a strange build log! I contacted ASUS for another build I am about to do, and they actually asked if I could do them something a bit special instead.

I cant show you the case. It's NDA and I wont be able to post pics until it is actually announced, however, I will say it is VERY sexy. As far as i know, i'm the only person in the UK with one and probably one of only a few in the world that has seen it! EXCITED!

Even though i can't show the case, I wanted to just post some things as and when im doing them so that i can keep a bit of a log and then at the end il show the expanded versions of the pictures so you can see how it relates in the case. Hopefully it will work haha.

So, I received a rather nice parcel today...

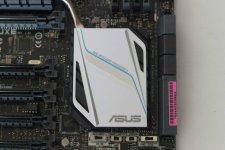
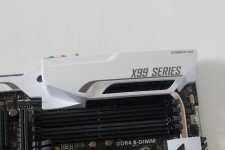
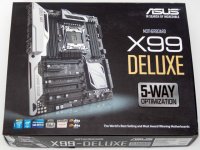
In this parcel is the main focal point of this build, the beautiful ASUS X99 deluxe. I was looking at these when they were released and I'm rather glad I have the chance to get my hands on one! Thanks ASUS!
3xwW6YTl.jpg

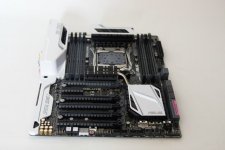
Out of the box we can get a better look of the Mobo.
EVDN6bOl.jpg

w6JUl9wl.jpg

vVxI14tl.jpg

This board actually has some extra pins, which allows for more POWER!
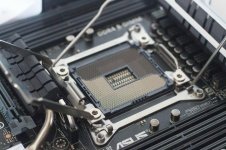
GkYPN5xl.jpg

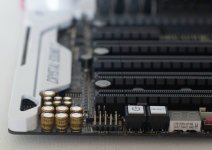
BUTTONS!

Zp1nrXjl.jpg

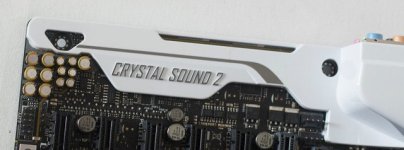
On board sound... I have never used a sound card (I know I know) so im always interested to see if i can tell the difference between motherboard sounds... lets see!
gGXlnG4l.jpg

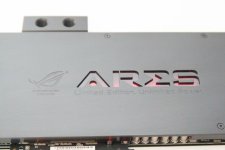
Another thing that I think any "enthusiast" would like to get their hands on is the ASUS ARES III lets face it, it's a beast. Well, ASUS again decided it was Xmas come early and sent me one <3!!!

I cant even tell you how excited I was when I was opening this!
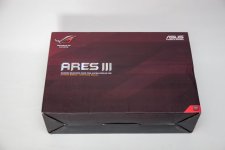
Hspd6hil.jpg

It has a case... A CASE!!!! I just wanted to handcuff this to my wrist... chuck on a suit and feel awesome for a few hours...
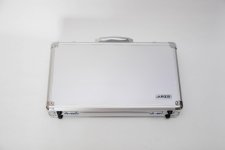
lgVClYvl.jpg

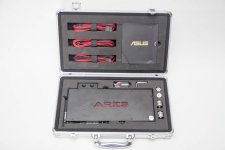
Opening the case let me to this... Apologies for the fingerprints, i got a little excited and started to have a look, then forgot to wipe them off lol
663oiyOl.jpg

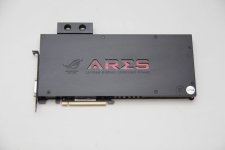
Oh lord. This is what £1200 (ish) buys you. So So So sexy. Obviously the waterblock is made by one of my other sponsors, EKWB, so its awesome to be able to use both so easily.
PXsYgPal.jpg

Hnnnnnnnng

aqHyEUZl.jpg

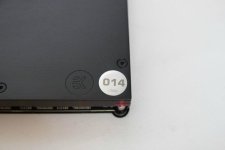
If you didn't know, there are only 500 of these cards made. I have number 14 :D
7srFIARl.jpg

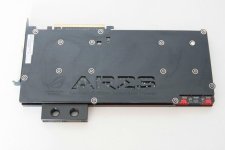
This is the backplate, you can see my rub marks (oooops) but yeah, its rather sexy looking!
9kVidM0l.jpg

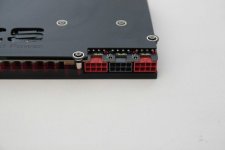
So, Power, most cards have a 6+8 pin.. or an 8+8 pin cable right? Not this one. 3 8 pin or go home!
WpoAjXBl.jpg

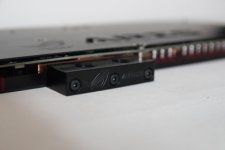
nom nom nom. I bet this will even play Minecraft!
8NEKoTGl.jpg

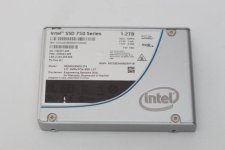
Another special item that was in the package was this 1.2TB Intel 750 SSD This is crazy fast.
XLHtddSl.jpg

hmmmm taaasty.

C6iybtOl.jpg

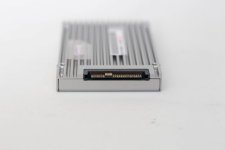
So, this is far faster than any other SSD ive ever seen tbh... the first thing i noticed was this... Yup, thats right, RIP sata cable! we have a new standard.
vLKg2fUl.jpg

The other end of the cable this SSD connects to looks like this.
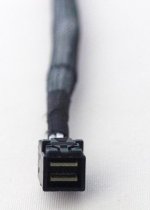
kHAdXMyl.jpg

This then plugs into this little M2 card, so you can use it in either the motherboard directly (the ASUS X99 Deluxe has a M2 slot) or if your board doesn't have one you can get adapters that fit into your 1x pci-e slot.
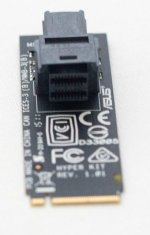
IZxyeZgl.jpg

This is the Asus Hyper M.2 PCI-e adapter.
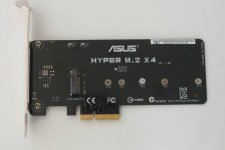
TTuZ3Qql.jpg

So, thats all for now, I'm waiting on a few packages still before I can really make a start, but I think we can all agree, this is gonna be a beast!
 
Last edited:
Stop lying, you were licking the card and wiped it with your fingers ! :D

Really excited to see what case these are going into :)

Me too! its a rather nice case!!!!

wow no words other than i'm so jelly :p

Don't worry, I think this will become my main computer when its finished.... although I do have 2 others to build which i will be announcing soon, neither has the BEAST of a GPU this has though!

Awesome Daviido can't wait to see more the Ares looks sick! :)

Best looking GPU I have ever owned!

What in the mother of God is that gpu, looks unbelievable !!!!

When can we see the case ? :D

It is an ASUS ARES III basically a dual GPU card with an EK Block! tis a bit of a beast!!!!

As for the case, I'm not 100% sure, It will be announced on June the first at Computex Taipei, but im hoping I can show some little teasers before then! if not its going to be a hard buildlog to do ensuring no one can figure out what case it is. The manufacturer are very recognisable just from even the littlest of glimpses.
 
Odd. Normally they never request them back.

Well that kinda sucks. What are they replacing it with? bit off of them to give it to you to show off for publicity and then snatch it back, given it's one of the best parts of the build.

I'm not really gonna get into the ins and outs of dealings with companies, but yes, quite often you can get asked for things back when they are commissioned builds rather than sponsored builds. I should be paid for this build, but I wanted to keep it instead, this is the compromise.
 
So another day and another parcel. this was shipped super fast from my friends at EKWB. They supported me for my BitFenix Pandora build and they were happy to help me out again with this build too!! Thanks very much EK!!

s3Ae4EY.jpg

So, opening the box I got all of this inside... Lots of goodies!!

ek_1.jpg


This time I went with my favorite pump, the D5 with a clear top.

ek_2.jpg


I do much prefer these to the DDC, even though the DDC is the only close contender.

ek_6.jpg


I just hope that the clear block suits the build, im sure it will!

ek_8.jpg


I was super impressed with the radiators I had from EK last time, so i had the same again... just a few more :D


ek_13.jpg


This time I went with a 360, a 240 and a 120. Bearing in mind the case i am using is NDA and hasn't been announced yet. There is no information available about it anywhere on the internet, no pictures, nothing. So I had to use a bit of judgment and the slithers of information I could find. Luckily a day after ordering the watercooling. I managed to get a spec sheet for the case and all of them will fit.... and more if needed ;)

ek_16.jpg


I do love how this series looks.

ek_20.jpg


and if you didnt already know what they were...

ek_21.jpg


Onto the CPU block and i went for this!

ek_24.jpg


This time i wanted to go for a clear block. I have never used a clear one, so thought it would be something a little different

ek_31.jpg


As with the D5, im hoping when it gets some nice fluid running through it, it will become more of fitting colour.

ek_33.jpg


If not, I can always just swap it out, I can use this for a different project, it does look rather nice!

ek_35.jpg


For the reservoir i went for a X3 250.

ek_37.jpg


This should be the perfect size for what i want to do.

ek_39.jpg


I couldnt decide between white or black, so EK sent me the white ends too :D

ek_41.jpg


Im going to use the EK-HD tubing again, it bent well last time and looked great and with the addition of the new EK-HDC Fittings, I think this build needed it.

ek_43.jpg


Did someone mention fittings?!

ek_44.jpg


I always under estimate how many angled fittings I need, so I usually just buy them as and when I need them, with OcUK next day delivery, I don't really have to worry or wait long.

ek_45.jpg


These fittings were huddling together for warmth...

ek_46.jpg


LEFT! RIGHT! LEFT RIGHT LEFT!

ek_49.jpg


The new white EK-HDC fittings are rather nice, the black chrome of the angled fittings and the white of these fittings will go together with the black of the radiators to create the perfect monochrome look.... i hope :D

ek_50.jpg


These are actually compression fittings for hard tubing. I need to send this build to Taiwan once its finished. I'm hoping that these will grip the tubing enough so that I can send it pre-filled.

LINE UP!!! AIM!!!!!

ek_55.jpg


FIRE!

ek_58.jpg


I would also like to invite you all to my Facebook and Twitter page!!! YES! Just click the little icons to get to the relevant pages, i will be giving some bits and bobs away on them at some point :D

QBOlrpX.jpg pfFnflA.jpg

Im just waiting on one other bunch of stuff then I can really get my teeth into this build. Looking at it, there wont actually be that much modding, the case is pretty much perfect as it is and everything fits the colour scheme... I will have to make some custom cables and do some little bits but it should be a really nice clean build!
 
Dave, so jel mate :D
Subbed and looking forward to see this case.


Those EK fittings are nice, but don't give (me personally) much confidence for movement/shipping. Curious how you'll find them :)

Cheers mate, I still havn't used the fittings yet, I think as long as there is no movement in the case (which there wont be, its very sturdy) we will be ok :)

Gonna be a good one this, when is the case for NDA lift. :)

Not 100& sure, I think its in around 3 weeks.

ooooooooooo, excited! what are Asus working on eh?! ;)

J.

The case isnt from ASUS, but they have sorted it me out. I think i'm the only person in the world with one of these right now!!! Even the UK reps from the company don't have any info on it other than renders.


Thanks bro

As it has been said before (and will probably be said again) I am unbelievable jealous :D

Don't worry, i'm kinda jealous for other people. I never expected to do a build like this!!!

Ummm, this is going to be EPIC to say the least!

Joining the mass of jealous peeps :(

Thank you sir! Lets hope I don't disappoint

I do love the Asus X99 Deluxe boards, white and black just 'works' :cool:

It certainly does, I wasn't a huge fan before this year, now i am converted!

I cannot wait for this to progress. It's gorgeous..

That SSD looks cool also, shame you don't get to keep it.

Yeah, its understandable why they wont let me though, I certainly don't mind, they have provided me with a alternative which will work perfectly fine:D

That GPU looks phenomenal. Cant wait to see how this turns out based on the previous builds.

Thank you buddy! :D
 
So, my final sponsor received stock of the parts that I wanted and a day later I received them from Germany!

A huge thanks to Thermaltake for sponsoring this build with fans and PSU. Its much appreciated!

So, this is what they have sent me!! 6 of the new 120mm LED Riing fans, a 1050w ToughPower DPS G PSU and a nice little suprise, a blue switch Poseidon Z Keyboard!!!

Tt_1.jpg


So, lets jump straight in with the new 120mm Riing fans.

Tt_3.jpg


I saw the promo for these a little while back and then saw them at an event. I can honestly say they looked far better than I thought they would. So much so I have been waiting for a project I could use them in since.

Tt_2.jpg


The fans come with a nice set of goodies, including a cable that reduces the fan speed for quite use and a nice set of longer screws for rads

Tt_4.jpg
#

This is what its all about, that clear bit of plastic combined with the 4 LEDS make this fan glooooow.

Tt_5.jpg


Whilst i was clambering up the loft to find a spare PSU to show you the lights (i failed btw, you will have to wait) i fount a little Tt dude from an old event!! so, he started to help me.. He seems impressed with these fans.

Tt_6.jpg


Next up is a little gift from Tt. When we are at events, we always end up a the bar (after the reps have finished work i may add!!!!) and the last time we got onto talking about keyboards. I have never owned a blue switched keyboard and the rep obviously remembered. He sent me this :D

Tt_7.jpg


This is the new Poseidon Z and from the looks of it, they are very proud.. 5 year warranty!!??!

Tt_8.jpg


Tt dude is trying to get in on it...

Tt_9.jpg


The keys are rather nice, they are rounded for her pleasure ;)

Tt_10.jpg


Im not sure what this button does. i will look at the instructions later :P

Tt_11.jpg


The Poseidon Z comes with a blue backlight.... its purdy

Tt_12.jpg


Especially in the dark!

Tt_13.jpg


And finally the beast of a PSU

Tt_14.jpg


1050W of semi digital capacitor goodness.

Tt_15.jpg


inside the box we get a wrapped PSU and a large bag of cables.

Tt_16.jpg


as always, il be honest and say im not a huge fan of the black/gold/red colour scheme, but both the red and gold parts can be removed so its no issue.

Tt_17.jpg


as its fully modular, there are plenty of slots for your cables.

Tt_18.jpg


Again, the Tt Dude approves.

Tt_19.jpg


These are all the cables that are with the PSU

Tt_20.jpg


the Tt dude spotted this one...

Tt_21.jpg


after a closer look, we can see its a nifty USB cable that plugs into the PSU. This allows you to some nifty things from your mobile phohne which i'm not even going to try and explain , this website does it far better lol

http://www.thermaltake.com/products-model.aspx?id=C_00002390

Tt_22.jpg


The build is going to be hard to show whilst the NDA is still live, but I am going to document it still and give you as many sneak peaks as I possibly can. The next job is cable braiding and spraying the PSU i think :)

Please give me a follow on the following social media accounts! I am going to be doing some little giveaways soon, and its far easier to do via these than it is over forums!!

https://twitter.com/davido_labido

https://www.facebook.com/davidolabidomods
 
Last edited:
Well, i still cant show you the case i'm afraid, but it will be seen very soon!!! I have been working away as per usual, so progress is slow, however I need it finished by tomorrow night as its getting flown to Taiwan on Thursday EEEEEK!!

So, today i needed to sort out the extensions whilst I wait for the last 2 or 3 bits to arrive from OcUK and one of my friends who has helped me with a little idea for some branding.


So, lets start to do some wires!


As per usual, I am back to making all my wires from scratch, Im going to make extensions this time rather than a full set to save quite a lot of time and also because the PSU is quite hidden.


IMG_6754.jpg


So with this build, I am going to use white black and shade 19 which is a very dark grey unless a flash hits it (i tried to get some pics without the flash too to show you what it can look like)

IMG_6760.jpg


First job is to cut 24 wires for the GPUs. 2 different sizes of course so that they have a nice curve!

IMG_6763.jpg


Also, i cut 24 wires for the 24 pin!

IMG_6773.jpg


once they are crimped and sleeved, we get something like this!

IMG_6776.jpg


Its the first time I have ever sleeved 24 cables for a single PSU so it was a little different!


IMG_6777.jpg


once they are plugged in they look awesome imo

IMG_6782.jpg


It was nice to be able to do the 24 pin the exact same way as the GPU cables as well :D

IMG_7098.jpg


depending on which way you want the curve depends on which way you crimp the cables, some are crimped with the "flags" on the top of the cables, so that the clips of the connectors are on the top, and some are crimped with the "flags" on the bottom.

IMG_7104.jpg


Nom Nom Nom

IMG_7090.jpg


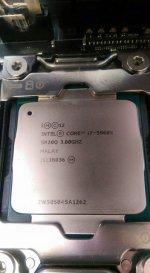
Oh, my processor turned up as well last week, I almost forgot ;)

bKJikxkl.jpg


As I mentioned, tomorrow is going to be a long day, got a the watercooling to finish off, some small case mods and some acrylic cutting to do to cover some of the bits i don't like. i have around 30 hours to get the whole thing done including testing the loop, software, checking everything is working OK and ensuring it survives the trip! Wish me luck :D

If you want to follow my progress tomorrow, I will be posting little snippits on facebook, as well as giving away a copy of the new Total War Attila game! check it out here:

https://www.facebook.com/davidolabidomods

On twitter i have a copy of Far Cry 4 to give away!

@davido_labido

I don't really have the time to play games at the moment, so I might as well share them when i get them!
 
Last edited:
So! Today was the day!

The In Win 909 was announced at computex and I was the first person to get to do a mod with it!

First off i would like to say a massive thank you to ASUS who were the ones to get me the case, and i would also like to appologise for the quality of the pictures. I pretty much did everything you see here the day that i was sending this build to Taiwan, i was awake for 30+ hours and as the case was still NDA pictures were not my main priority. It also isn't 100% finished, i have lots of little bits to do to it to make it perfect, but again, I just didn't have the time.

So, the In Win 909 is based on the 904/901, but has much better airflow and support for watercooling.

finished_1.jpg


It has support for a 240mm rad at the bottom (although i found this to be rather tight, an EK rad wont fit properly)

finished_2.jpg


a 240mm rad at the front

finished_3.jpg


and a 360 rad at the back, there is also space for a 120mm rad as well, or a fan, but it just wasnt needed for this build.

finished_4.jpg


iirc correctly, the case has support for 5 SSds around the back using nifty little bracets, i didnt need these though, so the first thing i did was cut a bit of the panel away to make this huge hole, this allowed me to curve my 24pin connector around better.

finished_16.jpg


on this pic you can see that the bracket for the SSD would have been in the way of the curve. I didnt likke how many holes there were in the motherboard tray so that was the first thing i thought id sort out.

finished_17.jpg


As I didnt want to use the bottom 240 mm fan space either, I thought id cover this as well as make a cover for the PSU space.

So, measuring and marking what i wanted to cut is first on the list

finished_6.jpg


I always draw on top of the protective film so that you don't mark the actual acrylic.

finished_18.jpg


I cut this using a jig saw to save time, not the prettiest of finishes, but not too bad.

finished_20.jpg


The first sheet in place goes here...

finished_21.jpg


This means I can now get the curve that i want (dont worry about the state of the holes, I will sort these out at a later time)

finished_25.jpg


The next one was the cover for the 240mm fan slots:

finished_8.jpg


The white bit of plastic underneath is actually a light bar, so i didn't want to cover that completely.

finished_9.jpg


once i had these 2 bits in place i needed to sort out the final bit that would have been left, just a little rectangle, when id made that it looked like this

finished_27.jpg


Once i pull all the bits out, they look like this, obviously this was before i sanded them down.

finished_23.jpg


The next job was the water cooling, this was quite a strange loop for me to do as I wasn't sent any RAM for the build. This needed to be added when it got to Taiwan, as such, I couldn't foul any of the RAM slots... and there are 8.

Due to this it meant getting a little creative with the loop

First to go were the hardrive bays at the top of the case, there are 4 of these so you have plenty of storage options, I drilled all the rivets out so that i could use the space for some tubing.

finished_40.jpg


With the 240 radiator orientated in the way i chose, it meant i could only really go this way, the only problem was that is where the case is :o

finished_41.jpg


So, time to drill a hole.

finished_42.jpg


add a pass through fitting

finished_43.jpg


and get the bit of tubing in place :D

finished_44.jpg


I needed to do the same with the back radiator as again, i couldnt go past the ram slots!

finished_14.jpg


EKWB sent me plenty of tubing, I thought with this case being rather big i would need it, but a lot of the bits of tubing i used were very very small

finished_15.jpg


Once all the tubing was in place, it looked like this, E22.biz sorted me out a rather nice panel as this build is to show off the ASUS X99 DELUXe

finished_35.jpg


I was going to use White pastel fluid, so the CPU block didnt really matter, but i do wish i had gone with nickel rather than copper now, at least i know for next time.

finished_10.jpg


I extended the tubing out quite a lot so that hands could easily work with the ram slots.

finished_12.jpg


I really like how it all turned out, i particularly like the placement of the rez.

finished_31.jpg


The Intel SSD was another item that needed to be on show, I had a lot of ideas with this, but unfortunately i needed a longer cable that isn't currently available at any retailers so i had to just make do with it on the bottom.


finished_38.jpg


Once i had added the fluid it looked like this? what do you think?

finished_45.jpg


I used Mayhems fluid as per usual, this is Aurora, that i had watered down a little using some ultra pure and then added just a touch of Pastel white concentrate.

finished_46.jpg


Im really happy with how this turned out. I cant wait to get it back to finish it to the standard it deserves, but with the time scale i had and everything else, I'm mega happy.

As soon as it gets back from Taiwan, I will be doing the finishing touches and getting some better pictures :)

please give my facebook page a like to get mini updates that I post that are not worth popping on to forums with, i will be giving away a copy of TOTAL WAR ATTILA when i get 500 'Likes' (140 to go i think!)

https://www.facebook.com/davidolabidomods

and also my twitter @davido_labido
 
Last edited:
Crackin job mate, very nice to get hold of something like that before its in the public domain.

As I said already I just think the coolant just makes it stand out and suits the case very well. Plus your pipe runs look very neat and clean.

Thanks dude :D yeah, its the first time i've had a case that i couldn't google haha

That is absolutely gorgeous!

I really like that case, the full glass panel looks really good.

Thanks :D

Cracking job! How did the acrylic stick to the case though? It is self adhesive or what?

I used strong double sided sticky tape, but i didn't to, most of the panels had to be forced into place as i measured them to size so that they have no wriggle room.

Cracking stuff, nice to see In Win are seriously considering WC options for the gorgeous 900 series. They still don't have it 100% right though, but it's a big step up.

I do have to ask though, where in the blue hell does the front rad draw air from?

there is roughly an inch gap between the brushed alu of the case and the radiator mounts, the air can be drawn up from below, or down from the top.
 
InWin have made a huge improvement with this version of the case and it still looks soooo good too.

What's the airflow/temperatures like? Does the reservoir get in the way of plugging in cables at the back?

i didn't get time to test it properly as i literally did a few stress tests to ensure that it was stable and then sent it out, the highest temperature i saw was 42 degrees, that was when running furmark as well as Prime95 with an ambient temperature of 23 degrees. This was with fans on full.

The reservoir doesn't get in the way as it is right at the front and you can access the space for the cables from behind the case :)
 
Back
Top Bottom