[Buildlog] 900D with Triple GTX Titans

Associate
Joined
12 Jul 2013
Posts
44
Location
Dublin
Hi folks,

Below is the progress I've made in moving the internals of my 800D build to a new 900D case and installing 2 watercooling loops.

Existing or old build with the 800D comprised of an i7 3930k, ROG Extreme IV Mobo, 3 GTX Titans. 16GB of Corsair Dominator RAM.

Running 3 2560 x1600 res screens so the GPU horsepower certainly helps in gaming.

The CPU was cooled with a Corsair 100i cooler. Titans cooled using their stock cooler.

The goal of the new build was to move everything to a 900D case and install 2 loops. One to cool the CPU & mobo and the other to cool the 3 Titans.
This was my first watercooled project so it was quite a challenge to take on but I'm happy to say that it has worked out very well so far.

For the moment I'm just using distilled water but I may add dye later. The lighting of the 2 loops still needs to be worked on.

Summary of watercooling components used:
CPU: XSPC Raystorm
VRs/SB: EK waterblocks
RAMs: 2 x XSPC RAM waterblocks.
Titans: 3 x XSPC Titan waterblocks with backplates.
Radiators: 2 x XSPC RX480 + 1 x XSPC RX240
Fittings: Mostly XSPC and a few bitspower.
Lamptron FC Touch Fan Controller.
2 x bitspower 250 Reservoirs.
2 x Laing D5 pumps each with a bitpower mod kit and top.
Fans: Corsair SP120s
Tubing: XSPC 1/2"ID, 3/4" OD


Below are some photos and I've added in comments.


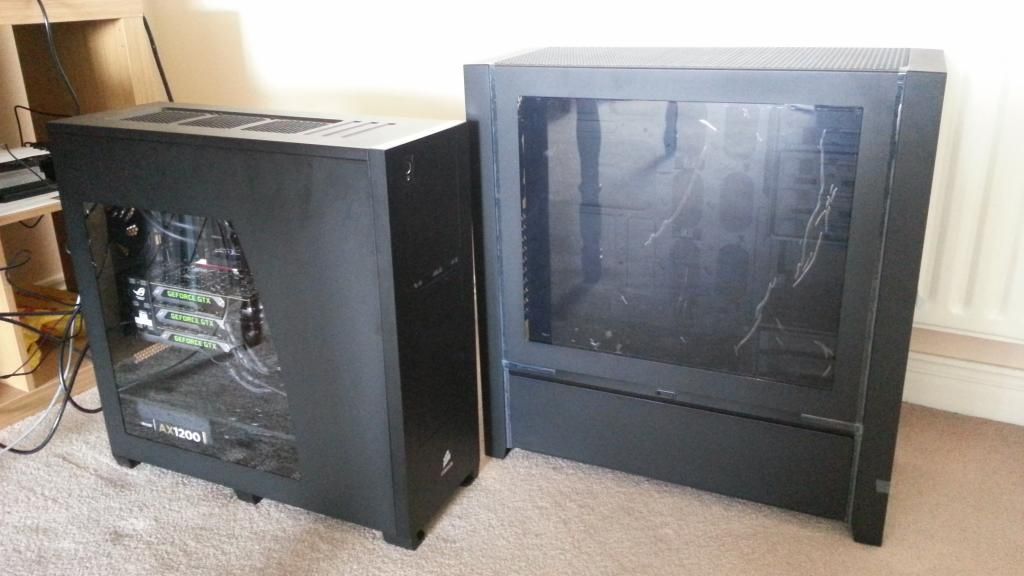
1. Old 800D system next to the new empty 900D case
20130704_140953_zpsd3674af5.jpg


2. All the bits and bobs for the watercooling.
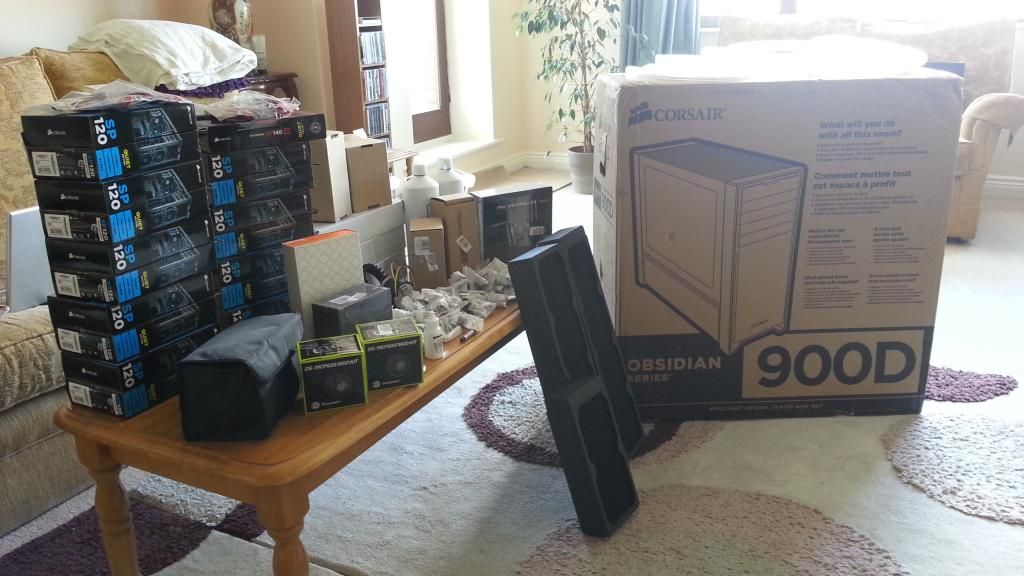
20130704_140054_zpse0df179c.jpg


3. Initially I had the top quad rad in push pull but due to the height of the reservoirs I later had to lose one row of fans so now they are in push only.
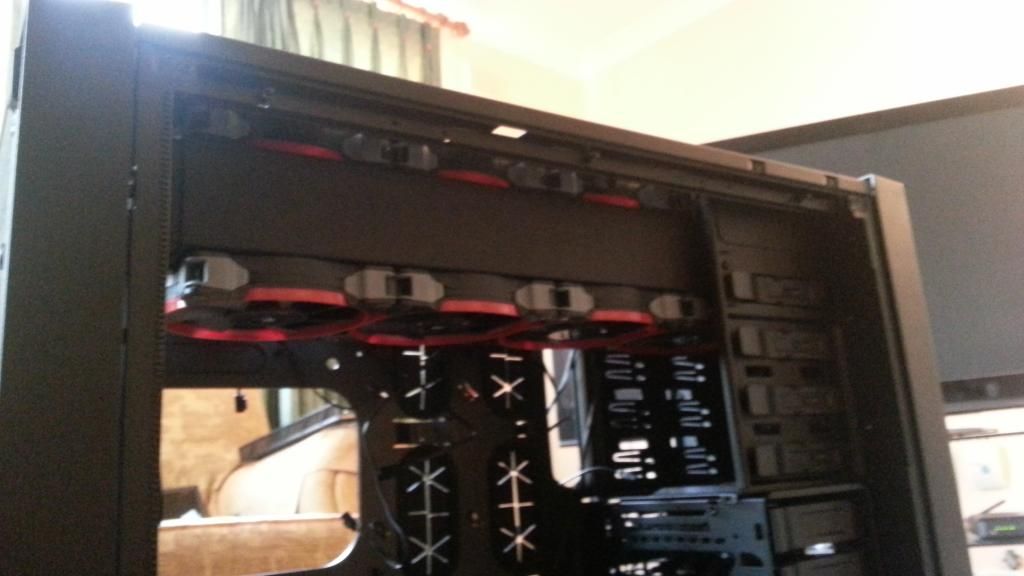
900d4_zpsd053da1d.jpg


4. In addition to the quad rad in the top, I've added another in the bottom and a 240 in the back.
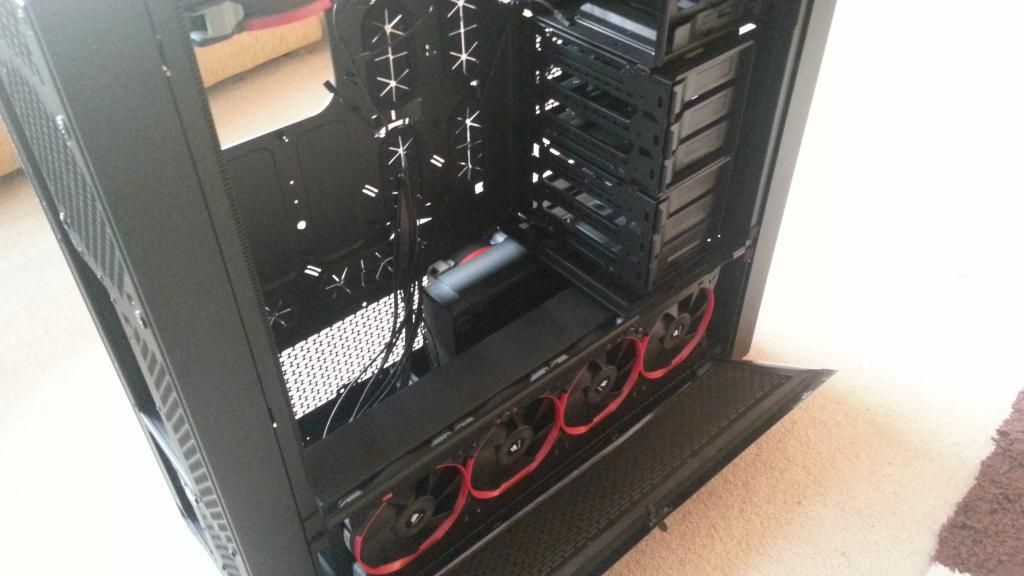
900d5_zps05a92b21.jpg


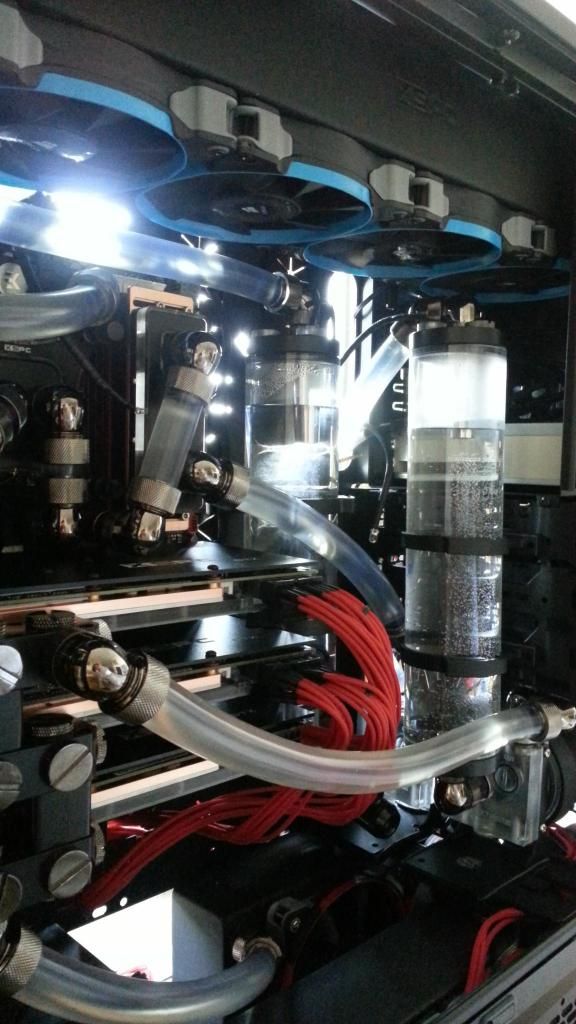
5. Two D5 pumps side by side. One res on the rear and the other on the drive cage.
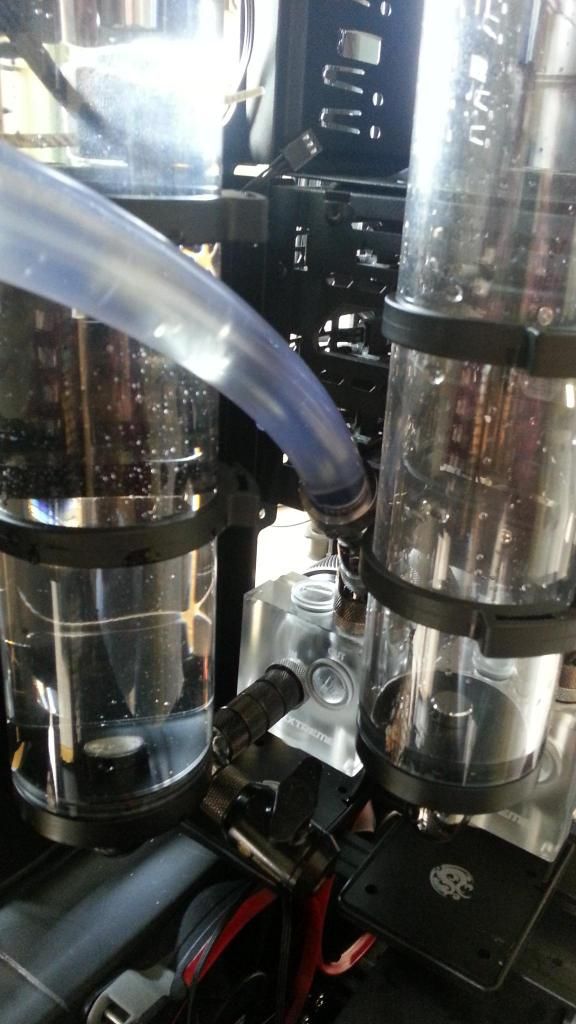
20130713_180226_zps20fad6da.jpg


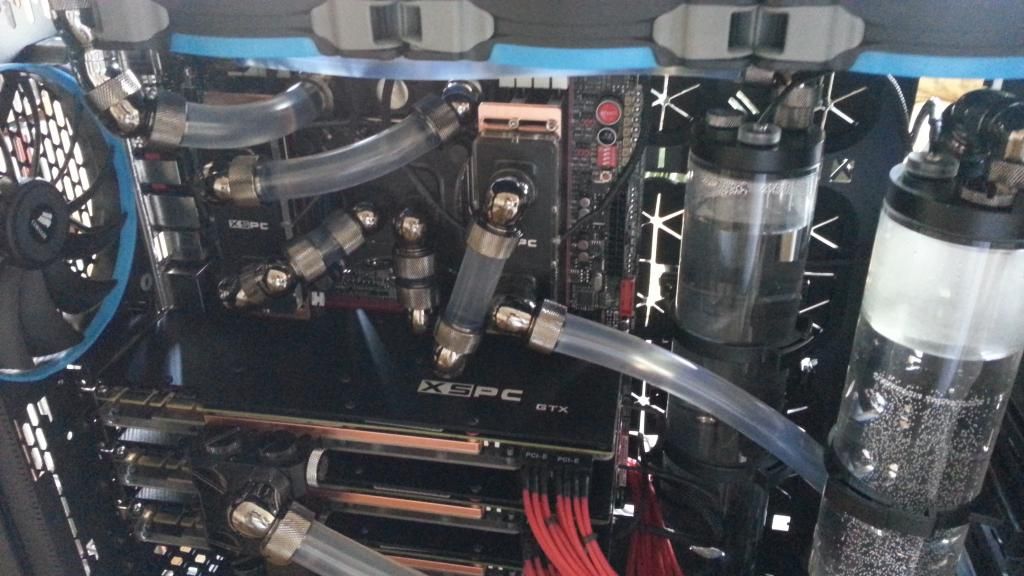
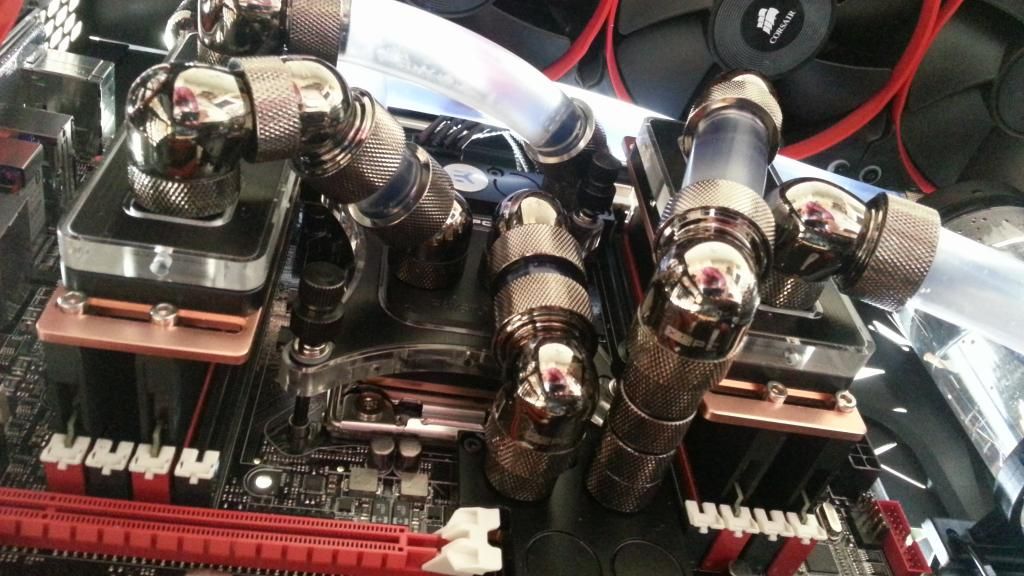
6. Mobo tubing complete. Very tricky and required patience.
20130713_180351_zps11bea081.jpg


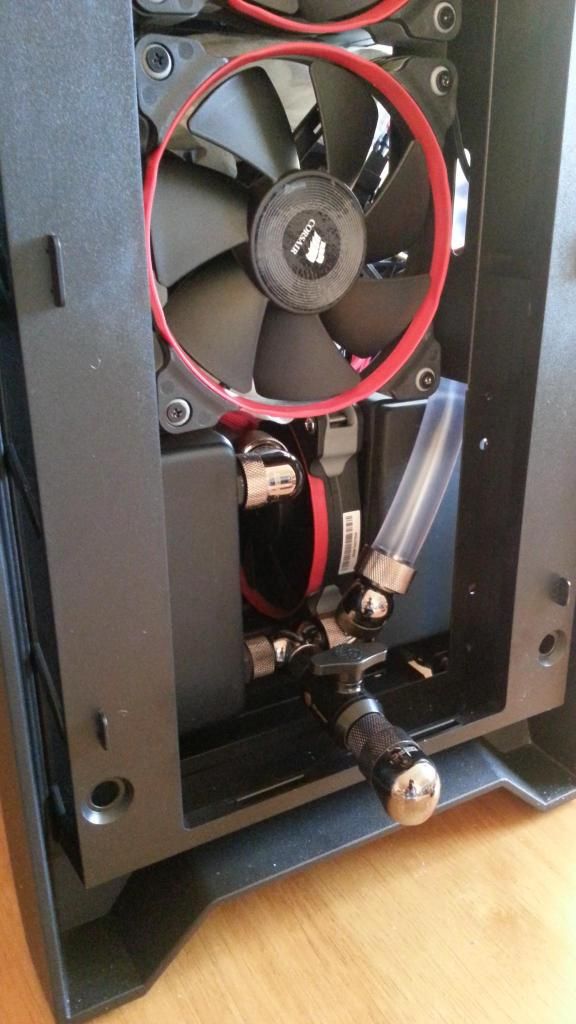
7. Drain port for the bottom loop
20130714_210053_zpse572a62d.jpg


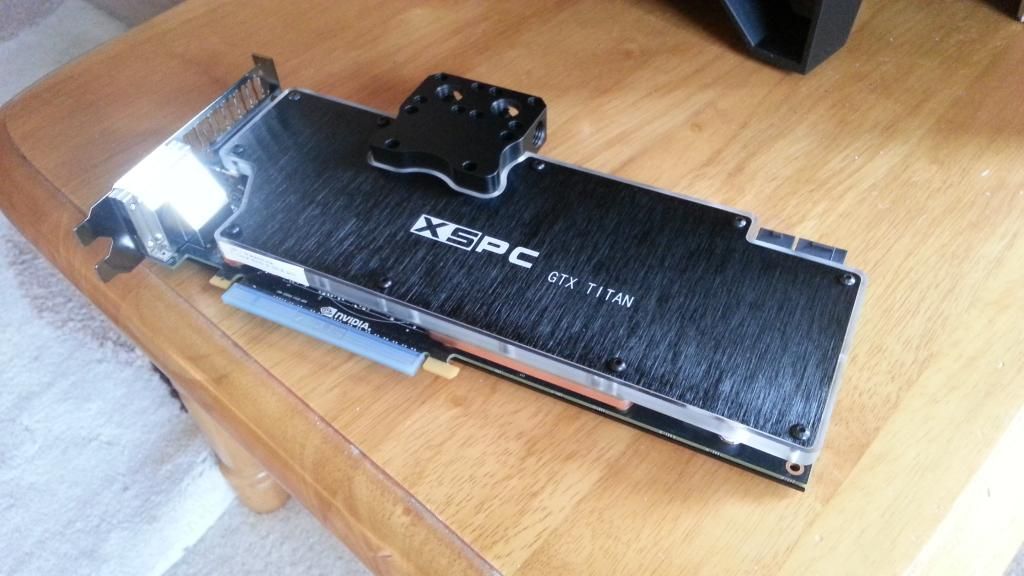
8. One of the Titan cards with the XSPC waterblock and backplate installed.
20130717_211258_zps08008f0d.jpg


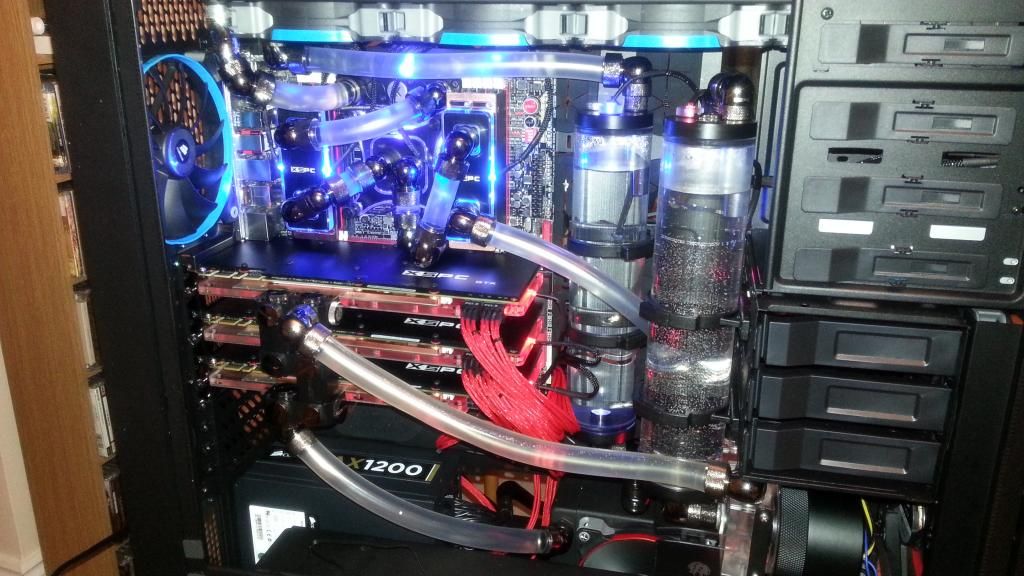
9. After leak testing the CPU-Mobo loop, the Titan cards finally went in.
20130719_223947_zpsa8dcd089.jpg


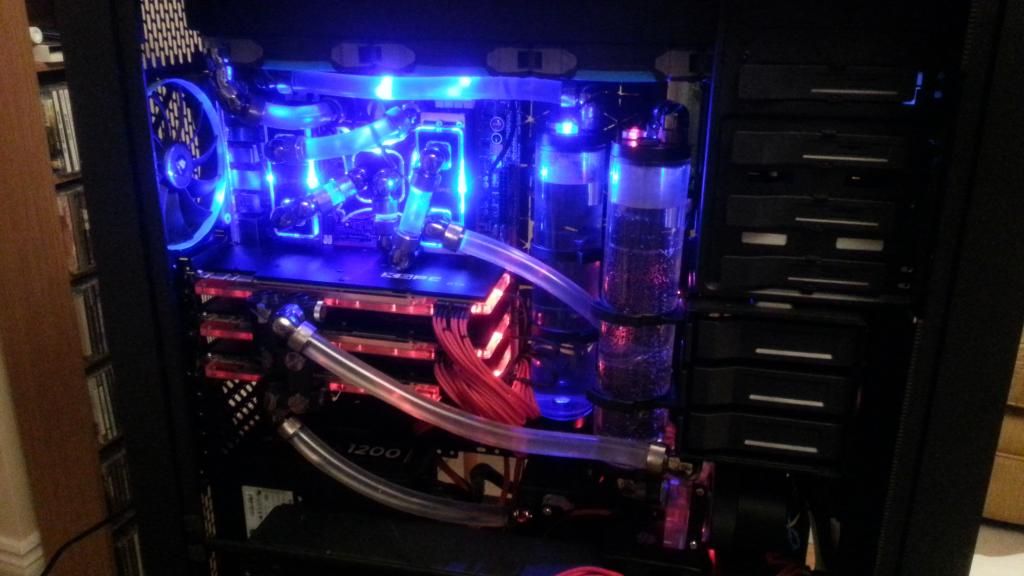
10. Latest pics. I havent really spent much time with the lighting and cable management but that will happen in the coming days.
20130719_224015_zps72a3daa9.jpg

20130720_094204_zpse3356fdd.jpg

20130720_094131_zps11504ad0.jpg
 
Last edited:
The 900D was a dream to work with at the start. Almost felt that I could sit inside it while putting the various bits and pieces in. With the 2 loops though I've managed to fill the space nicely. Plenty of expansion slots left and I may add an FPGA development card later as I work in FPGA/ASIC design myself.

My only slight criticism of the 900D was a lack of holes or screw mounting points in behind where I have the back reservoir installed.
 
Im looking at a 2 x 480 and 1 x 240 rad build will one d5 and pump top be enough as i see it says you have two ?


Very nice build i especially like the drain port :)

Thanks. I wouldnt have enough experience of watercooling to say if one D5 pump is enough for all your planned rads. Are you planning on cooling all the mobo chips also? I'm others here have the experience to say if the one D5 is enough.

As for the drain ports, I've two, one of each of the two independent loops.

Other is here, just above the red trimmed fan.

20130713_180226_zps20fad6da.jpg
 
That must have taken you a while to put all that together. How long did it take you to drive out the air bubbles? I can't imagine that was an easy job with a big heavy case like the 900d rocking it side to side with all that equipment in it.

So what made you run two separate loops? I like the idea of having two pumps but if it were me I would have run them and in serial rather then parallel that way you have redundancy built in in case one pump packs up. The other thing you might want to consider is routing the tube from your rear resieviour behind the case which is more then doable as theres tons of space and would tidy it up a bit.

It took a while alright. Most of the time was spent planning it out and doing mockups to see where I could and couldnt mount and route components etc.
Bleeding both loops was a major pain in the ass. The motherboard has a lot of heavy blocks hanging off it so I was very careful not to stress it while moving the case from side to side. I'd say the case is now over 40Kg easily.
I still have 2 big bubbles in the bottom loop that I'm finding near impossible to get rid of.

As for the going with 2 loops, well there was no big reason behind it apart from looks I suppose. I was concerned that with the complex tubing and angles on the mobo I might have had flow rate issues if I had everything on the one loop.
I did actually try to route a tube from the rear res behind the case but with the thick tubing I just couldnt get the bend tight enough and as a result I couldnt get the rear cover on. I'll break up the that route with angled connectors eventually but for now I'm happy enough.

I'd like to get better lighting in behind the two reservoirs to give the two loops a distinct colour and look. I dont mind if the colours bleed into one another either as long as it looks well.
I'm still trying to decide whether to add dye or mayhems instead of just distilled water but I'm not too eager to bleed the f*cker again.
 
Perhaps try lightport fittings in the bottom of the two reservoirs? Should give them both the individual glow your looking for :)

I do have 5mm LED holes in the top of both reservoirs and I put some XSPC LEDs in there but they are not strong enough to light up the res. I havent come across those lightport fittings before. I just did a brief search but couldnt find what I need so far.

I also seem to have a weird PSU issue too.
When I power on the PC, the PSU shuts down after 2 secs, then after another 3 secs it comes back on again and the PC boots into windows. Temps etc all look normal the PC behaves fine from then on, no burning smell etc.
Note that this only happens if I had the PSU power switch at the rear in the off position initially and then I switch it to the on position before I power on the PC.
If I shutdown the PC via Windows and I power on again, while keeping the PSU rear switch in the on position, the power up sequence is ok.

Its a corsair 1200w PSU. Surely if there was a short somewhere the PSU will power on/off continuously? And it seems strange that the issue only occurs after cycling the rear PSU switch.
 
Thanks chaps! That puts my mind at ease.

I did use the same PSU and Mobo in the old 800D and if memory serves, it never power cycled like this. In the new 900D build the only difference in terms of extra load would be the two D5 pumps, the fan controller and all connected fans.
 
Drain port is really handy and would recommend it. Put it on the lowest point of your loop if possible and you can easily drain the whole thing in about a minute.

Cant take credit for mine though as I copied the idea from another chap here, one who also has a 900D + Titans with a purple and white colour scheme in his loops. :-)
 
Thanks.
Temps are pretty good I think. The Titans are 27 degrees on idle and on full load they go up to around 37 degrees depending on ambient temp.
The CPU is about mid 30's idle and on Prime95, the average across the cores is in the high 60s.
That's with the case still open on both sides. I wanted to run it like this for a few days to make sure that there were no issues before I tidy up cables and close it all up.
 
Awesome.

I would love to do some thing similar at the end of the year. How did you install the graphic cards? one at a time and then build the cooling in after?

I asked as I'm thinking of using quick disconnets as my MB failed last week and it a pain in the ass the take out the cards.

Cheers, Thanks.

The graphics cards were tricky to install mainly due to their weight and the way the 2 SLI flow bridges get screwed together. I had to put them in one at time and be very careful. Any future changes to either the mobo or GPUs will require me to drain the loops.
I've no experience of those quick disconnects.
 
I'm thinking of adding a drain port like that to my 900D build, however how does it fit into the case? does it push back in with the dust filters and the aluminium front or is it sturdy and stick out the whole time?

Sticking out from the T-Fitting, is a 10mm male to male fitting, then comes the Valve itself, then another 10mm male to male fitting and finally a 90degree XSPC fitting.
The outer male to male and 90 degree fittings are not normally there, I just had them in place for drainage. With those 2 fittings removed, the dust cover just about fits on with an ever so slight bulge. However if I changed the 10mm male to male(where the T-fitting is) to a 5mm one, the dust cover should go on without a problem.

Hope this makes sense. :)
 
Back
Top Bottom