Coolermaster TD500 mesh water cooled build

D4N

D4N

Associate
Joined
7 Jun 2020
Posts
191
These projects always start with just planning to swap a couple of bits and snowball into something on a much bigger scale than first planned, don’t they?

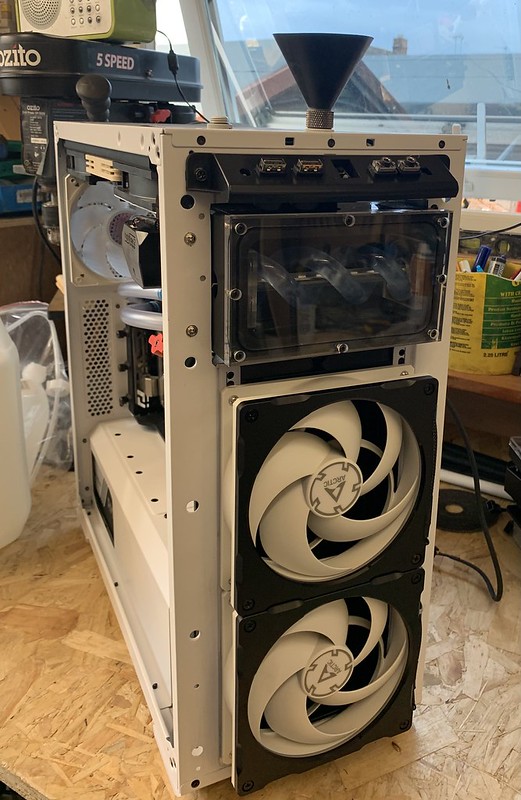
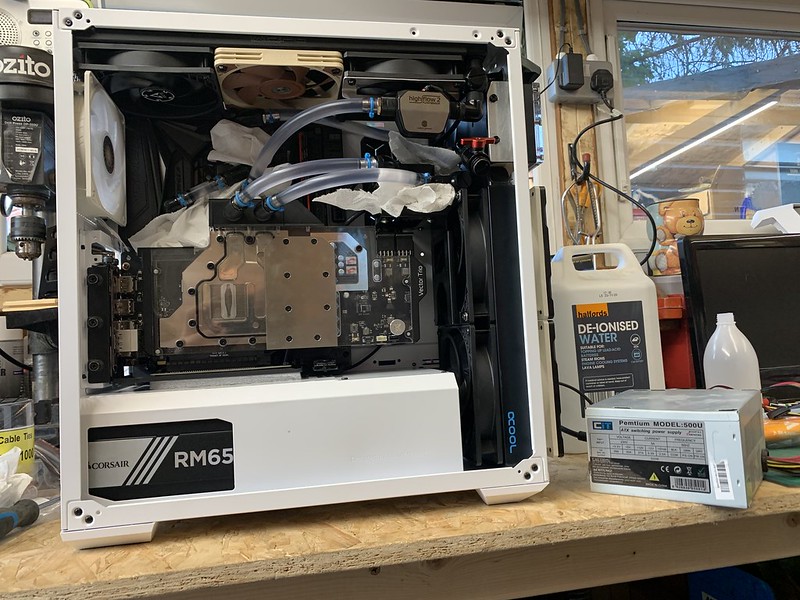
It started when I managed to get a 3080 ti for my main rig, and was going to repurpose the 2080 from that into the other pc that’s mainly used by my nieces to play on. It’s built in an old Corsair Obsidian 450D. Just a quick and easy gpu swap. Being water cooled though, I thought it’s the ideal time to give the loop a clean out too. It’s running a 280 rad in front, and a 140 up top to cool a 7700K, a 1070, and the VRM as it’s an Asus Formula motherboard. Seeing as the 2080 is likely to kick out a bit more heat than the 1070, I thought I’d squeeze in a 360 in the roof rather than the 140. It’s got one of them little water temperature gauges fitted behind the grill, but you can’t really see it, so I thought I’d replace that too, so that led me to Aqua computer. I use Aquasuite on my other pc to handle the fan control, so I thought I’d upgrade this one to use it too, which in turn ended up in me getting a Vision Touch to replace the temperature gauge, a High Flow 2, an Octo 8 fan controller and some rgbpx wires as I want to use the aqua computer rgb control on the Octo, as the motherboard has only got the old 12v rgb headers.

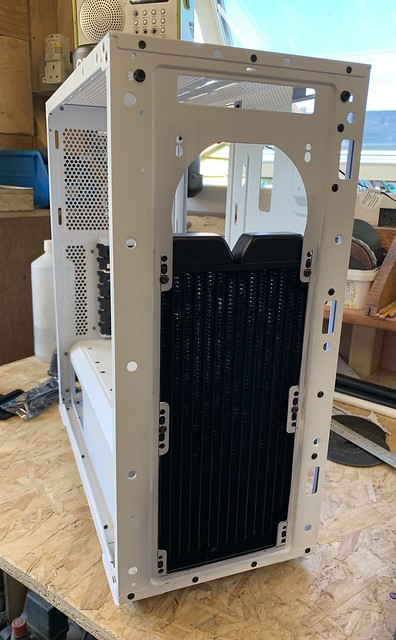
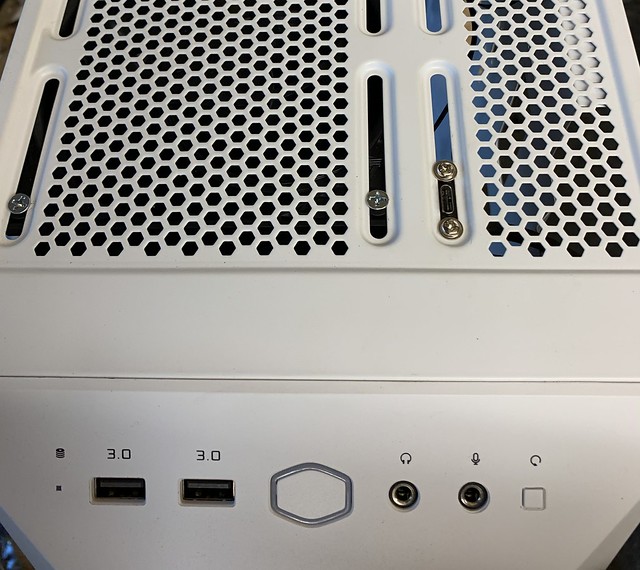
Next though was if I was going to all that effort, why not upgrade the case too while I’m at it? The criteria I had was something with good airflow, a maximum of 230mm wide, and capable of taking a 280 front rad and 360 top. The Cooler Master TD 500 Mesh ticked all of the boxes, so I ordered one in white.

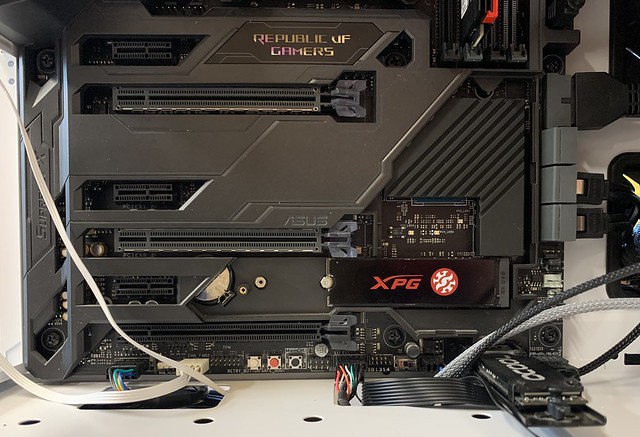
This is what I’ve got ready for the swap so far, I’m still waiting on a few more bits to come for this, and I need to get some more bits for the other build so I can then nick some more bits from that to go in here.

51312791070_1e4f57141e_z.jpg


51311990908_1ca53f9033_z.jpg


I hope I’ll get this done fairly quickly. I just keep finding more stuff I need to build it, I’ve ordered bits everyday for the last 4 days from OCUK this week! I think that should be enough to get it together.
 

D4N

D4N

Associate
OP
Joined
7 Jun 2020
Posts
191
I made a start on this over the weekend. So far I’ve cut out the front so that the 140mm fans aren’t half blocked where the original cut outs were for 120mm fans, and cut the top section to mount my dual bay reservoir. Also made clearance for a fitting to go through the top of the case for a fill port , and cobbled about a usb type c to fit in as well.
I’m trying to plan how the piping is goin to run now I’ve got the rads and the pump roughly mounted.

I should get some pictures up during the week.
 

D4N

D4N

Associate
OP
Joined
7 Jun 2020
Posts
191
Pictures!
This is the old Corsair Obsidian 450D. I have cut this about to move the hard drive cages and chopped out the drive bay supports for more room and various other holes drilled in it. It’s served it’s job well for the last 6 years or so I’ve had it, and had a few different set ups in it.

51323528580_df1ca54b0a_z.jpg


51322733878_2895446208_z.jpg


First job on the new case was to strip it down to the metal to see what I had to work with

51323252159_c0ee3fd854_z.jpg


Next I tried on the 140 fans, and after seeing how much was blocked off, I cut out most of the excess material to leave an unimpeded air flow path

51322734058_37aa82c1f9_z.jpg


I wanted to use my double bay reservoir so that I can see the water level from the front of the case, as it is slotted into a desk so the side isn’t really visible. In order to get it mounted, I had to get the grinder out again. I did have to drill some new holes to drop the rad down a bit to gain a bit more clearance for the reservoir up top.

51323528980_4ab22d1057_z.jpg


I also had to make a little bracket to support it on side, and drill a hole to bolt through on the tray.

51322533051_70f73efe1d_z.jpg


I cobbled up the usb type c panel mount I had to fit int the slots on the top where the 140 fans would have mounted.

51322533156_4a9872fc50_z.jpg


and the 2080 compared to the 1070 it’s replacing. You can see how the EKWB blocks are getting better looking each generation. The one on my 3080 ti in my other project log looks better again compared to the 2080

51321803602_881f06cd1b_z.jpg


and this is about where I’ve got to at the minute. The spec of the case says it will take a 360 up top, but it hasn’t got a lot of room up there really. I’m using a thin 20mm radiator, and I did originally want to have the top fans in a pull configuration to make for easier dusting, but it hangs a little bit low and would have either clashed or been really tight against the fitting coming out of the top on the VRM. I could have bought 3 slim fans to gain more clearance and keep it pull, but I already had a slim Noctua out of the old case, so I’ll probably end up leaving it like the photo with the Arctic P12’s at either end and a slim Noctua in the middle. I think this is going to have better airflow for cooling than using 3 slim fans. I might change the middle one for a chromax or a slim Arctic at some point, but for now I’m not particularly worried.

51322533491_d89d7a5652_c.jpg
 

D4N

D4N

Associate
OP
Joined
7 Jun 2020
Posts
191
I made a bracket to support the High Flow 2 tonight so that it’s not just hanging from the fittings, and made a start on doing some of the piping.

51327459299_f9a33bb8b2_z.jpg


I am planning on going from the pump to the GPU, back to the 280 rad then up to the 360 rad, through the flow meter into the CPU and onto the VRM and back to the reservoir to complete the loop.
51326005367_bb1349b804_z.jpg


I also had to drill some more holes in the pump mount to shift it over a bit to clear the fitting coming out of the radiator.
 

D4N

D4N

Associate
OP
Joined
7 Jun 2020
Posts
191
Made a bit more progress tonight. I’ve got all the piping cut to size, and fitted. Still needs a few cable ties on a few of the barbs for security. It’s a lot tidier job with shorter pipe runs than I had in the old case.

51331738425_b3ab90089b_z.jpg


Next I fitted the front Arctic P14 fans and Phanteks Halos lux. I went for the halos over RGB fans as I know the Arctic fans are good performers on radiators, and the halos have got 30 LED’s (I think) in, which is more than fans with RGB seem to have. And they link together so it should act like 1 long led strip rather than 2 separate ones with a split signal. From what I’ve seen the Aquasuite RGB control is quite good and you can control each individual led in a strip, so I want to see if I can get some effects going in a figure of 8 around the fans.

51330742351_de99bc5455_z.jpg


I had tried on the front panel previously, but not with the Halos fitted, where I did encounter 1 small problem. Where the bottom tabs that hold the mesh to the plastic frame just interfered slightly, so I had to cut it back a little shorter and reshape the mesh to suit to get it to fully clip into place. I don’t think it would normally have caught, I think it’s because I dropped the fan/radiator mounting holes 5 or 6mm to gain clearance for the reservoir, and the halos add about 5mm to the depth.

51330951763_b7c054fcac_z.jpg


Iit’s starting to shape up quite nicely I think. You can just about see the fill port poking through where I drilled on the top behind the power button. I also fitted one of the rgb fans that came fitted in the front of the case to the rear exhaust position. I did have to slightly extend the existing mounting slots down a couple of mm to get the screws in.

51330007367_3338070283_z.jpg


51330007462_61b5141aff_c.jpg


Soon I should be running some water in it to check for leaks, and the it will be fitting all the cables and stuff.
 

D4N

D4N

Associate
OP
Joined
7 Jun 2020
Posts
191
Nearly there now. I’ve tackled the wiring, finished the plumbing and started to leak test.

First I put the front panel wiring back in. It’s pretty tight for room in there

51333153174_1113fb708e_z.jpg


Next I put in the psu, hard drives and cables, then had to find somewhere to fit the Octo in. The trouble with it is that it uses a molex connector coming straight off it for power, so needs a bit of depth for clearance, which there isn’t a great deal of in this case. I ended up slotting it in by the hard drives facing the power supply.

51333152814_7f4c34a52c_z.jpg


I’ve got all of the fans on the radiators connected to it, 4 temperature sensors and 2 rgb lines.

51332430476_fbf8df4ecb_z.jpg


2 of the sensors are on the GPU inlet and outlet, there’s one on the flow meter which is on the exit of the radiators, and I’ve got an external temperature sensor too. I had to use some 180° PCIE connectors on the GPU to get the wires in below the pump.

51332639778_0435f60d75_z.jpg


Now came the fun that is RGB. I’ve got adapters galore to hook it all up. I’m still waiting on some more to arrive to finish it off yet! I used some Aqua Computer rgbpx cables from the Octo, then got some adapters to change that to normal 5v rgb 3 pin connectors, but I bought the female ones instead of the male ones so had to use some little joiners. That then goes into a splitter cable which in turn is plugged into a Phanteks rgb adapter, then into the halos daisy chained together. The rear fan is just a normal connector, so plugged into the splitter.
On the other RGBpx line on the octo, I’ve got another splitter, with one going to the GPU, and the other going to the RGB strip in the reservoir and the CPU block. Except it doesn’t yet, as they are both Barrow items that use their own different connector again, and I haven’t got the adapter yet. I’ve got a Barrow splitter, but it hasn’t got the standard end on it, hence needing another adapter. I was running them from a Barrow controller before so I didn’t need one, but this time I want to do it with Aquasuite instead, as it’s got more control. The Barrow controller has just got preset modes to cycle through.
After looking at the halos too, I’m not sure if they will work as one long strip or not. The bumpf in the packaging says they daisy chain together, but it looks like a splitter to me. The Phanteks neon strips work like one long one when connected, so I thought these would too. I’ll find out when I get it properly set up.

51332639858_a93c94132f_z.jpg


This is just a few of the many adapters

51333152904_df80f5ecb9_z.jpg


After all of that, I started to fill it up. I’ve got a little g1/4 funnel to screw in the fill port on the top

51333422105_0964026931_c.jpg


I did nearly have a disaster though. I had filled the reservoir, and it had air in the pipes stopping it flow into the pump, so I took out the plug on the side of the top radiator connector, took the funnel out, put on a spare bit of pipe and blew it through so that it started to fill the pump and pipes so I could safely power the pump without running it dry. I then started to pour some more water into the funnel, but had forgot to put it back onto the reservoir, so was actually just pouring water straight into the top of the case! Luckily I didn’t pour in a lot, and it’s fresh deionised water, so not conductive yet. The power wasn’t connected, so nothing could short out. I’ve dried off any water I can see, and given it a good blow off with an air line. Hopefully the weather will come back hot again soon, and I can leave it in the sun to be sure it’s all dry before it’s properly powered. I’m running it from a cheapo jumped power supply to run the pump for a while to make sure there’s no leaks, then I’ll drain it out and make up some EK Cryofuel to use as coolant in it. I’ve put some paper towel in to be a bit safer now after the near miss I had earlier.

51332639343_fd0b8e049e_c.jpg
 

D4N

D4N

Associate
OP
Joined
7 Jun 2020
Posts
191
Tested out draining it tonight. Seems to be okay.
I’ve got the ball valve on the reservoir to empty that

51339530548_7b9d87d07e_z.jpg


Next I tip the case on it’s side and take out the bung on the top radiator cube fitting and fit a spare piece of tubing

51340314440_e800763d10_z.jpg


and tip it over to empty it

51340044819_196bca949d_z.jpg


then repeat for the fitting on the front rad

51339530868_cb600c4ff9_z.jpg


Once it was emptied I went about removing the graphics card to let me fit an extra m.2 ssd. The one already on it is the one I used years ago when I first got a m.2 drive and is quite small by today’s standard, so I’ve gone for a 2tb Adata XPG Pro

51339313106_173096a88a_z.jpg


With any luck the rest of the bits should arrive tomorrow, then I can refill the loop with the Cryofuel.
 

D4N

D4N

Associate
OP
Joined
7 Jun 2020
Posts
191
I’ve got this pretty much as I wanted it now.
The next step I made was fitting a TPM module to be ready for Windows 11. I didn’t want to have to mess about pulling it apart later to get to it, so I bought one to put in now while I had it apart

51350712506_a0619dbb23_z.jpg


I also had the final RGB adapter arrive, so I could get that all connected up, and topped it up with fresh coolant ready for final assembly.

I’m quite pleased with how it turned out where I’ve hacked it about to fit the dual bay reservoir in. It does what I want, letting me see the coolant level from the front of the case.

51349980077_26e6aef2e2_c.jpg


51351452034_a044445eb0_c.jpg


This is the little bit that prompted me into buying a load of Aqua Computer goods. It’s way more advanced than the simple temperature read out I had before. It can be configured to show loads of different stuff should you wish. This particular screen is showing GPU in water temp, GPU out / radiator in temps, and radiator out temps. I’ve also got it scrolling through to show CPU temps and use, GPU core temp and use, room temperature and the time and date. I went for the external usb version, so I’ve got it plugged into the hub on the back of the monitor.

51350939433_cb388ed45c_c.jpg


I liked building in this case. It has a few nice touches, like the shaping of the glass on the side to carry the design through from the front, and how it fits on to the case with a formed angle piece at the bottom that sits on the case edge so that it doesn’t drop when you undo the 2 thumbscrews at the top. The rear pci slots have been already cut between them so fitting a vertical mount is straight forward too. The inclusion of 3 rgb fans and a controller is a bonus too, even though I only used one of them.
The only things I think could be improved is it could do with a little more space in the rear side for cables, and a usb type c would have been nice. The dust shield on the psu would benefit from some magnetic tape as well, because it’s very easy to dislodge it without trying. For the price though I think it’s a good buy.

Now I’ve done this, I can get back to putting my other system back together!
 

D4N

D4N

Associate
OP
Joined
7 Jun 2020
Posts
191
I was a bit limited where I could fit the Octo in. I had to use fan extensions to reach it from the top fans, but the rgb cables were the worst bit, there are 4 different types of connector used in there! And having all the fans and temperature probes running to it added to the clutter even more.

I did consider making up some new pcie cables as the Corsair ones that come with the psu are the type with the piggyback extra connector on, so that made more to try and hide away. I didn’t bother in the end as using the 180° connectors on the gpu means they aren’t seen.
 
Back
Top Bottom