It's 2020 and i've done nothing but tinker with this machine, lost count how many times i've rebuilt it and swapped out parts. But as usual im browsing through the ocuk website and the new quantum block reservoirs catch my attention. I do some digging and look at some builds and figure, you know what i could make my rig even cleaner and simplistic. So here we go again, another rebuild thread...
Parts used:
My basket at Overclockers UK:
Everything else i've had previously so was reused in this build.
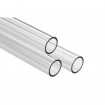
One thing i learnt through this rebuild, the corsair hydro x tubing is much harder than the usual PETG stuff im use to. I didn't see this when i bought it and thought it was standard PETG but turns out its PMMA which is an acrylic/poly carbonate plastic so had to use a saw to cut it. You can imagine my face when i first tried to cut it with a new tube cutter lol!
I do love this tubing way more though, its much more resistant to scratches and looks clearer. Would definitely be using this again over PETG.
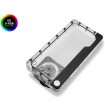
The EK Quantum Kinetic FLT 240 - First impressions...
It's very solid, very good quality and weighty! The machining is top notch and the material itself is very scratch resistant as i found out when i dropped a few heavy fittings on it by accident! It comes with all the necessary mounting hardware and an allen key tool to remove the G1/4 plugs. I got the FLT version with the D5/DDC mount at the back. As standard, the ports on the face are plugged leaving 2 open ports at the bottom. I feel like the ports at the bottom should have been plugged instead, its very easy to miss and forget that there's actually ports down there.. just something to look out for. The block also comes with a built in LED strip which i have yet to test out but does fit on a standard 5v ARGB header.
One thing i did notice and that i always do with EK blocks is testing how tight the screws are in. In this instance the screws were loose. If i was to fill this res block, it probably would have leaked eventually if not straight away as the vibration from the pump. I would 100% you check all your blocks from EK when you first get them to make sure they screws are in tight!
As usual, a couple of pictures of the process and a short description.
Getting the EK Quantum Kinetic mounted with the D5 pump mounted at the rear. Getting all this mounted together with the fan at the back for intake was an absolute ball ache to do! The standard screws that came with the kit is not long enough, i had to dig out some old screws i had to make this all work. Also note to remember to block off the bottom ports on the res block before you install it. Last thing you want is to fill it and have all the coolant fall out the bottom!


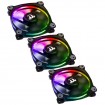
New fans, Thermaltake Riing! Came with the controller which i strategically placed under the res for easy access.

ML120's at the top, nice crisp but not over the top bright White led fans

This bitspower EF Summit that i've had for a millennia now...

GPU installed with the riser kit from Phanteks. There is no room underneath, the verti mount sits on the fans shroud...


The first bend! Used a mixture of tools and free hand to get the bends right, took a few attempts but PMMA is quite easy to work with provided you get it hot enough. Minimizing those angled fittings and adding more complex bends, something my last build lacked.


Finally getting the last of the piping in but need to cut some down to fit a flow meter inbetween. Also not 100% happy with the top bend, its slightly sacking downwards. OCD kicks in, will need to adjust it.


More to come later!
Another thing to note, i found PMMA tubing fits much tighter in XSPC 14mm fittings. Probably due to the fact that it was designed for PETG and not PMMA. They do fit but takes a lot more force to get them in, really have to twist and wiggle them to get them past the orings even with a nice chamfer edge.
Parts used:
My basket at Overclockers UK:
- 1 x EK Water Blocks EK-Quantum Kinetic FLT 240 D5 PWM D-RGB Pump / Reservoir Combo - Plexi= £169.99
- 1 x ThermalTake Riing 120mm LED RGB Fan Sync Edition - Triple Pack= £44.99
- 1 x XSPC TX360 Ultra Thin Copper Triple Black Radiator - 360mm= £52.99
- 1 x Corsair ML120 Pro LED White 120mm Premium Magnetic Levitation Fan= £19.99
- 1 x Corsair Hydro X Series XT 14mm Hardline Clear Tubing - 3 x 1m (CX-9059003-WW)= £17.99
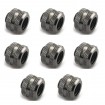
- 1 x XSPC G1/4" to 14mm Rigid Tubing Triple Seal Fittings - (Black Chrome) - 8 Pack= £28.99
Total: £345.44 (includes shipping: £10.50)
Everything else i've had previously so was reused in this build.
One thing i learnt through this rebuild, the corsair hydro x tubing is much harder than the usual PETG stuff im use to. I didn't see this when i bought it and thought it was standard PETG but turns out its PMMA which is an acrylic/poly carbonate plastic so had to use a saw to cut it. You can imagine my face when i first tried to cut it with a new tube cutter lol!
I do love this tubing way more though, its much more resistant to scratches and looks clearer. Would definitely be using this again over PETG.
The EK Quantum Kinetic FLT 240 - First impressions...
It's very solid, very good quality and weighty! The machining is top notch and the material itself is very scratch resistant as i found out when i dropped a few heavy fittings on it by accident! It comes with all the necessary mounting hardware and an allen key tool to remove the G1/4 plugs. I got the FLT version with the D5/DDC mount at the back. As standard, the ports on the face are plugged leaving 2 open ports at the bottom. I feel like the ports at the bottom should have been plugged instead, its very easy to miss and forget that there's actually ports down there.. just something to look out for. The block also comes with a built in LED strip which i have yet to test out but does fit on a standard 5v ARGB header.
One thing i did notice and that i always do with EK blocks is testing how tight the screws are in. In this instance the screws were loose. If i was to fill this res block, it probably would have leaked eventually if not straight away as the vibration from the pump. I would 100% you check all your blocks from EK when you first get them to make sure they screws are in tight!
As usual, a couple of pictures of the process and a short description.
Getting the EK Quantum Kinetic mounted with the D5 pump mounted at the rear. Getting all this mounted together with the fan at the back for intake was an absolute ball ache to do! The standard screws that came with the kit is not long enough, i had to dig out some old screws i had to make this all work. Also note to remember to block off the bottom ports on the res block before you install it. Last thing you want is to fill it and have all the coolant fall out the bottom!
New fans, Thermaltake Riing! Came with the controller which i strategically placed under the res for easy access.
ML120's at the top, nice crisp but not over the top bright White led fans
This bitspower EF Summit that i've had for a millennia now...
GPU installed with the riser kit from Phanteks. There is no room underneath, the verti mount sits on the fans shroud...
The first bend! Used a mixture of tools and free hand to get the bends right, took a few attempts but PMMA is quite easy to work with provided you get it hot enough. Minimizing those angled fittings and adding more complex bends, something my last build lacked.
Finally getting the last of the piping in but need to cut some down to fit a flow meter inbetween. Also not 100% happy with the top bend, its slightly sacking downwards. OCD kicks in, will need to adjust it.
More to come later!
Another thing to note, i found PMMA tubing fits much tighter in XSPC 14mm fittings. Probably due to the fact that it was designed for PETG and not PMMA. They do fit but takes a lot more force to get them in, really have to twist and wiggle them to get them past the orings even with a nice chamfer edge.
Last edited:


