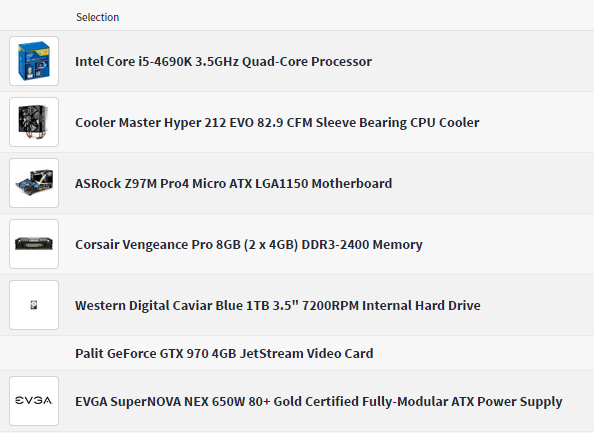
Hi everyone! I'm Tux/Ryan and this is my first ever build log for a project I call "Epipwn."
First off special thanks to Mr Montymole and davido_labido These guys are both inspirational and know what they're doing. Thanks for the help!
Apologies for the poor image quality, my ipad is usually used as my mouse mat.
So whats the plan?
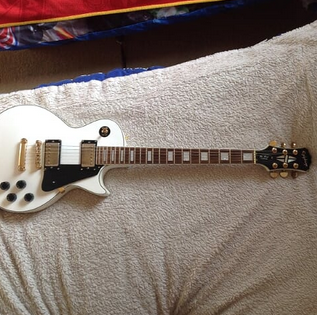
This is my beloved Epiphone guitar and although I don't play it very well (Self-Taught) It gave me inspiration to start a build. I will have a matching color palette to that of my guitar, and a similar if not surpassing; awesome bad-assity level.
Now of course every PC (Unless your crazy ) has a case to suit the parts inside!
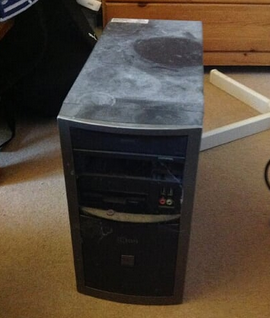
Well.. I don't.
You see being a kid of 15 there's two things we struggle to do: Purchase alcohol and getting money. But that's besides the point, so i'm going to call all the stops and get this looking like an awesome build!
So lets begin!
Now do you think I would buy this case as it is empty? Hell no. I'd save up some money do get a half decent case! So that must means somethings in it.. but what?
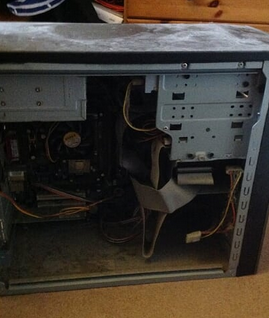
Oh boy.
Sadly, considering we got this PC back in 2004 the parts weren't up to scratch, consisting of an old AMD CPU and a surprisingly good quality gigabyte motherboard. Although, i'm not going to be using any of the parts inside in the final project due to their performance being that of a college kid and a female dominatrix.
So once I had all the components out I could, this is what I ended up with:
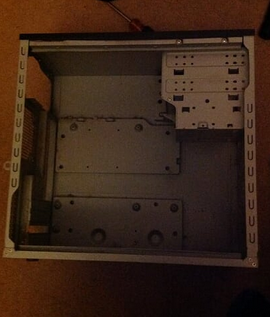
It took a while!
Now after getting cut by the HDD tray (Not in the picture above) and air-blasting the case, I was left with bare metal.
Now I found it difficult to take a picture so take my word for it, but as for cable management room: There is none. I have a solution to that though, so will post that in a later update.
About to order some supplies to awesome up the case so stay tuned!
First off special thanks to Mr Montymole and davido_labido These guys are both inspirational and know what they're doing. Thanks for the help!
Apologies for the poor image quality, my ipad is usually used as my mouse mat.
So whats the plan?

This is my beloved Epiphone guitar and although I don't play it very well (Self-Taught) It gave me inspiration to start a build. I will have a matching color palette to that of my guitar, and a similar if not surpassing; awesome bad-assity level.
Now of course every PC (Unless your crazy
 ) has a case to suit the parts inside!
Well.. I don't.
You see being a kid of 15 there's two things we struggle to do: Purchase alcohol and getting money. But that's besides the point, so i'm going to call all the stops and get this looking like an awesome build!
So lets begin!
Now do you think I would buy this case as it is empty? Hell no. I'd save up some money do get a half decent case! So that must means somethings in it.. but what?

Oh boy.
Sadly, considering we got this PC back in 2004 the parts weren't up to scratch, consisting of an old AMD CPU and a surprisingly good quality gigabyte motherboard. Although, i'm not going to be using any of the parts inside in the final project due to their performance being that of a college kid and a female dominatrix.
So once I had all the components out I could, this is what I ended up with:

It took a while!
Now after getting cut by the HDD tray (Not in the picture above) and air-blasting the case, I was left with bare metal.
Now I found it difficult to take a picture so take my word for it, but as for cable management room: There is none. I have a solution to that though, so will post that in a later update.
About to order some supplies to awesome up the case so stay tuned!

Last edited:


