First build vague review/overlook(56k warning)

Associate
Joined
20 Jul 2007
Posts
1,364
So i've just bought a computer that makes the following spec:

Spec:
320gb hard drive (16mb cache)
E2140 --cheap and overclockable
Corsair 520w --quality
Antec p182 -- looks amazing, though very big and heavy
Gigabyte p35c DS3R (DDR2&3) --cheap for what it is
ATA dvd drive -- A dvd drives a dvd drive really !
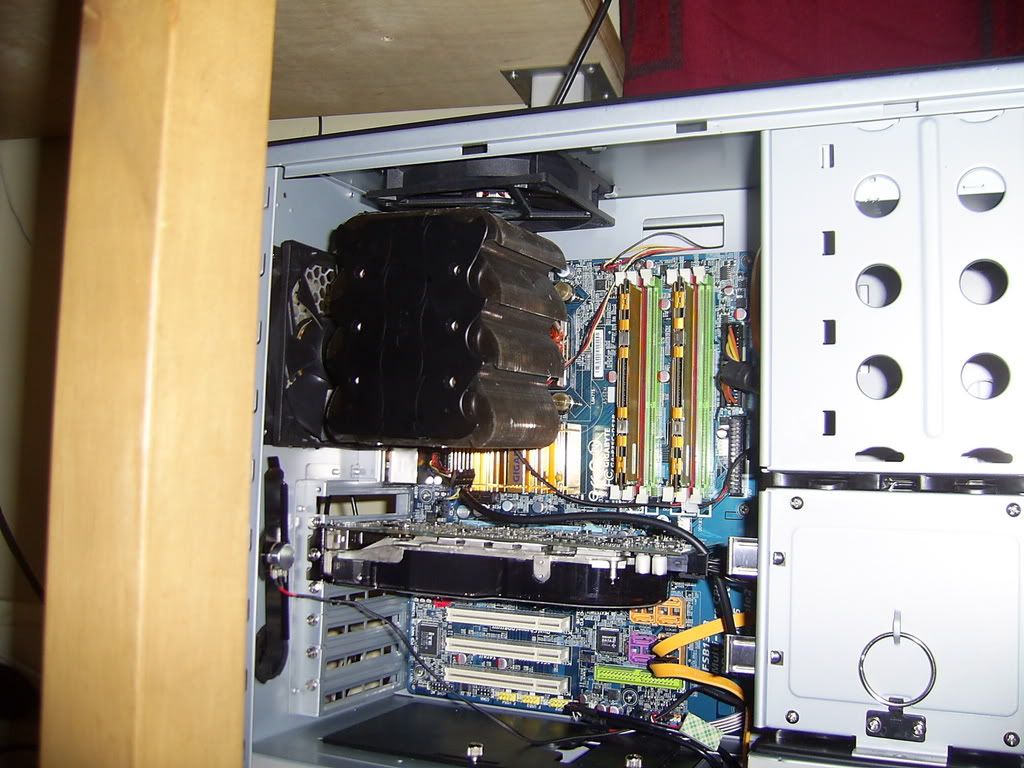
Tuniq 120 heat sink -- whoa, massive, sharp, cools well
2gb Crucial ballistix 667mhz ram --looks great, performs better.
OCuk GTS 8800 320mb

Think that’s it...


PSU:
So the first thing I did was install the PSU (started at this so I could have a method of discharging static to ground.)
PIC_0019.jpg

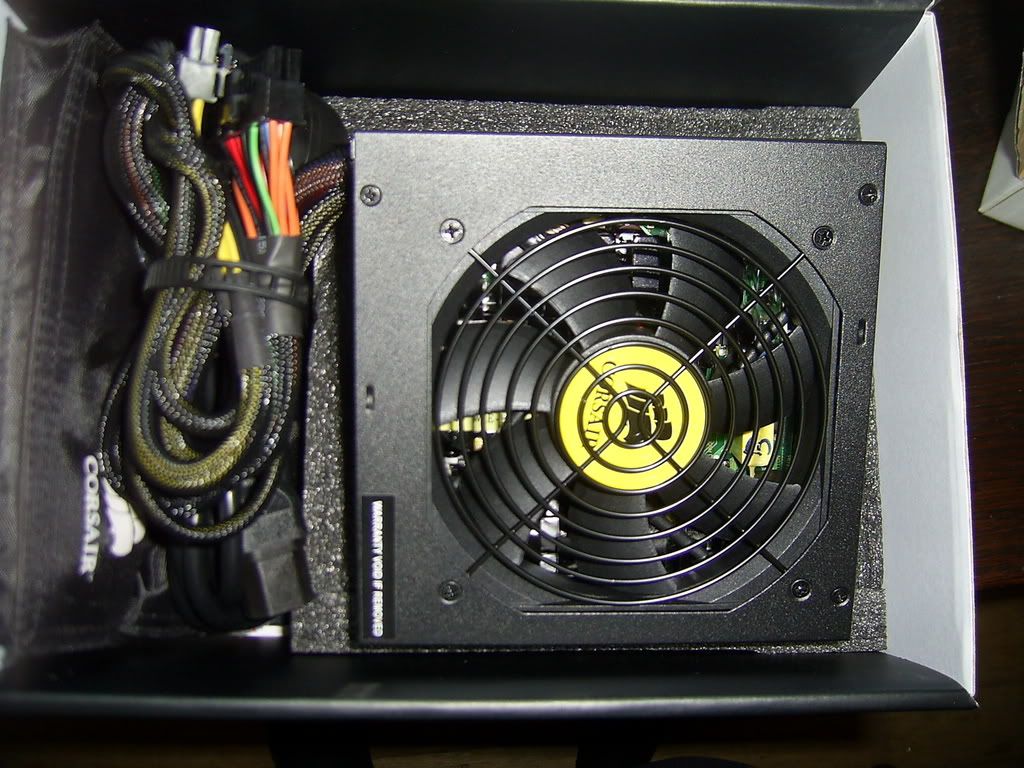
The first thing you notice about this PSU is the sheer quality; everything down to the box emits class.

Included is a nice black wallet containing plenty of cables for most systems.

Installing the PSU in the p182 isn’t as easy as it should have been, first you have to unscrew and remove the PSU cage
PIC_0021.jpg

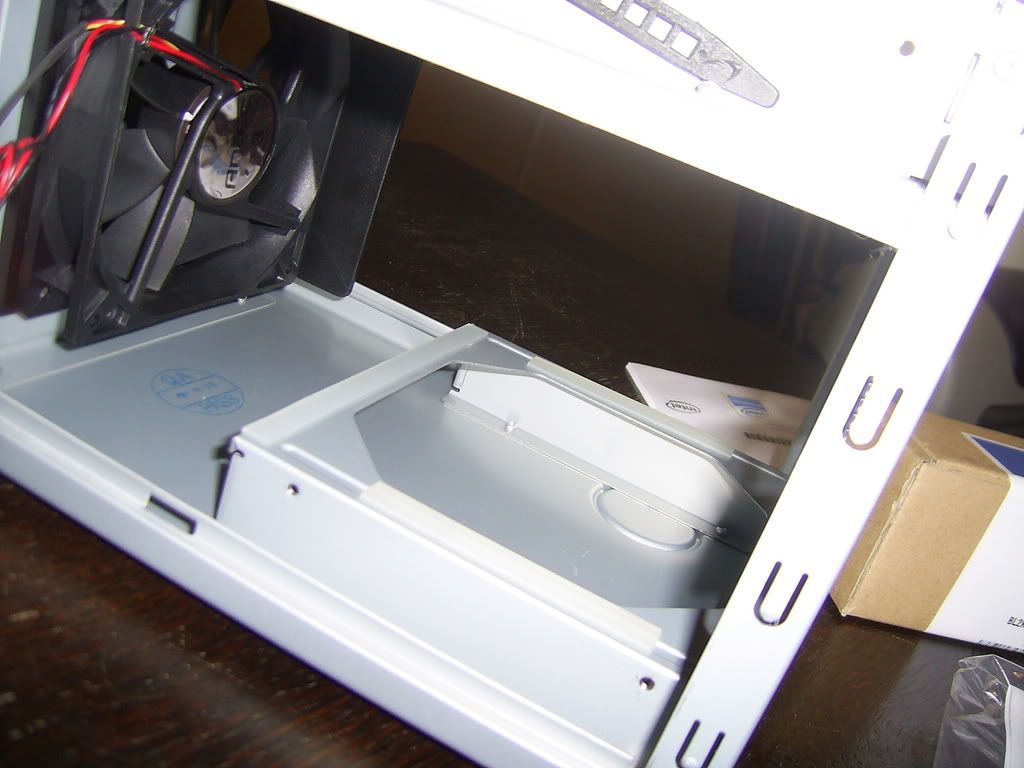
When removed it can then be placed over the PSU, but it far from fits perfectly, having to bend a little to cope.
PIC_0020.jpg

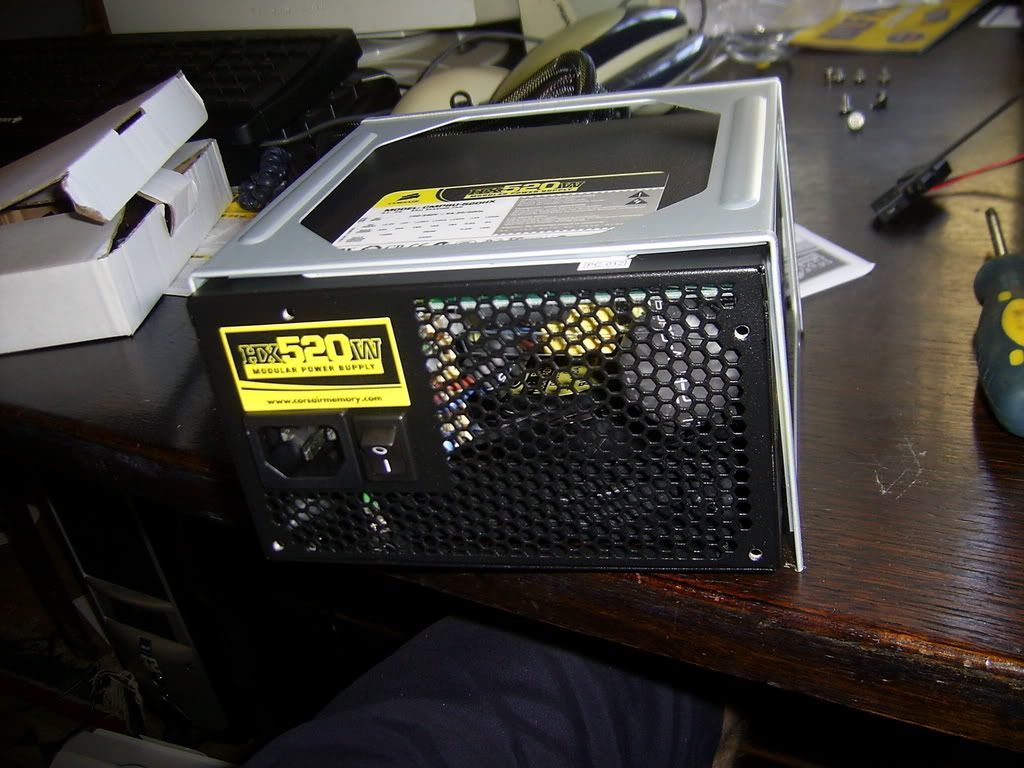
Once the PSU was installed I plugged it in but made sure it was off, for earthing whilst trying not to electrocute myself.

MB:
PIC_0025.jpg

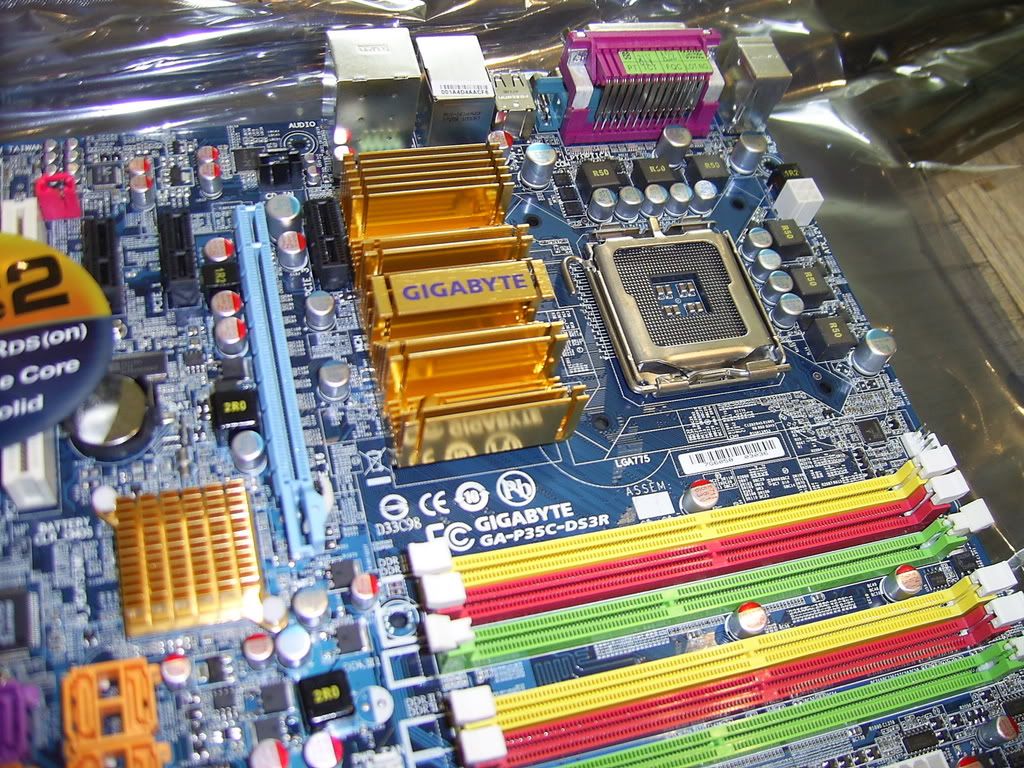
Then I pulled out the motherboard, and inspected it for cracks. Initial thoughts were that it all looked good, and if you had an open sided case you wouldn’t be put off by the aesthetics. Of course this was largely irrelevant to me.

CPU:
PIC_0026.jpg

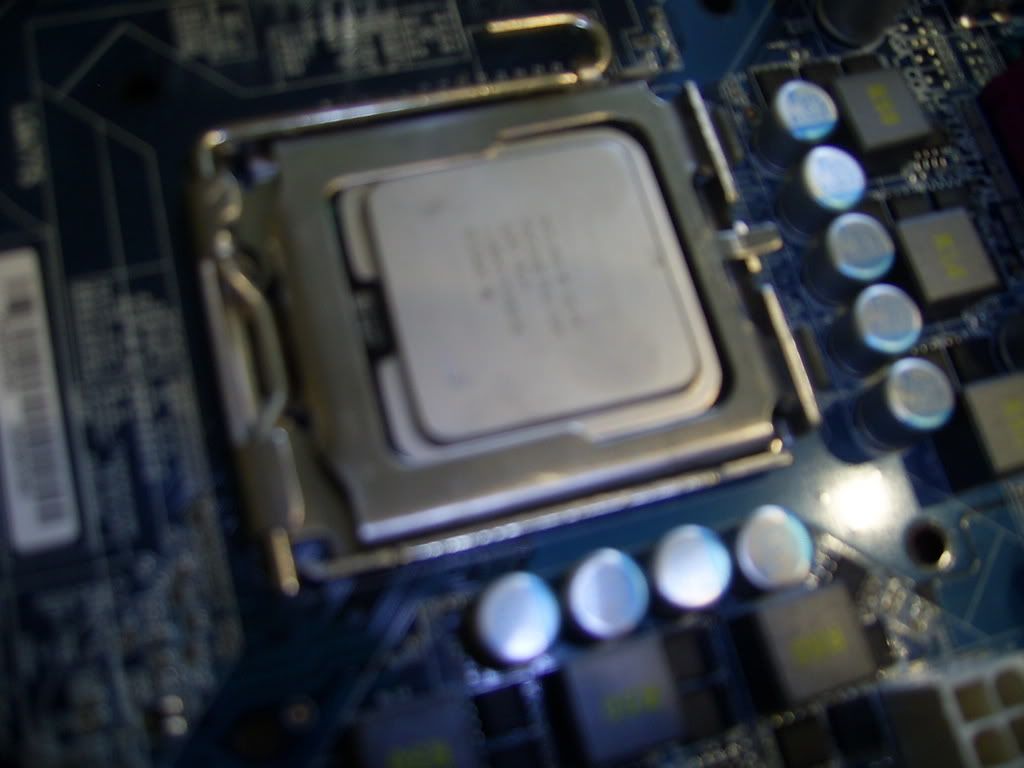
I found the little catch covering the CPU had to be pulled quite a way to the side (the bit that kinda looks like a shepherds crook), seeing as this was my first time doing a complete build this worried me as I wasn’t sure on what it should be doing exactly.

But it seemed ok, and pulled out enough to allow the socket to open up.
On doing this I could then simply line up the notches and put the CPU in, easy as pie.

Then closed the catch down, it seemed to close firmly and securely so all was fine.
 
Last edited:
PIC_0024.jpg

(note the various mounts for different socket's, errr and I moved the flowers after this too lol )

Heatsink:
So I started to read how the Tuniq heatsink was attached, and re-read several times as it seemed big and weighty enough to rip the mb to pieces if attached wrongly. Installation involved fitting a plate to the back of the motherboard that screwed in easily, sliding the appropriate matching piece through the heat sink, applying the thermal paste (absolutely no instruction on this, so I just covered the CPU in a thin layer spread on with a library card ), then screwing the heatsink into the backplate with the supplied screws.

RAM:
Sliding in the RAM was very simple, but required a little more pressure than motherboards i’ve previously installed ram on, probably stiff as it was new, but regardless caused a little extra panic.

I then read up on how the motherboard was fitted to the case (read the manual to avoid short circuiting), the manual antec supplied wasn’t fantastic, couldn’t really understand what it meant, so just went on instinct and screwed the board in.

Clearance between the heatsink and the fans on the antec case was about an inch on either side, not fantastic.

I then realised that one of the sockets the PSU plugs into was located almost directly under the heatsink ! This made it impossible to plug it in whilst the board was installed.
PIC_0028.jpg

(apologies for worst picture yet)

To actually plug this in I had to remove the heatsink, remove the top fan on the case (so that I could get my hand in to screw the heatsink back on), and have the entire motherboard tilted precariously in the computer.

After what seemed like hours of messing I finally got it all in and located :eek: 
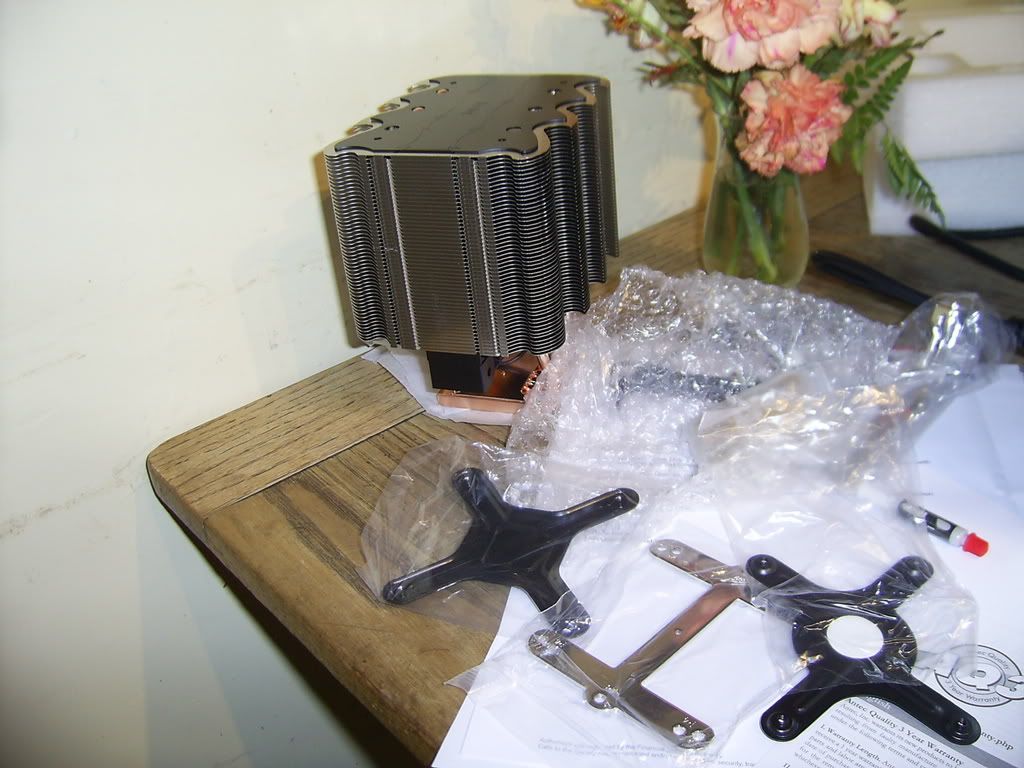
at this point I realised my hand was covered in blood from the razor blade edged on the tuniq, and that id managed to install the heat sink upside down, doing a very good job of blowing hot air into the case.
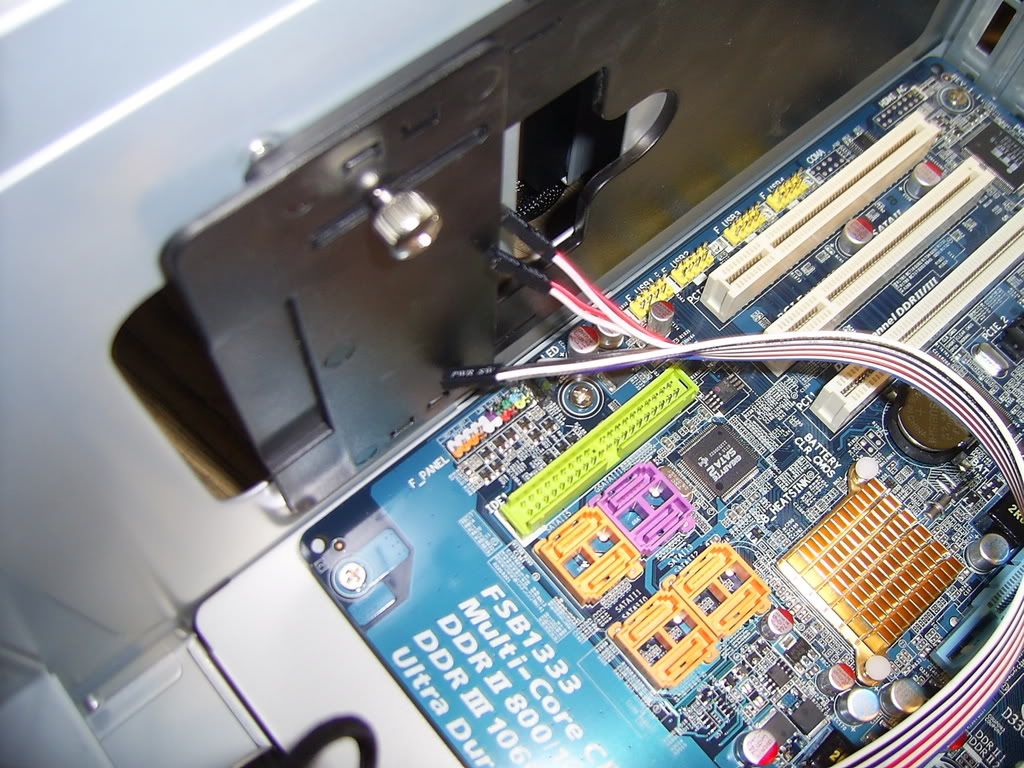
Solving this wasnt so hard, I simply took out the fan, and turned it round in the heatsink. Phew ! hard part was over.
 
Wiring:
PIC_0027.jpg


Then I had to plug the power buttons onto the motherboard, having never done this before I had no idea what to do, again the antec manual failed me, and the gigabyte manual seemed no better, there generally made for people that know exactly what there doing.

So I matched up the names on the power cables with the ones on the board and hoped for the best.

Graphics card:

Plugging in the graphics card was simple and required a 6 pin plug, which again was simple. Nothing spectacular in the graphics card box, but nothing was needed. The graphics cards appearance was largely irrelevant as the graphics are face down in the box.

Plugging in the USB and sound from the front of the case was simply a case of matching up the sockets, and was again very easy.

Harddrive:
I installed the harddrive in the bottom compartment of the case, the draw slides out simply and the rubber that the hard drives are mounted on seemed a great idea and both increased ease of installation as well as decreased noise.

Optical drive:
The dvd drive was attached to rails, slid into the case, and then quickly attached to the PSU and motherboard. The slide on rails were a good idea, and made installation easier, but realistically the chance of me changing optical drives much was so low they weren’t a massive bonus.
What many of the guides also fail to tell you is that the DVD drives have metal parts in the way that have to be removed first.
PIC_0017.jpg
doing this on the antec p182 seemed more difficult than it should, to be honest I’m not sure why they cant be removed at the factory's.

So at this point all my components were installed and ready to go, linked up the graphics card to a monitor plugged everything in, and pressed the on button... :eek: nothing happened, nothing at all, making it obvious I hadn’t wired up the power button right.

I played around with the wiring a bit, and managed to power the light so it was always on, then swapped the power button for that LED power, pressed the on switch and........Wahoo ! Worked!

Then went about installing XP, formatting the hard drive etc etc, took a long time probably would have been better at a faster clock speed.

Over clocking:

Once I got into XP I installed orthos, tat, CPUZ, and super pi, restarted the computer and started over clocking.

The BIOS on the gigabyte board was nothing spectacular, but adequate. Initially I was quite shocked that none of the memory over clocking facilities were to be seen. But read up on the internet that you could view them by pressing "ctrl +f1" at the initial bios screen.

The memory voltages were called "+1" or "+2" etc etc, which was fairly useless to me as I didn’t know what it was starting from, I assumed (correctly) that it was 1.8v starting block and set it to "+4" being the RAM's specified voltage.

I then Increased the FSB on the CPU by 25mhz at a time (increasing overall clock speed by 200mhz) and did light stress testing, this way I got to 2.6ghz easily, past this I was having failures from orthos. To get higher clock speeds than this I started decreasing increments, to 10mhz or 12.5mhz.

At the time I hadn’t changed the CPU voltage, so it was running at something around 1.25v. Again id assumed incorrectly that this was the CPU's stock voltage, when I clocked it up to the 1.325v that’s stock I found 2.8ghz to be very stable.

To get it past that I needed to increase to ~1.33v and have currently been running orthos at 3ghz for ~2 hours (large stress test, priority 8) and max temp so far is 52c . Shall update this if it passes /fails after a longer time period.

Overview:
Antec p182 case:
Goods
silent on low fan speed,
keeps everything cool well
Big(upgradeable)
Looks fantastic
Rubber parts everywhere help reduce noise
Hard drive trays
Cable routing

Bad
Lock on door, pointless as you can still open it a little and increases chance of damaging door
HEAVY !!!
Third fan pointing at Harddrives is probably a waste.
Fan's become very noisy on full settings
Not enougth removeable parts(eg motherboard tray)

Corsair PSU:
Good
Supreme quality
Looks good
Quiet fan
Stays cool at all times

Bad
Larger cables are a little rigid and inflexible

E2140:
Good
Cheap
Overclocks beyond 3ghz
Relatively cheap

Bad
Low cache (1mb)


Crucial ballistix 667mhz ram:

Good
Low timings
Capable of high speed
Looks fantastic
RMA service

Bad
Apparantly a slightly higher failure rate (balanced by RMA imo)

GTS 8800:
Good
value for money
Performs well enougth

Bad
Can get rather hot
Isnt a GTX


Gigabyte P35C DS3R
Good
Cheap
Relatively future proof
Looks good
Overclocks well

Bad
Power socket layout
BIOS(secret buttons to get to ram settings?)
Manual(doesn’t tell you the secret buttons)

Tuniq 120
Good
Cools fantastically
Value for money
Quiet

Bad
Sharp !
Fiddly to fit
Guide was very poor

OCuK performance
Good
Fast delivery
Well packed
Offered to pick up broken speakers the day I stated as a problem

Bad
Never seem to have enough stock
 
Last edited:
Thanks!

Was a nice read.
Have you got any pics showing the whole system?
Good luck Overclocking :D
 
Jay™ said:
Thanks!

Was a nice read.
Have you got any pics showing the whole system?
Good luck Overclocking

Thanks, have a few more pics to come, just cant stick too many in one post lol (shall post additional pictures in this post later)
PIC_0018-1.jpg

Full system pic, note the upside down fan in the heatsink, and the tuniq fan speed controller in the waterpipe ports ;) lazyness ***

Ill provide links to other images so as not to over do it:


Current overclock results

Case in bedroom
Nasty cable management
more insides
 
Last edited:
A nice little story you've written up there, I'm sure people will find it useful.

In order to avoid cutting myself on builds I took home a pair of kevlar gloves from work. They're great for not cutting yourself but you do look a little weird!

PK!
 
Christ that Tuniq is large, makes my HSF look miniature in comparison :)

Edit: Also nice to hear a build story that goes well, rather than the usual disasters :D
 
Growlingfish said:
Christ that Tuniq is large, makes my HSF look miniature in comparison :)

Edit: Also nice to hear a build story that goes well, rather than the usual disasters :D

Your not wrong there, its massive, like 3x bigger than the stock intel fan, but that just means better heat displacement and a cooler cpu !
 
That made a nice read, and we all learnt about fitting stuff before sticking the tuniq on.

Thanks :)
 
Nice :)

Think the Tuniq makes any case look small!

EDIT:
DavidB said:
{snip}So I matched up the names on the power cables with the ones on the board and hoped for the best{snip}
Bit surprised the mobo manual did not provide an illustration of some sort :confused: But, normally thats how its done as above - though a good case should also have the cables colour matched.
 
Last edited:
Thanks for taking the time to write that. It's certainly very useful and it always good too see pics of the actual build so you can learn about any pitfalls.

I am trying to figure out where the cable you forgot to plug in fits on the big motherboard pic. Am I blind?!

It's interesting the PSU has a special cage in the P182 - what's all that about?

z
 
Damn :eek:

The Tuniq is a BIG heatsink!!!!!!!!

Good thread, has saved me over 30 notes cos that thing is just a few centimetres out for my case.
 
Good read, I'll post my pics of P182/Abit IP35 Pro/Tuniq build etc in a bit.

Edit Here if anyone fancies a gander. :p

Quick question, which way up did you mount your psu and does it have a fan on the base? I have the HX620 mounted upside down with the fan facing up as it would have been touching the bottom plate.

Also I didn't bother with the cage, not sure it thats right but there you go!
 
Last edited:
Quick question, which way up did you mount your psu and does it have a fan on the base? I have the HX620 mounted upside down with the fan facing up as it would have been touching the bottom plate.

Also I didn't bother with the cage, not sure it thats right but there you go!

Not using the cage is probably a good idea, i cant see it really doing all that much, maybe cutting vibration a little.

And i also didnt think of the CPU fan, its pointing straight down.Luckily thers space underneath it for airflow, if it was the other way round im not sure itd have massive amounts more air getting to it, with the additional fan helping it seems fine to me.

I am trying to figure out where the cable you forgot to plug in fits on the big motherboard pic. Am I blind?!

If you look at the the close up on the tuniq heatsink its the cable with yellow and black cables ? Its impossible to see on the motherbaord as its behind the heatsink and routed through the back of the case.

Bit surprised the mobo manual did not provide an illustration of some sort But, normally thats how its done as above - though a good case should also have the cables colour matched.

I never actually checked the mobo manual, after reading the mess from the antec manual, i new itd just be trial and error. But i just checked the gigabyte manual, and can't see anything on it. Hopeless manuals imo.
 
Proved to be a great read mate, nice to hear a story that goes well like others have stated. I myself also have a DS3R and I always find it complicated, just checked the manual for you and they've got some instructions and an image on Page 28 about the front panel switches. However it is a bit annoying as I still haven't managed to configure my front audio panel on the DS3R, oh well can live without that!

Good read though, I usually find it a pain installing the PSU first as it gets in the way of installing the optical drives.
 
Nice write up there DavidB. You're not alone in being a bit puzzled by the headers/cabling for the power switch etc. I find it hard to believe that they still keep it like that...how difficult could it be to fuse the wiring into a single block/connector that you just plug in and which will be identical from case to case and motherboard to motherboard.

On my lian li the power led cable has a 4pin connector yet the header on my asrock 775dual-vsta only accepts a 3pin design...yes I could, with a bit of jiggery pokery, switch the wiring up on the connector so it would fit as if it were 3pin (I just left it unconnected for now) but it struck me as odd that mismatches like that can still occur. I'm thankful though that such a minor thing was my only problem during the build :D
 
Nullvoid said:
{snip}On my lian li the power led cable has a 4pin connector yet the header on my asrock 775dual-vsta only accepts a 3pin design...yes I could, with a bit of jiggery pokery, switch the wiring up on the connector so it would fit as if it were 3pin (I just left it unconnected for now) but it struck me as odd that mismatches like that can still occur. I'm thankful though that such a minor thing was my only problem during the build :D
Think its a design issue on the ASRock mobos because was the same on the 939Dual-SATA2. Solution was to simply split the connector in 2 since the middle slot did not have any wire, i.e. was empty.

Right now got a Reset button that's not working. Pains me when the front panel stuff doesn't work :mad:
 
I always found the best way to do the front case connectors was to take two cables that have a same colour wire, say one black and orange another black and red. Now look at the manual and it will tell you what the pins are for, for each switch header of the two you have selected. The two that you have selected will have one pinout the same, say +v or -v, and that you can then deduce must be the black wire, because its the same for each one.

Connect those two up and 'usually' the others will follow suit in the direction the printing faces on the little black connector.

Followed this process since my 386 days when I connected one back to front and it melted my power switch on! :)

Nice write up and like the others man that heatsink is massive.

Awaiting my DS4 and various parts some time next week!
 
Firstly, thanks for feedback guys, makes typing this stuff up worth it.
how difficult could it be to fuse the wiring into a single block/connector that you just plug in and which will be identical from case to case and motherboard to motherboard.

I couldnt agree more ! Why it has to be those fiddly little things to slip over pins illl never know. If everything else is just like a plug, what makes the case front different ?

Page 28 about the front panel switches. However it is a bit annoying as I still haven't managed to configure my front audio panel on the DS3R, oh well can live without that!
Your right ofcourse, must have just overlooked it ! :confused:


hp7907 said:
Right now got a Reset button that's not working. Pains me when the front panel stuff doesn't work
Oh i duno, its not so bad, personally i never really use the reset button anyway, and not having a few led's plugged in surely just saves the polar bears :cool:

porkpie said:
melted my power switch on!
You had me convinced up till that bit :p
 
Back
Top Bottom