
OcUK Product Page - https://www.overclockers.co.uk/showproduct.php?prodid=MB-530-GI&groupid=701&catid=5&subcat=3078
OcUK Bundle - https://www.overclockers.co.uk/showproduct.php?prodid=BU-021-GI&groupid=701&catid=6&subcat=2858
Gigabyte Product Page - http://uk.gigabyte.com/products/product-page.aspx?pid=5496#ov
Today I will give you a quick overview and a quick and easy overclocking guide for the Gigabyte Z170XP-SLI.
This should be a very popular motherboard for users wanting to jump onto the intel Skylake and Z170 platform. As it is available individually or as part of a CPU and board bundle including the i5 6600K all you need to ensure you have is a compatible heatsink (fittings for socket 1155/56/50 are the same) as not even retail Skylake 'K' SKU CPUs come with a heatsink and DDR4 RAM as well as the obvious parts such as PSU and drives etc.
The Z170XP-SLI has most major features covered including SLI support, USB3.1, SATA Express, 32Gb/s M.2 and even USB TypeC all covered by a 3 year warranty and a UK based RMA centre.
Packaging and Accessories
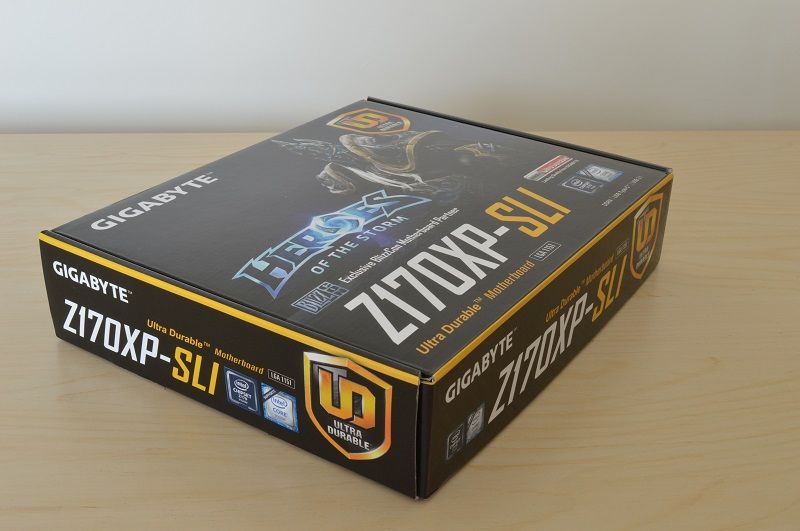
The board comes in a small cardboard box and I wont bore you with a picture of the rear that has the usual bullet points about the features.
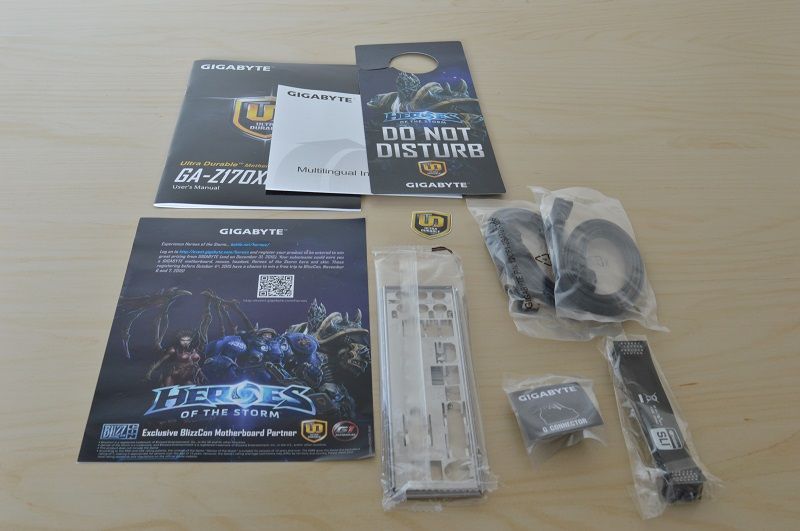
• Manuals and driver disk.
• Ultra Durable case badge.
• Four SATA cables (two with 90° connectors).
• Do not disturb door card and exclusive offer to prizes leaflet.
• G connector (a quick case cable connector).
• SLI Bridge.
The board
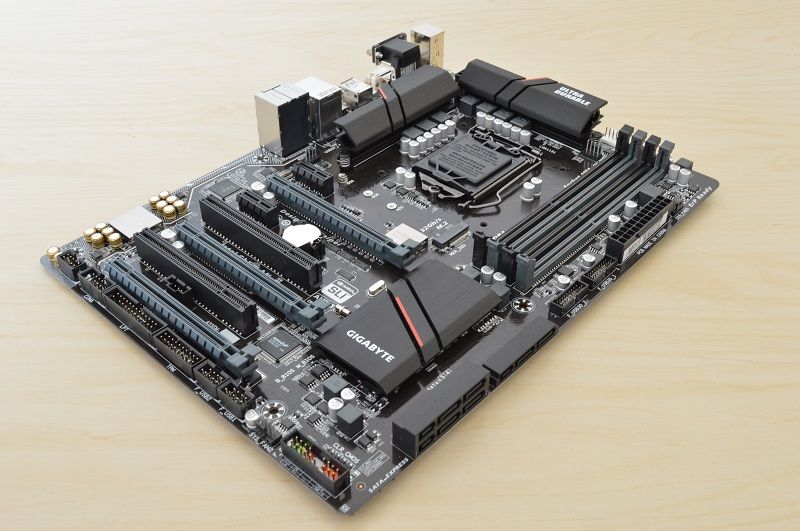
So this is the Z170XP-SLI motherboard, it is mainly black (although the PCB is more dark brown close up) with a few touches of red accents on the heatinks, it is not quite normal ATX form factor in width at just 22.5cm.
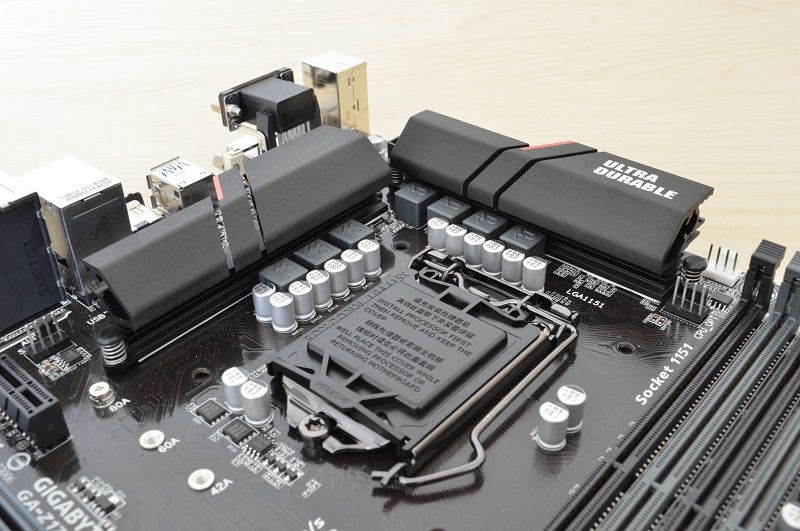
Around the CPU we find the power phases but with a reduced number of phases to suit the boards budget, Skylake CPU's now have the integrated voltage regulator that was found on Haswell/Devils Canyon processors removed and put back into the hands of the motherboard to control, so boards with a larger number of power phases should make a difference with overclocking.
The CPU socket pins are gold plated as part of the Ultra Durable branding.
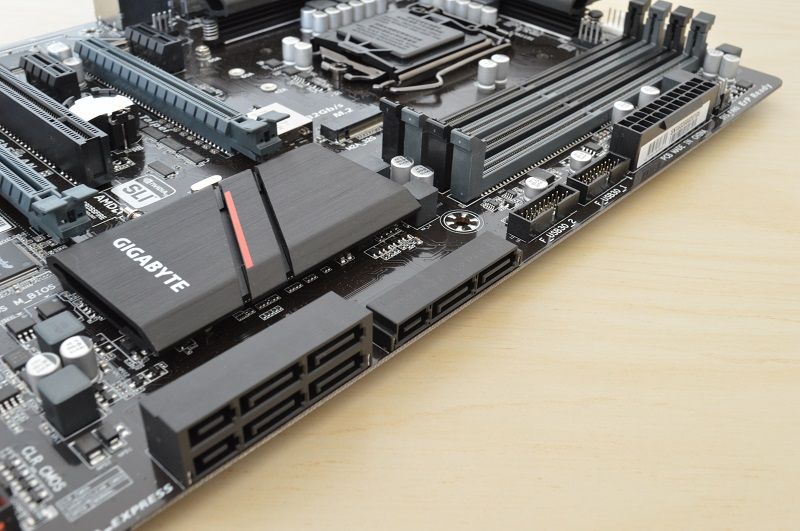
On this edge of the board is the 24pin power connector, two USB3.0 internal headers and 6 SATA 6Gb/s plus 3 SATA Express connectors. A system fan header is also located above the 24pin power connector.
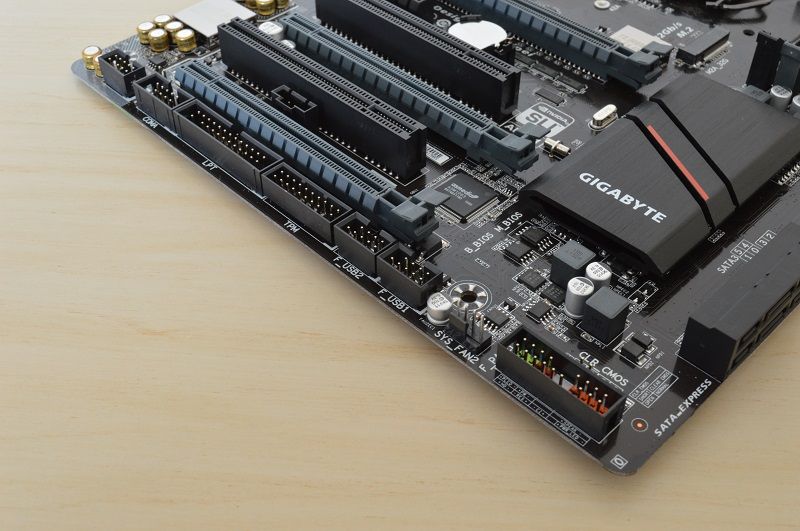
The bottom of the board is filled with front panel audio connector, two USB2.0 connectors, TPM and LPT (I have never used these) and another system fan header and the front panel connector for the case power+reset cables etc (but use the G connector to make this much easier than fiddling around in the dark).
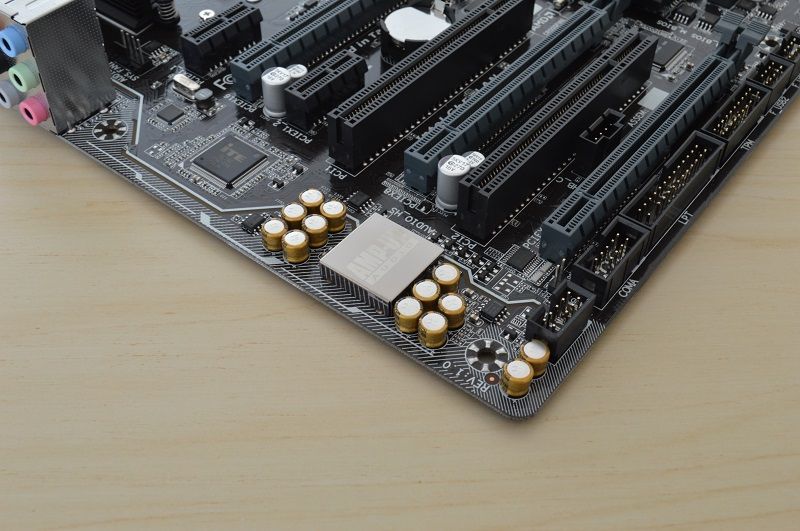
This is the audio section made up of the Realtek ALC1150 chip and Japanese NIPPON audio grade capacitors. There is an audio path separation from the main PCB to reduce interference and this is illuminated in a yellow/orange colour when powered ON but can be disabled within the BIOS or you can select Pulse mode or Beat mode so it dances along with the rhythm of the music.
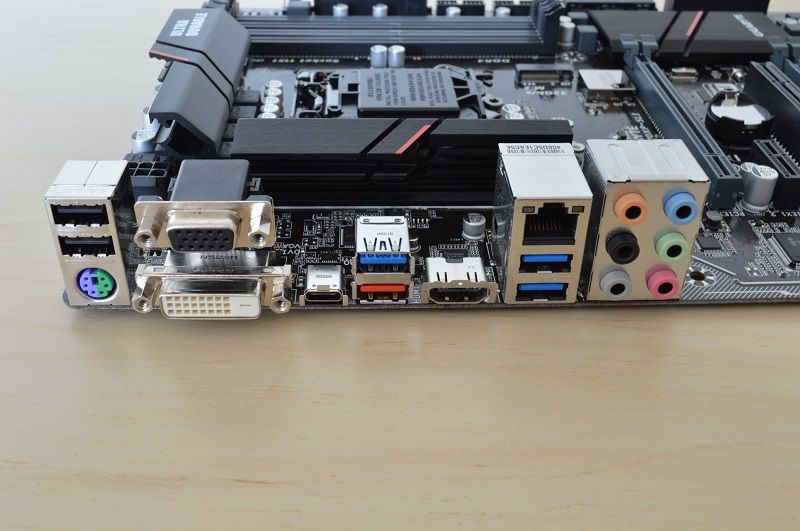
The rear I/O consists of,
• PS/2 keyboard/mouse port
• 2 x USB 2.0
• D-Sub and DVI-D port
• USB TypeC (supports 3.1)
• USB 3.1
• HDMI 2.0
• 2 x USB3.0
• Intel LAN
• 7.1 audio
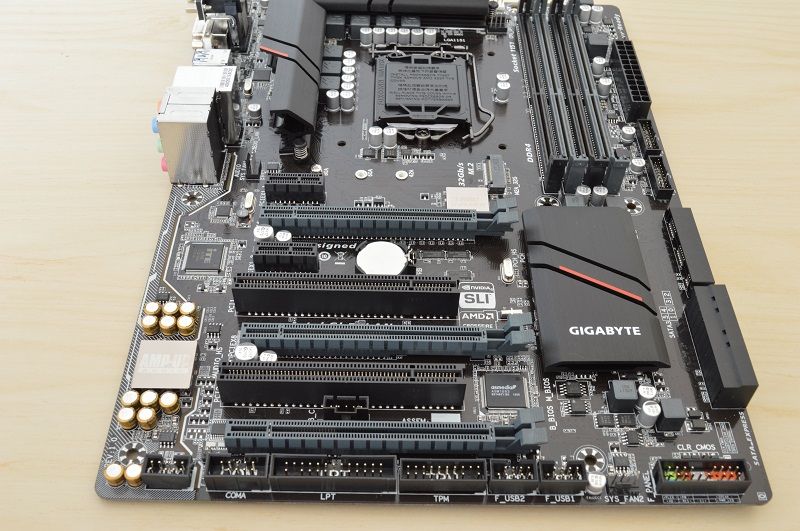
The expansion slots consist of,
• PCI-E X 1
• PCI-E X 16 (reduces to 8X with 2-Way SLI/Crossfire)
• PCI-E X 1
• PCI Legacy
• PCI-E X 8 (takes half the bandwidth away from the 16X slot)
• PCI Legacy
• PCI-E X 4 (for 3-Way Crossfire, not SLI)
Just behind the rear 7.1 audio jacks you will spot another system fan header.
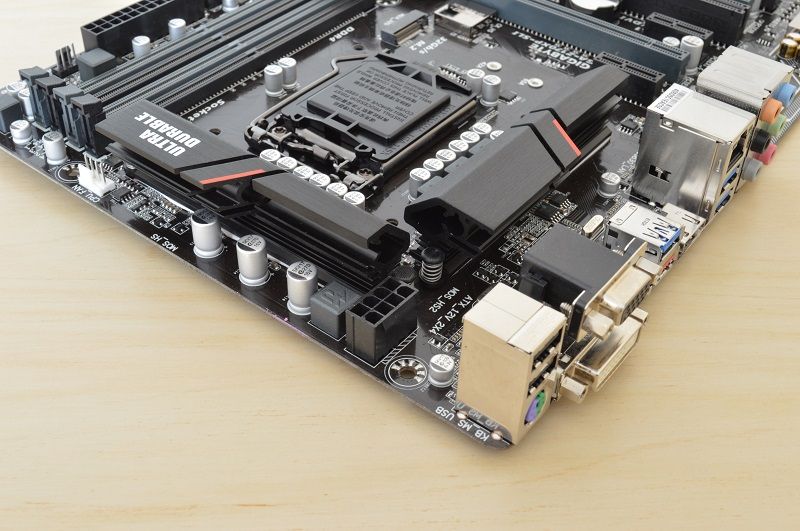
Top edge of the board just has the 8pin ATX and CPU fan, CPU option fan headers (for twin fan heatsinks etc).
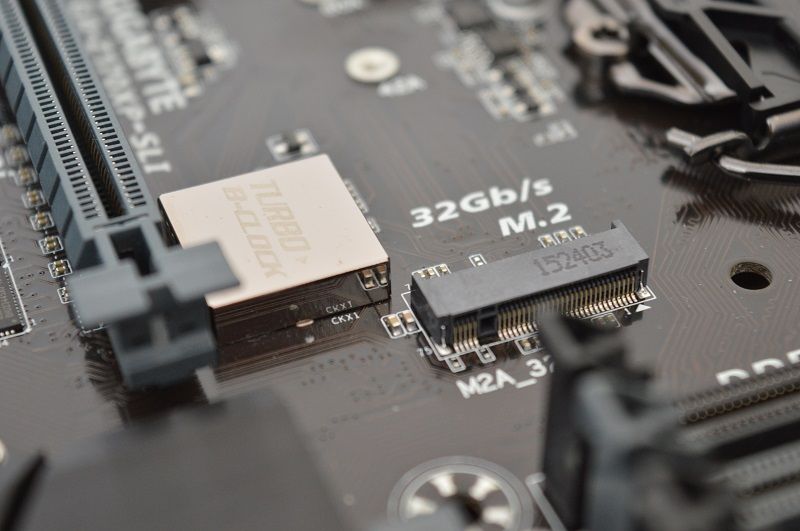
In the center of the board is where you will find the 32Gb/s M.2 connector and hidden under a metal cover an item called "Turbo B-Clock" which is designed to allow overclocks push the blck from 90-200MHz which is further than previous boards.
BIOS and overclocking to 4.6GHz
Gigabyte have done away with any fancy 3D or "tarty" BIOS pages with this board instead using the "classic" mode to show all the settings, I never used anything but this mode on previous boards anyway so the other layouts will not be missed by me.
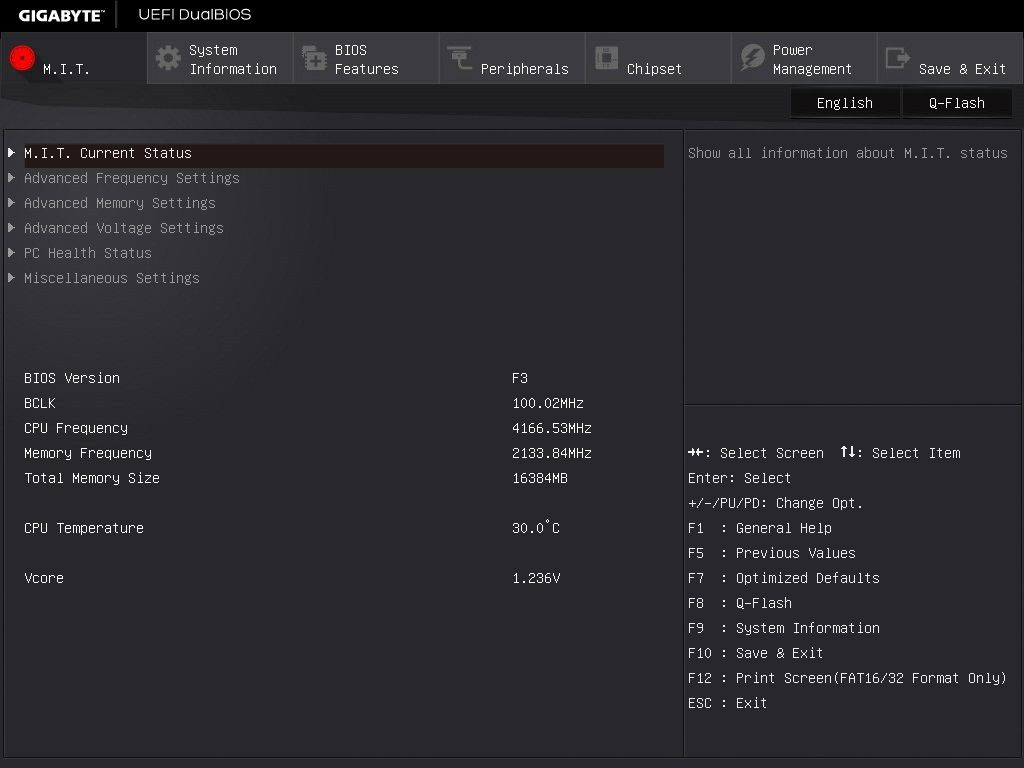
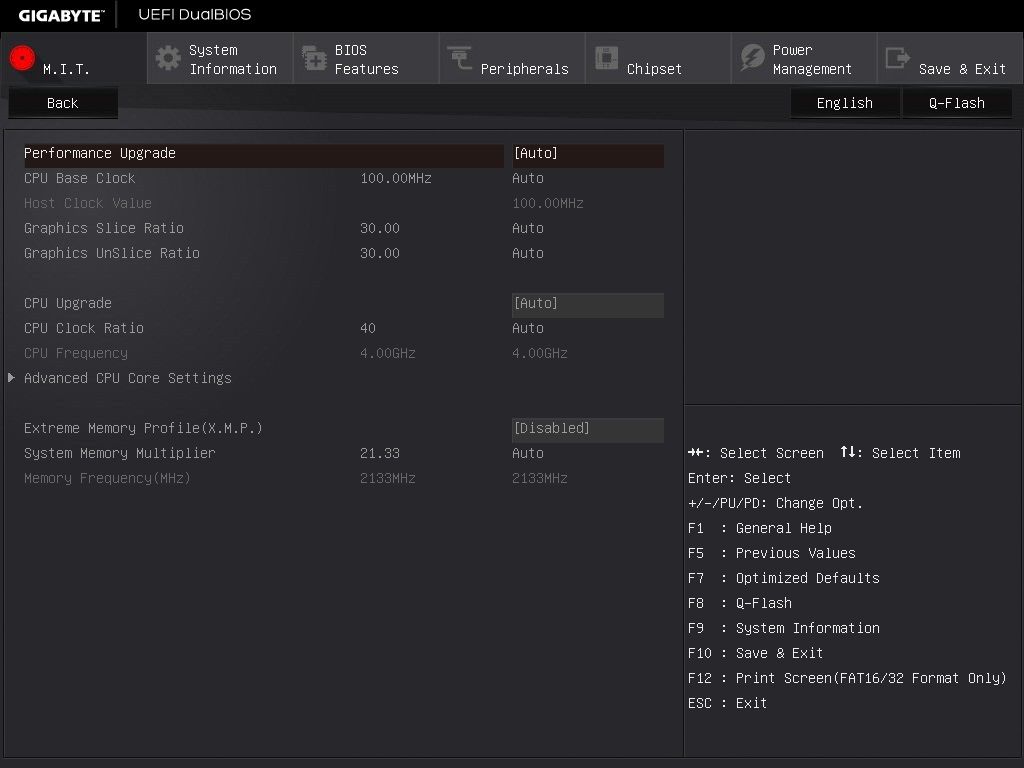
It is very clean and simple and if you have used a Gigabyte board in the past then navigation of this BIOS will be second nature.
So moving on how do you get a CPU to 4.6GHz? well that is actually pretty easy, but first you must ensure your CPU cooling is sufficient for any overclocking, below I will show you how to set a solid 4.6GHz without any Speedstep or Turboboost so it remains at 4.6GHz constantly.
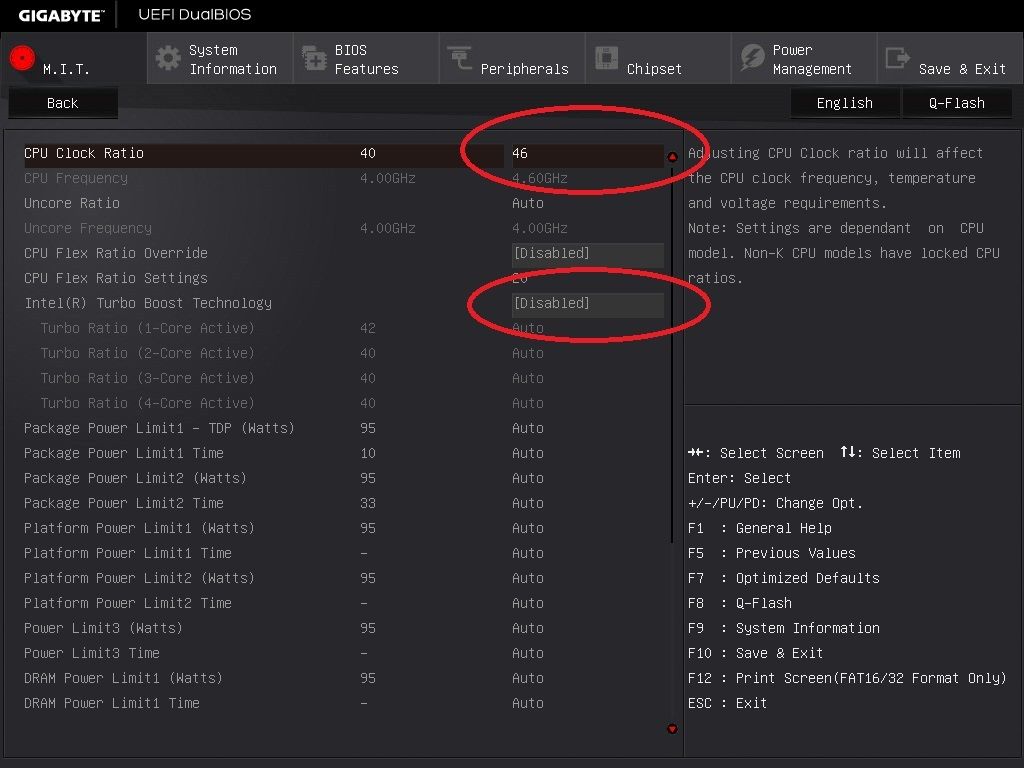
Here you can see I have set a CPU clock ratio of 46X (bclk is 100mhz so 100X46 = 4600MHz) and disabled Turboboost.
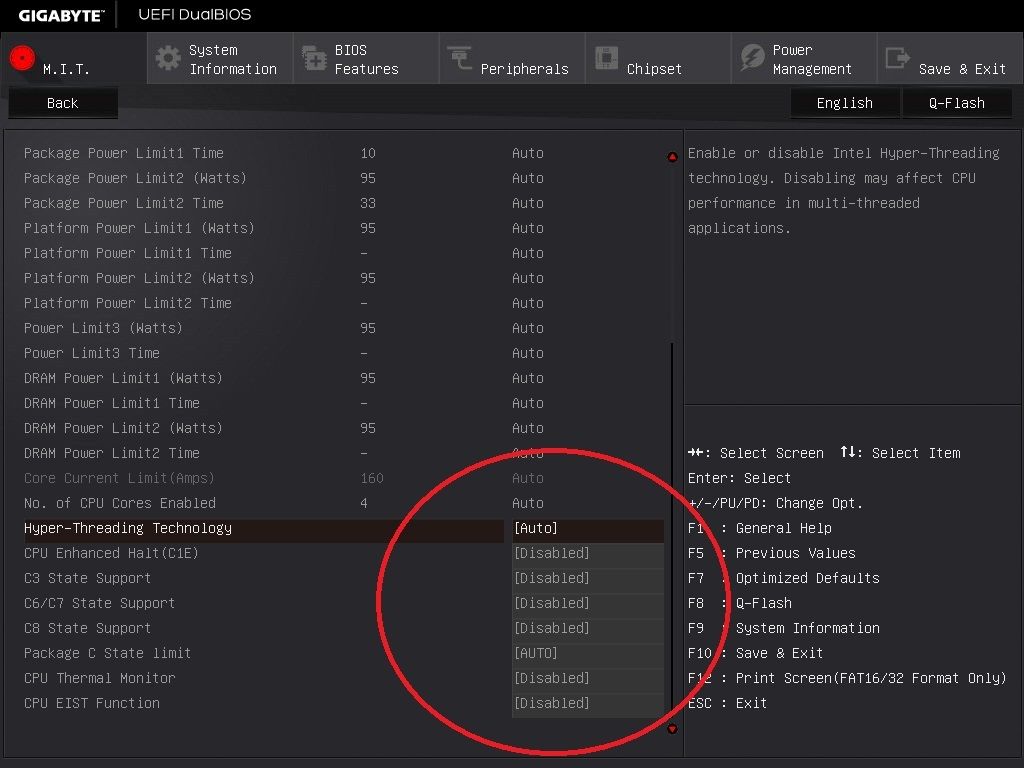
Further down the same page I have disabled everything underneath the Hyperthreading option apart from "package C state limit" which cant be disabled fully.
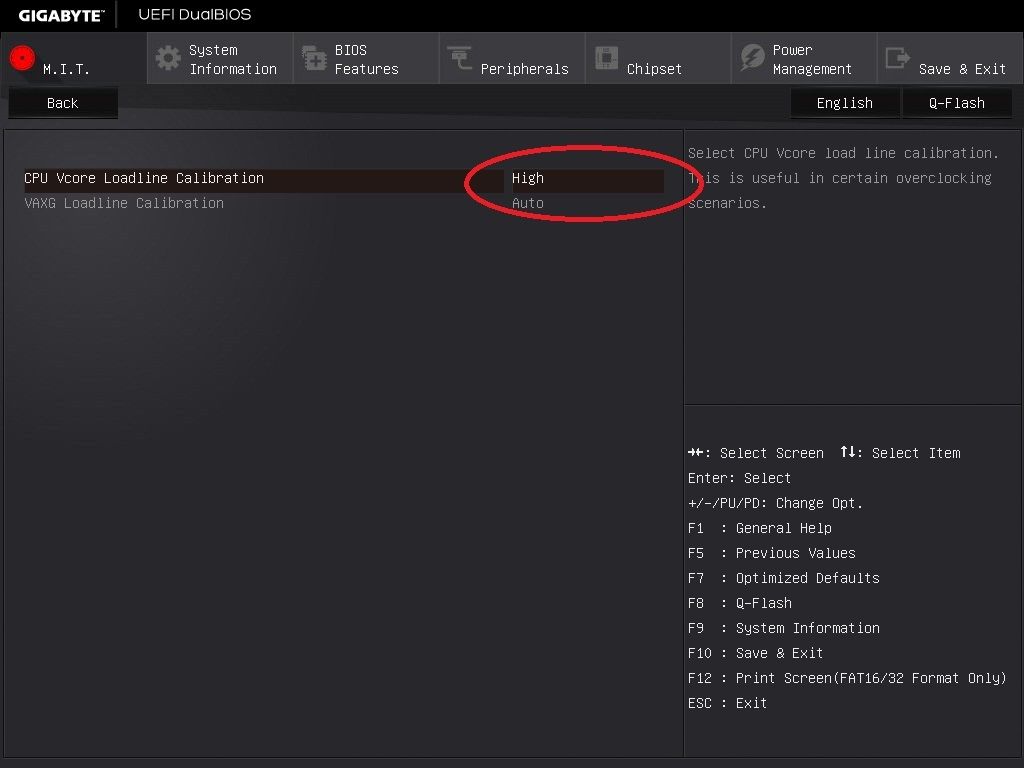
Loadline calibration helps reduce Vdroop (Vcore drops from set value under large load) and this I have set to High, as this board is a simpler cost option it does not have multiple settings such as "Turbo" " Extreme" etc found in more expensive motherboards.
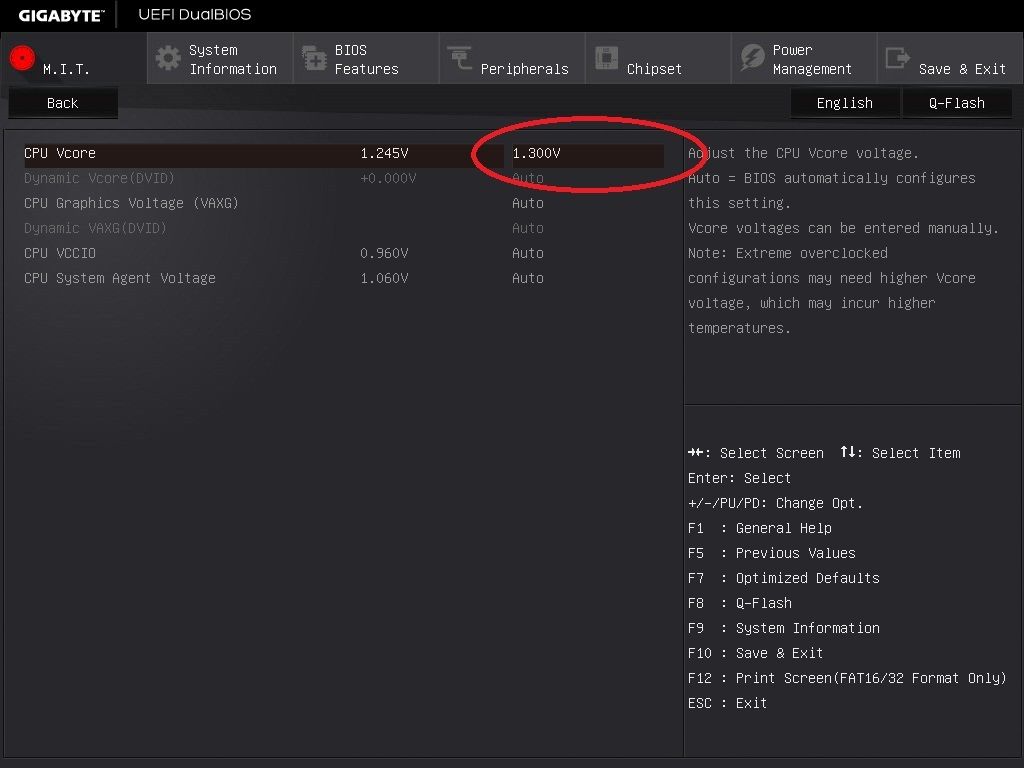
Vcore I set to 1.3V, this is what my particular CPU needs to run at 4.6Ghz, yours may and will vary so try a tiny bit more or less until stable and you are happy with the temperatures.
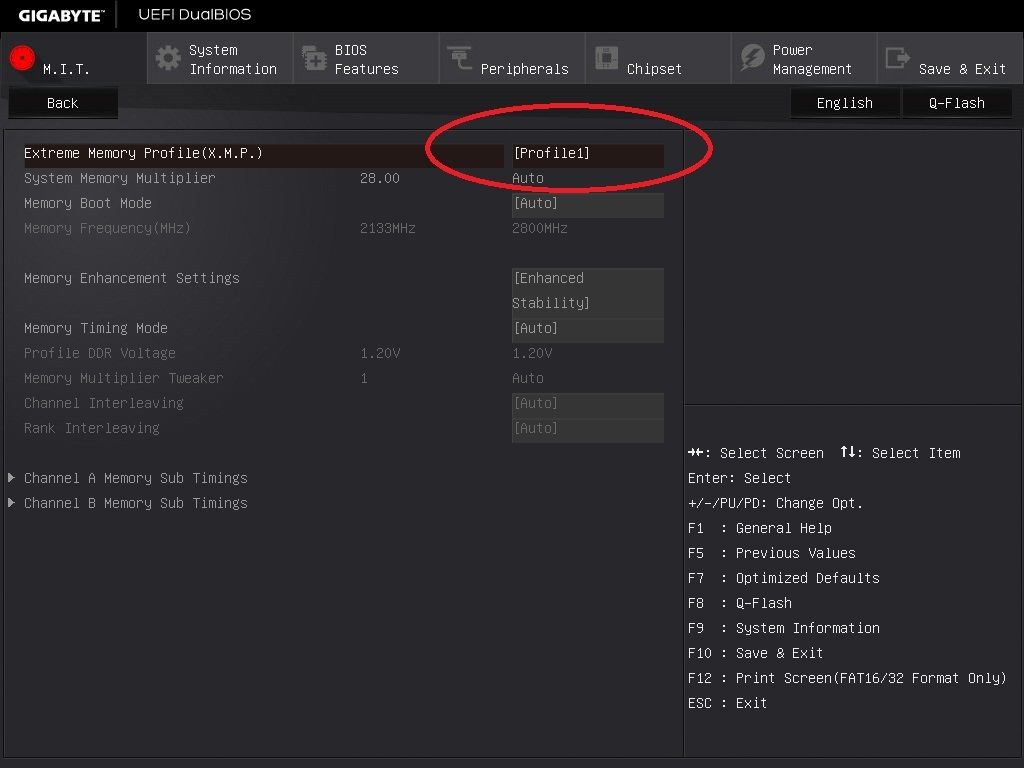
This is where you select your XMP profile for your RAM, the BIOS will set-up the timings, voltage and speed for your RAM for you.
Then all you need to do is save+exit the BIOS and hope it boots successfully in to Windows. If it does you can then proceed in testing the stability of your overclock.
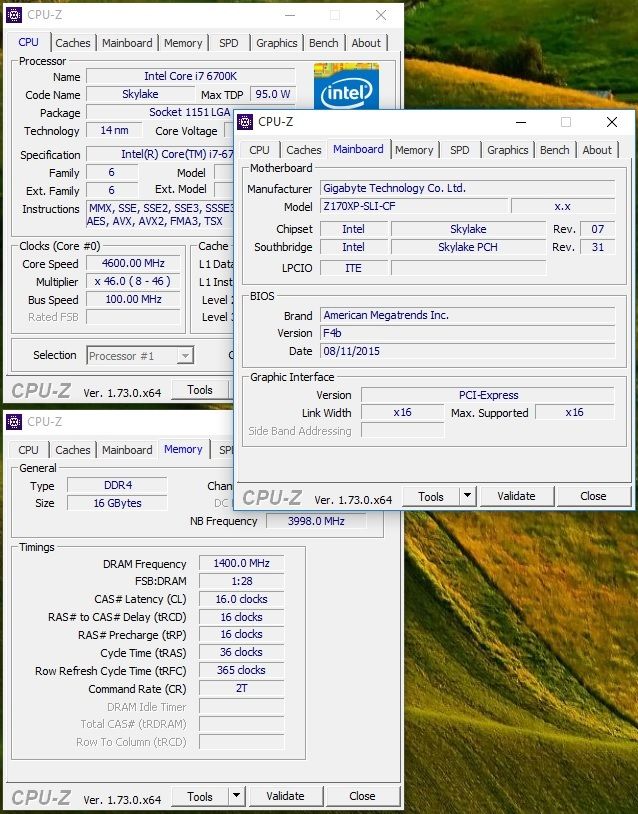
So with any luck you should have something like this, 4.6GHz on the core and in my case RAM running at 2800MHz (1400MHz X 2)
Stock VS 4.6GHz results
Below I have run a couple of tests comparing a i7 6700K at stock VS the above BIOS settings at 4.6GHz.
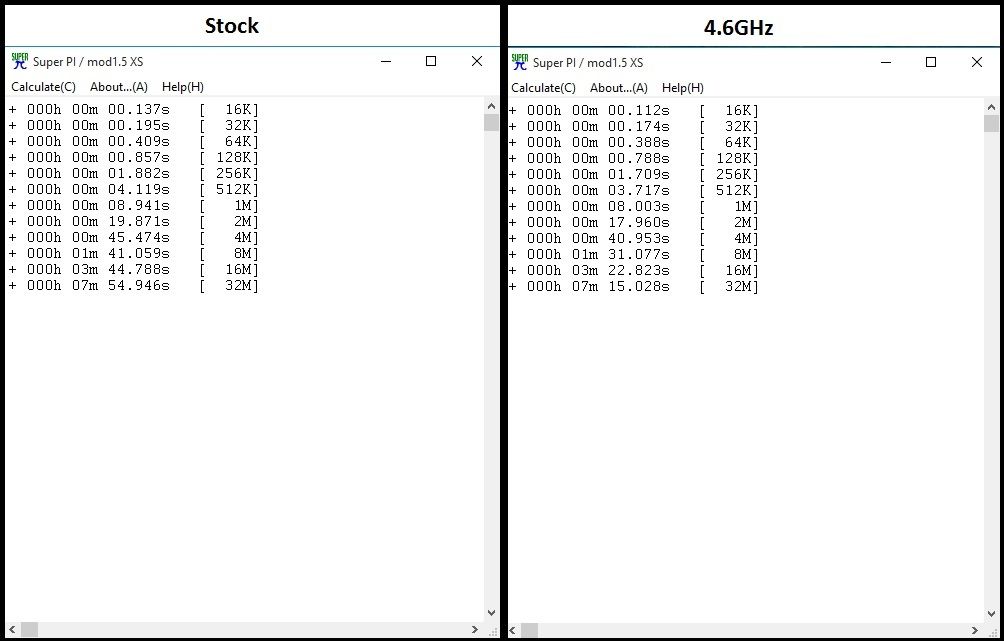
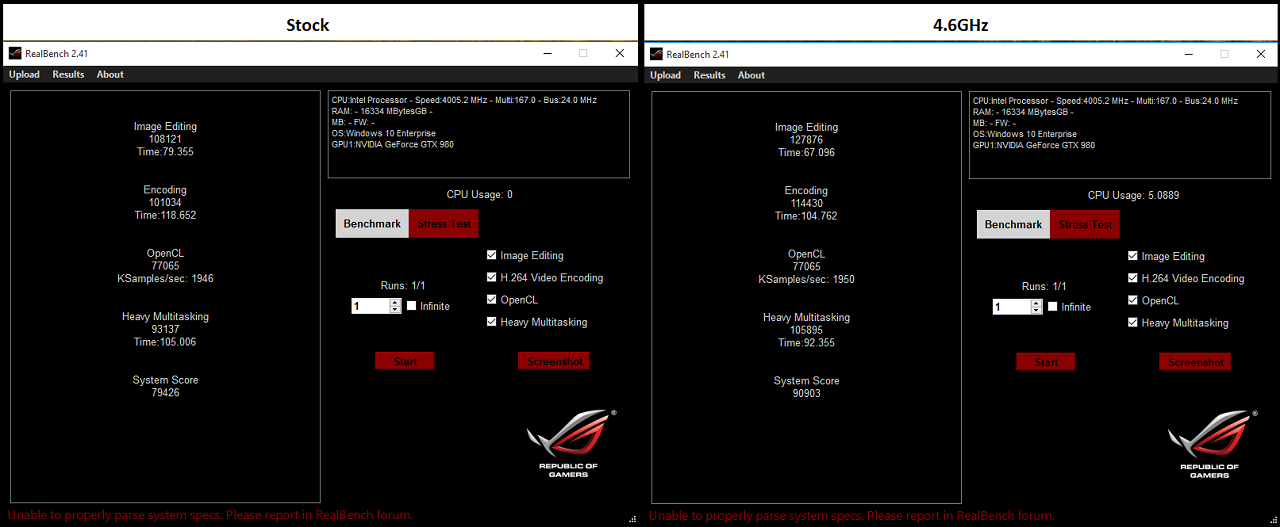
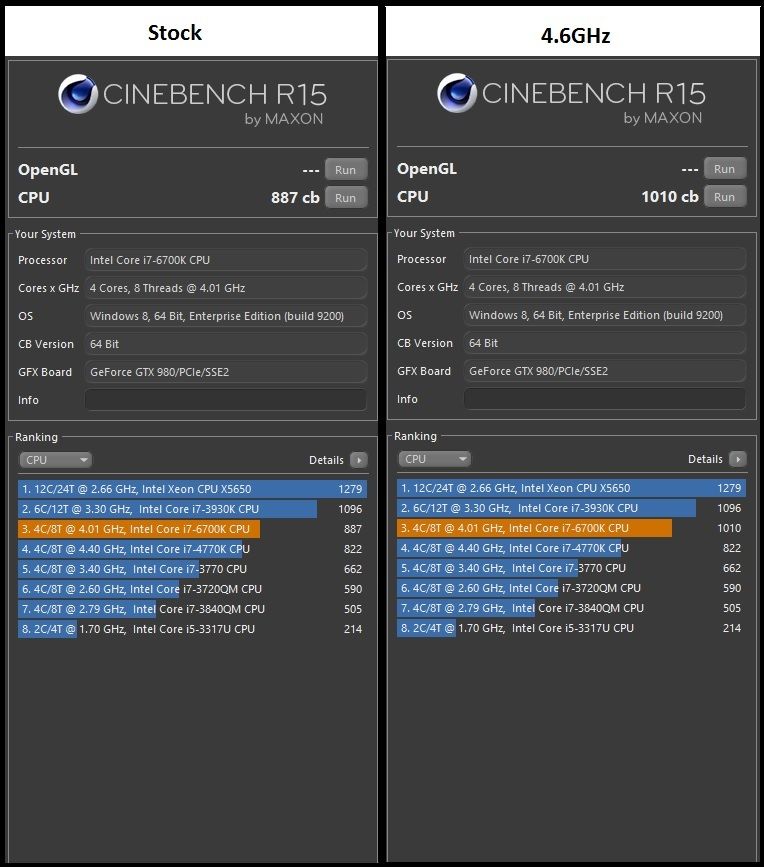
So some good gains in these CPU intensive tasks.
But I also tried two games Thief and GTAV.
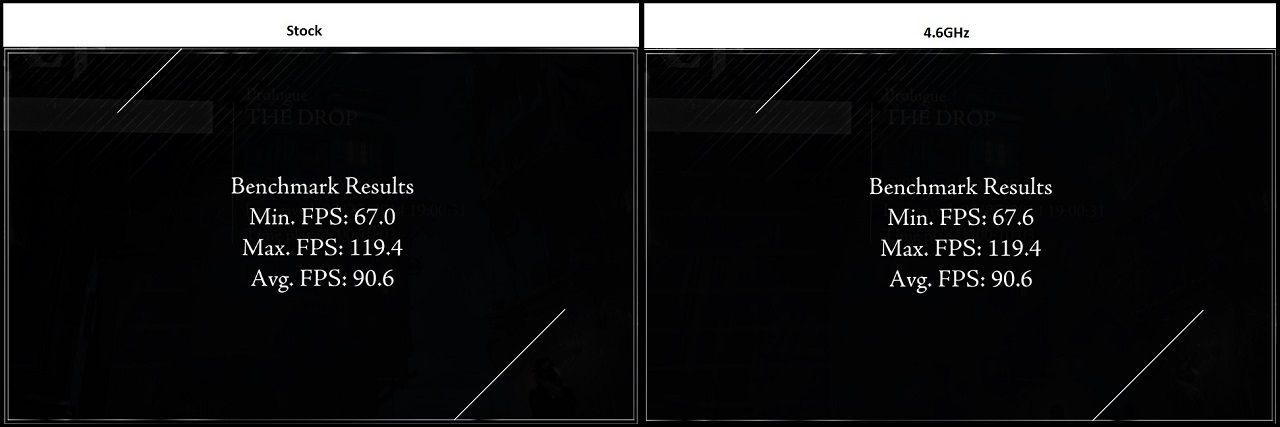

So no gains in Thief so I guess that is more limited by my GTX980 rather than CPU limited, GTAV performance went up nicely with the average frame rates seeing a boost.
BCLK Overclocking
Another way to overclock your CPU is via the BCLK.
So instead of running say 100MHz X 46 ratio to hit 4.6GHz you can use a lower CPU clock ratio but a higher BCLK value.
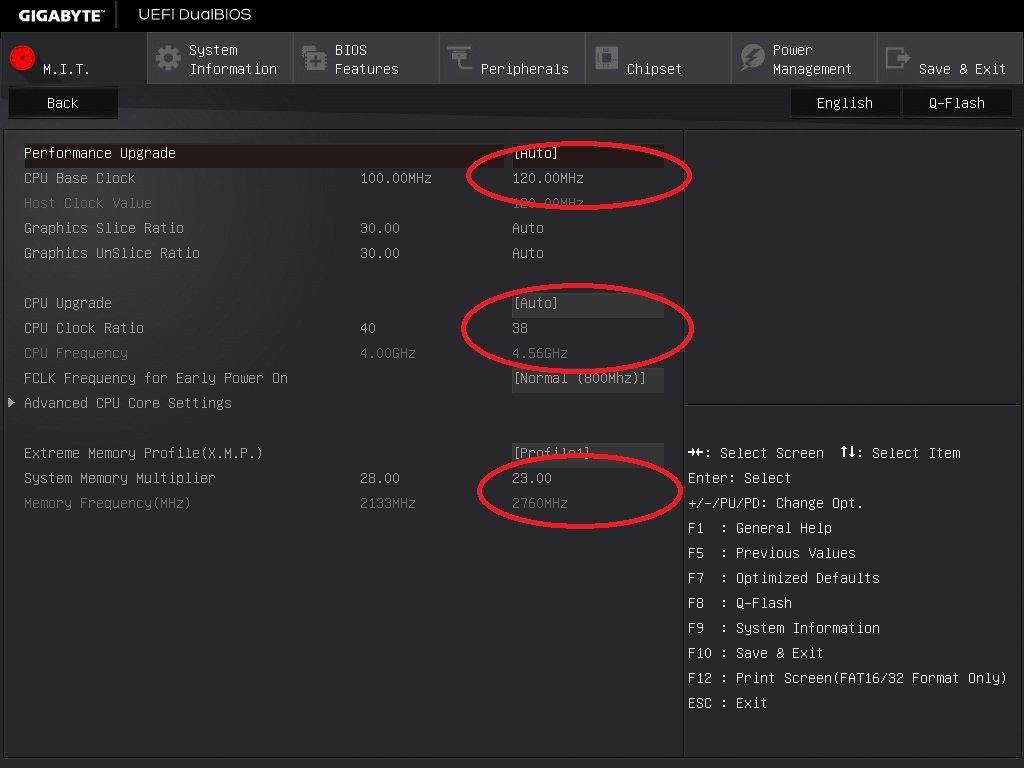
In the example above you can see that I have increased the BCLK from 100 to 120MHz and used a lower CPU and RAM ratio to get close to 4.6GHz + 2.8GHz (CPU and RAM speed) as before, I have not altered anything else such as Vcore or loadline calibration etc.
Now CPU-Z shows this,
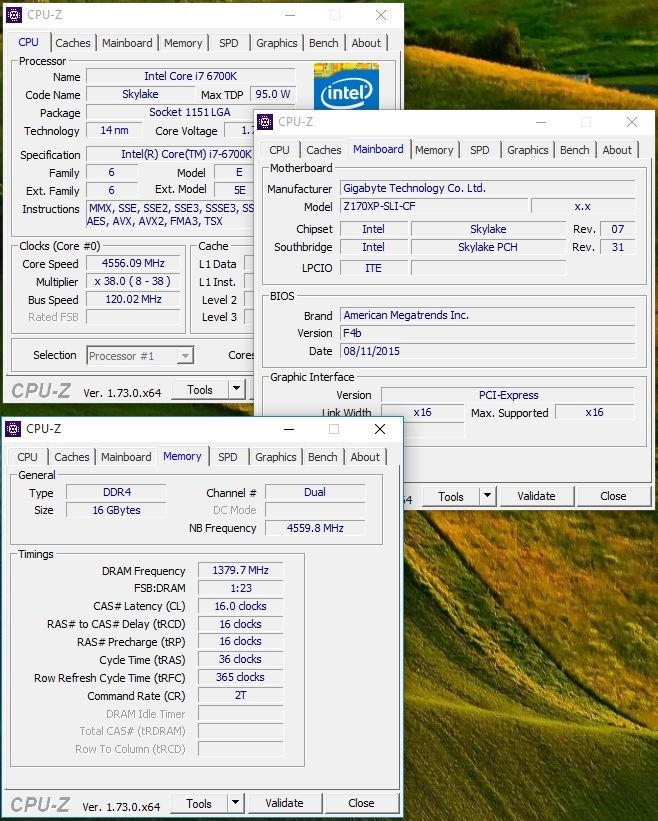
As you can see the CPU core is now at 4.56GHz and the RAM at 2760MHz.
But if you look carefully you will also see the NB Frequency (also known as Uncore in the BIOS) has gone up from 4GHz to now matching the CPU core speed at 4.56GHz as I left this setting on Auto in the BIOS and did not reduce the ratio.
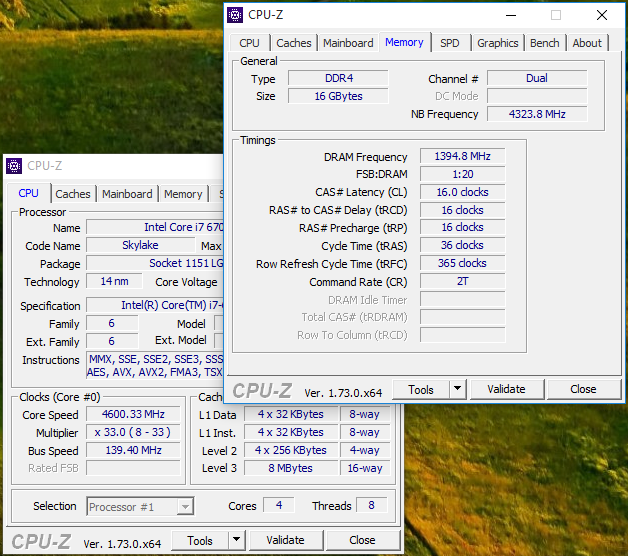
Going higher still here is 139.4MHz bclk with the CPU, Uncore and RAM multipliers adjusted to stay roughly around the desired values.
Using the BCLK to overclock is a bit more advanced than simply increasing the CPU ratio but if you want to try it then experiment and always test, test and test again to make sure you are getting performance gains.
Should you get a boot loop from an unstable overclock your two options are to power off the PC and removing the battery (unfortunately located under the first GFX card slot) or shorting out the clearCMOS pins found above the front case panel connector.
Also always remember to save your settings as profiles within the BIOS so if you do have to clear the CMOS you can simply and easily load the profile and adjust a bit to try and get it stable rather than having to re-enter all the values again.
So there you have it, some simple settings to get a good performance boost from your CPU and settings that I would consider 100% safe to run 24/7, I use a Corsair H100i GT to cool my CPU and temperatures were well below any danger limits and on average were around the mid 60c mark.
CPUs do vary in terms of quality (silicon lottery) so for example the exact Vcore I needed to set may not be the same for your particular CPU so maybe try 1.31V or 1.32V if it is unstable or if you are really lucky maybe less than 1.3V.
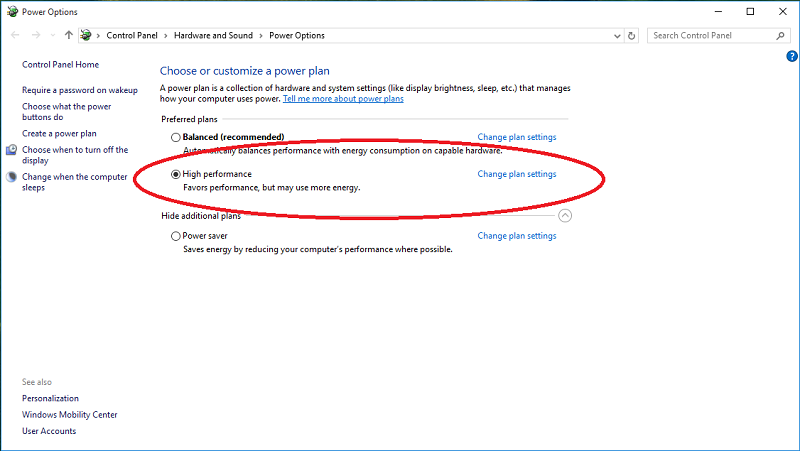
Should CPU-Z show the CPU core speed still reducing down in speed at idle go to your power management settings in Windows and select High performance rather than Balanced and that should solve that little annoyance.
Final Thoughts
The Z170XP-SLI is a good value motherboard with plenty of expansion options and features, the overclocking performance seems to be fine and I experienced no weird issue during use.
Overclockers have this board as part of a bundle with an i5 and this combination will make a good gaming set-up for most users.

Thanks to Ethermaster for the art work.

