


Here is a little guide to show you how to take apart a GTX980 G1 gaming card from Gigabyte, clean the GPU core surface and re-apply fresh thermal paste before re-assembly.
Items Needed
• One GTX980 G1 gaming GFX card (Windforce models will be similar, minus the backplate).
• A small, cross-head screw driver.
• Thermal paste remover or IPA and/or surface purifier.
• Toilet roll and cotton buds.
• Thermal paste.
Disassembly
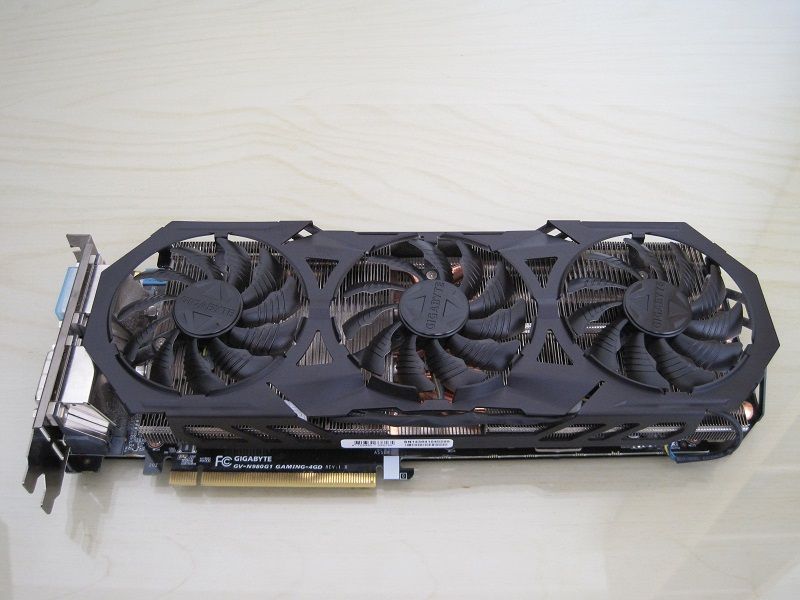
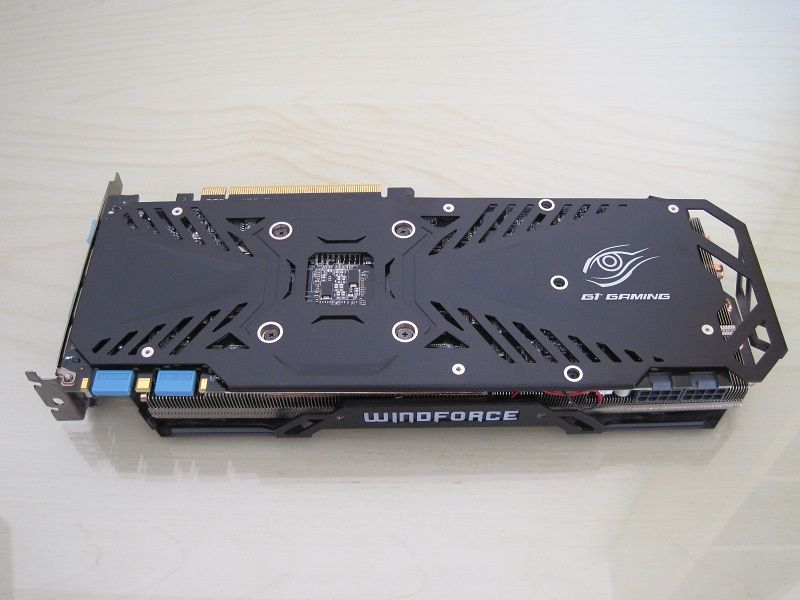
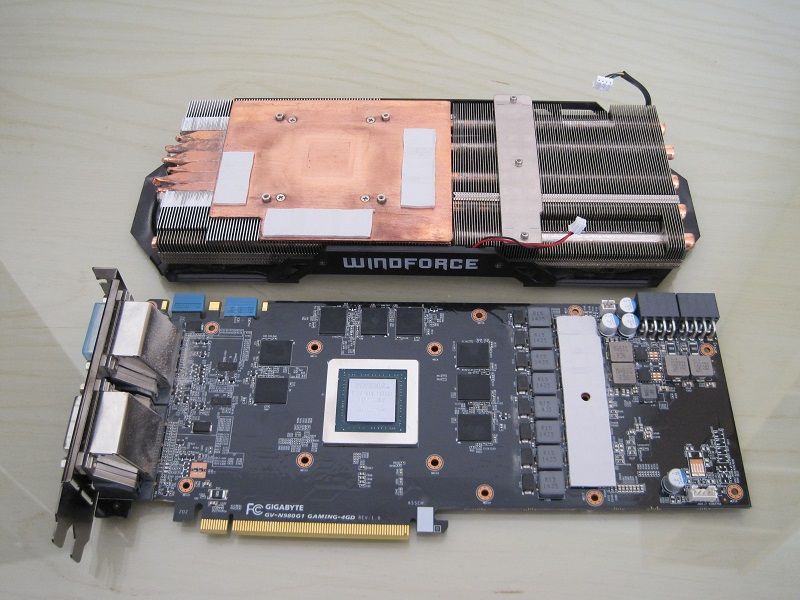
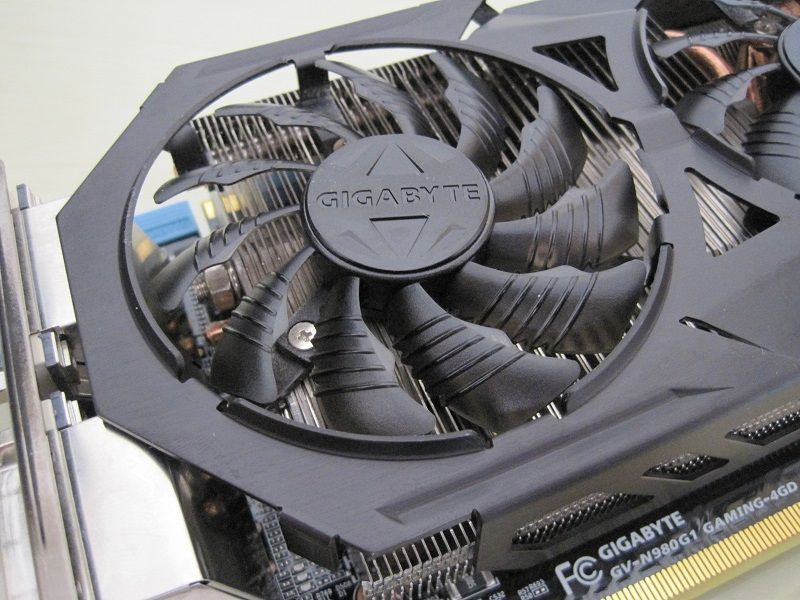
Here is the card I will be using. I have already given the backplate a slight clean as it has been used since October last year and was dusty.
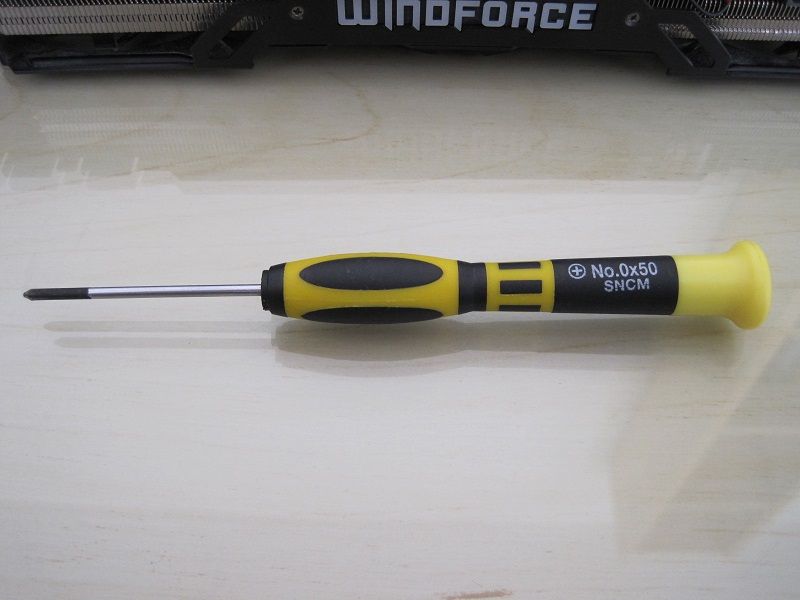
This is the screw driver I will use and it's the only tool needed for this job.
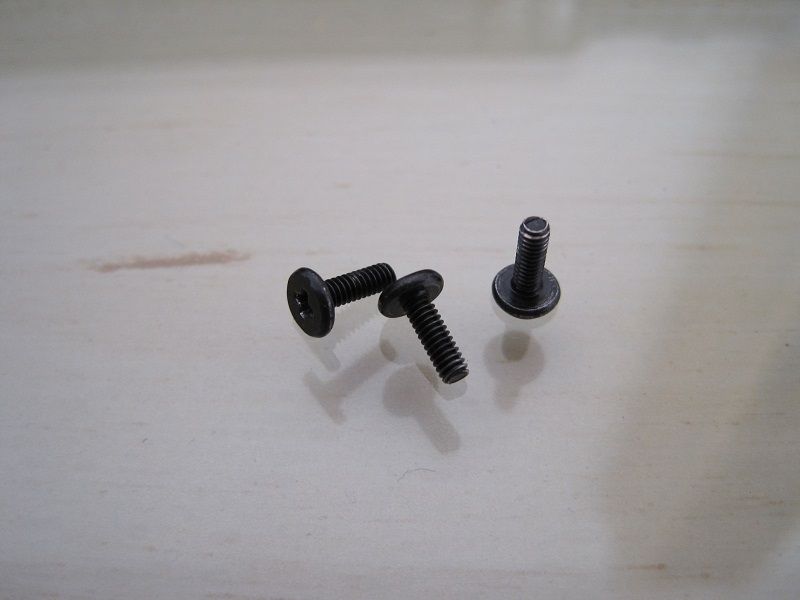

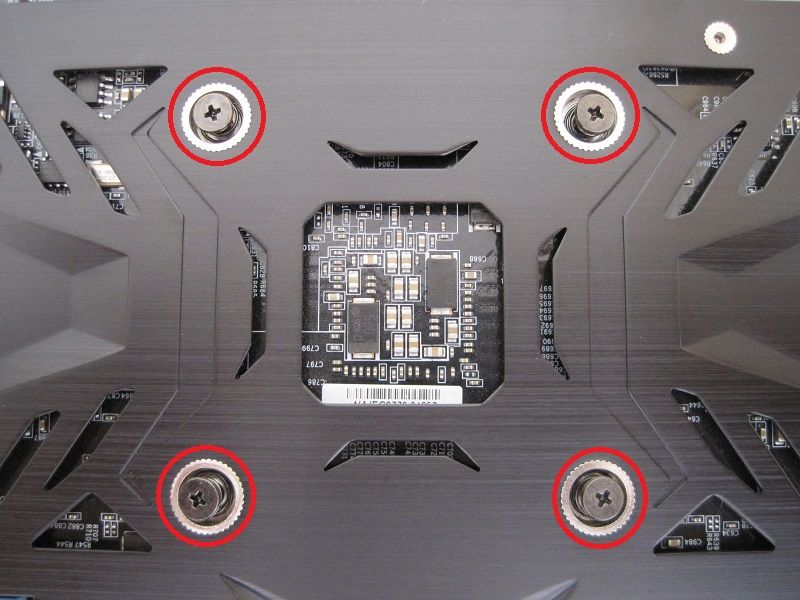
Take these three screws from out of the rear - at these three highlighted holes.
Loosen these four screws and remove them. (I have already started this which is why they look a bit loose already in this photo).
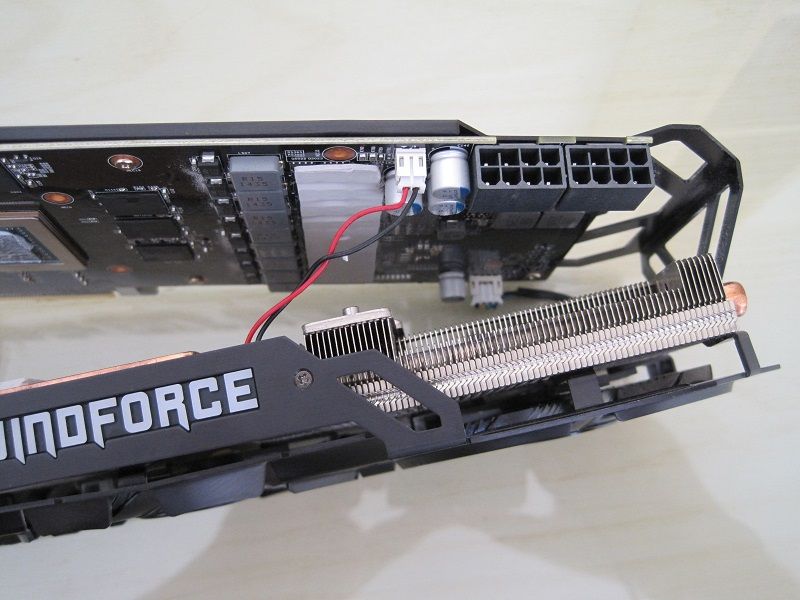
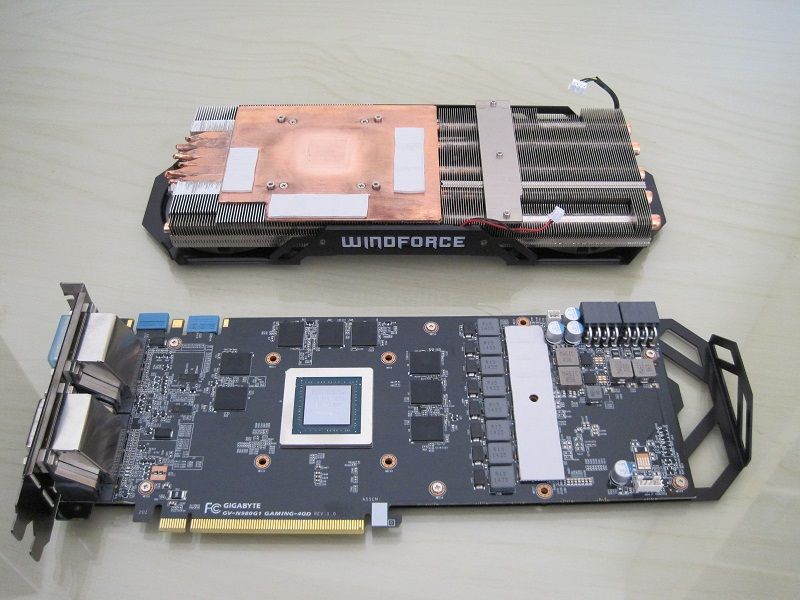
Using a bit of force (the two halves have been together since purchase and the existing thermal paste may have made a tight bond) the cooler will come away from the PCB+Backplate. Then unplug the two cables (fans+illuminated logo).
You should now be at this stage:
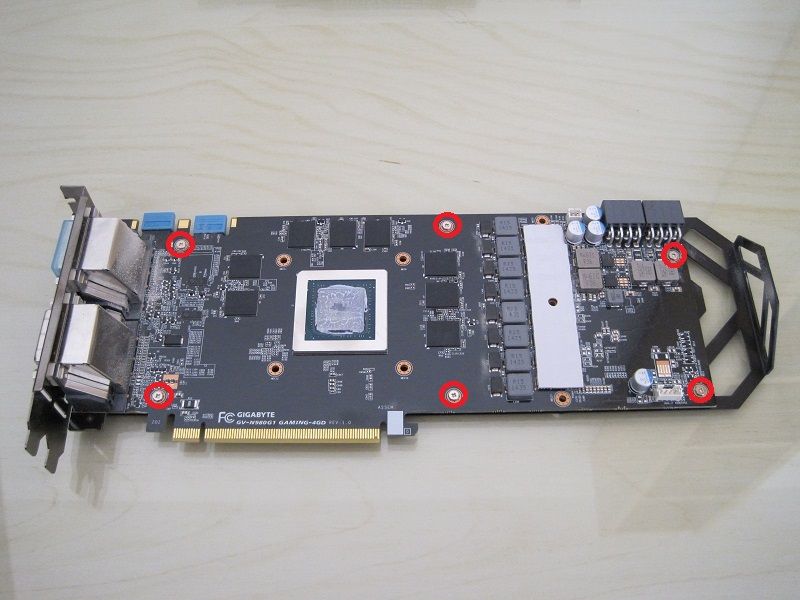
To take the backplate off unscrew these six screws.
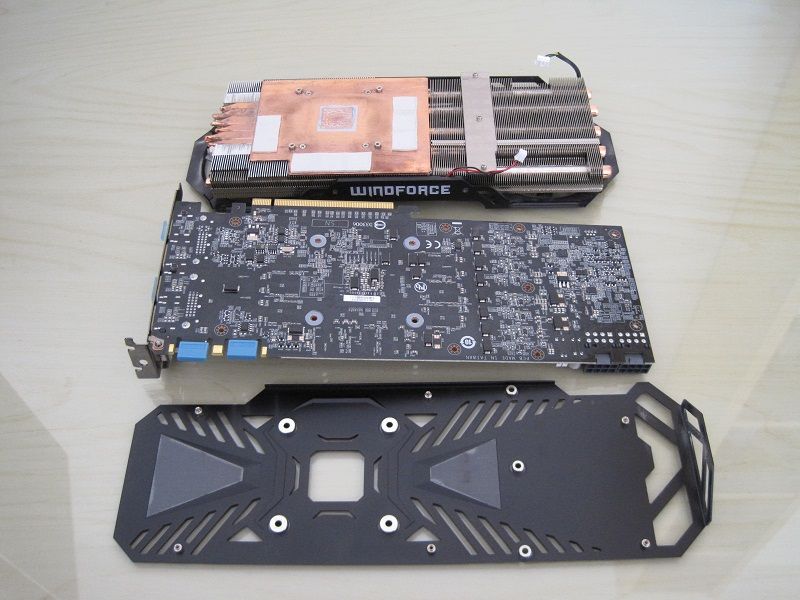
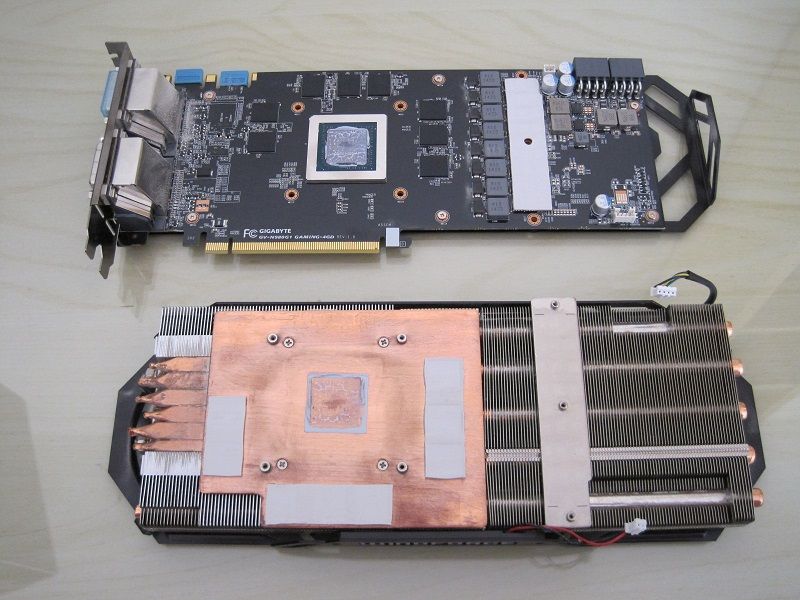
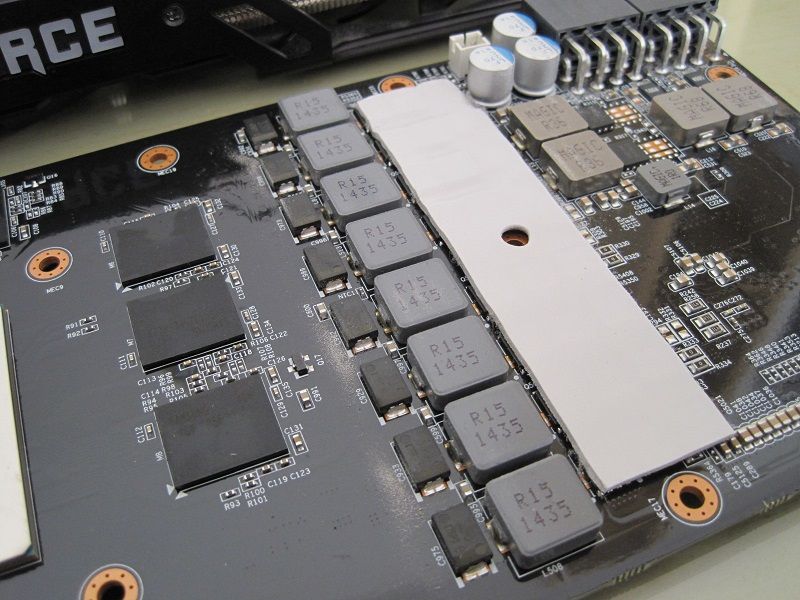
Now you should be looking at this:
Cleaning
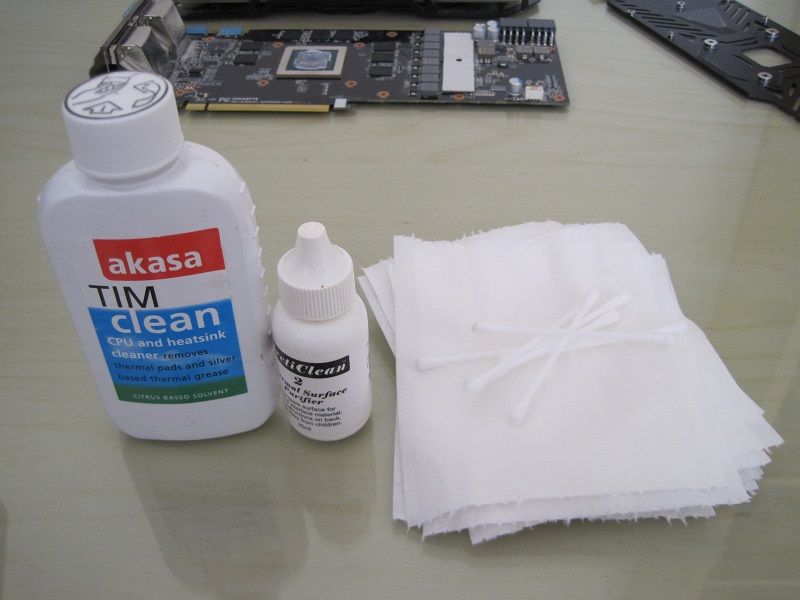
These are the consumables I will be using:
I started by wiping the core with some toilet roll in order to get the bulk of the paste off. Then, using a cotton bud, take the paste around the edges off. After applying the thermal paste remover and a few more cotton buds and toilet roll I got it looking like this.
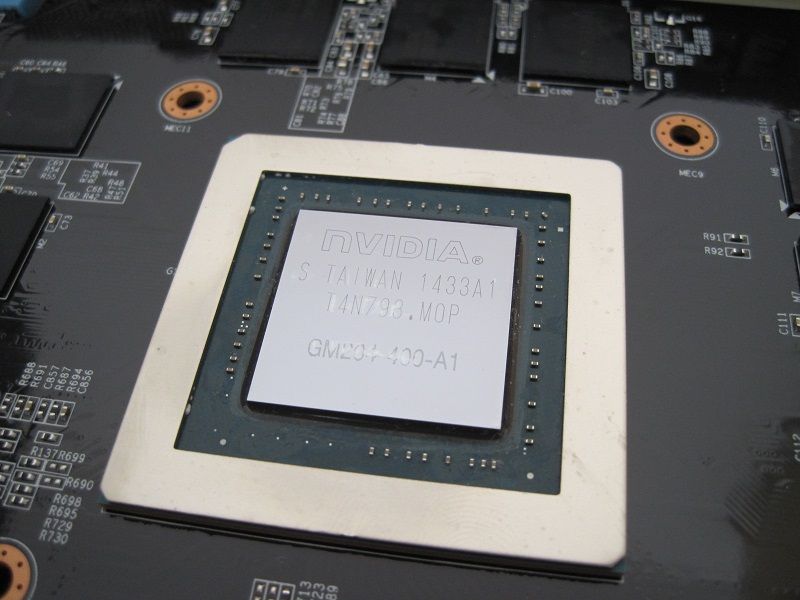
Going gently, I cleaned all traces of old paste off the little SMD parts around the core.
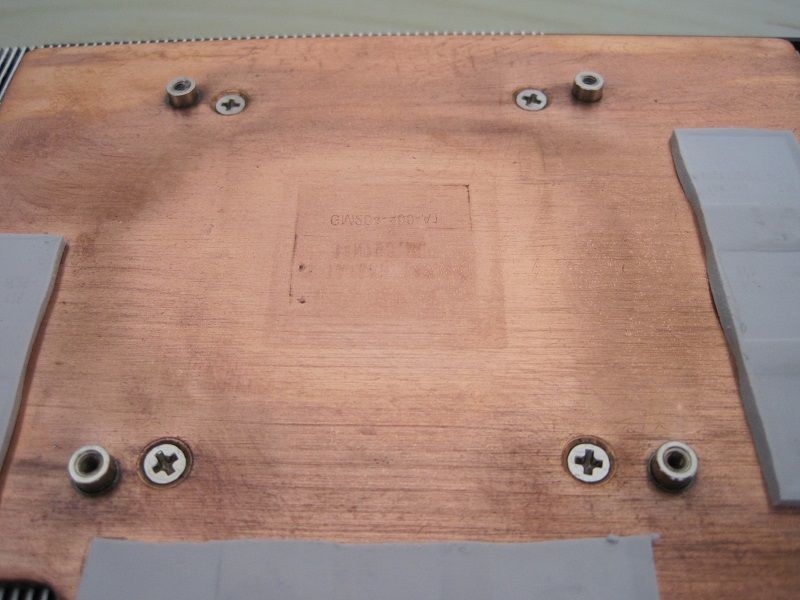
As this was solid copper I went a bit harder on it and used thermal paste cleaner until the toilet roll I was using stopped looking dirty. I then used the surface purifier on both parts.
So you will now be at this stage.
Removing all the Built-Up Dust
If your card has been in use for awhile it may have built-up some dust deposits - mine certainly had. If yours is cleaner, this next step is optional.

Using a hairy brush attachment on a vacuum cleaner, I removed the dust.
I also cleaned this slightly dusty area up.
That is about it for the PCB; the back can be given a clean too considering the backplate was taken off earlier.
I also wanted to take the cooler apart further to clean all the fins and fan blades.
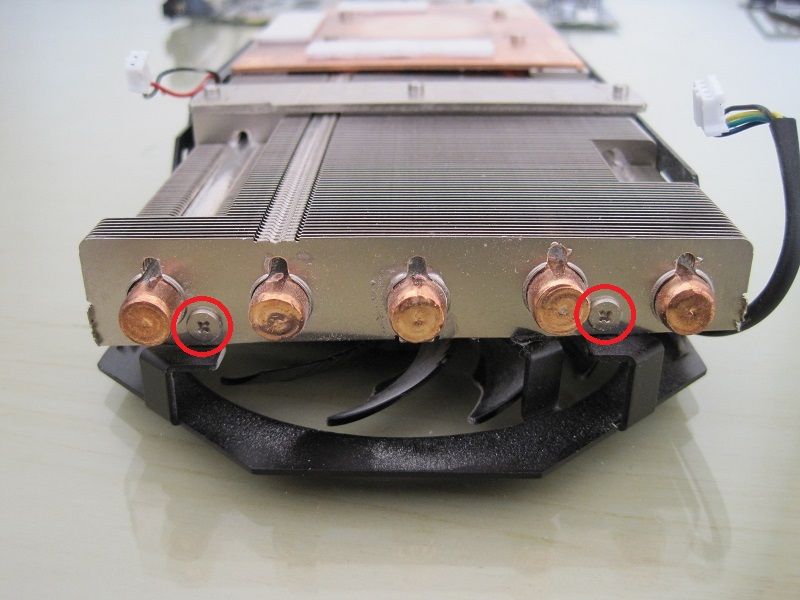
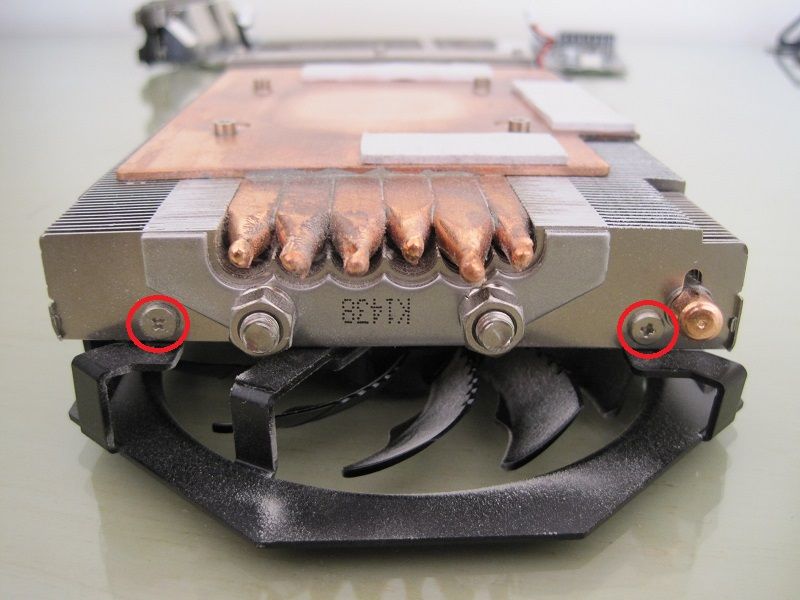
Undo the four screws highlighted above and the fan and shroud assembly will come away from the heatsink.
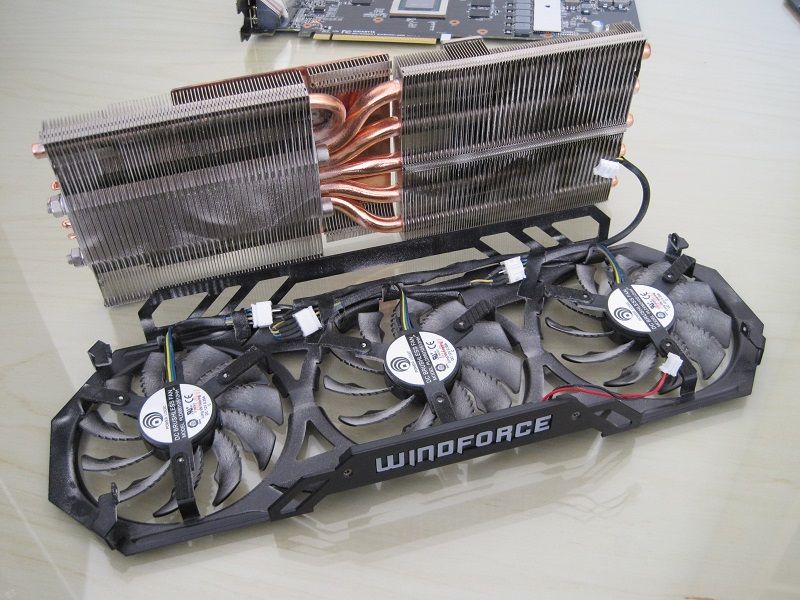
This is the main dust build-up from months of use.
I went at these two parts again with the hairy brush attachment on my vacuum cleaner, paying extra attention to the fan blades and getting deep into the heatsink fins.
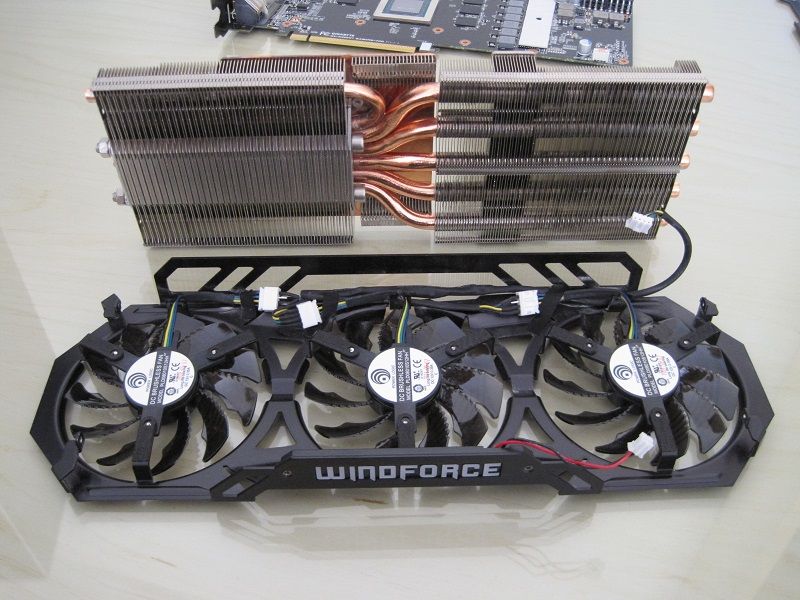
It now looks like this: almost box-fresh again.
Reassembly
Putting the card back together is just a reverse of the above.
I re-attached the backplate to the PCB using the six screws and re-attached the fan and shroud assembly to the heatsink.
Thermal Paste Application
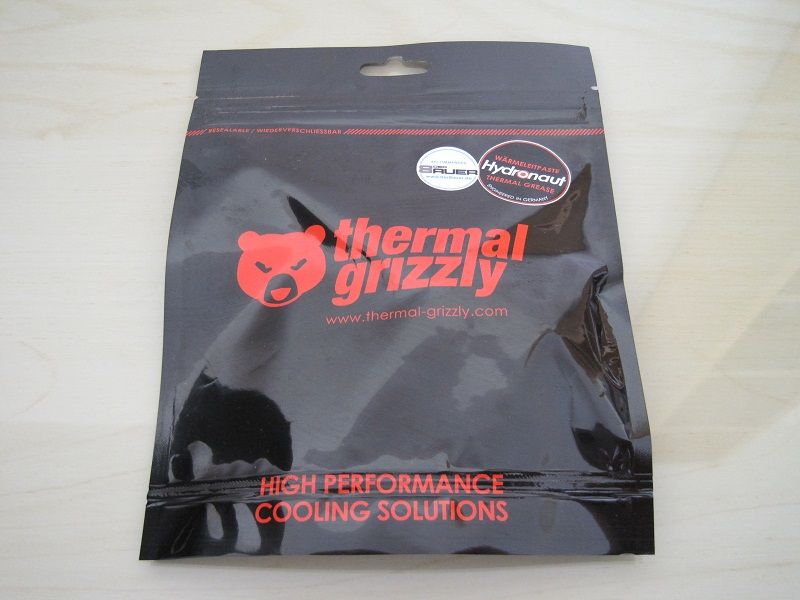
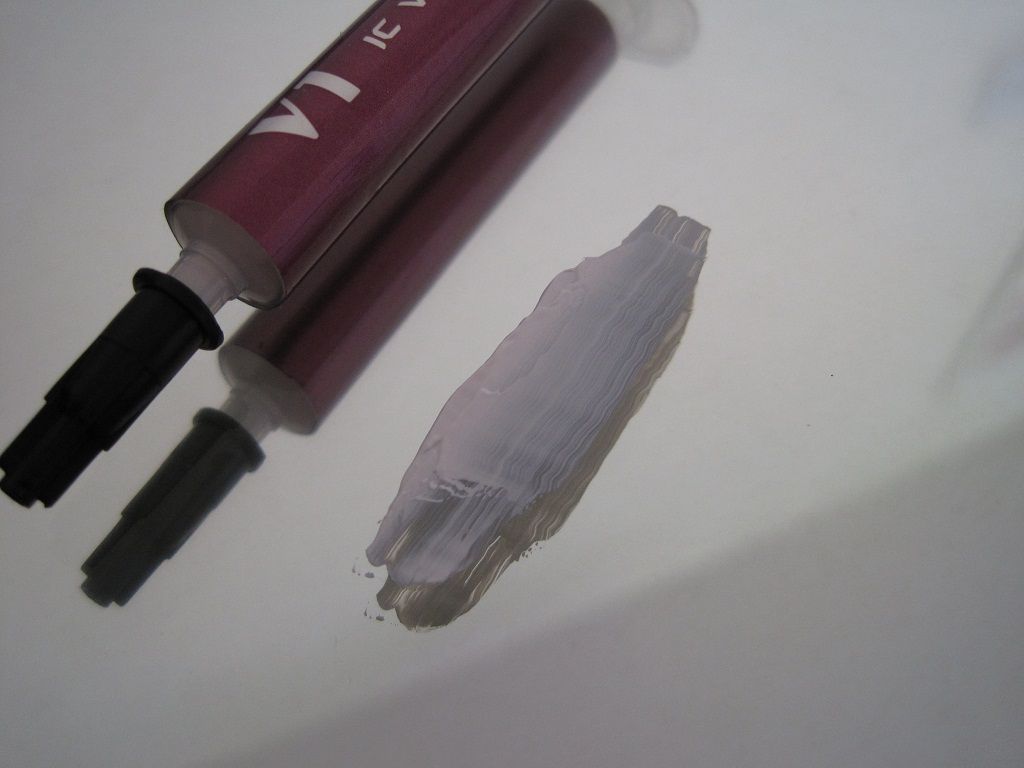
To mount the heatsink back onto the PCB I used Thermal Grizzly Hydronaut paste. This paste is formulated for use with water-cooling, but hey...let's see what it can do in this application.
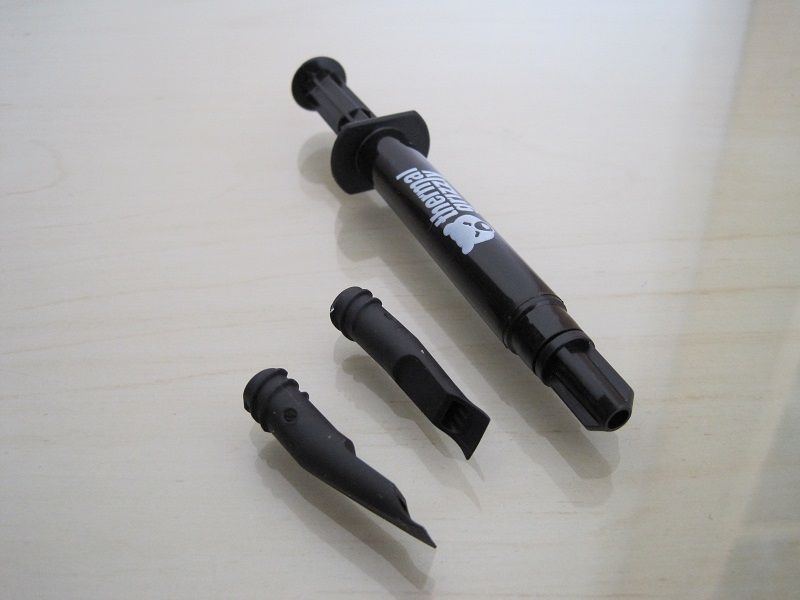
The supplied tube of paste has a very efficient applicator that makes spreading the paste an absolute breeze.
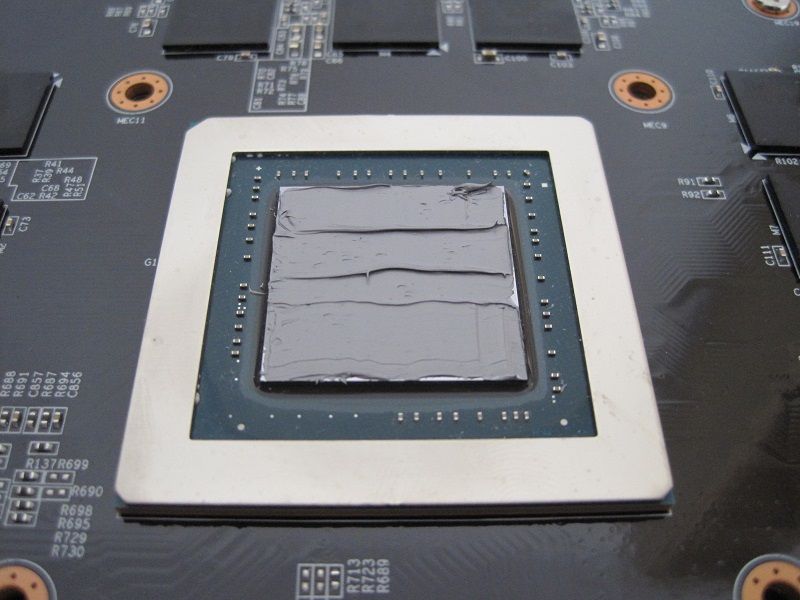
A nice coverage of paste.
So all that is left to do is place the PCB onto the upside down heatsink and screw those four screws with tension springs back in - again, a few turns at a time and in opposite corners, and the three final screws at the end of the card.
The Reassembled Card
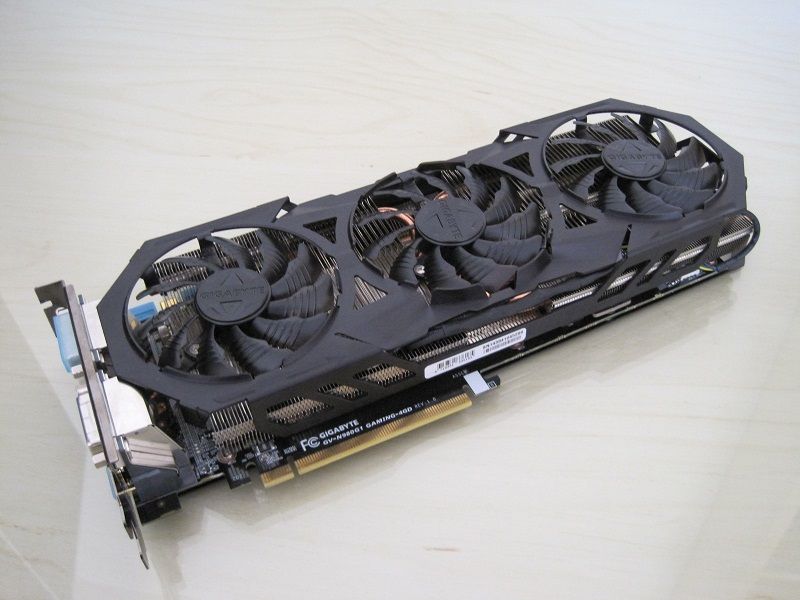
Looks as good as the day I bought it.
Results
Before disassembly, I ran GPU-Z render test for 30mins and two runs of Unigen Valley. I then repeated this after using the new paste.
Core temperature was recorded by GPU-Z logging to file - I used the peak value reached during this and deducted the ambient temperature.
I also tested using auto-fan speed, setting the fan control to a fixed 40% in MSI Afterburner.
I then repeated these four tests with the new paste.
Ambient temperature was recorded using my digital Hilka thermometer and the corrected Delta temperature is shown below.
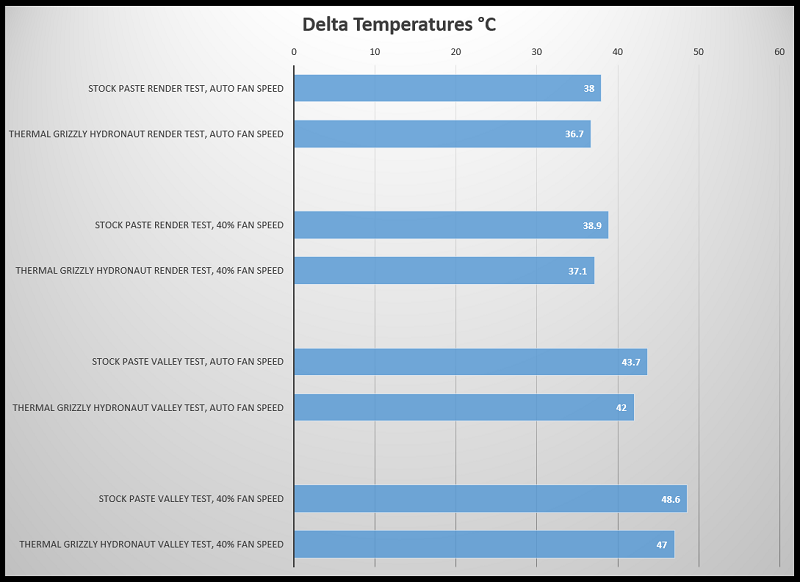
So that has knocked between 1.3°C and 1.7°C from my cards' temperatures; every little helps I guess.
")

")

 I was posting from my phone.