Heyy OCUK!
Welcome to my build log for Knife!
Background:
The way this build started was purely due to my impulsiveness, I've always had a thing for itx builds so it only made sense that my first proper build should be based around a itx motherboard. As some of you may know i've been around on the forums a while now and i've had some decent builds, but they were all aircooled in cases that were as close to perfect as i could get at the time. While planning this build once i had decided on the hardware i wanted to use, it came to the case. I wanted something bespoke and unique but at the same time to be clean, sharp and compact. I hunted everywhere for something that was perfect i wouldn't accept anything less.
After spending days searching and researching and searching some more nothing ticked all of the boxes and it had got to a point where i would have made compromises just to get the build started, until a very brief conversation with JR23 Design's from Parvum. What started as a random idea session over teamspeak and a gaming night, slowly progressed into a concept of which every time we discussed seemed more and more real....
This rig is going to be my LAN rig, some of you maybe aware of the Insomnia LAN events which take place throughout the year, i've attended the last few and safe to say most homely place as a gamer/pc enthusiast to be. I wanted to make sure i could build something which would be more than capable of heavy gaming yet remain compact enough to lug around for LAN's.
Hardware:
Intel 4790K
Asus ROG Impact
Corsair Dominator Platinums 2133
AMD 295x2
Corsair Force GT 120GB's
Silverstone Strider 850w
Bespoke Parvum
Cooling
EK Asus ROG Impact Waterblock
EK AMD 295x2 Waterblock/Blackplate
EK D5 Vario Clear Plexi
EK Fittings Black Nickel
Bitspower Multi 100mm Reservoir
XSPC AX Radiators 240mm X3
Primochill PETG Tubing Clear
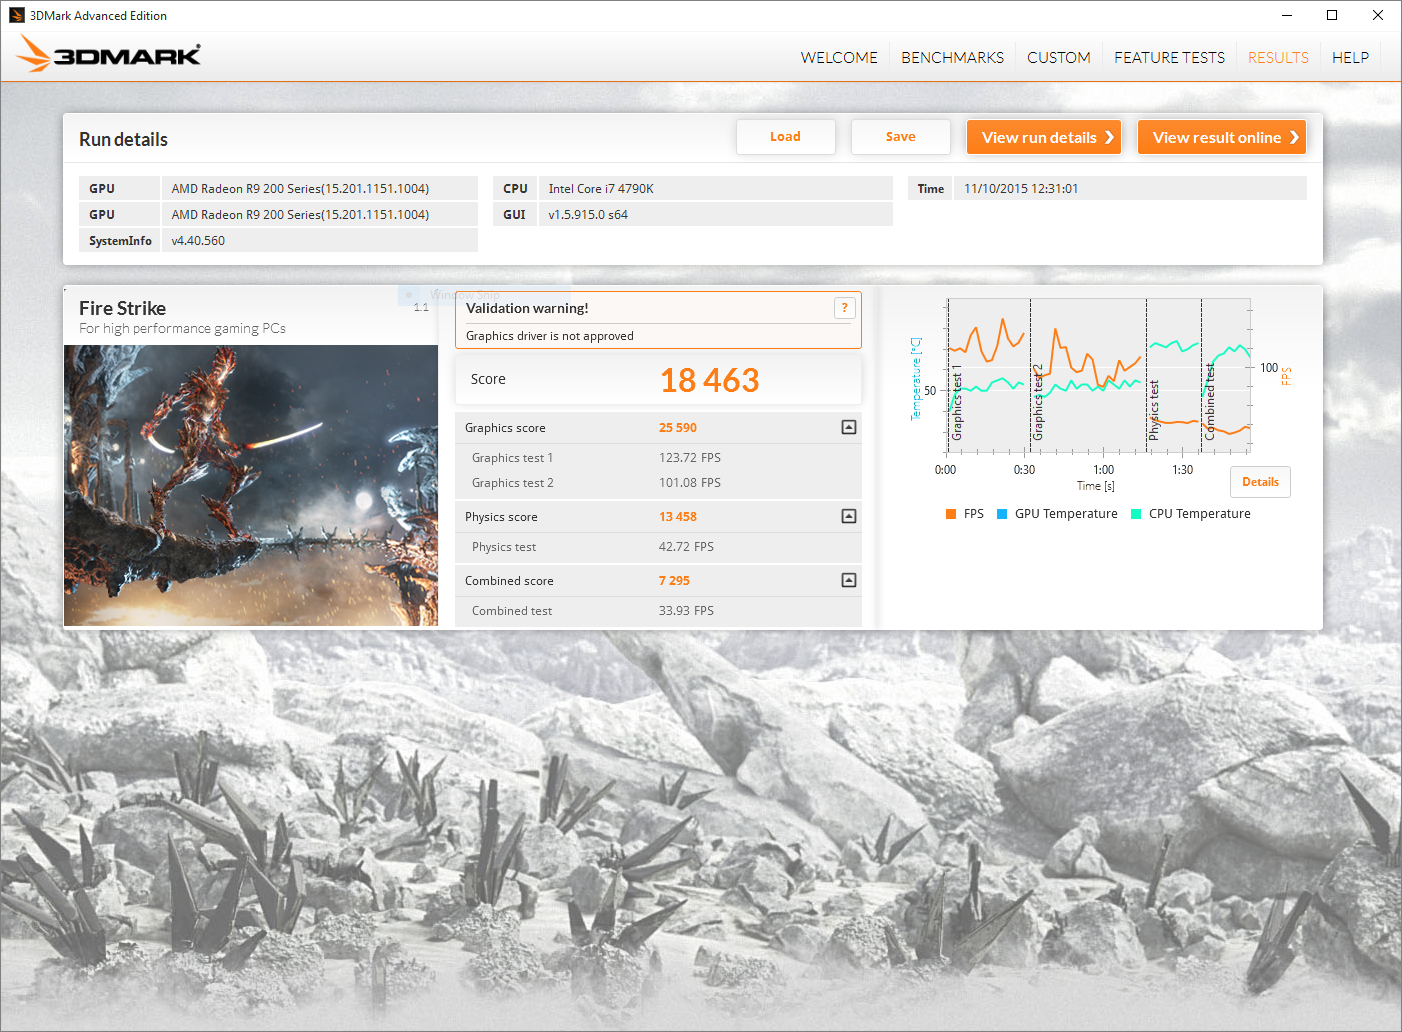
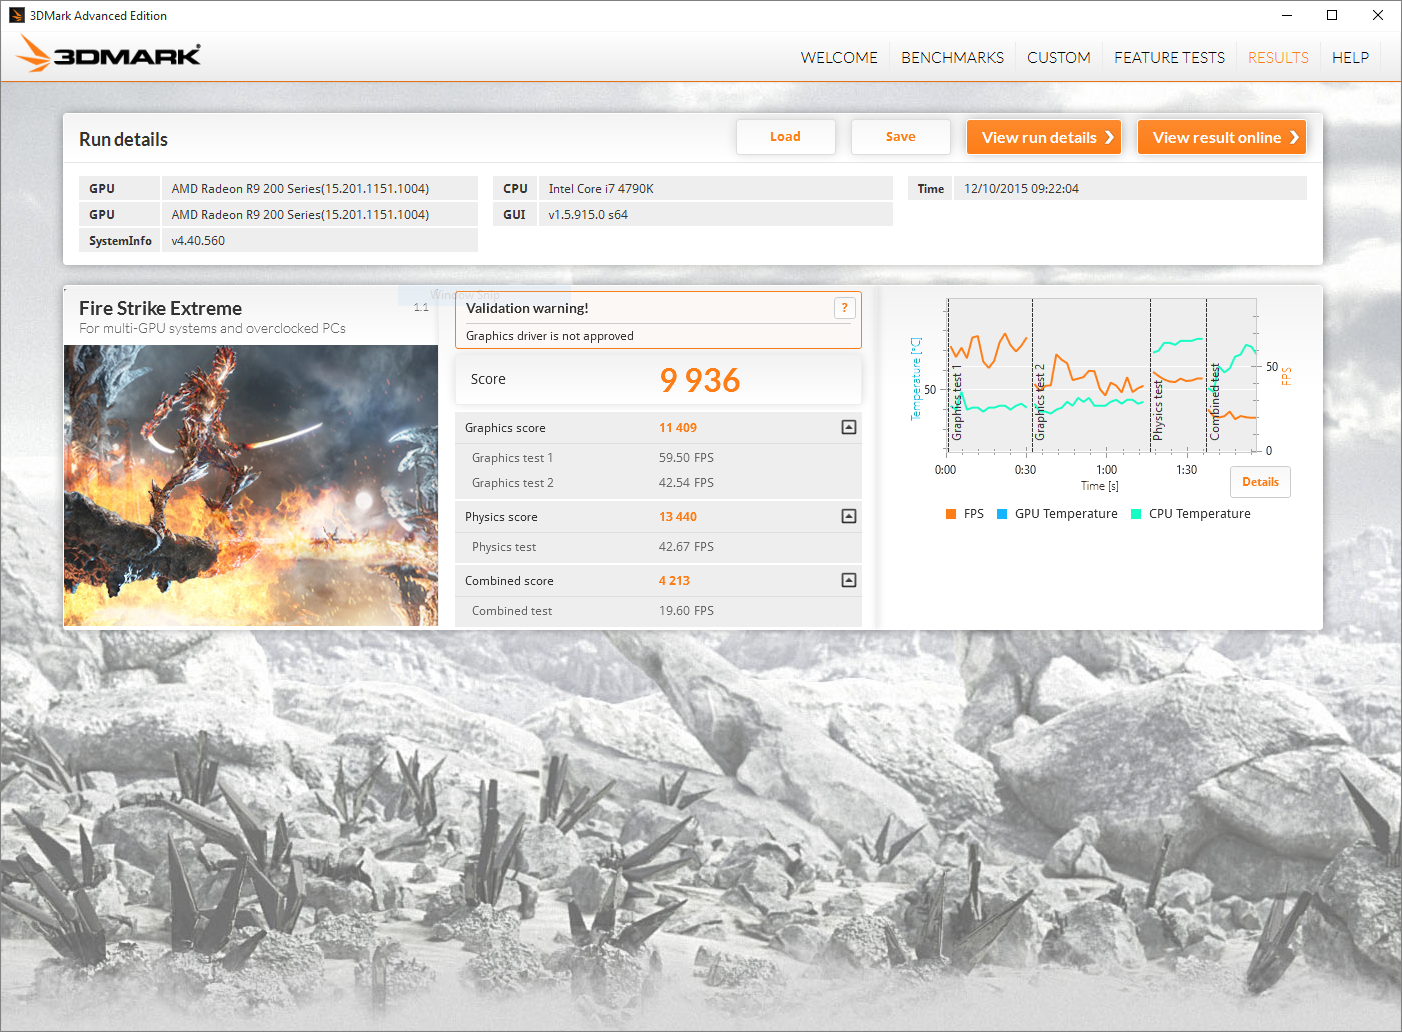
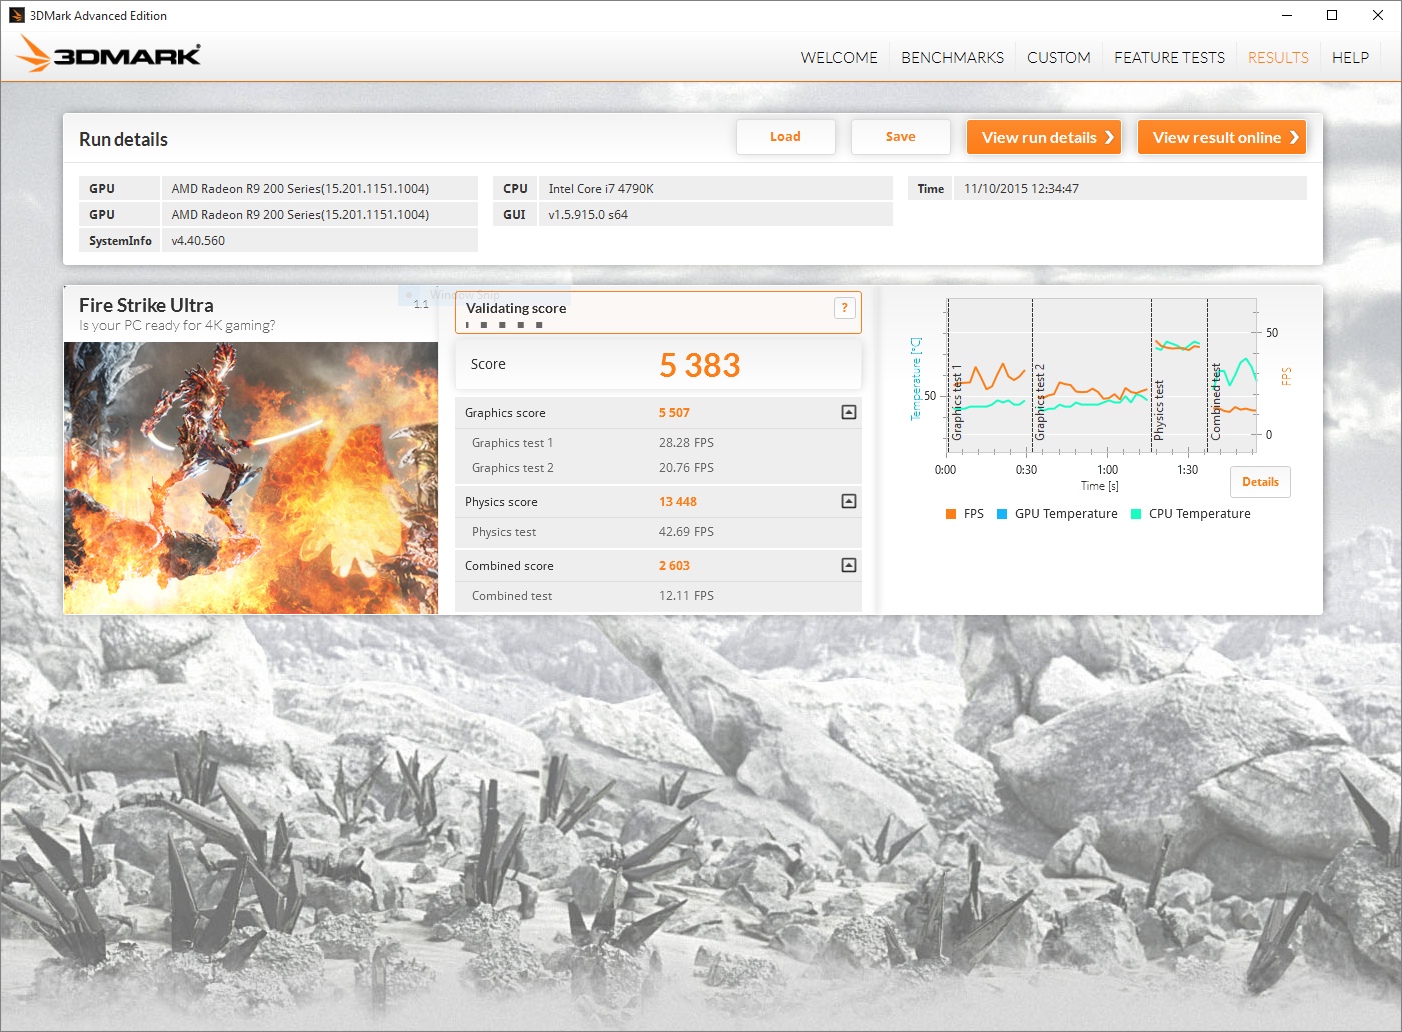
As you can see this setup is far from being a slouch, i game at 1440p and these specifications are more than capable of handling anything i could throw at it. After finalizing ideas with Joe he undertook the task of rendering everything for me so i could see what i had to work with.


While these were being drawn and rendered, i was in contact with Joe on a daily basis bouncing ideas of him and seeing what else we could cram into the case, while all this was going on the postman was knocking daily sometimes even twice a day delivering parts. This is where we hit a series of issues which could in the future have catastrophic effects on the hardware and the case. After i received the EK Waterblock for the GPU it came to my attention that the block itself weighs a lot 1023 grams to be exact, now you can guess how much damage this would cause if we didn't find a way to support the card whilst it was in the case. After a short time at the drawing board it was decided we would have a support bar coming out from the motherboard tray which the GPU will sit on top off, this should ensure minimal amount of damage to both the GPU and case. Whilst amendments were being made to aid the GPU, EK included a single PCI bracket for the 295x2, it would be disappointing if we didn't take advantage of this, as a result of this we were able to shave a few millimeters of the height of the case.
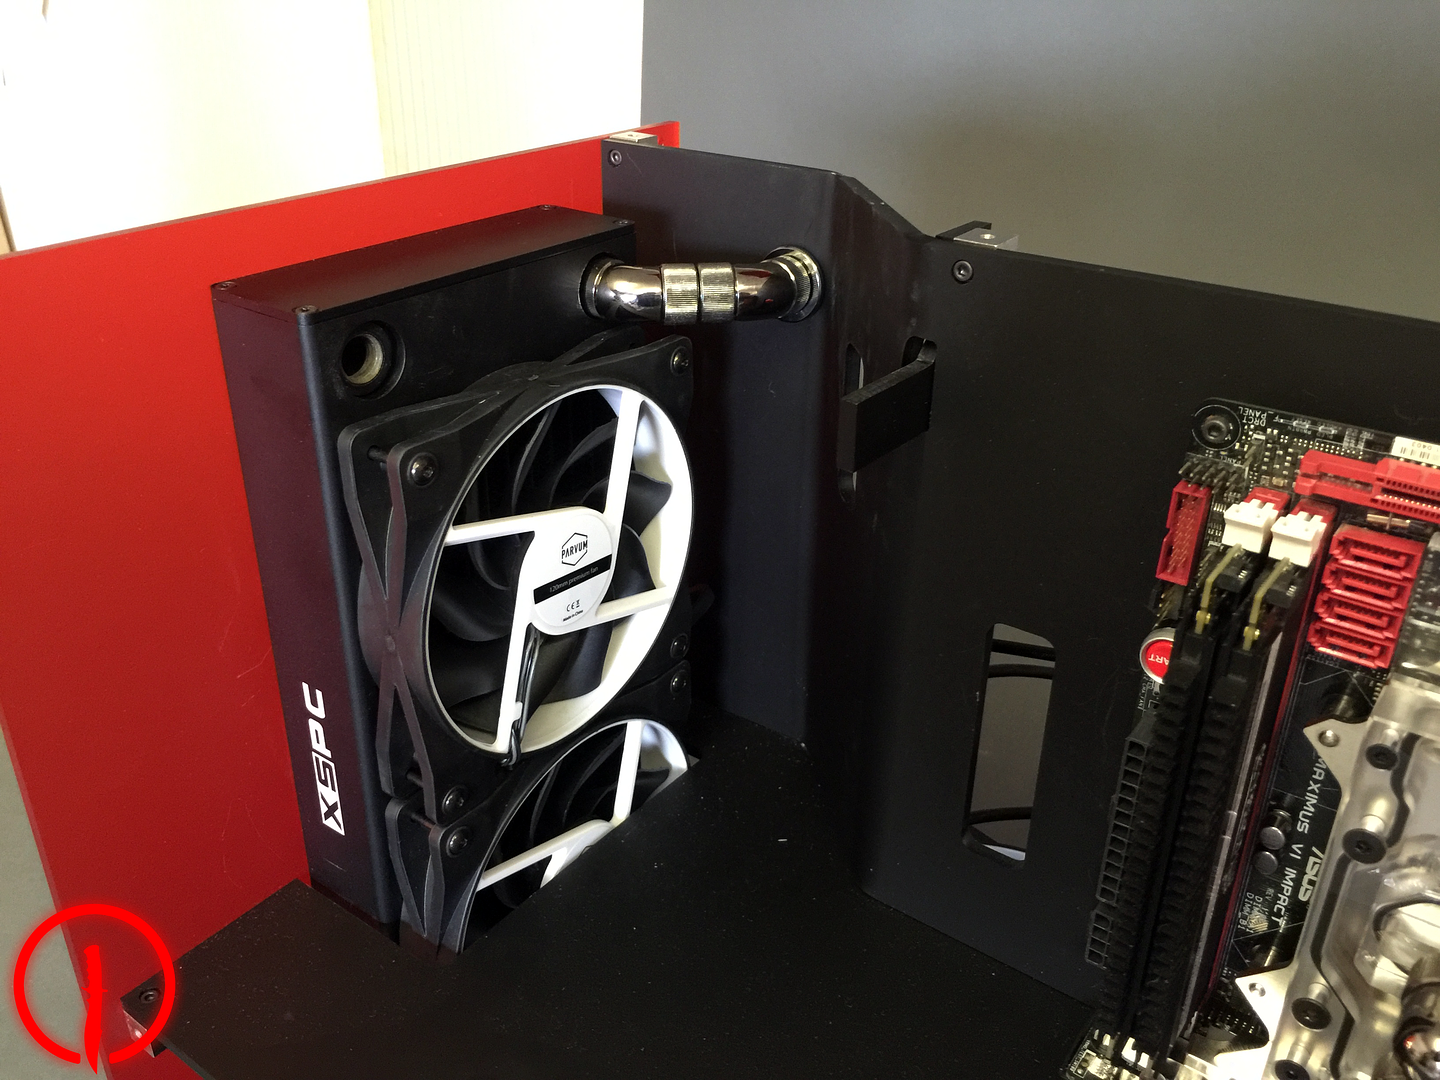
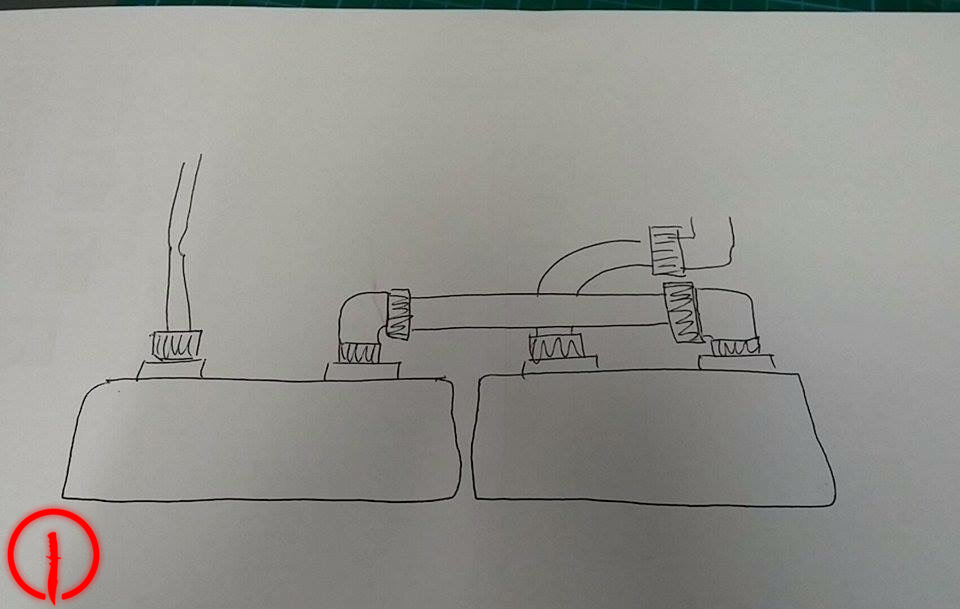
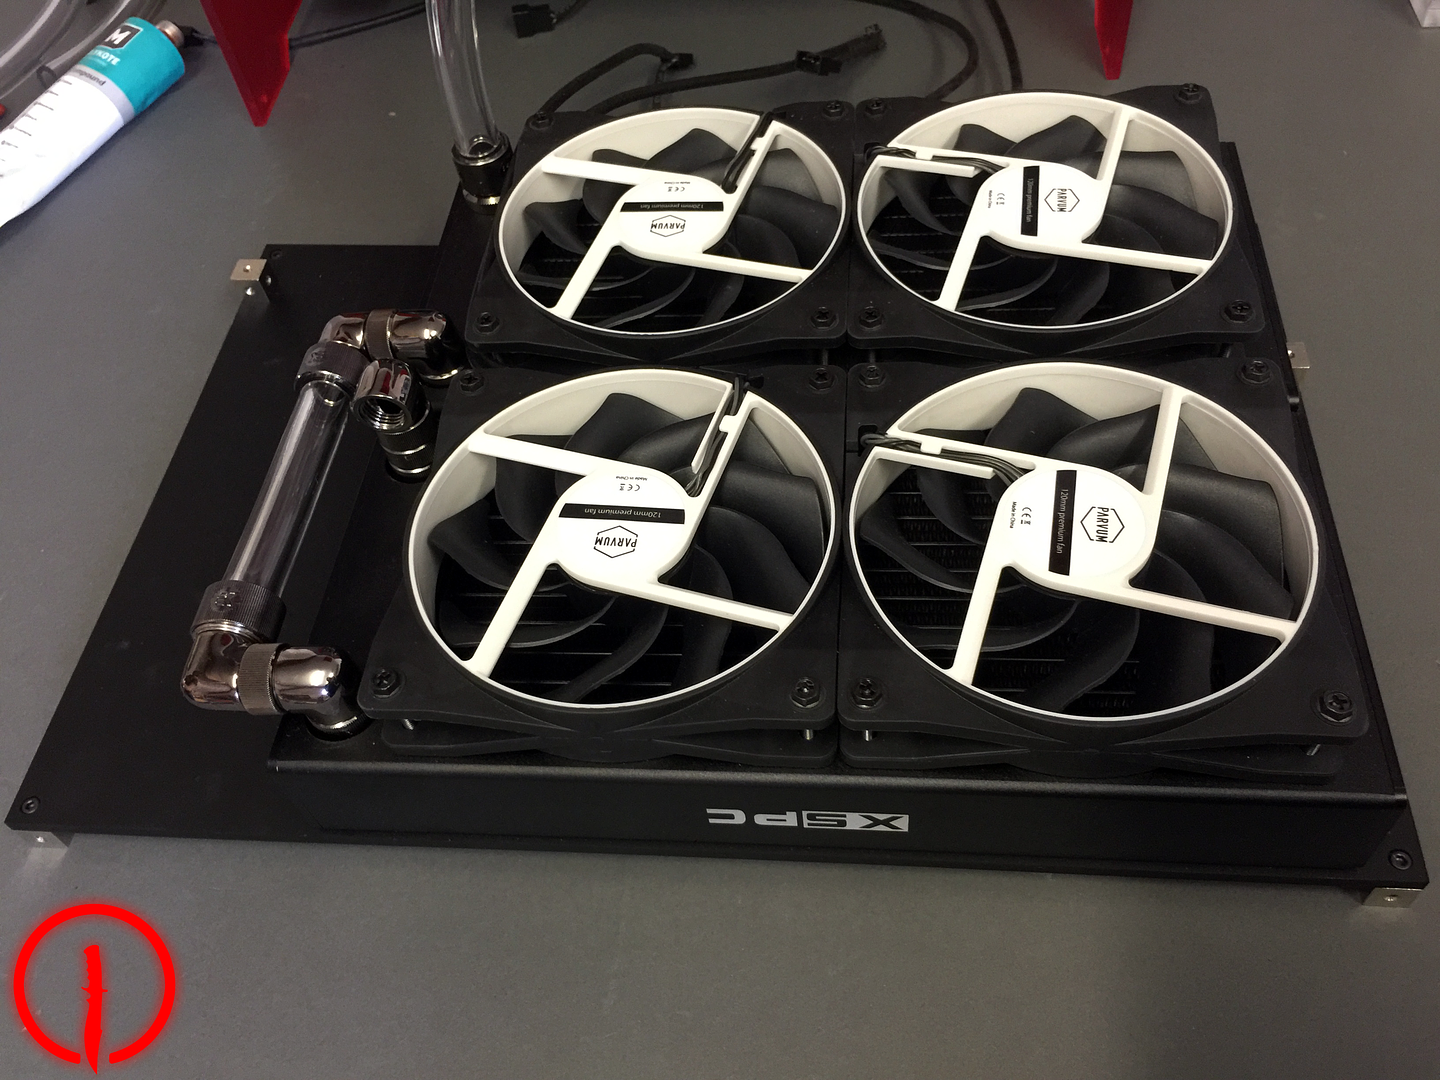
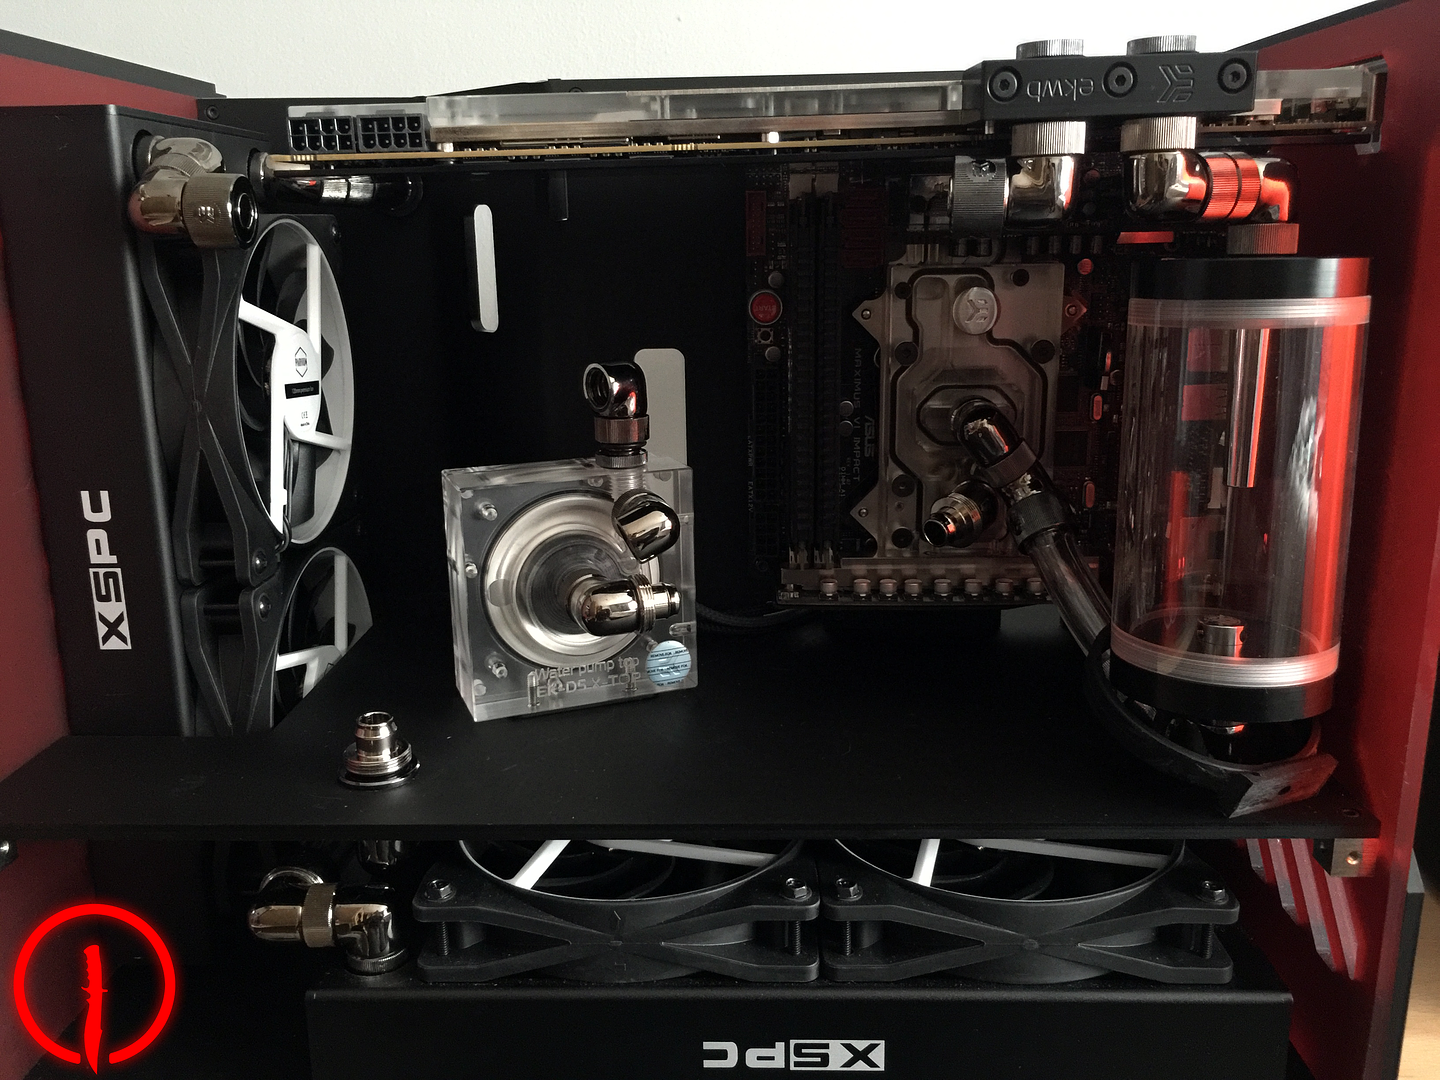
I decided to go with the XSPC AX radiators as i like the way they look, and perform very very well, so informed Joe of the decision and more changes were made to the drawing making it that just more millimetre perfect. We discussed multiple ways to set out the loop literally spent 3 hours one night just going over and over and over it seeing if we could make any more efficient changes we decided to keep the pump and reservoir separate purely for aesthetics, pump will be mounted at the front of the case while the reservoir will be on the back wall next to the I/O Shield.
Then came the finishing touches, i like to keep things clean and tidy, so i thought about how i would be wiring the components up and further changes to cable management holes made, i opted to have the power switch on the rear of the case with no USB headers as i wanted to keep the front clean.
Now that the idea stages had passed it was time to see what kind of a monster had be created!


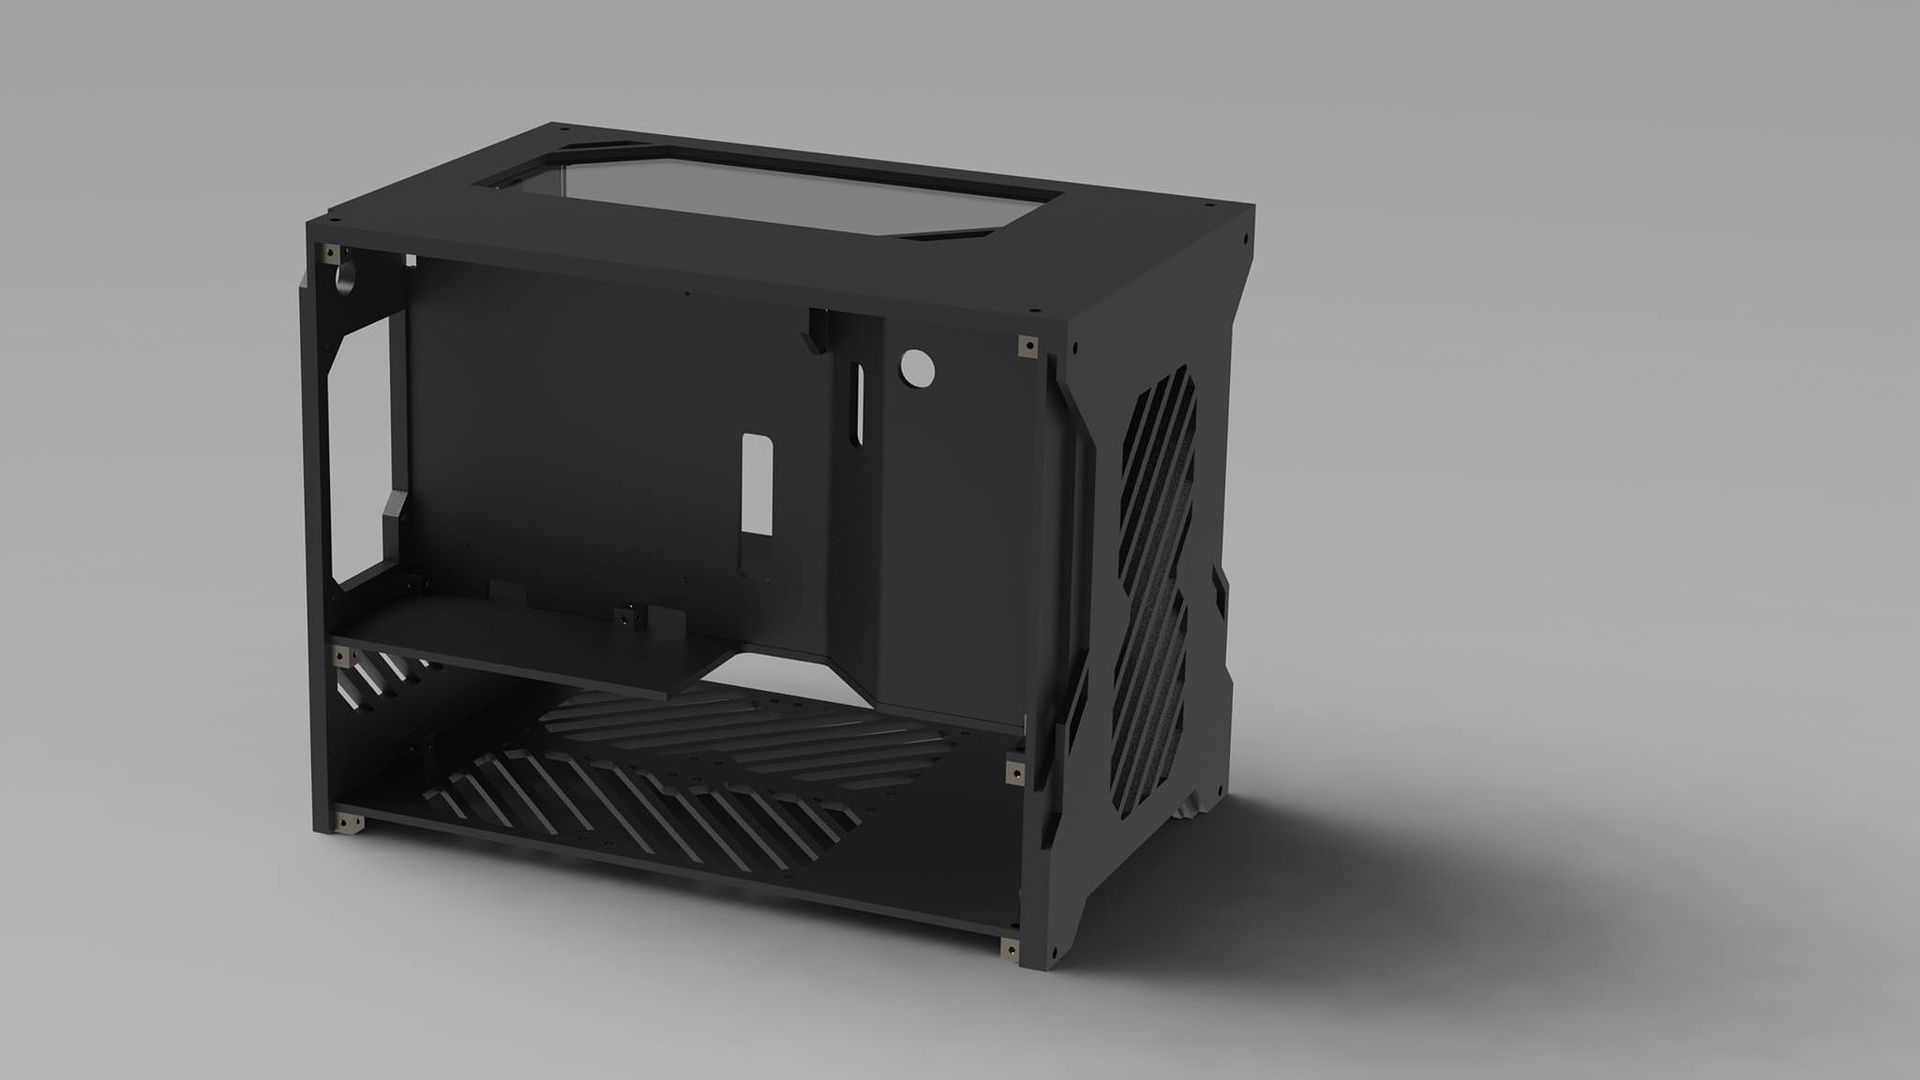

I was absolutely ecstatic when Joe sent me these renders, everything is perfect. He asked me if there was anything else i wanted to add or if i wanted confirmations of dimensions or any other angles of a render. With nothing left to change but the colour Joe once again began the final render of Knife.

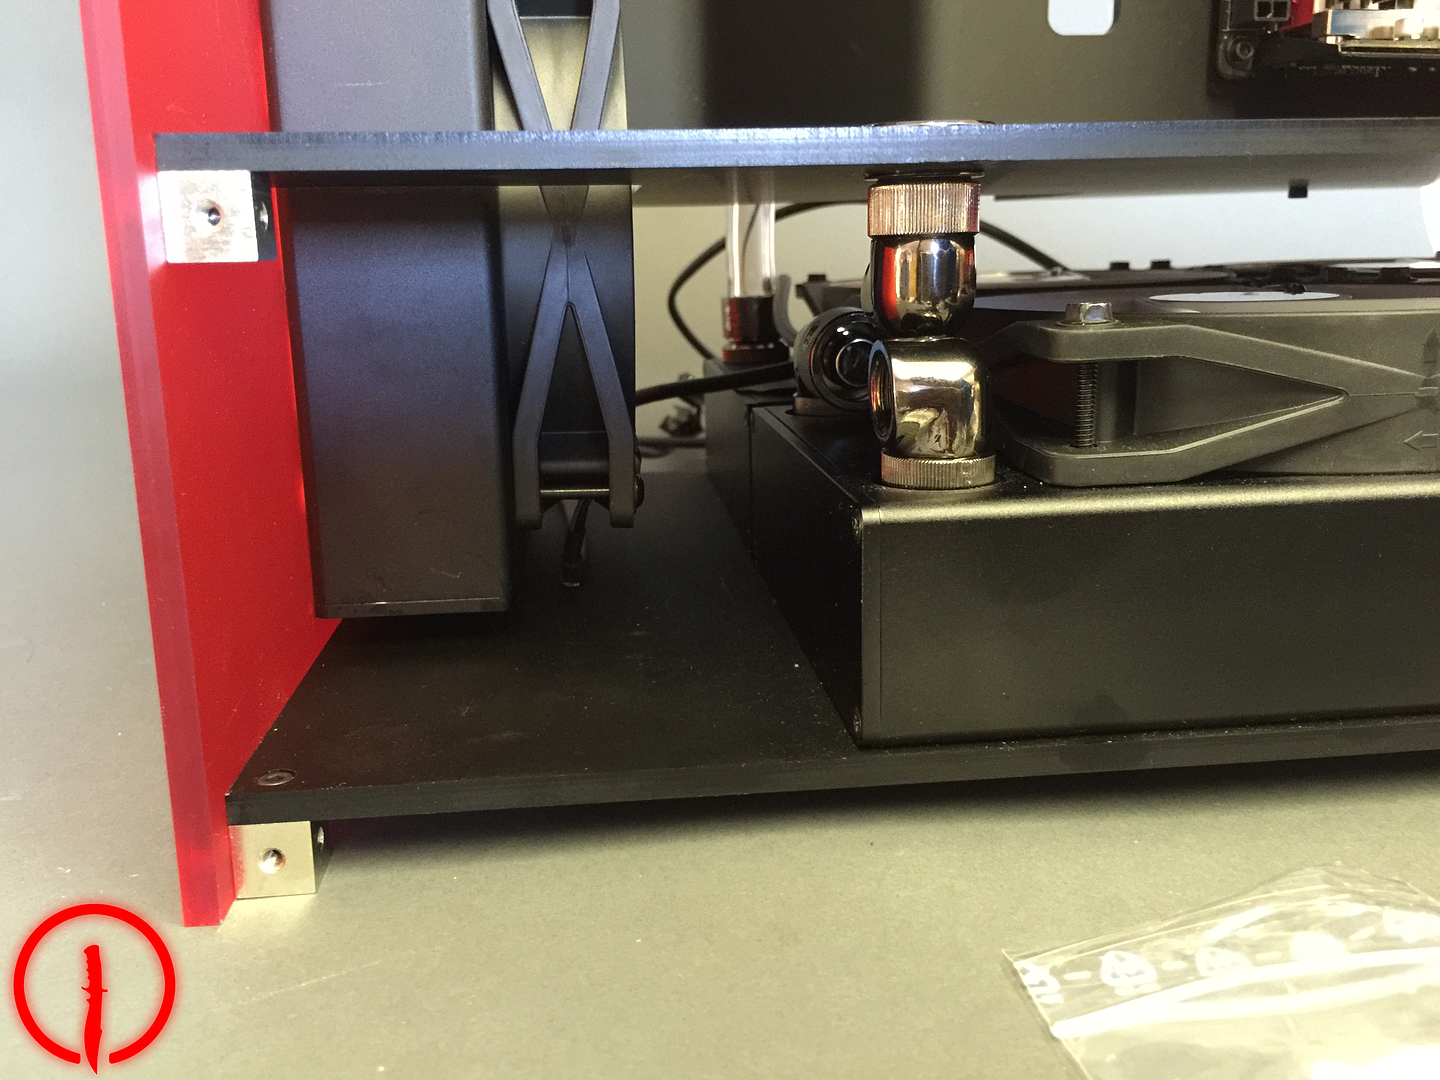
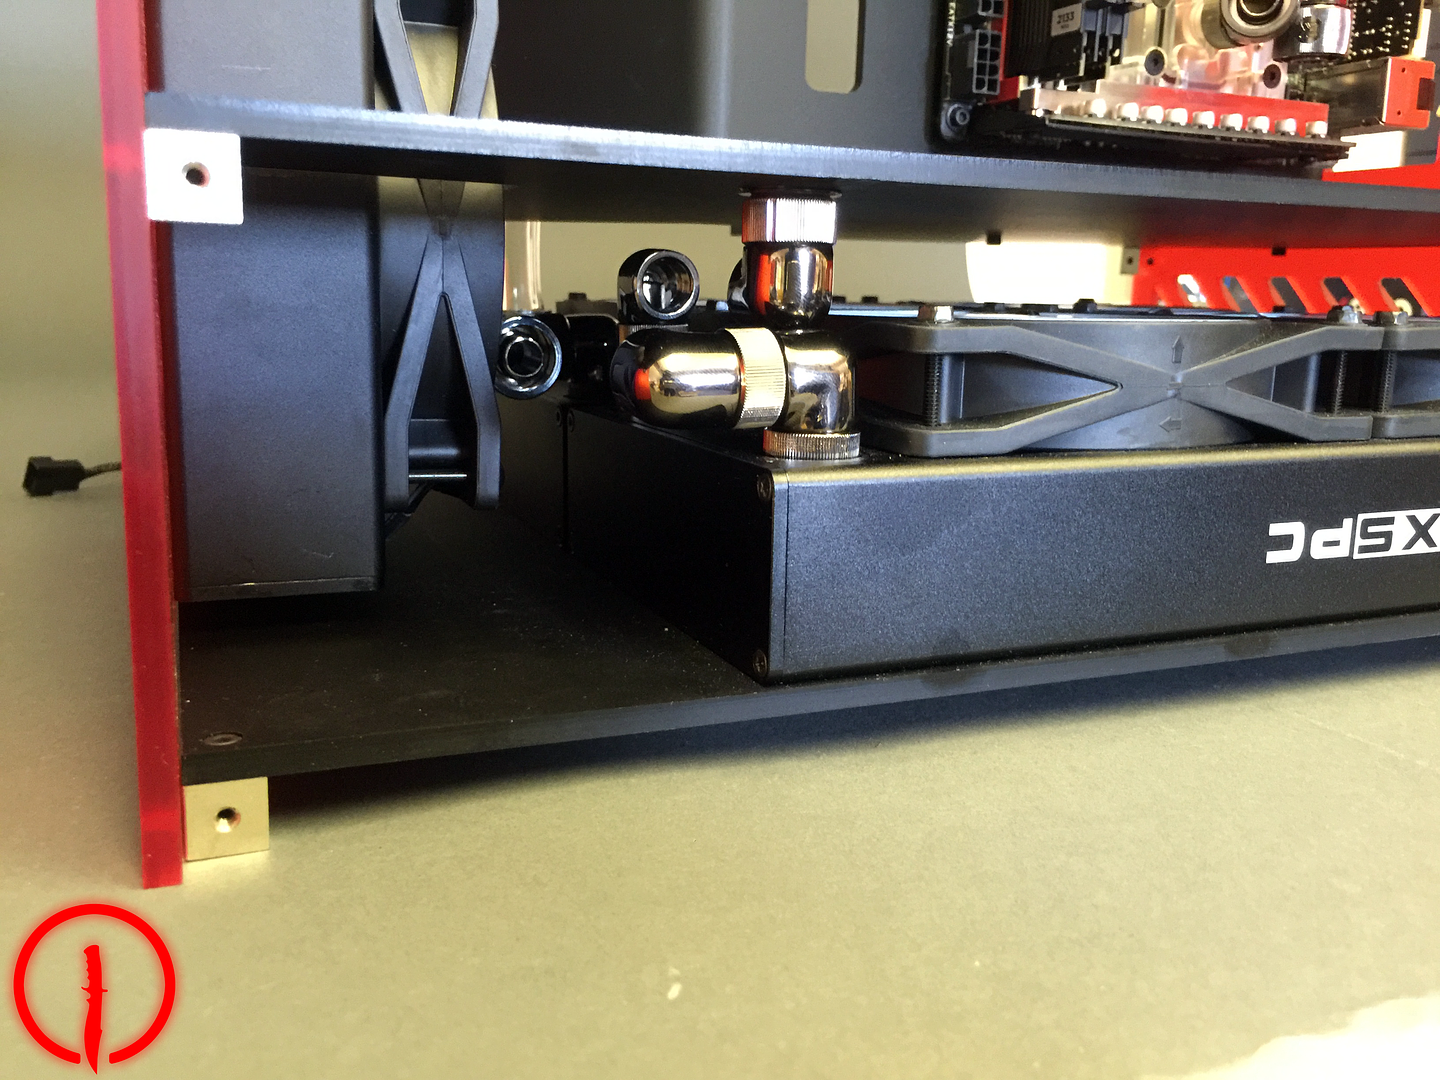
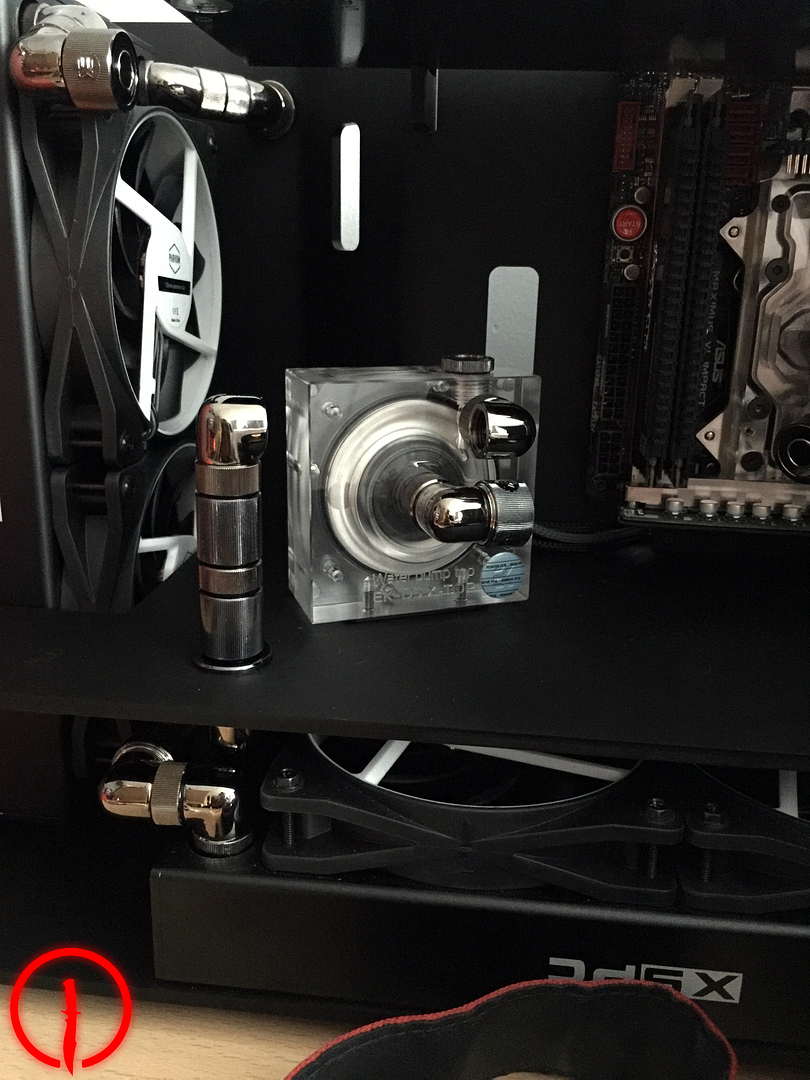
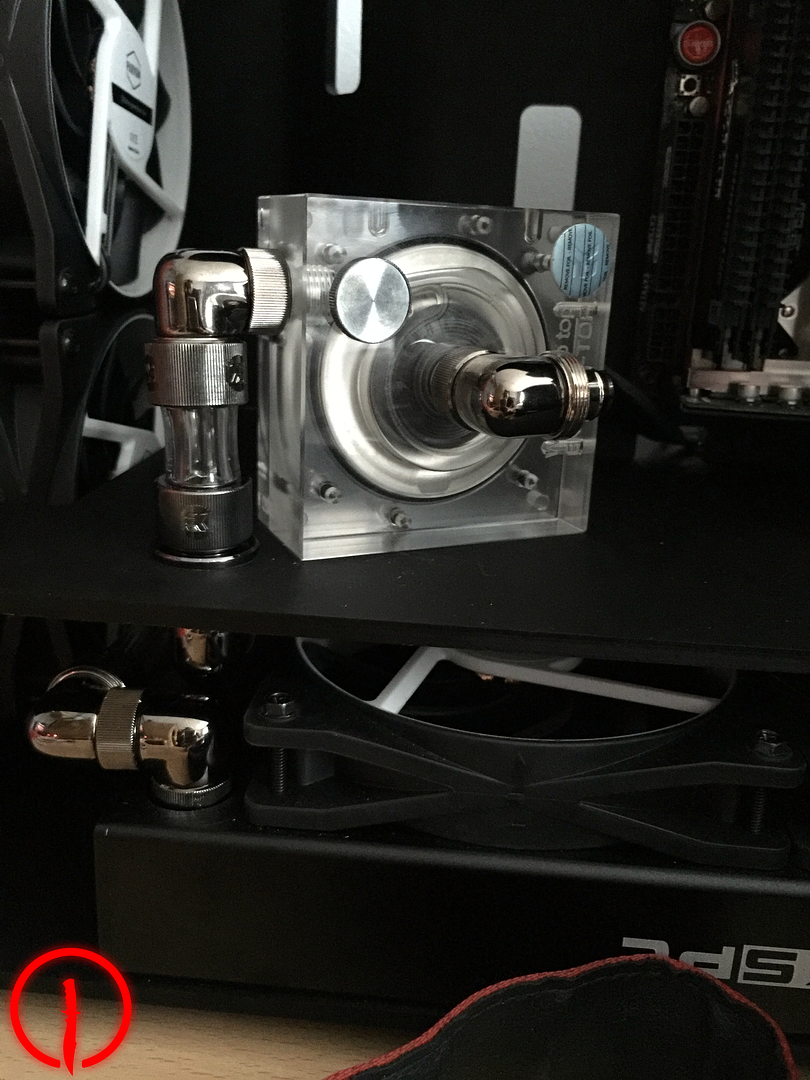
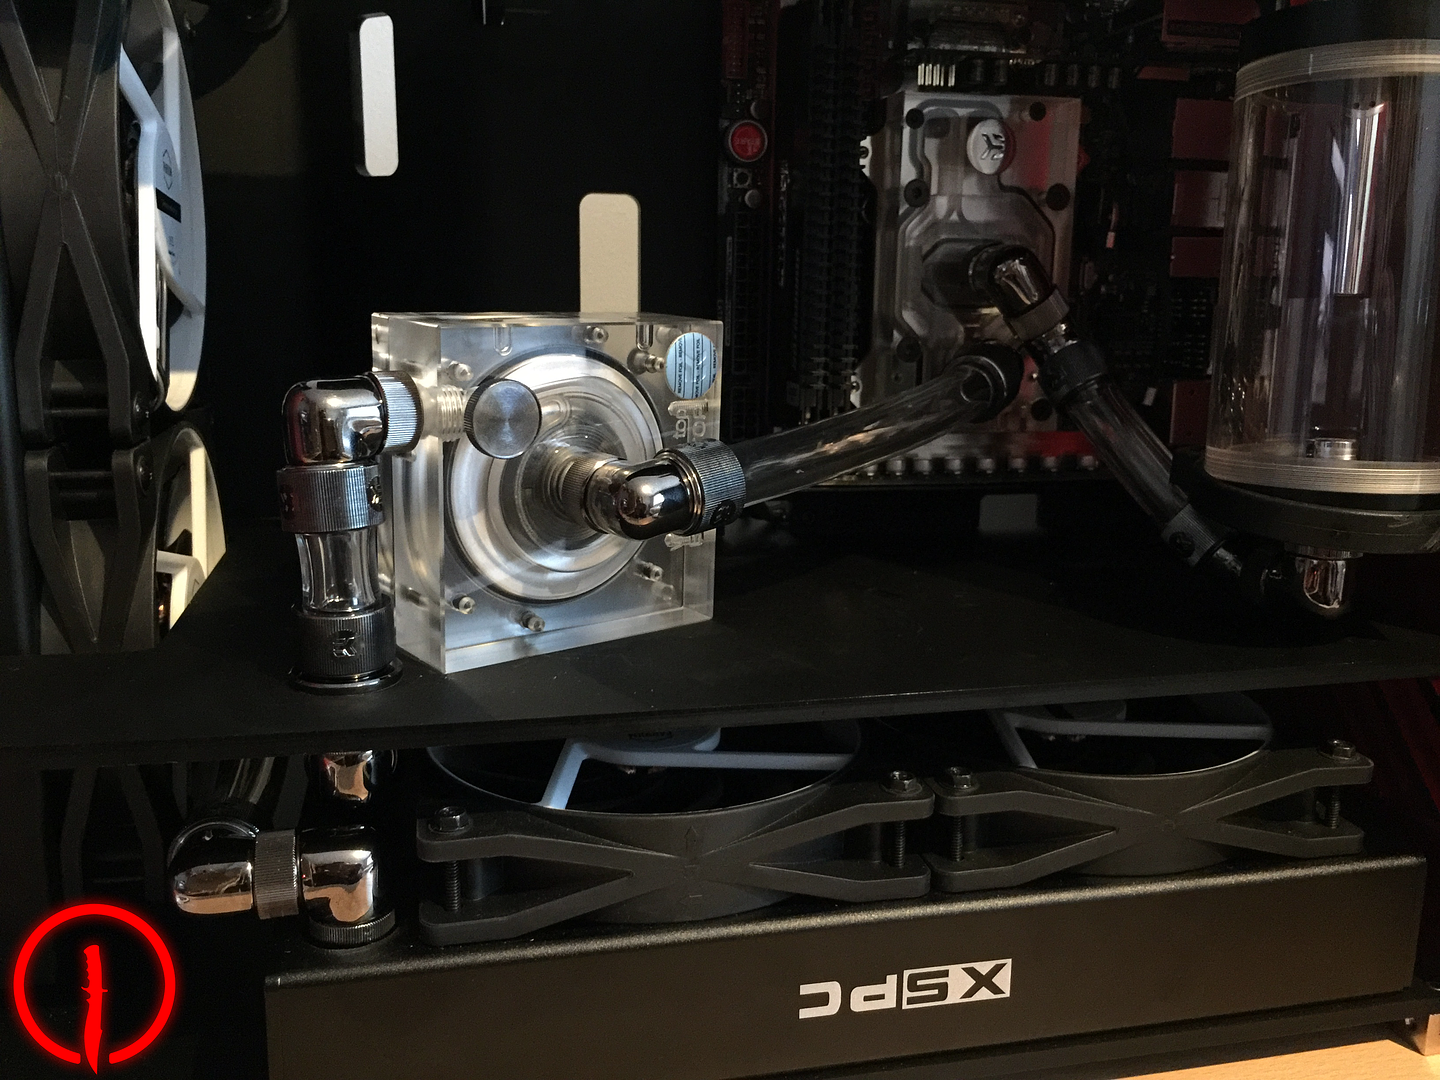
Giving Parvum the thumbs up they proceeded to cut and build the case, Joe was kind enough to send me a couple of WIP photos, nothing spectacular just mobile phone photos.


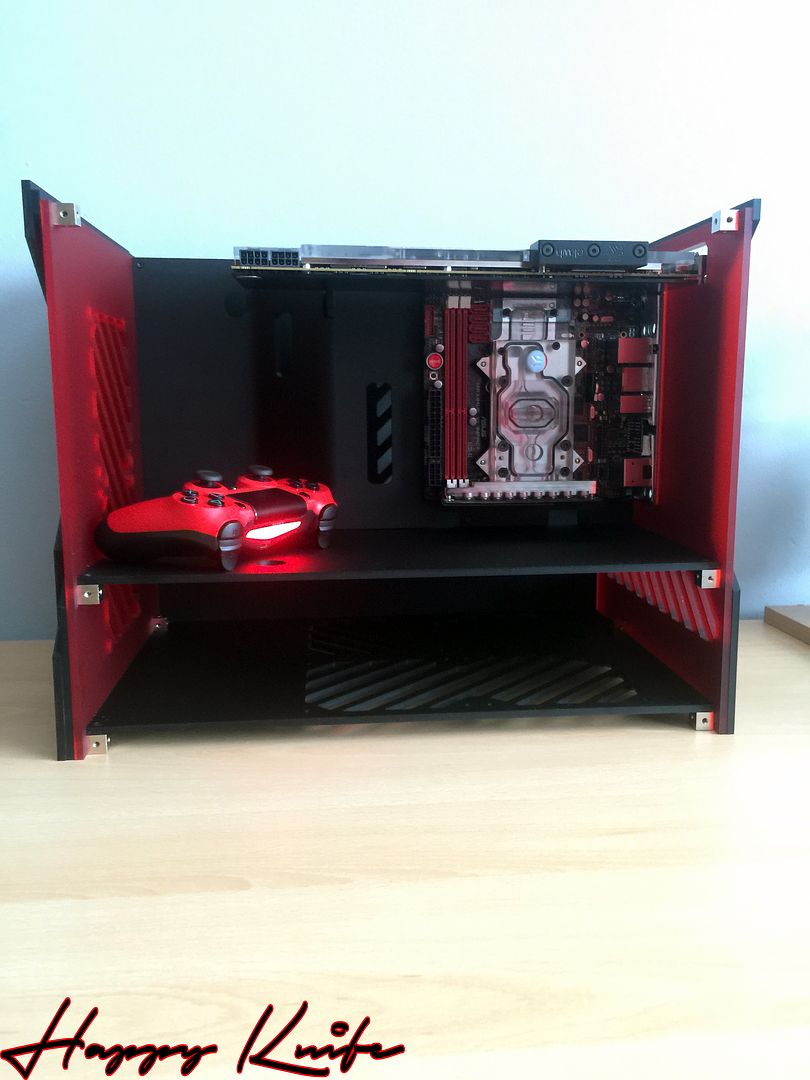
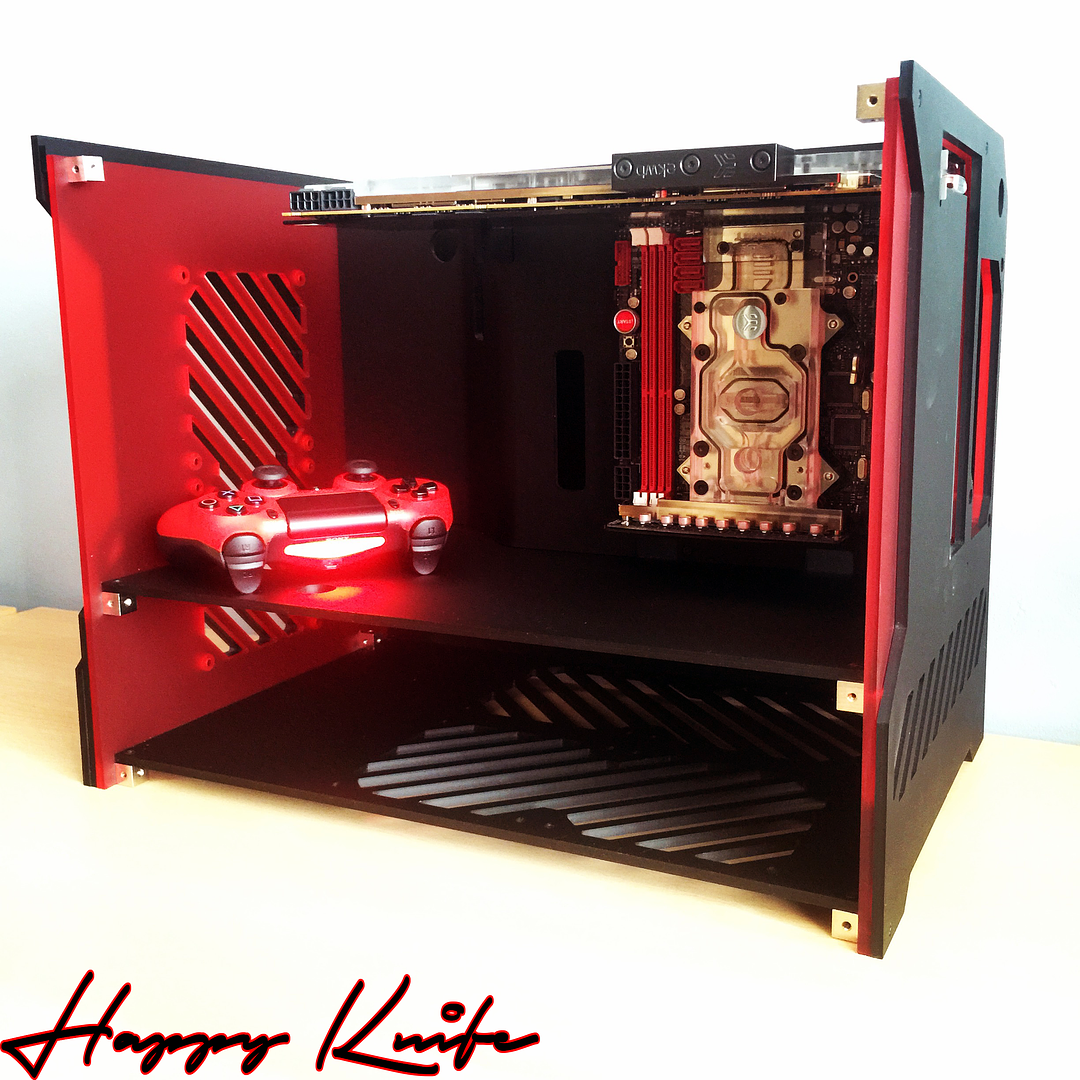
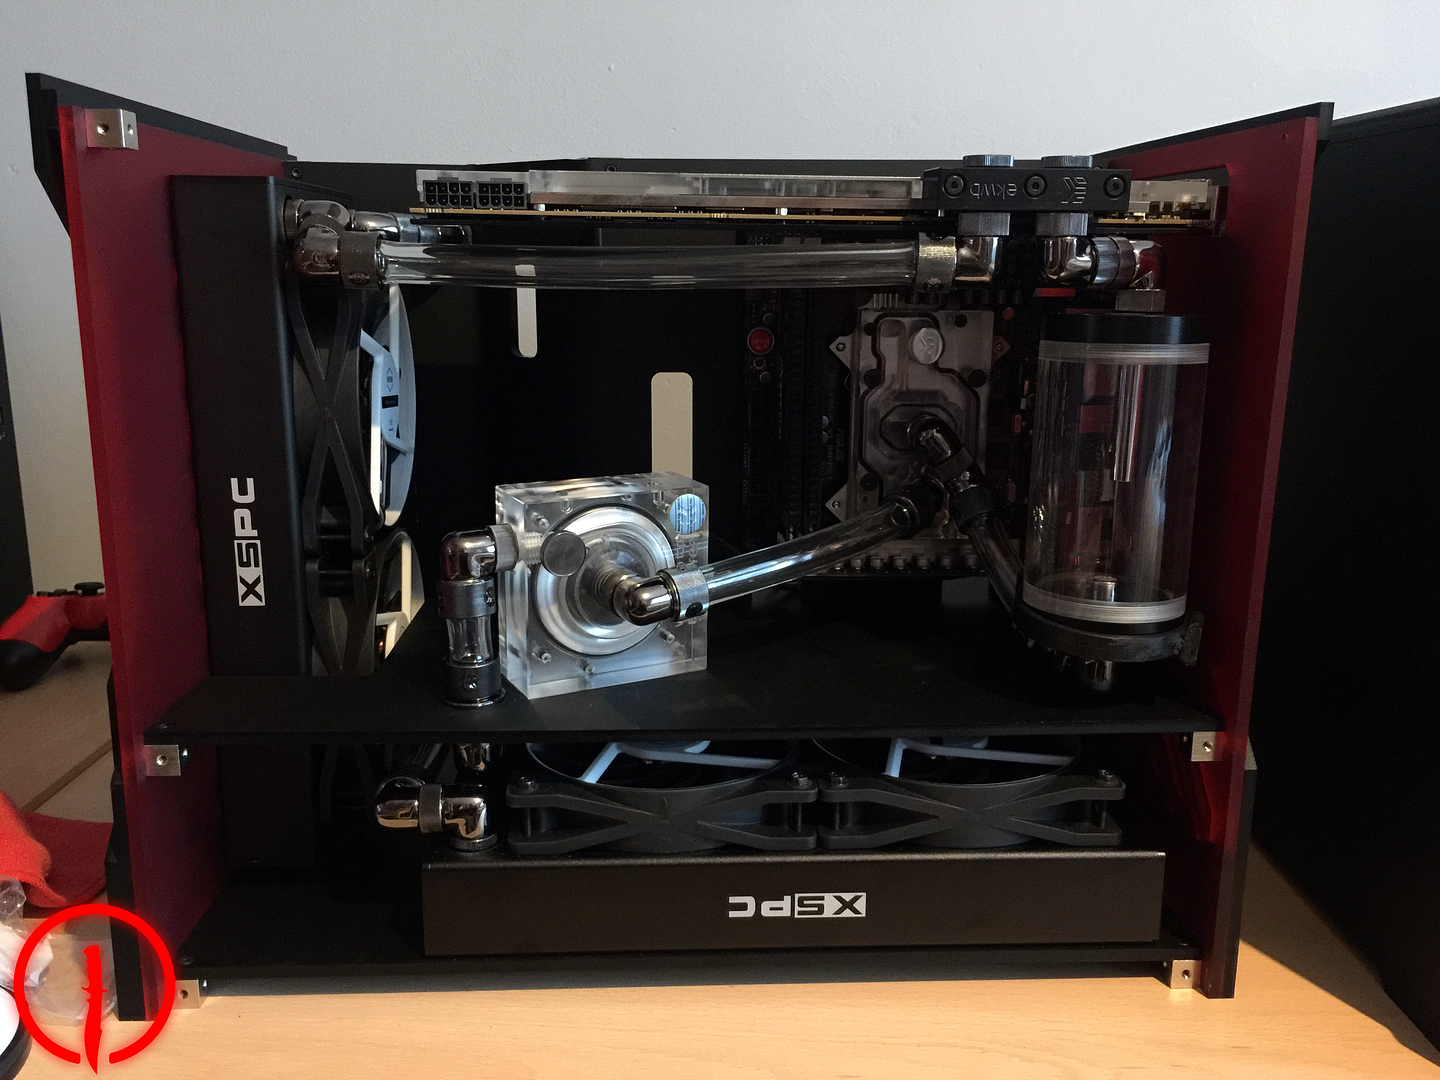
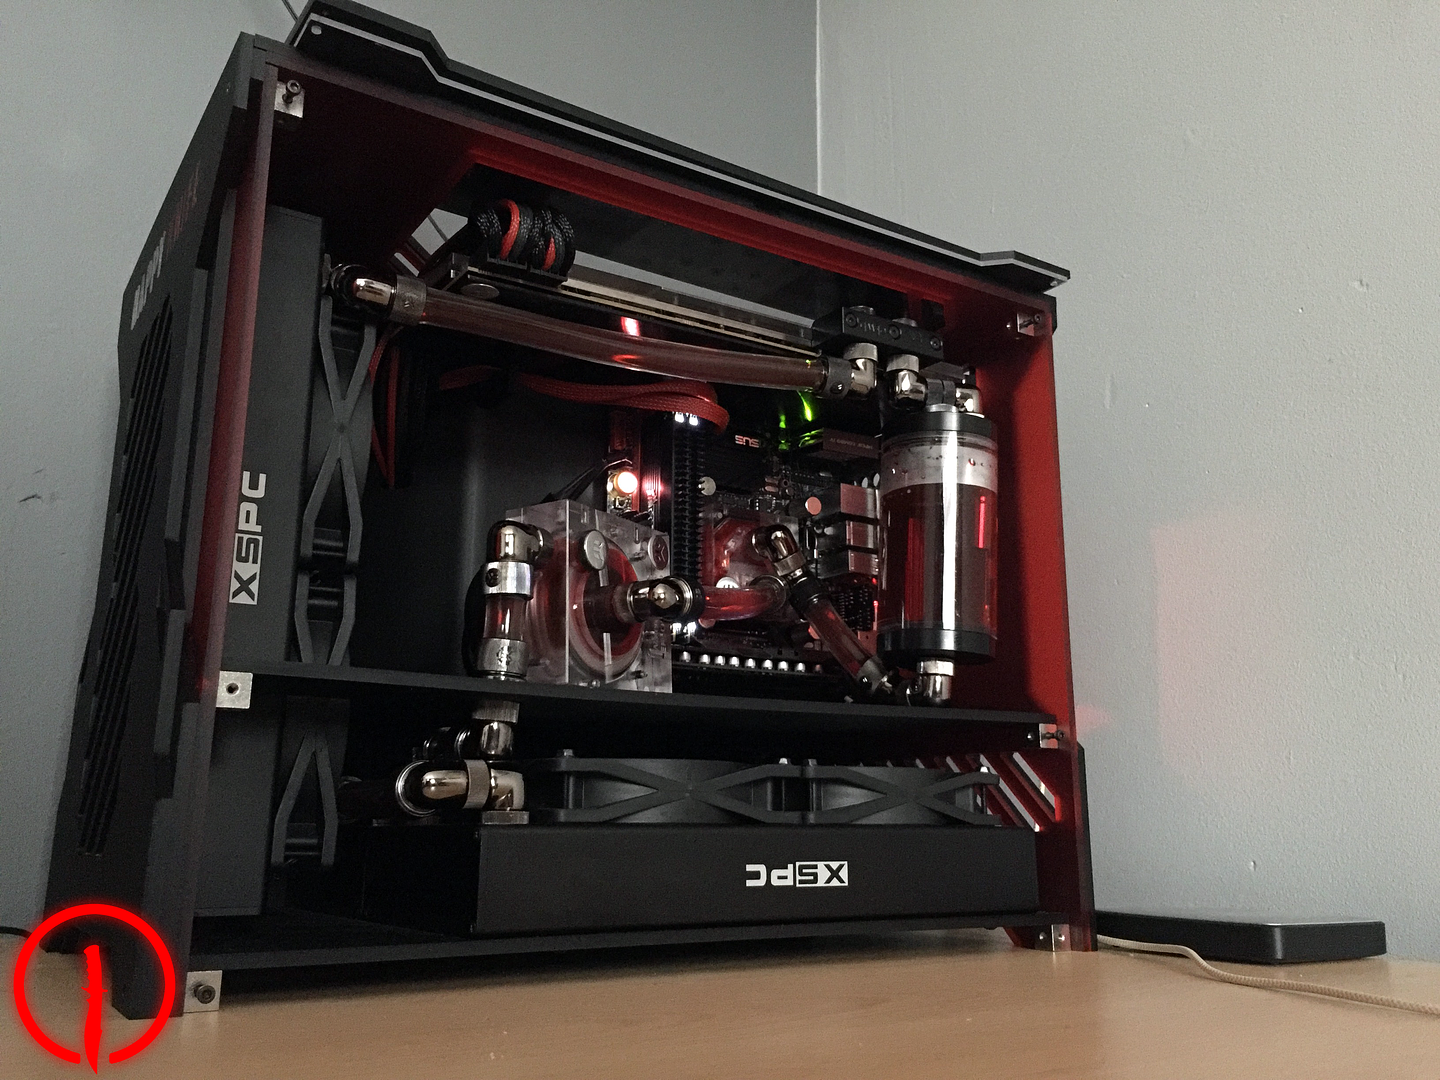
I was then surprised this morning by a couple of photos of the finished article, it is safe to assume im blown away by the way it came out.


Welcome to my build log for Knife!

Background:
The way this build started was purely due to my impulsiveness, I've always had a thing for itx builds so it only made sense that my first proper build should be based around a itx motherboard. As some of you may know i've been around on the forums a while now and i've had some decent builds, but they were all aircooled in cases that were as close to perfect as i could get at the time. While planning this build once i had decided on the hardware i wanted to use, it came to the case. I wanted something bespoke and unique but at the same time to be clean, sharp and compact. I hunted everywhere for something that was perfect i wouldn't accept anything less.
After spending days searching and researching and searching some more nothing ticked all of the boxes and it had got to a point where i would have made compromises just to get the build started, until a very brief conversation with JR23 Design's from Parvum. What started as a random idea session over teamspeak and a gaming night, slowly progressed into a concept of which every time we discussed seemed more and more real....
This rig is going to be my LAN rig, some of you maybe aware of the Insomnia LAN events which take place throughout the year, i've attended the last few and safe to say most homely place as a gamer/pc enthusiast to be. I wanted to make sure i could build something which would be more than capable of heavy gaming yet remain compact enough to lug around for LAN's.
Hardware:
Intel 4790K
Asus ROG Impact
Corsair Dominator Platinums 2133
AMD 295x2
Corsair Force GT 120GB's
Silverstone Strider 850w
Bespoke Parvum
Cooling
EK Asus ROG Impact Waterblock
EK AMD 295x2 Waterblock/Blackplate
EK D5 Vario Clear Plexi
EK Fittings Black Nickel
Bitspower Multi 100mm Reservoir
XSPC AX Radiators 240mm X3
Primochill PETG Tubing Clear
As you can see this setup is far from being a slouch, i game at 1440p and these specifications are more than capable of handling anything i could throw at it. After finalizing ideas with Joe he undertook the task of rendering everything for me so i could see what i had to work with.


While these were being drawn and rendered, i was in contact with Joe on a daily basis bouncing ideas of him and seeing what else we could cram into the case, while all this was going on the postman was knocking daily sometimes even twice a day delivering parts. This is where we hit a series of issues which could in the future have catastrophic effects on the hardware and the case. After i received the EK Waterblock for the GPU it came to my attention that the block itself weighs a lot 1023 grams to be exact, now you can guess how much damage this would cause if we didn't find a way to support the card whilst it was in the case. After a short time at the drawing board it was decided we would have a support bar coming out from the motherboard tray which the GPU will sit on top off, this should ensure minimal amount of damage to both the GPU and case. Whilst amendments were being made to aid the GPU, EK included a single PCI bracket for the 295x2, it would be disappointing if we didn't take advantage of this, as a result of this we were able to shave a few millimeters of the height of the case.
I decided to go with the XSPC AX radiators as i like the way they look, and perform very very well, so informed Joe of the decision and more changes were made to the drawing making it that just more millimetre perfect. We discussed multiple ways to set out the loop literally spent 3 hours one night just going over and over and over it seeing if we could make any more efficient changes we decided to keep the pump and reservoir separate purely for aesthetics, pump will be mounted at the front of the case while the reservoir will be on the back wall next to the I/O Shield.
Then came the finishing touches, i like to keep things clean and tidy, so i thought about how i would be wiring the components up and further changes to cable management holes made, i opted to have the power switch on the rear of the case with no USB headers as i wanted to keep the front clean.
Now that the idea stages had passed it was time to see what kind of a monster had be created!


I was absolutely ecstatic when Joe sent me these renders, everything is perfect. He asked me if there was anything else i wanted to add or if i wanted confirmations of dimensions or any other angles of a render. With nothing left to change but the colour Joe once again began the final render of Knife.

Giving Parvum the thumbs up they proceeded to cut and build the case, Joe was kind enough to send me a couple of WIP photos, nothing spectacular just mobile phone photos.


I was then surprised this morning by a couple of photos of the finished article, it is safe to assume im blown away by the way it came out.


