HAVN HS420 - AM5 build refresh

Don
Joined
24 Feb 2004
Posts
12,450
Location
-
The last time I properly rebuilt my system was for the launch of the HTC Vive some 9 years ago when I built a system around a Phanteks Enthoo Pro case. Systems and cases have moved on a lot since then and combined with a planned GPU upgrade this felt like the ideal time to scratch my upgrade-itus and rehome / upgrade my system. As an added benefit, my kids have been bugging me about updating their old i5 8500/980Ti system so perfect timing for some hand me downs for them.

The build will be focused around the HAVN HS420 case. I've never owned a glass panel case before and this will allow me to gaze lovingly on my new build, whilst giving me all of the options I might need for the next 9-10 years of system builds. I've never delved into RBG either so this will be my first toe-tip into visually appealing cases rather than my previous function-over-form builds. I favoured the horizontal GPU mounting rather than the optional vertical mount as I don't have any immediate plans to install fans in the bottom of the case. I guess I can always upgrade to the vertical mount if / when the optional kit is released in the future.

I'm aiming for a decent midrange performance, some of the components will be coming from my existing system and some will be new. In particular the mobo, CPU and case fans will be coming across from the Phantek initially but the fans are all Noctua units and don't really suit the glass panelled aesthetic. For the first time ever for me, it will be an all-AMD build too. Planned components:

Case: HAVN HS420
PSU: Seasonic Focus GX-850
Mobo: Gigabyte B650M Gaming-X AX
CPU: Ryzen 7 7700x
RAM: Corsair Vengeance 32GB 5600MHz
GPU: Gigabyte OC 9070XT
Cooler: Thermalright Aqua Elite 360 V3

I have most of the components at hand already and will document here as I go :)

1.jpg
 
Before starting the build, I unboxed the case to make sure all of my planned components would fit in the way that I wanted them to.

The top of the box gives some very helpful unboxing instructions!

2.jpg


Under the top is a box with all of the mounting screws and instruction manual:

3.jpg

4.jpg


Then rather unusually, despite all of the warnings of "this way up", turn the box over to remove it:

5.jpg


6.jpg


Then finally removed from the packaging

7.jpg


and figuring out how the panels are removed so I can compare component fittings

8.jpg


9.jpg


10.jpg


My first impression, it's a heavy beast! It weighs nearly 18Kg, which compared to my Phantek at 11Kg is quite a difference! It is very study and well built though, even with the side panels removed there is no flex or movement in the chassis which is impressive given that one corner is frameless thanks to the glass panel. For anyone else interested in this case, be careful when positioning the glass panel when it's removed from the case. I placed it upright on the floor but knocked it over on more than one occasion. Thankfully no damage, but being a glass panel I probably need to be more careful with it than my previous all-metal case :) All in all though, I'm very impressed with the case and the design choices.

I plan to work on the build over the weekend so will update next week with more photos and plans
 
Last edited:
I’m trying really really hard not to buy that case, it does look very nice.
Just the cost of 11 daisy chain fans that’s stopping me.
Look forward to seeing it built.
 
Built a new system in the HS420 a couple of months ago. Really is a lovely case and easy to build in. And yes....definitely factor in the cost of fans before buying as it quickly adds up. Although I suspect cooling would still be more than adequate if the HDD caddies were left in situ.

But it certainly is a heavy beast. More so once you add a PSU and components!
 
Nice collection of parts. Case looks good too. Looking forward to seeing this project progress
 
Not seeing a huge pile of fans in the photos to go in the case!
Always great building a machine from all new parts. (Beats finding that the case isn't big enough for the AIO, or the PSU doesn't have enough CPU power cables, etc, etc)
 
Not seeing a huge pile of fans in the photos to go in the case!
Always great building a machine from all new parts. (Beats finding that the case isn't big enough for the AIO, or the PSU doesn't have enough CPU power cables, etc, etc)
That's because there aren't many. I'm planning a pretty simple fan layout and will add more if I find heat to be an issue.

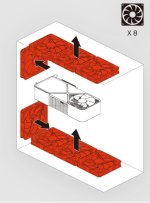
I'm going with the following layout, minus the three lower fans currently:

Screenshot_20250402_073339_Samsung Internet.jpg


The 7700X runs hot but the AIO will take care of that. The 9070XT are pretty low temp cards overall (50c as an average). With the PSU sitting inside its own shroud I dont have to worry about exhausting the heat from that either.

It appears to be really easy to add additional fans at a later date too :)
 

Attachments

  • Screenshot_20250402_073339_Samsung Internet.jpg
    Screenshot_20250402_073339_Samsung Internet.jpg
    404.4 KB · Views: 5
That's because there aren't many. I'm planning a pretty simple fan layout and will add more if I find heat to be an issue.

I'm going with the following layout, minus the three lower fans currently:

Screenshot_20250402_073339_Samsung Internet.jpg


The 7700X runs hot but the AIO will take care of that. The 9070XT are pretty low temp cards overall (50c as an average). With the PSU sitting inside its own shroud I dont have to worry about exhausting the heat from that either.

It appears to be really easy to add additional fans at a later date too :)
Only one intake? Isn't that going to cause huge negative pressure?
 
Only one intake? Isn't that going to cause huge negative pressure?

Sure, but unless my knowledge is out of date then the only issue with that is potentially more dust inside the case. Given the case design all of the air gaps have dust filters on them already including the non-glass side panel. End result is slightly more maintenance with cleaning dust filters but there's little performance difference between negative and positive pressure.

Happy to take advice though
True i guess. From what i've seen, negative pressure has a slight performance benefit at the cost of dust. However in this case I think you're right most of the holes have dust filters on them, so this wouldn't really be a problem as long as you clean the filters often.
 
Back
Top Bottom