

Hi All,
Just thought I'd post what I've been making for the last few weekends, someone expressed some mild interest in the man jobs thread so I thought I'd make a thread as it may interest some others.
After putting a new floor down in the kitchen I noticed that the chipboard kitchen cabinets were looking in a pretty poor state, I don't think they would've even gone back together so it was time for some new ones. I didn't want to put that same crap back in, and I can't really afford solid pine ones so I decided to make my own!
Opened an account at a local builders merchant and courtesy of their 25% discount I got all the materials needed for under £200, although with tools and bits and bobs I guess that total is nearer £300, still under the cost of a simple pine sink unit!
Anyway, to the build. I've not photographed anything else, so i'll show you how I made the corner unit.
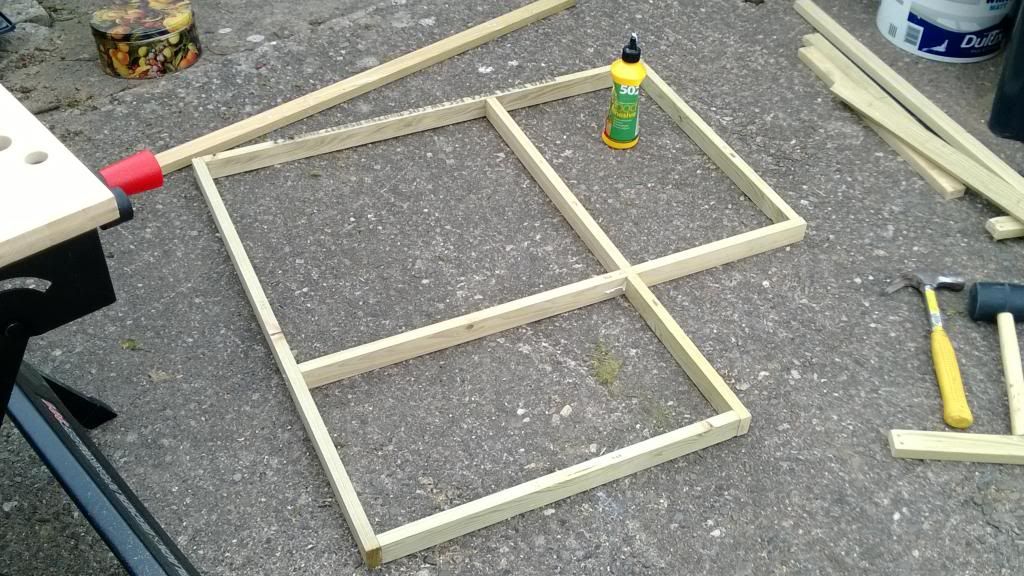
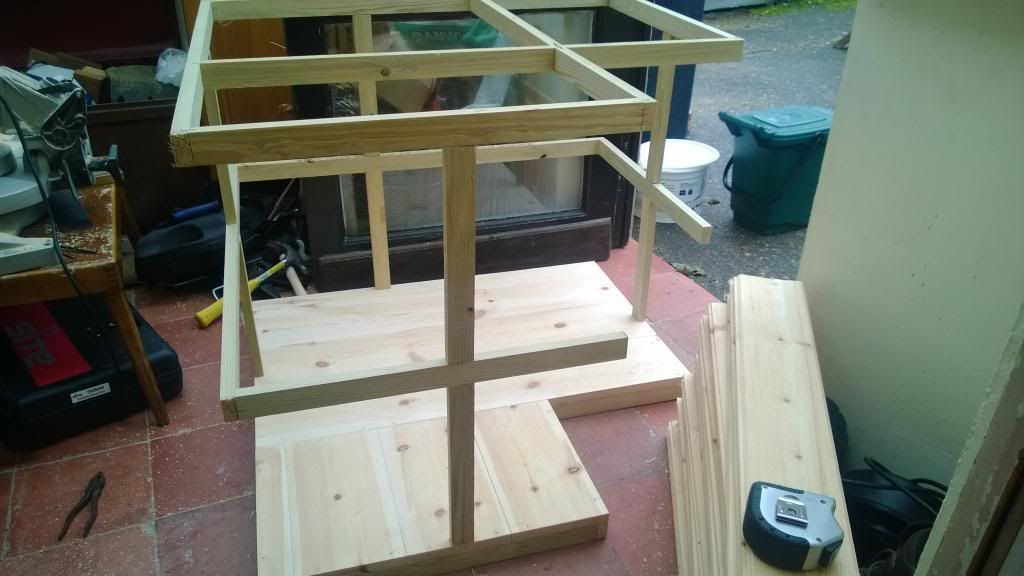
First off I made a frame, so a top, bottom and middle like this (the middle frame is just the outsides).
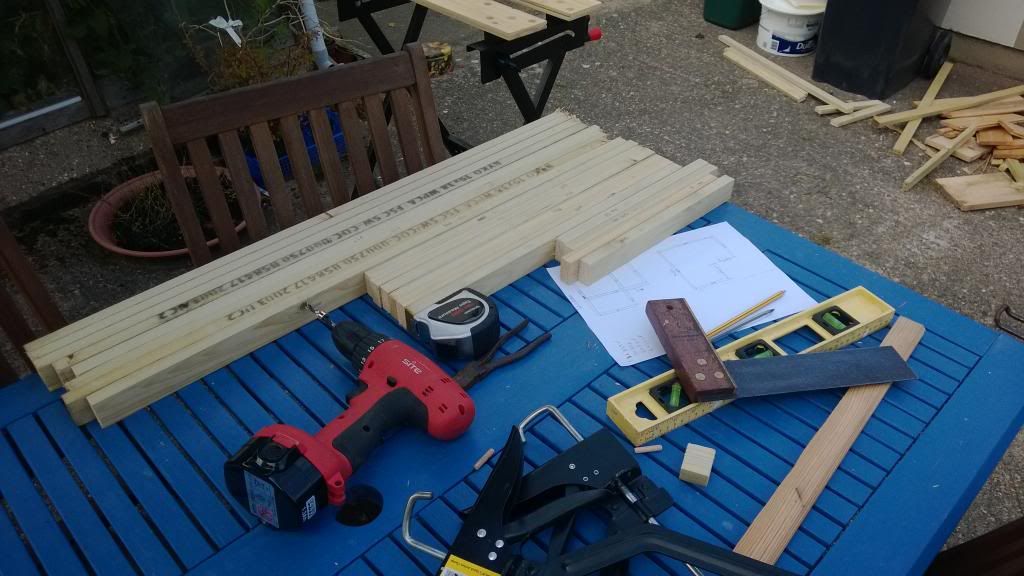
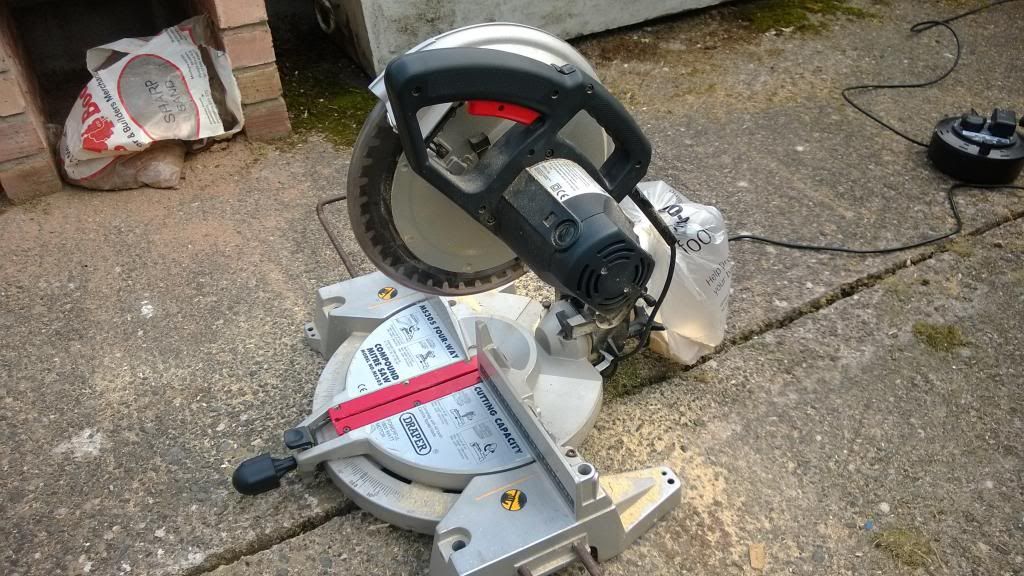
Measured and cut all the bits of baton.
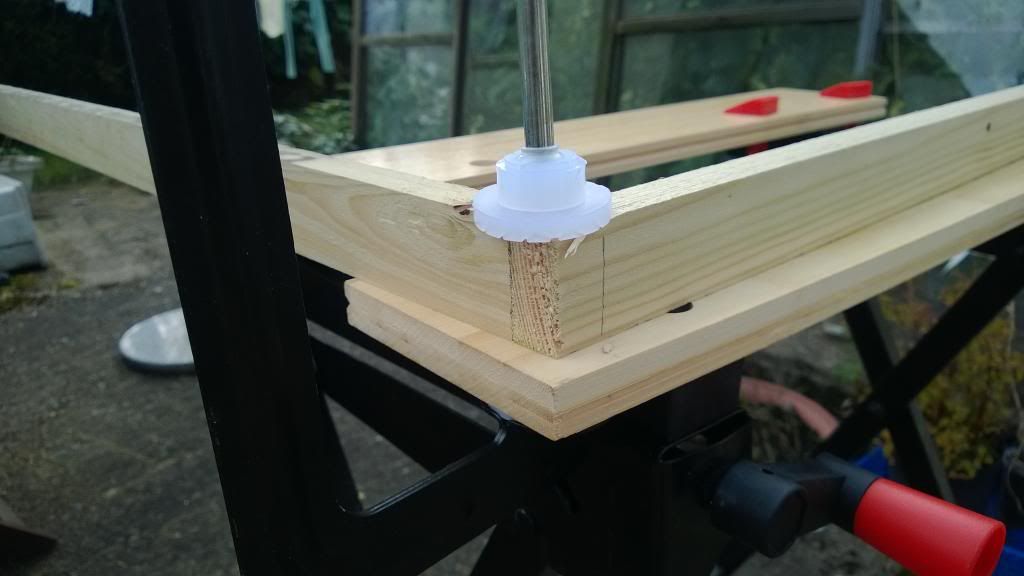
Clamped them together, and the drilled through for the dowel using a depth limiter so I don't lose the dowel.
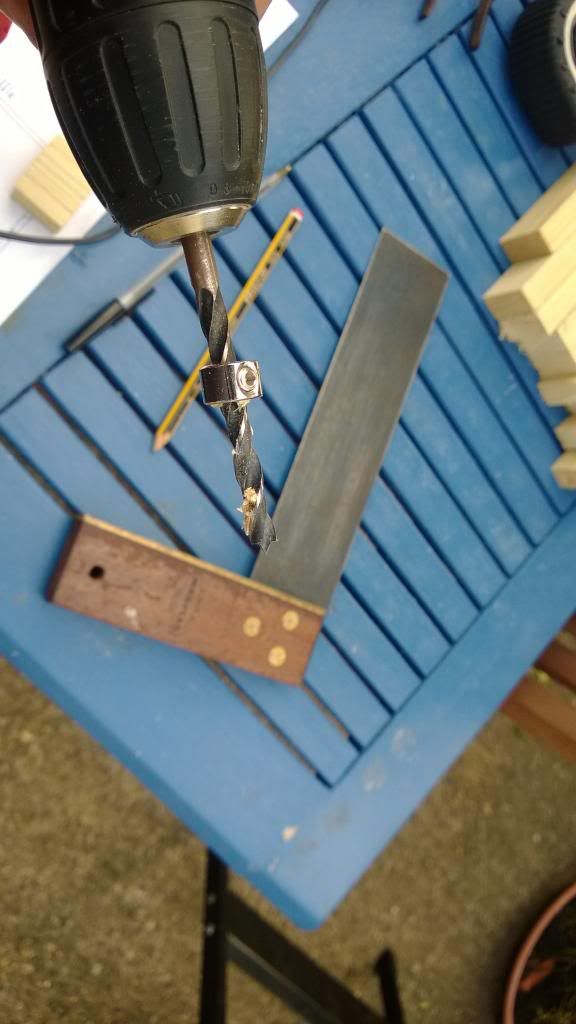
With the doweling hidden on the front sides that people will see, I used some dowel markers for that.
Then I made the base, it's pretty darn solid, all pieces doweled and glued together before being nailed to the base.
Unfortunately I didn't take a pictures of this but you can see it below...annoying as I was proud of that!
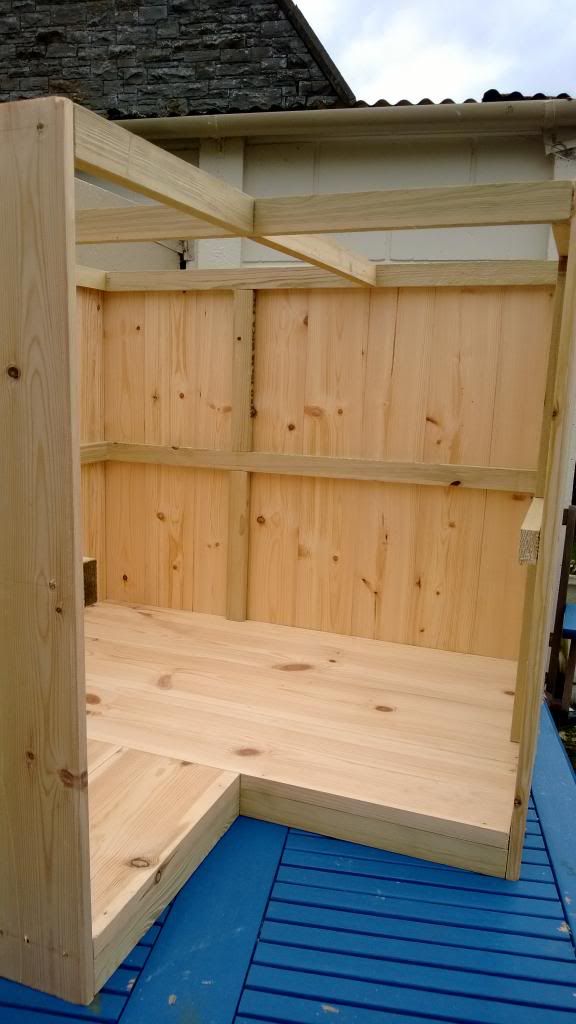
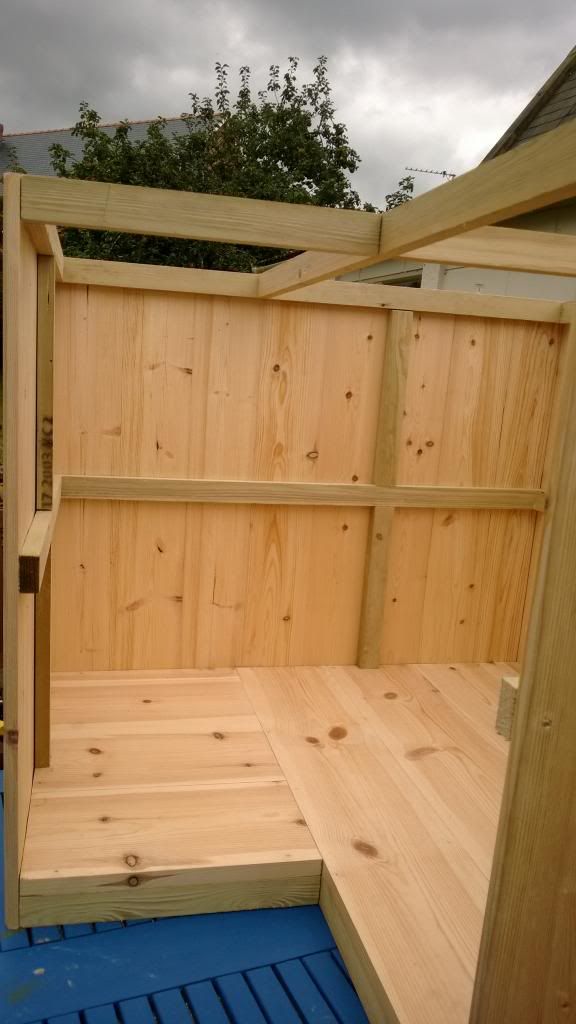
I then attached the frame together with baton, again doweled in and glued.
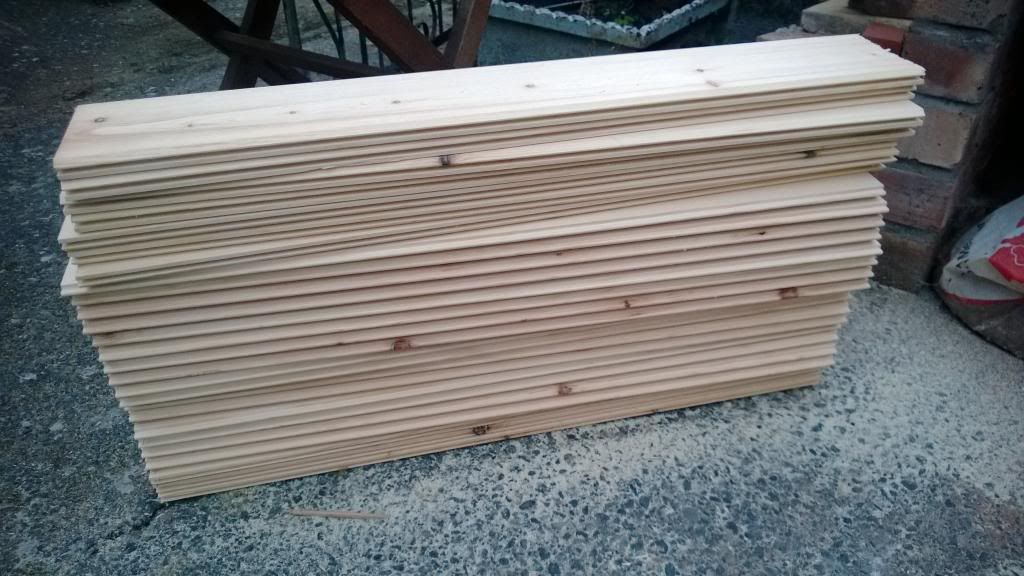
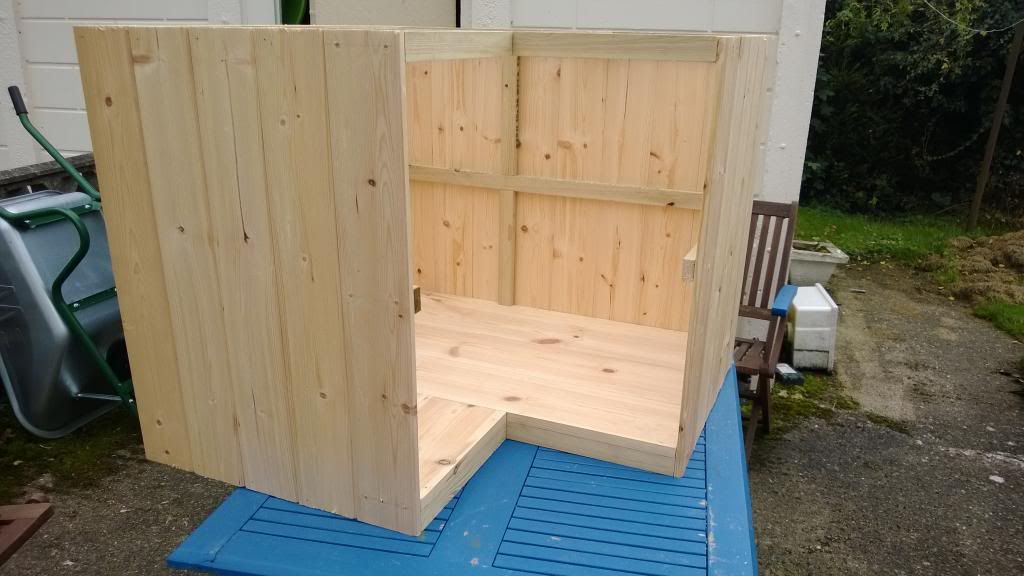
Next I cut the side boards, it's t+g stuff which will give a nice finish inside and keep the whole thing together.
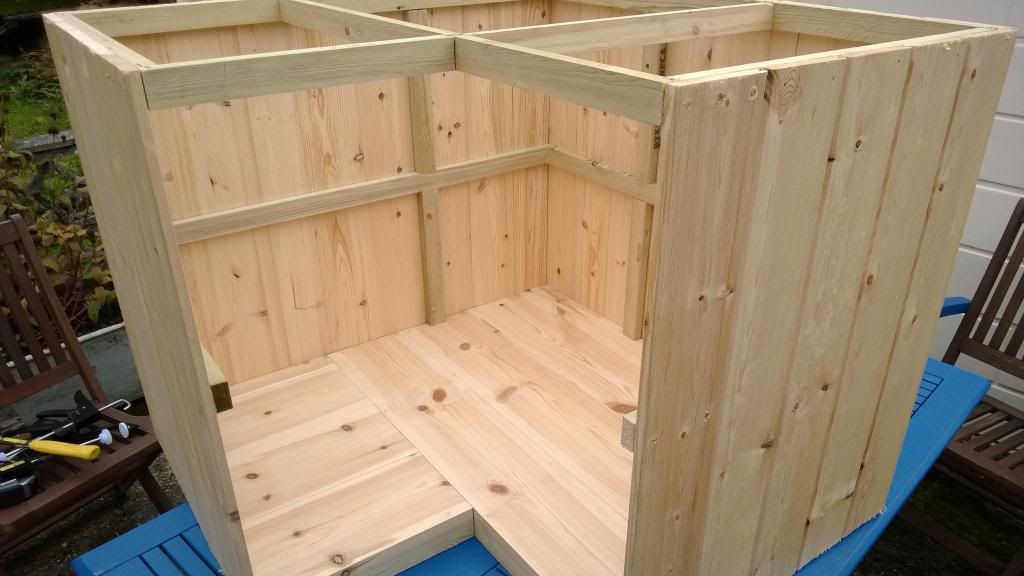
Then it's case of attaching them, I took a long time doing the front pair, ensuring they're level, I then clamped them, dowel and glued them and then clamped until it has mostly dried. The rest of the boards I just slotted in and nailed on, with a bit of frame wrenching to keep everything square.

And you're left with this.
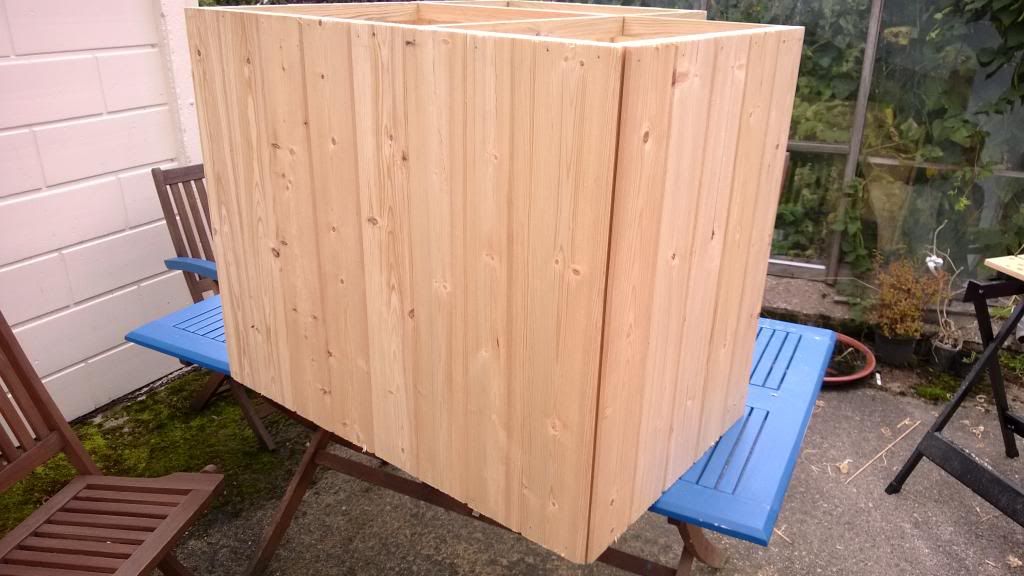
All I need to do now is glue and dowel the sides onto the base as this will be taking a lot of the loading, attached a spinning table thing in the middle and screw the feet on.
Updates to follow!
I hope this is of interest to some, I'm obviously not a carpenter
 but I think I've not done too badly, everything is square and the whole thing is damn solid (and heavy!).
Just thought I'd post what I've been making for the last few weekends, someone expressed some mild interest in the man jobs thread so I thought I'd make a thread as it may interest some others.
After putting a new floor down in the kitchen I noticed that the chipboard kitchen cabinets were looking in a pretty poor state, I don't think they would've even gone back together so it was time for some new ones. I didn't want to put that same crap back in, and I can't really afford solid pine ones so I decided to make my own!
Opened an account at a local builders merchant and courtesy of their 25% discount I got all the materials needed for under £200, although with tools and bits and bobs I guess that total is nearer £300, still under the cost of a simple pine sink unit!
Anyway, to the build. I've not photographed anything else, so i'll show you how I made the corner unit.
First off I made a frame, so a top, bottom and middle like this (the middle frame is just the outsides).
Measured and cut all the bits of baton.

Clamped them together, and the drilled through for the dowel using a depth limiter so I don't lose the dowel.


With the doweling hidden on the front sides that people will see, I used some dowel markers for that.

Then I made the base, it's pretty darn solid, all pieces doweled and glued together before being nailed to the base.
Unfortunately I didn't take a pictures of this but you can see it below...annoying as I was proud of that!
I then attached the frame together with baton, again doweled in and glued.

Next I cut the side boards, it's t+g stuff which will give a nice finish inside and keep the whole thing together.


Then it's case of attaching them, I took a long time doing the front pair, ensuring they're level, I then clamped them, dowel and glued them and then clamped until it has mostly dried. The rest of the boards I just slotted in and nailed on, with a bit of frame wrenching to keep everything square.

And you're left with this.


All I need to do now is glue and dowel the sides onto the base as this will be taking a lot of the loading, attached a spinning table thing in the middle and screw the feet on.
Updates to follow!
I hope this is of interest to some, I'm obviously not a carpenter
but I think I've not done too badly, everything is square and the whole thing is damn solid (and heavy!).
Last edited:
")