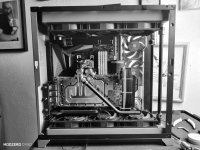
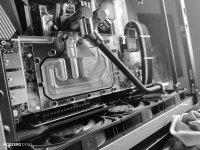
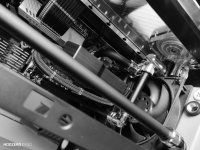
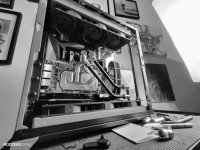
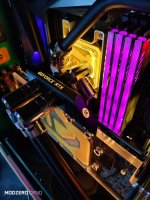
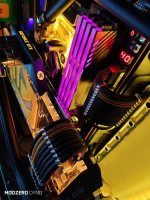
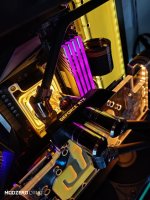
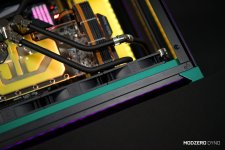
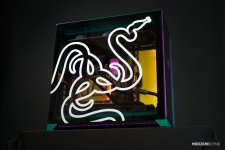
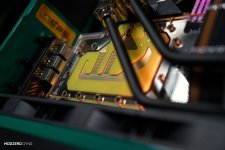
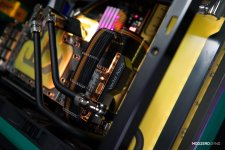
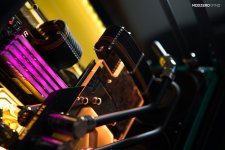
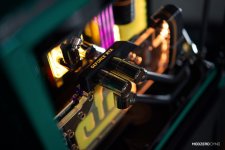
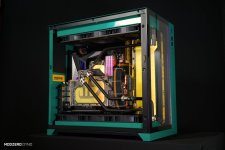
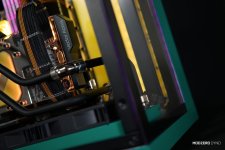
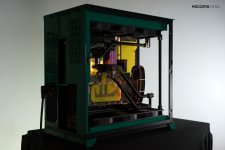
MODZERO DYNO - LIAN LI 0-11D RAZER EDITION

Associate
Joined
16 Oct 2014
Posts
130
TeIjISSh.jpg

UPDATE 1.0 - IT'S ABOUT DAMN TIME!

Sure feels like its been a while, the last three builds have felt the same. It's getting harder and harder to find the time, organise and pull everything together. I'm closer to 40 than ever (funny how that works), married, two kids (under 3), a dog, a mortgage and a job to keep it all moving forwards. I adore PC hardware, its the one constant that has stayed with me my whole life. It's an absolute pleasure and a true privilege to have the support of these industry titans! It's been six years since I started modding under the MODZERO name and truly, I don't take any of this support for granted. I enjoy the process more than the result and without these sponsors, I'd get to build maybe one PC every 5 years. Each project is a labour of love, I don't go to the extreme and believe that a 'PC' should look like a PC. For me, it's all about clean lines, custom cables, sexy hardware and water cooling. With that in mind, come along for the ride.

I'm not sure when I first mentioned I'd be doing a 0-11D build but I'm pretty sure Lian Li sent me the case well over a year ago!

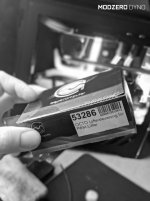
So where to begin, erm... Lian Li got in touch (I was honoured) and asked if I'd like to work with their Razer Edition 0-11D. I said I would and a couple of weeks later it arrived on my door from OCUK. I reached out to Gigabyte UK and they hooked me with some hardware goodies (I'll cover those in the next update). I then reached out to AMD UK and they sent me over some silicon loveliness (Thanks AMD, it's such a buzz having your support). Then, thinking this build was turning into something rather epic I reached out to Silverstone Tech (I'd not previously been sponsored by them). Side note - I've only ever used Silverstone PSUs (on my own builds), simply put, I believe they produce the best PSUs on the market. Certainly, others make great PSUs but for me, the simple design aesthetic and great cable pinouts make Silverstone my 1st choice.

Anyway, they hooked me up with a couple of options (more in the next update). EK then sent me a message as they were working on their 0-11d distro at the time (showing this builds age). The OG plan had been I'd build this around that, demo their distro glory early release style.

But a number of things went '**** up' and everything got delayed...

Life can be a bummer.

THE CASE!
DxtfS7Zh.jpg
...
b9iIJiNh.jpg
...
zRF7ah4h.jpg
...
zt0Yf7nh.jpg
...

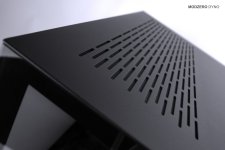
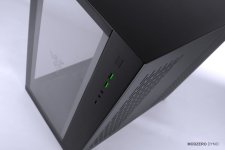
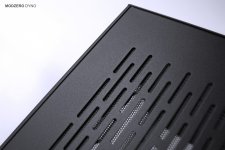
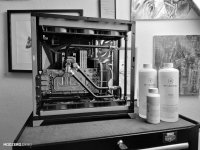
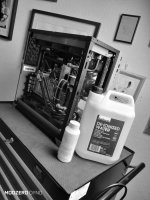
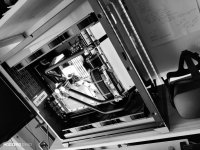
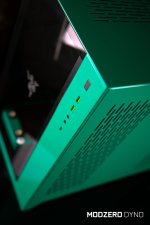
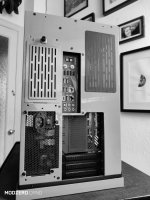
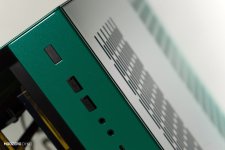
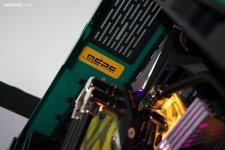
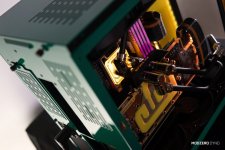
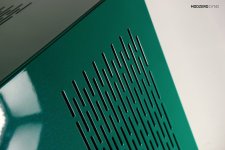
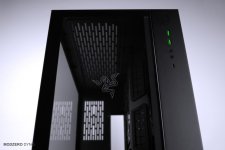
It's your standard 0-11d with some added RGB and a Razer etched logo. Oh! and some green USB ports. To be honest, I love it! There is a reason this case is so popular, it looks amazing! I like Razer, I've used their products off and on since their inception and the green flare of the ports with the effect the etched logo will give once the RGB does its thing is all good news in my books.

So what to do first...
fSkhl1Jh.jpg
...

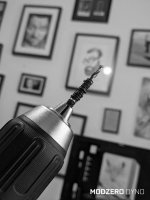
Yup! dismantle it!

DTwul56h.jpg
...

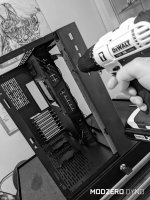
Which turned out to be a PIA. The price point on this case is awesome and I guess you gotta keep them costs low somehow huh... pressed steel and rivets it is then. But never mind, my wife treated me to a new drill (fancy) and I got to work hunting them down. Like this cheeky ****** hiding behind a black tape I'll not be able to replace.
9unJh2ch.jpg
...

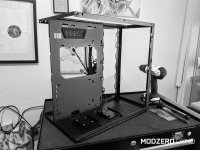
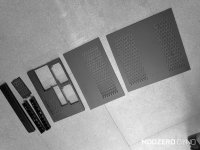
A lot of rivets later, the case was down to a frame. But why I hear you cry (cried no one) well, I'll get to that in a moment.
6a0xWE7h.jpg
...

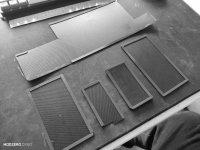
The front IO and rear panel were difficult, well, a pain. That front IO panel doesn't want to come off and they integrated an RGB strip into the panel which needed to come out in a sequence. The back was a fight too, it seemed as though the order in which the frame would have been first assembled would call for top/bottom panel to be removed before the back would come away. I opted to drill out the mid-wall rivets on the bottom panel which provided enough flex for the rear panel to come away.

So front, rear, top, back and feet are all off for some painting love.
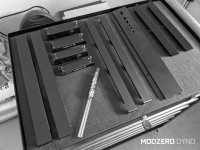
J1N7MiEh.jpg
...

Oh, a couple of rads too! If you're on Instagram check me out, with this build as I've been doing certain bits documented as stories. I pulled apart the SE360 and PE360 rads with ease. EK have you mind with those rads. four hex screws, slide the ends across and the sides pull off.

So, the case and rads in bits, they got packed up and sent on their jollies.

This is where this one gets fun. Some time prior, I was watching Top Gear and the lads are ragging a McLaren 600LT around the track.

Hfs0SKMh.jpg
...

This, McLaren 600LT!!!!.. in THAT green, with THOSE yellow callipers, forged alloy wheels, carbon panelling and a touch of orange in the model name stitching.

THAT'S WHAT I WANT!

Not the car! but the paint, the whole colour scheme. That's my 0-11D build in car form.

As it turned out, getting that green wasn't gonna happen. McLaren doesn't list the colour on their website (not that I could find) and 3rd party colours without a reference were gonna be difficult.

Very difficult.

Still, I sent some emails and PM'd a few people.
07PROvWh.jpg
...

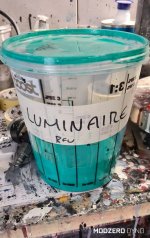
That's it! That is Luminaire green, a sample from Mclaren! Not that Mclaren knows that. I'll link the company that made it happen when I finish the build cos you really need the light to show off this paint! It has a metallic pearlescence to the hue (ponce)! it's three shade of green with a sparkle up close and wow do the panels look awesome!

Yup, sorry... moving on. I'll show it off when it's done and the guy that did the paint is happy to provide the service to others (granted, it cost me three times the value of the case to get it painted) but compared to other sprayers I'd had quotes from he is reasonable, reliable, great communication and genuinely takes pride in his work.
POUAxGyh.jpg
...

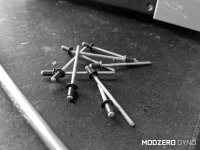
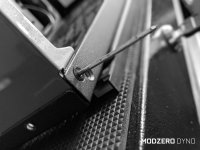
RIVETS! counter-sunk Lian Li black rivets... These I picked up from MDPC-X along with all my cable sleeve, connectors, crimps, wire, combs and terminals. They ship worldwide and only offer the best. #nocompromise again, more on this in a future update.
Lcms5Mbh.jpg
...
Y5w76U8h.jpg

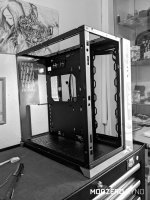
Putting them in is so much easier than taking them out. Once you remember how to re-assemble the case that is! I got a panic on fearing I'd have to drill the rivets back out and mark the paintwork in the process.

But alas...
RCfocb2h.jpg
...

Oddly, I was left with 4 stubby thumb screws and a small piece of foam (which now, having written it down reminded me it was a pressure fit wedge to hold the LED strip from wiggling) Oops.
SFMGXbTh.jpg
...

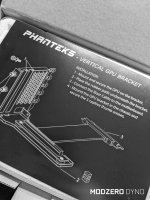
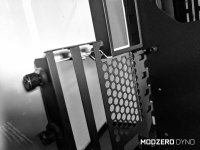
I'm jumping ahead a little, but I bought the Phanteks vertical GPU bracket. I'd intended to hold out for the EK one they announced during the EK EXPO and if the ribbon on this gives me any grief I'll be sure to go back and place my order.

I went with Phanteks for two reasons, it seems to have a smaller footprint and it positions the GPU further forward (closer to the side panel) than the Lain Li vertical bracket (oh yeah, that's the other one I was looking at..).

Annoyingly I didn't get a photo but fitted there wasn't the clearance required to put the SE rad + a 25mm fan underneath. Which ticked me off as I'm sure I'd seen it used in another 0-11d build on reddit. But not to worry.. break out the old Dremel and touchup paint.
hqMUh1yh.jpg
...

Sorted.

That'll do for now. I'll be back with UPDATE 2.0 perhaps at the weekend. I want to share the hardware I'll be using and maybe get some photos of all the EK glory they sent me!!!! I mean, WOW! They spoilt me. <3 those guys.

Thanks for checking this out, I appreciate I write a lot and maybe you just came for the photos (hey, we look at pron), either way, thanks.

J.
 
TeIjISSh.jpg

UPDATE 2.0 - OH NO THEY DEEDNT!

Sorry for the delay, turns out it editing photos with a three-month-old baby strapped to your chest just isn't the way to do it. I'm trying hard to push this project forward, almost everything is in hand now so truly its just a case of carving out the time to move it along.

Let's meet the hardware!!!!

wKAy7a9h.jpg
...

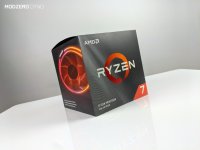
AMD UK - RYZEN R7 3700X (LINK)

Yeah, that box is empty! haha! The truth is I've had most of the core hardware much longer than the cooling. Then Half-Life Alyx came out.... and that's why they created test benches. I've got Adam over at Thermaltake UK to thank for much of the industry support I receive. But most of all for my introduction to the guys at AMD UK. Thanks again AMD and as always, thanks Adam.

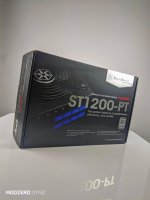
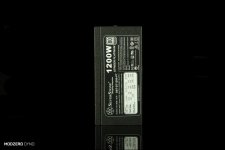
SILVERSTONE TECH - ST1200PT PSU (LINK)

xIyoU3gh.jpg
...

1st build with Silverstone on side! Though I've maybe built just a couple of PCs at most! that haven't used their products. Simply put, they are the best (IMO).

tH5Mpkih.jpg
...
baV9eCEh.jpg
...


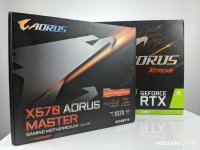
GIGABYTE UK - X570 AORUS MASTER (LINK) / AORUS RTX 2080 XTREME (LINK)

gA2Jv2th.jpg
...

The boxes may well be pretty beaten up (pretty sure every online tech-site had them before me) but these two beasts are hungry for their forever home... on liquid cooling... here with me... in rainy North Wales. Oddly enough the RTX2080 had slipped through my hands once before. They sent it to me for my ASHEN build but that cooler is huge! so with a heavy heart, I sent it back in exchange for an RTX2070 (I know right!).

I've never really been one for board partner designed pcb/coolers (yeah a couple the EVGA efforts are pretty sexy), having historically always opted for the reference design. Mainly because those are the first to get water blocks. I think this may be, as back in the day, it felt like CPU/GPUs were more thermally limited. Slap a block on them and you'd see better clocks... MUCH better clocks. Today, sure you'll get that extra slice, but mostly the chips are tapped out, fresh out the box. IMO, it's more about keeping them quiet under load and looking great doing so (forever dreaming the next-gen will rewrite the OC rules again, boost clocks have a lot to answer for!).

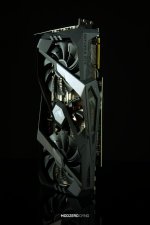
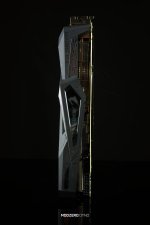
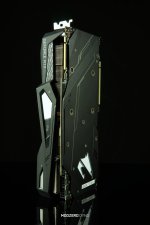
The Xtreme cooler is extreme... at idle its silent but slap a couple of tabs open in chrome and those fans will come to life and with them a beautiful dance of RGB pride. So first thing first (whilst I played through ALYX) I turned that ****** off. Instead, opting for a dim red effect. Looked awesome!

aCabuvch.jpg
...
SyLRx0sh.jpg
...
dNAIAKPh.jpg
...

Looks great right! The fans never spun up past 70% under sustained gaming load and it was comfortably quiet sat on a test bench next to me (granted.... I was wearing a headset... but that's why I'm water-cooling it duh).

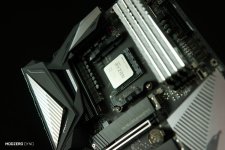
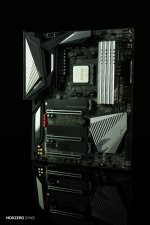
This motherboard, on the other hand, is gorgeous! Truly I think Gigabyte did a great job with their X570 range of boards. I run the ITX offering in my other build MODZERO SEVEN (It's a transplant from ASHEN, I'll post photos of it once I've happy with my loop runs) and that's been great too!

lMaMRUTh.jpg
...
EbgGx8eh.jpg
...

On my bench I'd been running a single 8-pin EPS as that 3700x isn't going to tax it much, but I'll make the full 16 for the build. Depending on the 4000 series compatibility I do see perhaps the 3900X(T) in its future.

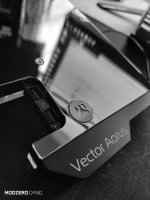
Now, if you're not already and are so inclined. Follow me on Instagram, I mentioned it in the last post (and I'm sure I'll mention it again) but I'm making 'stories' of some of the smaller build stuff. I'd recently posted me swapping out the chipset cooler for EKs Quantum Chipset block and I'm pretty sure I'd shared my experience fitting the Vector Aorus block on the Xtreme.

I eventually save each story so you can check them out from the profile page.

https://www.instagram.com/modzero_customs/

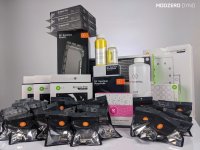
So I guess we should take a look at this GLORIOUS TABLE OF EK LOVE!

13R7hAFh.jpg
...

SO, what have we here... well.

Blocks

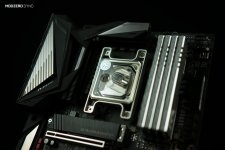
EK-Quantum Magnitude D-RGB - AM4 Nickel + Plexi (LINK)

Quite possibly the most exciting WC product release of recent years. This thing is a labour of love and whilst to demands a high price tag, genuinely feel its worth it.

Rads

EK-CoolStream SE 360 (Slim Triple) (LINK)
EK-CoolStream PE 360 (Triple) (LINK)

Both of these (as seen) have been painted to match the rest of the case. The Razer edition is the midi variant of the 0-11d so its slim down at the bottom and regular (yeah... let's say regular) thickness up top.

Res

EK-Quantum Kinetic FLT 360 D5 PWM D-RGB - Plexi (LINK)

Another exciting release from EK, the flat res! This was always intended to be the EK distro for the 0-11D. But then covid happened and stock died and that brought with it delay after delay. So once I received the green light from EK for this project I actually opted for a res. I've still no idea how I'm going to do the loop... but this gives me options that a distro doesn't.

Fans

EK-Vardar EVO 120ER Black BB (500-2200rpm) - Dual Set (LINK)

But... but... what about the X3M or the EVO RGBs! NOPE! If it's not Noctua, it's OG Vardar! (I just get that tattooed) The case, the blocks, res and ram all light up like Christmas! I'm not an RGB guy in the RGB sense.. er..

For me, I like that RGB means I can pick whatever colour best suits the build. Maybe, if I'm feeling like a tart, I'll add an effect to said light.

Coolant

EK-CryoFuel Lime Yellow (Concentrate 100mL) (LINK)
EK-CryoFuel Solid Laguna Yellow (Conc. 250mL) (LINK)
EK-CryoFuel Clear (Premix 1000mL) (LINK)

Yeah, it's gonna be yellow... acid ****-yellow or big bird bleeding out yellow. Only time will tell.

Fittings


EK-Quantum Torque HDC 12 - Nickel (LINK)
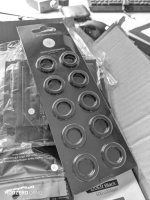
EK-Torque HTC-12 Color Rings Pack - Nickel (10pcs) (LINK)
EK-Quantum Torque Rotary 45° - Nickel (LINK)
EK-Quantum Torque Rotary 90° - Nickel (LINK)

Again, I've been doing unboxing 'stories' on my Instagram if any of that interests you. It was a big box and everything in it is beautiful!

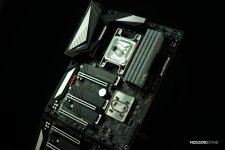
Now, I'm a few steps ahead in the real world so maybe I'll leave it here and post again sooner. But basically, I've put the blocks on the board and the gpu is pimped out now too. I test fit the gpu on the vertical mount and because the GPU pcb is wide/tall it blocks a lot of the CPU (can't show off that stunning Magnitude block... gutted). That said, the GPU block is glorious and stands proud up front. I've made a couple of tweaks and that's beginning to give me loop ideas.

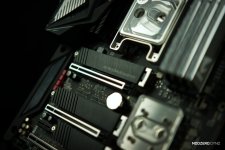
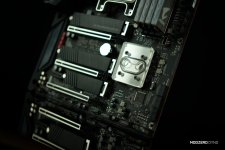
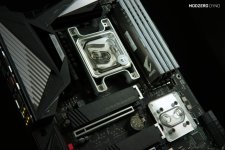
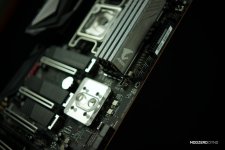
I'll leave you with a few more shots of that motherboard, only with the blocks fitted this time.

jpLgN48h.jpg
...

Not so funny story, I tend to get into this after my wife and kids have gone to bed. Which often means I'm already exhausted. I can maybe pull a few hours out of a week (what!). So one night I'm thinking.. I've had that box of wonderful EK goodies sat there for weeks!!!! (mainly because the case was off getting painted, I wasn't neglecting it.. haha) pull your thumb out ya ass and move this forward.

So I fitted the CPU block, chipset block and shot 100+ photos (95% as always, are *****). Loaded them onto the computer and edited three before I noticed the CPU block was upside down!!! I put this down to muscle memory though.. I've not built a PC that wasn't inverted, for years! so when the block went on, the board was upside down (right side up... whatever).

Anyway, couldn't leave it that way.. so spat my dummy and went to bed. came back the next night and refitted and reshot. You live and learn.. #dumbass

BdmedJIh.jpg
...

I'll not be running any SATA drives, why would you.. M2 options for days! I'm running sabrent drives on this. They are unreal value and perform great!

rBux5dAh.jpg
...

Cheeky little chipset block, this reminds me of MIPS blocks anyone else ever used there products? I wonder if they are still in business (googles it).

NOPE


ejr1EQeh.jpg
...
nlETeGAh.jpg
...

AORUS RGB Memory 16GB (2x8GB) 3200MHz (Limited Edition) (LINK)

I guess I've not mentioned the RAM huh! it's pretty. I had it in my ASHEN build but retired it when switched out the loop. I hope to use the Ryzen DRAM tool and really dial this kit in.

hUwgYAsh.jpg
...

I'm excited, this should be good.

Thanks for reading all that, or for just looking at the photos... until next time.

J.
 
Well done for achieving this with a family. I understand how difficult it is to work on a PC build, let alone one using water-cooling when you have kids (the pandemic makes things tougher, since home schooling is very difficult!)
Looking forward to seeding this progress at your pace.

Thanks, certainly is challenging. Would be wonderful to have a couple of days to crack on. It'll get there in the end. I'm excited about it now so that'll push it forward. It's looking like I might need to swap the D5 FLT RES for the DDC variant so I can put another three fans in so that might delay me. But my OCTO came today so I'm busy looking at how/where to mount that.

Im also excited to see how this goes.

Thanks, it be honest, I want the end result to be marmite. I think it'll look great, many may well disagree. haha. The paint will certainly be divisive.

J.
 
TeIjISSh.jpg
UPDATE 3.0 - HOW TO LOOP, NO I'M ASKING YOU?

Back again with another nudge in the right direction. Gonna be picture heavy but convey little progress, so strap in. haha

In update 1.0 (seeing as update 2.0 was just a gallery) we left off with slight mods to the vert GPU mount. So I guess we can take it from there.

dNjKrYvh.jpg
...

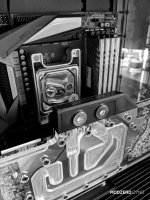
The Aorus Xtreme is a monster! with the block on and sat vertically in a position to allow enough clearance for the SE360 + 25mm fan it all but blocks out the CPU block... and you'd not know I have a chipset block on there either... But I kinda like it. It's a great looking GPU block and with yellow coolant in that area of the case, it should balance well with how I see it looking finished (in my head).

k4duvwsh.jpg
...

I sat back and thought two things... terminal and parallel.

eX9Jk2Kh.jpg
...

I'm fully not a member of the 'RGB everything' way of life... but love how picking a single colour from any number of hues can make for a great-looking build. Long gone are the days of soldering inline resisters to 3mm LEDs to 5v/12v molex feeds. But, tbh, that's all it took to make a CPU/GPU block look awesome!.

XF2OH6Vh.jpg
...

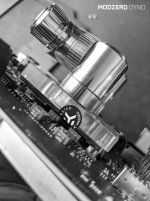
So I decided to swap out the default terminal on my GPU block for one of the more OG EK types from an old GTX980 STRIX block I still own.

yk5oG4yh.jpg
...

Aesthetics weren't the only reason, the DRGB terminals are larger (blocking more of my Magnitude block) and they have a wire that I can't sleeve! (aaargg!!) dangling down to the backside on the block.

M9GDZDKh.jpg
...

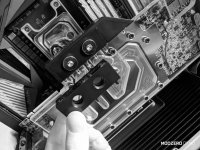
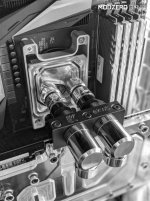
Ah yes... that's it. loads better! So now I got excited! Without the distro, I'm still to decide on a loop... but the idea of going parallel was shaping up to be a good one. Now, it doesn't line up.. its about 5-6mm off at a 60' angle. In my head, that wasn't gonna be a problem. A slight off bend in the tube might swallow the difference or maybe get more creative, take the CPU down off 90's and tight bends back up to the GPU.

1WWmo8ah.jpg
...
K8oKJYSh.jpg
...

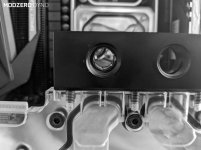
But in reality, once I'd put fittings on both blocks, the wiggle room was minimal. Now if I were Alex Banks I'd design and CNC my own terminal to offset the alignment. and, whilst I've used Fusion360 in the past, I couldn't genuinely see myself finding the time to pull it off. SO with my thoughts of parallel wonderment fading I thought... I'd try some offset fitting...

mBYVGIeh.jpg
...

NOPE!

It looks so busy! I don't like it. so parallel is out.

F2f8t2Gh.jpg
...

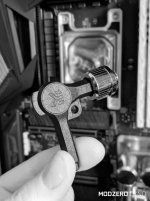
This thing by the way! is a game-changer, now to be fair, EK must be the LAST company to put these into their fittings but with this little tool, getting them off is a breeze. I'm not too much a fan of using it to put them on though. I think most leaks are due to crushed o-rings. Using one of these to tighten your fittings is too easy over tighten.

So with the parallel thing off the table, I took another look at the layout.

So many ppl have built great looking rigs in this case, looking for inspiration was easy enough. a simple hashtag search on Instagram got the juices flowing and it kept pulling me in the same direction.

I want my rads blowing out the case with as much air being pulled in through the dust filters on the rear panel. So I got to it.

I did a couple of Instagram stories on daisy-chaining rad fans (go check em out) then set to putting my beautiful FLT 360 in place.

vNsmB64h.jpg
...
KKyxPBrh.jpg
...

Oh yes, this thing is solid! and just oozes quality and it should right, they demand a pretty penny! It just makes so much sense! I fully intend to use others in future builds. I truly see a 120 DDC version being my PUMP/RES of choice in all future ITX builds.

But at this point, it was looking like perhaps I couldn't use this one...

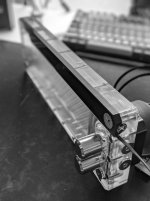
If you fit it directly to the mid-wall it'll block off 95% of all air that could be pulled in from the back. Plus, as its the D5 version it a pretty close fit in the back chamber too. So, use the supplied brackets right?? Well, doing that pretty much blocks off front res in/out ports (yeah you can use the ones on the bottom, maybe... but that fill port is only on the front! Something I'd like to see EK change).

So I wrote off the D5 and reached out to EK for the DDC version. The DDC version has smaller brackets (DDC pumps are not as deep) so with the DDC version I thought the bracket would still enable clearance for the top/bottom ports but more importantly, I'd be able to fit a further three Varder fans behind it, really use the space and make the most of the chassis design.

but actually. no. even the DDC brackets would stand the res out to proud, meaning I'd not be able to get my fittings installed.

So I made my own brackets... kinda.

AXL25Hbh.jpg
...

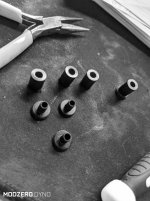
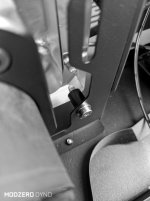
I had these spaces from a CPU HSF from years ago... I thought if I cut them down to about 15mm that'll provide enough clearance for the fittings and enough airflow for two varders (not three as the D5/DDC would still foul the midpoint) to pull in that beautiful clean flittered cool air.

S2JTmRXh.jpg
...

Pgs34Puh.jpg
...

0iPF8wah.jpg
...

Looks pretty good right? I did consider making six but... er.... yeah I totally ****** up two attempts at jr hacksaw cutting a straight line, so after some filing down I settled on four. In that top image of the spacers, you see some rubber inserts.. yeah, that didn't work out either.

So how is the clearance I hear you say...?

3HylWjvh.jpg
...

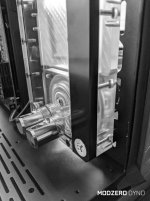
Pretty good.

OH!!!! Before I forget! in my photos in the last update.. turns out I'd mounted the chipset block upside down!!! At the time, I'd not thought that possible. Plus, I'd already boot tested it without a loop, as, if you can remember, I dropped the whole thing shooting the Magnitude block.

4Te5Avch.jpg
...

Do you see the cutaway near the sticker? yeah, I didn't. lol... its the right way round now and it booted that time so I'm pretty sure it's not fried.

YqJkMsqh.jpg
...

Love these Torque fittings! it's as though the more adapters you add, the cooler it looks!!!

5gIEyYFh.jpg
...
psst, the block is still the wrong way round in that shot. But let us move on.


FAN CONTROLLERS!!

The choice is huge!!! or is it. Having pretty much exclusively built ITX WC systems fan controllers just weren't needed. I'd put the pump RPM signal through a fan header and daisy (if needed) the rad fan(s) off the CPU fan header. I'd pretty much set a custom curve based on GPU temp in software where I could, or set a curve in the BIOS based on CPU temp.

Then I built MODZERO SEVEN, that Parvum R1.0 ITX build I've not shared yet. Well, that has got two 240 rads and two 120mm intake fans on the same footprint as my Parvum X3.0 build ASHEN. So for that project, I had an Aquaero 6lt mount built into the chassis (another design perk by the mighty JR23).

The Aquaero is a game-changer, I'm so late to the party with these but as I'd said, I'd not really needed one before. Now I don't think I'll do another build without it... or without its software at least!!! As I found this little beauty!

Nhmgierh.jpg
...

The Aqua-Computer OCTO. Smaller than a credit card, mounts on 2.5" drive mounts, 8 channel fan controller + 4 sensor inputs. Best of all runs on the same software suite as the Aquareo. I run the Aquaero 6LT in SEVEN. I run the two 240 rads through their own channel (daisy each set of fans) the intake fans on a channel and the pump (that's 4, all the channels the Aquaero has onboard, granted those four channels will run 50+ fans if you wanted). I then run two inline loop temp sensors on each end of the rad runs (using two was pointless, looks cool though). In the Aqua-Suite software, I set the pump to 33% and forget about it and I have the rads running low and slow unless the coolant temp pushes 40'c by which time the fan curve ramps up the rad fans and tickles the intake fans. It's amazing! taking a curve off your coolant temp is THE way to do it.

If motherboards had sensor inputs and a way in the BIOS to control fan speeds off them then it would be game over for the fan controller. But until then, this is king.

Now, I could be wrong about the OCTO but from what I can tell, it does all the same stuff the Aquaero does just without writing it to internal device memory and with further input limitations. But how I see it is, it'll do everything I have my Aquaero 6lt doing at a third of the cost.

bqhTcVXh.jpg
...

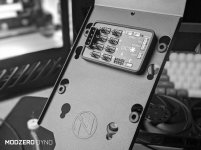
Mounted on the reverse of the chassis drive mount plate/cable hider type thing...


I think that's it...

So how does it stand now? Well, I'm waiting on resupply from EK. They released their Torque extenders and I'm in need of that GPU backplate. So fingers crossed that'll come in soon.

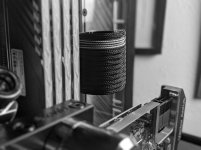
I've made all the cables!!!! and they look awesome!! I've posted some shots on Instagram (sorry) but I'm keeping progress B&W to build tension for the reveal... and posting shots of b&w cables is sort of like watching Avatar on a B&W CRT TV from the 80s.

Qbbc99Th.jpg
...

See...

Haha.

I'm stuck on the loop. I knew using the FLT over the distro would make the loop more of a challenge but equally, it was that challenge that excited me. I've some ideas and that'll be my next update.

Thanks for reading folks.

J.
 
TeIjISSh.jpg
UPDATE 4.0 - THE LOOP

It's been over two months! crazy! Well, I'm back and we're almost finished here. Go make a cuppa as this one is looong and picture heavy!

lf96o4qh.jpg
...
This is where we left off, just about everything in place but waiting on a re-supply from EK.

7LisbKth.jpg
...
The goodies came in. So let us take a quick look. That's mostly the new Torque extenders, but I needed a few more fitting too.

CchwqV3h.jpg
...
Some black accent rings. I'd originally planned to go chromed rings, chrome fittings. However, I chose some black tubing by Corsair so went for black rings to match.

vLMOzcYh.jpg
...
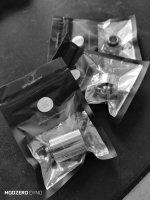
The Torque extenders, three lengths, 28mm, 14mm, 7mm. Nice.

91kRGwLh.jpg
...
ONnHZI7h.jpg
...
2GNgAQih.jpg
...

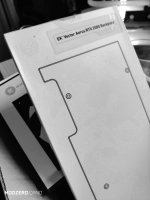
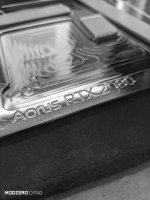
Backplates really do complete the look of a blocked GPU IMO. Really, they should come with the block. You have to remove stock backplates to install the block and often you can't put them back on. That said, these backplates are so nice! Historically I've always been happy to add one to the basket when buying the block. Keeps the block costs under control I guess. What do you think? Should they be included?

iILH8nmh.jpg
...
I can't believe I didn't own one of these already! I've since rebuilt my MODZERO ASHEN project into a new case with some new hardware and called it MODZERO SEVEN.

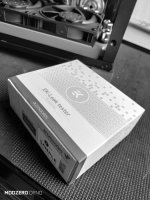
I ended up using this tester soo much during that rebuild and honestly think it's saved me hours as I found my distro unable to hold pressure more than once. In the past, I've always been confident in my loop and if I get through fill/bleed without a leak then I'm happy it's good to go.

I remember seeing SNEF use something like this years ago and thinking it was a great tool. Glad I've got one. It'll show up later in the post.

gTWGIchh.jpg
...
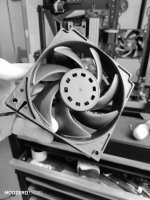
A couple more Vadars, these are for behind the flat res. In the last update, I'd mounted the res on some custom standoffs to provide airflow. It had been my intention to pull air in through the huge filtered vents on the rear side panel then out the rads. These are going in to provide a flow of cool filtered air.

But it turned out to be a little more challenging. I'd given up on getting three fans in due to the D5. I chose not to swap out for a DDC as the front would still have the same clearance issues. So two 120mms would be fine.

QZrEk8ah.jpg
...
The top needed a little modding. so the bolts I had could go through the fan and into the res. I removed the res, fitted the fans using six out of the eight holes then lined up the res and bolted through the top holes of that top fan then attached the bottom.

CCDJXwLh.jpg
...
Worked out well.

Yes, it would have looked better had I gotten three mounted and maybe it would have looked better even if these two were mounted more in the middle. I think though, even without these fans the rads would be sucking in air wherever it can get it and so much of that would still have come through from the back. At least with these, I can ensure plenty of cool air.

HqhoFobh.jpg
...
I removed the stock sleeving and did an acceptable job with some MDPC.

8TYM9dhh.jpg
...
I wired the pump directly into the PSU.

X0cs3nrh.jpg
...
But before I wired the pump I daisy-chained the rear fans.

DuxjmPph.jpg
...
iiGaMysh.jpg
...
That, along with the pump were the last of the controller wiring. Time to wire-up the OCTO. So that happened next.

1udcpsUh.jpg
...
I'm in love with this thing! MODZERO SEVEN was the first time I'd used the an Aquaero (6LT) and that was a game-changer too (I've always known they were good, however, I'd almost always built ssf builds and made do with just wiring pump/fans to the motherboard and controlling via the BIOS).

The Aquaero 6LT changed all that. Using the above method you're bound by either CPU or GPU temp (sometimes you can use the chassis temp) to control your fan curve. so when you jump into a game that temp rockets and so do your fans (granted not to the volume of an air cooler). Using the Aquaero (still referring to MODZERO SEVEN) I fitted two inline temp sensors to the loop (really only needs one) I put one on the RAD IN and the other on the OUT of the second RAD. In aqua-suite, I based the fan curve on coolant temp.

The result was silent gaming. The fans are nice and slow and ramp up very slowly, maxing out at 60% as my testing showed that was enough to keep the coolant under 40ç. Rarely do my fans hit 1000RPM which (Noctua P12s).

When I started this build I'd wanted to use the EK connect, this was the first ATX project in a long time and it was set to have 9x120mm fans plus the pump so really didn't want to put that through a mobo header.

I fear the EK connect is a couple of generations off worthy of recommendation so I looked around. Whilst the Aquaero is amazing it's super expensive! even more so once you put the heatsink on it.

But then I stumbled on to the OCTO. Initially, I thought it was an extension board to the Aquaero. It has twice the channels at half the cost and if you're in need of a controller (yeah the Aquaero can do a lot more then just fan control) the OCTO is awesome. It runs the same Aqua-suite software and it's set up / control is pretty much the same.

The OCTO will be my go-to controller for a while.

NU2ulcbh.jpg
...
cwL6dHRh.jpg
...

SO, THE LOOP!

OPRvsm9h.jpg
...
Let us jump into this. I made it up as I went along. The more I tried to plan it the worse it looked in my head. I just couldn't get a loop on paper that I'd be happy with. I had a few key things I wanted to achieve and I had to let a couple of them slide.

Firstly, I'd wanted to go parallel with the CPU/GPU, pretty sure I showed those efforts in the last update. That didn't work out due to alignment (But I will revisit this later as I have an update on it). Secondly, I wanted to keep things to single bend runs and do everything in 45' angles. I sort of always have, it looks super clean, the runs are easier to achieve and it means you get to play with more angled fittings. Lastly, I wanted to do a run from the bottom to the top rad.

Everyone and their dog has this case, and since EK rocked the water-cooling market with their distros, pretty much 99% of 011D builds use them. I want to get a clean loop without that distro look.

With parallel out the window, I was struggling to plan how the loop would get from the chipset block to the GPU and back to the res.

I tried a couple of test runs with some PETG (as that's all it's good for... Acrylic for life hahaha) this layout interfered with the GPU riser cable so I went with this.

Il8wJBSh.jpg
...
It's completely hidden by the GPU and it took some tinkering to get it to line up. the chipset block is far shorter (in height) than the Magnitude so it took a 7mm extender from the chipset to get it close.

9X2cDfxh.jpg
...
I always try and aim for 'block-rad-res-block' when making a loop but appreciate the difference isn't huge regardless of order these days. To get that clean look it meant I'd have to have the CPU/CHIPSET return the loop to the res. NOT IDEAL.

sQbDLV9h.jpg
...
Look how close it is to the bottom RAD. Looks great! All the pump/res outputs needed to be 90's to clear the bottom rad. With the pump outlet, I used a T fitting and fitted the temp sensor for the OCTO. Again, not ideal.

However, with the loop returning to the res from two blocks without cooling, taking a temp from the pump out would be a good indicator of how effectively the rads were cooling the coolant. You'd expect it to be at it's coolest when coming out the rads and it's hottest leaving the GPU. This way I could keep my eye on how warm that res might be getting (due to cpu/chipset return).

Really, I should have put the T connector on the chipset res inlet run as I've probs restricted my flow by putting a bar directly in front of the pump (it worked out ok).

w379kAyh.jpg
...
Next came the run connecting to the two rads. I really thought this would be easy. I'm not sure if I want to blame EK or Der8auer for this one. You have some control over the rad position up top (slide it back and forth) the bottom is a static fit.

I'm running two different model EK rads (PE/SE) and the connectors aren't positioned the same. So simply fitting the rads, linning them up and running a tube between when was out.

With the tube run being so close to the frame, unless the run was 100% straight, it looked a million miles out. So I tried a couple of things. The above was using a single offset fitting.

TXE7h24h.jpg
...
Then I did that.... puke.

fLj7luUh.jpg
...
But in the end, it took a combination of moving the rad back a little and putting an offset fitting on both ends.

e4UoXYZh.jpg
...
OH! This is the tubing! it's ace! The only product from the corsair WC stack I like. :p

uImVlV7h.jpg
...
GPU came next. So at this point, I've got the loop in my head. I'd finally accepted running the loop back into the res from the chipset and was running with it. So the plan was thus...

PUMP - GPU - RAD - RAD - CPU - CHIPSET - RES - PUMP

Two 90's off the pump got it out in line with the GPU. Sticking to 45' angles in my runs I used the torque extenders to align the runs from the GPU.

EA0UGI6h.jpg
...
rw14vAph.jpg
...
I then put a double female 90 to connect the two (something later I regret).

5f7UqrOh.jpg
...
I tried to mirror the other run but to a double female 45' (rather than the 90') so it could take a 90' bend into the RAD. Which worked out well I thought.

vQL3wwEh.jpg
...
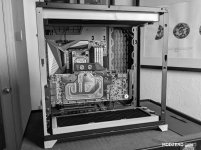
I was starting to like it, the black tube has an almost automotive rubber hose look which I liked a lot. I also added a drain port with a ball valve (another first for me). It works out pretty well. Just remove the front glass and attach a tube. open the valve and the res dumps out in seconds (getting it out the rads takes an effort).

TGwQ0yYh.jpg
...
The last run, I tried to mirror the bottom and take a 90' bend off the RAD into a single bent run to the CPU. I think at the time I wanted to fill the space and thought this looked cool.

rETCuk9h.jpg
...
It works, looks clean and I was happy. So I opened up that cool leak tester and gave it a go.

t7uwKK7h.jpg
...
Pumped it up, left it for 20mins, the needle hadn't moved so I prepped the coolant.

iwHs5CBh.jpg
...
lol, starting to regret the B&W thing now... hahaha. Hopefully, the final shots will be worth it. Can you spot the mistake?

Dw5xtBEh.jpg
...
Yeah, I'd just assumed the Cryofuel Clear would play nice with the concentrate. I'm a fool. Haha, so I popped out and bought a big old bottle of Di-Water.

VmRKArnh.jpg
...
yeah... b&w right! :/

Wow! this update is loooong. I'll sign off here and be back with another later today maybe?

Thanks for reading it!

J.
 
Great build. Looking forward to the colour photos with the green.

Thanks for the comment, here is a tease of the green. I took this when I'd first put the case back together.

K0Y44Lzh.jpg
...

It has a slight pearlescent shift to the colour. So really it changes slightly depending on the light.

J.
 
Looks great, however, the USB ports now need to be yellow to match the colour scheme of the McLaren.

Yeah! Agreed! I looked into buying the IO from a non Razer 011D chassis as it looks terrible. I resolved to using the rubber USB blanking plugs you see in the log update posts above.

J.
 
TeIjISSh.jpg
UPDATE 5.0 - IT'S SO CLOSE

Well, it's the next day, I'm back with another slice.

VmRKArnh.jpg
...
So I filled it up, bled it and booted. Faught the awful Gigabyte RGB software and didn't feel much better about using the Razer software suite just to set the case RGB either. On the plus side, while all the RGB was cycling it gave me some better ideas on what colours to set. But I'll get to that down the bottom.

Did anyone notice that the bottom run in the above shot is now different from how it was documented in the log? Well, I said I'd come to regret that double female 90' fitting and here is why. It's pretty heavy and that's all pulling on a rotary fitting up on the GPU which meant it wasn't great at holding its position.

Having sat and looked at it for hours (as you do when you boot up these sorts of projects) I was falling out with my runs. It just felt as though the angles were slightly off. Not just on the bottom run but the two 90's coming from the rads seemed too short, with their connected runs pulling on them slightly causing them to not look quite straight. So I shut it down, drained it, removed the bottom run and cut a single length with both the 45'and the 90' bends in it.

s1J7OMEh.jpg
...

But that wasn't all.

When booted up, the CPU, RES and GPU are lit up. I wanted to set a single colour and be done with it, this one wasn't about all the RGB glory hence the non-lit fan choice. However, each lit component seemingly holds different LED ICs so the hue wasn't a perfect match (component to component). The RES looks amazing!!!! I'm totally sold on the flat res! it's great! Magnitude uses a higher density strip which looks great too but so close to the GPU the difference was obvious. Even dimming the blocks didn't really help.

Now the GPU is only lit from one edge and I'm running a EK solid coolant so the lighting effect really dropped off the closer it gets to the IO. All in all, I wasn't too happy with the look. Remember I'd swapped out the terminal for an old school looking EK one. Well, that was a mistake. The Vector block terminal is also lit so I thought **** it, let's swap it back in.

HXK7Tw0h.jpg
...
Looks loads better. All the runs meet in this middle point, but with them being black they seem to blend into the overall look without being on show.

o6rqzc2h.jpg
...
MDPC sent me a couple of stickers with my last orders so I've started putting them on my work. I'm really not one for stickers.. but those look epic.

So I also decided to redo the top run from RAD to CPU. As I'd said the 90' bend from the RAD wasn't spot on and I'd thought it was looking a bit awkward from certain angles. With the only terminal and that CPU run as it was, that centre point looked more of a clutter. With a new cleaner single run using only a 45'bend it opened up the block more. Looks much better IMO.

So whats left..

Kmtn2Kyh.jpg
...
This worked a treat! With me having the rads push air out the chassis I didnt need the RAD filters. But the case has grills above the PSU, IO and PCI brackets that are not filtered. so I cut up the RAD filters and peeled off the mag strips to make some new dust filters.

8E7fChCh.jpg
...
They work great! the Rads, of course, pull a lot of air in through those places. The filters are working a treat.

Hfs0SKMh.jpg
...
The original colour concept for this project. The case is the green, the coolant is the yellow, the carbon/orange (seats) is the cables. the chrome (alloys) are the fittings. Secondly to that this project is meant to be Razer branded. The case has the etched logo on the front but I want to take it further.

FnK9Txjh.jpg
...
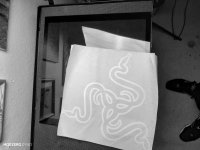
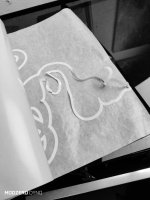
My neighbour has an A2 plotter so she hooked me up with a great big Razer logo.

lpsxANSh.jpg
...
4CFjKT3h.jpg
...
Only I screwed it up.... wow it's hard putting these on when they are so big. But not to worry, we plotted another.

yrsn8OOh.jpg
...
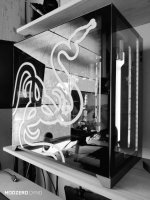
This time it was a little bigger and cropped to go on at an angle.

xCRRVClh.jpg
...
0udRoUUh.jpg
...
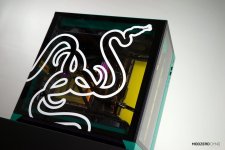
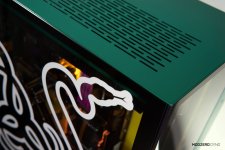
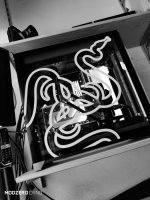
Really pleased with that. As the glass is tinted it mutes the lights and with the fans and tubing being black to does a good job remaining subtle. The great big white logo pulls focus and shows off the green and thus the exterior nicely. It's then a lot of fun looking through and picking out the details.

I've plotted a few more bits, But I can't decide if I want to put them on. I've got 'RAZER' and a few different 'For Gamers, By Gamers'. I thought perhaps the 'for gamers, by gamers' could work on the rads and maybe 'razer' on the res. But as I said, I can't decide. What do you think?

For now, I'll leave you with these.

HXK7Tw0h.jpg
...
njfmZnPh.jpg
...
FzAl2K1h.jpg
...
XE7Sy3Mh.jpg
...

I'd been holding off shooting it as I'd not been totally sold on the vert mount. It has horrid sag that required I prop it up with a trimmed slice of tube between two of the bottom rad fans. Propped it looks great, but EK announced and have since started shipping their own vert so I kindly asked for one and held off taking the final shots.

The mount arrived last week.

So that's next.

J
 
I'm waiting for the EK 3080 FE blocks to come in so I'm keen to see what you think of EKs vertical mount as it's a bit of a chunker. Bottom SE rad and will get some Notcua 15s if it will fit.

So I'll go into more detail in the next update but I've ended up sticking with my Phanteks mount. The EK is better in almost every regard! But it mounts the GPU 5mm (approx) closer to the IO. So both my runs were off and would need redoing.. I swapped out the mount without draining my loop (scary) and whilst it both held the GPU firmer and the bottom edge looked cleaner I just couldn't bring myself to draining the loop and redoing those runs.

Actually, what really got me was, had I had the EK mount before I started the loop the mount holds the GPU in perfect alignment with the CPU! I could do my parallel loop! as I'm not running the XL I modified both mounts to allow me to fit it two slots higher. With the Phanteks that weaked its hold but the EK mount with MUCH stronger.

there is something satisfying about it..
many do it "good enough" but when its so nice it just takes the build to a higher level

Thanks buddy.

Brilliant build. The black tubes work great!

Cheers.

0WjlMrPh.jpg
...

I've taken a lot of photos and gotten that down to 88 keepers... they are mostly slight variants of the same two dozen angles so I'll edit that down to 24 and post 6 on here.

They're coming.

J.
 
TeIjISSh.jpg
UPDATE 6.0 - IT'S DONE!

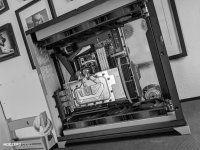
Well, It's finished and I'm really interested to hear what you think of it. I'll jump in and share some photos then I'll give you my take on how it turned out.
SOxBTUqh.jpg
...

qkwUvsRh.jpg
...

6nEiC2Mh.jpg
...

4PYFESZh.jpg
...

h1CzXrAh.jpg
...

HZjRAXLh.jpg
...

S7SdhU0h.jpg
...

z5UrSmxh.jpg
...

Overall, I'm pleased with the results. I set out to do something a little outside of my norm. I picked a bold colour scheme and ran with it. Now, has it worked? No, I don't think so. I'll try and explain.

The paint is amazing! it's a pig to shoot! the pearlescent effect makes it hard to get a consistent colour result and its harder still to capture the flake. Now, its automotive paint, it is Mclaren paint! Its meant to be outside and sure enough under the sun it really delivers. Indoors, in my office, it actually looks darker and slightly dull. Point some studio lights at it and the colour shifts lighter to almost blue/green (which looks ace! but crap on camera).

The fittings and the tubing I really like, it has an almost engine hose finish. I wish I'd stuck with the chromed accent rings though... Not sure the black rings really add anything. Either way, I'm a fan of the EK torque fittings. It was high time BP had some competition in the fittings space.

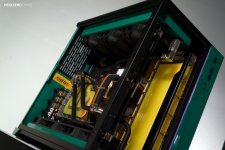
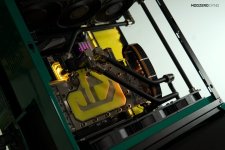
The yellow isn't great. I actually have the blocks pushing a yellow light too, otherwise, the coolant looks too much like custard! the colour is stronger in the res as its deeper, more intense in the cpu block as the LEDs are brighter. Its really quite washed out in the GPU with it only getting light from one side so far away from the coolant and the channels being so shallow. So loving the yellow...

But the loop design I'm delighted with! When I kicked this off EK got in touch asking if I'd like a distro they had planned for it (at the time it wasn't released) So from the off I wanted to get this out the gate to show off that distro. But the build hit delays with hardware then covid killed a lot of marketing budgets causing more delays and so I shelved the build.

None of the above was a problem though, I build maybe one PC a year and rarely in doing so am I without a PC. So I really enjoy just being able to pick it up and put an hour in here and another hour there. Granted this one, like my last has been harder now I've young kids.

By the time everything was in hand EK had a hand full of different distros on the market and the PC-011D was already a HUGE hit! I mean it was a huge success long before I decided to build in one.

I'd taken that TopGear McLaren photo and saw a version of the 011D that embodied some of those design cues. but ultimately the build went in a different direction. picking the purple lighting out in the ram and the case and putting more yellow into the coolant actually makes it look more like a Cyberpunk 2077 or Joker themed build with a Razer logo on it. haha. Either way, I'm happy with how it's turned out though perhaps it is not how I'd originally intended.

I kinda think I occupy an odd position in the modding scene. I'm not young, I don't have loads of free time (or much at all) or do this professionally as an extension of say an education or fulltime job. I'm far from the best and my work isn't overly exciting. But it is constant. I do what excites me and build PCs that are intended to be used 24/7 hard! I enjoy writing these logs though they often just read as blogs and rarely see huge numbers of view or responses. The forum is losing to social media which is a shame but I'll keep it old school as long as I can.

I'm an enthusiast, I love it! I had access to a 386 a 486! (as a kid). Loved overclocking the snot out of old Pentium chips pre 1ghz days (as a tweenager). Started building as I couldn't afford to buy a workstation (when I was a teenager). Cherry-picking AMD Athlon chips (1400+ 1700+ 2200+) and OC'n them to match the performance of my mates who could afford to buy prebuilt work stations. I fell in love with Charles Harwoods work and I've spent my life since trying to achieve something close...

I've stuck with it and continued to be excited by the industry. In recent years I've been lucky enough to have amazing support from brands I love!!! That's all come about slowly and wouldn't have happened at all without the support and encouragement from the likes of Adam Faulkner, B-Neg! The Parvum boys and a few others. I enjoy the process, all the while others are raising the bar and taking PC modding to a new place. It's a great community, one I wish I was more involved with.

I keep learning and think I get better with every project.

I've got another couple photo sets I'll be posting on Insta and Fb (if you follow on there?). I shot it on a white background too which came out pretty cool. Not too sure what the future holds for this one. I'd love to put a 5900X in there with the 3900XT or a 3080FE with that super block EK have done.

My next project will be the EK vert ITX case they teased at their expo! (please!!!) My first MODZERO build was in the Silverstone FT03! I have a fondness for vert cases. I'm thinking of doing it fully blacked out. black everything! with ZMT soft tubing! I guess we'll see.

D9qKQWsh.jpg
...

Thanks for coming along for the ride.

J.
 
great job, I think the colours work fine, but the razer logo doesn't. I would remove that, is too big, distracting, and the white doesn't match any part of the build. I think the aesthetic inside is covered by that decal

Sure, on some level I agree. I'd offer that the tinted glass mutes the internals so much that the Razer logo contrasts really well. It is very eye-catching and easy to look at. It also breaks up the reflection you get off the glass, draws your focus. But if you're not a Razer fan its a great big horrid snake thing on the side of a green case covering some cool yellow water cooling stuff! :p haha

J.
 
Hey folks,

I finally got round to doing something with these extra shots I took. I'd wished they'd come out better. This paint is awesome in natural light, my mistake was publishing the final shots using a black background. Looking back, I should have taken it outside.

A few of these are cool.

Enjoy.

bx0BymNh.jpg
...
CHHuG5Bh.jpg
...
UfNUzdwh.jpg
...
VPPjXb5h.jpg
...
YOsizC6h.jpg
...
MtaZo6hh.jpg
...
0u87MMRh.jpg
...
54kkfCoh.jpg
...
Ndm5PuBh.jpg
...

It's up for Mod of the month, which is always great! Go check it out and vote for your favourite. I'm heading back to the wonderful world of ITX next. I've two builds on the books with a third and fourth planned for later in 2021.

Working name of MODZERO SHOCK coming up in the new year. Sliger has kindly supported the build with their great looking S620 chassis.

Check it out here


I've also bought the S610 both are coming in White with black top panels, black handle/feet. Silverstone and Noctua are on board too so the plan is to bring a console size/spec console killer build to life.

I'm in love with the new FE coolers so it'll all come together once I can get my hands on a 3060ti/3070. Hoping to go with Intel on this one.

If anyone LOVES to green 011D above I'm selling it, so send me a DM. I'll include the matching RADs for a little extra. I'd keep it if I had any use for it. as it is, the whole build has been retired and the case is back in its box ready to go.

Thanks for coming along for the ride.

J.
 
Back
Top Bottom