Soldato
I never had a Game Boy, my first one was recently given to me by a good friend.
It's really cool as it's one of the Play It Loud models, with the clear case. It also came with games, and the clear protective case that holds the Game Boy and games.
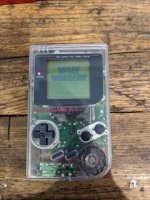
I played on it for a bit, before my wife stole it off me to play on it instead! A short time later we both agreed that the screen wasn't great - we're spoilt with modern display tech.
After looking at doing backlight mods, I ended up putting it to one side as I was worried about destroying the original screen. Then I saw a new IPS mod for it, that replaced the entire front PCB and required no risky work to ribbon cables.
I don't have any photos of that being done, but it was simple enough - with some minor cuts to the case, and soldering on the speaker;
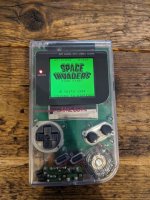
This screen is so much better, the contrast wheel has been changed for a rotary encoder - it doubles as a brightness adjustor and a button to change the 'backlight' colour;
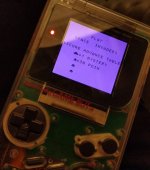
It even has some fake colour palette modes that are quite effective.
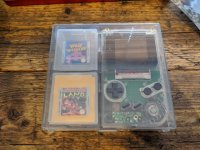
Here it is powered off, in the storage box I mentioned earlier;
An easy mod, and well worth the ~£40 it cost.
So after this, I was now interested in Game Boys. It was around the time that MVG was releasing videos about how the graphics worked in them (GB,GBC and GBA). I was curious and wanted to see what the newer ones were like too. I bought a tatty GBA for £20, with case and some games.
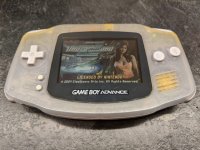
It was very yellowed (meant to be glacier!), I'm no stranger to retrobrighting and having watched Odd Tinkering's video on restoring one. I thought I'd do similar.
However.. that screen. ARGH!
There are two screen upgrade options for the GBA, one is the AGS-101 screen from the GBA-SP which I think is a TN panel, but backlight. Or an IPS (V2) kit. I want viewing angles, and brightness so went with the IPS.
To fit either screen requires the case to be cut slightly - and when ordering the screen it was only about £7 to buy a pre-modded full replacement shell, so I did that.
and then left it on my desk for ages as I've got too many projects on the go;
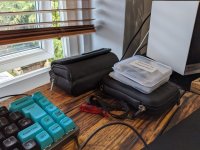
finally got some time to work on it;
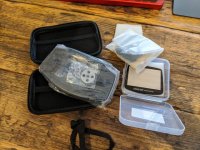
fitted the front (glass) lens;
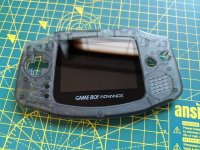
I wanted to test the screen before going much further;
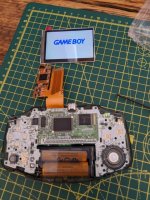
All good, so I continued. There's a little bit more soldering (3 wires in total) for this mod - you can omit them but doing so allows you to control the backlight by holding 'Select' and tapping L or R. This wires are little awkward to then route through - but not a pair of tweezers and some choice words doesn't fix.
Tada!
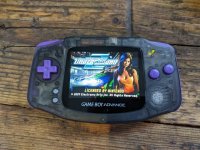
I wasn't sure about the grey Start / Select buttons whilst building it but once finished I think they balance with the speaker and text well.
I'm not keen on using AA batteries, the case I have for this is compact and I don't want to carry spare batteries. Everything should USB charge, so that's what I wanted here. The 'proper' GBA USB battery packs are expensive, not worth it imo - so I bought an XBox One controller battery pack and modified that.
The battery compartment needs trimming too - as well as the battery cover, but I'm pleased with it.
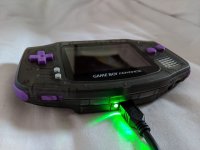
Onto games, rather than trying to buy all the carts I wanted - I opted to get an EZ Flash Omega - as this meant I could keep it all in the compact case too. As a bonus it also plays Master System, Game Gear and NES games.
It even matches the shell colours!
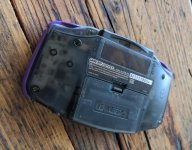
There we go then, thought some might find this interesting
It's really cool as it's one of the Play It Loud models, with the clear case. It also came with games, and the clear protective case that holds the Game Boy and games.

I played on it for a bit, before my wife stole it off me to play on it instead! A short time later we both agreed that the screen wasn't great - we're spoilt with modern display tech.
After looking at doing backlight mods, I ended up putting it to one side as I was worried about destroying the original screen. Then I saw a new IPS mod for it, that replaced the entire front PCB and required no risky work to ribbon cables.
I don't have any photos of that being done, but it was simple enough - with some minor cuts to the case, and soldering on the speaker;

This screen is so much better, the contrast wheel has been changed for a rotary encoder - it doubles as a brightness adjustor and a button to change the 'backlight' colour;

It even has some fake colour palette modes that are quite effective.
Here it is powered off, in the storage box I mentioned earlier;

An easy mod, and well worth the ~£40 it cost.
So after this, I was now interested in Game Boys. It was around the time that MVG was releasing videos about how the graphics worked in them (GB,GBC and GBA). I was curious and wanted to see what the newer ones were like too. I bought a tatty GBA for £20, with case and some games.

It was very yellowed (meant to be glacier!), I'm no stranger to retrobrighting and having watched Odd Tinkering's video on restoring one. I thought I'd do similar.
However.. that screen. ARGH!
There are two screen upgrade options for the GBA, one is the AGS-101 screen from the GBA-SP which I think is a TN panel, but backlight. Or an IPS (V2) kit. I want viewing angles, and brightness so went with the IPS.
To fit either screen requires the case to be cut slightly - and when ordering the screen it was only about £7 to buy a pre-modded full replacement shell, so I did that.
and then left it on my desk for ages as I've got too many projects on the go;

finally got some time to work on it;

fitted the front (glass) lens;

I wanted to test the screen before going much further;

All good, so I continued. There's a little bit more soldering (3 wires in total) for this mod - you can omit them but doing so allows you to control the backlight by holding 'Select' and tapping L or R. This wires are little awkward to then route through - but not a pair of tweezers and some choice words doesn't fix.
Tada!

I wasn't sure about the grey Start / Select buttons whilst building it but once finished I think they balance with the speaker and text well.
I'm not keen on using AA batteries, the case I have for this is compact and I don't want to carry spare batteries. Everything should USB charge, so that's what I wanted here. The 'proper' GBA USB battery packs are expensive, not worth it imo - so I bought an XBox One controller battery pack and modified that.
The battery compartment needs trimming too - as well as the battery cover, but I'm pleased with it.

Onto games, rather than trying to buy all the carts I wanted - I opted to get an EZ Flash Omega - as this meant I could keep it all in the compact case too. As a bonus it also plays Master System, Game Gear and NES games.
It even matches the shell colours!

There we go then, thought some might find this interesting

Last edited:

