Associate
- Joined
- 31 Jan 2015
- Posts
- 8
New Build Log: The King Julian Project (i finely named it  )
)
UPDATE:- I Finely worked out a name, which sums up the entire build and is one of my favorite characters/ Animals (i know its sad isnt it)
Welcome to The King Julian Project
Good Afternoon all hope your well and you all had a great weekend.
My name is Nate I’m 29, I’m a systems admin for the USAF (British national), I’m a typical geek, who shamefully has to admit to owning a few collectables and also crying to the Last Of Us (don't ask the game is very sad lol).
I decided to log my build, join a awesome community of like minded geeks and nerds, and hopefully get some additional hints and tips on my build and just enjoy the ride, this isn’t my first custom build but it is my first build log so hopefully the grammar and spelling won’t be too bad. (and its not to long)
The specification was simple, it shouldn't cost any more than £1500, (with an additional £300 as overspill for any little nerdy goodies that I may see like paint, water cooling, broken parts if i got over excited with a drill or jigsaw etc) it had to play every game available at a minimum of 40 FPS on High or Ultra. (My monitor for my console gaming only outputs at 60fps so anything higher for now would be unreasonable) and be future proof for up to 1.5 years. It also had to be fully water-cooled using a completely custom loop, with potential to upgrade the cooling in the future, and it also had to be completely unique, something i designed and build and not similar to others. (Wow tall order i know)
Now I’ll be honest this build won’t be immediate, i don’t have the available fund to build it all at once, I'm hoping that i can get all the parts and finish it by the latest April. It’s a long time away, but i have plenty of build time to get it right, drinking plenty of tea alone the way as well as doing lots of mods to lots of painting and loads of people here to chat to.
So let’s move on, I’ll start the parts I’ve got and the modifications I’ve done so far of course things will change ill update this as much as i can and as regularly as i can. Also im happy to recommend suppliers but I’m not sure if I’m allowed to do that (if someone could let me know ill happily add those I’ve brought from: D)
The Case Corsair Vengeance Series Black C70 Mid Tower Computer Case
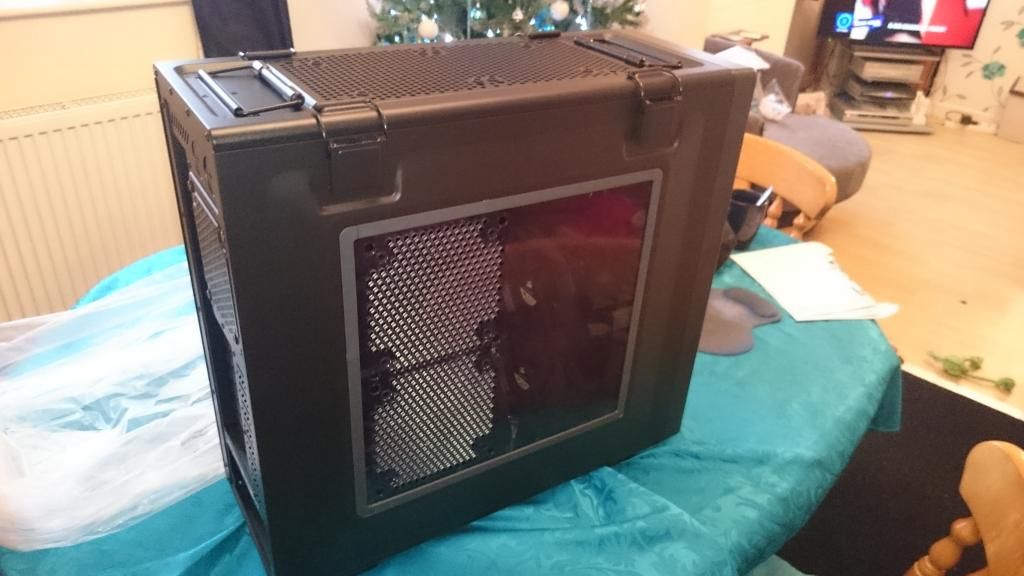
Now this was a bit of a mistake, I used to preach to those i taught on building rigs not to buy the case until your design was set in concrete, plans change, the build grows and you end up changing it or deciding on a bigger or smaller case. i broke this strict rule i setup and in my excitement i went out and picked up a Corsair C-70 Case. Now this case is awesome, but its a tad old and doesn’t really support mass growth, and to be honest its been a proper nightmare to work on, and i really should have given up and brought another one, but im very stubborn and refuse to be beaten (its the nerd inside me)
The work so far has included
Adding a custom bottom tray to the base of the case, this is to hide the power supply and its cables and in the future hiding the water cooling drain plug and some of the piping.
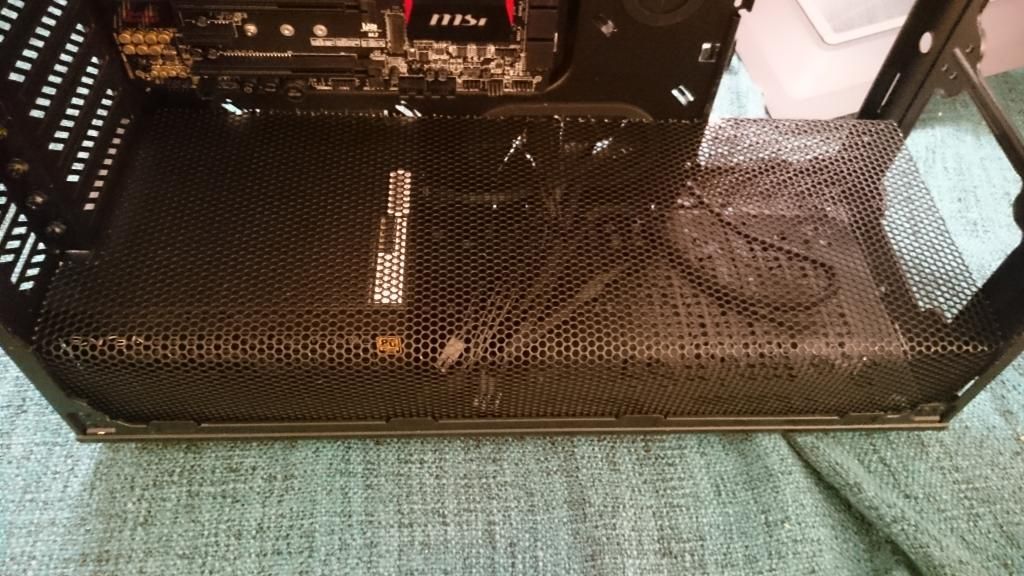
Removed all hard drive caddies and trimmed the edge where the drive slides into
Drilled and fitted mounting screws to the top mounted radiator
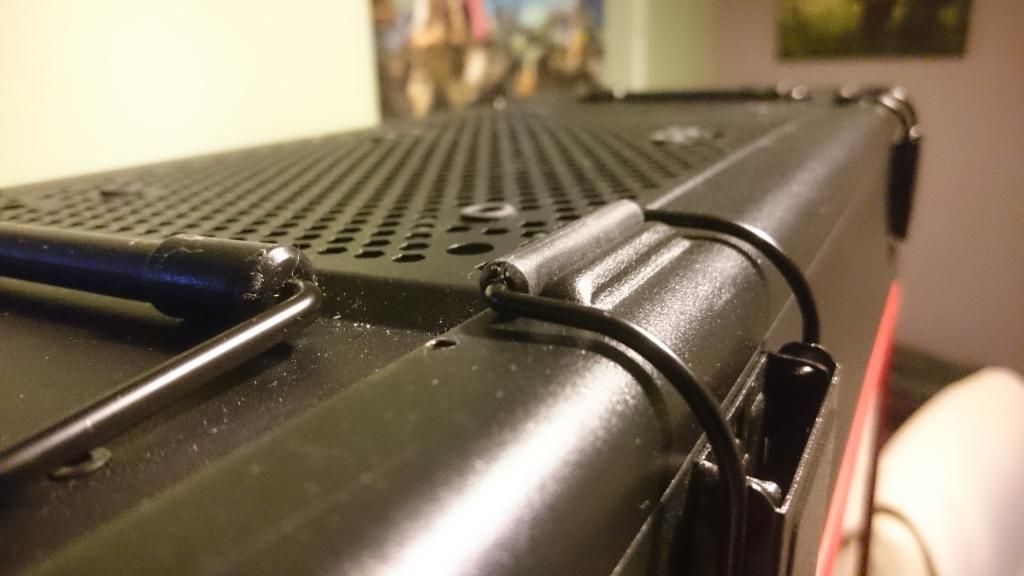
Drilled an entrance hold for the Prima-Chilled Red water colour tubing to loop back into
Drilled and removed the rear water cooling holes and fitted rubber grommets to the rear case
The Power Supply, EVGA Super NOVA 850W PC Power Supply (owned)
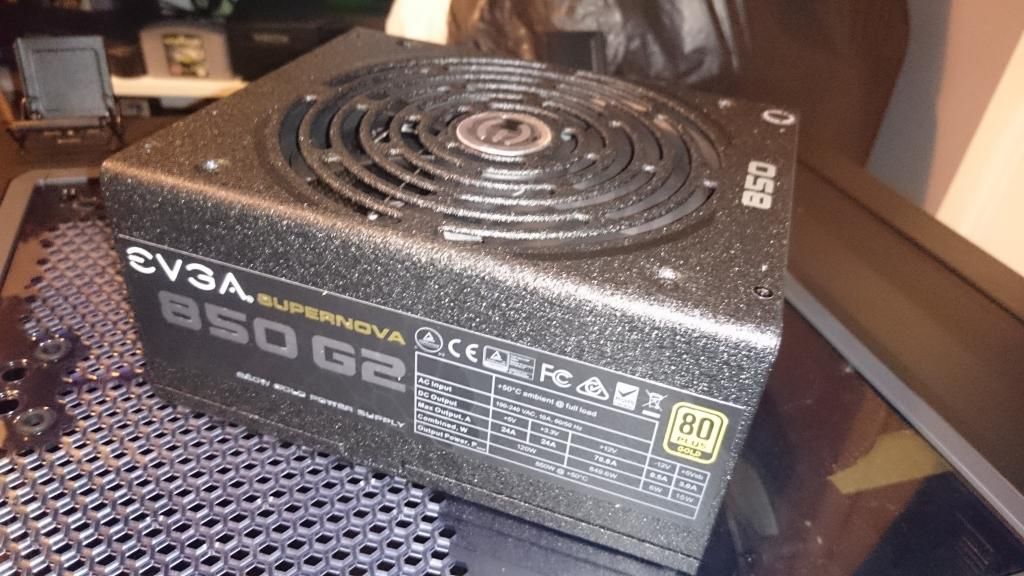
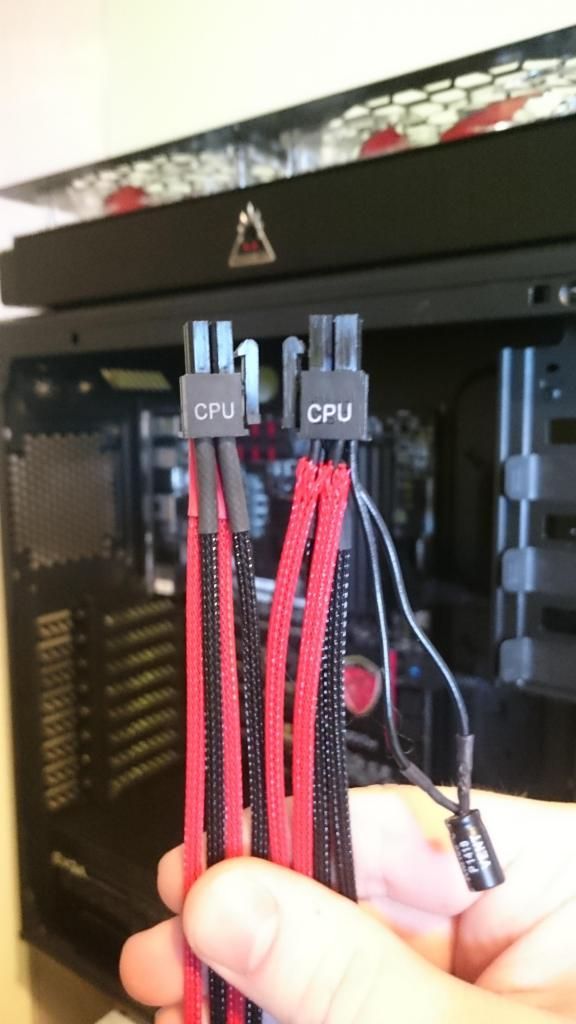
Nothing much to say here, its very powerful, well built and quiet but i did have a lot of issues with the braiding, so be warned those who attempt it, it cost me a small fortune and i ended up buying the Cable Mod gear. (There is a stupid resistor on each cable; if you want to braid it properly you will need a full crimp tool and crimps) Shame EVGA did this hopefully their future products will be slightly better. The Picture below shows some of the issues, ill upload a picture shortly of the awesome cable mod gear (expensive but saved my sanity)
Motherboard MSI Z97 Gaming 7
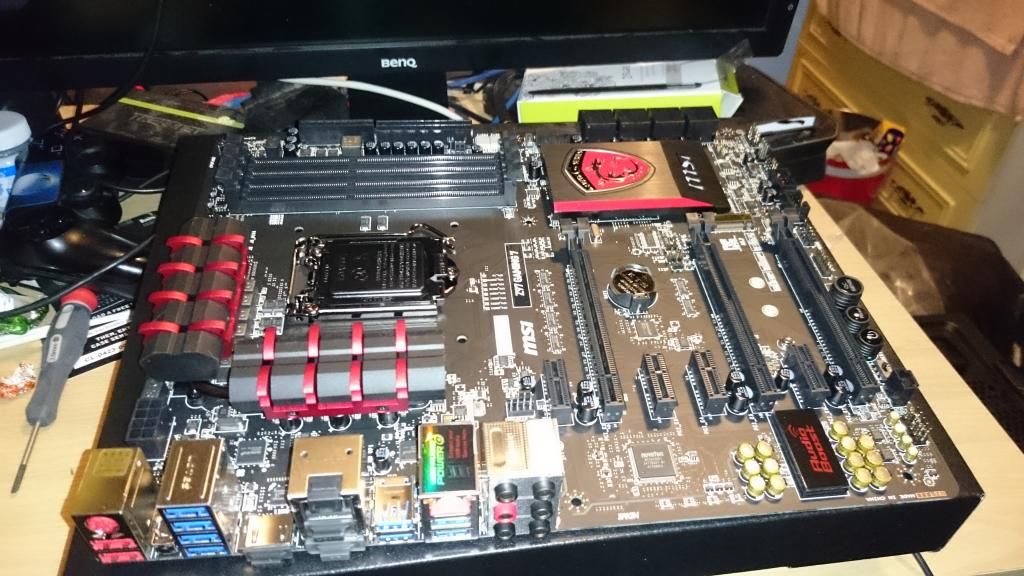
I’m a big fan of MSI. They have grown there company and have gone from strength to strength. This board had a mix of good quality components that i was after. It hit the budget perfect and had the upgradeability i was looking for, so no brainer there. Only thing is, maybe someone can help, the MSI Logo on the board is brilliant white, can this be changed to red to match my build?
Water-Cooling Kit
So now we get the big daddy, the water cooling kit. I wanted it big, it wasn’t just about performance but also about the look of the build. Now some of you will probably be think what the hell?, but like i said above this build had to be unique, something so outlandish and extreme but also on a bit of a budget. I researched a lot of kits, a lot reservoirs, radiators pumps, tubing, fittings etc. I found a kit that matched my absurd need for over the top looks a Phobya Pure Performance 400LT Intel Water-cooling Kit. It cost just £150 with delivery, and came with pretty much everything I needed and enough for me to trade without me breaking the bank. The radiator was a huge 400mm beast with 2x 200mm cooling fans.
The reservoir was equally large at 250mm
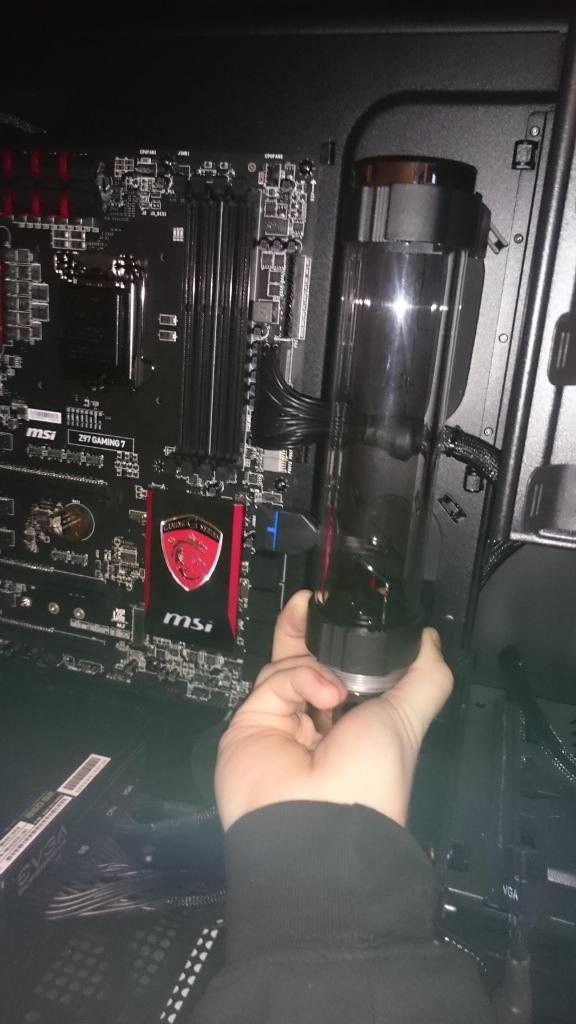
and the CPU cooler was recommended through a number other sites. The pump, tubing and fittings were to be traded in and a more powerful pump and larger tubing to be brought later.
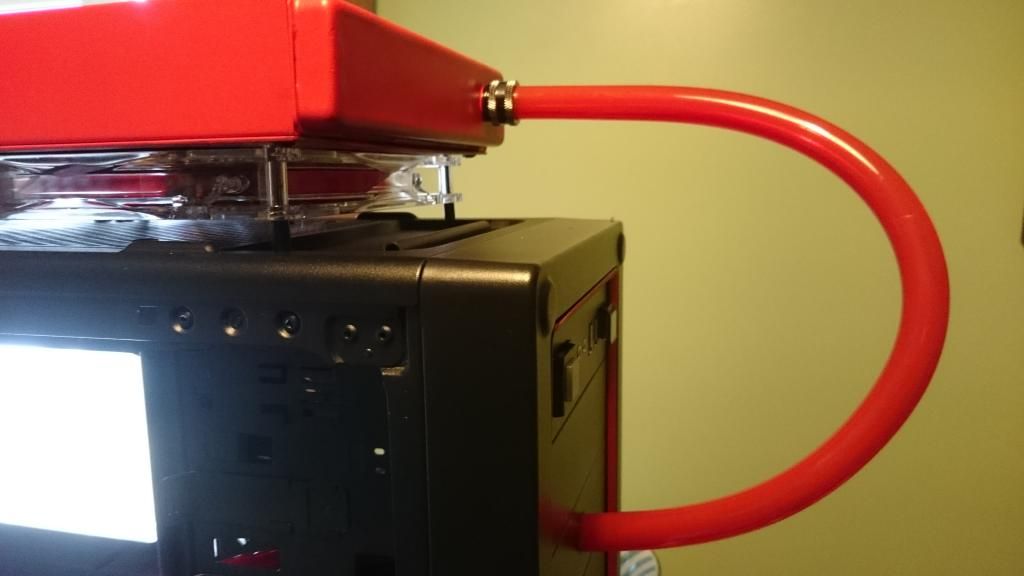
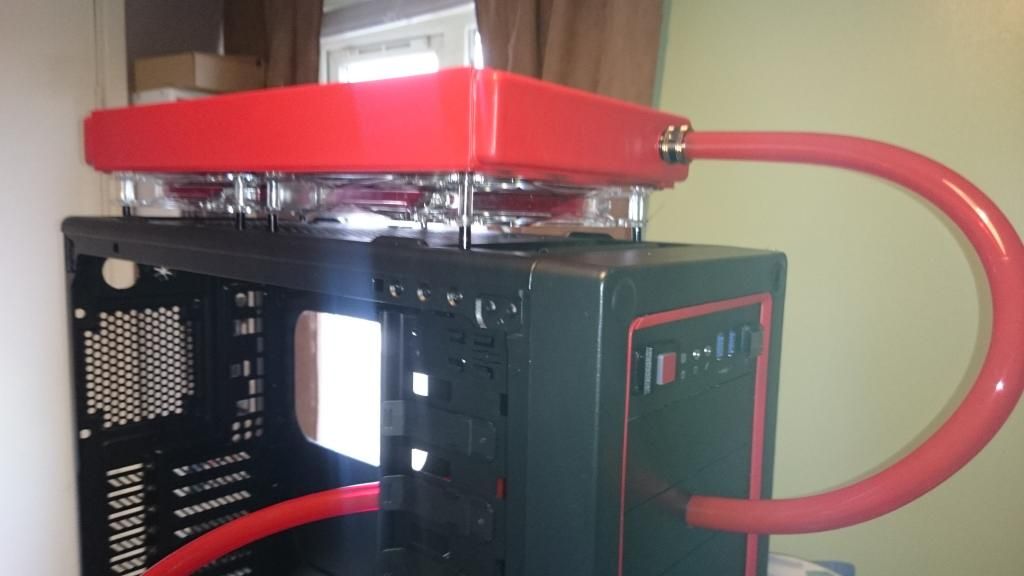
The radiator is so huge that ive custom fitted some small mounting screws and plastic spacers and fitted that to the top of the case.
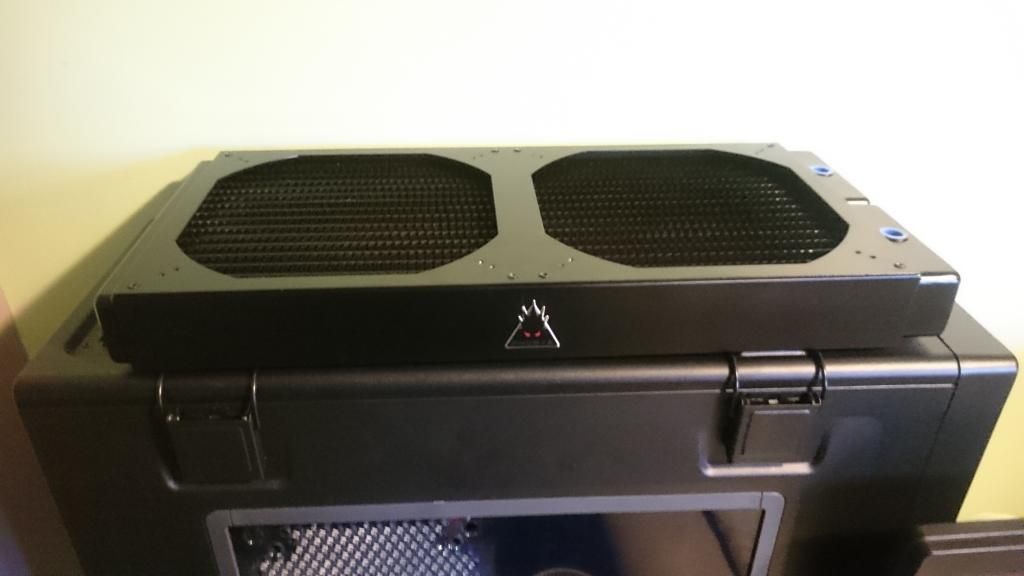
Ive also picked up a Alpha VPP655 PWM G14 Plex top water pump.
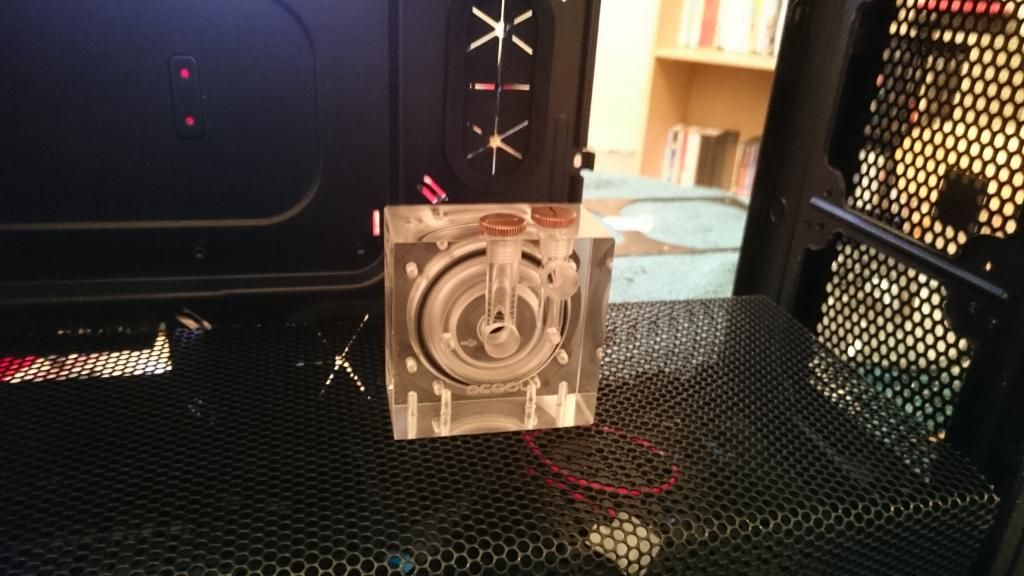
For the pump to fit in the case, im working on a custom mounting stand that sits just slightly below the bottom tray. So you still see the awesome pump and liquid churning, but its also low enough to see the reservoir.
And thats it so far for the text side, think ive written enough there, ive put some pictures below of the actual modification work, there will be some more to come (got to wind up the dial up to get it to upload in a timely manner)
The entire build will mimic a breathing AI system, with the red pipe flowing out to the top radiator, looping back round the front to the inside reservoir.
Phew grab your self a cup of tea after reading that. And sit back and browse the following pictures. More to come
Now the work ive done this weekend has been to completely transform the case, and get everything mounted ready for the next stage of the build.
I also picked up another 240mm Alpha cool radiator, and have mounted this to the front. Below are the pics of how its been going.
Test Fit, Looking Good
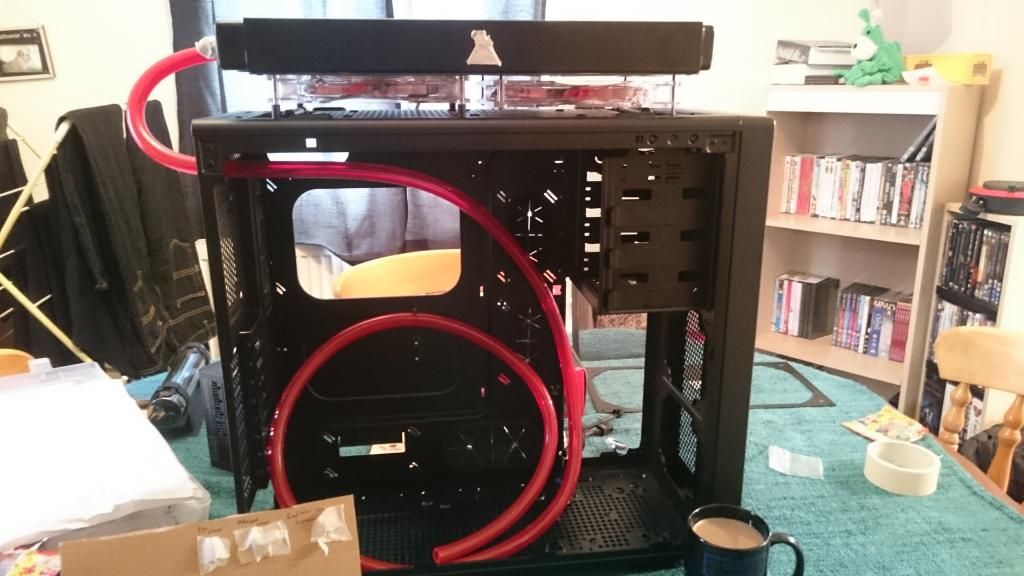
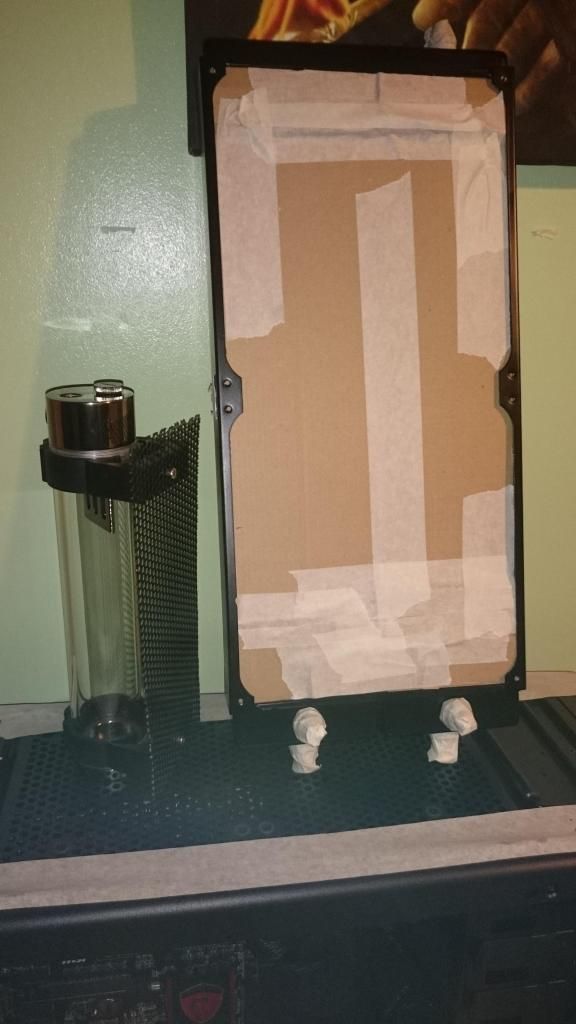
Masking Done, Oh and made a floating mesh panel for the resevouir
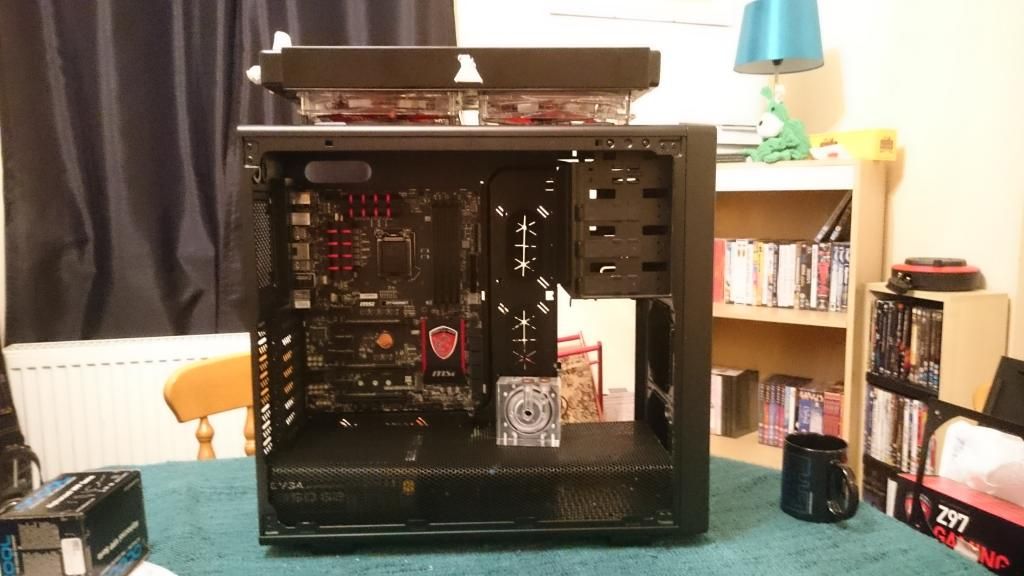
A complete test fit before paint
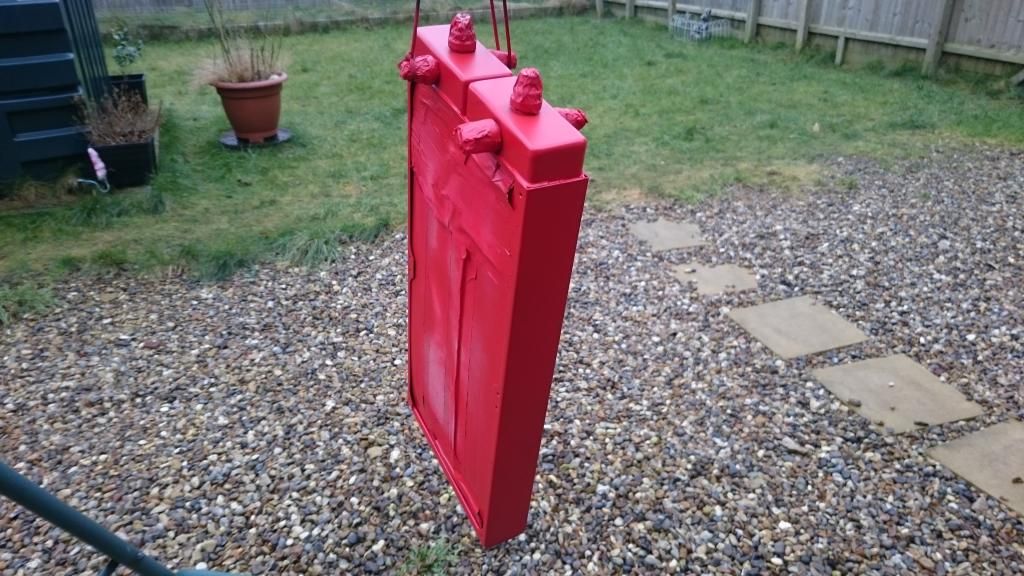
Let the Painting begin (dont judge im not fantastic )
) 
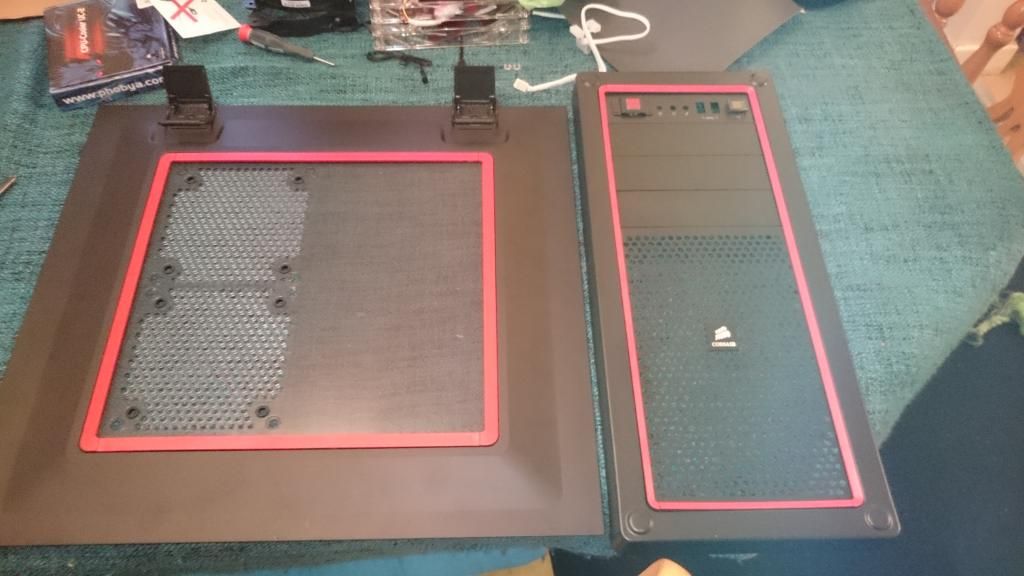
Front And Side Bezel Painted
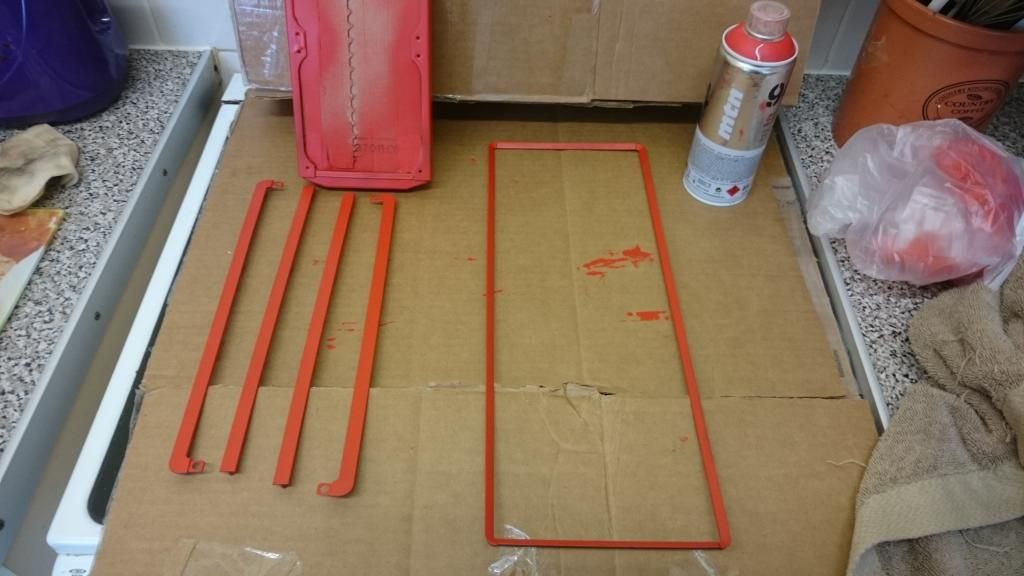
Finished Panels (just waiting for the clear panel to arrive )
)
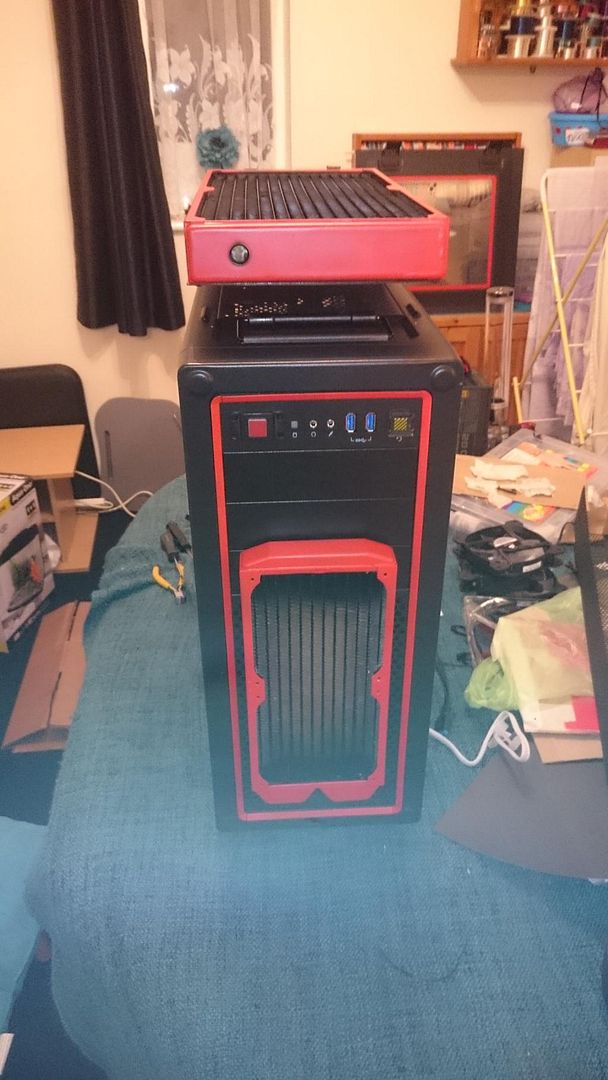
Radiators Mounted, Looking sexy
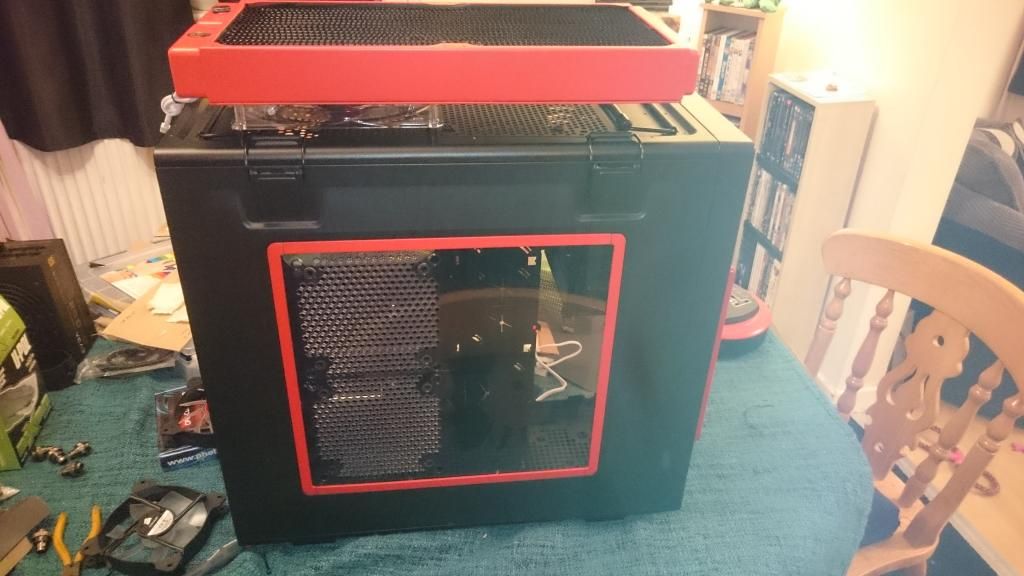
Side Action Shot (waiting for some 50mm M3 screws to arrive to fit the front 200mm fan, the corsair case has a fat lip at the front, which i hadnt predicted "DOH"
New Photo Of The Finished Bottom Tray. Note the gap between each end, this is to allow for easy removal its actually not that noticable when the front is replaced.
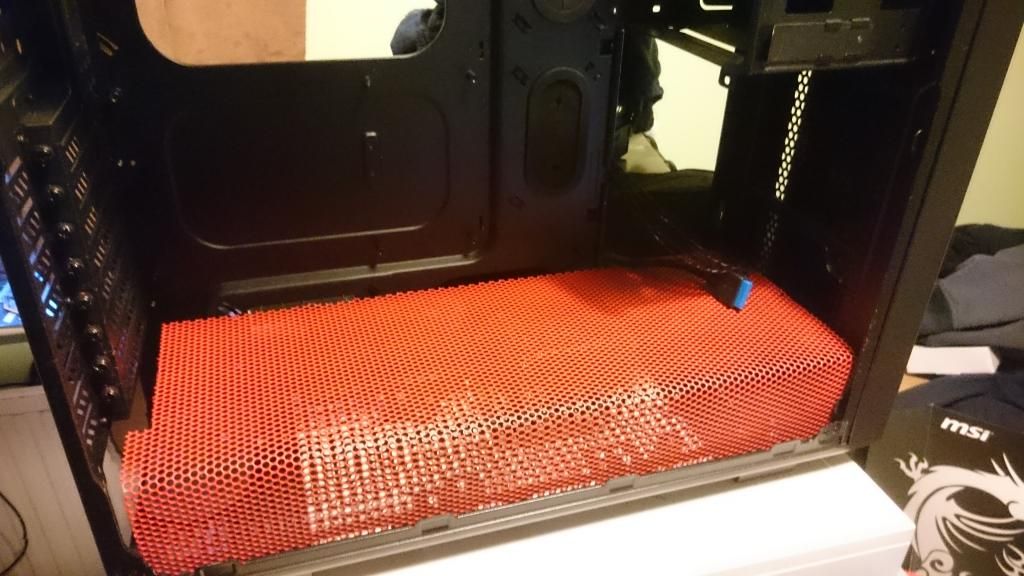
And a little close up in the light showing that awesome red (on the can it says intense red, it defiantly is intense, and i really like it
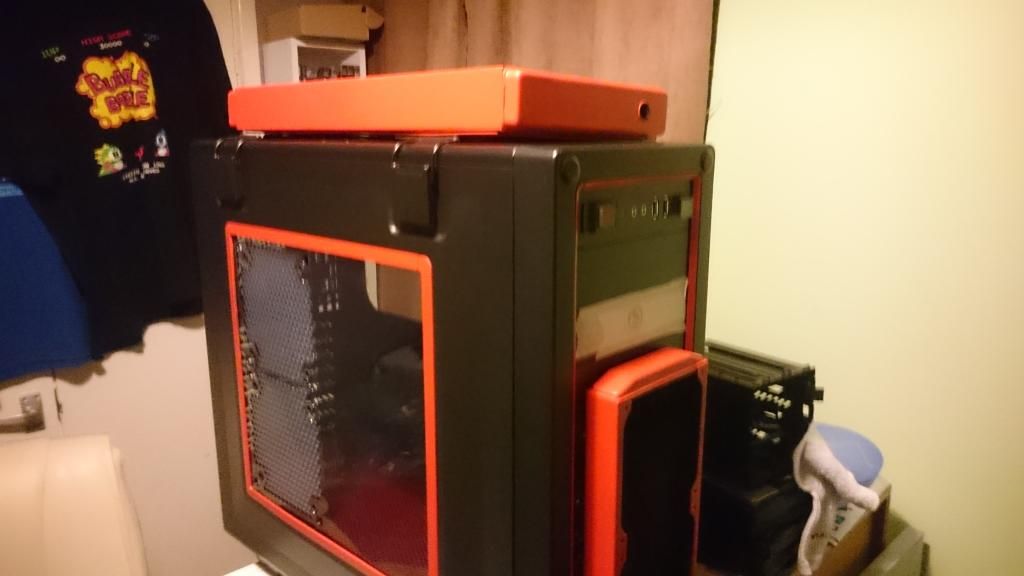
Some new pictures
Top radiator mounted perfect, front radiator is also mounted i place, will need 1 more coat of paint but looking good. As this build is all about Over the top insanity, i decided to mount and feed all the pipes outside as well
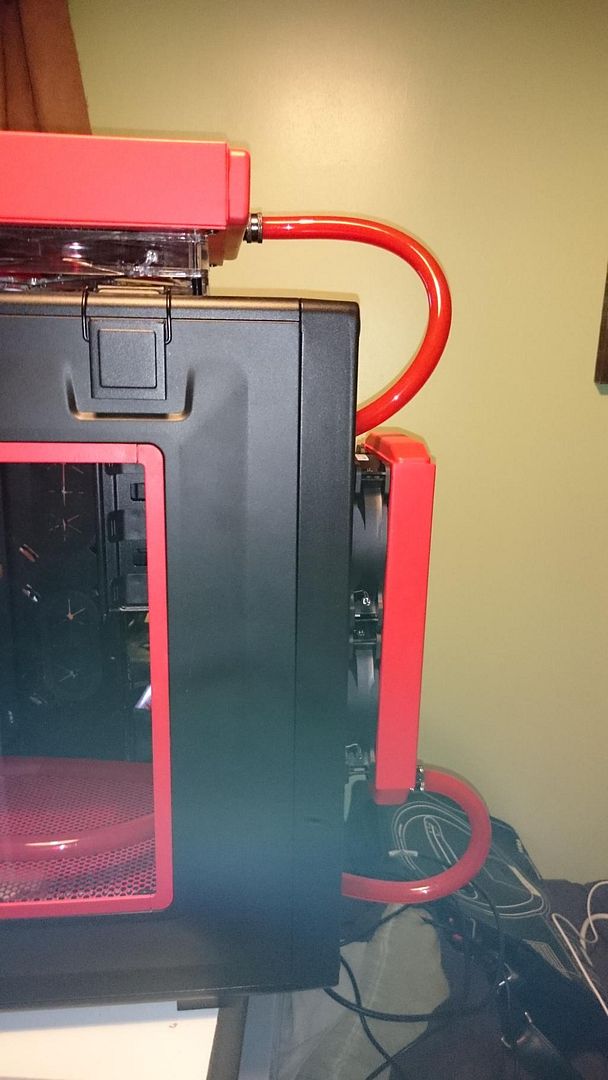

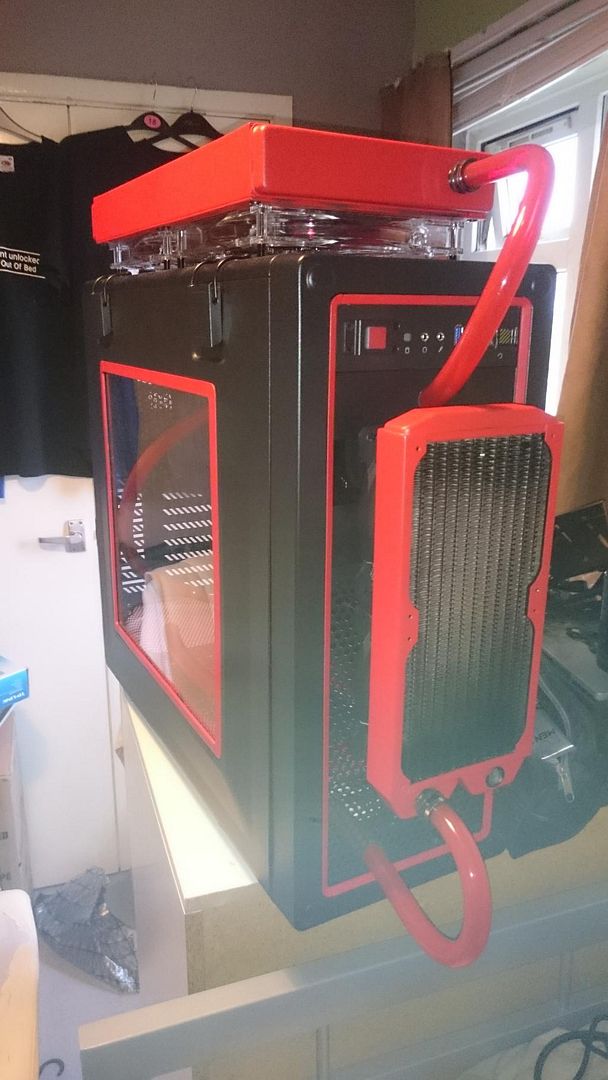
Because its mesh fronted, making a hole for the tubing was going to end up being messy, so ill be fitting some rubber gromits to tidy up the mess
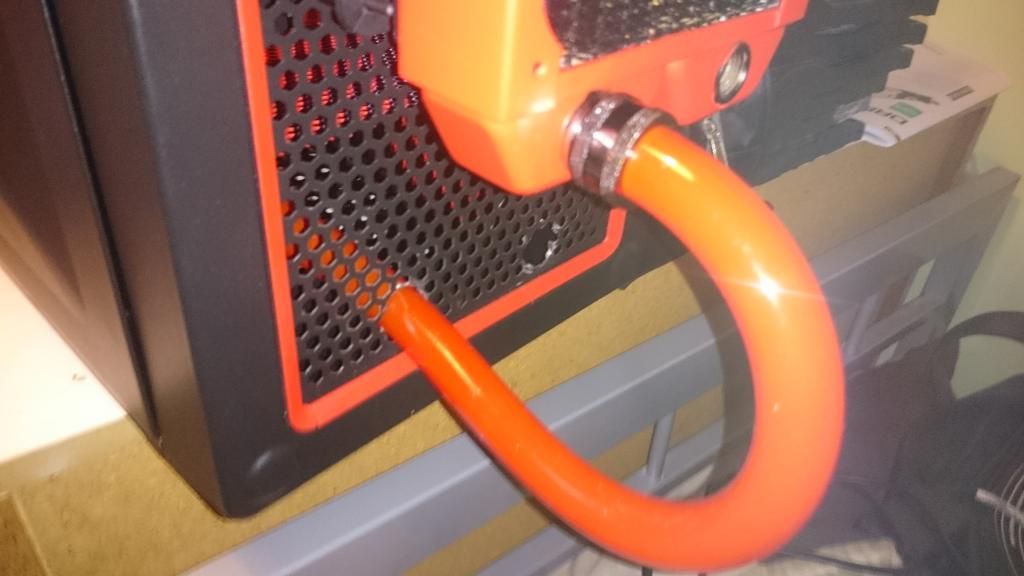
Thats it for now
Lots more pictures to come and of course ill keep it updated.
Also please throw over any ideas for a name, any suggestions on changes etc and please let me know what you think
Nate
 )
)UPDATE:- I Finely worked out a name, which sums up the entire build and is one of my favorite characters/ Animals (i know its sad isnt it)
Welcome to The King Julian Project
Good Afternoon all hope your well and you all had a great weekend.
My name is Nate I’m 29, I’m a systems admin for the USAF (British national), I’m a typical geek, who shamefully has to admit to owning a few collectables and also crying to the Last Of Us (don't ask the game is very sad lol).
I decided to log my build, join a awesome community of like minded geeks and nerds, and hopefully get some additional hints and tips on my build and just enjoy the ride, this isn’t my first custom build but it is my first build log so hopefully the grammar and spelling won’t be too bad. (and its not to long)
The specification was simple, it shouldn't cost any more than £1500, (with an additional £300 as overspill for any little nerdy goodies that I may see like paint, water cooling, broken parts if i got over excited with a drill or jigsaw etc) it had to play every game available at a minimum of 40 FPS on High or Ultra. (My monitor for my console gaming only outputs at 60fps so anything higher for now would be unreasonable) and be future proof for up to 1.5 years. It also had to be fully water-cooled using a completely custom loop, with potential to upgrade the cooling in the future, and it also had to be completely unique, something i designed and build and not similar to others. (Wow tall order i know)
Now I’ll be honest this build won’t be immediate, i don’t have the available fund to build it all at once, I'm hoping that i can get all the parts and finish it by the latest April. It’s a long time away, but i have plenty of build time to get it right, drinking plenty of tea alone the way as well as doing lots of mods to lots of painting and loads of people here to chat to.
So let’s move on, I’ll start the parts I’ve got and the modifications I’ve done so far of course things will change ill update this as much as i can and as regularly as i can. Also im happy to recommend suppliers but I’m not sure if I’m allowed to do that (if someone could let me know ill happily add those I’ve brought from: D)
The Case Corsair Vengeance Series Black C70 Mid Tower Computer Case

Now this was a bit of a mistake, I used to preach to those i taught on building rigs not to buy the case until your design was set in concrete, plans change, the build grows and you end up changing it or deciding on a bigger or smaller case. i broke this strict rule i setup and in my excitement i went out and picked up a Corsair C-70 Case. Now this case is awesome, but its a tad old and doesn’t really support mass growth, and to be honest its been a proper nightmare to work on, and i really should have given up and brought another one, but im very stubborn and refuse to be beaten (its the nerd inside me)
The work so far has included
Adding a custom bottom tray to the base of the case, this is to hide the power supply and its cables and in the future hiding the water cooling drain plug and some of the piping.

Removed all hard drive caddies and trimmed the edge where the drive slides into
Drilled and fitted mounting screws to the top mounted radiator

Drilled an entrance hold for the Prima-Chilled Red water colour tubing to loop back into
Drilled and removed the rear water cooling holes and fitted rubber grommets to the rear case
The Power Supply, EVGA Super NOVA 850W PC Power Supply (owned)

Nothing much to say here, its very powerful, well built and quiet but i did have a lot of issues with the braiding, so be warned those who attempt it, it cost me a small fortune and i ended up buying the Cable Mod gear. (There is a stupid resistor on each cable; if you want to braid it properly you will need a full crimp tool and crimps) Shame EVGA did this hopefully their future products will be slightly better. The Picture below shows some of the issues, ill upload a picture shortly of the awesome cable mod gear (expensive but saved my sanity)

Motherboard MSI Z97 Gaming 7

I’m a big fan of MSI. They have grown there company and have gone from strength to strength. This board had a mix of good quality components that i was after. It hit the budget perfect and had the upgradeability i was looking for, so no brainer there. Only thing is, maybe someone can help, the MSI Logo on the board is brilliant white, can this be changed to red to match my build?
Water-Cooling Kit
So now we get the big daddy, the water cooling kit. I wanted it big, it wasn’t just about performance but also about the look of the build. Now some of you will probably be think what the hell?, but like i said above this build had to be unique, something so outlandish and extreme but also on a bit of a budget. I researched a lot of kits, a lot reservoirs, radiators pumps, tubing, fittings etc. I found a kit that matched my absurd need for over the top looks a Phobya Pure Performance 400LT Intel Water-cooling Kit. It cost just £150 with delivery, and came with pretty much everything I needed and enough for me to trade without me breaking the bank. The radiator was a huge 400mm beast with 2x 200mm cooling fans.
The reservoir was equally large at 250mm

and the CPU cooler was recommended through a number other sites. The pump, tubing and fittings were to be traded in and a more powerful pump and larger tubing to be brought later.
The radiator is so huge that ive custom fitted some small mounting screws and plastic spacers and fitted that to the top of the case.

Ive also picked up a Alpha VPP655 PWM G14 Plex top water pump.

For the pump to fit in the case, im working on a custom mounting stand that sits just slightly below the bottom tray. So you still see the awesome pump and liquid churning, but its also low enough to see the reservoir.
And thats it so far for the text side, think ive written enough there, ive put some pictures below of the actual modification work, there will be some more to come (got to wind up the dial up to get it to upload in a timely manner)
The entire build will mimic a breathing AI system, with the red pipe flowing out to the top radiator, looping back round the front to the inside reservoir.
Phew grab your self a cup of tea after reading that. And sit back and browse the following pictures. More to come
Now the work ive done this weekend has been to completely transform the case, and get everything mounted ready for the next stage of the build.
I also picked up another 240mm Alpha cool radiator, and have mounted this to the front. Below are the pics of how its been going.
Test Fit, Looking Good

Masking Done, Oh and made a floating mesh panel for the resevouir

A complete test fit before paint


Let the Painting begin (dont judge im not fantastic
 )
) 
Front And Side Bezel Painted

Finished Panels (just waiting for the clear panel to arrive
 )
)
Radiators Mounted, Looking sexy


Side Action Shot (waiting for some 50mm M3 screws to arrive to fit the front 200mm fan, the corsair case has a fat lip at the front, which i hadnt predicted "DOH"

New Photo Of The Finished Bottom Tray. Note the gap between each end, this is to allow for easy removal its actually not that noticable when the front is replaced.

And a little close up in the light showing that awesome red (on the can it says intense red, it defiantly is intense, and i really like it


Some new pictures
Top radiator mounted perfect, front radiator is also mounted i place, will need 1 more coat of paint but looking good. As this build is all about Over the top insanity, i decided to mount and feed all the pipes outside as well


Because its mesh fronted, making a hole for the tubing was going to end up being messy, so ill be fitting some rubber gromits to tidy up the mess

Thats it for now

Lots more pictures to come and of course ill keep it updated.
Also please throw over any ideas for a name, any suggestions on changes etc and please let me know what you think
Nate
Last edited:


 ..
..