Hi all,
Been planning this build for a while, and thought I'd post a few pics up as people have been very helpful, and it's a way of saying thanks! I have also used the CoolIT ECO as a cooling solution, and have had a couple of requests to give some feedback on it, so some details of that will be included too.
I was replacing my Q6600, Asus P5Q pro and 4870 512 MB, so the Antec 300 case, drives and Corsair 650w psu have been recycled for this build.
New components are:
Intel 2500k cpu
MSI P67A-G45 mobo
4GB Corsair XMS3 RAM
MSI 6950 2GB
CoolIT ECO watercooling
And here they are!

Some unpacked pics as well, the P67A

And the board itself, which I think looks pretty nice

6950 (Huge compared to my old 4870!)

and the CoolIT

Close up of the heat plate and pre-applied TIM

And of the fan and rad

Then on to the build itself...
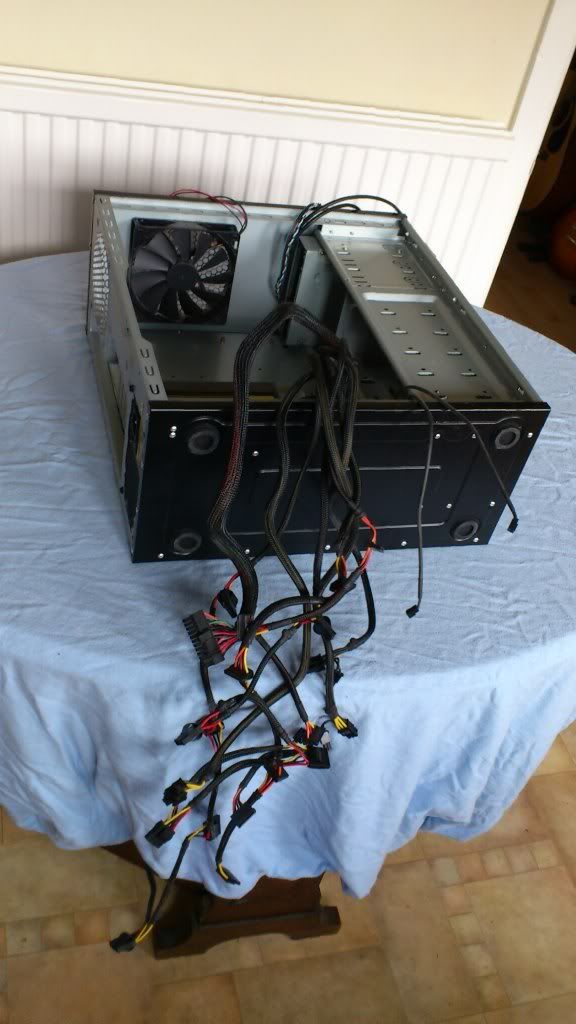
The Antec 300 with old parts stripped out, given a good clean (and me wishing I had spent the extra on a modular PSU)

Motherboard with CPU, RAM and CoolIT backplate in place

The CoolIT was a bit fiddly to fit. The back plate went on very nicely, but the hand screws on the cpu head unit unit were a bit of a pain as they weren't easy to align properly. A second pair of hands to hold the fan unit would have helped as well (wives are never around when you need them to be...) I ended up having to reseat it after booting as temps were high, and the TIM hadn't spread evenly due to it not sitting properly. Fitting the fan/rad was fine though - the stiff tubing actually helps a little here. Having said that, it was much easier than my old Tuniq tower! Incidentally, having 2 fans in a push/pull configuration wouldn't be possible in this case as the extra size would obscure the cpu power socket. Here it is all installed

Most of the power cables plugged in (really wanting a modular PSU now!) and the 6950 added. The card just fits, it has to be placed in at an angle it get it past the top of the HDD cage, and if I had more drives I would have been in trouble at this point... Unfortunately, I couldn't route the cpu power through teh back of the case either, and so the only way to plug it in was to bring it over the top of the graphics card which was very annoying. Next build I think I'll be investing in a bigger case with proper cable routing.

The finished thing. Cabling looks absolutely horrible, and it is far from great, but it doesn't obscure air flow too much and looks far worse in the pic than it actually is. If anyone has suggestions to how to improve it, bearing in mind I can't route behind the motherboard support plate, I'd be very grateful!

And on my equally messy desk (Normally lives under it)

Then the fun begins!!
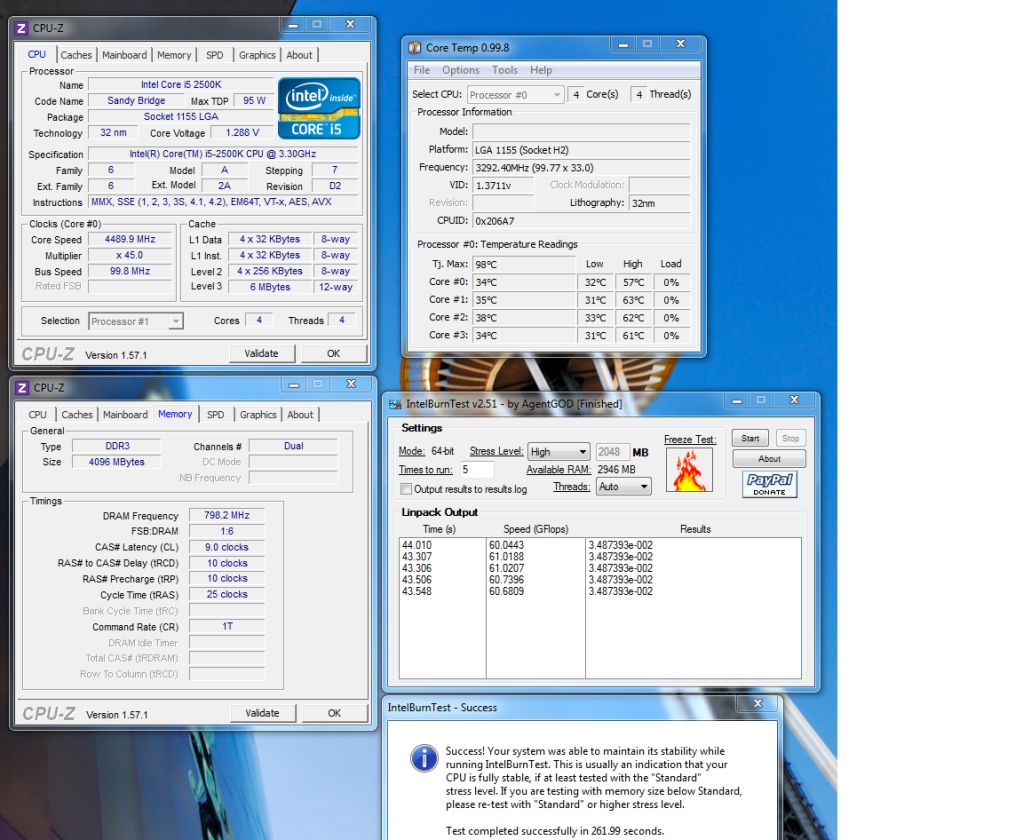
The CoolIT seems to be doing a pretty good job (after reseating), at stock, the cpu idles in the low 30s, and load temps were high 40s, so I got overclocking
I have it 4.5GHz at the moment, running very stable, max temp is 63 degrees (though one core peaks at 57) and at 1.29 volts. Still want to try pushing it a bit further, and I haven't tried lower voltage than this yet either, but I will do. As it is I am very happy with 4.5GHz for day to day use Only thing is memory is supposed to be at 9-9-9-24, but it appears to be at 9-10-10-25. Does this matter much? It's set at 1.5v as well and seems very happy. Had the system on constantly for a couple of days and it has been prime95 tested for 4 hours as well as having some long gaming sessions, all the time remaining rock solid.

The CoolIT seems to be doing a great job, low 60s seems like quite a reasonable temperature and I'm sure it would quite happily do the job at higher clock speeds as well, but I'll post back once I have had a chance to push it a bit further. All in all, a very nice bit of kit and I'm very happy with it, and it's especially good if you only have a small case to work with. Two small niggles: 1) I found out that the H50 is £4 cheaper with a code on OCUK a couple of hours after my order was packed... 2) I have it fitted so that it sucks air out of the case through the rad, but would have preferred to have it pulling cool air in as this can help the temps a little. I couldn't do this though as you need a screwdriver with a very narrow shaft (to fit through the screw holes on the upper level of the fan surround)in order to remove the fan and turn it around, and I don't have one that fits. Not a massive issue though, and I will sort it out at some point.
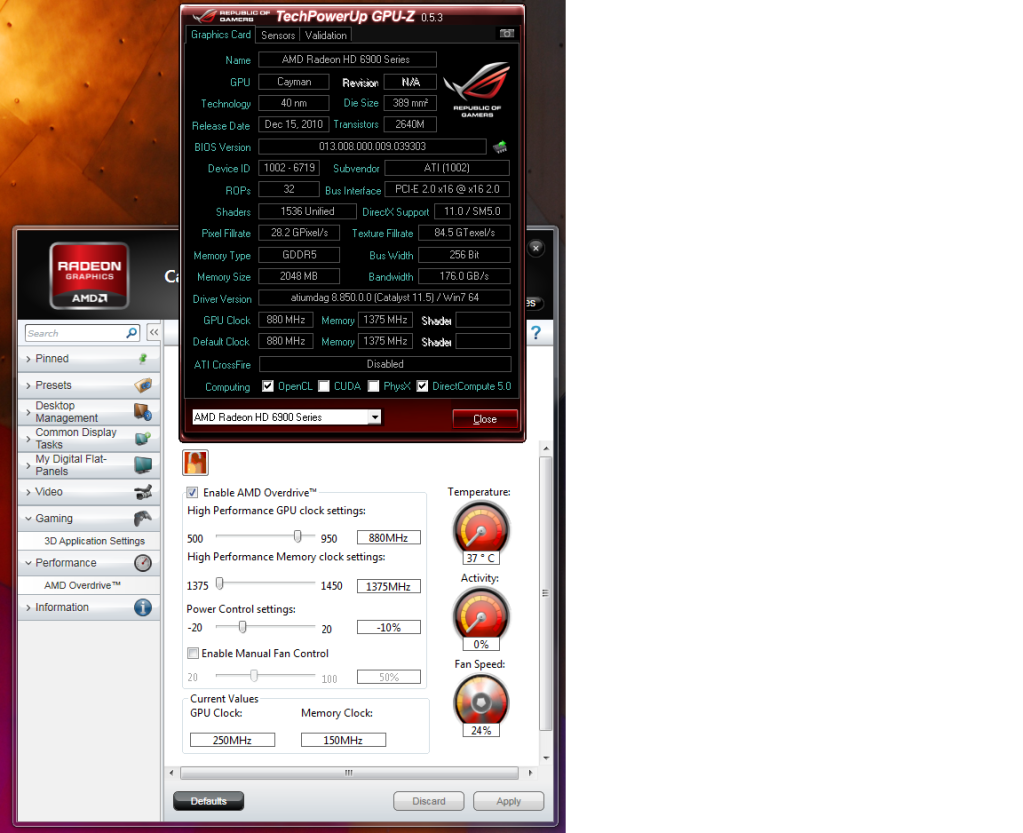
I also flashed the 6950 to a 6970 using the method on the graphics card thread, but set the power control to -10% hoping this would help with temps. Not convinced the power setting has done much, but it has had no adverse affect on stability so I left it like that - unless anyone suggests differently? I was amazed at how simple it was, and again the card seems very stable at these settings. I set the fan speed to 40 in MSI Afterburner when I play games to keep the temps below 80 degrees at load (including when running Heaven 2.5 benchmarks) as it's not too loud at this level, but drop it back to about auto (about 24) when doing other tasks as you can barely hear it then.

I'll probably try pushing the clock on this as well, but it's doing just fine performance wise at the moment so no need to rush.
Next step is to save some pennies for an SSD and maybe a second 6950 while the revision 1s are still available, but at the moment I am happy man
Been planning this build for a while, and thought I'd post a few pics up as people have been very helpful, and it's a way of saying thanks! I have also used the CoolIT ECO as a cooling solution, and have had a couple of requests to give some feedback on it, so some details of that will be included too.
I was replacing my Q6600, Asus P5Q pro and 4870 512 MB, so the Antec 300 case, drives and Corsair 650w psu have been recycled for this build.
New components are:
Intel 2500k cpu
MSI P67A-G45 mobo
4GB Corsair XMS3 RAM
MSI 6950 2GB
CoolIT ECO watercooling
And here they are!

Some unpacked pics as well, the P67A

And the board itself, which I think looks pretty nice


6950 (Huge compared to my old 4870!)

and the CoolIT

Close up of the heat plate and pre-applied TIM

And of the fan and rad

Then on to the build itself...
The Antec 300 with old parts stripped out, given a good clean (and me wishing I had spent the extra on a modular PSU)

Motherboard with CPU, RAM and CoolIT backplate in place

The CoolIT was a bit fiddly to fit. The back plate went on very nicely, but the hand screws on the cpu head unit unit were a bit of a pain as they weren't easy to align properly. A second pair of hands to hold the fan unit would have helped as well (wives are never around when you need them to be...) I ended up having to reseat it after booting as temps were high, and the TIM hadn't spread evenly due to it not sitting properly. Fitting the fan/rad was fine though - the stiff tubing actually helps a little here. Having said that, it was much easier than my old Tuniq tower! Incidentally, having 2 fans in a push/pull configuration wouldn't be possible in this case as the extra size would obscure the cpu power socket. Here it is all installed

Most of the power cables plugged in (really wanting a modular PSU now!) and the 6950 added. The card just fits, it has to be placed in at an angle it get it past the top of the HDD cage, and if I had more drives I would have been in trouble at this point... Unfortunately, I couldn't route the cpu power through teh back of the case either, and so the only way to plug it in was to bring it over the top of the graphics card which was very annoying. Next build I think I'll be investing in a bigger case with proper cable routing.

The finished thing. Cabling looks absolutely horrible, and it is far from great, but it doesn't obscure air flow too much and looks far worse in the pic than it actually is. If anyone has suggestions to how to improve it, bearing in mind I can't route behind the motherboard support plate, I'd be very grateful!

And on my equally messy desk (Normally lives under it)

Then the fun begins!!
The CoolIT seems to be doing a pretty good job (after reseating), at stock, the cpu idles in the low 30s, and load temps were high 40s, so I got overclocking

I have it 4.5GHz at the moment, running very stable, max temp is 63 degrees (though one core peaks at 57) and at 1.29 volts. Still want to try pushing it a bit further, and I haven't tried lower voltage than this yet either, but I will do. As it is I am very happy with 4.5GHz for day to day use
 Only thing is memory is supposed to be at 9-9-9-24, but it appears to be at 9-10-10-25. Does this matter much? It's set at 1.5v as well and seems very happy. Had the system on constantly for a couple of days and it has been prime95 tested for 4 hours as well as having some long gaming sessions, all the time remaining rock solid.
The CoolIT seems to be doing a great job, low 60s seems like quite a reasonable temperature and I'm sure it would quite happily do the job at higher clock speeds as well, but I'll post back once I have had a chance to push it a bit further. All in all, a very nice bit of kit and I'm very happy with it, and it's especially good if you only have a small case to work with. Two small niggles: 1) I found out that the H50 is £4 cheaper with a code on OCUK a couple of hours after my order was packed... 2) I have it fitted so that it sucks air out of the case through the rad, but would have preferred to have it pulling cool air in as this can help the temps a little. I couldn't do this though as you need a screwdriver with a very narrow shaft (to fit through the screw holes on the upper level of the fan surround)in order to remove the fan and turn it around, and I don't have one that fits. Not a massive issue though, and I will sort it out at some point.
I also flashed the 6950 to a 6970 using the method on the graphics card thread, but set the power control to -10% hoping this would help with temps. Not convinced the power setting has done much, but it has had no adverse affect on stability so I left it like that - unless anyone suggests differently? I was amazed at how simple it was, and again the card seems very stable at these settings. I set the fan speed to 40 in MSI Afterburner when I play games to keep the temps below 80 degrees at load (including when running Heaven 2.5 benchmarks) as it's not too loud at this level, but drop it back to about auto (about 24) when doing other tasks as you can barely hear it then.

I'll probably try pushing the clock on this as well, but it's doing just fine performance wise at the moment so no need to rush.
Next step is to save some pennies for an SSD and maybe a second 6950 while the revision 1s are still available, but at the moment I am happy man


 Then either grab some cable ties and make do as best you can, or search online for some proper stick on cable clips, they're pretty cheap.