Associate
- Joined
- 27 Dec 2014
- Posts
- 5
Hi all!
So this is my first time posting a build thread, I intended to start this around 3 years ago when I first started, but sort of forgot.
Bit of background info in case you care, I’ve always wanted to have a go at building my own PC, but was always a bit put off by all of the numbers, versions, fancy names and confusing bits. I settled for buying a Sony VAIO (I’d been told they were a pretty decent laptop to have, so invested around £800 into a top spec one). Here’s the setup as it was…
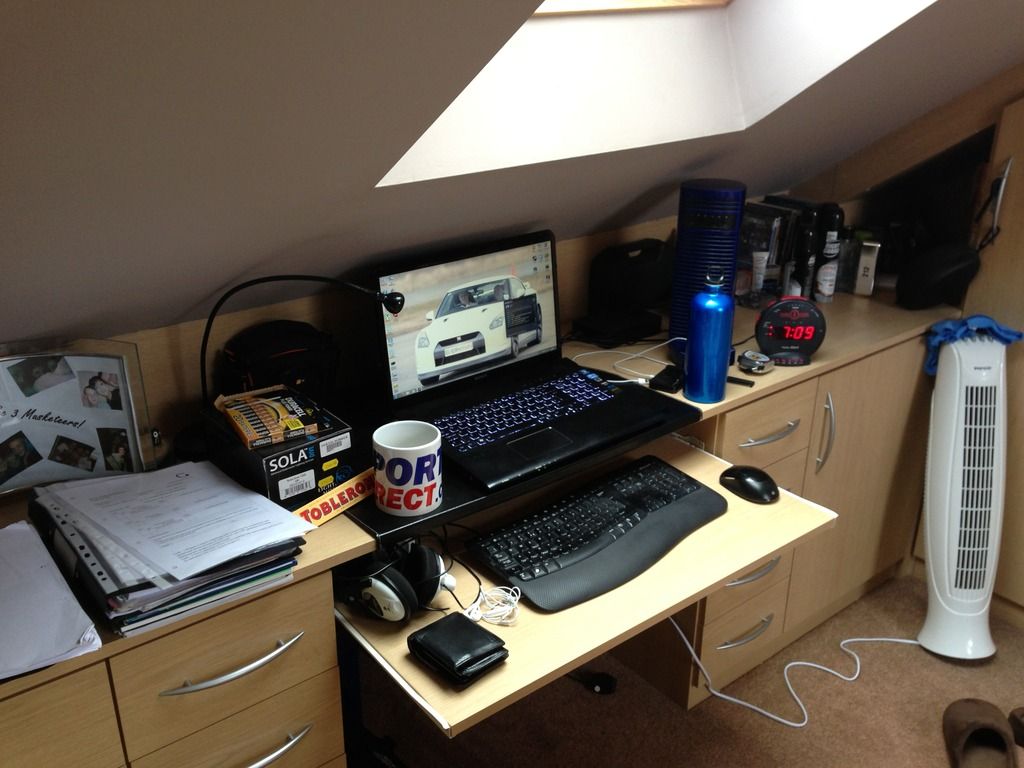
I met a guy at work who turned out to be another user on here (was Arkious, now Sandmod) and after a few weeks of him nagging me, I finally buckled and upgraded the HDD to an SSD. This simple little fix ended up being the tip of the iceberg; I ended up itching to do more modding! A few weeks later, I really did give in and said I’d save to build a full gaming PC. Fast forward a few more weeks of planning and investigation with him, I forgot about saving and broke out the ‘emergency credit card’.
Before I get into it, here’s quick list of the bits I bought at first:
NZXT Phantom Enthusiast USB3.0 Full Tower Case – Orange/Black
Gigabyte SKT-1155 Z77-DS3H Motherboard
Intel 3rd Generation Core i5-3570K CPU
Samsung 840 Series 250GB 2.5 inch SATA Solid State Drive
Asus Nvidia GeForce GTX 660 Ti DirectCU II Top Graphics Card
Avexir Core Blue Series 8GB (2x4GB) DDR3 PC3-19200C10 2400MHz Dual Channel
Asus VN247H 24"Widescreen Super Narrow Bezel LED Monitor – Black
Corsair Gaming Series 2013 Edition GS 700W ATX/EPS 80 PLUS Bronze Power Supply Unit
So, a few days after I’d put a dent in the credit card, this arrived (among other things!). Loved the OCUK touch of putting some Tangfastics in…they ended up being the build prep! On a side note, please excuse the foot...I was too excited to get building to think about getting a proper photo...
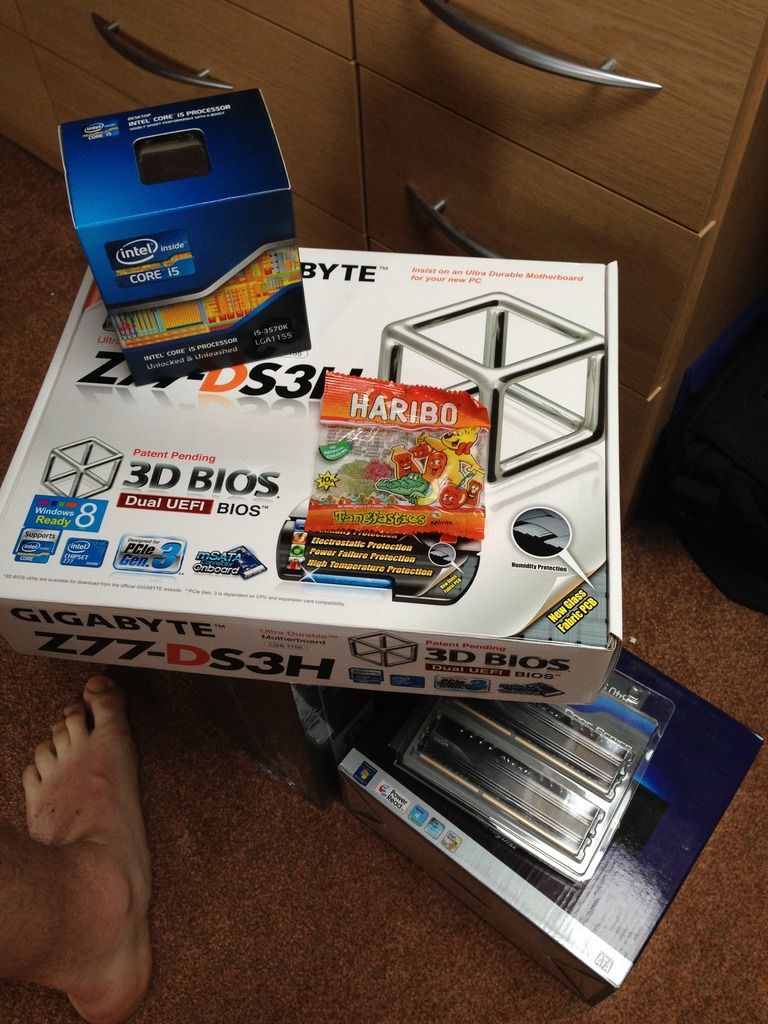
I set about ripping everything out of its boxes and started building from the ground up. I was a bit taken aback by the mass of wires from the PSU, but after I poked most of those into holes to hide them, I managed to compose myself and continue!
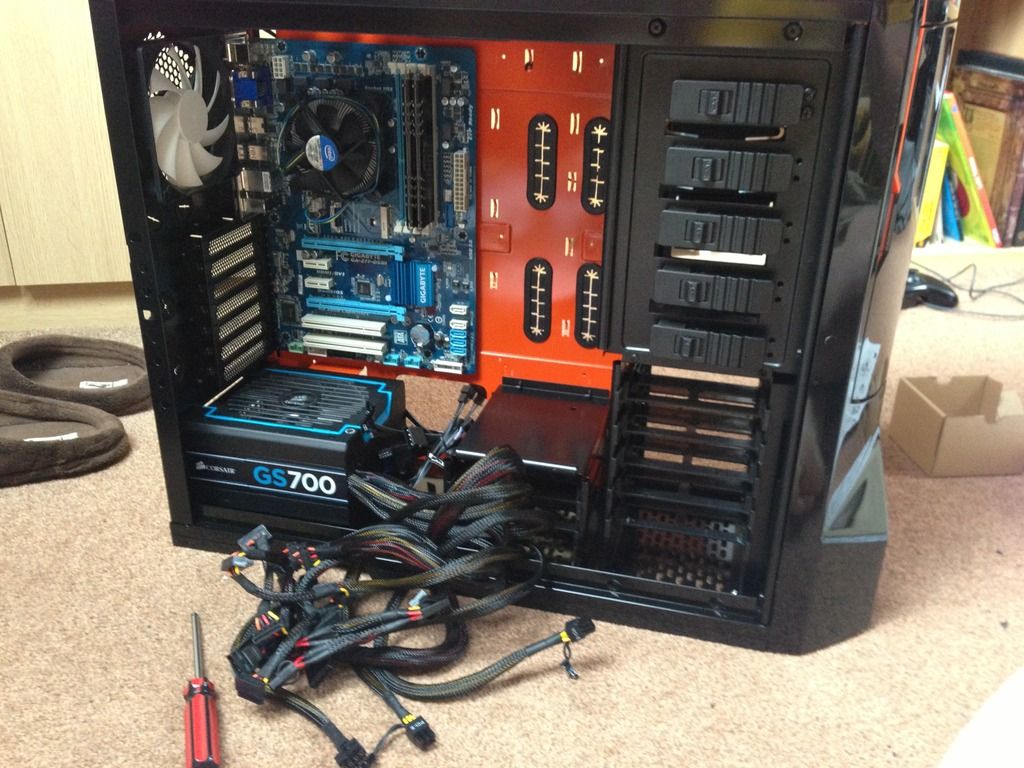
After an hour or so of nervous assembly and some confused expressions, I was greeted with this heavenly sight!
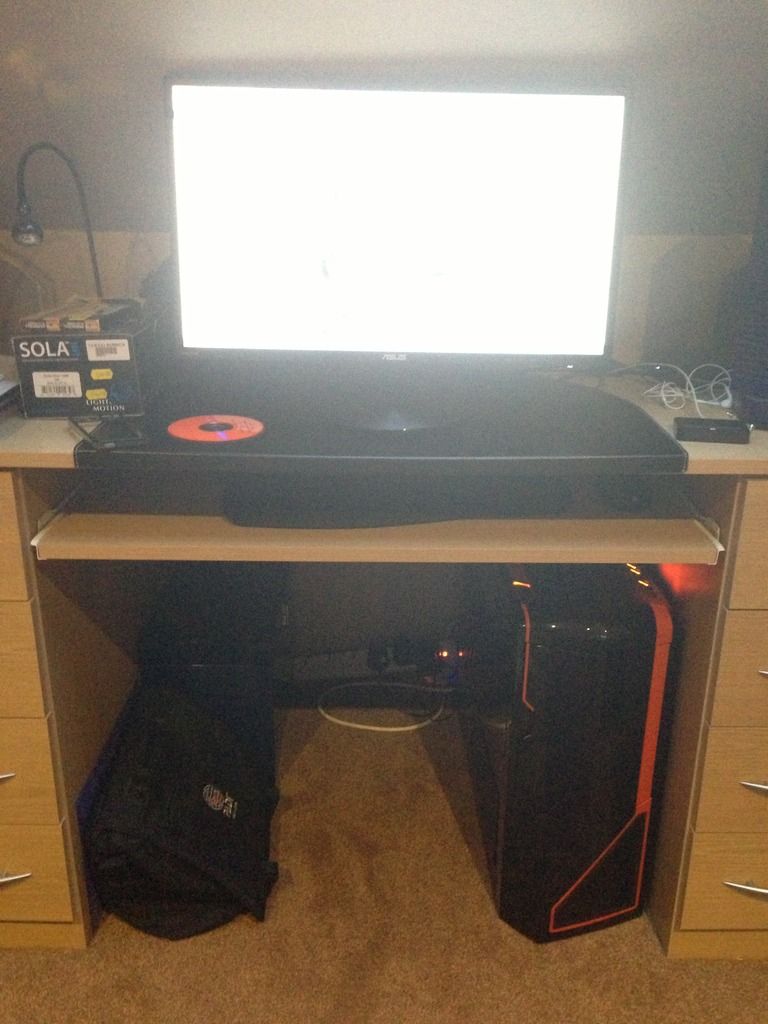
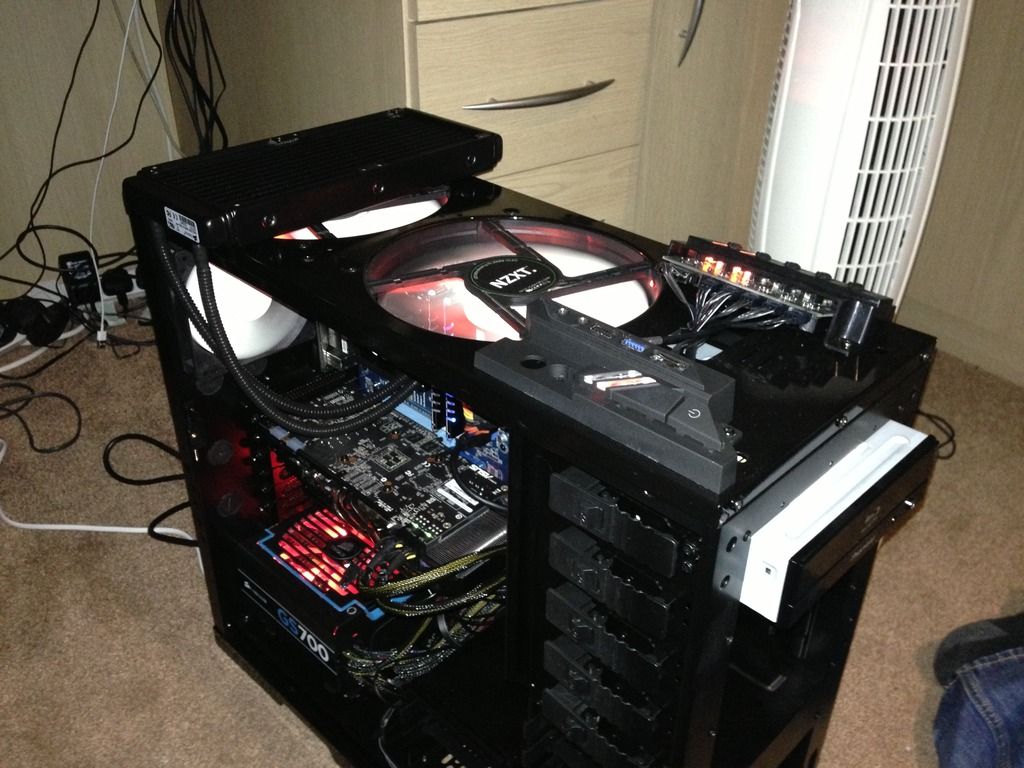
Naturally, things didn’t stop there. I ended up being introduced to the concept of ‘overclocking’, which made me sweaty and weak at the knees just thinking about. Though I only really understood the whole ‘more juice in, more speed out’, I decided to invest in watercooling! Enter, the Corsair Hydro H100... alongside another 200mm fan for the top of the case and a windowed side panel! I didn’t take any pics before installation, but here’s a snazzy pic of the new fan installed into the blank slot, and the H100 just chilling on the top (hehe, get it?! …sorry).
I encountered a bit of a problem when mounting the H100, as the 2 x 200mm fans in the top prevented the screws for the radiator reaching from the top. I borrowed a tap from work, made the threads metric, made a few longer bolts disappear from work and then hey presto! It fit!
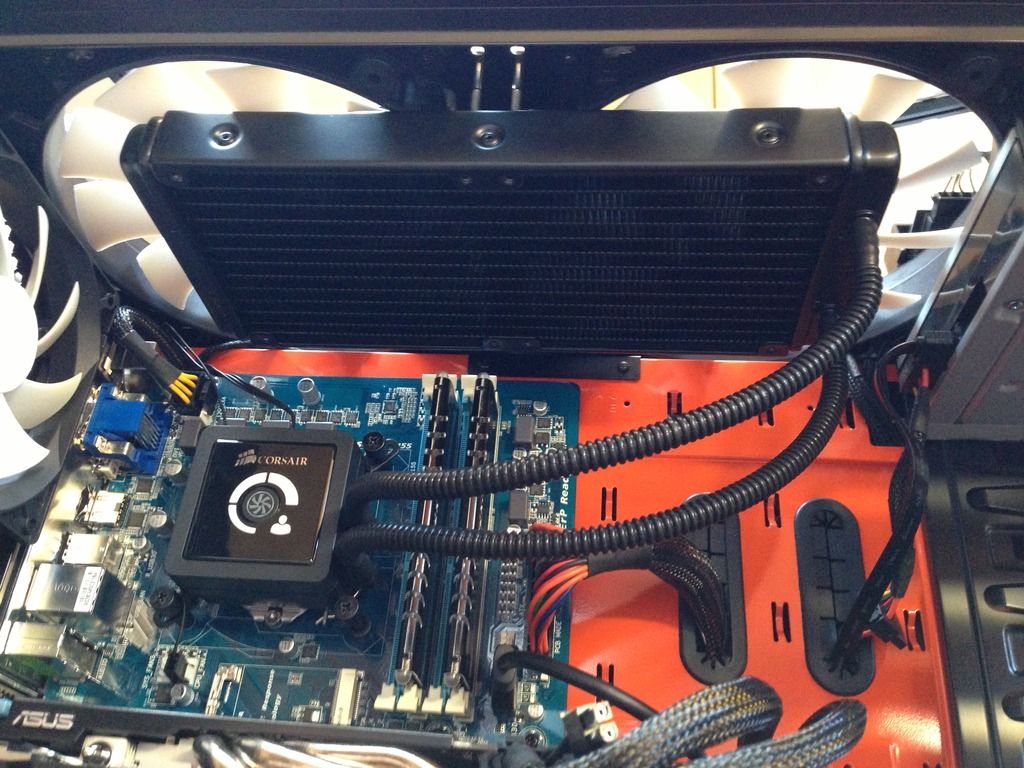
Another problem was when I was fitting the 2 smaller fans to the underside of the radiator in a ‘push’ configuration. The fan housing was quite bulky and wouldn’t fit in place due to the RAM…out with the Dremel, with a bit of persuasion and some ‘weight reduction’ on the fan housing, it fit!
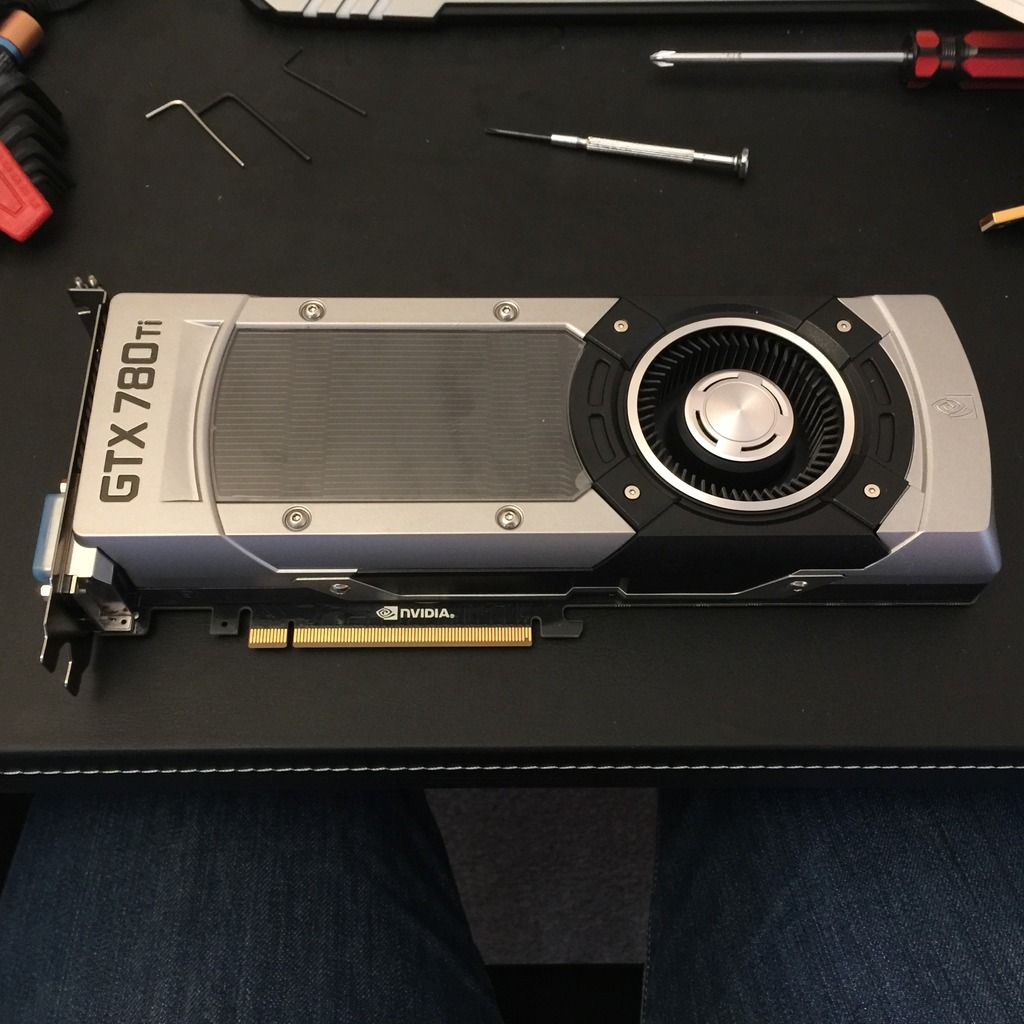
A few months down the line, Sandmod wanted a new GFX card,…naturally I couldn’t be out done, so invested in a GEFORCE GTX 780Ti. I also removed the larger HDD bay from the front of the case for increased airflow.
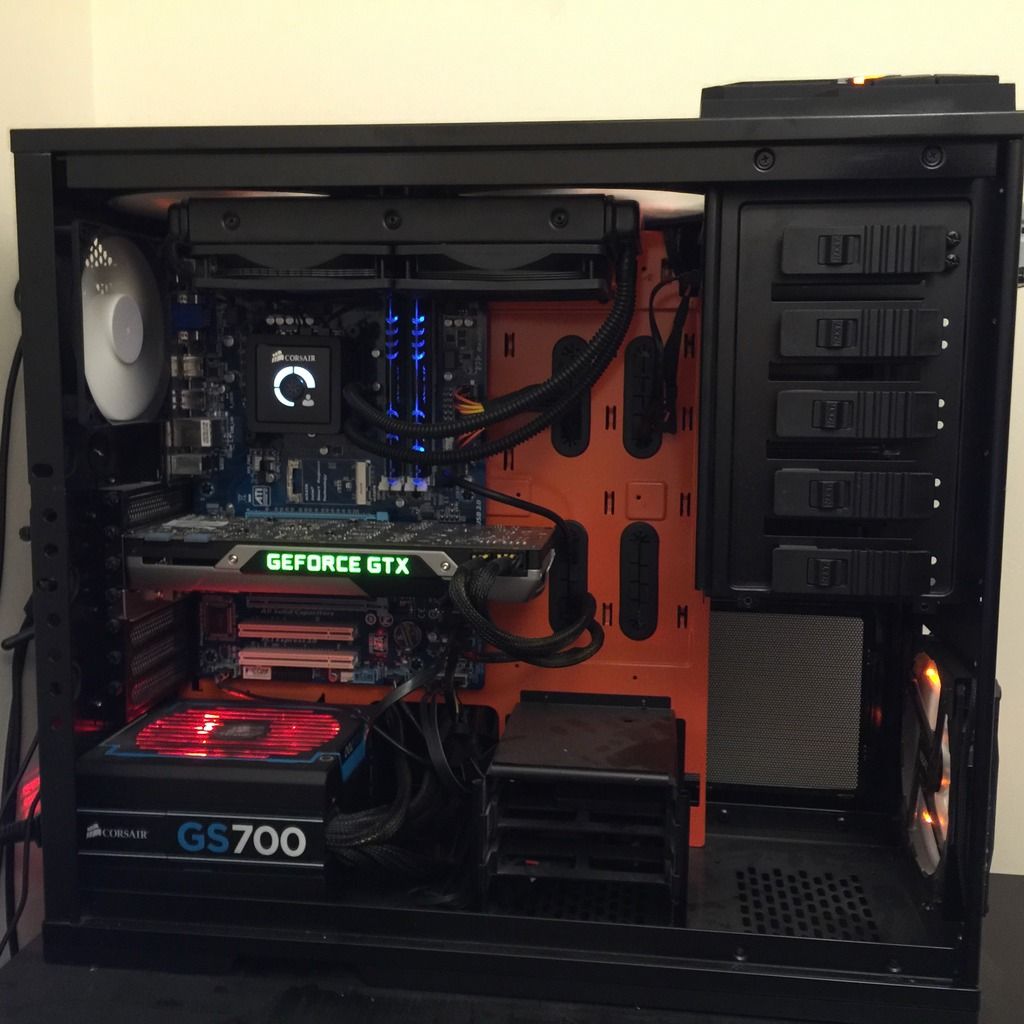
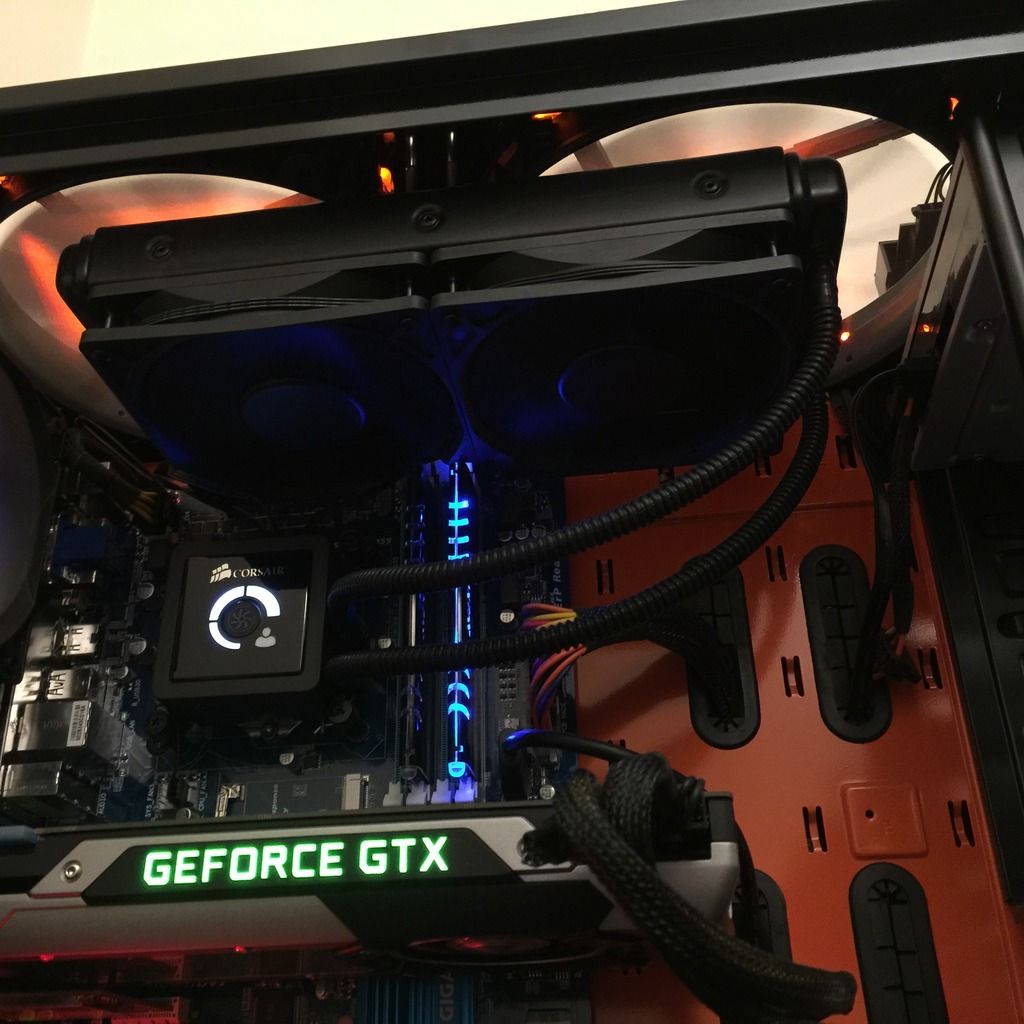
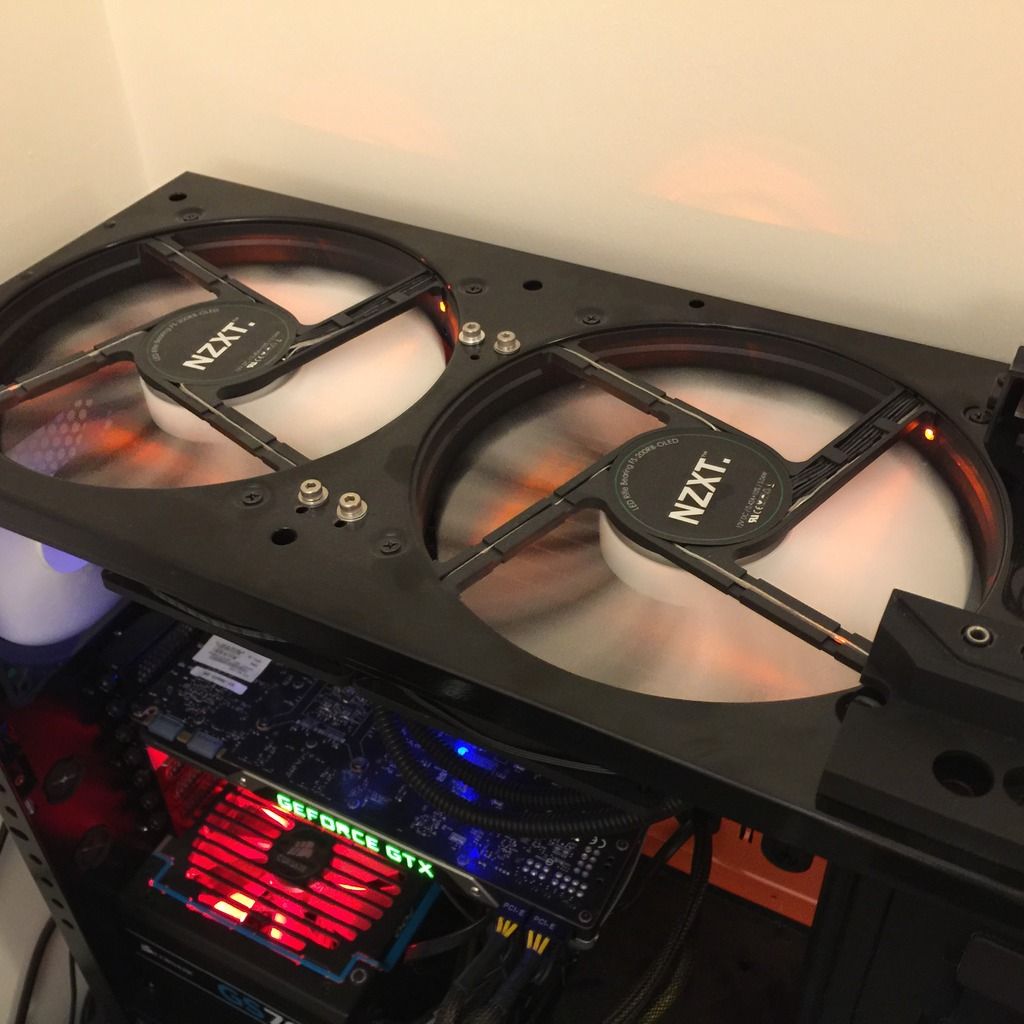
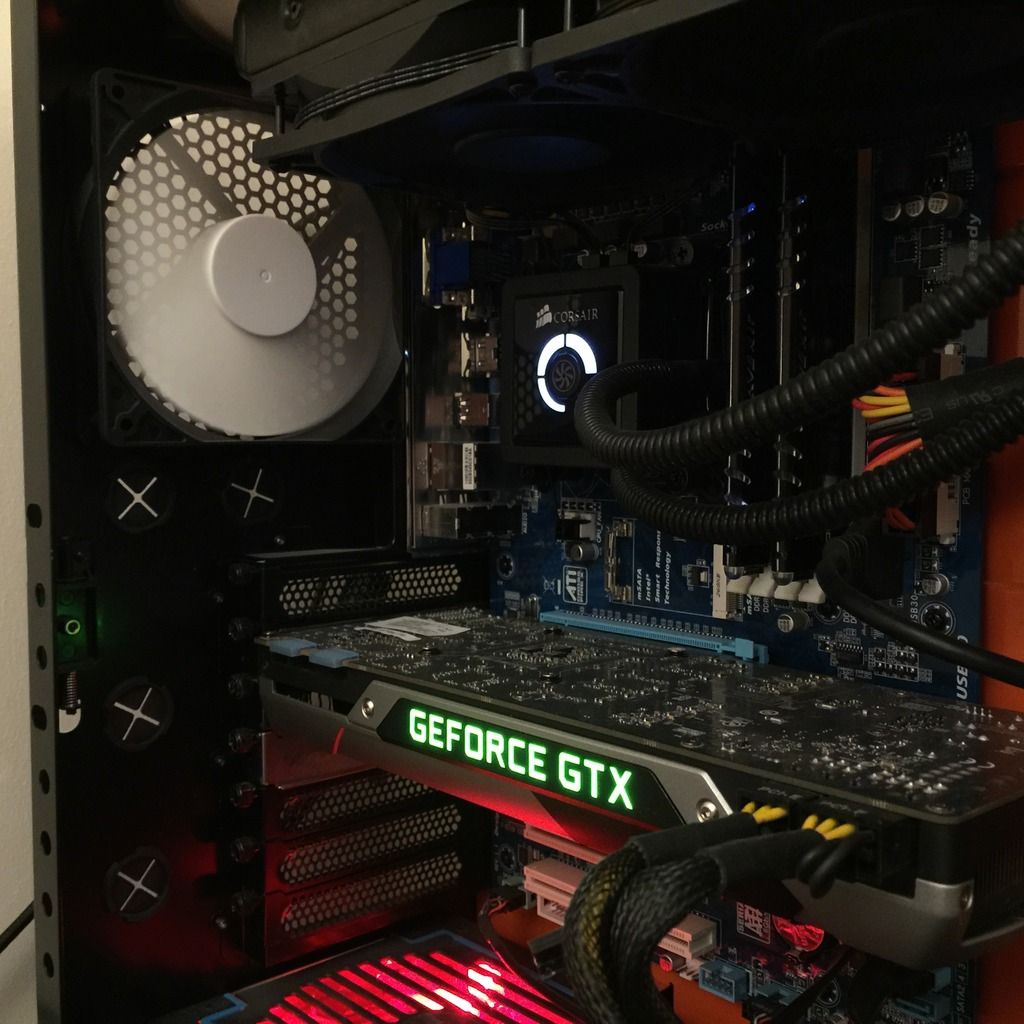
I then bought another 140mm fan for the front of the case simply because of the pretty lights…
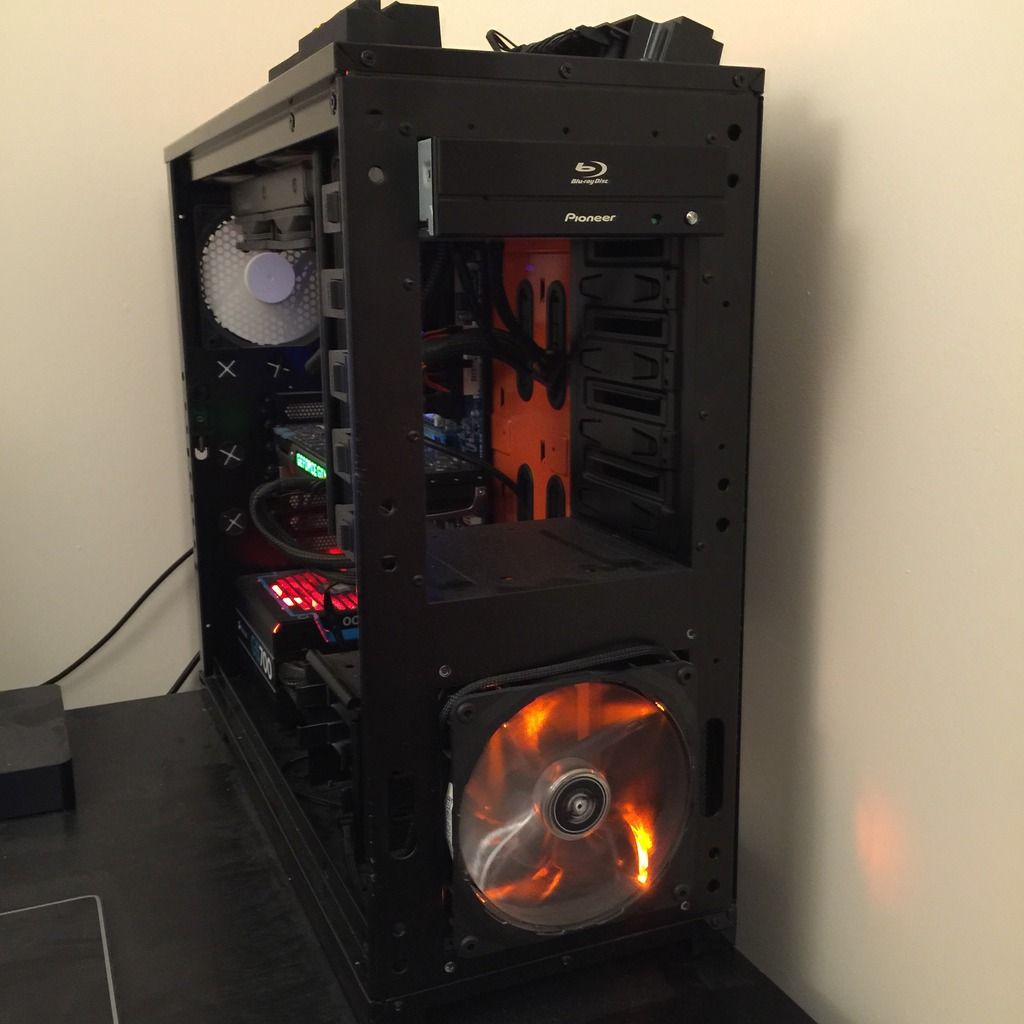
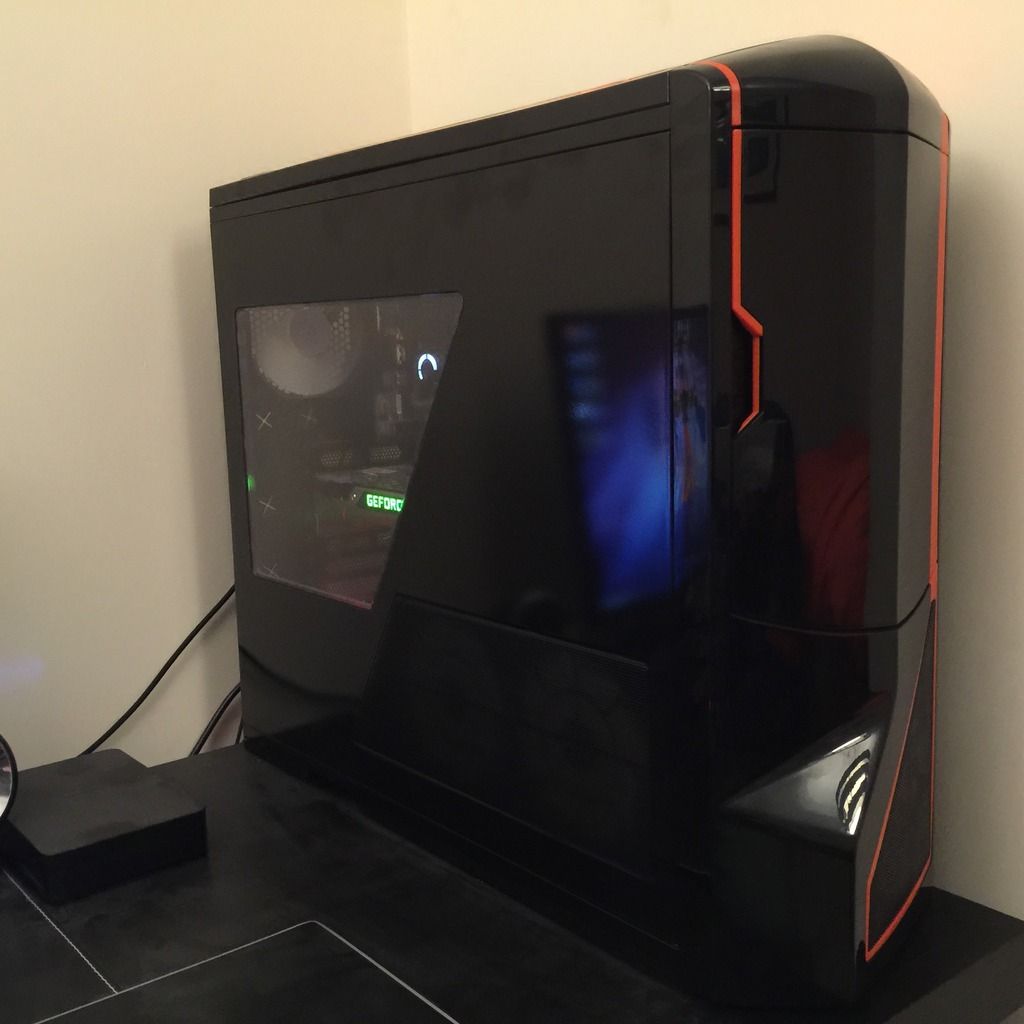
I ran with the rig like this for a while. It seemed pretty perfect to me! Didn’t think there was much else I could do, especially since it looked so sleek!
Then, Sandmod hit again…he mentioned a custom loop…god dammit. And of course, I couldn’t just settle for CPU cooling… I had to go GFX card cooling too! But it doesn’t stop there! I just HAD to get the biggest god damn radiator I could find! May I please introduce…the PHOBYA extreme 400. All I knew was that the radiator itself was slightly smaller than the top of the case. Somehow, I had to make this work! Once again, Dremel to the rescue!
For my custom loop, I used the following components:
PHOBYA Extreme 400
EK Water Blocks EK-D5 Vario X-RES 140 (incl. pump)
EK Water Blocks EK-Supremacy EVO – Nickel
XSPC HighFlex Hose 12" ID, 34" OD, 1912.7mm, 2m, Clear
EK Water Blocks EK-AF Angled 90 Degrees G1/4 inch – Black
EK Water Blocks EK-AF Angled 45 Degrees G1/4 inch – Black
EK Water Blocks EK-FC780 GTX Ti
Mayhems Pastel - Gigabyte Orange Concentrate 250ml
Coollabs Liquid Metal Ultra Thermal Paste
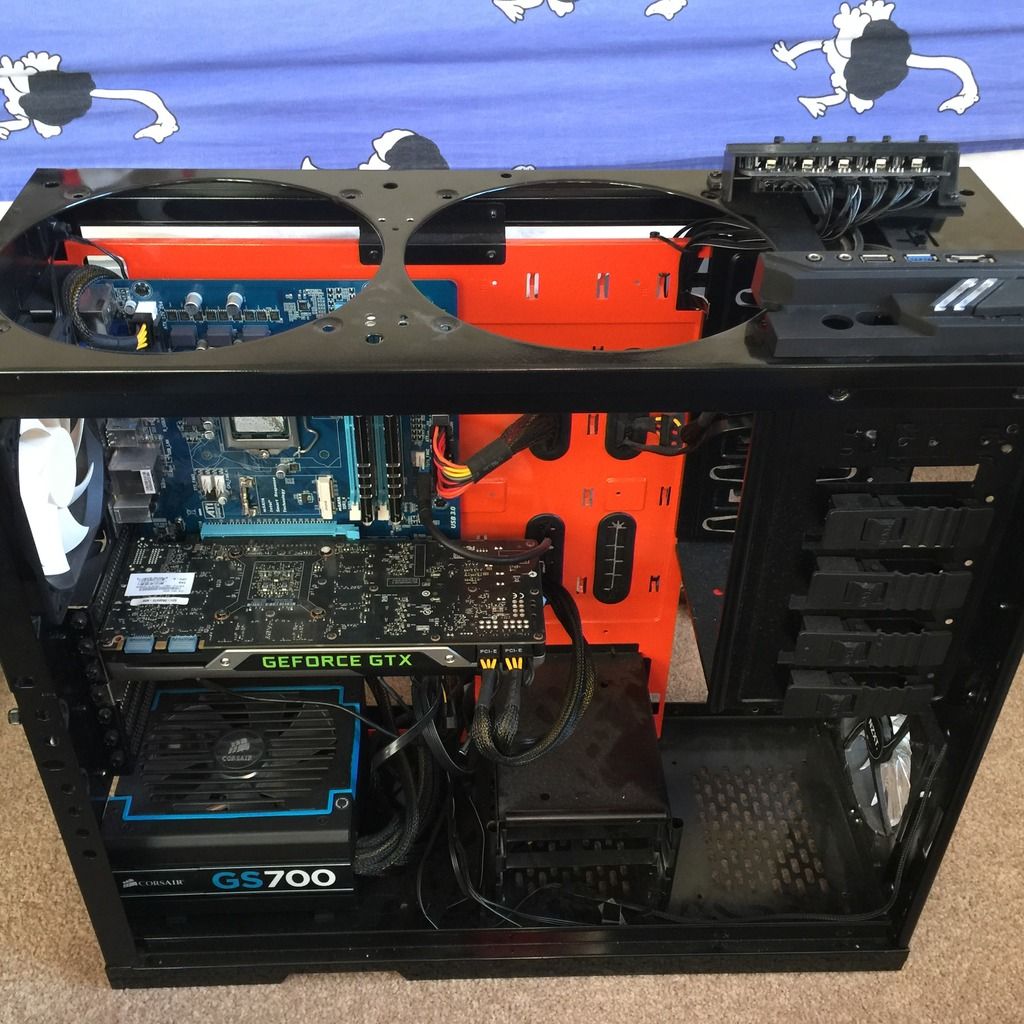
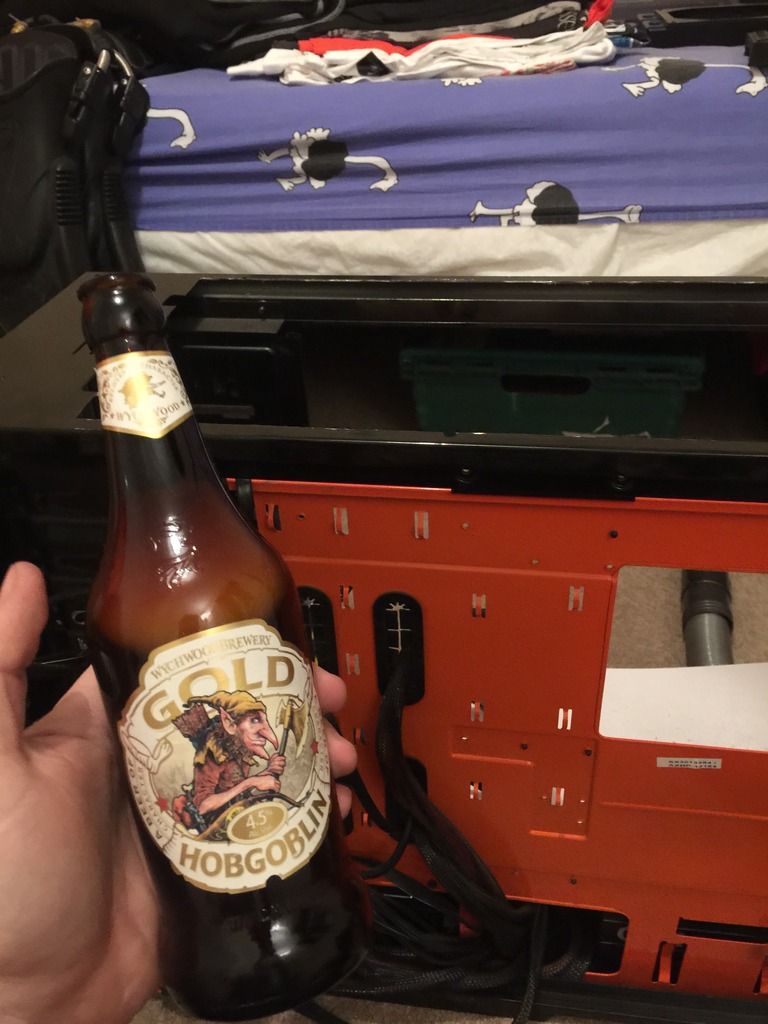
As I was removing most of the top of the case, the fan controller, IO board, power and reset buttons all had to come off. Suddenly, there was a distinct lack of wires in the case, but I eventually made it fit…with regular breaks for refreshments! Note: I’d thoroughly not recommend cutting tower cases while under the influence of alcohol…your ‘accurate’ cutting lines suddenly become…not so accurate!
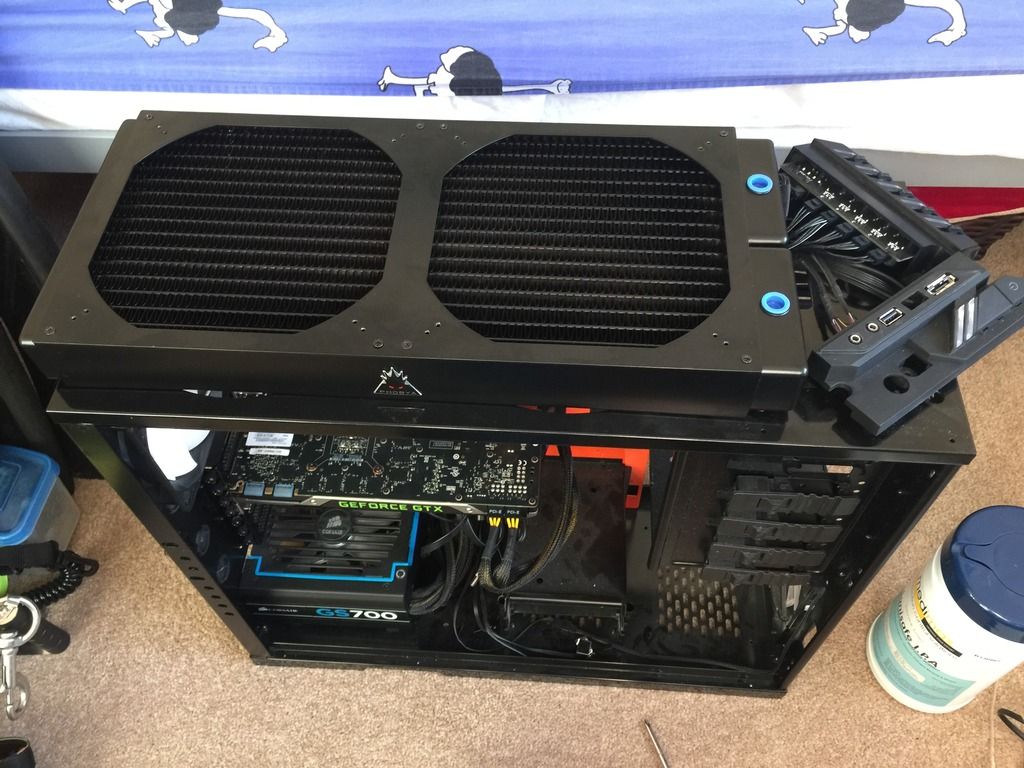
I then had to strip the cooling case off the GFX card. I was a bit disappointed at this since it looked so cool and futuristic, but needs must!
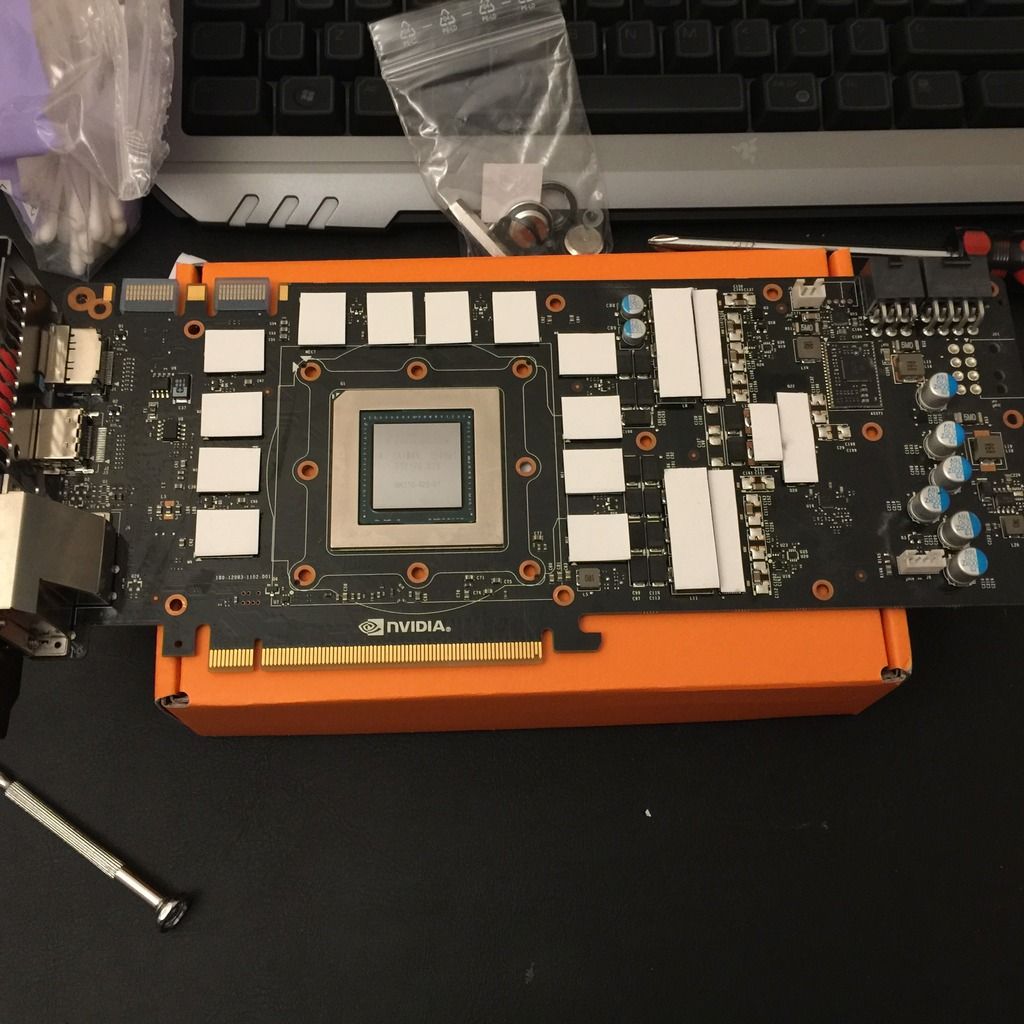
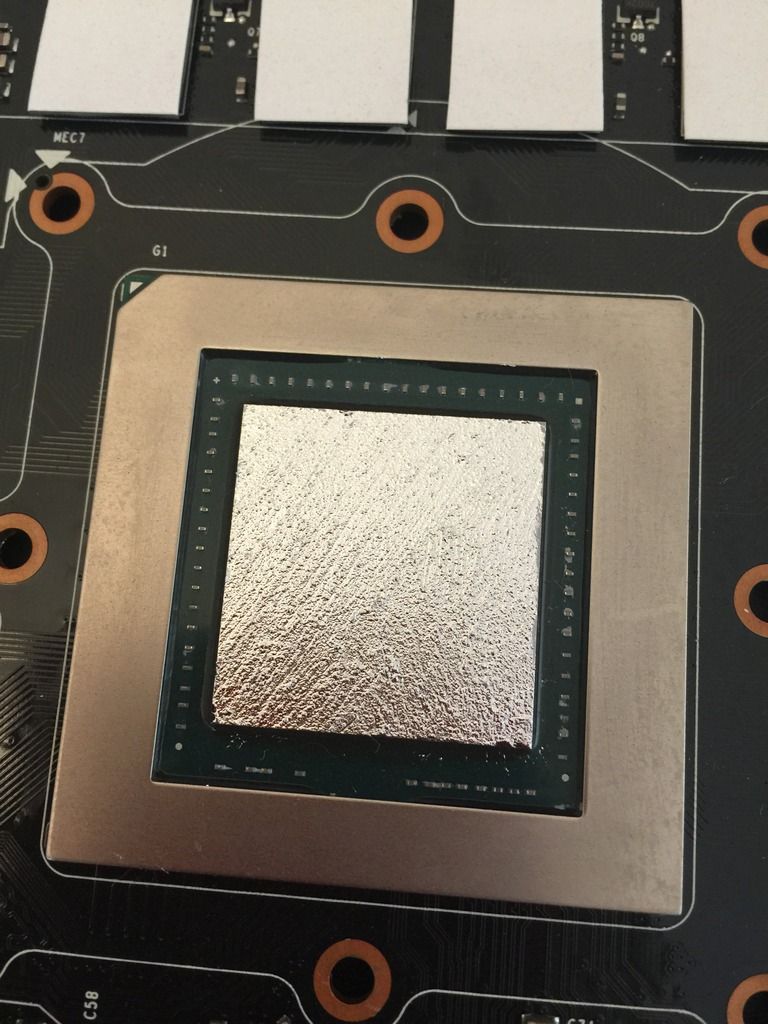
Added a splash of thermal paste to the GPU…
Then I drilled the holes to mount the pump, before assembling the whole system…minus pipes.
With some super accurate measurements (honest) and a whole lot of luck, I managed to get the pipes fitted to a near perfect level! I even impressed myself!
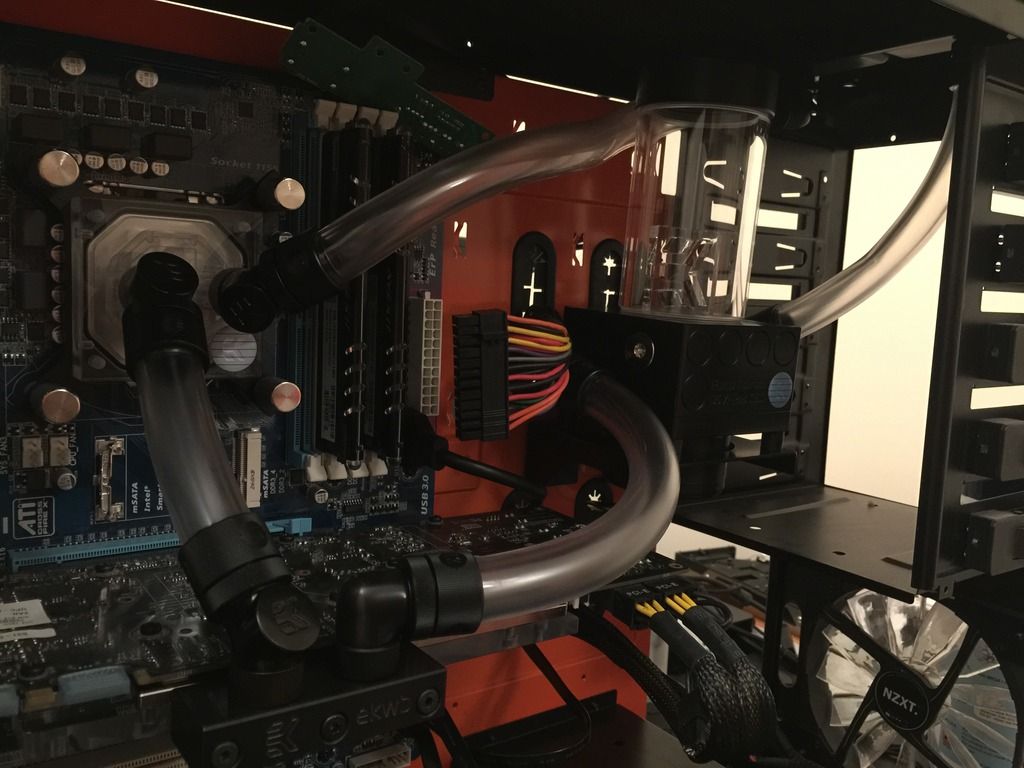
Then, the bit I was dreading…priming the system. Of the handful of people I know who have installed their own custom loops, all of them have had a leak. I more or less stuffed kitchen roll everywhere in the case, just in case even a dribble came out! Sandmod told me of a way I can get the pump to run without having to turn the whole PC on by linking out 2 sockets on the main motherboard plug, which came in massively helpful for filling the lower part of the system. I’d somehow managed to forget to fill the radiator first though, so had to jack up the front of the PC to make any air bubbles flow to the front of the radiator where the fittings are. By leaving the pump running for about 2 hours, I managed to get all the bubbles get sucked out of the radiator and into the reservoir.
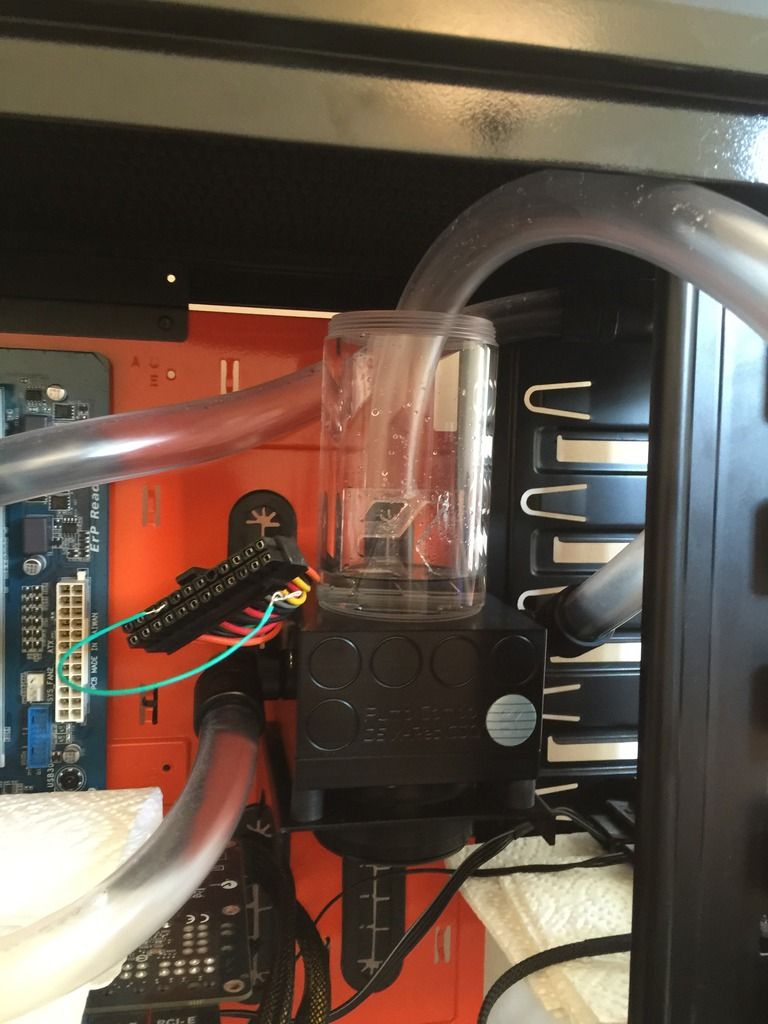
Somehow, as if by magic, I managed to fill the system with de-ionised water without a single drop escaping from the system!
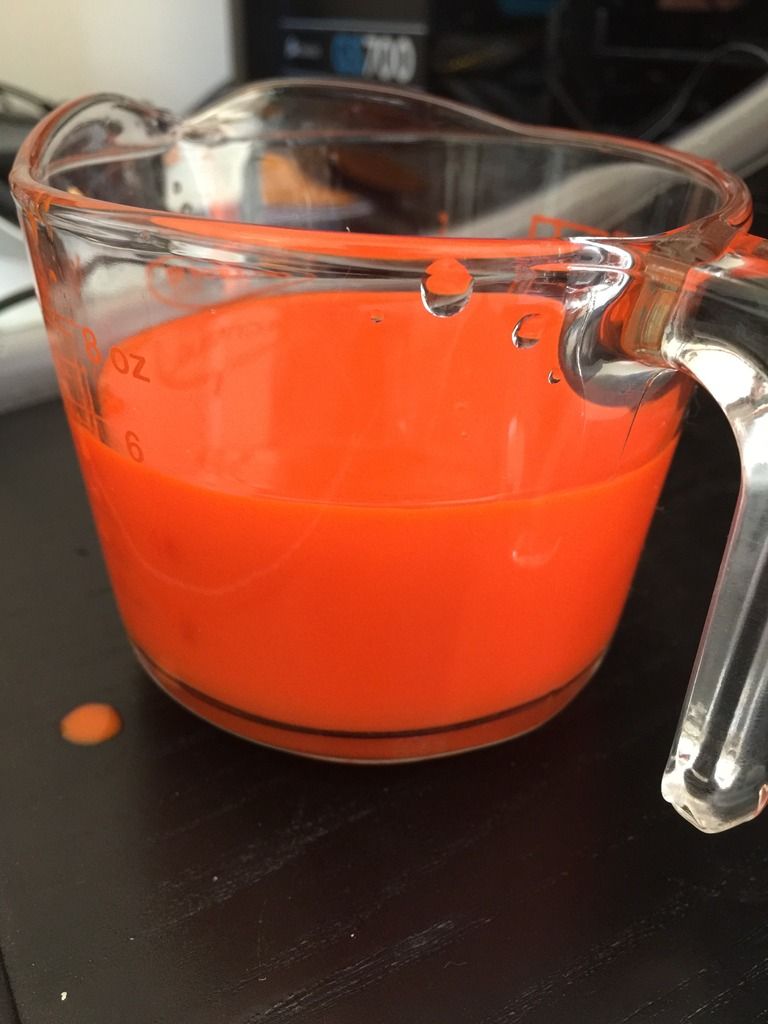
I left the pump running overnight with just the water in and checked first thing in the morning for any wet patches on the kitchen roll. Then, came my favourite part…adding the die! It looked so cool I was even slightly tempted to drink it!
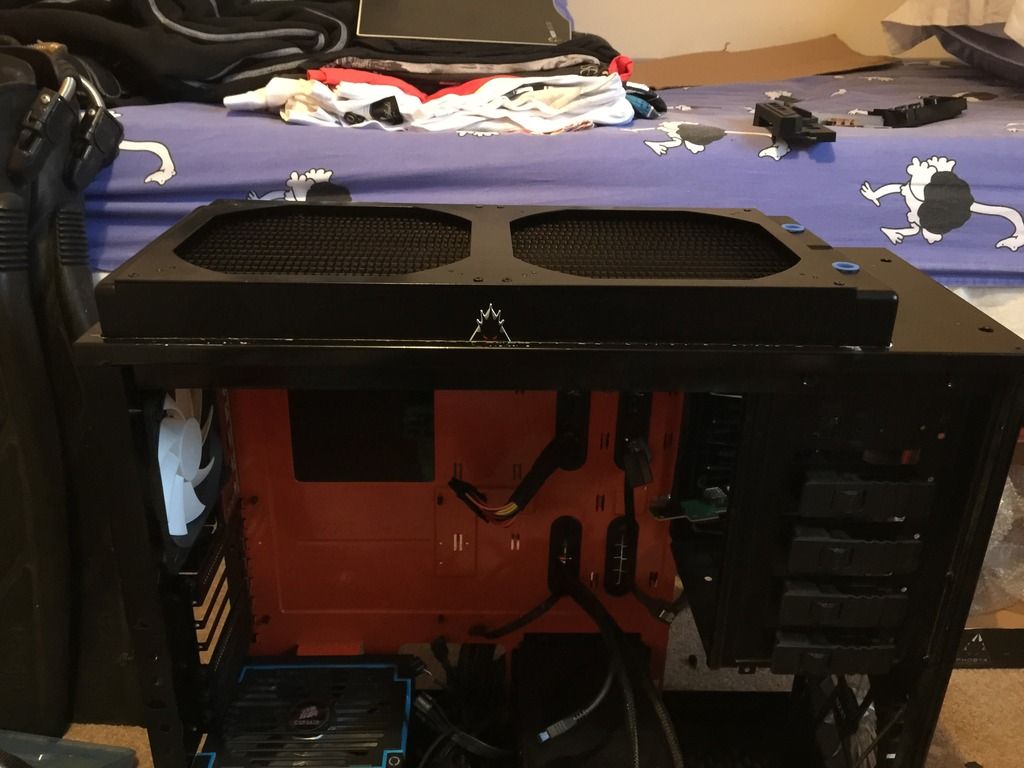
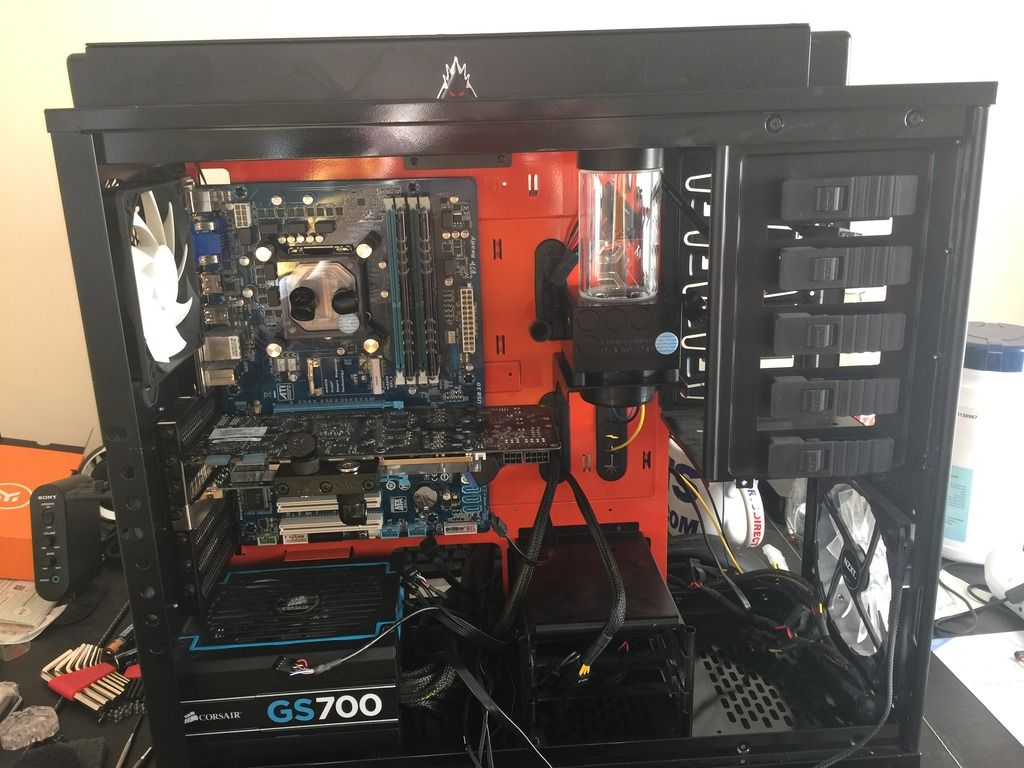
This pretty much brings me to my current location. As it stands, I can’t refit the lid to the case with the monstrosity of a radiator being as it is.
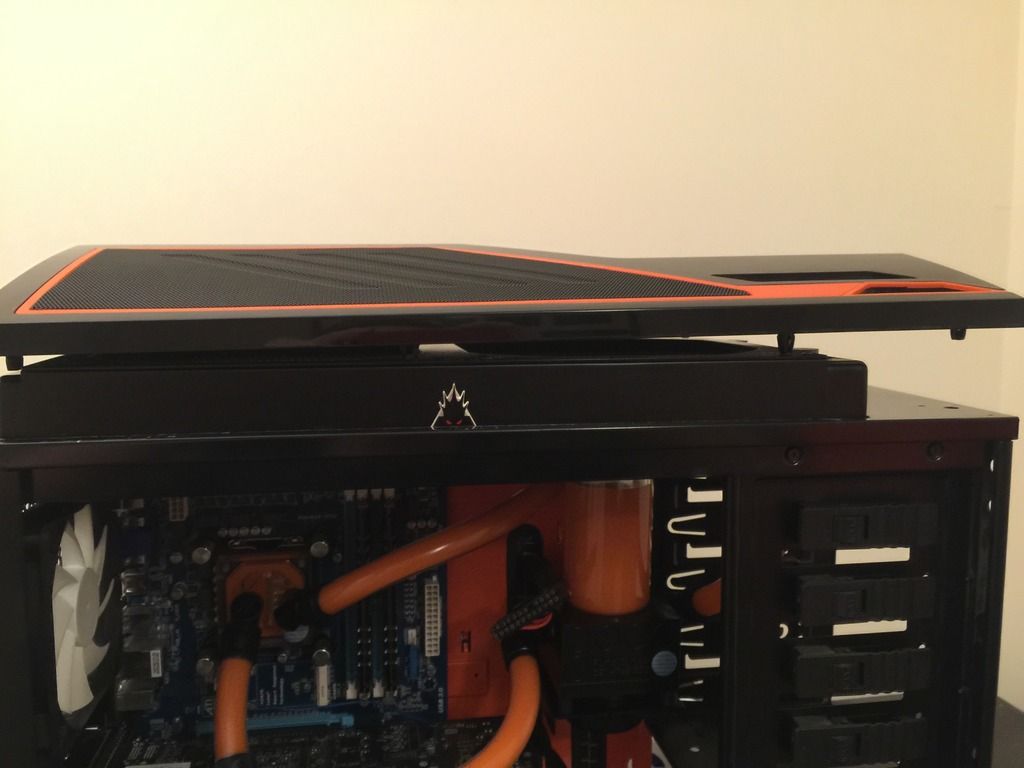
I also have yet to install a proper IO panel to one of the drive bays so that I can have some proper buttons for power etc again. So, here’s a picture of the rig as it stands today, with as much of the case on as I can fit!
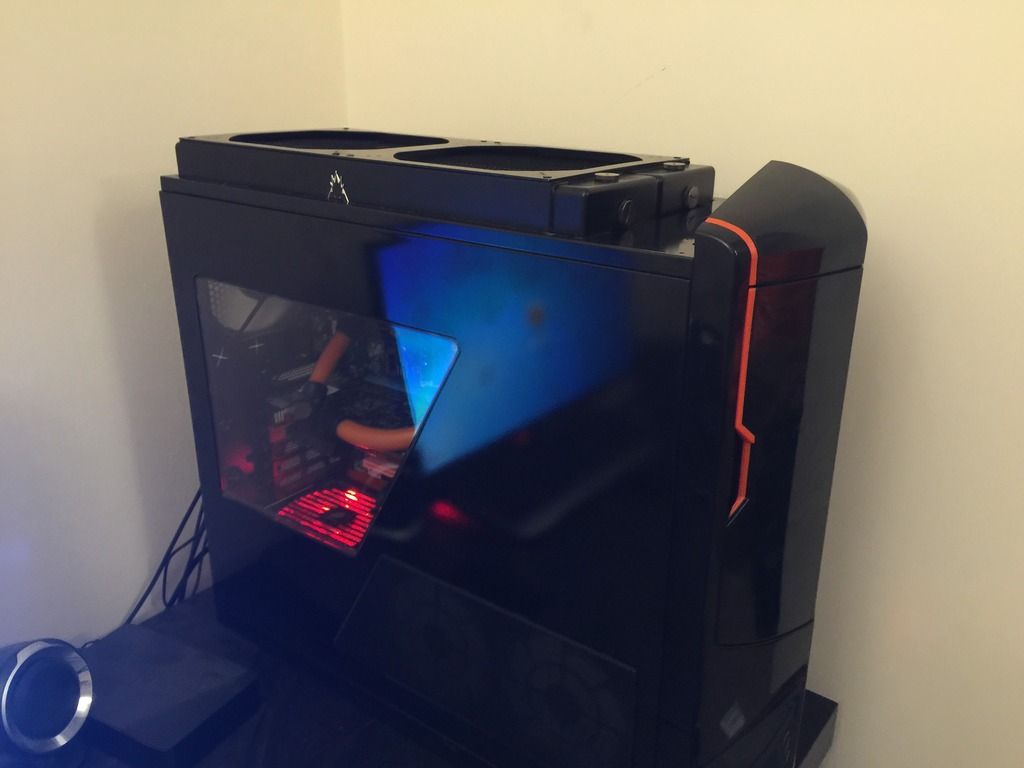
I’ve yet to come up with a way to either make the lid fit, or to design my own version of it…any ideas, please step forward!
So this is my first time posting a build thread, I intended to start this around 3 years ago when I first started, but sort of forgot.
Bit of background info in case you care, I’ve always wanted to have a go at building my own PC, but was always a bit put off by all of the numbers, versions, fancy names and confusing bits. I settled for buying a Sony VAIO (I’d been told they were a pretty decent laptop to have, so invested around £800 into a top spec one). Here’s the setup as it was…

I met a guy at work who turned out to be another user on here (was Arkious, now Sandmod) and after a few weeks of him nagging me, I finally buckled and upgraded the HDD to an SSD. This simple little fix ended up being the tip of the iceberg; I ended up itching to do more modding! A few weeks later, I really did give in and said I’d save to build a full gaming PC. Fast forward a few more weeks of planning and investigation with him, I forgot about saving and broke out the ‘emergency credit card’.
Before I get into it, here’s quick list of the bits I bought at first:
NZXT Phantom Enthusiast USB3.0 Full Tower Case – Orange/Black
Gigabyte SKT-1155 Z77-DS3H Motherboard
Intel 3rd Generation Core i5-3570K CPU
Samsung 840 Series 250GB 2.5 inch SATA Solid State Drive
Asus Nvidia GeForce GTX 660 Ti DirectCU II Top Graphics Card
Avexir Core Blue Series 8GB (2x4GB) DDR3 PC3-19200C10 2400MHz Dual Channel
Asus VN247H 24"Widescreen Super Narrow Bezel LED Monitor – Black
Corsair Gaming Series 2013 Edition GS 700W ATX/EPS 80 PLUS Bronze Power Supply Unit
So, a few days after I’d put a dent in the credit card, this arrived (among other things!). Loved the OCUK touch of putting some Tangfastics in…they ended up being the build prep! On a side note, please excuse the foot...I was too excited to get building to think about getting a proper photo...

I set about ripping everything out of its boxes and started building from the ground up. I was a bit taken aback by the mass of wires from the PSU, but after I poked most of those into holes to hide them, I managed to compose myself and continue!

After an hour or so of nervous assembly and some confused expressions, I was greeted with this heavenly sight!

Naturally, things didn’t stop there. I ended up being introduced to the concept of ‘overclocking’, which made me sweaty and weak at the knees just thinking about. Though I only really understood the whole ‘more juice in, more speed out’, I decided to invest in watercooling! Enter, the Corsair Hydro H100... alongside another 200mm fan for the top of the case and a windowed side panel! I didn’t take any pics before installation, but here’s a snazzy pic of the new fan installed into the blank slot, and the H100 just chilling on the top (hehe, get it?! …sorry).

I encountered a bit of a problem when mounting the H100, as the 2 x 200mm fans in the top prevented the screws for the radiator reaching from the top. I borrowed a tap from work, made the threads metric, made a few longer bolts disappear from work and then hey presto! It fit!

Another problem was when I was fitting the 2 smaller fans to the underside of the radiator in a ‘push’ configuration. The fan housing was quite bulky and wouldn’t fit in place due to the RAM…out with the Dremel, with a bit of persuasion and some ‘weight reduction’ on the fan housing, it fit!
A few months down the line, Sandmod wanted a new GFX card,…naturally I couldn’t be out done, so invested in a GEFORCE GTX 780Ti. I also removed the larger HDD bay from the front of the case for increased airflow.


I then bought another 140mm fan for the front of the case simply because of the pretty lights…

I ran with the rig like this for a while. It seemed pretty perfect to me! Didn’t think there was much else I could do, especially since it looked so sleek!

Then, Sandmod hit again…he mentioned a custom loop…god dammit. And of course, I couldn’t just settle for CPU cooling… I had to go GFX card cooling too! But it doesn’t stop there! I just HAD to get the biggest god damn radiator I could find! May I please introduce…the PHOBYA extreme 400. All I knew was that the radiator itself was slightly smaller than the top of the case. Somehow, I had to make this work! Once again, Dremel to the rescue!
For my custom loop, I used the following components:
PHOBYA Extreme 400
EK Water Blocks EK-D5 Vario X-RES 140 (incl. pump)
EK Water Blocks EK-Supremacy EVO – Nickel
XSPC HighFlex Hose 12" ID, 34" OD, 1912.7mm, 2m, Clear
EK Water Blocks EK-AF Angled 90 Degrees G1/4 inch – Black
EK Water Blocks EK-AF Angled 45 Degrees G1/4 inch – Black
EK Water Blocks EK-FC780 GTX Ti
Mayhems Pastel - Gigabyte Orange Concentrate 250ml
Coollabs Liquid Metal Ultra Thermal Paste

As I was removing most of the top of the case, the fan controller, IO board, power and reset buttons all had to come off. Suddenly, there was a distinct lack of wires in the case, but I eventually made it fit…with regular breaks for refreshments! Note: I’d thoroughly not recommend cutting tower cases while under the influence of alcohol…your ‘accurate’ cutting lines suddenly become…not so accurate!


I then had to strip the cooling case off the GFX card. I was a bit disappointed at this since it looked so cool and futuristic, but needs must!


Added a splash of thermal paste to the GPU…

Then I drilled the holes to mount the pump, before assembling the whole system…minus pipes.

With some super accurate measurements (honest) and a whole lot of luck, I managed to get the pipes fitted to a near perfect level! I even impressed myself!

Then, the bit I was dreading…priming the system. Of the handful of people I know who have installed their own custom loops, all of them have had a leak. I more or less stuffed kitchen roll everywhere in the case, just in case even a dribble came out! Sandmod told me of a way I can get the pump to run without having to turn the whole PC on by linking out 2 sockets on the main motherboard plug, which came in massively helpful for filling the lower part of the system. I’d somehow managed to forget to fill the radiator first though, so had to jack up the front of the PC to make any air bubbles flow to the front of the radiator where the fittings are. By leaving the pump running for about 2 hours, I managed to get all the bubbles get sucked out of the radiator and into the reservoir.

Somehow, as if by magic, I managed to fill the system with de-ionised water without a single drop escaping from the system!
I left the pump running overnight with just the water in and checked first thing in the morning for any wet patches on the kitchen roll. Then, came my favourite part…adding the die!
 It looked so cool I was even slightly tempted to drink it!
This pretty much brings me to my current location. As it stands, I can’t refit the lid to the case with the monstrosity of a radiator being as it is.

I also have yet to install a proper IO panel to one of the drive bays so that I can have some proper buttons for power etc again. So, here’s a picture of the rig as it stands today, with as much of the case on as I can fit!

I’ve yet to come up with a way to either make the lid fit, or to design my own version of it…any ideas, please step forward!

Last edited:


 I'm thinking probably just have to butcher the lid and see how I can fit it!