Associate
so having moved into my partners and utilizing the junk room as an ad-hoc office ive finally decided after 3 months and no days off that tomorrow is the day I do something with it.
plan of action
edit - step 0 - strip the room of everything and dump it in the landing at 11 oclock at night so when the kids wake up they'll not be able to move - CHECK.
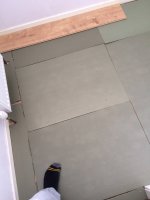
step 1 - laminate the floor , it previously consisted of industrial carpet , of which is now rolled up in preparation , will rip the spongy underlay up etc tomorrow , have proper stuff or so I think to go under the new flooring
step 2 - build wall to wall desk , approx. 1.6m in width and god knows what in depth , ill measure the wall tomorrow at two points and approximate the depth id need , monitor is going to be on stand etc so will need to be comfy. as Ive previously come a cropper in the past as walls are never straight lol.
step 3 - hang the blinds , ive a lengthy but narrow crevis window , that's a bain for evening sunlight in the summer.
step 4 - ive numerous motherboards with CPU's in socket from previous builds , both that hold meaning and those ive bought and tinkerd with , from barton chips and board , Athlon 6000+ and 939 sockets , to more current z97 and AM1 boards and CPU's . these will be mounted into a collage of boards across the back facing wall.
step 5 -Shelving is a must , as god knows why maybe I'm a freak but I love to display boxes LOL , makes me think I'm important or something . so two long sitting shelves under the window.
BUDGET - £25 , Homebase is closing down so fingers crossed I can get some hardwood cheap , including plasterboard fixings for the boards , possibly extra screws , trim for the laminate ( already have the flooring )
CONCERNS - I'm cack at anything remotely DIY , the missus is the man of the house in this regard , and shes addimant itll look naff. ive enlisted my pal to give us a hand and make sure I don't **** up to badly , but I do imagine what I'm thinking of in my head wont be the end result .
CAVEATS - there is some decorating to do , and hole filling to do , I will blitz on with the filler first thing tomorrow , and as for the painting well , there white walls so wont look to hideous but this will have to wait for another day . I do plan on updating this thread for aslong as it takes to get to the point of perfection , or at least what bob the bodger is capable of
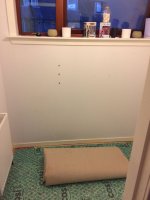
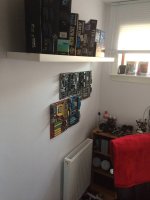
this is the back window , the shelves will sit underneath and blinds fitted
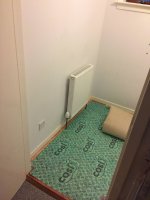
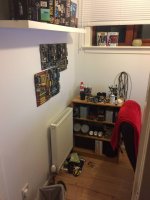
this is the entrance the box room / my new real soon to be probebrly will look pants office
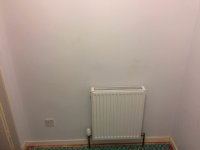
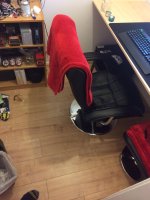
this is the wall to the right of the window and will be where I place to build the desk
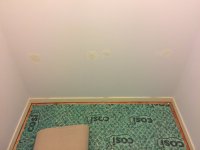
this is the wall where I plan to place the mobo collage
--------------------------------------------------------------------------------------------
DAY 1 -
So excited and after little sleep , 8 oclock arrives , kids wake up to go to school and I crack on … you can thank gary ''the pal" for that
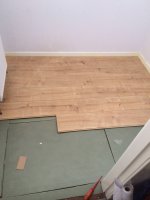
First things first , lay the laminate , armed with a saw of some kind ,scissors , a tacking hammer and my ingenui... idiocy. I go to work hacking with scissors at the underlay till I get a rough but snug fit... you be the judge
armed with thou saw and thou might to succeed , I crack on laying the laminate in a brick formation , hoping the one youtube video I watched doing this pays off , like having total recall being high on NZT.
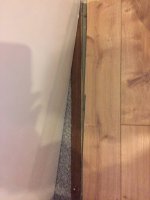
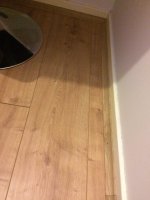
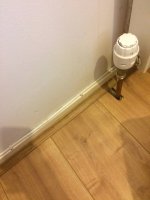
half way through I reach the conclusion that it looks semi cack , I mean it looks like a floor , but some gaps between panels and skirting are to much to bare... so thick beading is on the to buy list. fill the gaps with off cuts to keep it tight and hide all my mistakes with beading being something that must be done
an hour later , the floor is complete with all my lovely bodges , including one im particularly proud off …
cutting down a board that long with a crappy saw is hell , but Hey , nothing an extra large threshold cant sort down the road... Dohh ! With the flooring done , and 3 hours later , '' My Pal '' arrives right on cue to take the **** … fair play I suppose , I convinced him it could be cleaned up and we ran straight to homebase …
I acquired enough beading 3 lengths , you tell me in measurements I have no clue. give me voltage regulation data all day long over a tape measure . also cable tacks to run an extension to the opposite side of the room over the skirting. oh and a shelf , singular , nor plural like planned. total cost = #26 quid … pound over budget.
luckily ''my pal'' was very gracious in providing a spare piece of boarding for the desk and various bits and pieces of timber. not very often you have friends like that imo. just an FYI he guided me every step of the way and taught me a fair amount today . consistently letting me do the work at his instruction . perfect really.
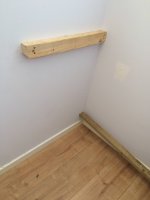
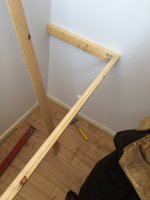
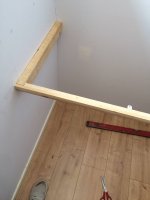
next up , finding the joists and screwing support to the walls , as you can see this took several attempts … good old knocking on a wall... waiting for a dense sound that may as well have came from my head. luckily here we succeeded and alas they were fastened
the frame now comes together , bracing and strengthen where possible but whilst also trying to add facias underneath where the lip of the top will be to make it look neat , clean and tidy.
next up we do the beading and make sure we are gap free... and we are !! Yay
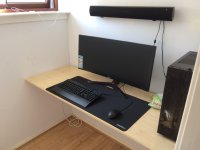
next up was to mount build a wee box in the back to hide the cables and power adapters , mount the board, sealent the sides with pine seal , and install the Pute… we are actually looking good right now … I cant believe it !!
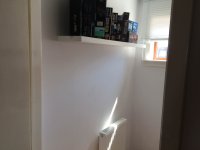
So next up we crack on with the shelving and blinds , I thought white shelving would be better off here , and I was right. looks good , few boxes displayed and the rest popped into the loft.
No spirit bubbles , here …. seems level , stuff doesn't fall... satisfied !! . as you can see , its not where I planned but figured it looked better here
now the blinds... the missus came home and corrected me by showing me the same blinds in the bedroom .. I literally stud there for half an hour and could I heck work out why the clips wouldn't fit round the frame … turns out they sit in recess I couldn't or wouldn't see. I screwed them into the blinds rather then clipping , problem solved , and proceeded to mount then blinds to the ceiling , mission success
I also decided now was the time to start fitting boards to the wall , and actually I think it looks rather good with good spacing , theres more to go on here , but ran out of plasterboard fixings, obviously using the pre manufactured standoff points , making life easy to line up and fix. more will go up soon and will update accordingly. also brought in a couple of shelving units to put tools and bits and bob on that I often use , IPA , compressed air , hardware etc.
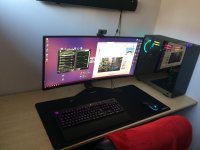
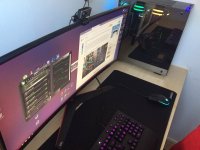
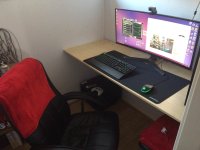
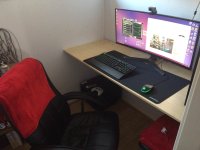
so a clean down of everything , and chair fitted in etc , everything squared away , finally finishing at 5ish today. heres pictures of the overall finish , I do plan to carry this thread on and update it as I have other plans such as RGB led floor lighting , mounting my projector , adding more shelving and polishing the entire thing off , I genuinlly do feel slightly proud of myself , and is actually a pleasure to sit and work in as off this evening . well here you go.
Last edited:


