

Don
- Joined
- 20 Oct 2002
- Posts
- 17,044
- Location
- In a house
So, as some people may have seen before, I purchased a banger to act as a mobile skip for some projects I am working on in my house.
It is a 1998 Audi A4 1.8i
This was the only picture I got after I went to view it before it ended on eBay:

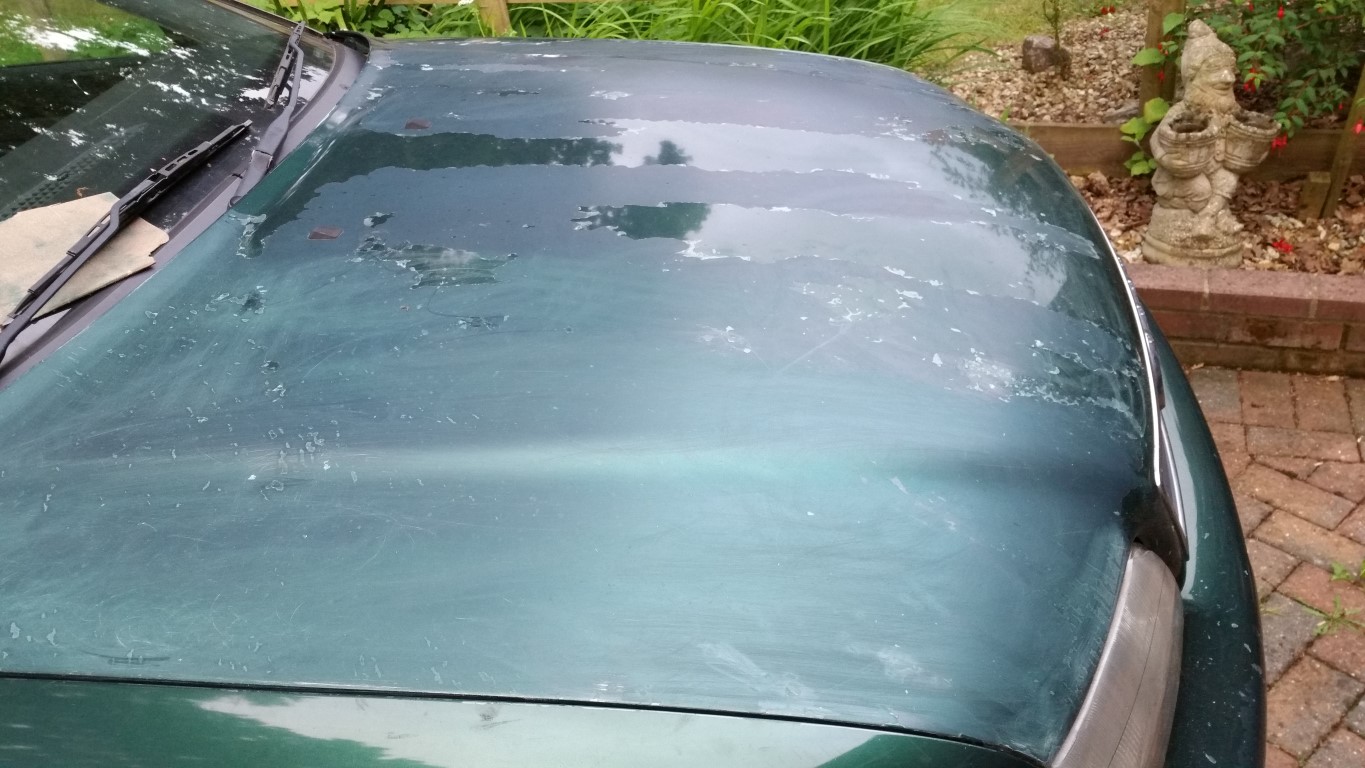
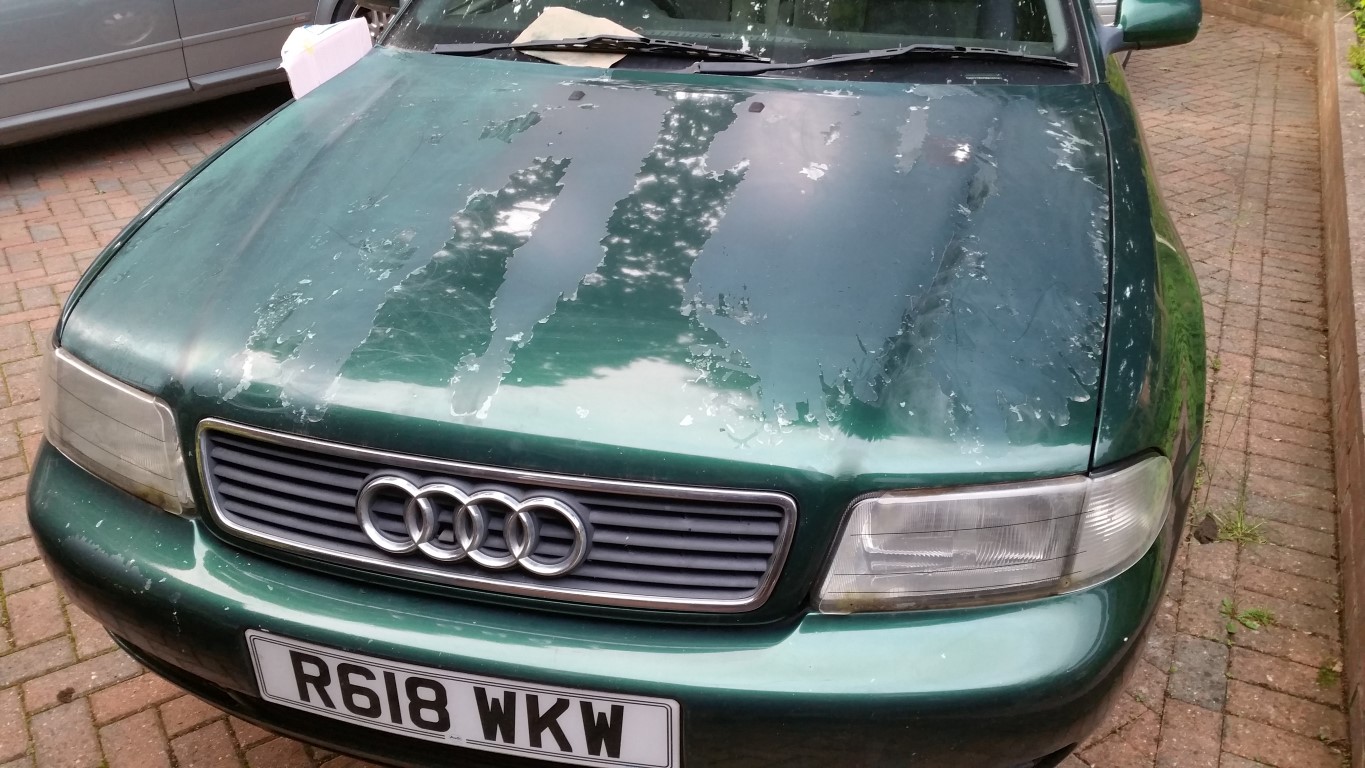
So, the paint was peeling in a few places:
I decided to do something about it. I sanded down the paint with some light sandpaper, and bought some pain and masking tape:

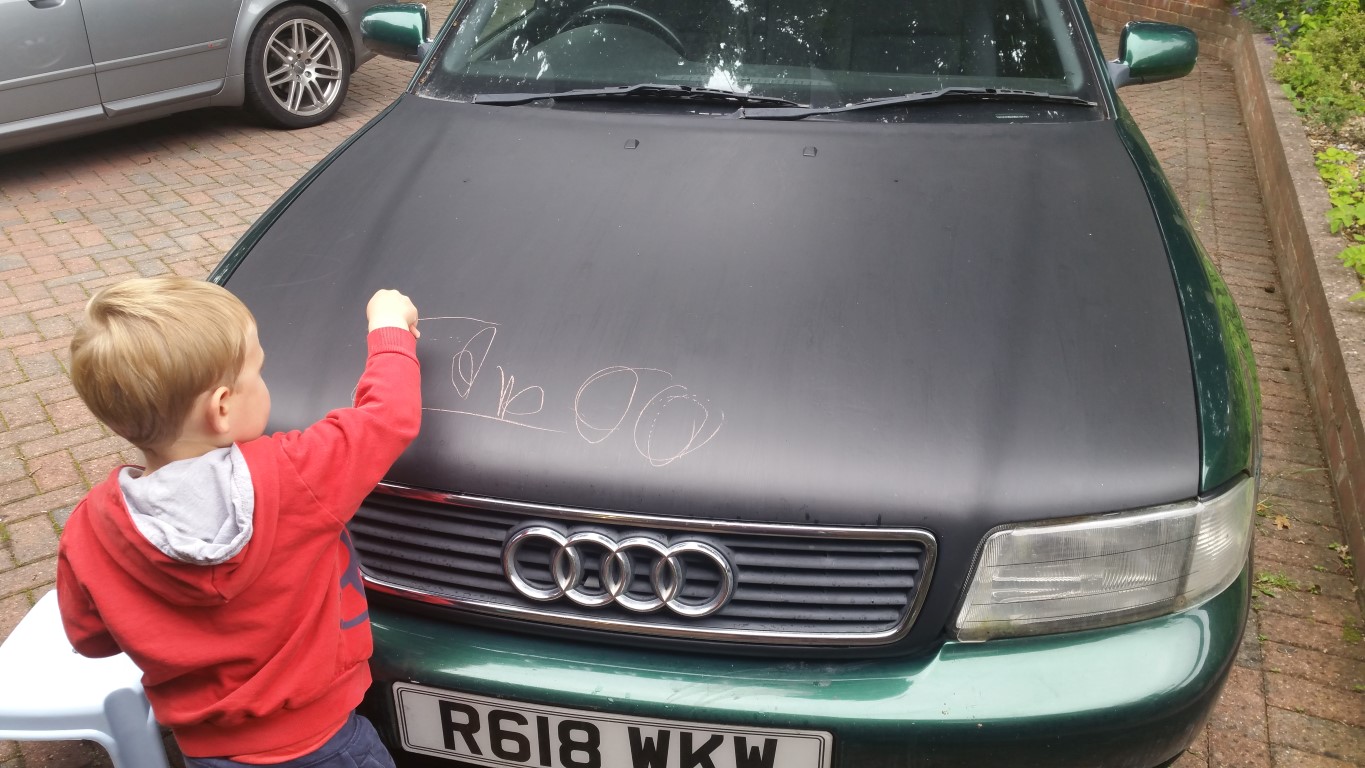
I had some old paintbrushes lying about, so grabbed one, and pulled out the grill,then quickly did this:

Starting to dry after second coat:

Mostly Dry:

My Son trying it out!:
Buoyed by this success, I moved on to other panels, starting with the front bumper:
I had found that the paint will end up with a very light grain that was not itself unappealing, but it meant that the last coat has to be carefully applied to follow the chosen grain direction to ensure it looks mostly uniform, and bends/edges required a bit of creativity to make it "flow".
I did some work on the centre caps of the alloys as some further test work, and they came out ok:

I then removed the bumper,(I was also doing some work on the cooling system at the time so killed two birds with one stone) popped out the grills, propped it up onto some axle stands. Then got to work sanding it down before a bit of masking, then finally applying two coats.


Drying:

Found a couple of runs (i had been painting in the dark mostly) that i had missed, so sanded them down in preparation for a final touch up:

This was a hard panel, it has a lot of curves, and hiding spots, and sanding took an age, and ensuring it was all covered evenly was tough.
Refitted:


Was pretty chuffed with that, and decided to move onto more panels!
Wings next!
Masked them up, removed the side repeaters:

I did both sides at once, alternating between coats. It was a warm day so they dried fast!


Ended up with this:


Really started to change the look now
I forgot, one of my earlier test panels after the bumper was the rear spoiler bit:

Next up was a big challenge... The roof! its a VAST panel on this estate, and doing it in 1 brushstroke to keep the grain in line was not easy. In the end, i painted from the sides towards the middle, and then went to the other side and joined it up, I was worried how it would come out, but it went quite well!
I had to pull out the roof rails/rubber seals:

After first coat:


I sanded it back a bit, and went again:

Was pretty happy with that. Biggest problem was bugs! I had to keep swatting them away till it was dry enough to stop them getting stuck..
Tape removed, still drying in a few places:

I masked, sanded, and double coated the wing mirrors inbetween coats:

Had to do some creative masking here, as i was too lazy to remove the glass and do a proper job, but they came out remarkable well, just struggled a bit with getting the grains right, so took a little longer than I would have liked..
I had to stop at this point for a while, as the weather was too windy/wet and my driveway is under some big trees, which makes it bad for painting at the best of times!
Still, a progress shot, shows the roof after it had dried (and got wet again..):

Next up a few weeks later was the boot! Same as before.
1 coat down, still very wet:

Second coat mostly dry:

Forgot to get a de-masked photo. But promptly moved onto the next big challenge!
Rear quarter.. Its a big long, and funny shape, so some carefull(ish) masking, and after 2 coats, still wet!:


Tape removed, and were ready to start the other side.

That's as far as I have got. and I will try and get the rest done soon, otherwise winter weather is going to make things diffcult!
I will be leaving the rear bumper till last, as I can take that off, and being it inside if needs be.
So, that leaves me 1 rear quarter and 4 doors to go!
It could be done in one solid day easily, perhaps only a couple of hours with decent weather, and careful management of time over each panel to get coats on quickly. However, fitting this around weekends with kids is quite hard! So, I expect it will be done one or two panels at a time when i get an hour or so to spare")
It is a 1998 Audi A4 1.8i
This was the only picture I got after I went to view it before it ended on eBay:
So, the paint was peeling in a few places:
I decided to do something about it. I sanded down the paint with some light sandpaper, and bought some pain and masking tape:
I had some old paintbrushes lying about, so grabbed one, and pulled out the grill,then quickly did this:
Starting to dry after second coat:
Mostly Dry:
My Son trying it out!:
Buoyed by this success, I moved on to other panels, starting with the front bumper:
I had found that the paint will end up with a very light grain that was not itself unappealing, but it meant that the last coat has to be carefully applied to follow the chosen grain direction to ensure it looks mostly uniform, and bends/edges required a bit of creativity to make it "flow".
I did some work on the centre caps of the alloys as some further test work, and they came out ok:
I then removed the bumper,(I was also doing some work on the cooling system at the time so killed two birds with one stone) popped out the grills, propped it up onto some axle stands. Then got to work sanding it down before a bit of masking, then finally applying two coats.
Drying:
Found a couple of runs (i had been painting in the dark mostly) that i had missed, so sanded them down in preparation for a final touch up:
This was a hard panel, it has a lot of curves, and hiding spots, and sanding took an age, and ensuring it was all covered evenly was tough.
Refitted:
Was pretty chuffed with that, and decided to move onto more panels!
Wings next!
Masked them up, removed the side repeaters:
I did both sides at once, alternating between coats. It was a warm day so they dried fast!
Ended up with this:
Really started to change the look now
I forgot, one of my earlier test panels after the bumper was the rear spoiler bit:
Next up was a big challenge... The roof! its a VAST panel on this estate, and doing it in 1 brushstroke to keep the grain in line was not easy. In the end, i painted from the sides towards the middle, and then went to the other side and joined it up, I was worried how it would come out, but it went quite well!
I had to pull out the roof rails/rubber seals:
After first coat:
I sanded it back a bit, and went again:
Was pretty happy with that. Biggest problem was bugs! I had to keep swatting them away till it was dry enough to stop them getting stuck..
Tape removed, still drying in a few places:
I masked, sanded, and double coated the wing mirrors inbetween coats:
Had to do some creative masking here, as i was too lazy to remove the glass and do a proper job, but they came out remarkable well, just struggled a bit with getting the grains right, so took a little longer than I would have liked..
I had to stop at this point for a while, as the weather was too windy/wet and my driveway is under some big trees, which makes it bad for painting at the best of times!
Still, a progress shot, shows the roof after it had dried (and got wet again..):
Next up a few weeks later was the boot! Same as before.
1 coat down, still very wet:
Second coat mostly dry:
Forgot to get a de-masked photo. But promptly moved onto the next big challenge!
Rear quarter.. Its a big long, and funny shape, so some carefull(ish) masking, and after 2 coats, still wet!:
Tape removed, and were ready to start the other side.
That's as far as I have got. and I will try and get the rest done soon, otherwise winter weather is going to make things diffcult!
I will be leaving the rear bumper till last, as I can take that off, and being it inside if needs be.
So, that leaves me 1 rear quarter and 4 doors to go!
It could be done in one solid day easily, perhaps only a couple of hours with decent weather, and careful management of time over each panel to get coats on quickly. However, fitting this around weekends with kids is quite hard! So, I expect it will be done one or two panels at a time when i get an hour or so to spare
Last edited:
 I think some teenagers decided to have a go instead, and kinda ruined the fun for the smaller kids!
