So in an attempt to delay going to the in laws for christmas day for as long as possible, I thought I'd tackle my blocked passenger washer Jet issue on the E46
Symptoms: 1 or both windscreen washer jets do not work but the headlight washers do. This rules out a clogged filter for the reservoir bottle as nothing would work in that case.
Issue: You have checked for blockages on the water tubes and used a narrow pin to clear the jets themselves but the issue persists.
You have now narrowed the problem to the washer jet enclosure itself.
Inside the washer jet enclosure is a rubber valve that is operated by water pressure against a little spring.
DIY: (be careful as these pieces are all plastic and potentially brittle after many years)
1: Unclip the water hose and electrical heater connection from the washer jet enclosure. You should end up with this piece
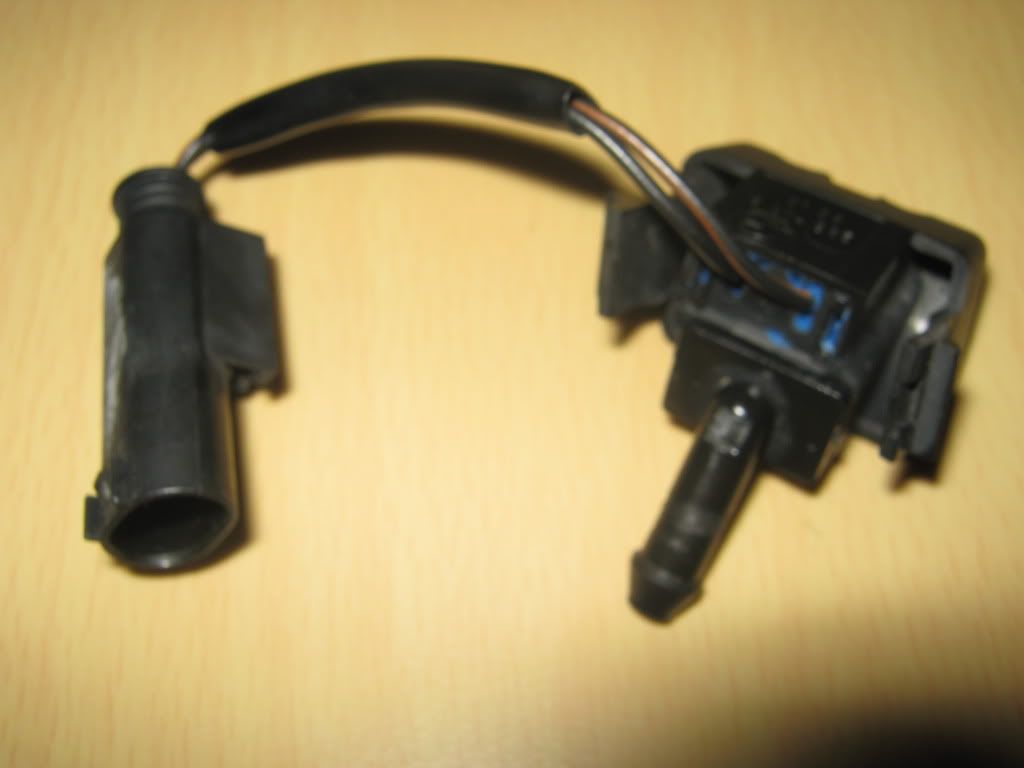
2: BE CAREFUL here as there is a small spring inside and once these 2 pieces seperate this spring may go anywhere rendering the washer jet enclosure useless.
Use a wide but narrow flat head screwdriver and insert it between the 2 pieces and twist to unclip the 2 parts - this piece may break, I was lucky in that the plastic bent enough for the 2 bits to be pulled apart *phew*
You should now have seperated this piece from the main body
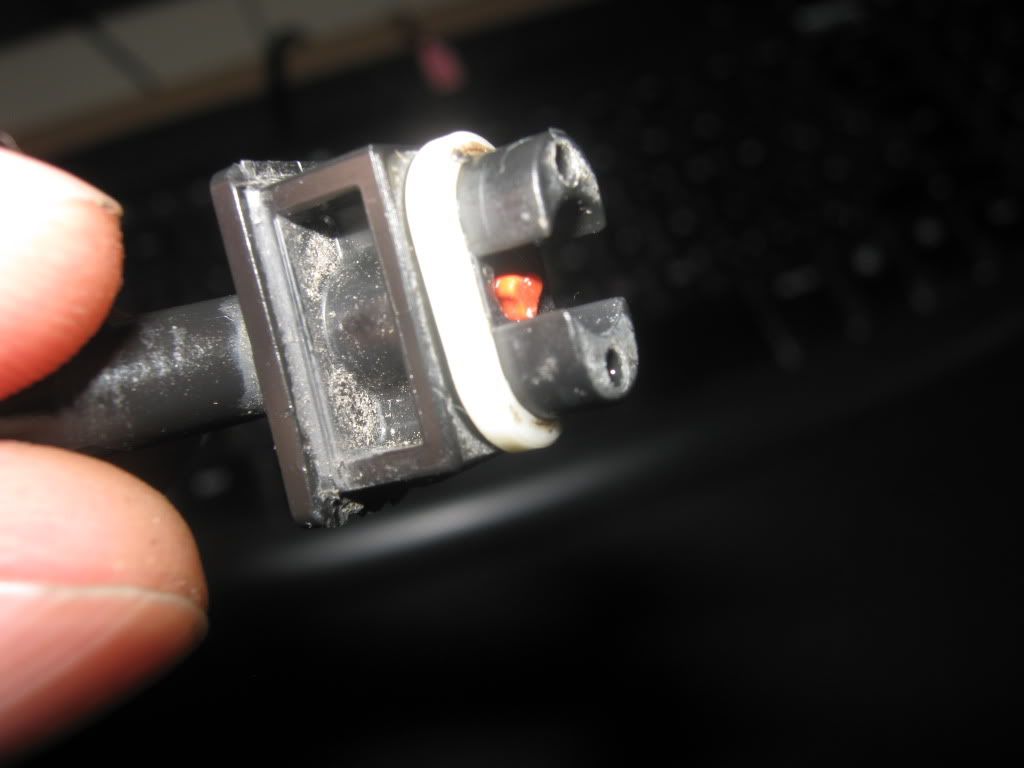
You can see the rubber seal and the cause of my problem - the orange rubber valve wedged inside! This may be caused by the water in the jets freezing and thawing and dislodging it out of place.
3: I used a pin to carefully pull the valve out. You should now have these 3 bits
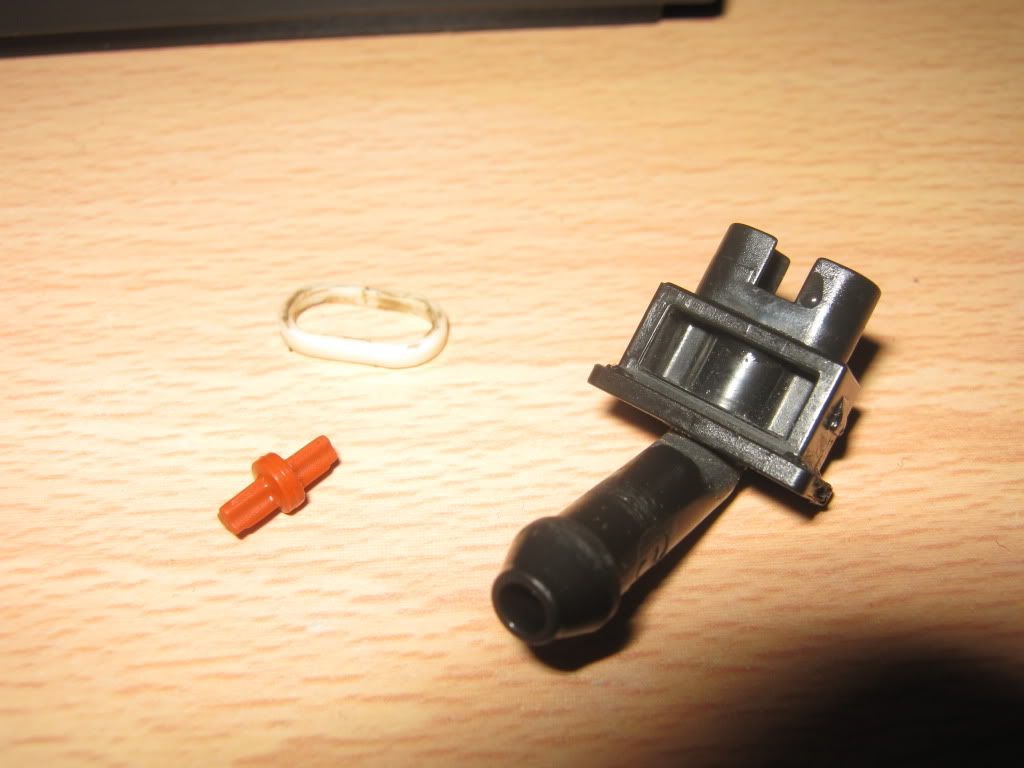
4: Here is a picture of all the seperate pieces - including the little spring
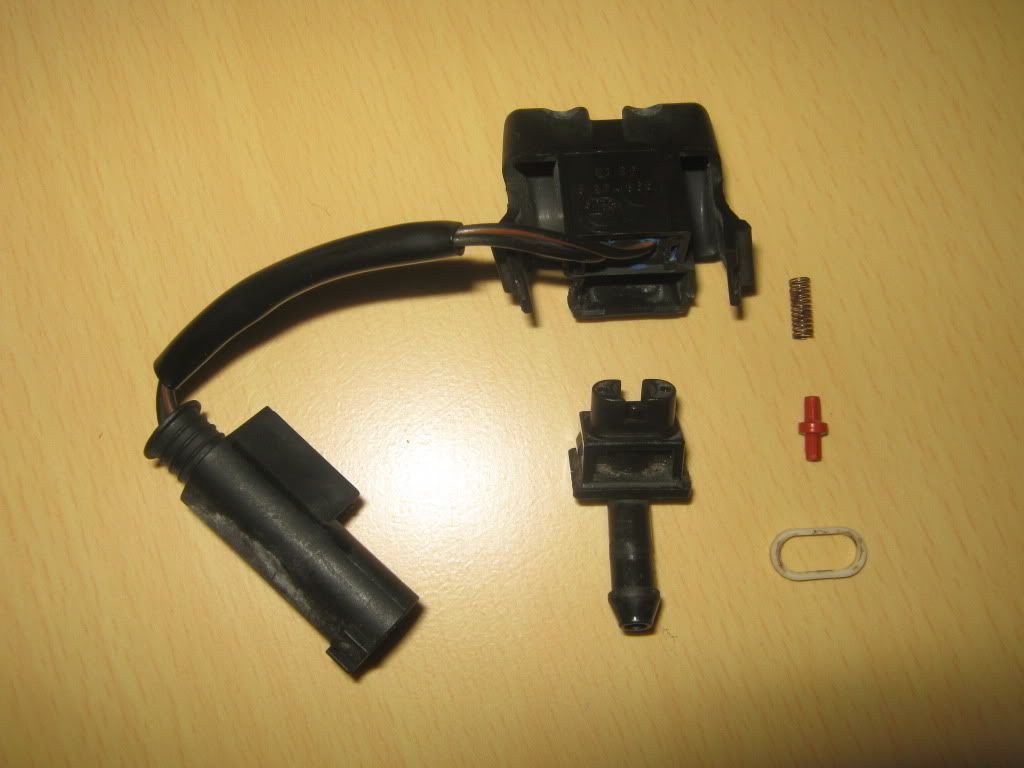
5: Reassemble like so
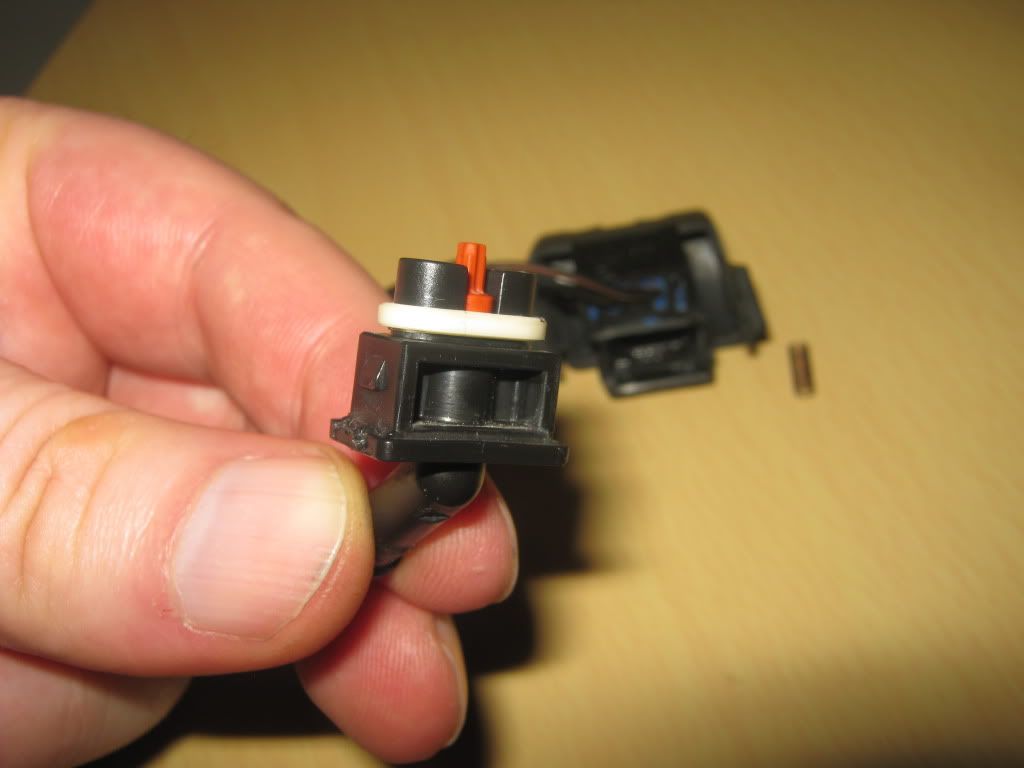
6: And place the little spring over the orange valve
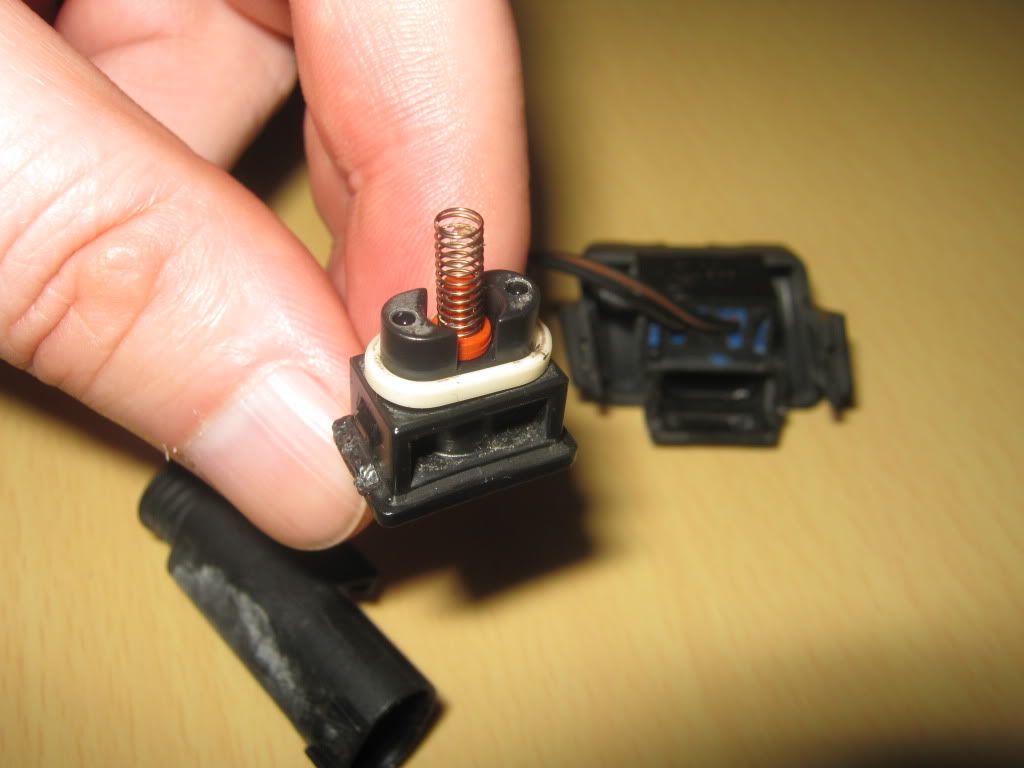
7: Now while holding all this upright, carefully lower the main enclosure bit over this and snap it all back in place - making sure the spring is centered.
8: Fit it all back to the car and enjoy working washer jets
Hope this helps anyone with the same issue - must go get ready now as the missus is jumping up and down at me
Symptoms: 1 or both windscreen washer jets do not work but the headlight washers do. This rules out a clogged filter for the reservoir bottle as nothing would work in that case.
Issue: You have checked for blockages on the water tubes and used a narrow pin to clear the jets themselves but the issue persists.
You have now narrowed the problem to the washer jet enclosure itself.
Inside the washer jet enclosure is a rubber valve that is operated by water pressure against a little spring.
DIY: (be careful as these pieces are all plastic and potentially brittle after many years)
1: Unclip the water hose and electrical heater connection from the washer jet enclosure. You should end up with this piece

2: BE CAREFUL here as there is a small spring inside and once these 2 pieces seperate this spring may go anywhere rendering the washer jet enclosure useless.
Use a wide but narrow flat head screwdriver and insert it between the 2 pieces and twist to unclip the 2 parts - this piece may break, I was lucky in that the plastic bent enough for the 2 bits to be pulled apart *phew*
You should now have seperated this piece from the main body

You can see the rubber seal and the cause of my problem - the orange rubber valve wedged inside! This may be caused by the water in the jets freezing and thawing and dislodging it out of place.
3: I used a pin to carefully pull the valve out. You should now have these 3 bits

4: Here is a picture of all the seperate pieces - including the little spring

5: Reassemble like so

6: And place the little spring over the orange valve

7: Now while holding all this upright, carefully lower the main enclosure bit over this and snap it all back in place - making sure the spring is centered.
8: Fit it all back to the car and enjoy working washer jets

Hope this helps anyone with the same issue - must go get ready now as the missus is jumping up and down at me


