Hello OCUK,
This is the write up of my recently completed project αclass (alphaclass), I will attempt to give you a retrospective insight into the build process and follow it up with photographs of the finished rig within the next few days.
Started in May 2014 this is actually my first watercooling project and the first time I have undertaken any serious case modding making it far more ambitious than everything I have done before. The name comes from the combination of alphacool and classified as that encompassed my ethos of a clean, elegant and high performing rig. The colour scheme follows the classifieds quite closely with the majority being black with accents in red and monochromatic shades. All of the core components came from my previous build 'JR23's rig' with the addition of a new Corsair 750D and a lot of watercooling kit making the full specification as follows...
Intel Ivy Bridge-E i7-4820k
Asus Rampage IV Formula
Asus Xonar Essence STX
EVGA GTX780 Classified x2
Corsair Dominator Platinum 4x4GB 2133MHz
Corsair Neutron GTX 240GB x2
Corsair AX860 Platinum
Alphacool NexXxos ST30 360
Alphacool NexXxos Monsta 360
Aquacomputer Aquaero 5 LT
Aquacomputer Aquaero 5 Passive Heatsink
Bitspower Black O-rings
Bitspower Matt Black Ball Valve
Bitspower Matt Black 90deg Rotary
Bitspower Matt Black 90deg G1/4 to G1/4 90deg Extender
Bitspower Matt Black 90deg G1/4 elbow
Bitspower Matt Black Rotary G1/4 to G1/4 x2
Bitspower Matt Black G1/4 Extension x3
Bitspower Matt Black G1/4 Stop Plug
Bitspower Matt Black G1/4 Low Profile Stop Plug x10
Corsair Obsidian 750D
Corsair Quiet Edition SP120 x12
Corsair Quiet Edition AF140
EK Supremacy Clean CSQ Nickel/Plexi
EK FC780 GTX Classy Clean CSQ Nickel/Plexi x2
EK FC780 GTX Classy Backplate x2
EK D5 Vario X-TOP Clean CSQ Plexi
EK RES X3 250 Black Acetal
EK RES X3 Multiport Top Black Acetal
Primochill Ghost 10/13 x16
Primochill Rigid clear acrylic tube 10/13
Matt Black 3mm and 5mm Acrylic sheet
MDPC-X Red, Grey mkII, Shade 19 and Black custom cables by Pexon PC's
Sorbothane 3mm sound dampening sheet
This was my first installment of predominately EK parts as they were the only manufacturer to supply blocks for the 780 Classified and the pump top, CPU block and res all match the Clean CSQ Nickel/Plexi look perfectly. The fittings are Primochill Ghosts along with Primochill 10/13 clear tube as their system seemed most robust and clean looking.


Once I got home from University for the summer I headed straight over to OCUK and picked up a crisp 750D, two boxes full of SP120's and an Aquaero 5 LT and once my radiators arrived I really started burning through the project.
To get the 750D to fit the hardware as cleanly as I wanted it in my head meant total destruction of most of it's internals. It's dremeltime!

After drilling out the relevant rivets there was just a cut to be made on either side to get rid of the optical drives for good. I narrowly avoided marking the inside of the roof with the dremel, and after some filing it all cleaned up ok although none of the cuts will be on show.

The main aim in removing the cages was to squeeze in a 360mm radiator which thanks to the abundance of mounting holes was quite easy, the bottom two fans mount through the cases standard holes and into the radiator. The top fan needed two more holes drilling for the bottom screws.

The second big concern was airflow and although I wanted to remove unnecessary restrictions I didn't want to create a route which avoided the dust filters, I also didn't want to change the exterior of the case. Half of the top fan is unobstructed and a bar which supports the optical bay covers passes straight across the centre with about 3mm of clearance to the fan blades.

Luckily the top radiator required no such modding and didn't interfere with the front radiator. I was very pleased to find the front radiator height was perfect. I guess I should clarify that I actually went with an Alphacool ST30 and a Monsta, having seen the 750D in the flesh I was worried that there wouldn't be enough clearance for a UT60 in the roof. Looking how tight it was against the motherboard saving the extra 5mm paid off.

Once the dirty jobs were out of the way I decided to block up and mock up. First was the Supremacy which after mounting a fair few H100i's seemed very familiar and a bit of a non event, if anything the springs made it even easier to apply an even pressure.

I hadn't ever taken a graphics card apart before so I was quite nervous about fitting the GPU blocks but after a quick watch of TTL's guide and a good read of the instructions it all went well. I used about a pea of AS MX-4 on each card.
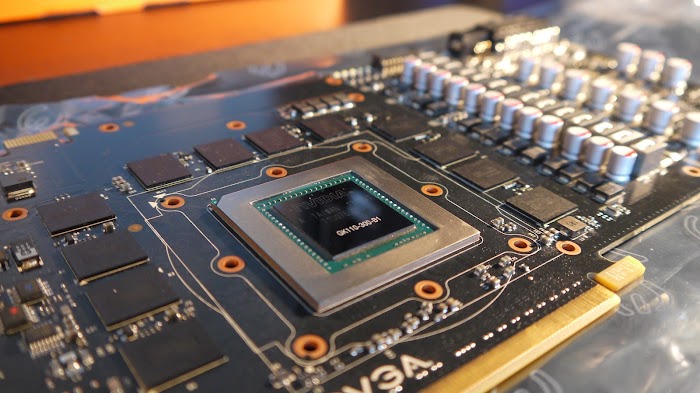
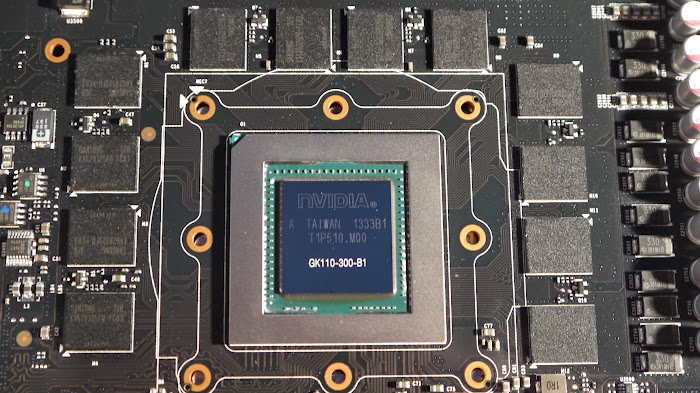
In the process I also got to find out which memory the Classys had which was intriguing, the first card had SK Hynix but the other had Samsung. I guess it would be nice if they were matched but at least neither had Elpida.

While I was at OCUK I couldn't resist picking up the EK backplates!


This was the second card with the Samsung.

With everything blocked I piled it all into the case so I could see if my tubing plans were going to be possible.

This isn't an odd ball camera effect the backplates somehow magically motion blur the reflection in the machining marks.

At this point I wasn't sure how the floor stealth mod would go, just trying things out I thought the SSD's would look good down there.

Corsair must have put some serious consideration into all of the fan mounts beyond just typical stock setups everything fitted together nicely without needing to shift anything radically.

After trying a few different slots I decide the sound card would work best at the bottom rather than inbetween the cards.

So 3-days of cutting and blocking up later this is how it stood.

The next task to complete was the tubing for which I had Primochill clear 10/13mm and most of the monsoon bending accessories. I actually binned over 16 feet to get 5 runs I was happy with as some have 3 bends and need to be 100% symmetrical it was extremely difficult. I've seen so many builds with wonky tube and dodgey corners that I had to make it perfect, I also don't like seeing 100's of fittings and angles. In the end I achieved the clean and flawless look I was after and actually it was quite fun and more controlled than flexible tube would have been.

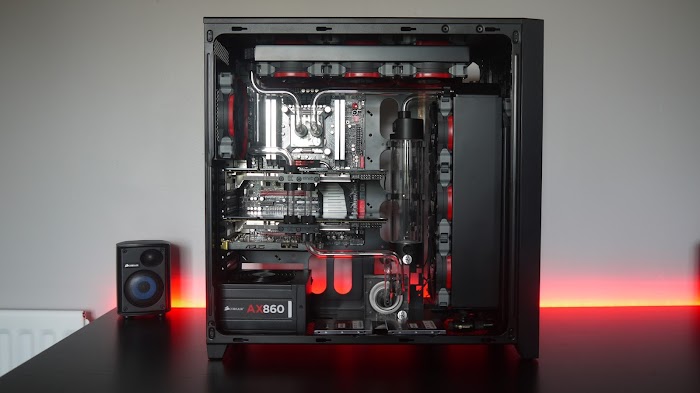

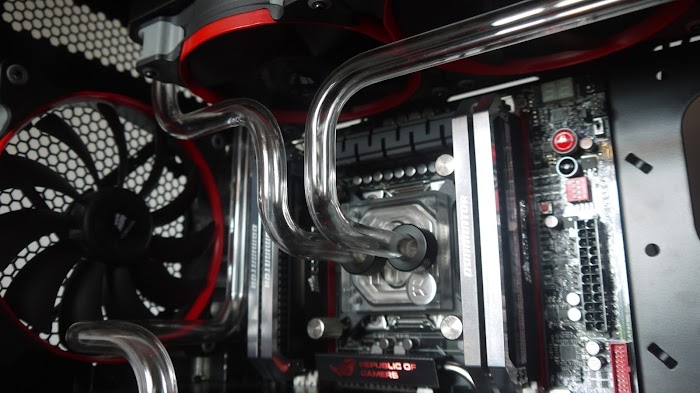


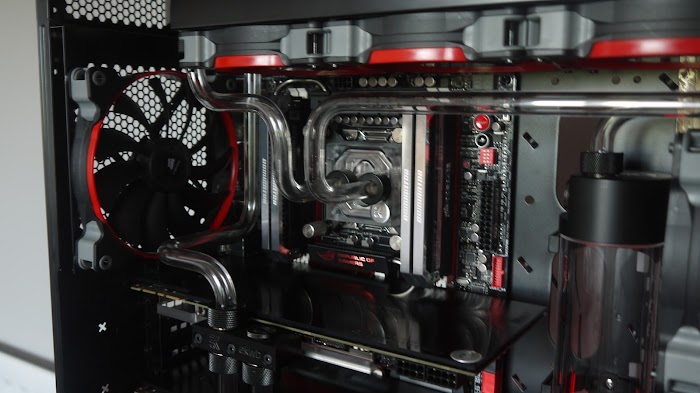


You will have also noticed a lot of little Bitspower fittings started appearing, a moderator on another forum got me addicted to them and they ended up costing far more than the original fittings for just a few stop plugs and a drain tap, they are absolutely lovely though.
I guess to most people at this point it's looking quite complete, all of the components are in, it's all tubed up and just waiting for cables right? Well I had other ideas about that, as a complete clean freak the interior of the 750D just didn't do it for me, hell I look at Caselabs and think 'that's a bit messy right there' so armed with a big stack of matt black acrylic sheet I set to work stealthing this puppy.

I ordered several pieces all cut to the correct external dimensions so I just had to take a few nibbles out of them. I was thinking I would use a circular saw and hacksaw along with a file to clean it up but that would leave some difficult places in the centre. To get around this I went and picked up some plastic cutting discs for my dremel and they just cut so nice I used them for everything.


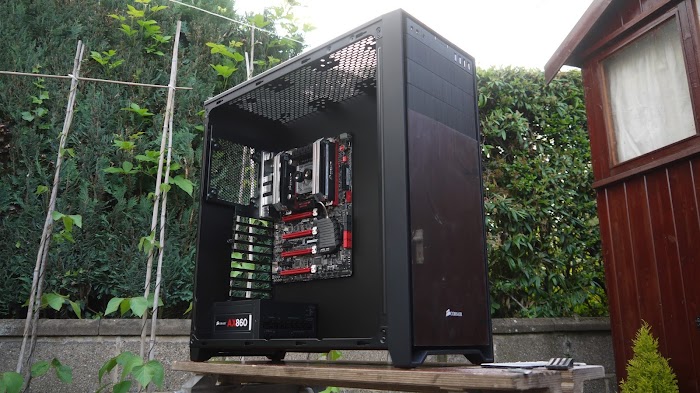
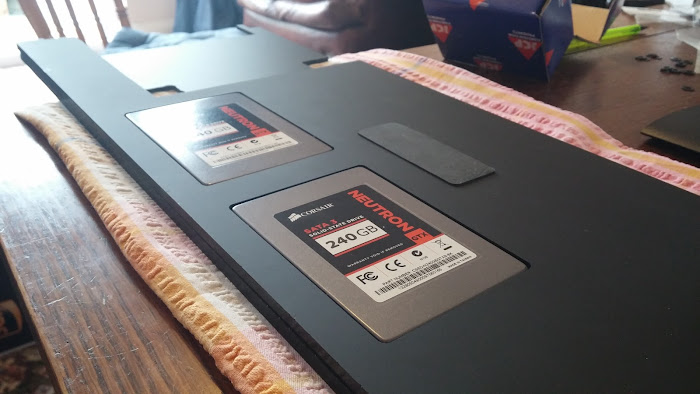
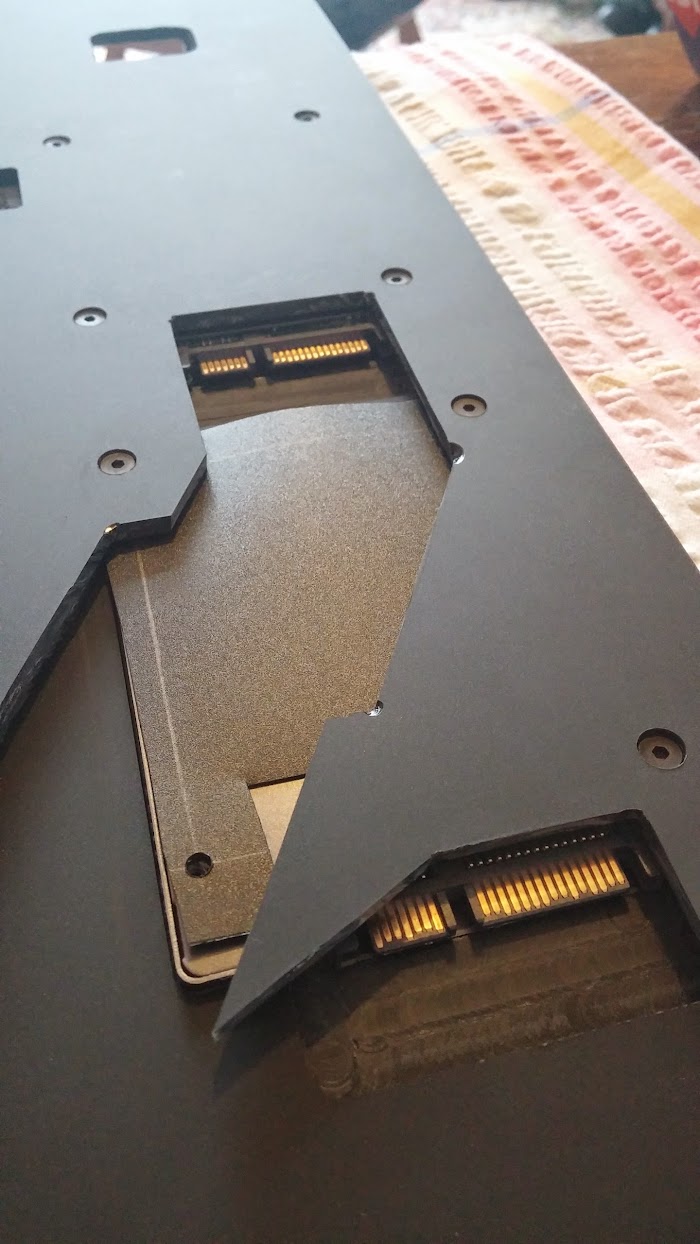
Once the simple flat panels had been taken care of I started working on my mod for the floor. I wanted to sink the SSD's flush inside it, hiding all of the wires and also creating a mount for the pump.

The next step in the fabrication of the floor was to cut out the void which the PSU would sit down into using the dremel.


So with that done it all went back together again...

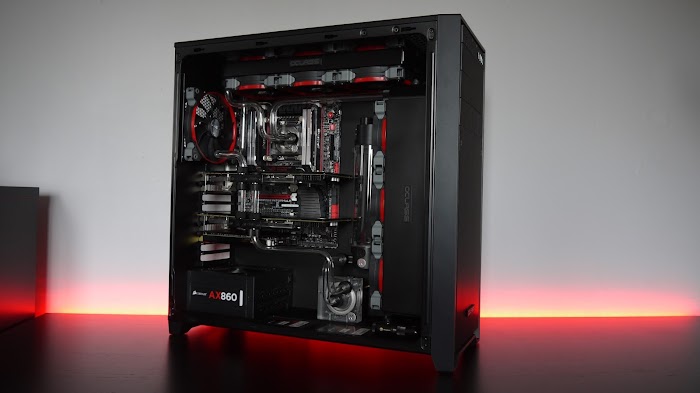
The floor mod all worked out and the SSD's sat in there nicely although not fully assembled at this point.
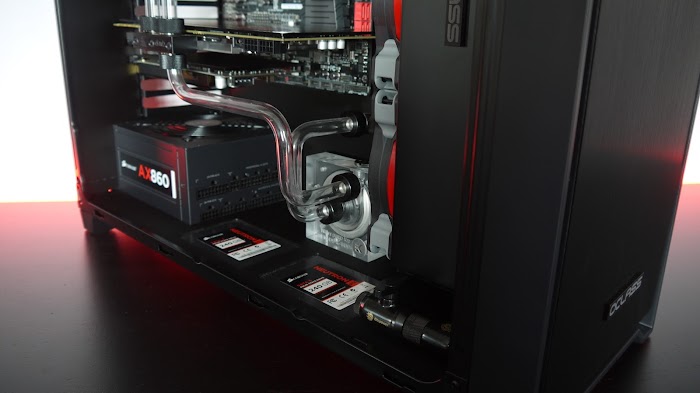


I love the shadows and contrast in this pic, the end of the radiators just disappear, I love being a clean freak.


Oh yeah how the hell could I forget this for the last 7 pictures!
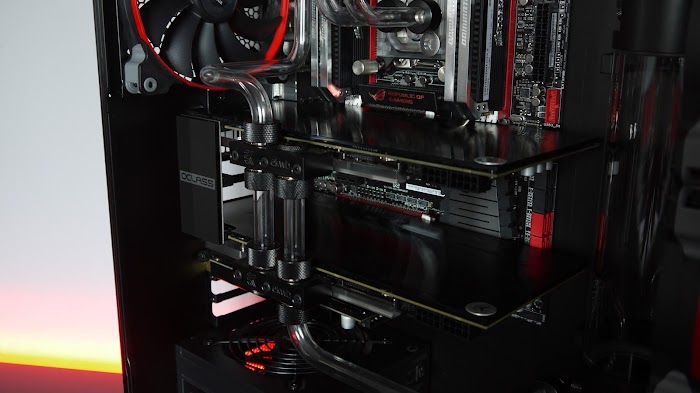

Then a little more progress was made with the mount for the Aquaero's. It was made from two pieces of acrylic one 5mm and one 3mm, the 5mm piece has a large hole cut from it and was then glued to the 3mm piece. I milled all of the edges true so it looked like one homogeneous piece and then polished the edges. This piece will now get glued to the motherboard tray behind the holes for the aquaero and they will then screw into it.

This is where it fits snugly behind the Monsta. The Aquaero's are a ridiculously perfect fit in the motherboard tray and sit flush with it on both sides so this will look super clean from all angles.

At this point I was also working on JR2.0, pretty intense building action going down in my room.

Still had time for a bit of GTA V though, on PS3

So with the stealth modding over at this point it was genuinely looking complete, so is what I did was take it all apart again!

Makes sense right?


Milling all of the cable holes was very challenging on the little milling machine but somehow I managed to reach all of them.


After months and months of messing around, throwing all of my components in a wardrobe and ripping the case apart again it finally started going together for the very last time.
Life hack: cable tie the first set of fans to the roof and put the screws through to locate them, then simply offer up the radiator and screw it in.

I did this so that I could get each fan plugged in to it's own respective fan extension. All of which were assembled and sleeved through the motherboard tray.

So here's the top 360 mounted and wired in, not that you would know

All 12 SP120's had been sleeved and had their cables shortened by Pexon so they all sit neatly hiding their connector.

<3 Corsair 'dust' filter, so clean.

The big 360 in the front of course has a very similar cable routing solution with a 6mm hole for each fan. The acrylic plate holds the aquaero's in place giving the extra bit of room for cables in the back.

Eventually 3 months after starting the project coolant went in! There was just one leak around the bottom of the tube res which I quite easily tightened together in situ and carried on. All of the fittings were fantastic and sealed perfectly, kudos to primochill.

It took about 1.5 litres to fill the loop however most of that went into the Monsta.

After some gentle shakes and changing the pump speed the loop gradually emptied itself of air and after about half an hour became completely silent aside the gentle hum of the D5.

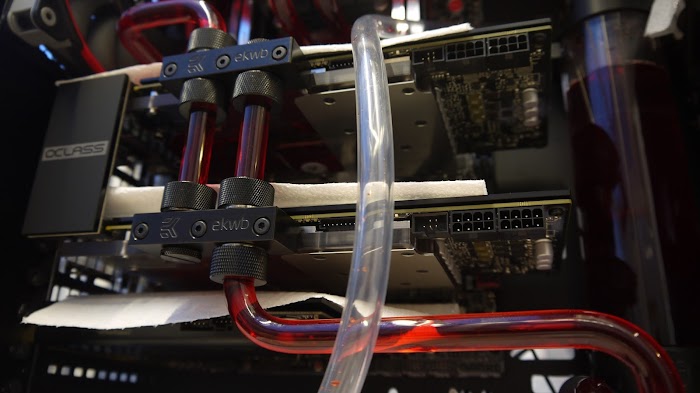
It was left running for 20 hours and came out of the other side perfectly.

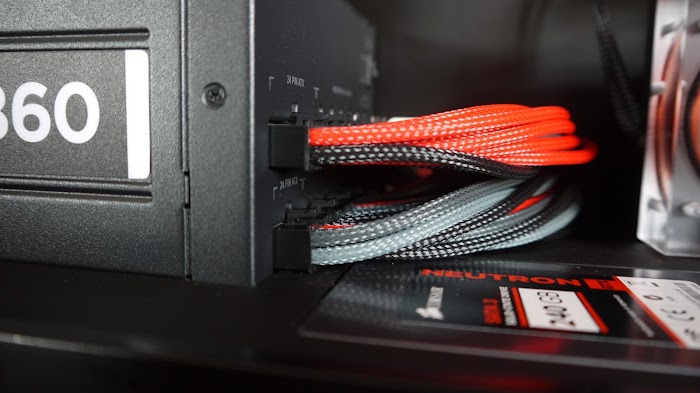
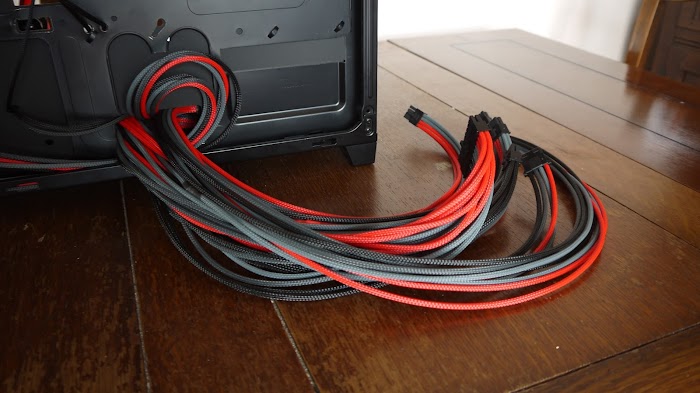
Finaly I had cables, many beautiful cables from Pexon PC's.


First ever boot under water!


Eventually, much much time and money later...
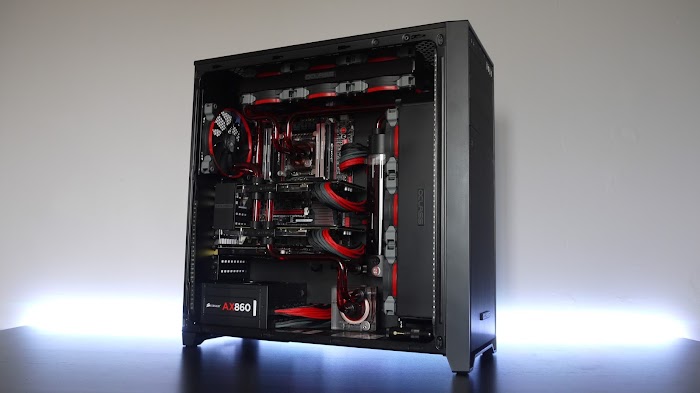


Complete alongside JR2.0

And how i'm using it now.

Thank you very much for scrolling through this epic post even if you just blasted through the pictures. I would appreciate your feedback and comments and thanks for your support. There will be some far more detailed final photographs coming when I get enough free time to take them.
JR
This is the write up of my recently completed project αclass (alphaclass), I will attempt to give you a retrospective insight into the build process and follow it up with photographs of the finished rig within the next few days.
Started in May 2014 this is actually my first watercooling project and the first time I have undertaken any serious case modding making it far more ambitious than everything I have done before. The name comes from the combination of alphacool and classified as that encompassed my ethos of a clean, elegant and high performing rig. The colour scheme follows the classifieds quite closely with the majority being black with accents in red and monochromatic shades. All of the core components came from my previous build 'JR23's rig' with the addition of a new Corsair 750D and a lot of watercooling kit making the full specification as follows...
Intel Ivy Bridge-E i7-4820k
Asus Rampage IV Formula
Asus Xonar Essence STX
EVGA GTX780 Classified x2
Corsair Dominator Platinum 4x4GB 2133MHz
Corsair Neutron GTX 240GB x2
Corsair AX860 Platinum
Alphacool NexXxos ST30 360
Alphacool NexXxos Monsta 360
Aquacomputer Aquaero 5 LT
Aquacomputer Aquaero 5 Passive Heatsink
Bitspower Black O-rings
Bitspower Matt Black Ball Valve
Bitspower Matt Black 90deg Rotary
Bitspower Matt Black 90deg G1/4 to G1/4 90deg Extender
Bitspower Matt Black 90deg G1/4 elbow
Bitspower Matt Black Rotary G1/4 to G1/4 x2
Bitspower Matt Black G1/4 Extension x3
Bitspower Matt Black G1/4 Stop Plug
Bitspower Matt Black G1/4 Low Profile Stop Plug x10
Corsair Obsidian 750D
Corsair Quiet Edition SP120 x12
Corsair Quiet Edition AF140
EK Supremacy Clean CSQ Nickel/Plexi
EK FC780 GTX Classy Clean CSQ Nickel/Plexi x2
EK FC780 GTX Classy Backplate x2
EK D5 Vario X-TOP Clean CSQ Plexi
EK RES X3 250 Black Acetal
EK RES X3 Multiport Top Black Acetal
Primochill Ghost 10/13 x16
Primochill Rigid clear acrylic tube 10/13
Matt Black 3mm and 5mm Acrylic sheet
MDPC-X Red, Grey mkII, Shade 19 and Black custom cables by Pexon PC's
Sorbothane 3mm sound dampening sheet
This was my first installment of predominately EK parts as they were the only manufacturer to supply blocks for the 780 Classified and the pump top, CPU block and res all match the Clean CSQ Nickel/Plexi look perfectly. The fittings are Primochill Ghosts along with Primochill 10/13 clear tube as their system seemed most robust and clean looking.
Once I got home from University for the summer I headed straight over to OCUK and picked up a crisp 750D, two boxes full of SP120's and an Aquaero 5 LT and once my radiators arrived I really started burning through the project.
To get the 750D to fit the hardware as cleanly as I wanted it in my head meant total destruction of most of it's internals. It's dremeltime!

After drilling out the relevant rivets there was just a cut to be made on either side to get rid of the optical drives for good. I narrowly avoided marking the inside of the roof with the dremel, and after some filing it all cleaned up ok although none of the cuts will be on show.

The main aim in removing the cages was to squeeze in a 360mm radiator which thanks to the abundance of mounting holes was quite easy, the bottom two fans mount through the cases standard holes and into the radiator. The top fan needed two more holes drilling for the bottom screws.

The second big concern was airflow and although I wanted to remove unnecessary restrictions I didn't want to create a route which avoided the dust filters, I also didn't want to change the exterior of the case. Half of the top fan is unobstructed and a bar which supports the optical bay covers passes straight across the centre with about 3mm of clearance to the fan blades.

Luckily the top radiator required no such modding and didn't interfere with the front radiator. I was very pleased to find the front radiator height was perfect. I guess I should clarify that I actually went with an Alphacool ST30 and a Monsta, having seen the 750D in the flesh I was worried that there wouldn't be enough clearance for a UT60 in the roof. Looking how tight it was against the motherboard saving the extra 5mm paid off.

Once the dirty jobs were out of the way I decided to block up and mock up. First was the Supremacy which after mounting a fair few H100i's seemed very familiar and a bit of a non event, if anything the springs made it even easier to apply an even pressure.
I hadn't ever taken a graphics card apart before so I was quite nervous about fitting the GPU blocks but after a quick watch of TTL's guide and a good read of the instructions it all went well. I used about a pea of AS MX-4 on each card.
In the process I also got to find out which memory the Classys had which was intriguing, the first card had SK Hynix but the other had Samsung. I guess it would be nice if they were matched but at least neither had Elpida.
While I was at OCUK I couldn't resist picking up the EK backplates!
This was the second card with the Samsung.
With everything blocked I piled it all into the case so I could see if my tubing plans were going to be possible.
This isn't an odd ball camera effect the backplates somehow magically motion blur the reflection in the machining marks.
At this point I wasn't sure how the floor stealth mod would go, just trying things out I thought the SSD's would look good down there.
Corsair must have put some serious consideration into all of the fan mounts beyond just typical stock setups everything fitted together nicely without needing to shift anything radically.
After trying a few different slots I decide the sound card would work best at the bottom rather than inbetween the cards.
So 3-days of cutting and blocking up later this is how it stood.
The next task to complete was the tubing for which I had Primochill clear 10/13mm and most of the monsoon bending accessories. I actually binned over 16 feet to get 5 runs I was happy with as some have 3 bends and need to be 100% symmetrical it was extremely difficult. I've seen so many builds with wonky tube and dodgey corners that I had to make it perfect, I also don't like seeing 100's of fittings and angles. In the end I achieved the clean and flawless look I was after and actually it was quite fun and more controlled than flexible tube would have been.
You will have also noticed a lot of little Bitspower fittings started appearing, a moderator on another forum got me addicted to them and they ended up costing far more than the original fittings for just a few stop plugs and a drain tap, they are absolutely lovely though.
I guess to most people at this point it's looking quite complete, all of the components are in, it's all tubed up and just waiting for cables right? Well I had other ideas about that, as a complete clean freak the interior of the 750D just didn't do it for me, hell I look at Caselabs and think 'that's a bit messy right there' so armed with a big stack of matt black acrylic sheet I set to work stealthing this puppy.

I ordered several pieces all cut to the correct external dimensions so I just had to take a few nibbles out of them. I was thinking I would use a circular saw and hacksaw along with a file to clean it up but that would leave some difficult places in the centre. To get around this I went and picked up some plastic cutting discs for my dremel and they just cut so nice I used them for everything.


Once the simple flat panels had been taken care of I started working on my mod for the floor. I wanted to sink the SSD's flush inside it, hiding all of the wires and also creating a mount for the pump.

The next step in the fabrication of the floor was to cut out the void which the PSU would sit down into using the dremel.


So with that done it all went back together again...
The floor mod all worked out and the SSD's sat in there nicely although not fully assembled at this point.
I love the shadows and contrast in this pic, the end of the radiators just disappear, I love being a clean freak.
Oh yeah how the hell could I forget this for the last 7 pictures!
Then a little more progress was made with the mount for the Aquaero's. It was made from two pieces of acrylic one 5mm and one 3mm, the 5mm piece has a large hole cut from it and was then glued to the 3mm piece. I milled all of the edges true so it looked like one homogeneous piece and then polished the edges. This piece will now get glued to the motherboard tray behind the holes for the aquaero and they will then screw into it.
This is where it fits snugly behind the Monsta. The Aquaero's are a ridiculously perfect fit in the motherboard tray and sit flush with it on both sides so this will look super clean from all angles.
At this point I was also working on JR2.0, pretty intense building action going down in my room.
Still had time for a bit of GTA V though, on PS3

So with the stealth modding over at this point it was genuinely looking complete, so is what I did was take it all apart again!

Makes sense right?


Milling all of the cable holes was very challenging on the little milling machine but somehow I managed to reach all of them.


After months and months of messing around, throwing all of my components in a wardrobe and ripping the case apart again it finally started going together for the very last time.
Life hack: cable tie the first set of fans to the roof and put the screws through to locate them, then simply offer up the radiator and screw it in.
I did this so that I could get each fan plugged in to it's own respective fan extension. All of which were assembled and sleeved through the motherboard tray.
So here's the top 360 mounted and wired in, not that you would know

All 12 SP120's had been sleeved and had their cables shortened by Pexon so they all sit neatly hiding their connector.
<3 Corsair 'dust' filter, so clean.
The big 360 in the front of course has a very similar cable routing solution with a 6mm hole for each fan. The acrylic plate holds the aquaero's in place giving the extra bit of room for cables in the back.
Eventually 3 months after starting the project coolant went in! There was just one leak around the bottom of the tube res which I quite easily tightened together in situ and carried on. All of the fittings were fantastic and sealed perfectly, kudos to primochill.
It took about 1.5 litres to fill the loop however most of that went into the Monsta.
After some gentle shakes and changing the pump speed the loop gradually emptied itself of air and after about half an hour became completely silent aside the gentle hum of the D5.
It was left running for 20 hours and came out of the other side perfectly.
Finaly I had cables, many beautiful cables from Pexon PC's.
First ever boot under water!
Eventually, much much time and money later...
Complete alongside JR2.0
And how i'm using it now.
Thank you very much for scrolling through this epic post even if you just blasted through the pictures. I would appreciate your feedback and comments and thanks for your support. There will be some far more detailed final photographs coming when I get enough free time to take them.
JR
Last edited:


 Thanks I appreciate the want, having spent so long working to get it to this level I don't really appreciate 'having' it that much. It's just going through the process of choosing everything and doing it, overcoming problems in the cleanest way, that I enjoy and get serious pleasure out of, i'm not a very big gamer nor is overclocking really of much interest to me.
 Love the SSD mounting idea of yours though!