Associate
- Joined
- 21 Feb 2010
- Posts
- 17
Hello.
Forgive the project name i have become so entangled in this project i haven't actually came up for a name.
It has been called many of names up until now but none of which are suitable for forums.
A little bit of history. I am not a joiner/chippy/carpenter i am actually a mechanical guy so a good majority of these tools i have never used professionally nor do i really work with wood but i prefer working with wood over sheet metal given the flexibility that is wood.
In choice of design most of the picture i see on other builds are the box standard square desk which is fine enough as i can see the appeal over a normal desk with spacing e.t.c. For me however i wanted something different and as you will see and i will try explain the best i can why a curved desk might not be so appealing but most certainly is different.
and at the moment this project is not complete as will be obvious but most likely there will not be an update apart from answering comments/questions until either the end of September or Christmas. Why so long? Because i spend most of the year working outside of the UK. Why spend so much money on a build that will not be used ? because this is something i have wanted to do for a long time but never had the space. Regardless of personal circumstances. And its a Hobby if i was to be honest.
So Anyway. I literally got back from Italy on the 26th August. on the 29th I had moved into a new house sorted out all that i needed too and picked up the materials i would need ( at least to begin with)
Material - 12mm Birch Plywood and 8mm Flexible (short grain) Plywood
Tools - Circular saw. Router. Drill. Jigsaw. Electric sander. And normal handtools
motivation - lots and lots of coffee
Hardware - Corsair HX 1000. 2x EK-CoolStream XE 360. 2x XSPC D5 Photon 270. 8x Cryorig QF120 and 4x bit fenix fans
Other hardware i have not decided on yet but will do in due course. Onwards to the pictures and the pitfalls.
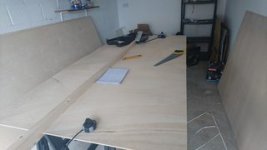
The very first cut would be the upper part of the desk as this is the longest piece in the 12mm birch. The radius were marked using trammel points and make up 350° (ish) as you can see the pencil lines on failed attempts.
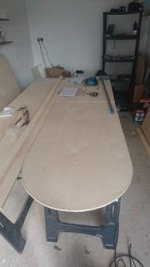
marking out for the shelves
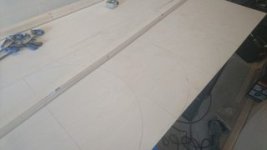
first shelf carcass made
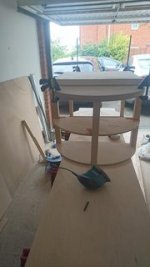
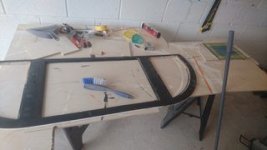
marking out the top desk section for where the glass will go and access points (i would later enlarge the glass area)
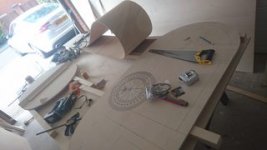
the lower half of the desk section. comprised of 2 radius cuts. 45° cuts to raise up the center partition by about 60mm
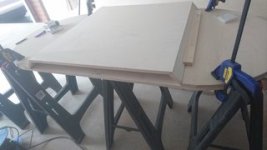
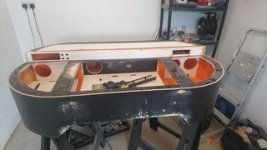
the boxing which i had originally made 350mm tall. When i looked at it when i made this resembelled more like a coffin. i ended up cutting 100mm off to make look more suitable (i would later regret this)
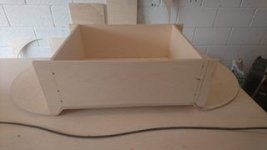
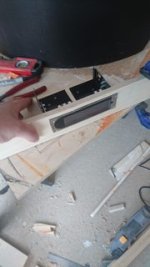
the part on top is where a piece of acrylic will sit which the motherboard will sit. The idea behind this is that all the cables will come from underneath and all being well i should physically be able too disconnect pipework and lift out the hole tray for bench testing or general assembly
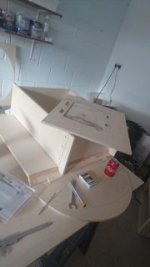
access panels and glass area cut out
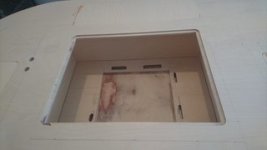
coming together
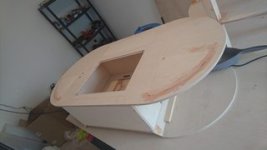
primer paint and holes cut out. the support underneath are 21mm to allow for cables to be passed through
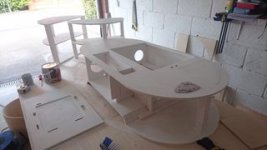
first turn of flexi ply added to complete the carcass- pre sanding
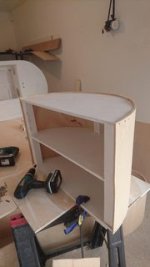
it was at this point i knew i was going to have a problem with the painting
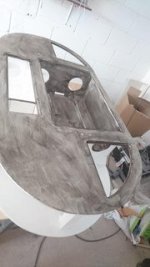
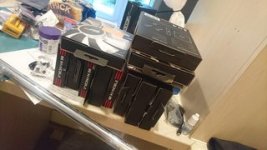
some parts
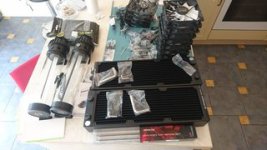
more parts
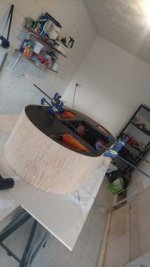
final wrapping on desk
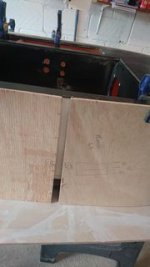
nothing a bit of wood filler wont fix
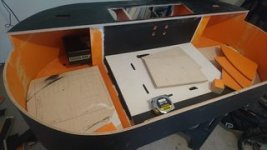
This will haunt me for making an impulsive decision. Originally i had planned the 2 radiators to go one on top of each other, However when i ripped 100mm from the box i never too this into consideration and was 10mm too short and i was running out of time before i had to go back to work. So the soloution has been too put them at 90° to each other. One will draw air from the back side and the other will draw air from the underside. at the moment this was the only soloution because of the curved design i am unable to locate them anywhere else.
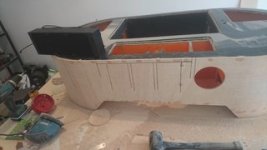
more painting and sanding
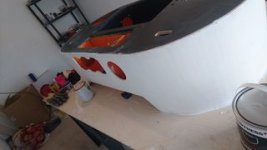
cutouts
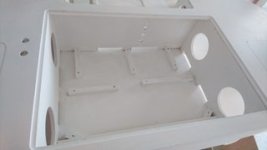
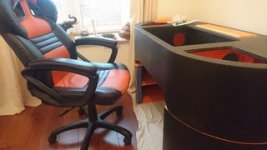
so this is where im at
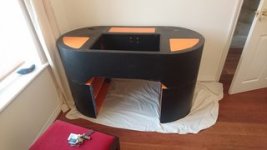
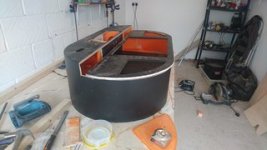
now i have spent about 4 days of painting and sanding and i can not get the finish i want on the wood and it is taking up too much time. The desk top is nearly there but the flexible ply i really deeply grained so i have decided that i am going to vinyl wrap in the colours. I also need to get some sort of graphics on the upper desk too take away the black. until this is done it is pointless in fitting any components.
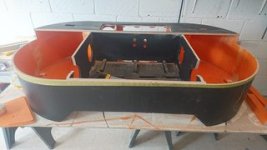
every component can be accessed and removed through the 3 access holes. i have some parts still too tidy up but i started to rush trying to achieve because i leave the UK today. I had originally planned to groove in some lines and use some EK wire to add some lighting but on light test it is not as bright as i had hoped so this got shelved. What i have done instead when i wrapped the upper desk section i have left about 40mm more so i can fix a led strip under both sides which will light up the underside and the shelf unit top. i also have chrome poles to fit to seperate the shelf and the desk by about 100mm.
I extended the underside angles to match but this was a bad decision as now it does not sit so well with the shelfing i will figure something out by either making a correction and having this 90° to the underside so it blends or do something else. Needless to say i now have the time to reflect on choices and decision.
apologies for spelling. Sitting in Heathrow and my flight is ready so will correct when i get a chance
Reaper
Edit - Sincere apologies those pictures were huge.. now sorted
Forgive the project name i have become so entangled in this project i haven't actually came up for a name.
It has been called many of names up until now but none of which are suitable for forums.
A little bit of history. I am not a joiner/chippy/carpenter i am actually a mechanical guy so a good majority of these tools i have never used professionally nor do i really work with wood but i prefer working with wood over sheet metal given the flexibility that is wood.
In choice of design most of the picture i see on other builds are the box standard square desk which is fine enough as i can see the appeal over a normal desk with spacing e.t.c. For me however i wanted something different and as you will see and i will try explain the best i can why a curved desk might not be so appealing but most certainly is different.
and at the moment this project is not complete as will be obvious but most likely there will not be an update apart from answering comments/questions until either the end of September or Christmas. Why so long? Because i spend most of the year working outside of the UK. Why spend so much money on a build that will not be used ? because this is something i have wanted to do for a long time but never had the space. Regardless of personal circumstances. And its a Hobby if i was to be honest.
So Anyway. I literally got back from Italy on the 26th August. on the 29th I had moved into a new house sorted out all that i needed too and picked up the materials i would need ( at least to begin with)
Material - 12mm Birch Plywood and 8mm Flexible (short grain) Plywood
Tools - Circular saw. Router. Drill. Jigsaw. Electric sander. And normal handtools
motivation - lots and lots of coffee
Hardware - Corsair HX 1000. 2x EK-CoolStream XE 360. 2x XSPC D5 Photon 270. 8x Cryorig QF120 and 4x bit fenix fans
Other hardware i have not decided on yet but will do in due course. Onwards to the pictures and the pitfalls.

The very first cut would be the upper part of the desk as this is the longest piece in the 12mm birch. The radius were marked using trammel points and make up 350° (ish) as you can see the pencil lines on failed attempts.

marking out for the shelves

first shelf carcass made

marking out the top desk section for where the glass will go and access points (i would later enlarge the glass area)

the lower half of the desk section. comprised of 2 radius cuts. 45° cuts to raise up the center partition by about 60mm

the boxing which i had originally made 350mm tall. When i looked at it when i made this resembelled more like a coffin. i ended up cutting 100mm off to make look more suitable (i would later regret this)

the part on top is where a piece of acrylic will sit which the motherboard will sit. The idea behind this is that all the cables will come from underneath and all being well i should physically be able too disconnect pipework and lift out the hole tray for bench testing or general assembly

access panels and glass area cut out

coming together

primer paint and holes cut out. the support underneath are 21mm to allow for cables to be passed through

first turn of flexi ply added to complete the carcass- pre sanding

it was at this point i knew i was going to have a problem with the painting

some parts

more parts

final wrapping on desk

nothing a bit of wood filler wont fix

This will haunt me for making an impulsive decision. Originally i had planned the 2 radiators to go one on top of each other, However when i ripped 100mm from the box i never too this into consideration and was 10mm too short and i was running out of time before i had to go back to work. So the soloution has been too put them at 90° to each other. One will draw air from the back side and the other will draw air from the underside. at the moment this was the only soloution because of the curved design i am unable to locate them anywhere else.

more painting and sanding

cutouts

so this is where im at

now i have spent about 4 days of painting and sanding and i can not get the finish i want on the wood and it is taking up too much time. The desk top is nearly there but the flexible ply i really deeply grained so i have decided that i am going to vinyl wrap in the colours. I also need to get some sort of graphics on the upper desk too take away the black. until this is done it is pointless in fitting any components.
every component can be accessed and removed through the 3 access holes. i have some parts still too tidy up but i started to rush trying to achieve because i leave the UK today. I had originally planned to groove in some lines and use some EK wire to add some lighting but on light test it is not as bright as i had hoped so this got shelved. What i have done instead when i wrapped the upper desk section i have left about 40mm more so i can fix a led strip under both sides which will light up the underside and the shelf unit top. i also have chrome poles to fit to seperate the shelf and the desk by about 100mm.
I extended the underside angles to match but this was a bad decision as now it does not sit so well with the shelfing i will figure something out by either making a correction and having this 90° to the underside so it blends or do something else. Needless to say i now have the time to reflect on choices and decision.
apologies for spelling. Sitting in Heathrow and my flight is ready so will correct when i get a chance
Reaper
Edit - Sincere apologies those pictures were huge.. now sorted
Last edited:


 before going away again. Such is the life