Associate
- Joined
- 4 Jan 2007
- Posts
- 197
- Location
- Stoke
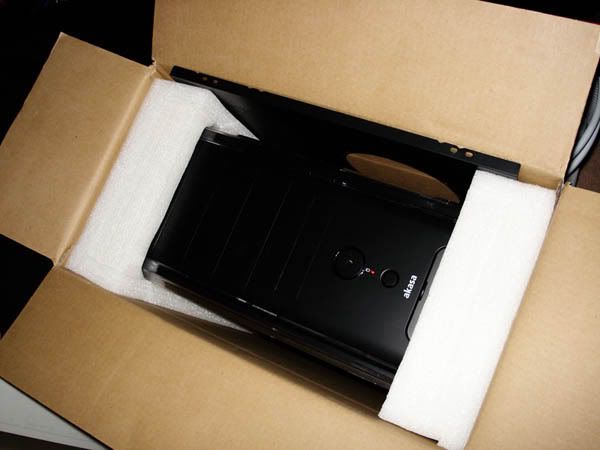
This is going to be my first major mod. In a nutshell, I’m modding an akasa zen for my girlfriend because she’s always lamenting the lack of “nice, girly” cases available. I’m going to post all my efforts in here, and I’ll be aided and abetted by my girlfriend along the way.
The themes are really simplicity, funky/bold and girly.
PLANNING.
At the moment, she has a white Zen but she’s moved house and her new house has had a lot of building work done on it, so it’s been bashed about a bit. Originally she wanted to mod her case, but I bought a new one so we could start fresh.
The plans are quite simple:
- A custom window.
- Internal and external paint job.
- A custom front panel.
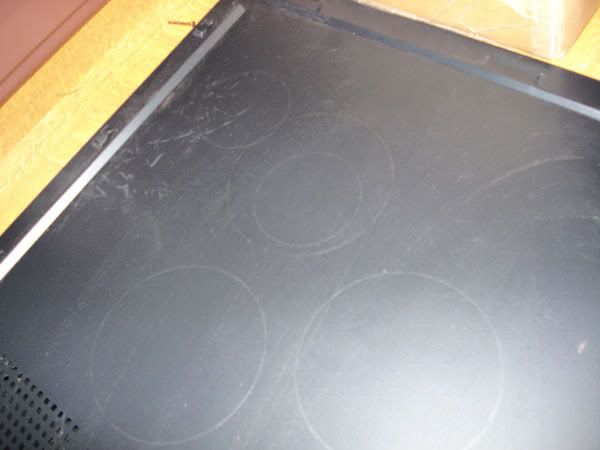
SIDE PANEL

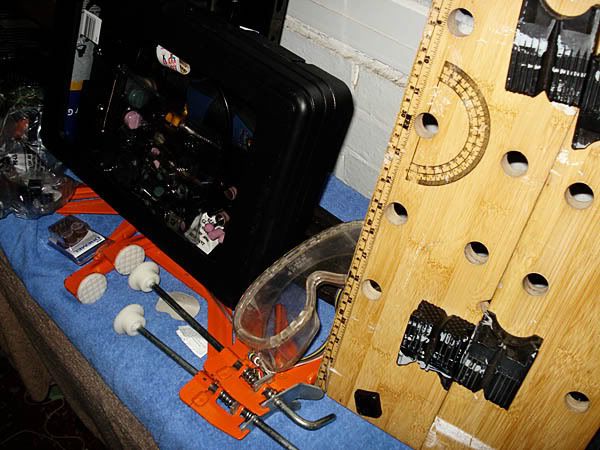
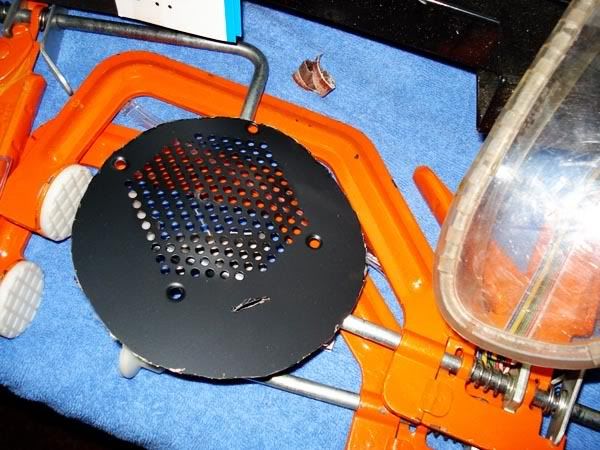
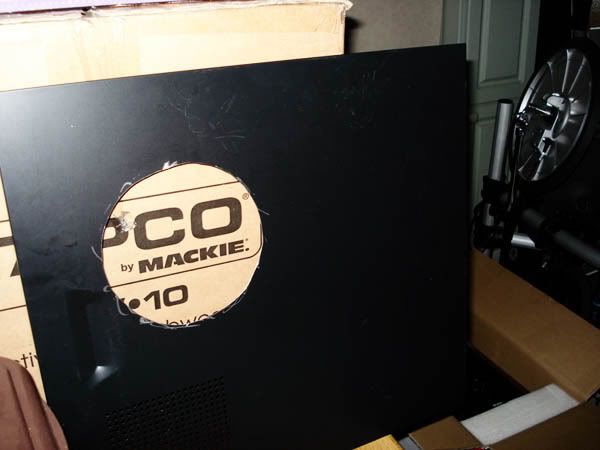
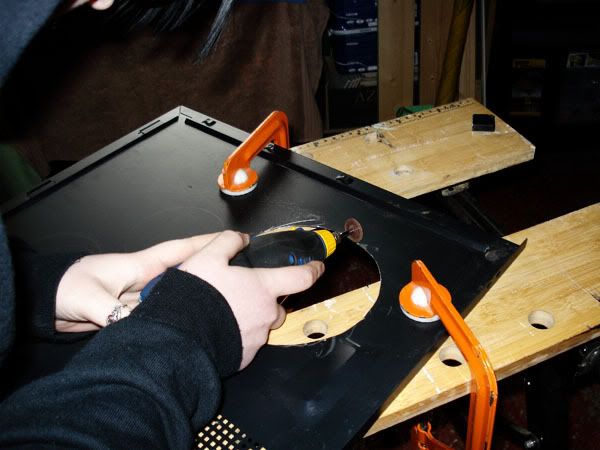
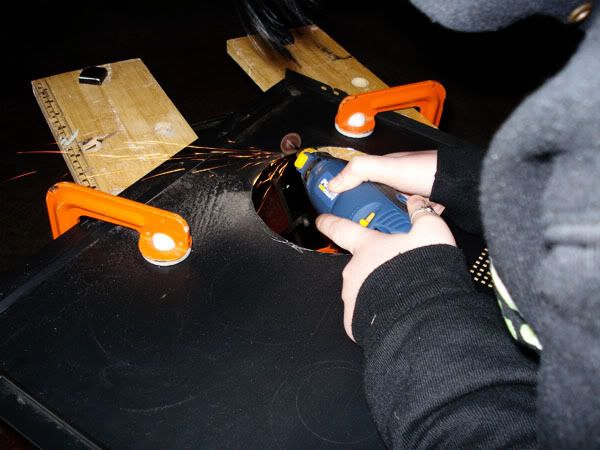
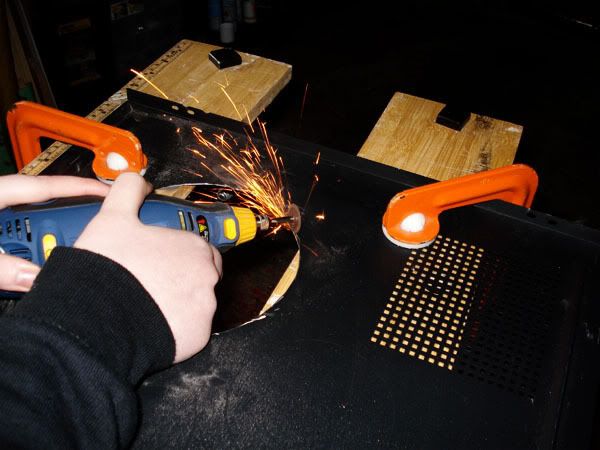
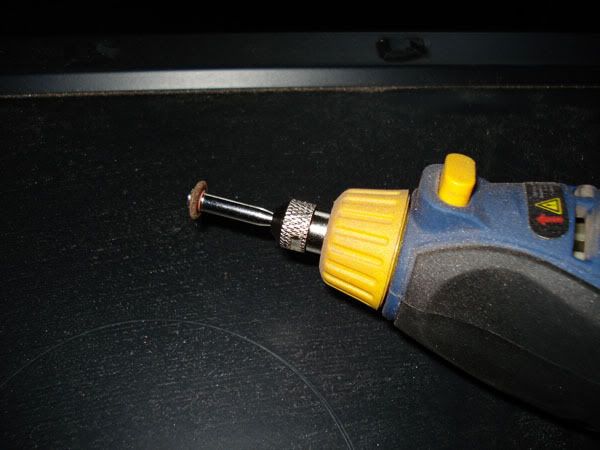
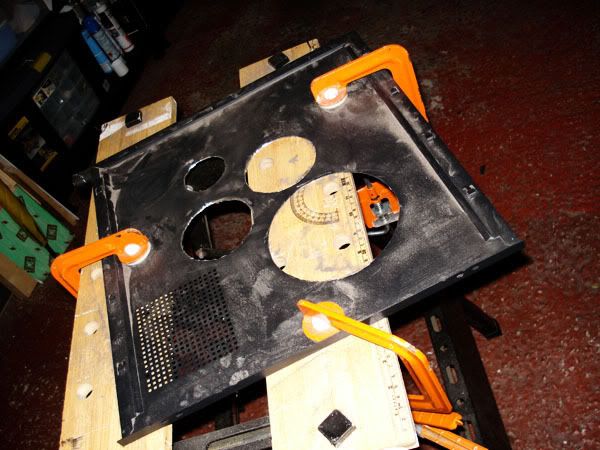
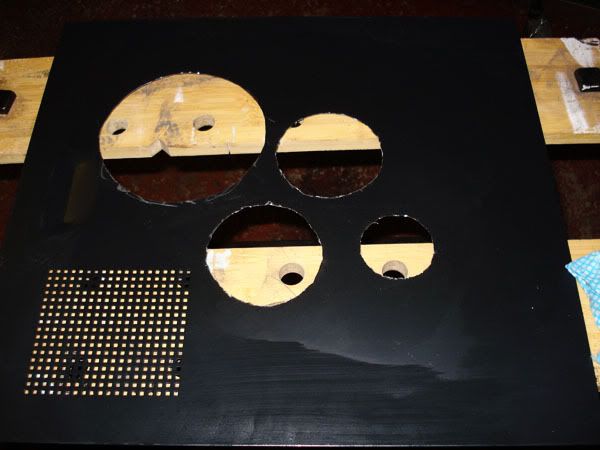
I’ve never cut out a side panel before, but I know the principle so this shouldn’t be too much of a problem. I don’t think we’re going to use window trim so sanding and neatness is priority here. Circles might be harder to cut out but we thought it would be quite unique and it fits in with the cartoony/girly theme quite well.
FRONT PANEL

The custom front panel is going to be the biggest challenge I think. Simplicity is the key here, because both of us really dislike the Zen front panel as its plastic rather than metal. We’re thinking brushed aluminium with a hole for the CD drive and usb i/o at the front. At the moment the plan is to put the power button on top of the case because the case lives on the floor under the desk and it’s easier to hit there (and it stops her dog hitting it accidentally which it does at the moment). The front panel is most open to change and all suggestions are welcome!
PAINT
I’ve painted the insides of cases before so I’m not too worried about that, but the outside might be harder. Again, it’s something that I know the principles of but I’ve never done so it shouldn’t too much of a problem. I think we’re going to have black internals and possibly a purple/pinky colour on the outside. She’s quite keen to have a pinky/purple colour. I’ve seen a nice pale bluey/purple colour but she was having none of it
____________
We started work on cutting the windows today and after a few kinks (more detail in the next update) we finished cutting/grinding/sanding the first circle. We only have a couple of days a week to work on it (I’m at uni and she’s at college but I'm only allowed to work on it when she's there to see what I'm doing so we have to factor in time for school work) so I think I should be able to do update at least once a week if not twice a week.
All constructive criticism is very welcome!
The themes are really simplicity, funky/bold and girly.
PLANNING.
At the moment, she has a white Zen but she’s moved house and her new house has had a lot of building work done on it, so it’s been bashed about a bit. Originally she wanted to mod her case, but I bought a new one so we could start fresh.
The plans are quite simple:
- A custom window.
- Internal and external paint job.
- A custom front panel.
SIDE PANEL
I’ve never cut out a side panel before, but I know the principle so this shouldn’t be too much of a problem. I don’t think we’re going to use window trim so sanding and neatness is priority here. Circles might be harder to cut out but we thought it would be quite unique and it fits in with the cartoony/girly theme quite well.
FRONT PANEL
The custom front panel is going to be the biggest challenge I think. Simplicity is the key here, because both of us really dislike the Zen front panel as its plastic rather than metal. We’re thinking brushed aluminium with a hole for the CD drive and usb i/o at the front. At the moment the plan is to put the power button on top of the case because the case lives on the floor under the desk and it’s easier to hit there (and it stops her dog hitting it accidentally which it does at the moment). The front panel is most open to change and all suggestions are welcome!
PAINT
I’ve painted the insides of cases before so I’m not too worried about that, but the outside might be harder. Again, it’s something that I know the principles of but I’ve never done so it shouldn’t too much of a problem. I think we’re going to have black internals and possibly a purple/pinky colour on the outside. She’s quite keen to have a pinky/purple colour. I’ve seen a nice pale bluey/purple colour but she was having none of it
____________
We started work on cutting the windows today and after a few kinks (more detail in the next update) we finished cutting/grinding/sanding the first circle. We only have a couple of days a week to work on it (I’m at uni and she’s at college but I'm only allowed to work on it when she's there to see what I'm doing so we have to factor in time for school work) so I think I should be able to do update at least once a week if not twice a week.
All constructive criticism is very welcome!
")