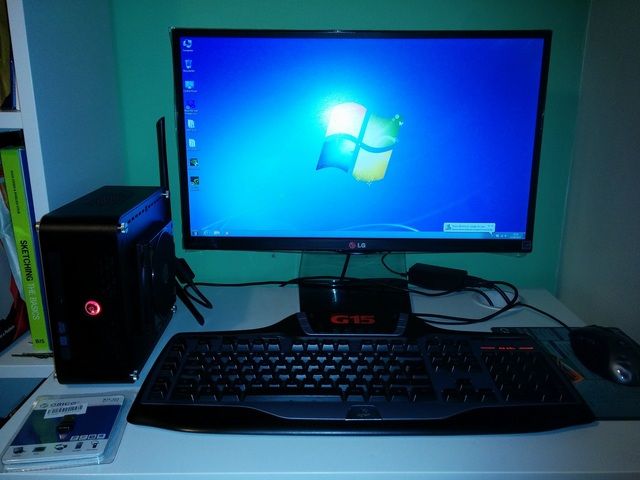
Associate
I’ve got the fancy to build a bespoke system that is both ultra-compact and has a high power-to-watt ratio. In short, it will use a desktop i5 coupled with an itx z77 and a decent discrete graphics card yet take up less than half the volume of an SG05.
It will serve as both my sole gaming rig and HTPC fulfilling the minimal requirements to perform at 1080P on a 22” monitor and at 720P on a 90” image from an LED pocket projector. XMBC and a USB dongled Xbox360 controller will also be part of the plan.
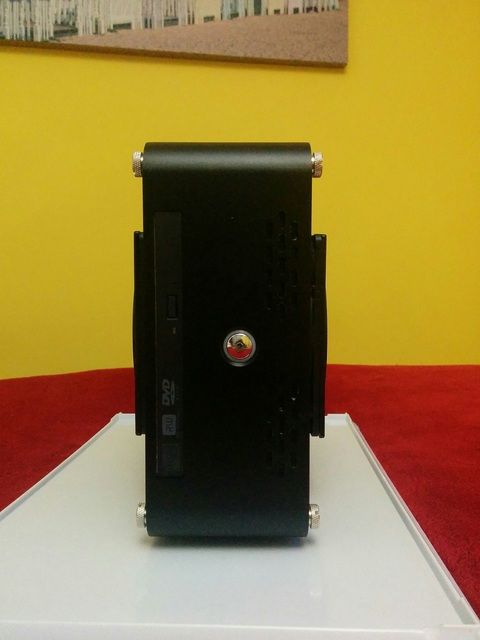
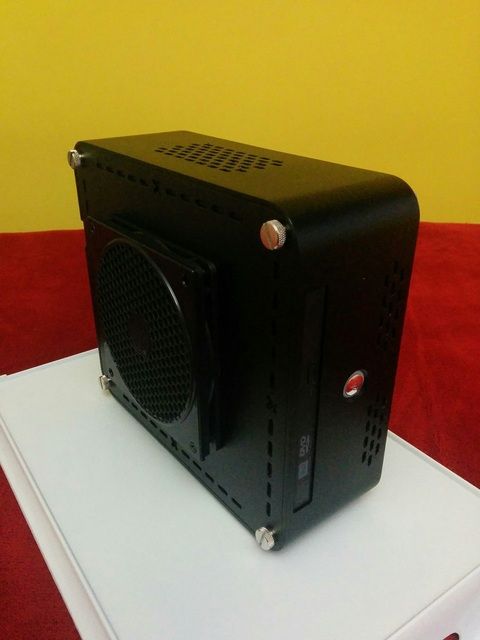
The main chassis is based around a wall-mounted, embedded ITX enclosure my company produces called a pack-box. Jamming all this hardware this simple pack-box defined the project name. I acquired a scrap one from the metal skip for free. I guess my build is definitely function-over-form but I guess I am more engineer than designer nowadays. It will however be ultra-portable and lightweight as half the chassis (namely the lid) is aluminium whilst the base is 1mm laser-cut zintec.
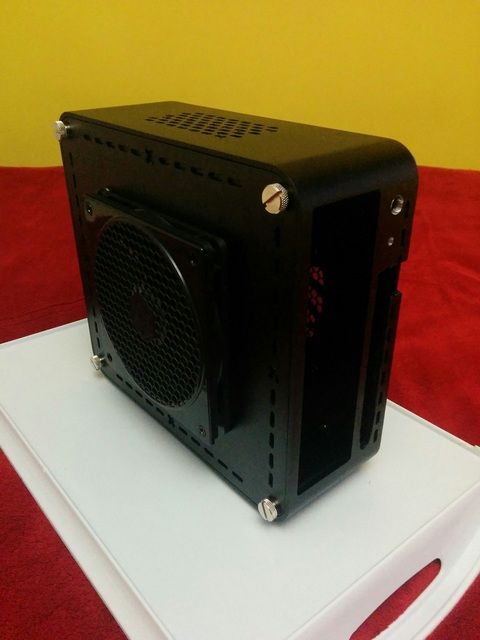
Mods will include cut-outs in the front face for a 80mm exhaust fan and two in the lid for the projecting graphics card fan and a pair of 40mm fan base intakes. The rear will be modified to accommodate a pair of 4-pin din power input jacks and two repositioned new power and reset switches. The wall mount flanges will also be removed and the case flipped onto its side turning it from a desktop into a micro tower sitting on raised rubber feet. A projective mesh will protect the protruding graphics card from getting knocked about.
The standard chassis comes in at under 3-litres in volume whilst the whole system after my re-jigging will be just over 4-litres if you include the projecting graphics card, slim external exhaust fan, base feet and external power brick. To get an idea of this systems diminutive size, it will be smaller in volume than a chunky 15” laptop! Granted; it won’t offer the power of an alienware laptop but it does use standard components allowing easy upgrading in the future.
Compromises will have to be made of course. CPU cooling will be limited to a 1U solution and thus limits me to low-TDP T-class Ivybridge processors. The CPU will have to be low-power anyway due to limited power availability and the desire of moving more dedicated system watts towards the discrete GPU.
The system will also have to be limited in max graphics card length (170mm) and have limited graphics card height access. The graphics card cannot be too beastly either as it will be relying on a modified 160W/192W combo PICO & AC Adapter PSU for its juice but I’m aiming for maximum power-to-watt not outright performance. This will be provided by the lesser, but still capable GTX650 Ti which is also conveniently stubby in length, low TDP and should give acceptable 1080P performance.
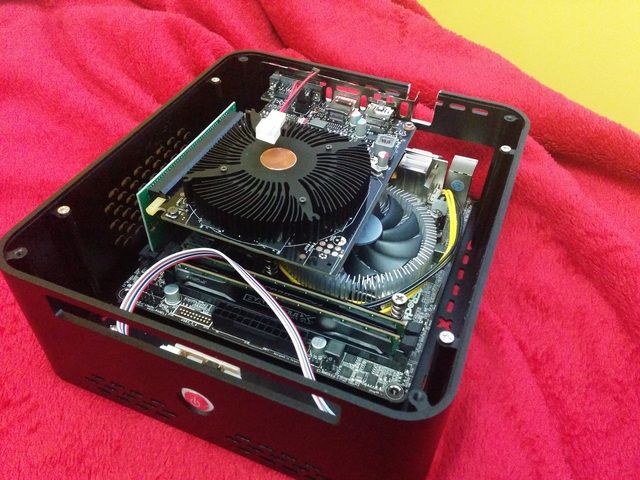
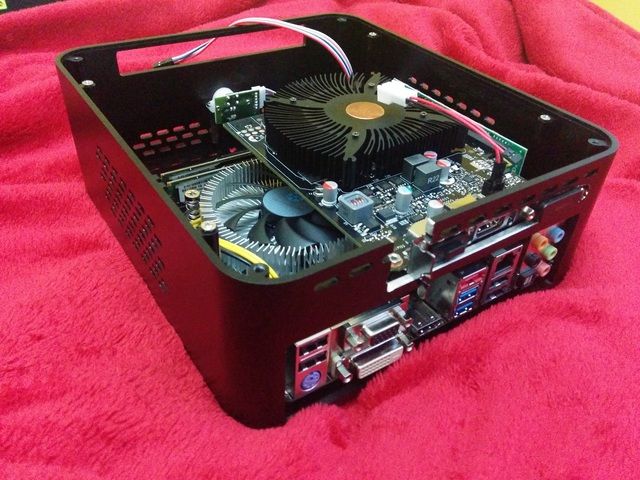
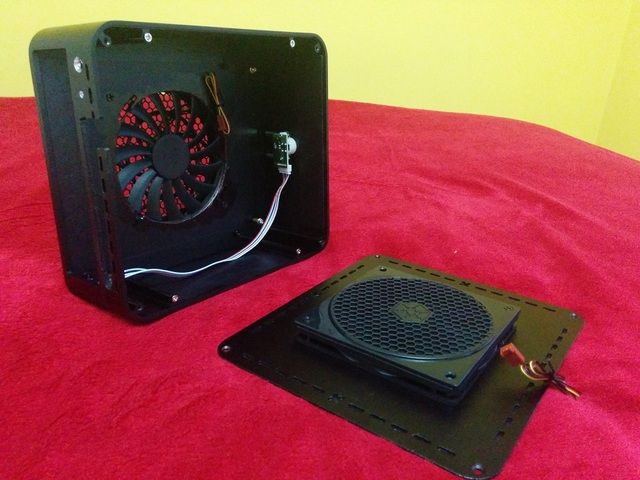
The system configuration I’m going for involves mounting the gfx card over the ITX motherboard via a right-angled 2U riser. I will use a quiet PWM controlled Silverstone NT07-1156 slim CPU cooler to clear the graphics cards underside. There will also be room for a pair of Noctua 40mm intake fans in the cases base raised up on rubber feet with filtration mesh. There will also be a secondary intake path formed as part of the graphic cards fan arrangement and a slim 80mm PWM exhaust fan in the top front face of the micro-tower mounted externally due to limitations.
The system will have room for a single 2.5” SSD mounted behind the front face and space for a 2nd MSATA based SSD which can be added later for additional games & programs. Mass storage when it’s needed will be handled by an external 3.5” eSATA & USB 3.0 enclosure.
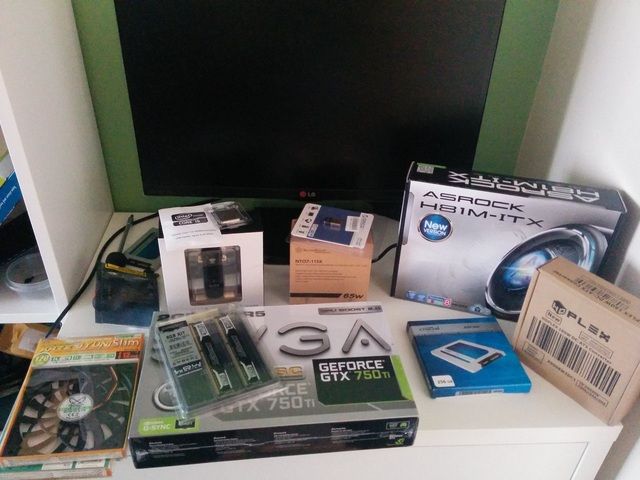
It will use low-power, efficient components comprising the following:
• Intel i5 3470T 2.9Ghz Ivybridge Dual Core
35W TDP – less-so when under-volted
• ASRock Z77e-ITX Mobo. Chosen as it has voltage control, esata and msata mounts.
5-15W ??? – Z77 motherboard
• NVidia GTX650 Ti Generic OEM
80-110W @12V – PCIE 6-pin
• 8GB Samsung Green 1.25V 1600 low-profile RAM
1-3W ???
• 256GB SSD 2.5”
1W @5V
• 2x 40mm intake (0.8W each), 1x 80mm exhaust (3W) & 1x CPU fan
8W @12V approx
Worst case, this whole setup should draw no more than 150W total but I have to account for potential heat de-ratings and drops in efficiency with the supplied power and also draw from additional Mini PCIe & USB devices like Wifi and external drives.
This should be all that’s needed to play 90% of games well since most still only really use dual core tech anyway. I’m also extending the energy efficiency in time to peripherals going with a Gechic 13.3” LED, USB powered HDMI monitor, Bluetooth keyboard/mouse and a pair of XB-Mini USB rechargeable speakers to make the system even more portable.
The reason for this is that I’m planning on relocating onto a narrow boat where my power source will be limited to batteries. These are charged either from solar, wind or the occasional engine alternator recharge.
Here are some 3D renders of the intended outcome
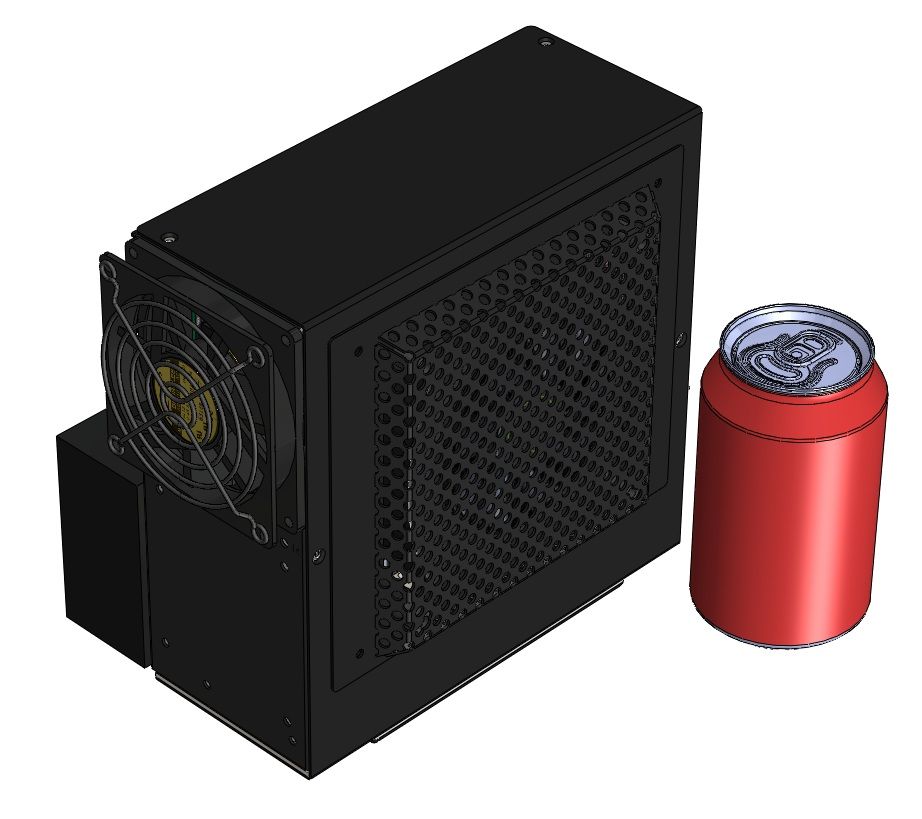
First shows the micro tower next to its 192W power brick on the left and a 330ml soda can for size comparison
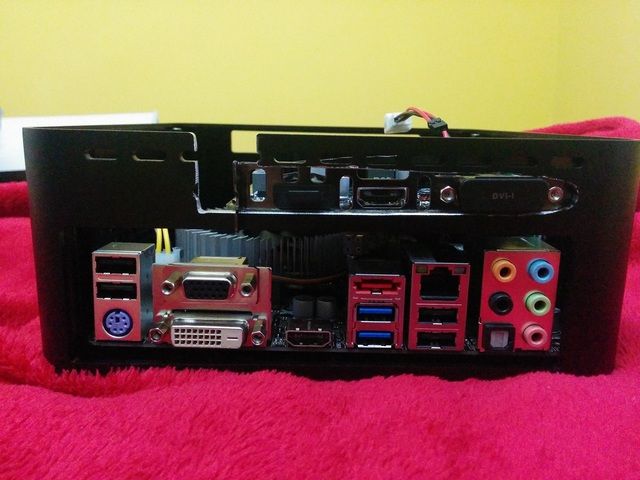
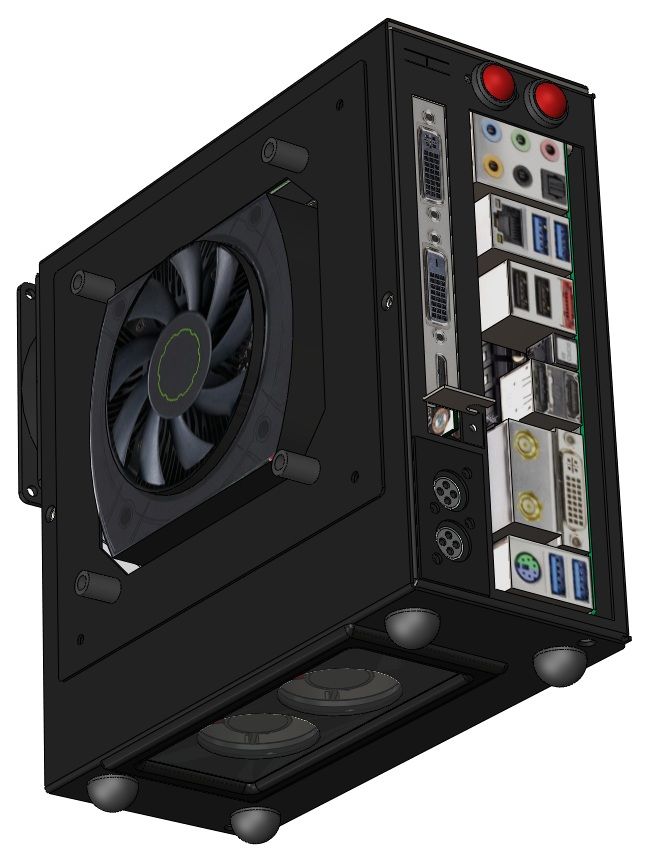
The rear shot with graphics card protective mesh removed. You can see a pair of 4-pin din jacks at the base. Hopefully I’ll only end up needing the one but should I find I have the ability to handle the heat of a more serious graphics card I’ll add another 84W 12V adapter to the second din and power the graphics cards PCIE port directly. Also note the pair of filtered noctua 40mm base fans.
A lid transparency shot with the secondary graphics card cover plate removed. Two microswitches will be added for power and reset in the cases top rear face. This is a good shot of the 1.5U right angled riser which which gives this system it’s compactness.
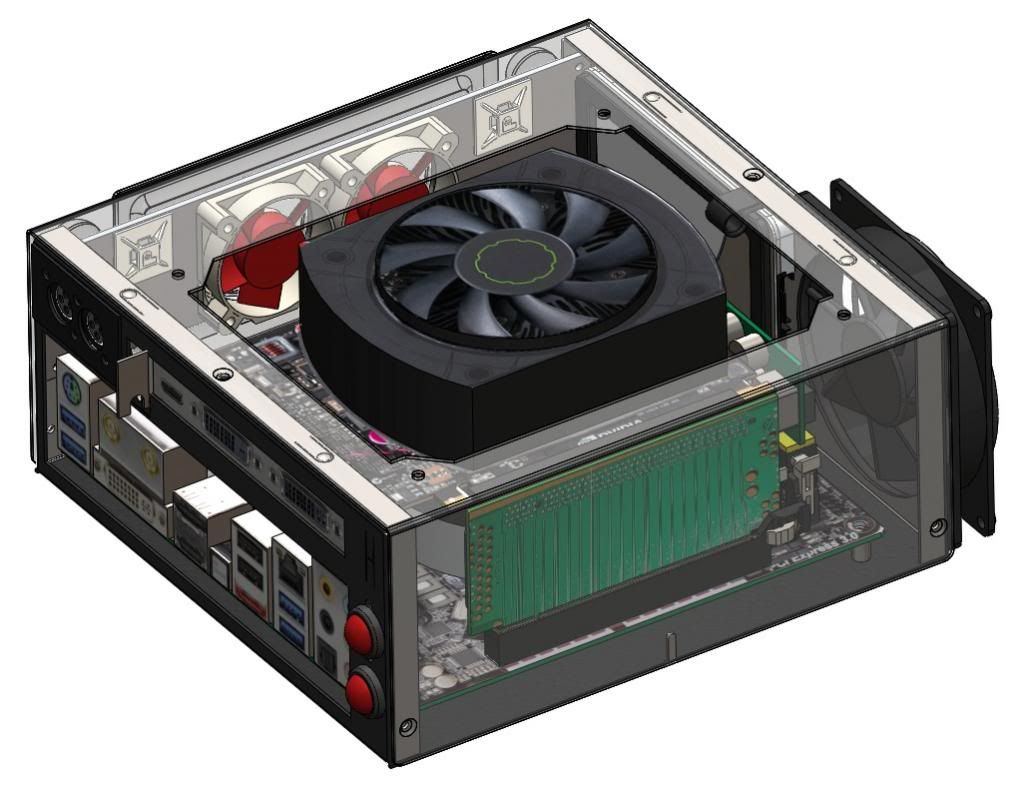
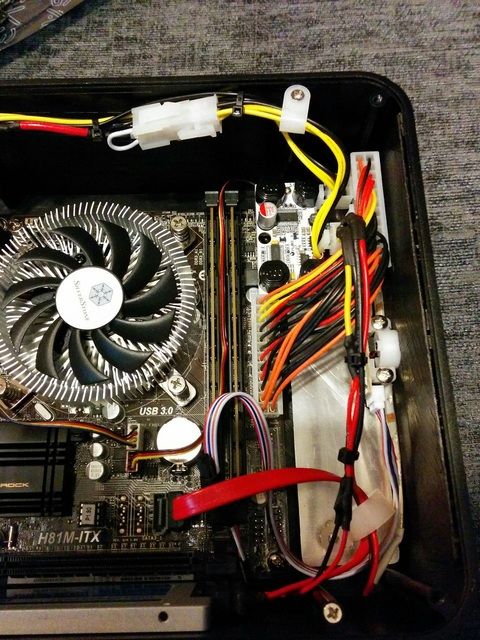
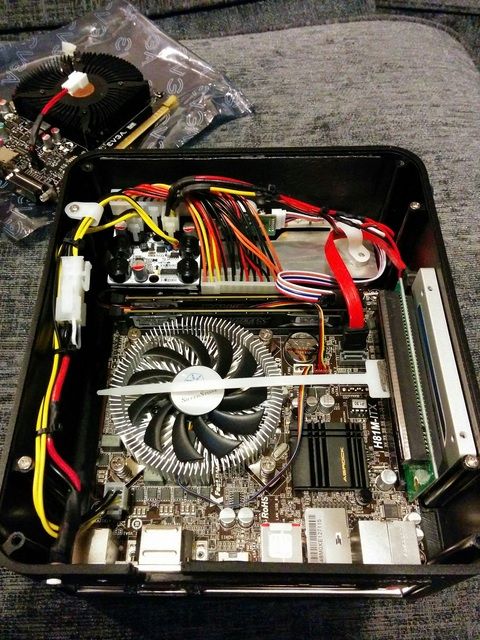
Same orientation with lid and graphics card removed. Here you can see the pico cooled in direct airflow from the 80mm front top exhaust fan. The NT07-1156 CPU cooler has about 7mm of clearance between it and the underside of the graphics card PCB.
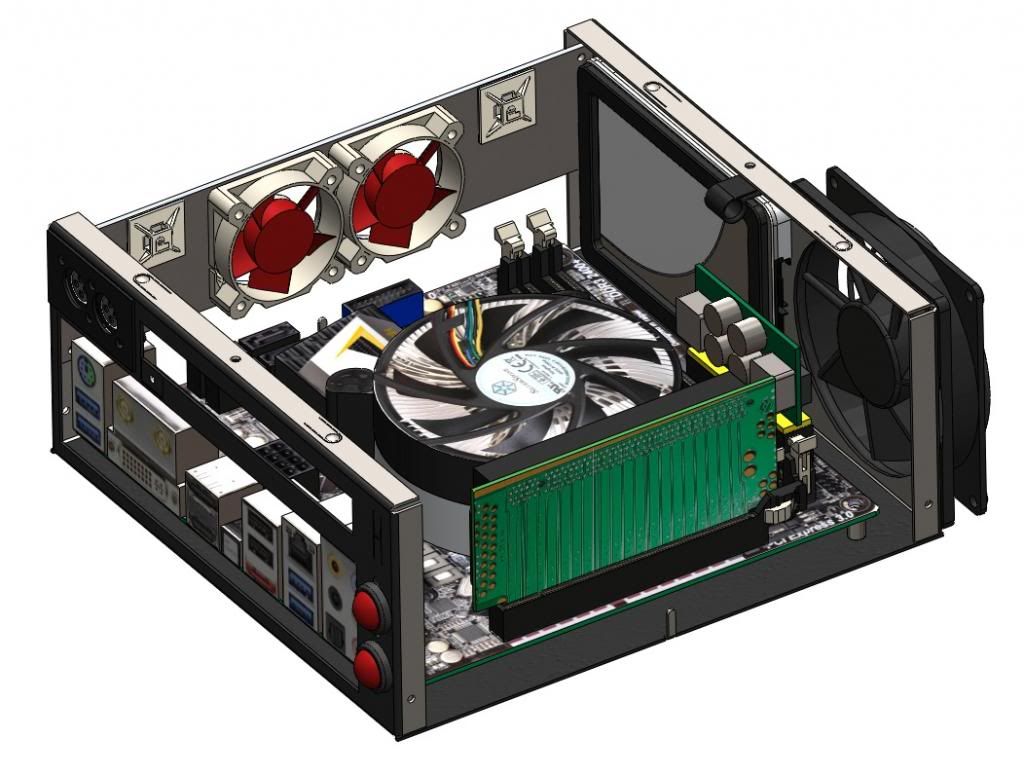
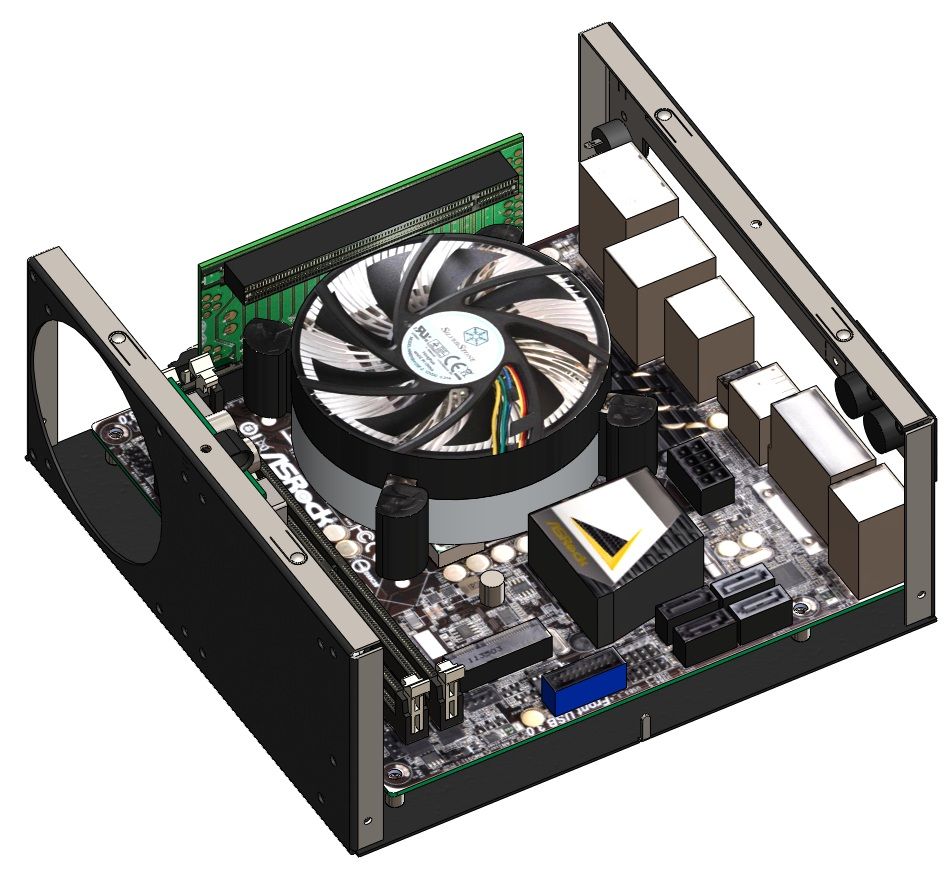
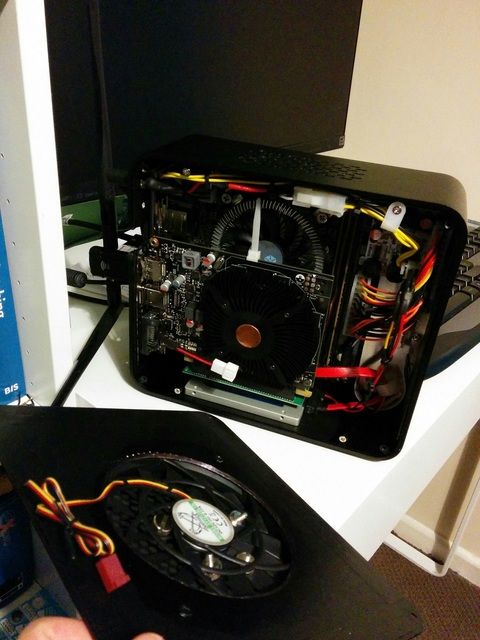
Chassis fans removed showing better layout view. Everything will be ruggedized using cable tie bases and card clamps using knowhow from my workplace who specialise in military pc design.
It will serve as both my sole gaming rig and HTPC fulfilling the minimal requirements to perform at 1080P on a 22” monitor and at 720P on a 90” image from an LED pocket projector. XMBC and a USB dongled Xbox360 controller will also be part of the plan.
The main chassis is based around a wall-mounted, embedded ITX enclosure my company produces called a pack-box. Jamming all this hardware this simple pack-box defined the project name. I acquired a scrap one from the metal skip for free. I guess my build is definitely function-over-form but I guess I am more engineer than designer nowadays. It will however be ultra-portable and lightweight as half the chassis (namely the lid) is aluminium whilst the base is 1mm laser-cut zintec.
Mods will include cut-outs in the front face for a 80mm exhaust fan and two in the lid for the projecting graphics card fan and a pair of 40mm fan base intakes. The rear will be modified to accommodate a pair of 4-pin din power input jacks and two repositioned new power and reset switches. The wall mount flanges will also be removed and the case flipped onto its side turning it from a desktop into a micro tower sitting on raised rubber feet. A projective mesh will protect the protruding graphics card from getting knocked about.
The standard chassis comes in at under 3-litres in volume whilst the whole system after my re-jigging will be just over 4-litres if you include the projecting graphics card, slim external exhaust fan, base feet and external power brick. To get an idea of this systems diminutive size, it will be smaller in volume than a chunky 15” laptop! Granted; it won’t offer the power of an alienware laptop but it does use standard components allowing easy upgrading in the future.
Compromises will have to be made of course. CPU cooling will be limited to a 1U solution and thus limits me to low-TDP T-class Ivybridge processors. The CPU will have to be low-power anyway due to limited power availability and the desire of moving more dedicated system watts towards the discrete GPU.
The system will also have to be limited in max graphics card length (170mm) and have limited graphics card height access. The graphics card cannot be too beastly either as it will be relying on a modified 160W/192W combo PICO & AC Adapter PSU for its juice but I’m aiming for maximum power-to-watt not outright performance. This will be provided by the lesser, but still capable GTX650 Ti which is also conveniently stubby in length, low TDP and should give acceptable 1080P performance.
The system configuration I’m going for involves mounting the gfx card over the ITX motherboard via a right-angled 2U riser. I will use a quiet PWM controlled Silverstone NT07-1156 slim CPU cooler to clear the graphics cards underside. There will also be room for a pair of Noctua 40mm intake fans in the cases base raised up on rubber feet with filtration mesh. There will also be a secondary intake path formed as part of the graphic cards fan arrangement and a slim 80mm PWM exhaust fan in the top front face of the micro-tower mounted externally due to limitations.
The system will have room for a single 2.5” SSD mounted behind the front face and space for a 2nd MSATA based SSD which can be added later for additional games & programs. Mass storage when it’s needed will be handled by an external 3.5” eSATA & USB 3.0 enclosure.
It will use low-power, efficient components comprising the following:
• Intel i5 3470T 2.9Ghz Ivybridge Dual Core
35W TDP – less-so when under-volted
• ASRock Z77e-ITX Mobo. Chosen as it has voltage control, esata and msata mounts.
5-15W ??? – Z77 motherboard
• NVidia GTX650 Ti Generic OEM
80-110W @12V – PCIE 6-pin
• 8GB Samsung Green 1.25V 1600 low-profile RAM
1-3W ???
• 256GB SSD 2.5”
1W @5V
• 2x 40mm intake (0.8W each), 1x 80mm exhaust (3W) & 1x CPU fan
8W @12V approx
Worst case, this whole setup should draw no more than 150W total but I have to account for potential heat de-ratings and drops in efficiency with the supplied power and also draw from additional Mini PCIe & USB devices like Wifi and external drives.
This should be all that’s needed to play 90% of games well since most still only really use dual core tech anyway. I’m also extending the energy efficiency in time to peripherals going with a Gechic 13.3” LED, USB powered HDMI monitor, Bluetooth keyboard/mouse and a pair of XB-Mini USB rechargeable speakers to make the system even more portable.
The reason for this is that I’m planning on relocating onto a narrow boat where my power source will be limited to batteries. These are charged either from solar, wind or the occasional engine alternator recharge.
Here are some 3D renders of the intended outcome
First shows the micro tower next to its 192W power brick on the left and a 330ml soda can for size comparison

The rear shot with graphics card protective mesh removed. You can see a pair of 4-pin din jacks at the base. Hopefully I’ll only end up needing the one but should I find I have the ability to handle the heat of a more serious graphics card I’ll add another 84W 12V adapter to the second din and power the graphics cards PCIE port directly. Also note the pair of filtered noctua 40mm base fans.

A lid transparency shot with the secondary graphics card cover plate removed. Two microswitches will be added for power and reset in the cases top rear face. This is a good shot of the 1.5U right angled riser which which gives this system it’s compactness.

Same orientation with lid and graphics card removed. Here you can see the pico cooled in direct airflow from the 80mm front top exhaust fan. The NT07-1156 CPU cooler has about 7mm of clearance between it and the underside of the graphics card PCB.


Chassis fans removed showing better layout view. Everything will be ruggedized using cable tie bases and card clamps using knowhow from my workplace who specialise in military pc design.


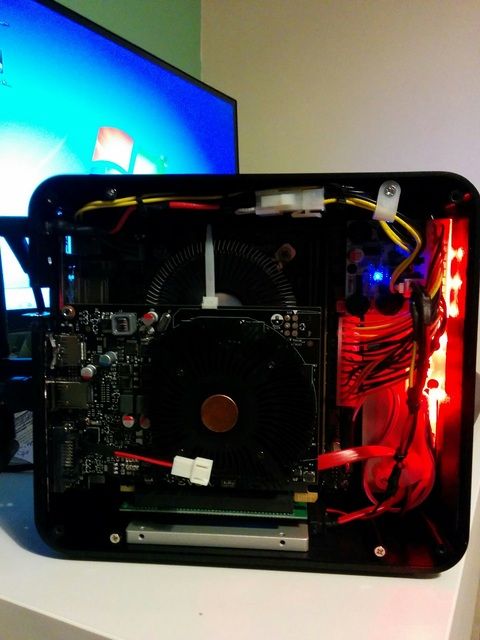
 . Like to think of it as a slightly beefier Alienware Alpha which can be fully upgraded.