Project: Phoenix Rising

Associate
Joined
22 Jun 2014
Posts
11
So I had that "itch" to buy some new tech and after seeing the black/orange H440 I fell in love and decided to do an orange and black themed build. While I was at it I thought, hey the H440 can do watercooling - so why not turn it into my first custom loop build. As it is the largest PC build I thought I would keep a log of what I was, but what is the point unless I share - so here is my first post on these forums.

I may have got a little bit carried away with the both the spec of the machine as well as the size of radiators needed. But hey nothing wrong with overcompensating, right?

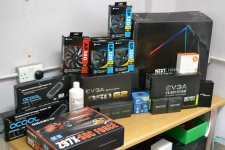
So the components are as follows:

Gigabyte Z97X-SOC-Force
Intel 4790K
Avexir Blitz 1.1 Gigabyte Orange - 1866MHz 16GB
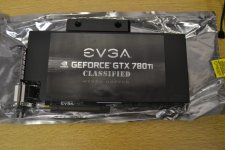
EVGA 780 ti Classified Hydro Copper
EVGA 850W SuperNOVA Gold
Hard drives coming out of my existing PC to begin with, though I'm looking at some Samsung 840 Pros for their black/orange colour (I have to restock the coffers first!).

In terms of cooling I have:

Alphacool NexXxoS UT60 360mm in the front
Alphacool NexXxos ST30 240mm in the top
EK Supremacy CSQ Clean
D5 Pump
Monsoon Fittings
Corsair SP120 Performance PWM x5
Corsair AF140
Mayhem's Pastel Orange

I haven't decided on a res yet as I wanted to see what kind of room I would have in the front after putting the stupidly large radiator in (the answer is: not a lot).

So with the case arriving today I could finally get started. I appologise for the background of the photos, I am doing this project in my spare time at work so everything is currently located on the tiny desk in the server room (the air con is a plus though!).

Here is everything together:
yAGUzBul.jpg

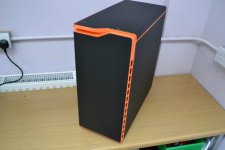
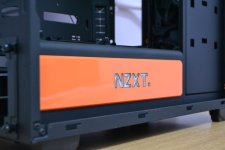
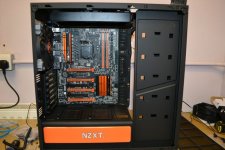
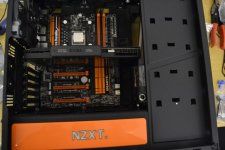
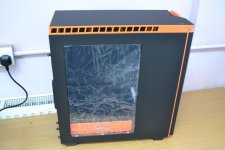
The H440 (cover staying on the window until all is finished!):
xKfJpSQl.jpg

yVQyQG3l.jpg

uGYlhD9l.jpg

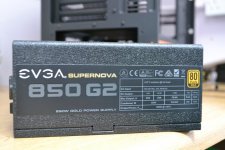
The PSU about to go in:

dk50EH6l.jpg

The album for anyone who wants full size pictures.
 
Thanks for the comments all.

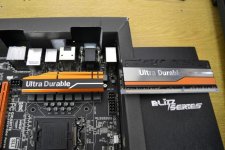
And you found the Avexir Blitz Giga Orange memory too, nice.

Yes, I came across them by sheer blind luck, but as soon as I saw them I knew I couldn't have any other memory. I kinda wish the middle silver bit was black instead but it still matches up lovely. Here's a pic of a stick next to the mobo:

2Ugdik6l.jpg

Today I managed to get the rads and the mobo fitted. The rads provided a slight issue in that no washers were included for the mounting screws. A quick scrounge in the woodworking area turned some up.

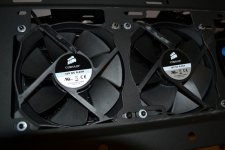
Here's a pic of it so far. You can see I have removed the coloured rings from the Corsair fans. I will probably get the white ring from AF140 painted orange, but not worried about the SP120s as the rings can't be seen anyway.

sT0FBrYl.jpg

The UT60 doesn't leave a lot of room for the pump/res, especially as I want to mount my spindle drive in the slot at the bottom, so they'll need to be mounted to the rad. I have a plan on how I'm going to do it though.

kp3h52bl.jpg

Meanwhile at the top I will need to rethink my tubing. I had originally planned to go from the Pump->UT60->CPU->ST30->GPU. However after fitting the ST30 I found a slight problem in the outlets are too close to the AF140 at the back. There's no way the Monsoon fitting are... fitting in there. Looks like I'll flip it around so the outlets are at the front of the case and go Pump->UT60->ST30->CPU->GPU instead.

kt4hN1Pl.jpg
 
You've had exactly the same problem as Ive had! I found two ways of doing it:
1: Mod the chassis where the hdds go and mount the pump/res in front of the long rad at the front (requires you to bend the lip of the hdd shroud back and wedge the pump in there)

2: (the option I've gone for) mount the pump/res where the 140mm exhaust fan goes. Means fewer pipes in the top right hand corner of the case, otherwise you have pump and both rads all squashed up there together!

Thanks for the tips. I had considered modding the PSU cover to give me a couple of extra mil but would rather not if possible. Hadn't considered the rear 140 as a mounting point. I'd like to keep it hidden away if possible, but that will certainly work if I can't find another way of doing it.

Wow I want that ram

My exact thoughts when I saw it! Would match lovely with the Z87 you have too.

Love the ram, matches great with your theme.

Any way you can move your top rad further forward maybe sacrificing the top drive bay a bit? Not familiar with the case so can't tell if its possible. Or reverse the rad so ports are at the front, but that might mess up the look you are going for once you tube it.

Hope you find a solution.

I have no issues losing the top drive bays - mainly because I have already lost them due to the front rad! As you can see all of the drive caddies have come out to put the UT60 in:

1wJLNpcl.jpg

Unfortunately the rad is as far forwards as it can go on the rear two 120 slots, unless I take out the two rear and one of the middle mounting screws, something I'm not too keen on doing.

64p89a6l.jpg

I could move it into the front two 120 mount slots, but then I think it will be too close to the front rad to tube nicely.

After thinking some more last night, spinning it round so the ports are on the front would actually remove one piece of piping from view so it may end up being a good thing anyway.
 
So I managed to get a small amount done today.

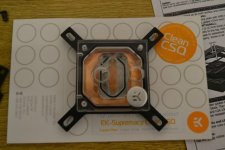
I started with the EK Supremacy. I much prefer the clean to the one with the funky circle pattern. Here it is out of the box:

Y9hyZAXl.jpg

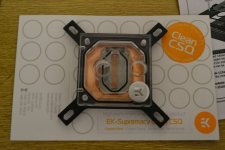
Then after the jet plate had been switched out with the one designed for LGA115X:

ehkLaSql.jpg

Once I figured out which one that was. I would be interested to see any information on the difference between the three optional jet plates is. One is 1mm thick, one 0.8mm and one 0.7mm. Surely that size difference cannot make that much of an impact, can it?

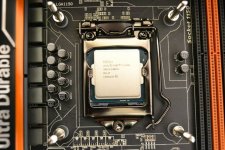
Then after mounting the back plate and stand offs for it I also added in the new Devil's Canyon processor. Batch L418C133, which I believe means it was manufactured this year.

S8Qux5zl.jpg

I haven't put the waterblock on yet as I want to get the pump in and the tubing finalised beforehand to make sure the in and out are located in the best position.

Now it is a case of waiting for my res to arrive so I can work on the next bits.
 
Sorry for the lack of updates on the build. From the time it took to arrive I can only conclude that Royal Mail liked the look of my parcel so much that instead of delivering it they decided to use it as a decoration in the delivery office...

Anyway, after flipping the top rad around around so the ports were at the rear of the case I realised it would be quite a short run between the two rads. I decided to put the fittings in to see just how short a run and discovered an issue I hadn't thought of. The fittings are at completely different heights and because it was such a short distance there was no way I'd get a piece of tubing to go between them nicely:

Ck0N8z6l.jpg

So I swapped the rad and fans on the top so the rad was on top and the fans were below pushing air through. This has brought the ports more in line. Still not exactly in line, but much closer and easier to work with:

F81i8ubl.jpg

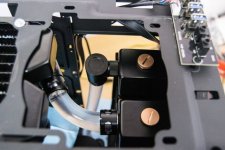
As for the res and pump mounting, my plan failed miserably. I had planned to use an EK-D5 res/pump combo mounting it to the front rad using a Pulse Modding bracket. It worked well, but the PSU shroud still blocked it by about 1cm. As I really don't want to start cutting the case I had to find another solution. I really didn't like the idea of mounting it on the rear fan point, as suggested by cwgk91, because I felt it would look messy trying to plumb it in, as well as blocking the lovely motherboard. So two hours, lots of cursing and whole load of iterations later I came up with this:

lygkYmhl.jpg

What you see is a D5 with an XSPC top with a tiny piece of tubing connecting to the bottom of an EK X3 res, which is held in with the EK bracket, which is in turn connected to the Pulse Modding bracket. The pump is then attached to 1/3rd of a Shoggy Sandwich which will stick to the floor of the case. The top port on the pump top will then go up to the front rad. While certainly not elegant, the only thing you will see from the window is the res (110mm so it will fit below the GFX card).

I need to make the tubing slightly shorter to bring the res down as far as it can (space is tight below the GFX card) and also so that the EK mount will fit around the acrylic part of the res instead of only just holding the bottom part.

This solution does present some new issues to overcome though. It means I won't be able to mount my spindle drive on the bottom "tray", so I need to find somewhere else for it. I'm currently thinking it can sit on the other black third of the shoggy, just under the front rad. The other issue is this takes up a pretty large amount of space under the PSU shround that would have been used for cable management.
 
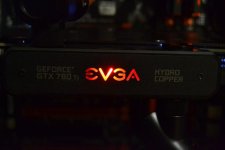
I managed to get a lot done over the last couple of days. First up was getting the graphics card and making sure everything fit. This card is heavy, but looks so nice. I did have some pictures of the back, but I was taking them at 6:45 in the morning, not paying attention to the fact the camera was on manual focus. Suffice to say the pictures are useless... Anyway, here it is:

gU1BZzUl.jpg

It is long enough that it just creeps into the hard drive caddy area, though this angle doesn't really show that:

Qq4ARv6l.jpg

Due to sheer dumb luck, I mean extremely clever planning, the card sits just millimetres above the res. On the plus side this does help me sleep better knowing that if it does sag any due to the weight the res is there to support it (not that is does sag, the backplate does a good job of keeping it straight):

A0vl89Ll.jpg

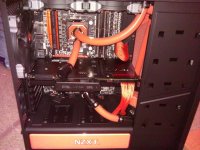
You can just about make out the tubing going from the pump to the front rad in the background of the pics. I have now finished the tubing and have some pictures, but was nearly locked in due to staying after work late to finish it. This meant I had no time to get the pictures off of the camera. But here is a sneaky peak from my rubbish phone camera:

j32T93ul.jpg
 
Thanks for the comments all. Here are a few of the work in progress images I didn't get to upload yesterday.

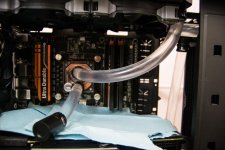
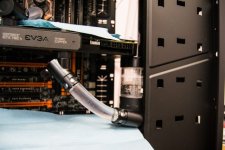
Close-ups of the various connections. You can see there is some distilled water in while I did the first leak check as I knew I would be draining the system to transport it home:

7BDCEDVl.jpg

w7FASJvl.jpg

bep8rf5l.jpg

Including the drain port which comes from the bottom of the res, which was the lowest point I could fit some tubing in:

Vzx1aQxl.jpg

Tubing and cables in. Will some combs or something to keep the cables tidy:

JYfQ1btl.jpg

3q0PmGEl.jpg

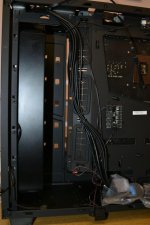
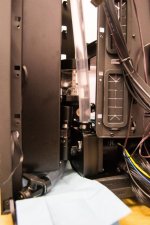
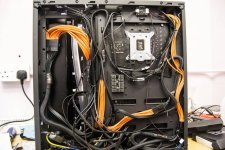
As mentioned the positioning of the pump meant most of the room for cable hiding, I mean management, was lost. As I was using Bitfenix Alchemy extensions for the cables I was left with a lot cable length to try and tidy. The USB 3.0 ports are not connected yet as the position of the header on the board does not work nicely with this case. It is certainly not neat and the side takes a bit of effort to get on, but it does go on. The only cable that can by seen from the other side is the 24pin where it crosses the gap to fit alongside the front rad:

IH4SxXql.jpg
 
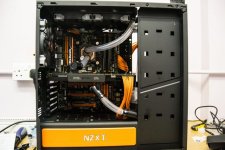
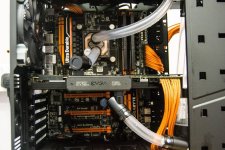
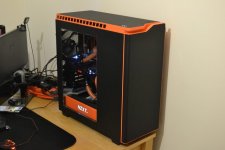
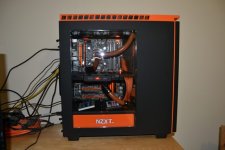
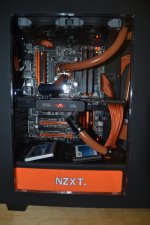
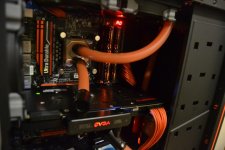
I managed to borrow a decent camera to get some images of the project now that it is at home and usable. Please excuse the messy cables - as I still have some work to do I didn't want to spend too long sorting them out only to need to do it again:

upWWt8Zl.jpg

heZuvuMl.jpg

pBKJnzSl.jpg

k8qXI7Xl.jpg

M5xk4gkl.jpg

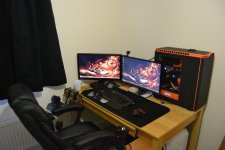
And my entire setup:

z8K5uD4l.jpg

Temps are currently around 34C idle for the CPU and 31C for the GPU. I've not pushed it hard yet as I wanted to let everything wear itself in. CPU is maybe a little higher than I was expecting - need to run some more tests.

I also need to get a bit of lighting in there. You can see the res and long pipe quite clearly in the photos due to the flash, but they are near impossible to see normally.

I didn't have enough room to put my spindle drive in the case itself, so that is in an enclosure connected to a E-Sata to SATA in one of the expansion slots. Still want to get the cables a little neater and you can see the SSDs are not screwed in yet. This is because I don't like the way they currently look - but I have a plan for what I want to do with them... Stay tuned!
 
Back
Top Bottom