Project: Quiet White Enthoo

Associate
Joined
11 May 2004
Posts
131
TL;DR: A Devils's Canyon/780 water cooled build in a white Phanteks Enthoo case with the objective of producing a really quiet PC.

Beyond a graphics card refresh a couple of years ago I haven't upgraded my PC in several years. It's used for gaming and photoshop/lightroom, and I haven't felt like I needed to change it. The new generation of consoles and the possibility of more demanding games (at last!) prompted me to rebuild from scratch. I've been saving up, so some of the stuff I've bought is overkill - I'm hoping this case will last a couple of hardware refreshes.

My computer desk is in the main living area of the house, and when the GPU gets hot the fan noise can be really annoying. I decided to go with water cooling, with the aim of producing a quiet PC. Once I've got it built, I may try overclocking a little if it's still quiet enough.

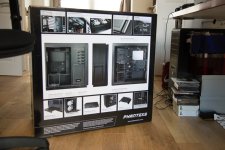
The first choice was: what case? After looking at a lot of build logs and reviews, I placed an order and this behemoth arrived a couple of weeks ago.
a3kvTx3.jpg

It's huuuge. I thought my old Lian Li case was big, but this is enormous.
xJyrtir.jpg

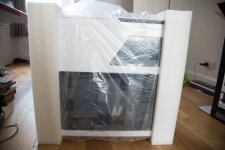
Mmm, shiny white goodness. At first sight, there will be plenty of room in there for everything.

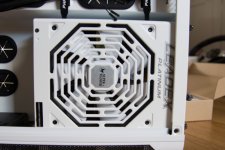
The PSU is a white SuperFlower 1000W. More power than I need at the moment, but I'm buying these trousers long in the hope that I'll grow into them (you'll notice that again when I get to the rads).
4sMuoDS.jpg

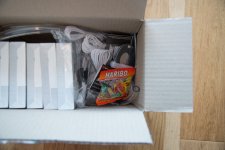
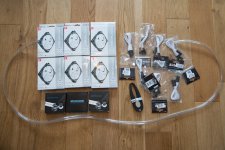
The fans and radiators arrived a week later. Mmm, Haribo.
KOv0I8y.jpg

After much indecision, I went with 1900rpm NB eLoops. Fan noise is such a subjective issue, that reading other people's opinions on the web doesn't really help. I hope I made the right choice.
n5UITEU.jpg

With a white case, the only choice for radiators was the XSPC white AX radiators. I got an AX480 and an AX240 (more overkill, I know). They're really nicely packaged, with a piece of cardboard under the fittings to stop them damaging the fins.
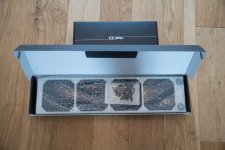
IiQrSVf.jpg

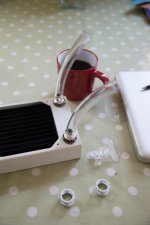
The next job was to flush the rads. This is my first time watercooling, so I didn't know what to expect. As it was, nothing visible came out of them but I gave them a good flushing anyway.
mYSOEj6.jpg

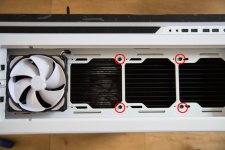
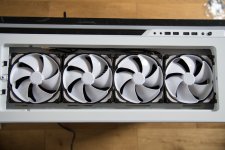
I mounted the 4 fan rad in the top, with the fans just below the filter on the top of the case. This meant that the rad was below the top of the case. It was a little fiddly getting it in and mounted, so I used several screws to hold it in place while I mounted the fans. It's one of those jobs where you carefully mount the rubber grommets on the fan, push the bolt through, line it up to the case, move too fast and ping grommets all over the shop.
NDW4k2e.jpg

All done. Both rads have the fans mounted to push, drawing air from outside the case. At the moment I'm leaving three Phanteks fans in the case (two on the front, one on the rear).
95i9siD.jpg

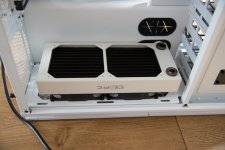
The bottom rad was a lot easier to fix as the bottom rad panel comes out of the case.
wkApx8o.jpg

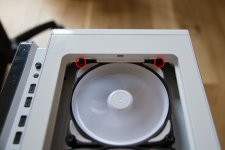
Everything else went pretty smoothly, apart from a problem with the top fans. The rad fittings have chunky heads on the bolts. At the end fan, these stop the holeson the case filter from engaging in the lugs in the case, and you can't get the filter back on. The case comes with lower profile heads on its fitting bolts, but they're the wrong thread for the rads. I'm trying to source some lower profile 6/32 bolts.
Bn7NRYM.jpg

Another delivery of bits arrives this morning, when I'll have pretty much everything apart from some fittings and the reservoir (who's been buying all the water cooling stock from OcUK recently, damn you?).

I plan to assemble everything air cooled first to check it all works. That way when I brick the GTX780 fitting the cooling block I'll know it's my fault.
 
Last edited:
Looking very familiar to my build log!

That's because I blatantly stole your ideas was inspired by project White Out to buy the white Enthoo case. There's a few differences in my plans, but if it looks half as good as your build I'll be happy.
 
Is it possible for you to flip the 240 rad the other way so the logo is the right way up?

Annoying, isn't it? If I flip it, the ports end up on the bottom of the rad. There might just about be enough space to get 90 degree fittings under there, but it would completely muck up the tubing run.

I suppose I could always mask the whole rad up and spray paint it white...
 
HARIBOOOO!

HZW34kF.jpg

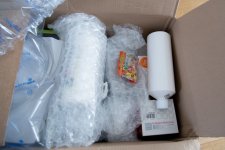
So, this pile of goodies arrived. After a panic because the courier had managed to cave in one corner of the box, all was found to be well. OcUK packaging saves the day.

YOUR BASKET
1 x EVGA GeForce GTX 780 SC ACX Superclock 6144MB GDDR5 PCI-Express Graphics Card (06G-P4-3787-KR) £439.99
1 x Intel Core i7-4790K 4.00GHz (Devil's Canyon) Socket LGA1150 Processor - Retail £269.99
1 x Corsair Dominator PLATINUM 16GB (2x8GB) DDR3 PC3-12800C9 1600MHz Dual Channel Kit with DHX Pro Connector (CMD16GX3M2A1600C9) £179.99
1 x Crucial MX100 512GB SATA 2.5” 7mm SSD + 9.5mm Adapter CT512MX100SSD1) £149.99
1 x MSI Z97 MPower Intel Z97 (Socket 1150) DDR3 ATX Motherboard £128.99
1 x EK Water Blocks EK-D5 Vario X-TOP - Plexi (incl. pump) £89.99
3 x Western Digital Caviar Green 3TB SATA 6Gb/s 64MB Cache - OEM (WD30EZRX) HDD £86.99 (£260.97)
1 x EK Water Blocks EK-FC780 GTX Ti - Nickel £79.99
1 x Crucial M550 128GB SATA 6Gb/s Solid State Hard Drive (CT128M550SSD1) £61.98
1 x EK Water Blocks EK-Supremacy Clean CSQ - Nickel £52.99
2 x Mayhems Pastel - Sunset Yellow Coolant 1L £14.99 (£29.98)
2 x Monsoon 16/10mm (OD 5/8) Rotary 45° - White £8.69 (£17.38)
1 x Primochill Primoflex Advanced Tubing 16/11 - Clear £5.99
1 x XSPC G1/4" T Fitting (Chrome) £3.95
Total : £1,781.75 (includes shipping : £8.00).


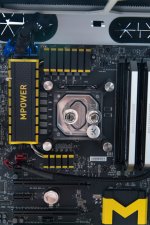
Some of my choices might seem a little odd. I agonised for hours over which motherboard to get, and in the end plumped for the MSI Z97 MPower. I was hung up about having an M.2 slot on the mobo, despite not actually buying an M.2 drive. I also didn’t want a really red or really blue board. Not sure that should have been a priority, but hey ho.

I got the 6GB 780 because I predict that more game developers will start get lazy about video RAM now the new consoles have more (I’m looking at you, Watch Dogs). The Dominator RAM - well, nobody ever regretted buying Dominator, did they?

I’ve gone a bit mad on storage, too. A 128GB SSD for the OS, a 512GB SSD just for Steam, and 3x3TB caviar greens to be RAID5ed for storage of photos.

8Ux656i.jpg

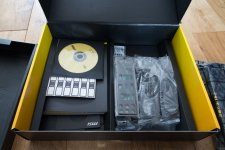
The motherboard comes with a reasonable selection of accessories. I’m not sure I really need a ‘Do Not Disturb’ doorknob hanger though. On the other hand, the backplate has a nice foam backing and is the first one that’s actually been a pleasure to fit. The foam means they’ve got rid of those annoying metal prongs that were always getting stuck in the USB ports as you slid the mobo into place.

F2Uomng.jpg

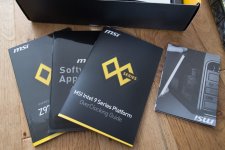
Not sure how useful the over clocking guide will be. Nice touch, though.

b3g1UtE.jpg

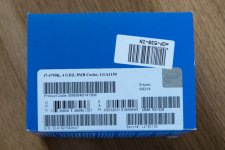
4790K! Even better, 2014 batch! Not sure whether the whole 2013 batches are worse thing in true, but good new if it is.

K9YIiA8.jpg

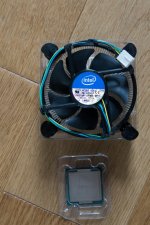
Intel stock fans still suck. Or is that blow?

xe58kJM.jpg

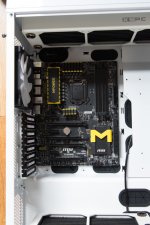
Time for an air-cooled build to check that everything works. This case! There’s so much room for activities! The cavernous interior really does make it much easier to get to everything. It reminds me of working on my old Triumph Spitfire; you could step over the front wheels and stand in the engine bay to get to things.

6szI3rA.jpg

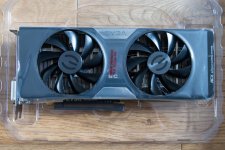
Shame that excellent GPU cooling is about to be unscrewed and disposed of.

nfkRdt1.jpg

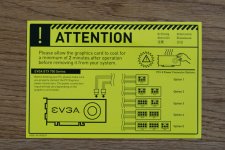
Is this a thing now?

LVZCyYo.jpg

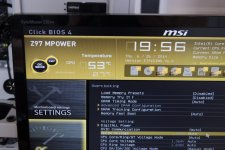
So, 53 degrees idling on the BIOS screen made me panic for a bit. I don’t know what’s happening here - apart from the fact that the stock Intel cooler sucks - but once Windows was installed, idle temperatures were more healthy at around 30 degrees or below.

cjoso5I.jpg

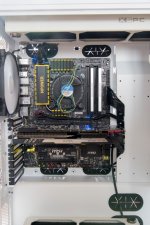
And here it is as we stand at the moment. Cabling was a bit of a pain. Having the PSU in a separate compartment behind the panels is nice and neat, but can make running the stiffer PSU cables a little tricky. I used to think that people who braided their own cables were mad, but now I’m beginning to see the point.

This board has a PCIE power socket just above the first PCIE slot. Is this common on Z97 boards? I’m sure it’s a great idea, but it means you have to have a long cable running across the board. Whichever way I do it, it won’t be pretty. Unless I start braiding and make a feature of it. Maybe I could get my son to make a cable cosy out of loom bands.

The SATA sockets are right under where the graphics card sits. Great design, guys.

Now for a little critique of the Enthoo: Notice the cutout in the plate to the right of the GPU? The plate is one of the places you can mount a reservoir (and it’s where I’m planning to put mine). It also doubles as a screen to hide cable runs. It’s lovely, but you can’t fit GPUs longer than 277mm in the case without removing it. That eliminates most 290s and some non-reference 780s. The cutout also only works in SLI for dual cards in slots 1 and 3, and with Z97 most SLI arrangements are further apart these days - usually slots 2 and 5. I’d love it if Phanteks made a new version of the plate. In their defence, when they designed the case it was the right size for most dual card setups.

I’m now waiting for the reservoir and some fittings (drain valve, 90 degree bends, T-piece) to be in stock. It’s up and running Windows 7 on air. It can run Cinebench a couple of times without melting, which is nice. I’m not going to try any heavy testing until it’s on water.
 
Ain't that PCI-E power only supposed to be connected, when running multiple graphics cards?

I thought that, too, but there's no mention of it in the manual. I'm sure another motherboard I was looking at pointed out that it was optional, but this one doesn't.
 
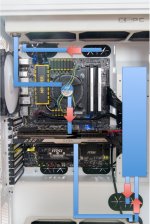
What's your plan for the tubing?

oLPAHyY.jpg

(Forgive the PotatoPoint scribbling)

That's the shortest loop. The pump lives behind the motherboard panel on one of the case pump mounts, next to the power supply (or possibly under the hard drive bay).

An alternative I was thinking of changes the order at the top. Instead of pump > top rad > CPU > GPU it would go pump > CPU > top rad > GPU. I'm not sure that's a good plan, though, as the CPU would effectively be at the bottom of a U-bend which might make draining the loop a pain.
 
Good board choice :D you wont need the PCI-E power connector. I'm running perfectly fine without it. :)

Thanks, that's good to know. I shall remove it immediately.

Looking good glad to see another enthoo primo build. Are you going for push pull by any chance?

Can you add 2 more of those lovely fans so you have push/pull config and in the process you gain space for fittings? I didn't realise that rad only had ports on one side that's a bummer.

Even with push/pull I don't think there will be enough room underneath for fittings. I'd have to use some sort of spacer underneath the fans to lift the whole thing a little more. I'm not sure that's what I want to do.

On the other hand, having the radiator draining downwards will make it really easy to empty the loop for maintenance. I haven't got my Monsoon 90 degree fittings yet, they were out of stock when I ordered everything else. I'll see what fits when they arrive.

As for the Res mounting plate and gfx card size, I just took the trusty Dremel to mine to accommodate my 2 780ti's. Just quick file and black marker on the cut edge and you all good.

I was thinking that was the best solution. At the moment I've only got one graphics card, but I'm planning to put two in some time after the nVidia Maxwell line is properly released. I'm indecisive about whether to mod the plate now or wait until I've actually got two cards. I guess the loop with have to be taken apart then anyway, so I might leave it.

Have you thought about routing the tube that comes out of the graphics card behind the motherboard and then round to the radiator? will give you a much cleaner look too?

That's a possibility, although at the moment there's too much unruly wiring behind there to do it comfortably. I need to get some cable management in and then see if the tube will fit sensibly. I'm not too fussed about having the tube visible - it's quite a short run to the radiator and will look reasonably neat.
 
Haven't achieved much today, as it was the school summer fete - most of the day was spent collecting helium cylinders, playing hook the duck and avoiding the occasional torrential rain showers.

What I have managed to do is fix a problem with the top air filter.

puEYEFH.jpg

The big-headed fitting bolts that came with the NB fans have caused me problems already. I noticed today that in the middle of the filter there's a cross-rib that is fouling two of the bolt heads, bowing the filter up in the middle by about 3-4mm. Bah.

Ten minutes with a file decreasing the depth of the ribs solved the problem.
 
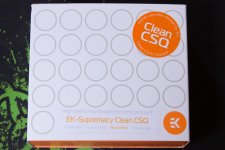
Now that I know the machine is working, it's time to break it. First in the order of the day is to fit the CPU block. I've got an EK-Supremacy Clean CSQ.

7v2RHhi.jpg

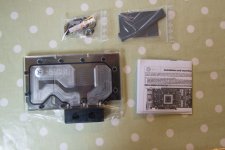
You can't fault EK for providing clear instructions, and everything that you need or more. The thermal pads are a good example - you get plenty to cover the parts you need on the card with enough left over to muck things up a couple of times.

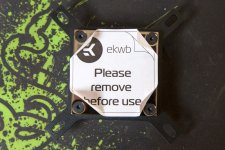
The EK block comes fitted with a general purpose jet plate, but suggests fitting a different plate for socket 1150 chips. I could just leave it, but why not squeeze out a couple of extra degrees of cooling? First I have to reveal the corner screws and remove them.

HQQhCPi.jpg

Now I start getting scared. I know I'll end up with O rings everywhere and might struggle to get them back.

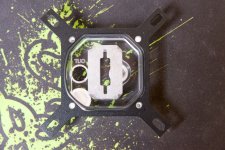
zcRIiRF.jpg

Here's the general purpose jet plate. The socket 1150 plate has a narrower hole down the middle and is a little thicker.

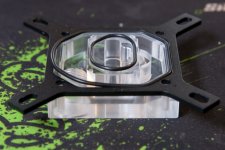
27C5RXB.jpg

Argh. Damn those O rings.

Fitting to the motherboard is also nice and easy, although more complicated if you do it in the case rather than before. All the screws and nuts engage nice and easily.

2eoGEhR.jpg

Now to invalidate some warranties. I hope I don't mess this up.

swuSA4r.jpg

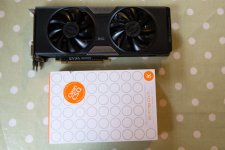
The card and EK full cover waterblock. I originally decided not to get a backplate, but I'm beginning to regret this now. Again, EK provide plenty of everything and very clear instructions.

YNLOiJZ.jpg

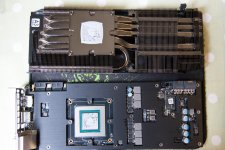
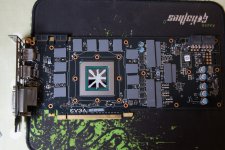
The EVGA heatsink and fans come off easily. I'm initially confused by the black plate, but realise it's a heat spreader and there are heat pads on the chips underneath it. The old gunk comes off, thanks to a some TIM clean and microfibre cloths.

hQloD4b.jpg

The new heat pads and thermal paste go on easily. The star pattern is EK's idea. I figure they probably know what they're talking about.

UisqI9e.jpg

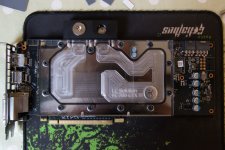
Block fitted.

pqgbCzF.jpg

Now I need to start plumbing things together.
 
I still don't have the reservoir and some of the fittings I need, but I couldn't resist building the part of the loop that I can with the bits I have. It's at the front of the case so I may have to take it out again to get at the plumbing nearer the motherboard.

wFgXLnN.jpg

I'm not sure about the 45 degree fitting on the top rad; I could probably do without it and still have a nice run. On the other hand, it adds symmetry to the 45 degree at the bottom.

I'm using Primochill 16/11 tubing and I've noticed that the compression rings on the Monsoon fittings are very tight when I thread them on the tubing. When I try to tighten them up on the base of the fitting, they tend to drag the tube round making it twist and kink. I can't get a tight enough grip on the tube to stop this happening. Has anyone else noticed this? Any cunning solutions?
 
Try a tiny bit of washing-up liquid smeared on the tube to stop the twist, just avoid getting it on the internals. Or o-ring grease if you had any such as Molykote 111 or similar, tiny amount though.

Thanks. I'm sure I've got some o-ring grease somewhere I can try.
 
Well, the reservoir and extra fittings arrived yesterday. Sorry, no pictures yet, they're still on the camera. I fitted the reservoir and started plumbing it and the pump in. The res fitted fine, at least after I'd spent half an hour getting stuff out of the shed to then drill a single 4mm hole in the res plate in about 5 seconds.

The pump, on the other hand, is being a bit of a bugger. I'm planning to have it under the HD cage, having removed the second, lower cage. The case has two locations for pumps next to the power supply, behind the motherboard panel, but you'd have to be much better at cable management than me to get it in there without a lot of swearing. The proposed layout had the reservoir leading into the pump via a T-fitting, letting me have a drain on the other side of the T at the lowest point of the loop. The tubing wasn't having any of that idea without kinking or putting a lot of strain on the fittings.

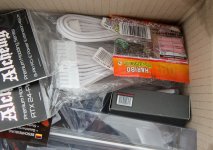
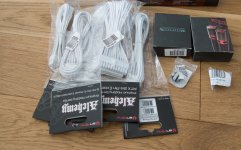
So, plan B involves another order with OcUK for some male-to-male connectors to put the T directly on the pump and a 90 degree fitting to let the tubing fall more naturally straight down from the res to the T-pump-drain combo. While I was at it I bought some of the Bitfenix pre-braided cables. I just know I'm going to end up braiding my own at some stage, despite my intention not to, but maybe this will delay that.

Finally, I'm still wondering what to do with the tubing going from the pump to the top reservoir. It comes up behind the motherboard panel. It can either emerge from a hole behind the res port and be almost invisible or run along the top of the motherboard to a port at the other side, and have a long, visible, straight(ish) run.
 
Back home now, so here's the photos.

HARIBO!

Il4nNhd.jpg

Reservoir, Monsoon 90 degree fittings, ball valve, blanking cap to back up the ball valve.

dyplzU4.jpg

Extra 4mm hole drilled in the Enthoo reservoir bracket in line with the other central holes. I rubbed that pencil line off with an eraser I'd nicked from my son, only to discovered that it stained the bracket green. D'oh. In the end I had to use citrus-based degreaser to get the stain off.

cDHcEv6.jpg

Hmm, this drain and T-junction should fit, surely...

dD28hsd.jpg

Nope. Apologies for the poor photos, it was getting dark.

VHvBZax.jpg

My idea of how this would work was hopelessly wrong. I'll try again tomorrow when the new fittings arrive.

zvsWR0V.jpg

It doesn't look quite as bad from the front, but I didn't like the stress that it was putting on the entry port on the pump head.
 
H-H-H-HARIBO!

PAXpttC.jpg

I ordered a 5mm and 10mm male-to-male fitting, not being sure which would fit best, and another couple of angle fittings that I hadn't realised I might need before. While I was at it, I ordered some Bitfenix Alchemy pre-braided cables. Hopefully they'll look nice enough that I'll stave off the madness that is braiding my own cables.

cIXlbEh.jpg

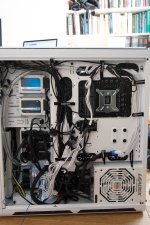
Yeah, the back still needs some cable and tubing tidying.

BmPxBZh.jpg

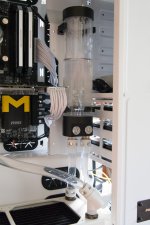
So, reservoir in and - more importantly - now connecting to the pump neatly without kinks or putting too much strain on the pump.

jblxFNI.jpg

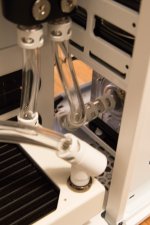
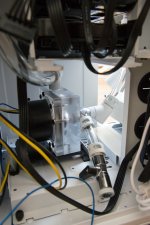
The reservoir now has a drain that drops down to a 45 degree Monsoon connector that plugs into the pump via a T-fitting to the drain pipe and a 5mm male-to-male fitting.

tIV93Lb.jpg

I realised later that I ought to have got a rotating male-to-male fitting, but as luck would have it when I tightened things up the T-fitting was pointing in the right direction. This looks a lot neater now.

KTY3j6U.jpg

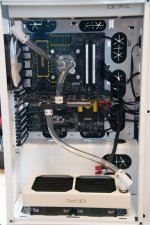
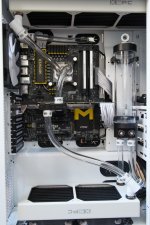
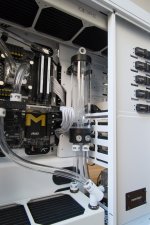
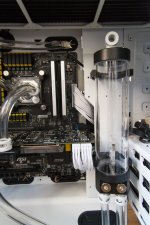
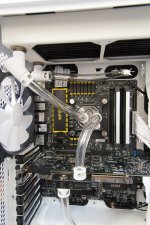
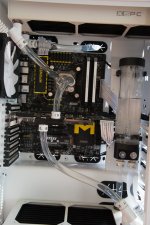
So, the loop is done. The right-angle fitting on the top of the reservoir is to allow me to get a tube attached to a funnel into the case for filling the res.

Yv85qZ0.jpg

I really like the white braided cables. Much neater than before. I still need some cable combs or something to neaten them up though.

LCevFds.jpg

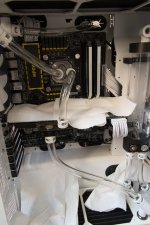
Time to do something with it. This is my first watercooling setup, so I'm quite nervous at this stage. Waterclockers, keeping kitchen towel manufacturers in business since 2004...

IAbVZ46.jpg

By God, it works. I had to loosen the top of the res to fill it, because the funnel and tube was causing a airlock and the water was just sitting in the funnel going nowhere.

InkRvSg.jpg

There was a small leak from the T-fitting (which is, of course, the hardest bloody bit to get to and tighten up) but that was soon fixed.

B8HMuKu.jpg

It actually works! I don't believe it.

So, testing so far with a small overclock to 4.6GHz on the 4790K gives idle temps around 25 and Aida64/Realbench temps around 65-70.

But the main point is that it's really quiet. You can barely hear it when you're sitting next to it. And that was the point of the project.

However, there's more...
 
whats the paint like on the monsoon fittings i hear it comes off very easily when using the tool. have they fixed this?

I found the white fittings quite easy to scratch or mark. A lot of the time, though, it's not the paint scratching but the tool being worn away. This can be cleaned off the fitting with a little effort. Also, I'm quite clumsy.

One 45 degree fitting - the one on the T-fitting out of the pump - I had to tighten with pliers because it was leaking. This made ugly marks on the ridged/knurled part.
 
Back
Top Bottom