Project: The Machine from Uncle

Associate
Joined
11 May 2004
Posts
131
The Machine from U.N.C.L.E.

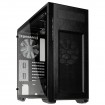
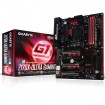
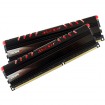
It was soon to be my nephew's 16th birthday. He's a great lad, and a keen PC gamer. Unfortunately, his PC was built with hand-me-down components and held together with string. I decided to shamelessly bribe my way into his affections by building him a new watercooled gaming PC as a surprise present.

Thus began Project: The Machine from Uncle. A plan to become the favourite uncle.

This actually all happened last year, but I've been moving house since then and have only just found the box containing the camera with which I took the photos.

The plan: build a good but not excessive gaming PC. Don't get carried away and spend too much money.

The reality: it ends up better than my PC.

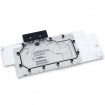
I bought all the stuff in two batches. First, the case, components and waterblocks. Second, once I've had a chance to measure up the case inside and look at potential mounting points, the radiator and reservoir.

My basket at Overclockers UK:


My basket at Overclockers UK:


Here comes the first batch.

yIGaUiv.jpg

Most importantly: HARIBO!

XAnhwFr.jpg
 
Last edited:
Time to get to work. First, offer up the GPU to check for size and see what sort of reservoir I can fit in.

qMGQfvm.jpg

Management comes to inspect progress.

g8ont8S.jpg

I'd forgotten how long GPUs are getting these days. I had some plans for a reservoir mounted on the back panel where the drive bay mounts are, but the length of the GPU made me reconsider those. At this stage I was glad that I hadn't bought the radiator and reservoir yet.

My revised plans involved mounted a res/pump combo on the front rad/fan mounting area using an adapter between the res mounting plate and the 120mm fan holes on the case.

Now to get the GPU water block mounted.

w5Kfrlv.jpg
T3vxoL9.jpg
tvR8jx1.jpg

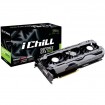
What with it being a few months ago, I can't remember why I decided on the inno3D iChill 1070. I suspect it was relatively cheap at the time compared to the amount of oomph.

The normally excellent EKWB fitting instructions confused me a bit here - although it's a waterblock designed for just this model, the diagram indicating which screws had to be removed missed out some of the screws. In particular, the four big spring-loaded screws on the back that hold the GPU heat sink on weren't marked as being for removal. They need to go.
 
So, we have the CPU and GPU waterblocks on. Nice red cables in. SSD mounted on visible mount.

5C27p1r.jpg

There's actually a nice amount of space in the front of the case, which is handy if you're planning on mounting a pump/reservoir combo in there.

It's less handy if you were hoping to mount a load of HDs - those plastic 'Phanteks' plates are the blanks for where the optional HD mounts go. I've seen some complaining on other forums that they aren't included as standard. I didn't mind - there are two HD caddies for 3.5"/2.5" disks hidden in the PSU compartment at the bottom, one visible SSD mount where I put my SSD and a hidden SSD mount behind the case.

BPDolkC.jpg

Supplies arrive for the next part of the build and are inspected by management.

u6yq74L.jpg

A shiny red backplate completes the 1070 rebuild. The 1070 backplates were out of stock, so this one actually claims to be a 1080. And who can tell the difference, eh? (Cough)

iQ8BgcZ.jpg

So, I hear you asking, what is my favourite feature of the case? It's the slide out fan and radiator mounting panel at the top of the case. It's robust, it slides in and out easily, and it means that you don't have to try and get a screwdriver into the depths of the case to fits fans and a radiator.

If you're fitting a 360mm radiator, as shown here, you have to lose the 5 1/4" drive bay. Not a problem, unless you're an idiot who later decides he wants to fit a fan controller in there.

Guess what I am?

wOQFnLJ.jpg

The sliding mount definitely impressed me. It even has space to make sure that screw heads don't foul on things when sliding in and out. A simple thing, but I'm often surprised by cases that don't like screw heads being behind fan filters.


7RFAPUz.jpg
 
Thanks for all the kind words.

Don't get too excited though - this isn't going to be half as cool as some of the projects on here. Just a good, solid water-cooled gaming PC, hopefully.
 
I've put the EK-XRES 140 in the front of the case. The mounting screw pattern for this pretty much ensures you have to start drilling holes in things - unless you buy their EK-UNI pump bracket. This matches the fitting hole pattern on a 120mm fan, so I could attach it to the fan mounting plate in the front of the case which has holes for 120mm and 140mm. This doesn't affect the ability to mount case fans there.

I've used the EK pump/res combo again since then in a build for work and I like it. It's quiet and PWM controllable. I plugged it into one of the motherboard fan outputs (which they label as being suitable for a pump) and controlled the speed according to CPU temperatures.

URely28.jpg

Management popped by to point out that I'm an idiot - I hadn't left enough clearance above the top of the reservoir to get to the fill port. They were right, as usual. Fortunately I had a spare 90 degree Monsoon fitting from a previous build that I could just about get onto the top of the reservoir. This let me fill through a temporary tube coming out of the front of the case.

153fOoQ.jpg

Leak testing!

This is where you can see I'm not quite as good as some of the other projects - the tubing is a bit of a mess.

My excuses: I'm using 13/10 tubing and I find it hard not to get kinks without doing long sweeping bends. I also wanted the T-fitting you can see in the middle at the bottom to go through a hole into the PSU compartment so that I could hide the drain tap out of sight at the back of the case. The height of the reservoir ports was more or less the same as the GPU and this didn't help matters either.

The tubing tidied up a bit later, but was never quite as neat as I wanted it to be.

qPxlyTN.jpg
 
I love Mayhems customer support

The plan was to go with clear UV red coolant. When I filled the loop again, I wasn't really liking the UV effect - it was a bit weak. After some fiddling around, I discovered that part of the problem was rubbish UV LEDs. With some different LEDs it was better but still not great.

I got in touch with Mayhems customer support. They were really helpful. After a bit of discussion about the LEDs, they sent me a free bottle of their UV pink dye to see if that would help matters. It did, but I still didn't like the effect.

In the end, I decided to go with red LED strips. It's quite an overpowering red, but I like it.

(Sorry, no pictures of this bit)
 
So, time to get the red coolant in and tidy up the tubing a bit.

lTZvpOh.jpg

I was a little happier with the pipework now that it's big, sweeping curves.

This picture shows my dilemma. I really wanted to get the drain house going out of the back of the case, and the only real way was through the grommet you can see at the bottom of the picture under the chrome T-fitting.

The position of the reservoir ports meant that this was the best solution I could come up with without getting extra fittings. I'm sure someone on here could have done better, though. :)

owtcqny.jpg

Obligatory shot at a funky angle.

The extreme redness comes from two red LED strips running down the corners of the case. It's matched by a red XPSC LED temperature sensor tucked down in the rear corner.

uKiTEiC.jpg

Management comes to comment: "It's very red, isn't it?"

FfO6cE2.jpg
 
looking good, just wondering... have you tried mounting the SSD so the writing is in the correct orientation? should hide the red SATA and power a bit better? Guessing the sata might be a bit short and would need a nice braided Red one , but would make it look cleaner at the bottom end :)

That bugged me too. I did look at turning it round but I would have needed another cable and the deadline of his birthday was looming.
 
So, we're on the home straight.

To complicate issues, I decided that I wanted to fit a fan controller. I chose a NZXT Sentry 3 for reasons that elude me now. It's quite low profile and there was enough space between the front of the case and the radiator to fit it in.

No problem, right?

Wrong. I'd taken the 5 1/4" drive cage out to fit the radiator in. Without that, although the fan controller fitted in the hole there was nothing to attach it to. The drive cage was far too big to fit in the case alongside the radiator. Time for drastic drive cage surgery.

RoNMLO4.jpg

You can see why I should never be left in charge of a hacksaw.

Amazingly, this actually worked. I now had easy control of the fans, and could get nice quiet running.

tt0RX97.jpg

Management discovered that when I stress test it with Prime95 it blows warm air out of the top of the case. Management approves of warm air.

MVIYkwF.jpg

Finally, here it is installed in my Nephew's room.

BAzLRR9.jpg

He was really pleased with it. He'd guessed I was getting him something computer-related, but was thinking along the lines of a new GPU. Getting a whole machine really shocked him.

Mission accomplished, I think.

Thank you all for reading, and for all the kind comments.
 
Back
Top Bottom