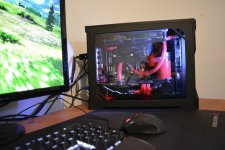
Project Thunor

Associate
Joined
16 Dec 2013
Posts
310
Location
Staffordshire
Mj6iLu3l.jpg

Hi everyone!
Welcome to my 2015 mATX build project featuring (soonTM) a custom Parvum case and full-loop watercooling. It will be my main (and only) desktop PC, mainly used for gaming and light video/photo/music editing.
Originally I was planning a 6700k build but decided on an X99 system instead thanks to great pricing from OcUK.

---------------------------------------------------------------------------------

Spec:
CPU – Intel i7 5820k
MB – Gigabyte X99M-Gaming 5
RAM – Kingston HyperX Fury 16gb 2400 MHz
GPU – Gigabyte GTX 970 windforce OC edition (planning to go SLI in the future)
Storage – 120gb Kingston SSD + 500gb Samsung 850 evo SSD
PSU – BeQuiet 600w 80+ bronze (recycled from old build)

And for watercooling:

CPU block – EKWB evo supremacy
GPU block – EKWB 970 wf3 + corresponding backplate
Pump/Res – EKWB D5 x-res 140 PWM
Radiators – 2 x Darkside slim 240mm
Tubing – Primochill 3/8” ID 5/8 OD
Fittings – EKWB black compression fittings
Coolant – Mayhems pastel red

---------------------------------------------------------------------------------

Thunor was an Anglo-Saxon deity analogous to the norse God Thor. He was worshipped by the people of England before Christianisation in the 7th century and is immortalised in place names (Thursley, Thundersley), in the word thunder (literally meaning Thunor), the day of Thursday (Thunor's day) and as of now, my watercooled gaming PC.

For a PC named for the mighty thunder god, I chose a colour scheme based on this central theme: The majority of parts will be black including the case and CPU/GPU blocks. I will use white braided cable extensions to represent the sparks cast from Thunor's mighty anvil that we call lightning, and red coolant to represent the blood of the evil serpent Jormungand, destined to be killed by Thunor in the last days of the world (Norse mythology).

---------------------------------------------------------------------------------

Back with computers, I thought I'd start the thread now as I have everything but the case and have been busy putting stuff together so I can build as quickly as possible when it arrives. So let's begin!

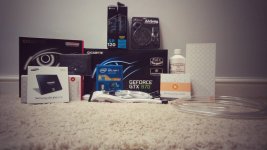
DSoMTImh.jpg
A selection of parts.

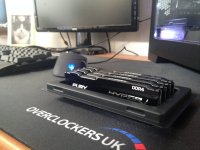
rxxeBnHh.jpg
The RAM.

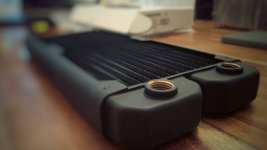
Lu5PDuXh.jpg
27.5mm slim radiator by Darkside (240).

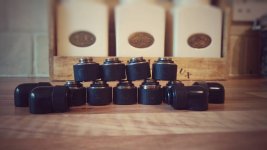
8nhEmZRh.jpg
The EK fittings I'll be using.

1JaQxXFh.jpg
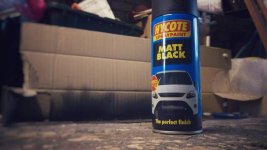
Spraying fan rings matte black. I'm spraying the blue rings as I'm not sure yet whether I'll be using the white or black rings (or a mixture).

Xo6PVG8h.jpg
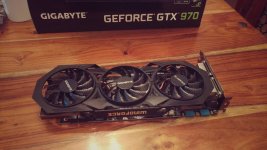
GTX 970 windforce OC before...

w069Cmzh.jpg
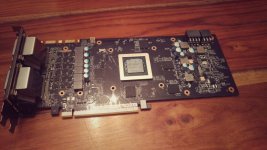
During...

1HQKn5Rh.jpg
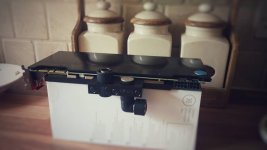
And after :D

TFslAjzh.jpg
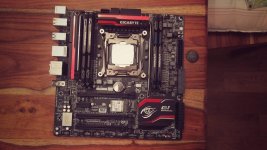
Close up of the motherboard.

lqPqu4Hh.jpg
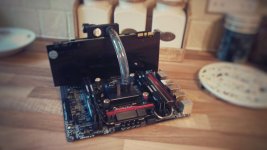
A final shot for now, showing the board with CPU block and first connection in place.

Hope to have updates featuring the case soon ;)

Cheers
 
Last edited:
Thanks guys :)

Just wondering why you chose the Gigabyte board, also keep up the good work :)

Around the time of Skylake release OcUK were offering the 5820k and motherboard bundle at £414 (it's £440 now). A skylake build would have cost more because of the price of the 6700k and that the only good mATX board at release - the gene VIII - is £170.

I looked at some reviews comparing it to the other mATX X99 boards (asrock and ASUS I think) and it seemed to compare reasonably well so I just went for it!
 
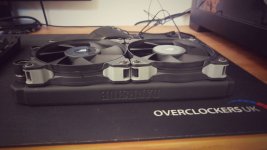
With the fan rings dried, I've mounted the fans to the rad, which as you can see is very slim which will give me plenty of clearance in my case..

iY5wKk7h.jpg
Super-stealthed fans :cool:
 
Last edited:
case2.jpg


Happy to say that things are finally moving with this project again and I will post a big update in the coming days.

The case was delivered today after a long wait and I got to building straight away, even though the case came in reverse ATX (I asked for standard) which presents problems and has meant I can only fit one of my 240 rads in - which is crazy because the case is very large, much bigger than an S2.0.

Hopefully I can get that problem sorted and I'll drain and rebuild the loop that is currently testing for leaks (as seen in pic) :D

Cheers
 
MAJOR UPDATE

So I've spent all my spare time in the last 24 hours in a trance-like state working on this thing and I'm now in a position where I'm happy with it for now.

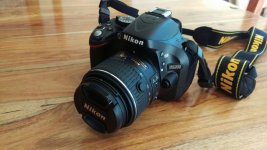
It's been a long time since the last update and I got a new toy in the meantime: the Nikon D5200 :D

ivRPprFh.jpg

So all of the following photos were taken with this camera. I'm really enjoying using it (first DSLR) although I'm a massive camera noob so sorry for the poor quality and composition of pictures in advance. In the future I'd love to invest in some kit and get the knowledge to match some of the great quality pics we see on build logs here at OcUK.

So before I received the case boredom was striking hard, so something I decided to do was remove the motherboard heatsink(s) and spray it the red parts black for a super-stealth look!
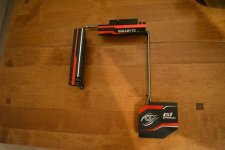
f8UT9qxh.jpg

Removing the heatsink was very easy - just 8 screws in total on the back of the motherboard. As you can see the whole thing comes off as a single assembly connected by the heat pipe.
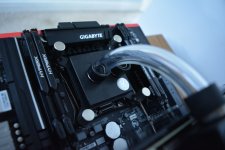
Gv0izcph.jpg

Pleased with the way that turned out.

Fast forward a few days... a wild package appears!
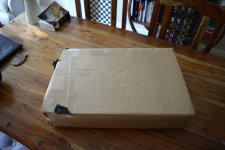
EMzFYlfh.jpg

Much head-scratching and umming and ahing occurred over the next hour or two as I assembled the case. Photography rather fell by the wayside I'm afraid.
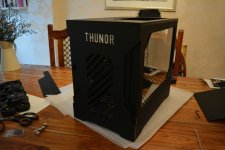
UEJOEWoh.jpg

The THUNOR Parvum R1.0 taking shape...

OChTUrZh.jpg

And there she is. Case fully assembled. It's an mATX chassis but looks easily large enough to fit a full ATX board. The side wall only extends around 2/3 down the case though so that prevents the use of an ATX board (unless modded). There is capacity for 3 x 240mm radiators: one at the front and two on the bottom.

As I mentioned in my previous post, I had asked Justin at Parvum for a standard ATX layout and as you can see the case they delivered is reverse ATX. I immediately sent an e-mail to let them know this and am waiting for a response - I hope they will send me the requisite parts to allow a standard ATX assembly (I think it'll take a new side-wall, left-side panel, back panel and top and bottom panels...

In the meantime - with the amount of time I'd waited with all those shiny new components sat on my table - I set about a reverse ATX build, even if it is temporary.
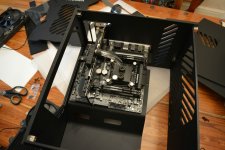
vqnle3Hh.jpg

motherboard in place. The space you see below the side-wall should be separated by a panel which I guess you could call a false floor. However, with this piece in place you'd need to drill through the acrylic (or go with ridiculous routing) to connect tubing to a radiator on the floor. It also drastically reduces your options on the placing of the pump and res.
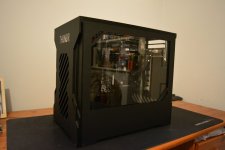
cdXnmTwh.jpg

Motherboard in place - side panel on.
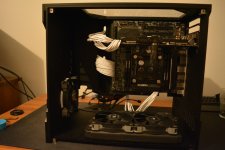
r7XN4GRh.jpg

Some cables connected and fans fitted. Coming across problems with radiators already. With a radiator in the front and on the bottom I'm struggling for space as the mounting bracket I have for the pump means the pump is fouled by PCI-E cables. So for now - unfortunately - I am going with a single 240mm radiator for CPU+GPU and a single 120mm fan in the front. Spoiler alter: so far idle temps are fine (mid 20s) but not tested under load yet).
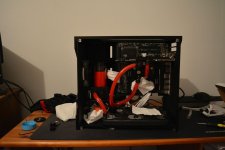
BqKkPK7h.jpg

Again, I'm sorry to say that photography fell by the wayside as I embarked on tubing up my first watercooling loop. The pic obviously shows leak-testing, the results of several hours effort which left my fingers red raw and my patience frayed. The layout of the loop is far from ideal and a couple of the bends are very tight and the tube is close to kinking. The order is res/pump > radiator > CPU > GPU > pump.
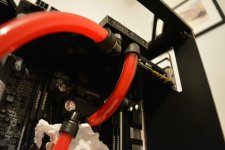
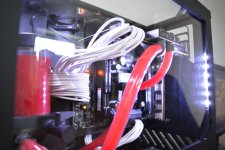
ys6xjXQh.jpg

Nice colour on the Mayhems pastel red :)

I was happy (and surprised) that as the evening went on no leaks appeared. I left it running overnight and woke up this morning to find no leaks :) so onto plugging everything in!

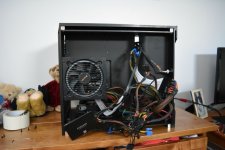
8FghoDmh.jpg

Oh God! the cable jumble... I think a nice modular PSU upgrade may be a wise investment.
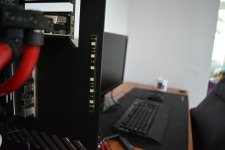
6b53WAch.jpg

Installation of one of the two 15cm BitFenix Alchemy white LED strips.

With everything powered up it was time to turn this bad boy on!
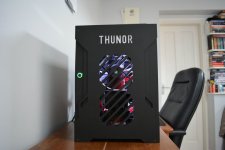
7YXaCDph.jpg

Ew, why is the power LED green?

QRS2N3mh.jpg

To quote Dimitri from Hardware Canucks... the first boot goes without problems! Windows is installed from a USB stick and I'm up and running. Installing all my programs and temps are around 25-30 on CPU and GPU.

Noise is audible but not too loud. We'll see how it sounds under load. I've been considering replacing the SP120s with either Darkside GTs or EK Vardar fans to reduce noise.
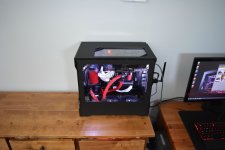
rXdQM4kh.jpg

Aside from the PCI cables - which look cack and need fixing - I'm pretty happy with the way it looks.
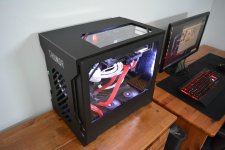
P0PNthQh.jpg

Pretty :)

BMOy6Pxh.jpg

Not so pretty a picture, but here you can see the placement of one of the LED strips, and in the bottom left my drain valve, also sprayed matte black.
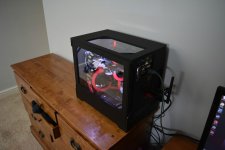
UeZAefGh.jpg

Final shot for now showing the back of the case.

Phew, writing all that felt like a marathon! I'm looking foward to playing some games on it tonight and seeing what kind of temps it's getting with the single 240mm rad. I'll also be cleaning up the cables (looking into solutions, tips welcome) and taking some nicer photos in the near future.

I hope to get the issues with the case resolved soon. I have to say my experience dealing with Parvum has been quite disappointing. My wait time was over twice what they originally said and the case is not exactly what I wanted.

The inlay on the front is nice but I had asked for the name embedded in a red hexagon - Parvum style.

I think they should send renders of what the finished product will look like to the customer before they cut it. If they had done so I could have pointed out what was wrong with it, but ho hum.

As I've said in another section of this forum, communication with Parvum is very poor. I wait for days for a reply and generally receive a fairly unhelpful one-line reply. I know they're busy - especially with the launch of the L1.0 - but I don't think it excuses neglecting customers who have paid a lot of money for a premium product.

Sorry for the rant, I hope the coming weeks will see some resolutions of the problems I've had with the build, and in the meantime I'm looking foward to getting to grips with what I've built. Until next time...

Cheers
 
Last edited:
Early indications on temps are promising, ran Valley benchmark and hit 120 average fps (1080p) and max temp on the GPU of 40C.
 
Thanks guys :)

I agree the motherboard looks much better in all-black, and totally agree that manufacturer's should stop shipping motherboards with opinion-splitting colours.

ED209, with the heatsinks I just masked up the Gigabyte logo with plenty of tape and made sure to hit the rest with a few light coats.

Hopefully I'll hear something from Parvum soon. I'm happy with the build the way it is but with the single 240 I'm keeping it at stock which is extremely boring. The good news is that as the cooling looks pretty good with the single rad, hopefully having two 240s will allow a beastly overclock on both CPU and GPU.

I've also got to get some cable combs to sort out those graphics card cables.
 
Last edited:
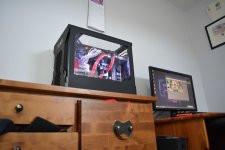
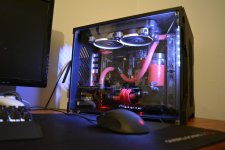
After some discussion with Justin from Parvum (many thanks to him), I have received a case more in-line with my original requests andpretty much finished the project with a smaller form of the case. The build went well and aside from a couple of minor things (fan speed control and maybe changing the cable extension colour) I'm very happy with the build.

5820k and 970 are both overclocked and temps are fantastic with the 2x240 rad setup. Max temps I've seen are about 40 on the GPU and low 30s on the CPU. Will definitely push my CPU above the conservative 4 GHz I have it set to at the moment.

900x900px-LL-59a1d437_OxCwlF7.jpeg

N4NVcBPh.jpg
eWkxriQh.jpg

Building this PC has been a blast. I've loved my first experience with liquid cooling and can't wait to crack on with another project in the not-so-distant future, this time at the other end of the spectrum I think...EATX :D

Cheers
 
Thanks everyone :)

I will buy a white vandal switch next time I want to order something from OCUK, the green is really hurting my eyes lol. I've tried with the LED off but that looks bad too.
 
Back
Top Bottom