

Last night I started to watch a film when 20 minutes in the screen went blank, ps3 beeped and then switched off.
Tried to turn it on and it fired up for about 3 seconds before showing the yellow light briefly and then switching itself off.
This is a 60GB that I bought on launch day for around £550 with a couple of games
Anyway watched some videos on youtube last night by a guy who goes by the name of "gilksy"
Got home from work today and stripped the ps3 down, re flowed the areas mentioned in the guide with a
300 degrees heat gun (350 degrees is recommended but I just held it slightly closer instead)
Defluffed it all then spread some artic silver on the main chips and re assembled.
To my joy the PS3 lives again") Sony wanted £131 for what is essentially a reflowed refurbed console and the repair shop wanted £70.
Sony wanted £131 for what is essentially a reflowed refurbed console and the repair shop wanted £70.
All it cost me in the end was just under 2 hours of my time (which included 30 mins cooldown of the board on both sides.)
More info can be found in gilksy's thread here: http://playstationlifestyle.net/forums/showthread.php?t=2376
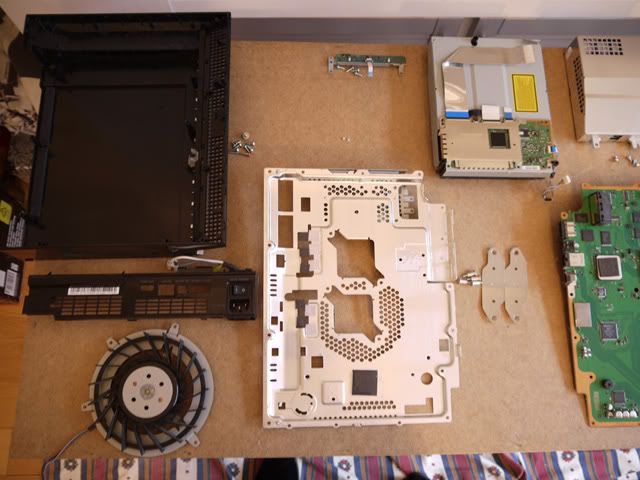
Some pics of the stripped PS3 (excuse the paste table and cloth )
)


Tried to turn it on and it fired up for about 3 seconds before showing the yellow light briefly and then switching itself off.
This is a 60GB that I bought on launch day for around £550 with a couple of games
Anyway watched some videos on youtube last night by a guy who goes by the name of "gilksy"
Got home from work today and stripped the ps3 down, re flowed the areas mentioned in the guide with a
300 degrees heat gun (350 degrees is recommended but I just held it slightly closer instead)
Defluffed it all then spread some artic silver on the main chips and re assembled.
To my joy the PS3 lives again
Sony wanted £131 for what is essentially a reflowed refurbed console and the repair shop wanted £70. All it cost me in the end was just under 2 hours of my time (which included 30 mins cooldown of the board on both sides.)
More info can be found in gilksy's thread here: http://playstationlifestyle.net/forums/showthread.php?t=2376
Some pics of the stripped PS3 (excuse the paste table and cloth
)
Last edited:

")

