OcUK Product page - http://www.overclockers.co.uk/showproduct.php?prodid=HS-000-RT&groupid=701&catid=2330&subcat=2666
RaJintek home page - http://www.raijintek.com/en/products_detail.php?ProductID=4
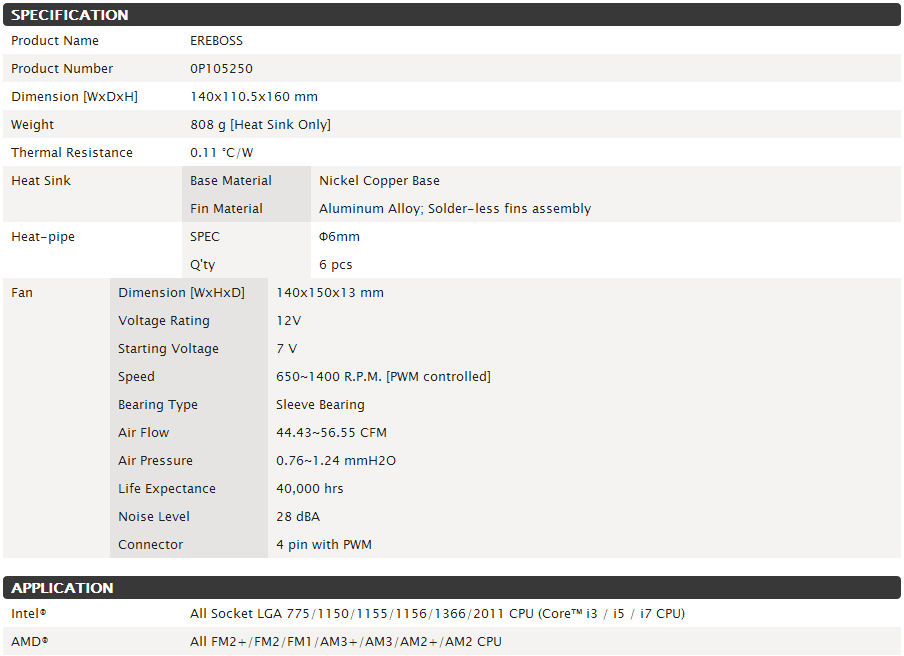
Packaging and Accessories.
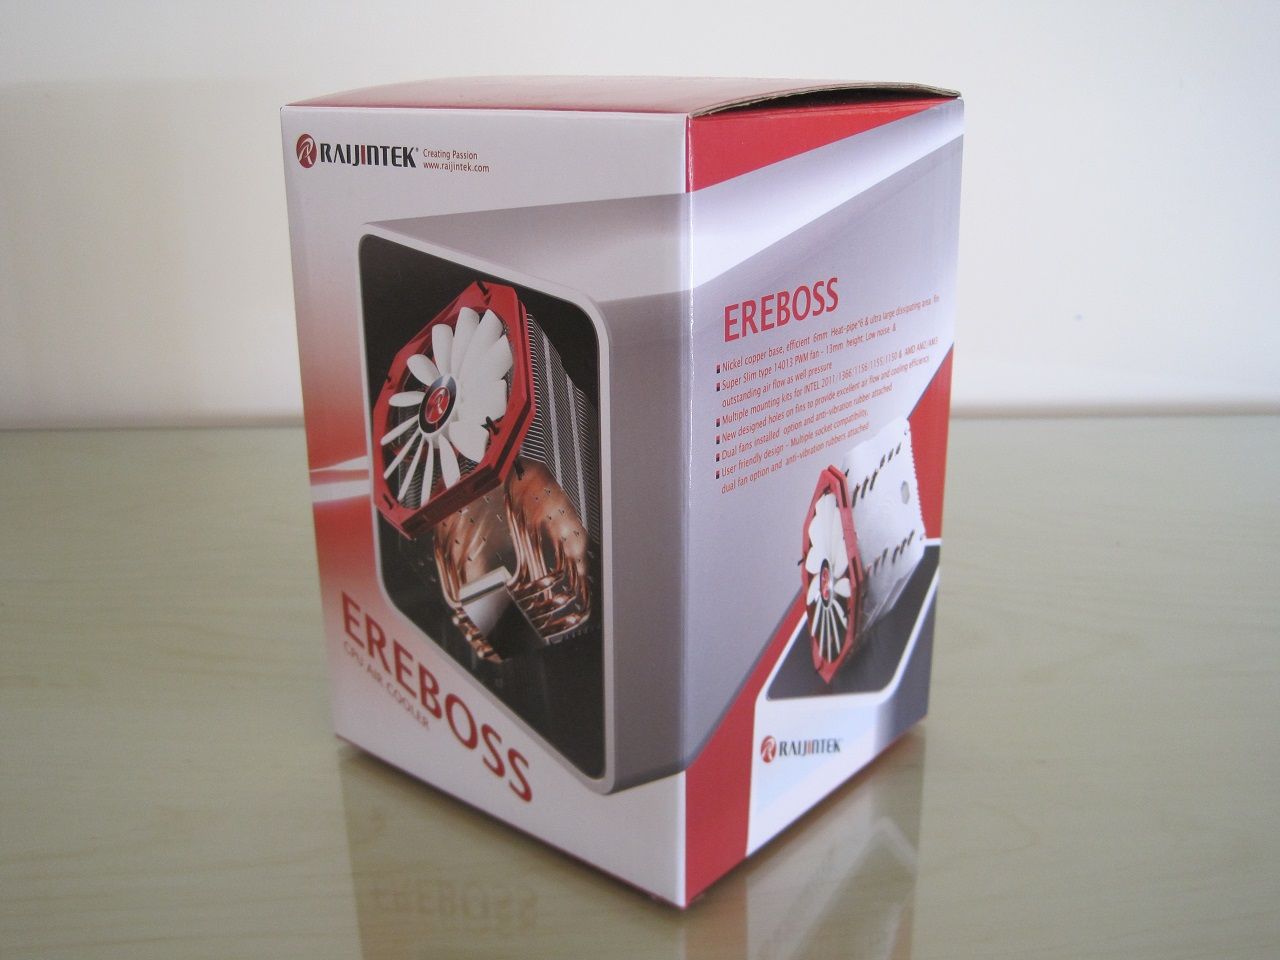
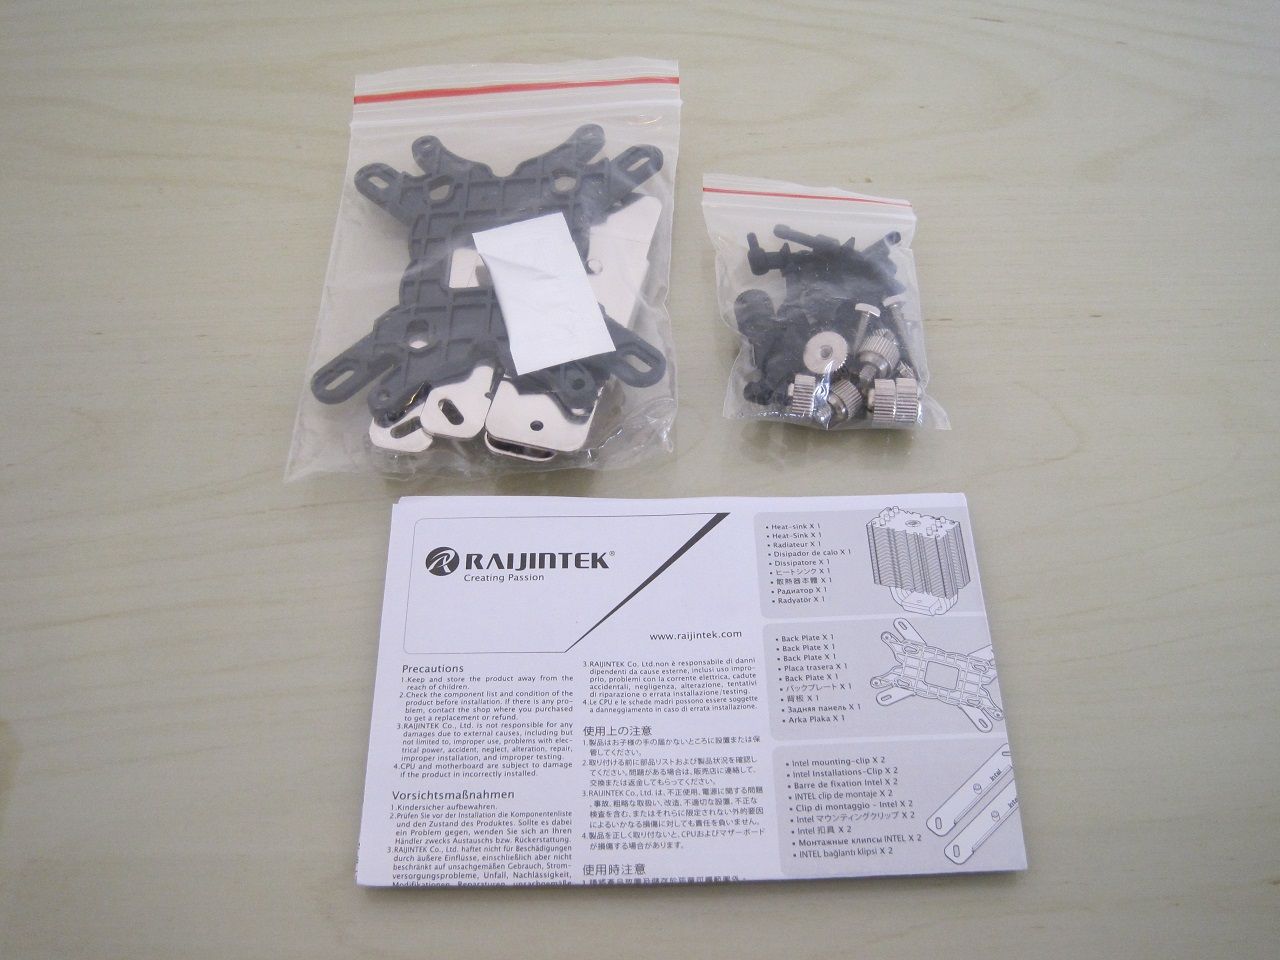
Easy instructions to follow and a sturdy set of metal plates to hold the heatsink securely, extra rubber mounts are provided to allow push/pull with an identical fan and a sachet of thermal paste is also included.
The heatsink body and fan.
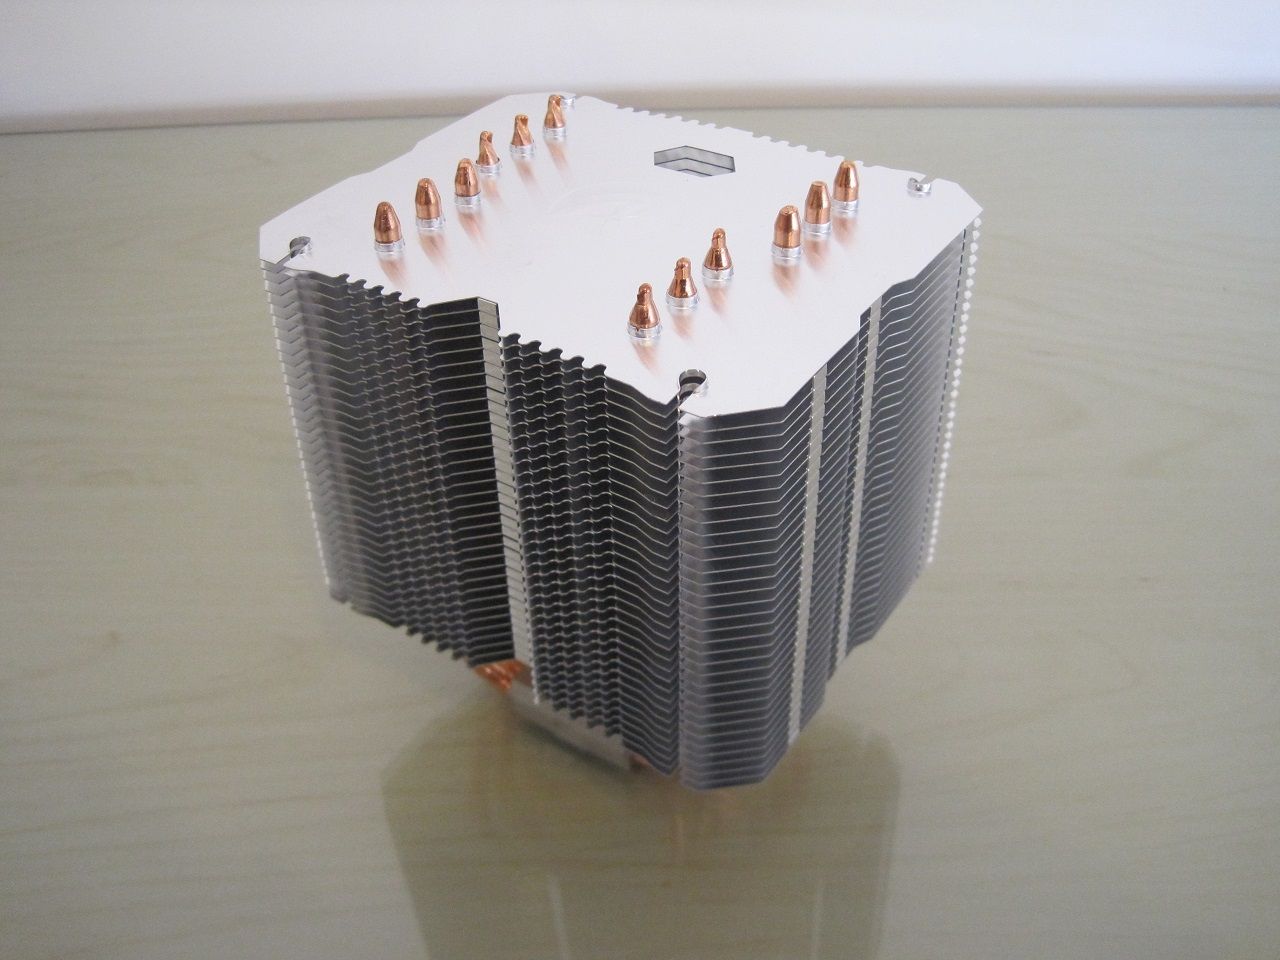
First impression is wow that's a large heatsink for £32.
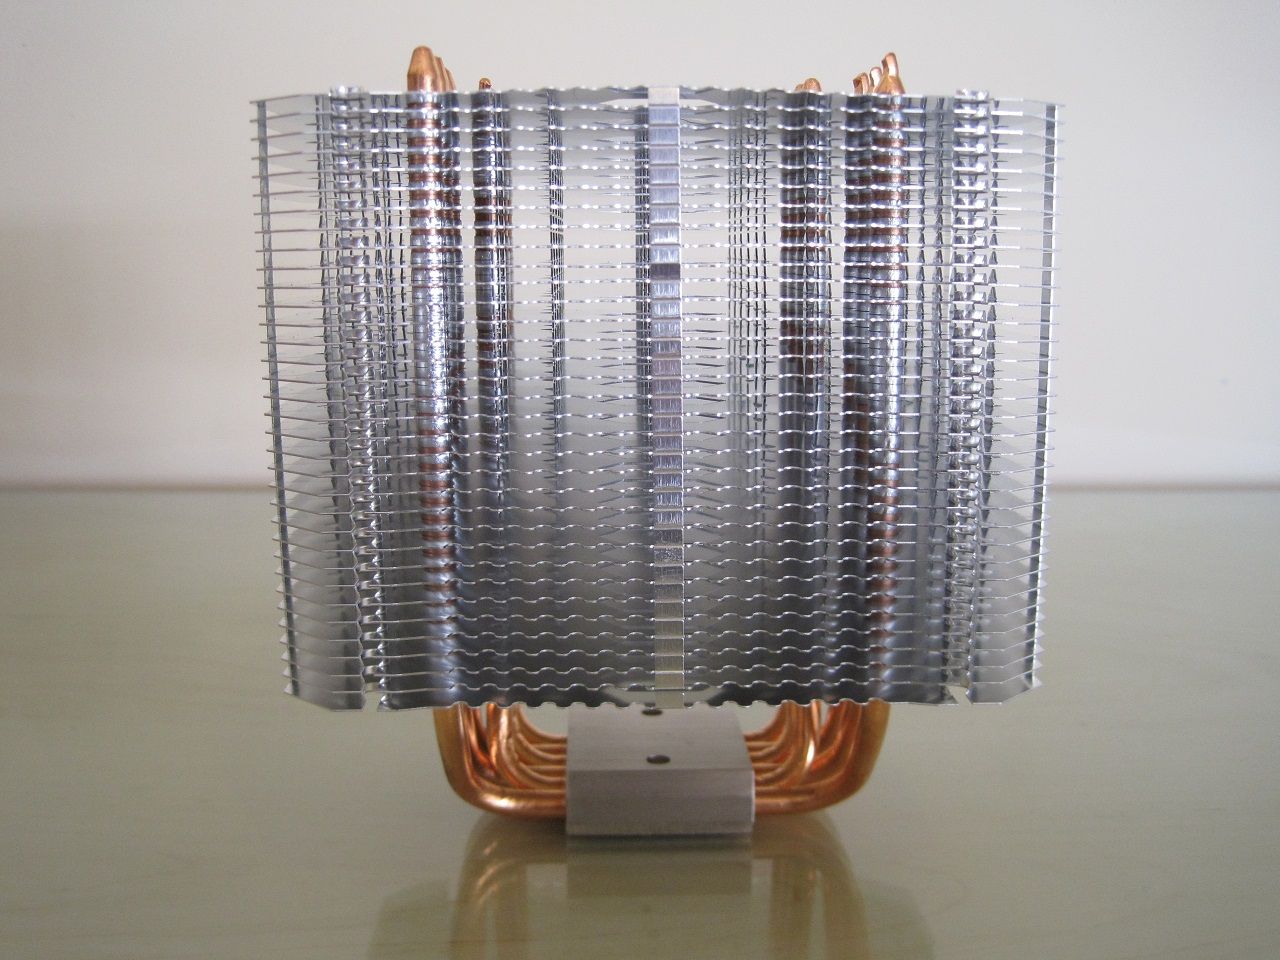
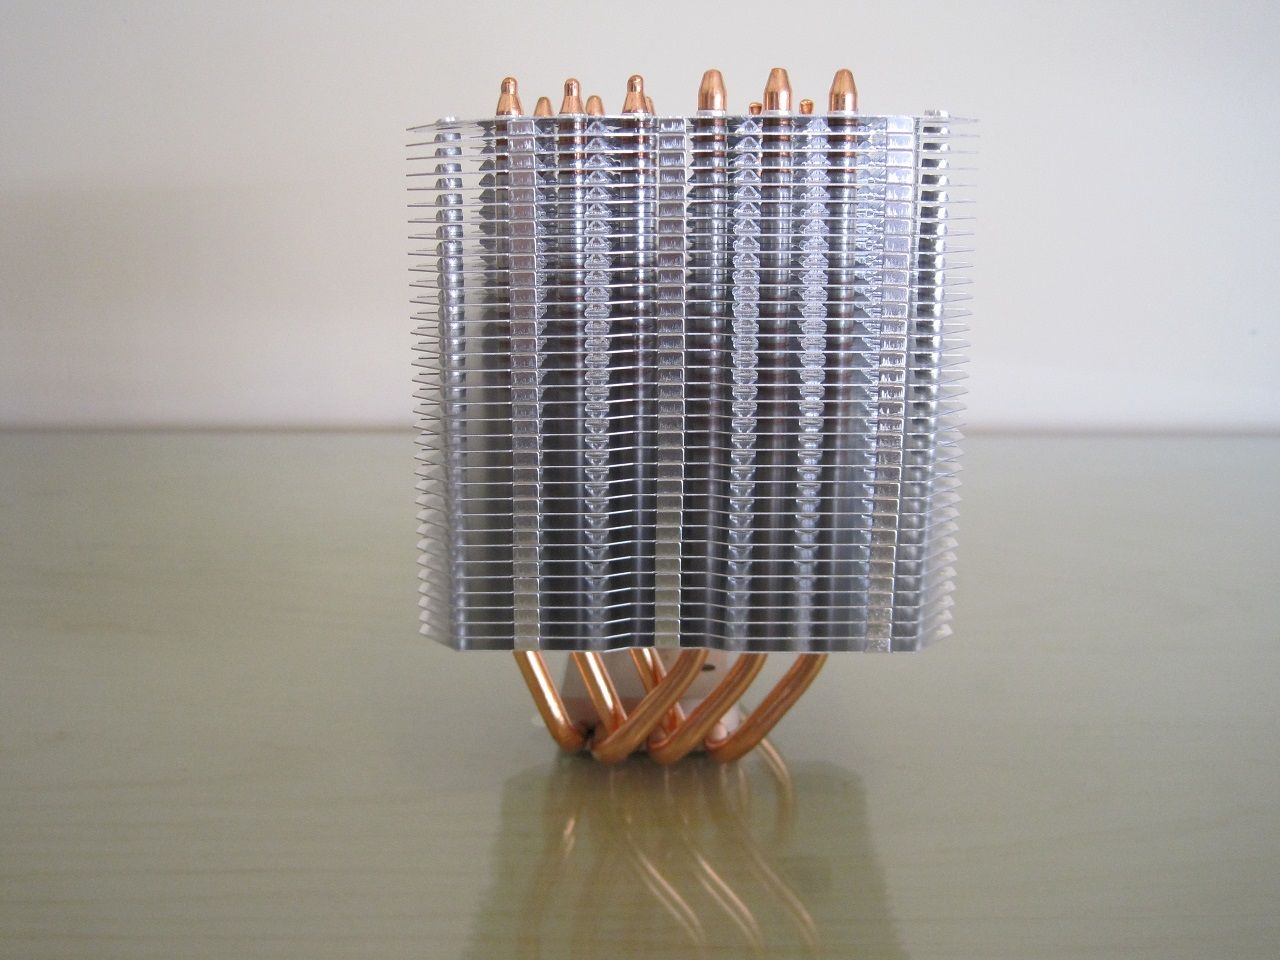
Six 6mm heatpipes help take heat from the base and up into the fin stack to be cooled by passing air.
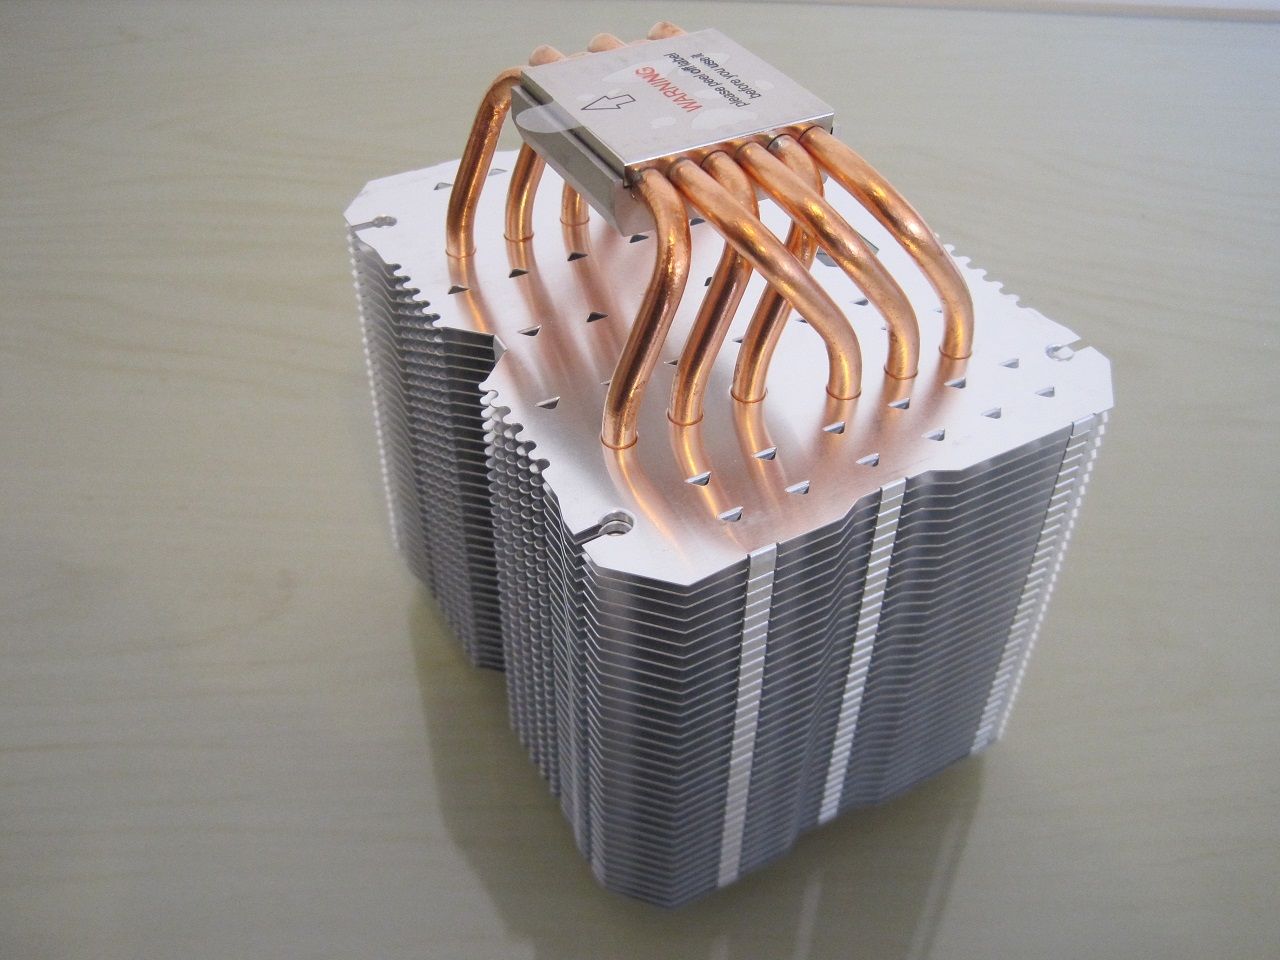
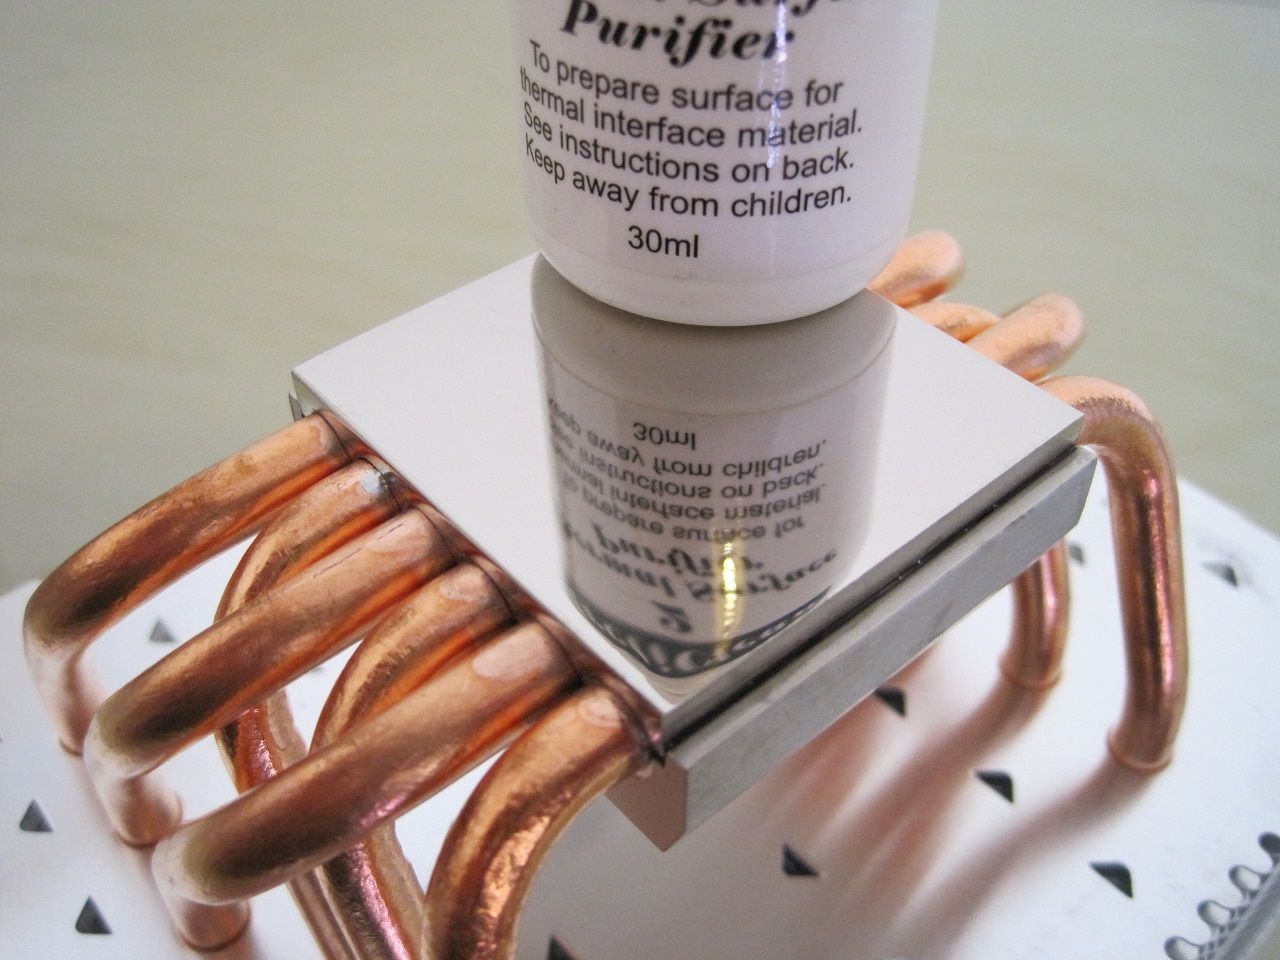
Highly polished base looks and feels smooth.
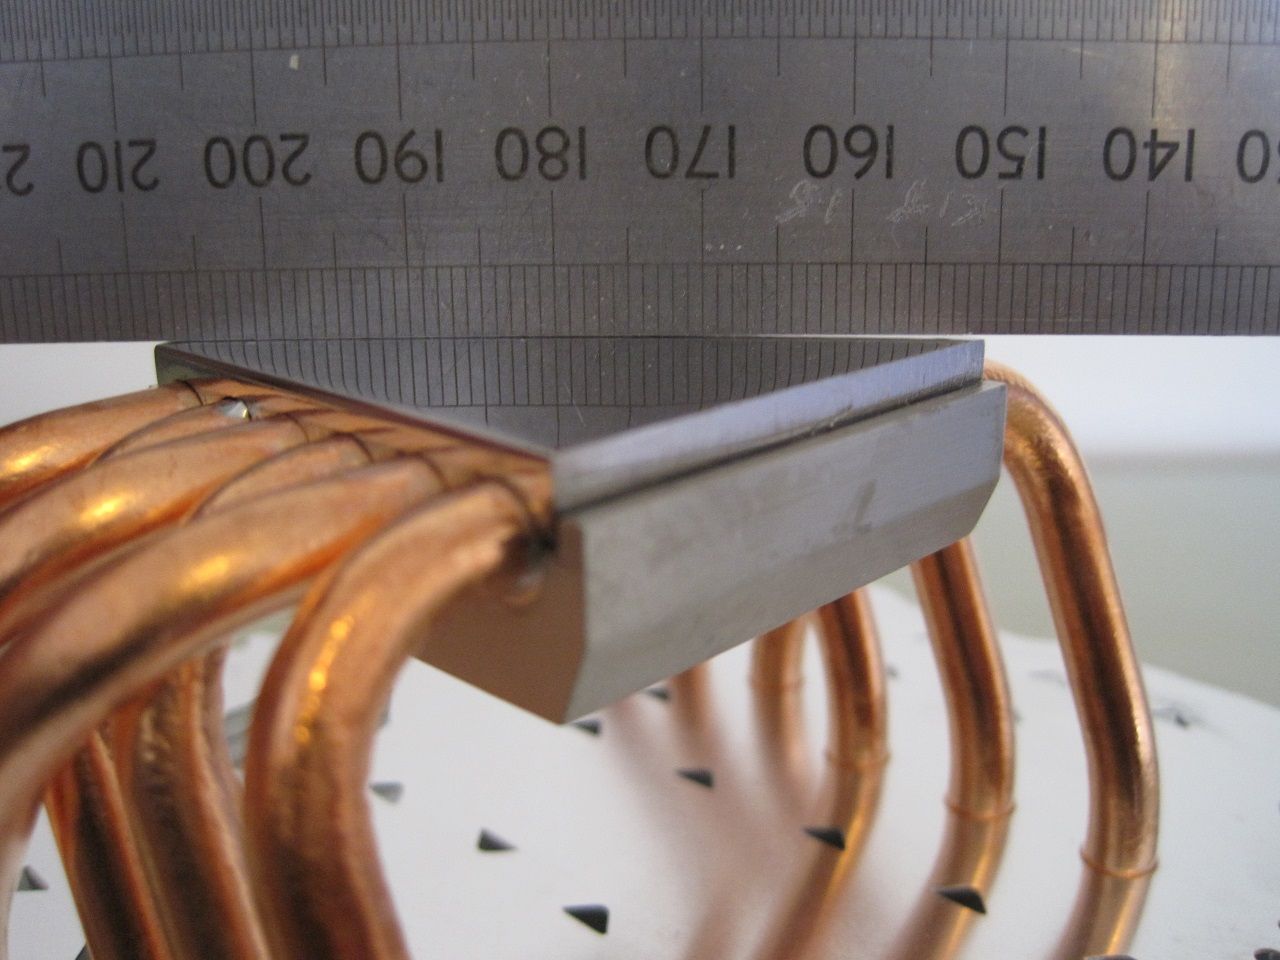
But its not totally flat with it having a slight curve on one side.
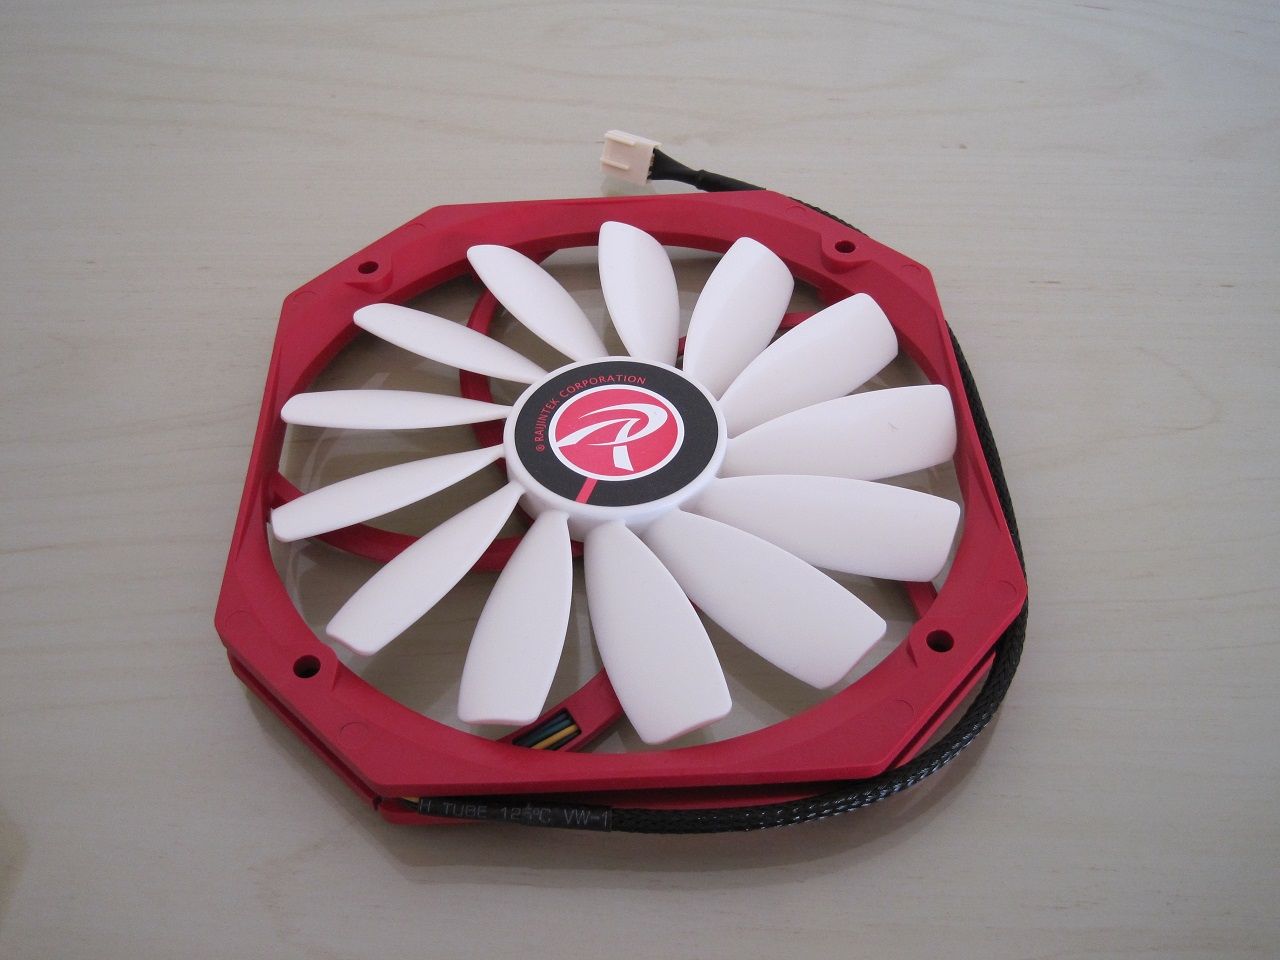
Quite like it.
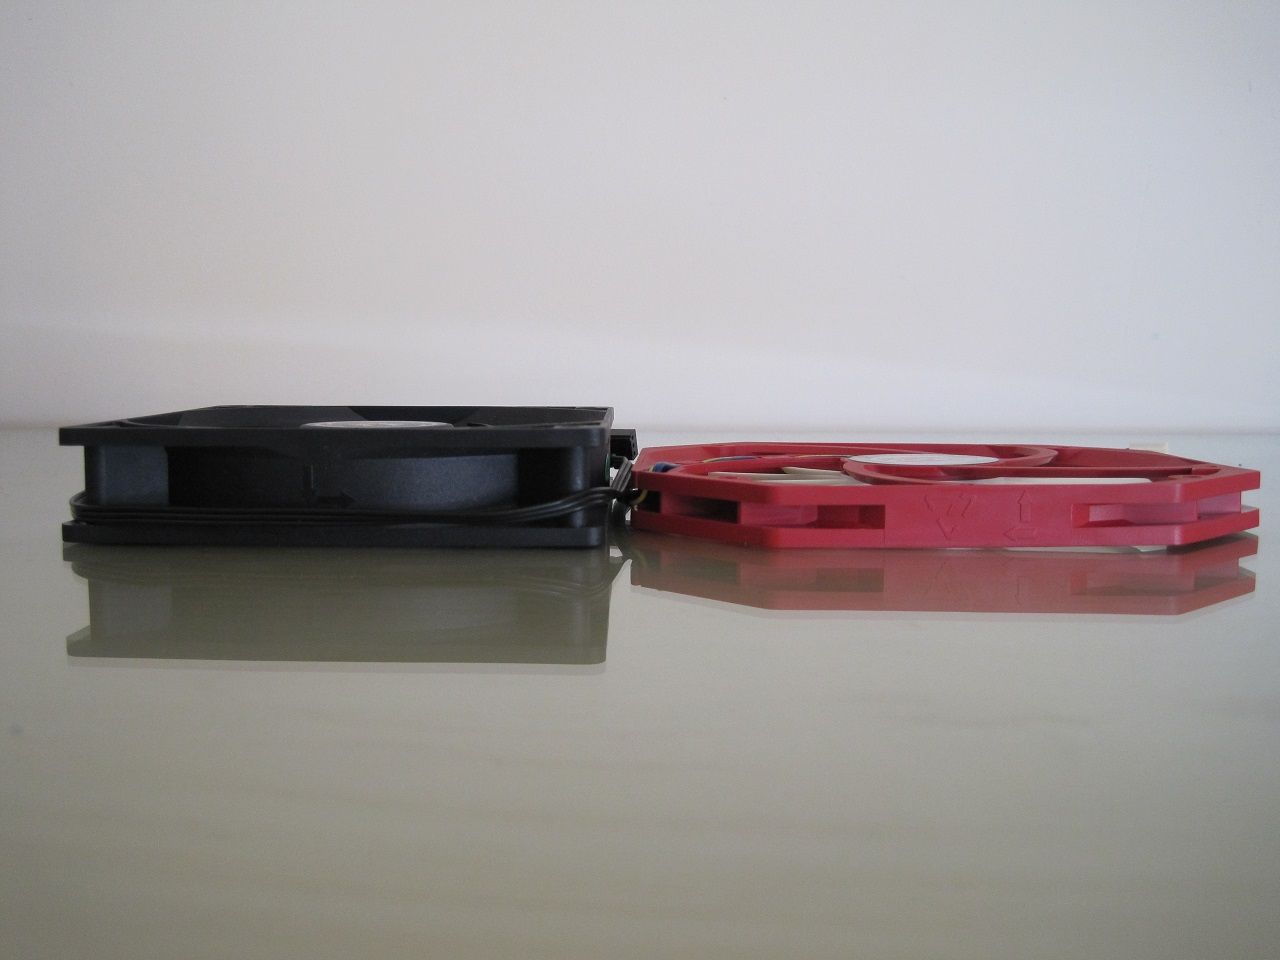
Look at how thin it is at 13mm compared to a 25mm thick (normal) fan.
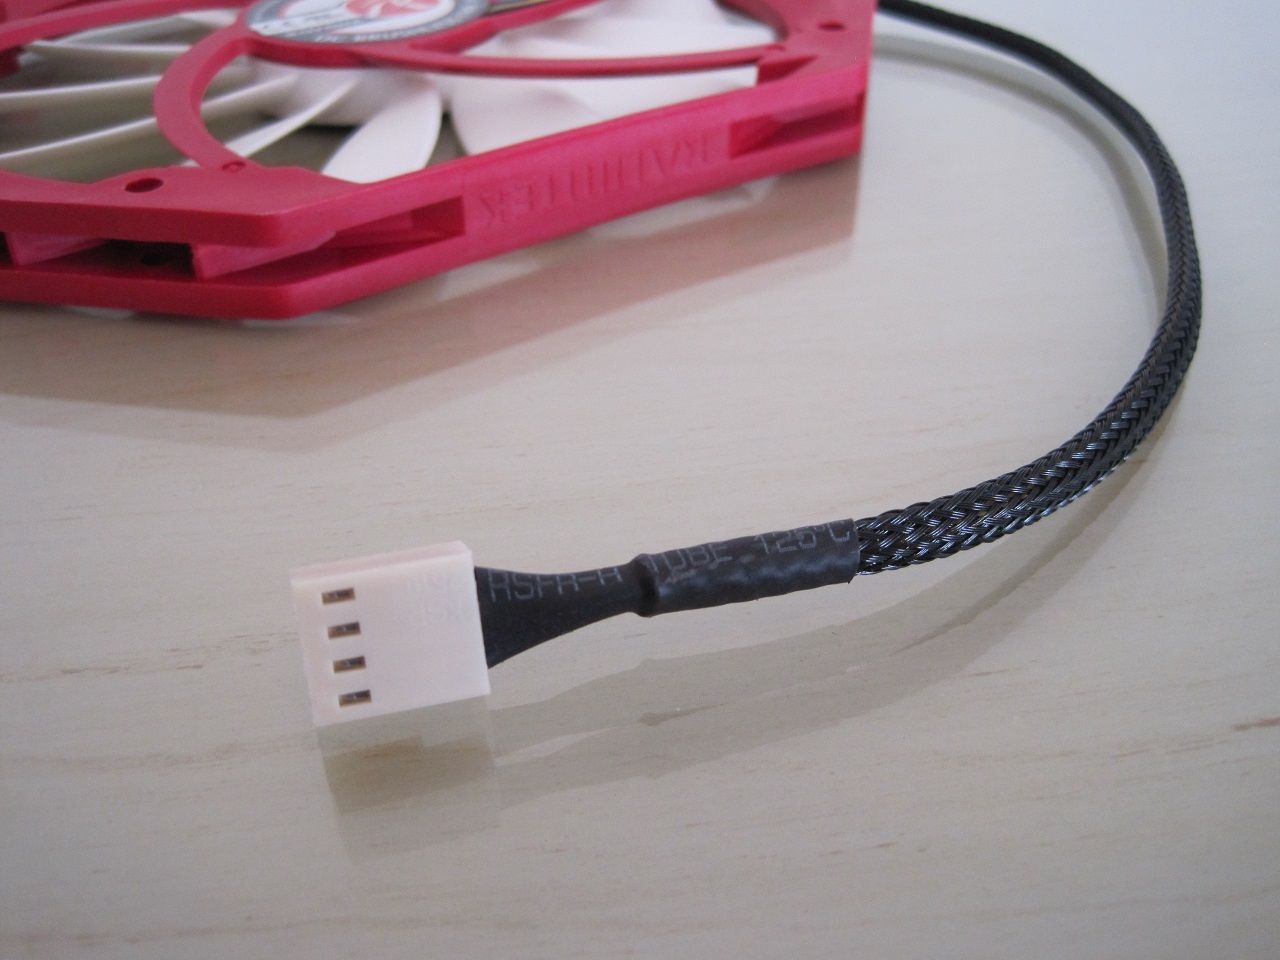
Nice quality braid from end to end with no bare wires showing.
The complete heatsink.
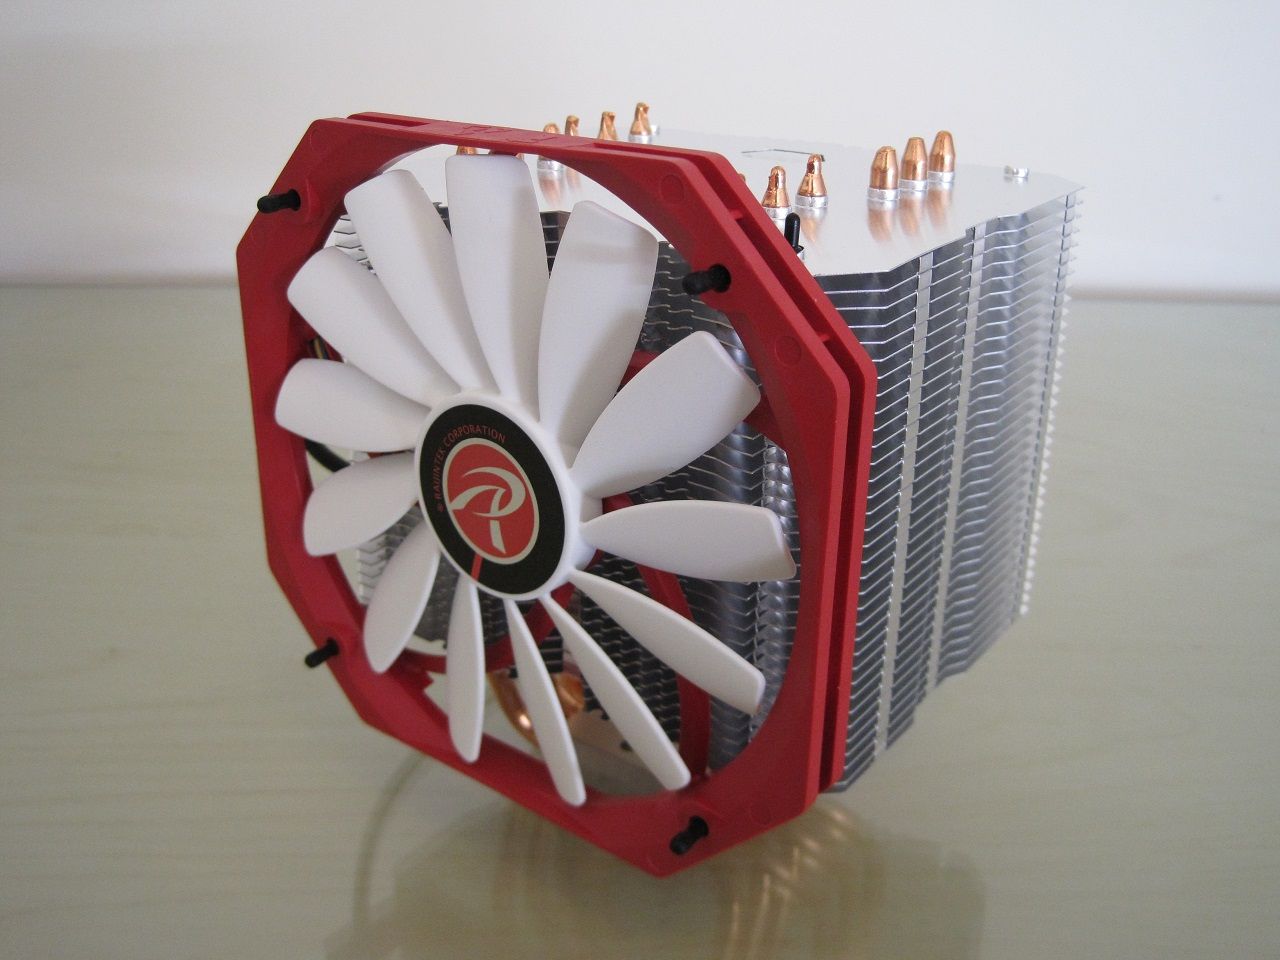
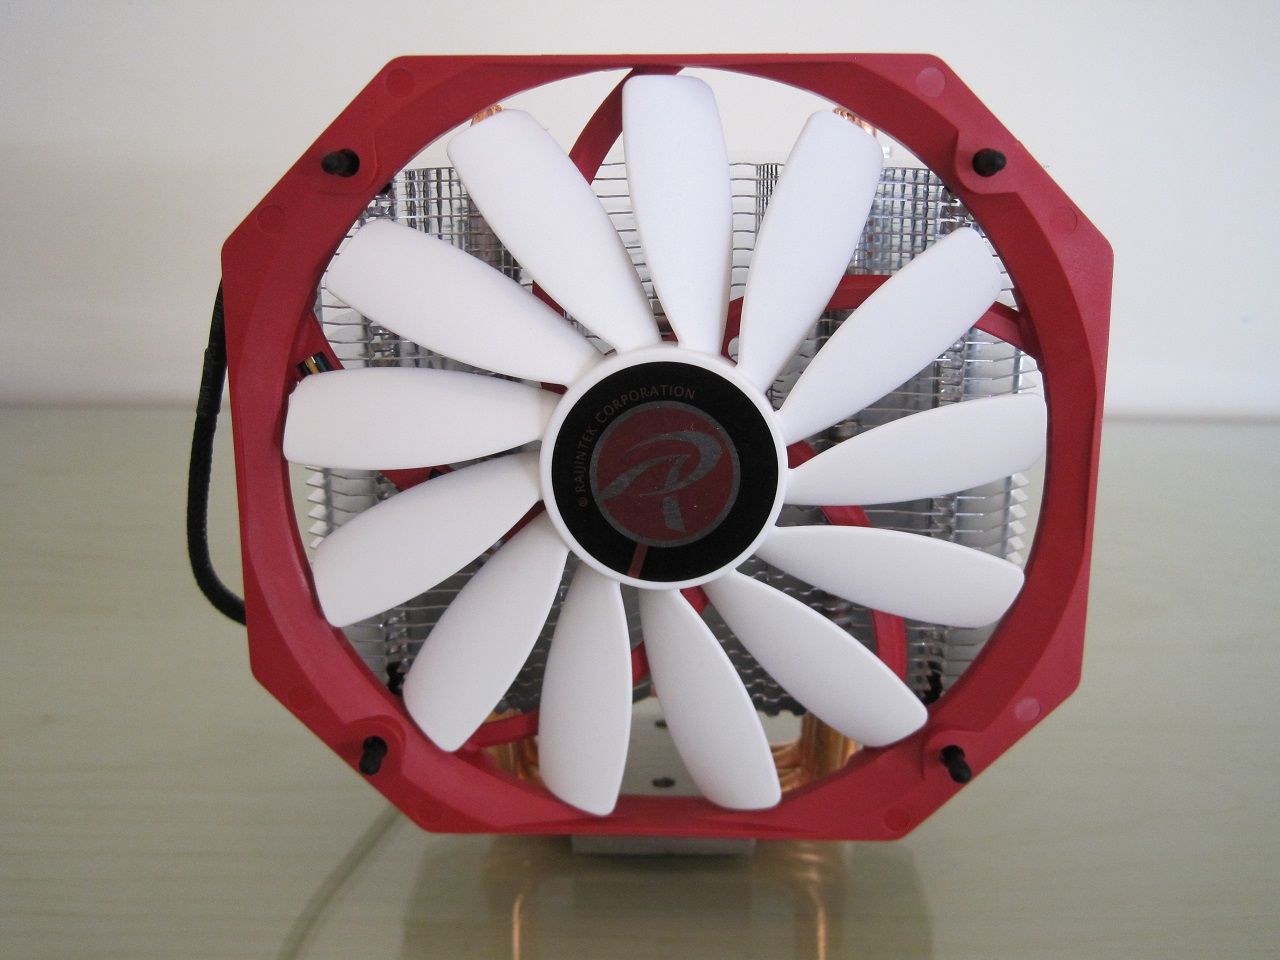
Massive fan also blows air around the sides of the heatsink body (could help cooling VRM heatsinks?)
The total height with fan fitted is around 173mm give or take 1mm.
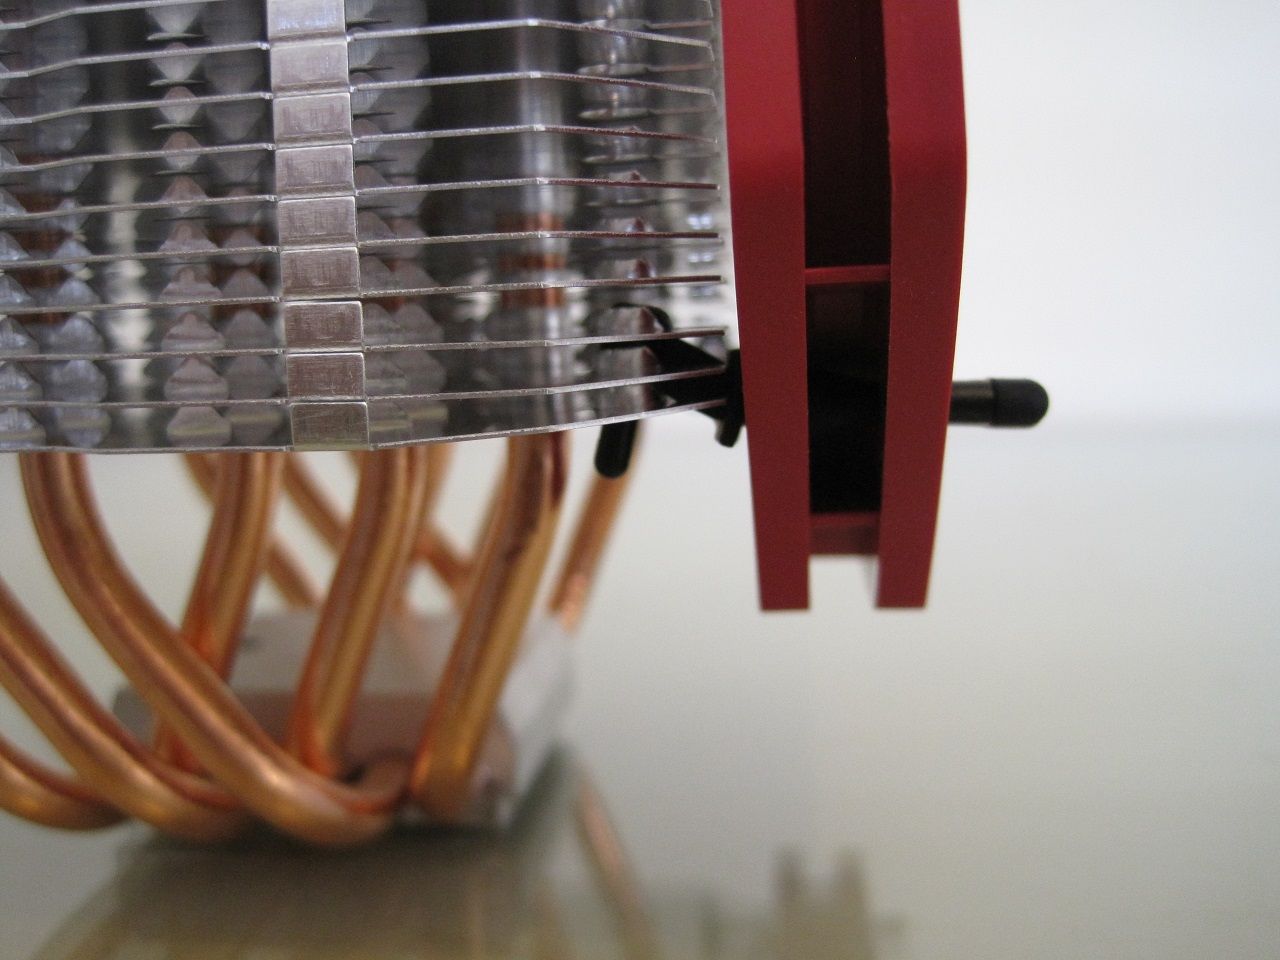
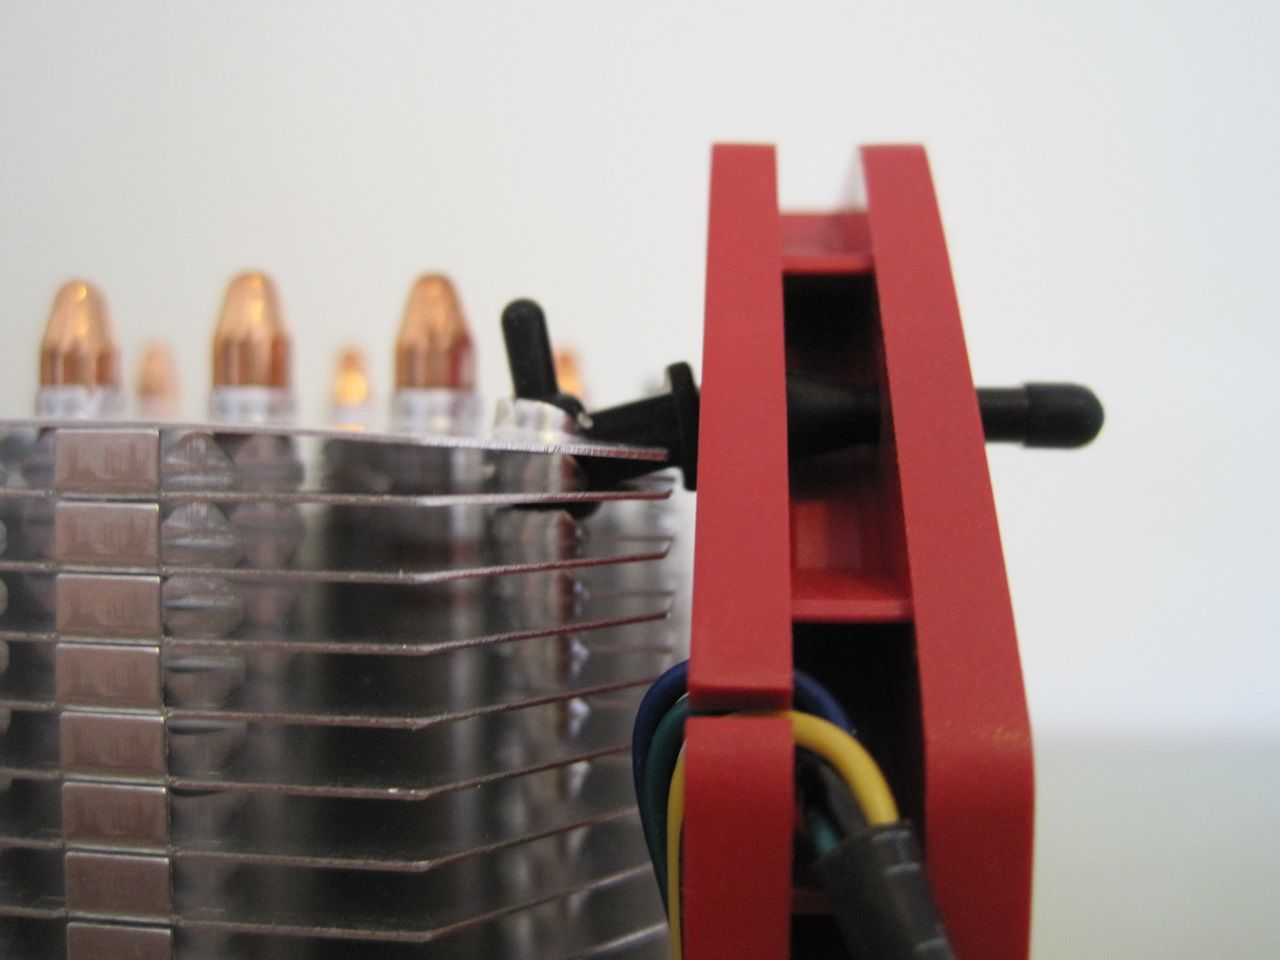
The fan is so big the rubber mounts are bending out to cope!
Fitting.
So lets look at how it fits both Socket 2011 and Socket 1155.
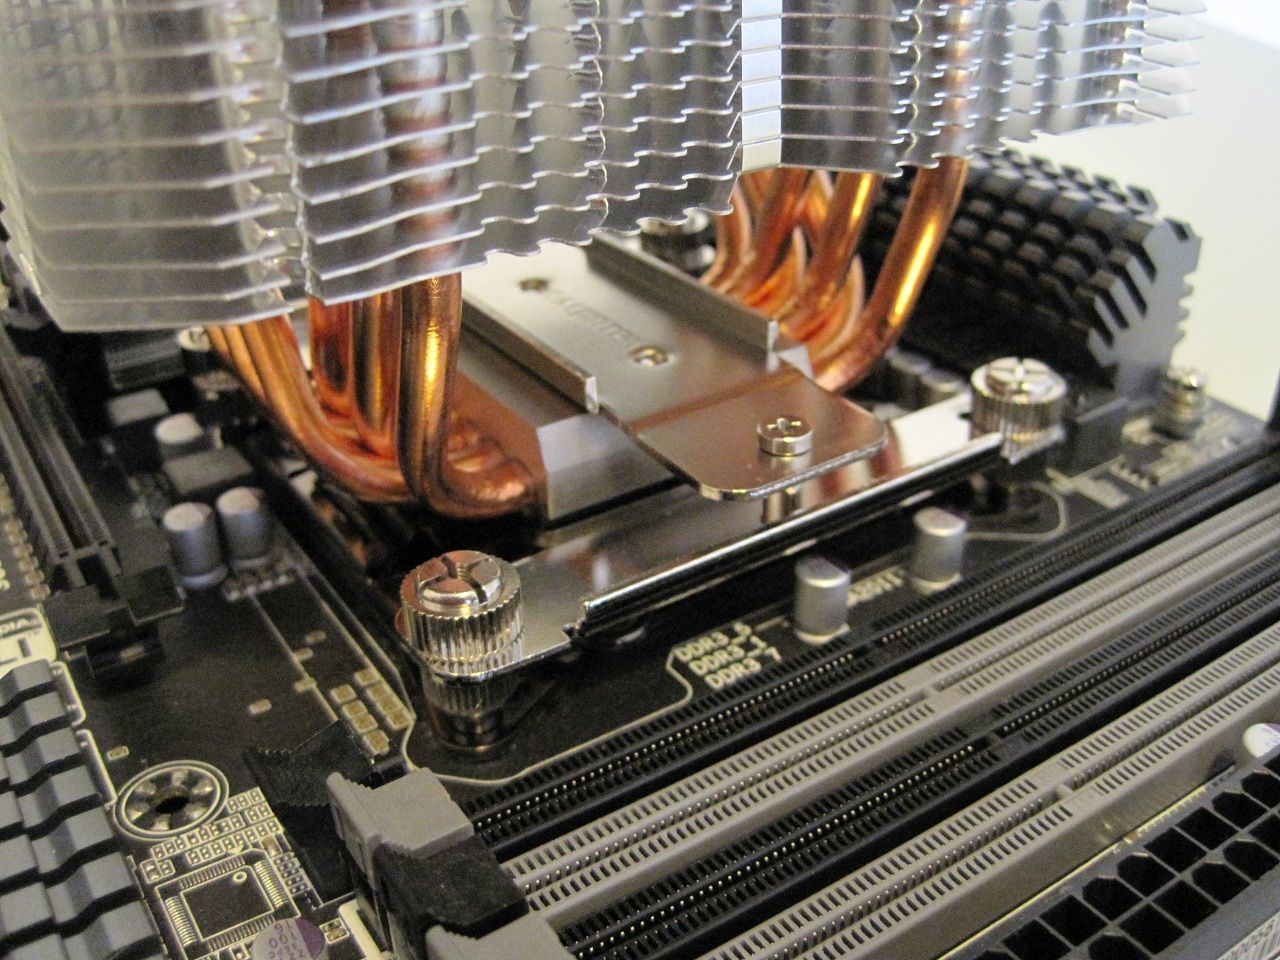
Its very simple and follows the sort of standard I am use to when it comes to fitting on these sockets.
• For Socket 2011 its as simple as screwing four stand-offs in each corner of the socket, fit a brace arm across them on either side and secure these down with the four knurled nuts, apply the thermal paste and screw the cooler onto both brace arms with a single screw at each end till it is secure.
• For socket 1155 (and 1156 and 1150) make sure the rear mounting bracket is the right way around and pass four screws through the PCB and secure these four screws with four plastic threaded stand-offs (this helps leave a hand free as you don't need to hold the rear mounting bracket any more), then place the two brace arms across the four screws/stand-offs and secure down with the four knurled nuts, apply the paste and then again screw the heatsink onto these two brace arms.
But,
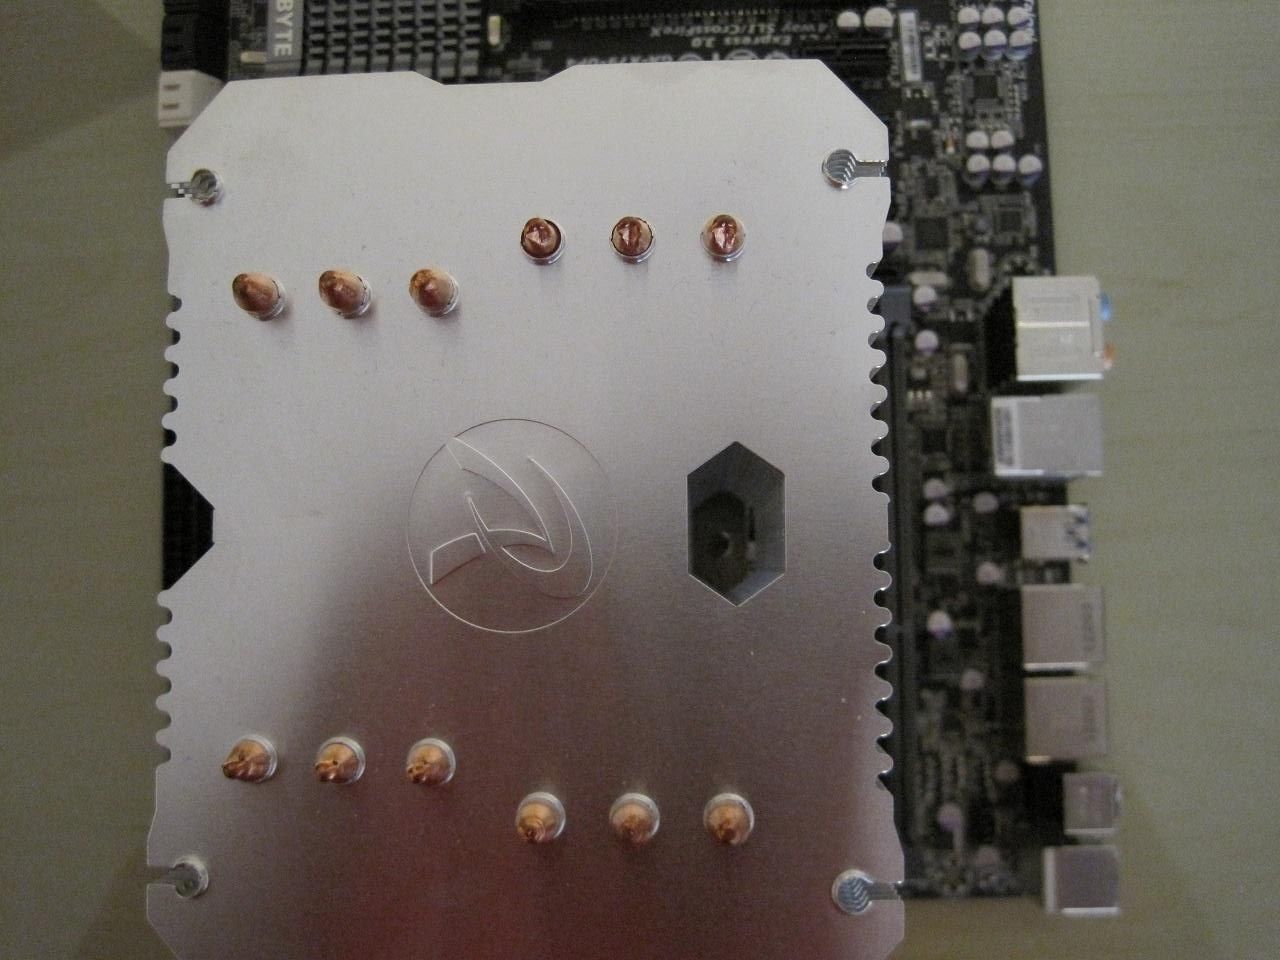
Now the heatsink body has a hole and a notch in the heat fin stack to allow you to get a screwdriver onto the top of the two screws that secures it to the braces.
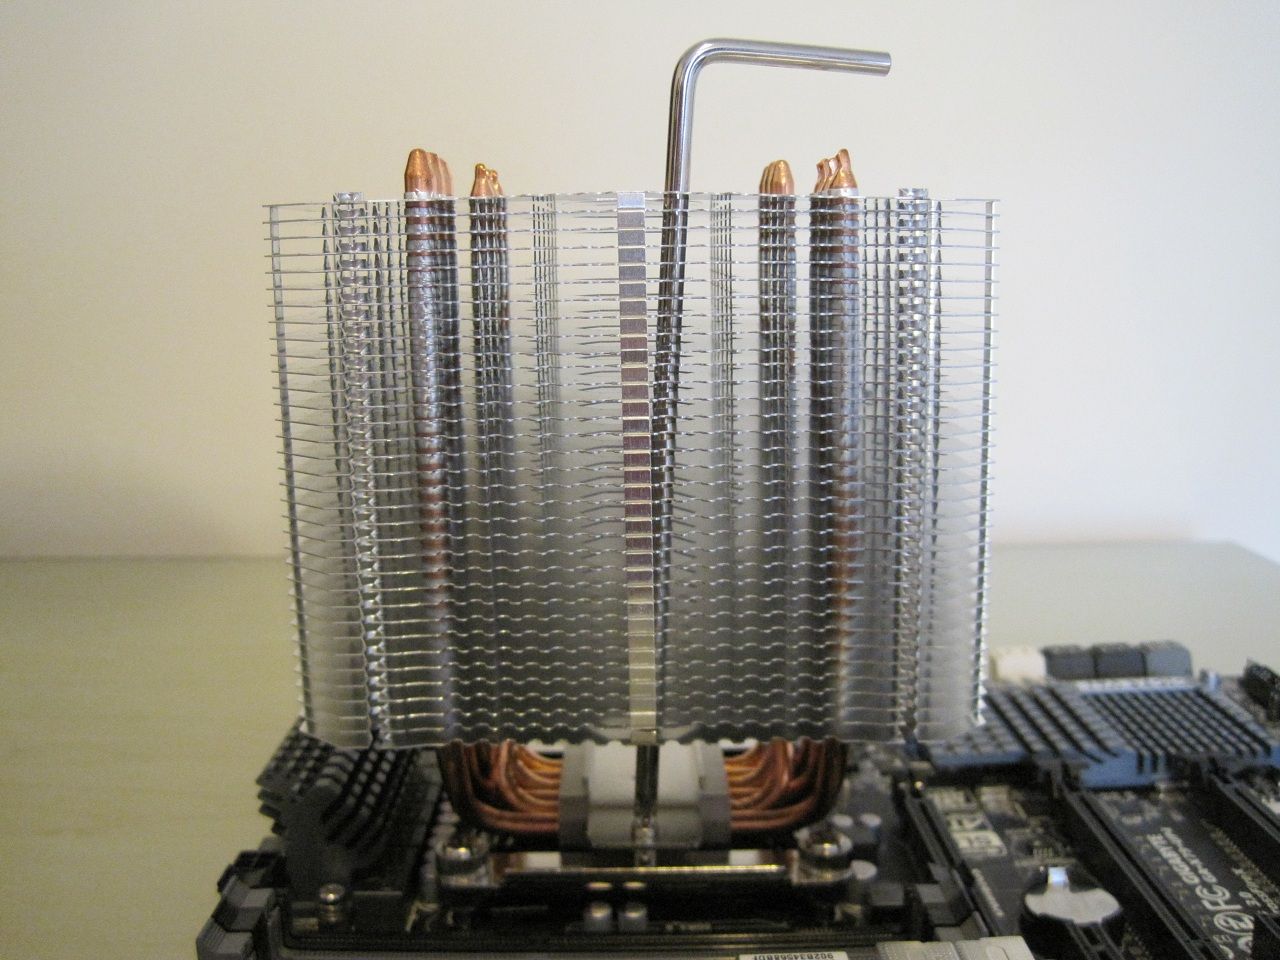
Make sure you have a screwdriver with a long shaft of around 15cm otherwise you will never tighten it down.
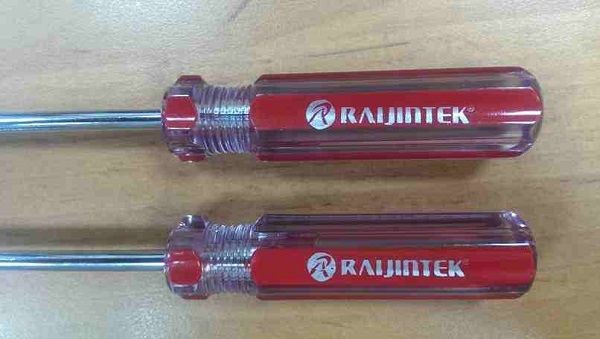
It would have been wise if Rajintek had included something suitable, the picture above shows an accessory that came with my Noctua NH-U12S which was perfect for the job.
Memory clearance.
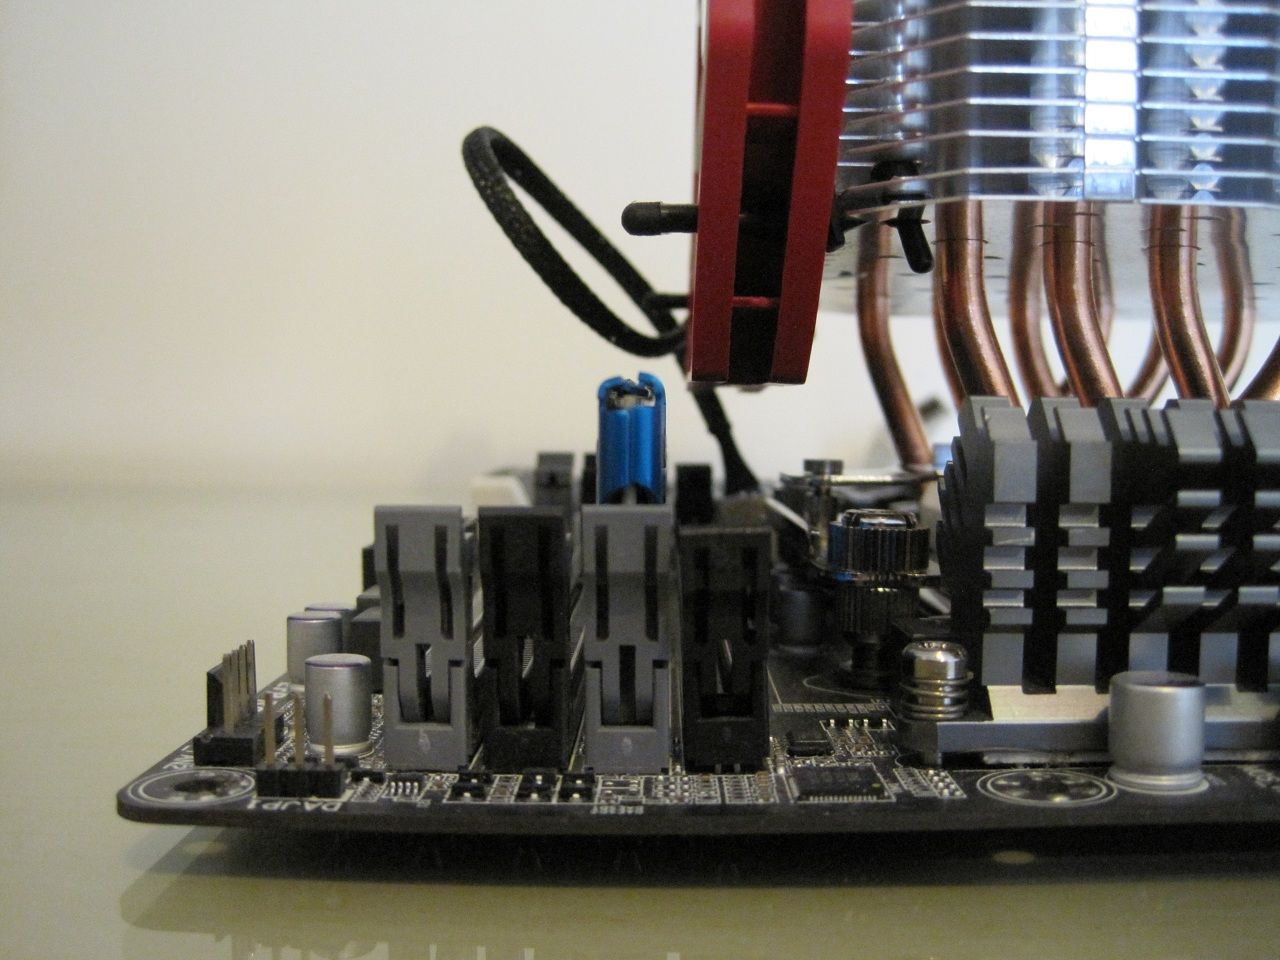
The fan hangs over the first slot and may touch some RAM, the above RAM is Gskill Ares.
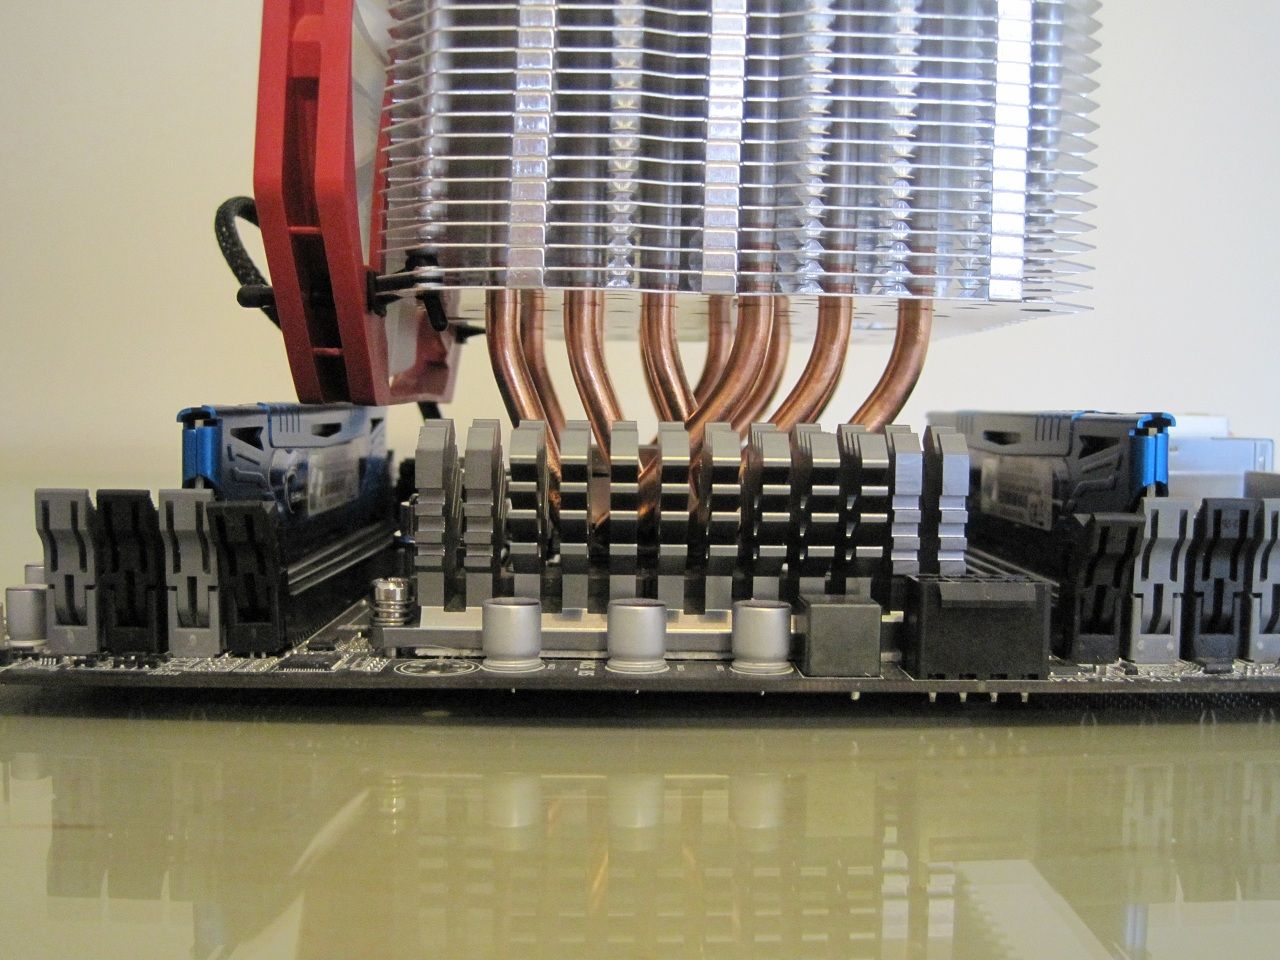
The rear hangs over the first RAM slot too, but without a fan there is plenty of room for all but the tallest of RAM.
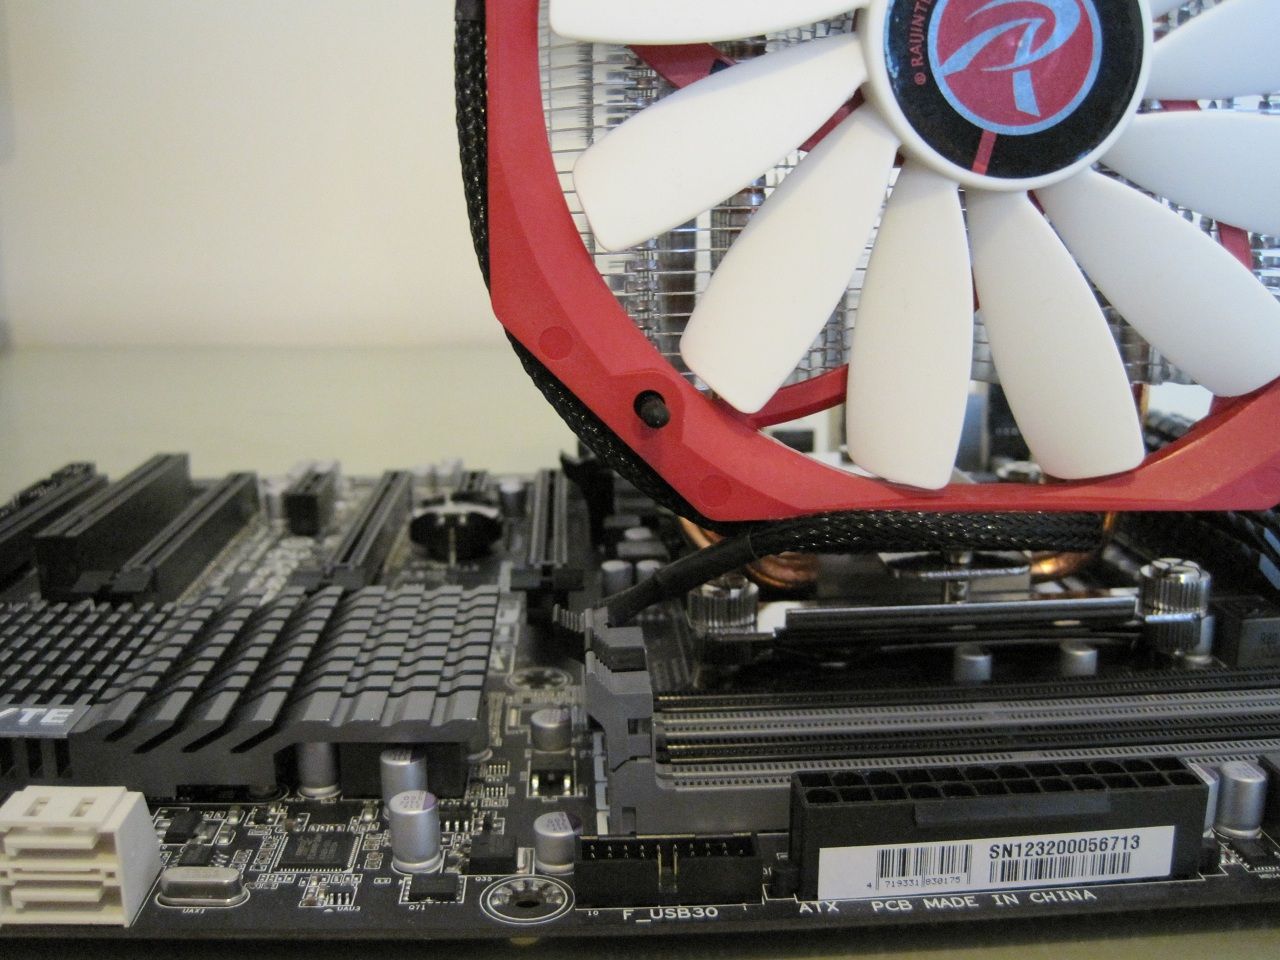
Say goodbye to your top PCI-E slot on X79.
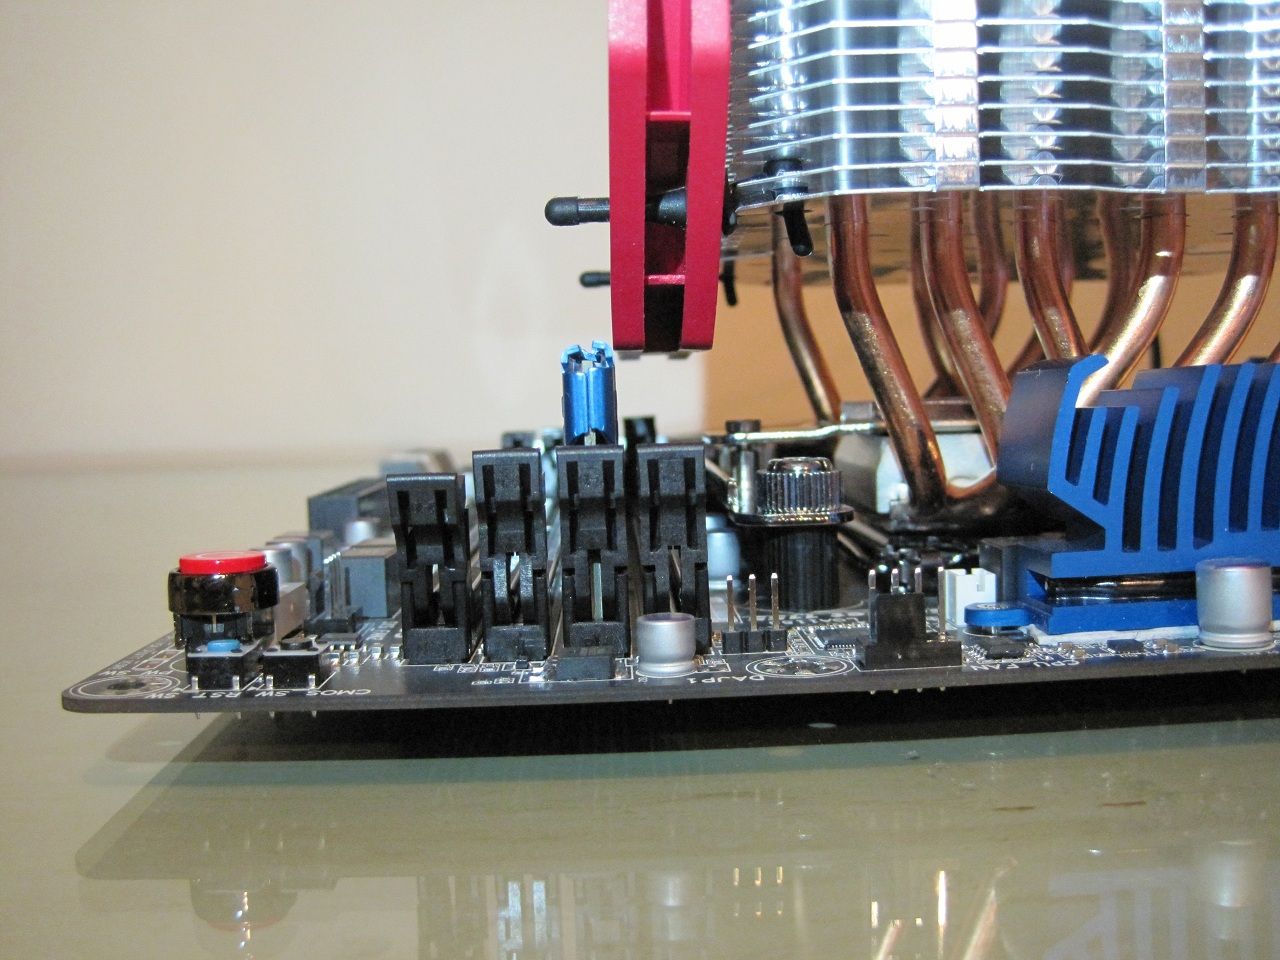
Similar story for Z77 with the fan over hanging the first RAM slot, I could still get my GFX card in the first 16X slot as there is a PCI-E 1X slot in-between.
Performance.
Test setup.
i7 [email protected] with 1.3V
Gigabyte X79-UP4
i5 [email protected] with 1.35V
Gigabyte Z77-UD5H
Gskill Ares 2133Mhz RAM.
Gigabyte Geforce GTX670 Windforce X3 2GB
Antec HCP 850W PSU.
BitFenix Shinobi XL case.
Z77 Stock.
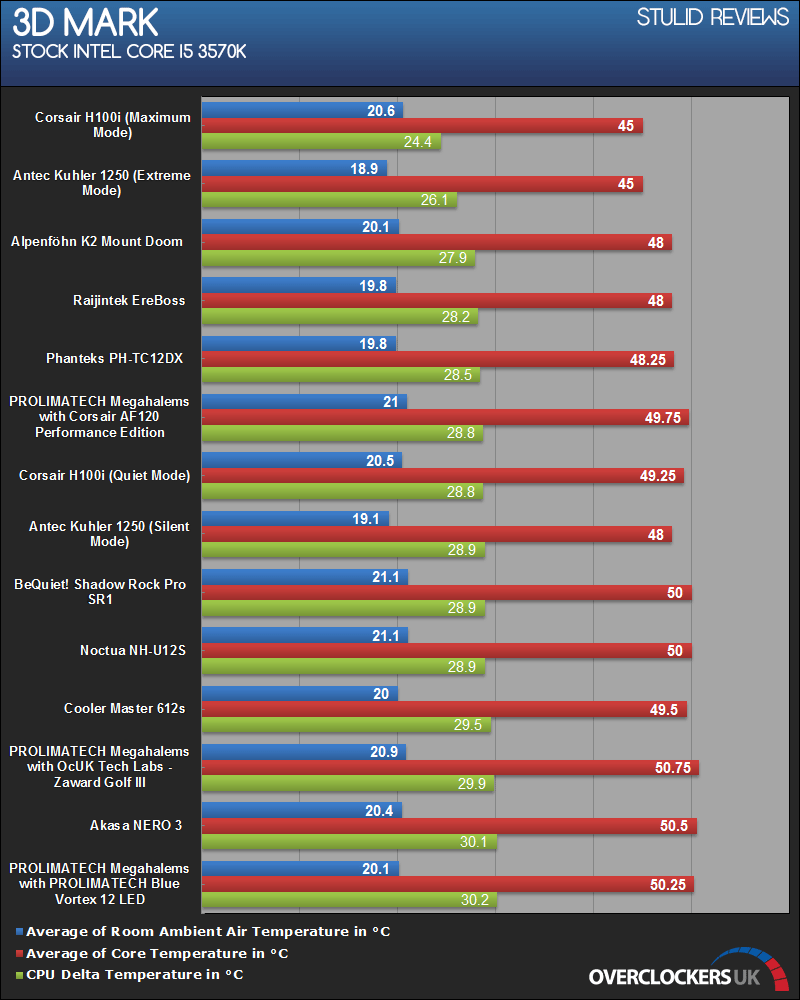
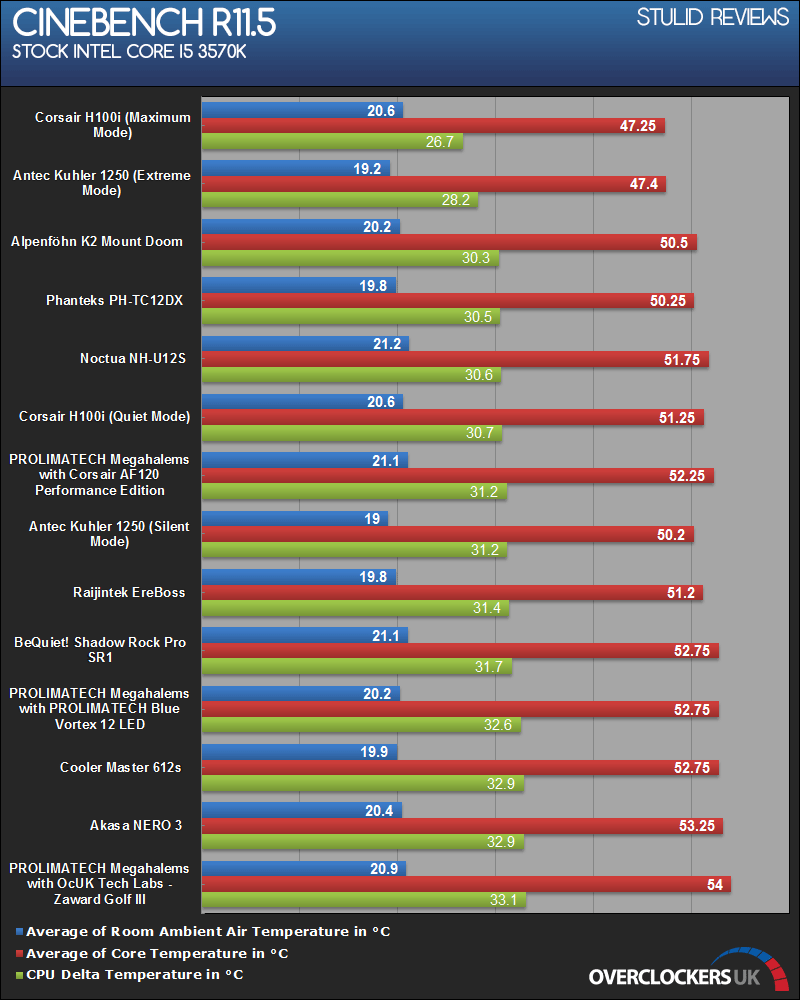
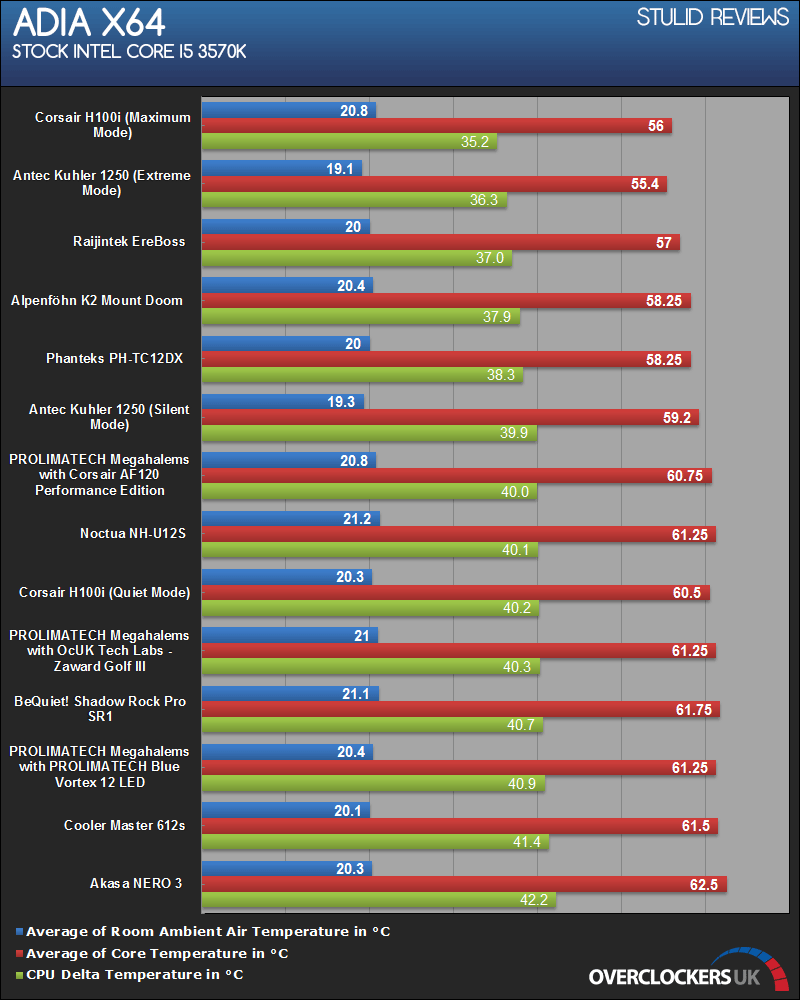
Z77 Overclocked.
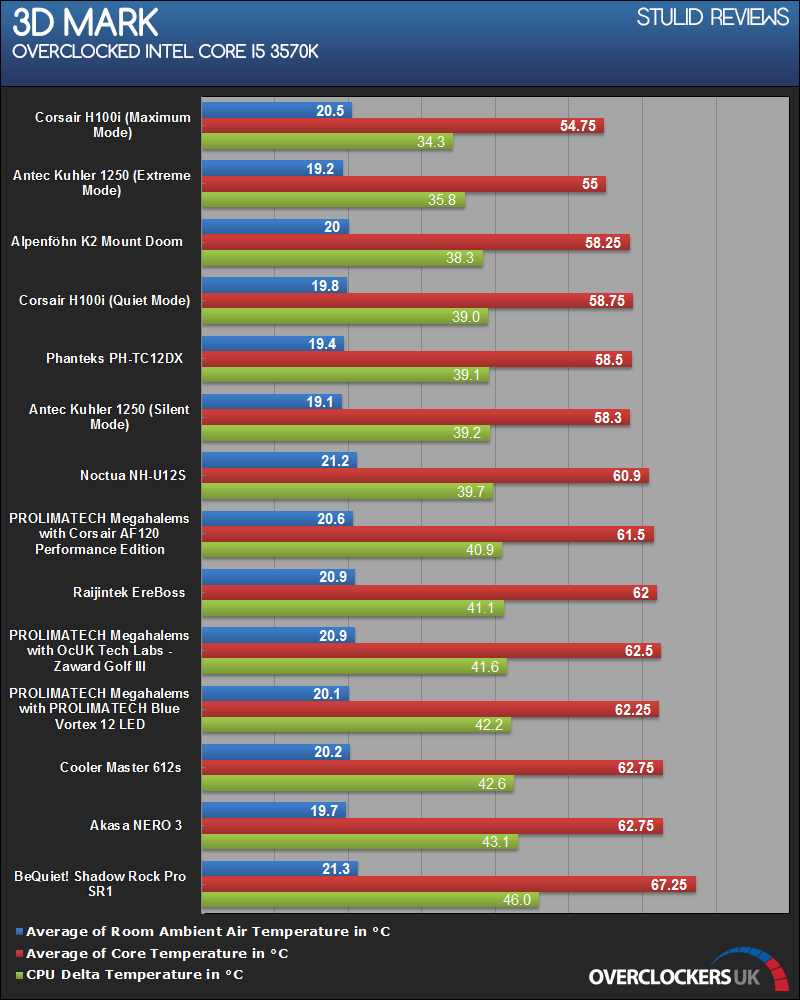
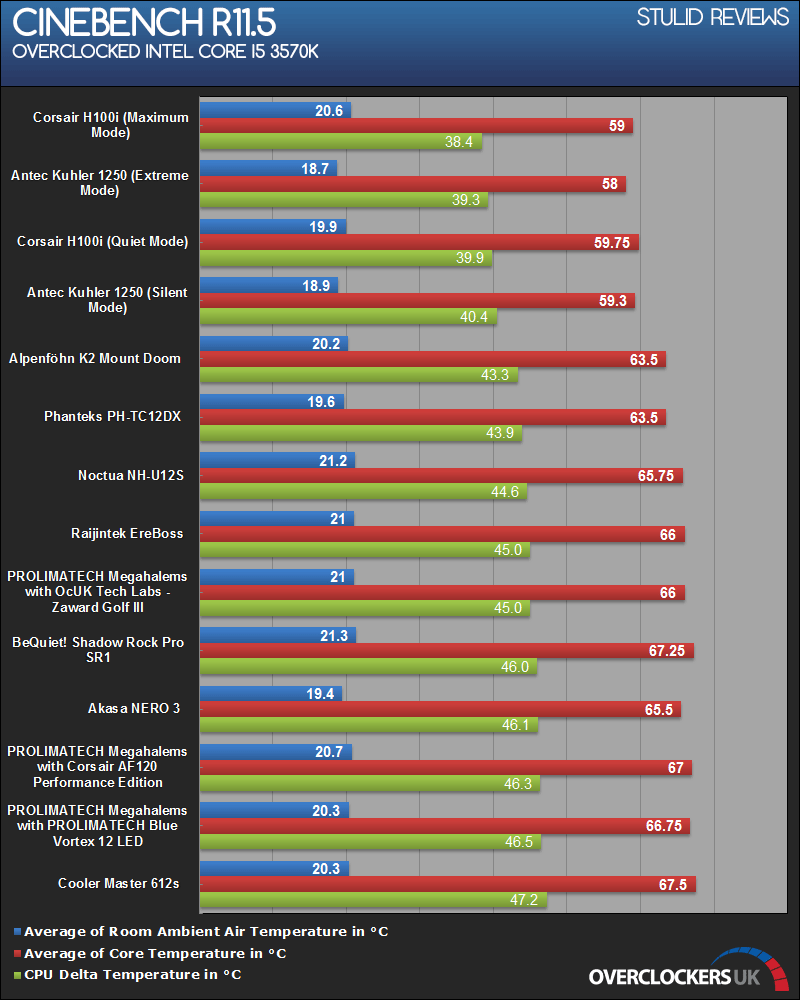
[
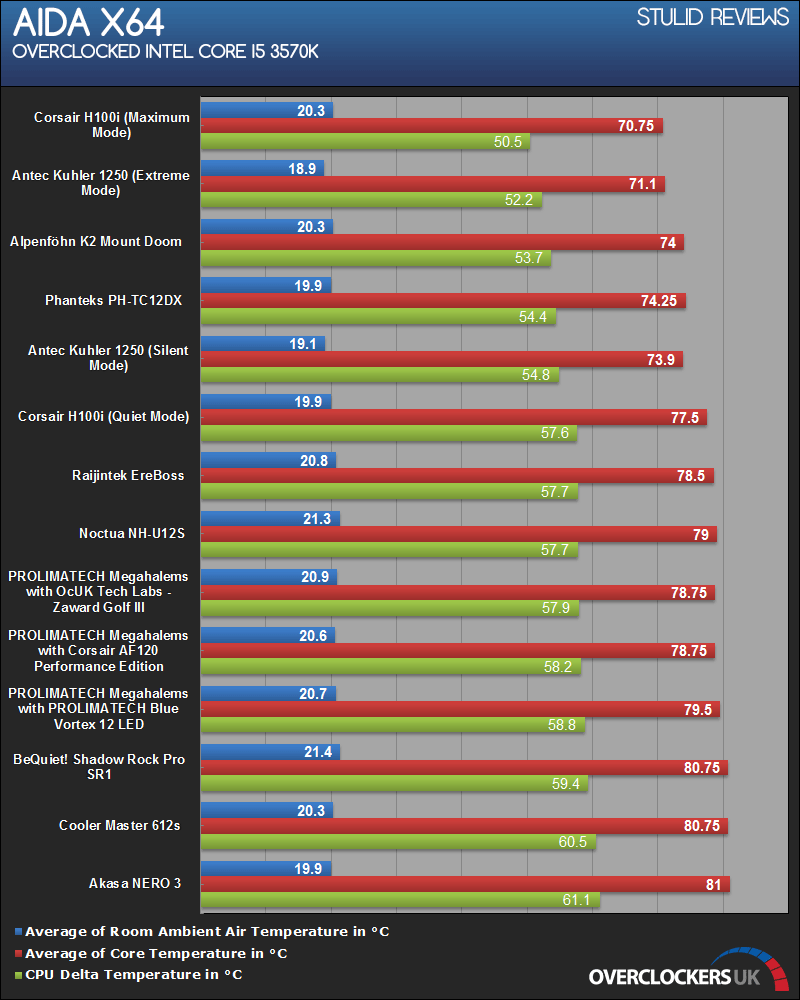
X79 Stock.
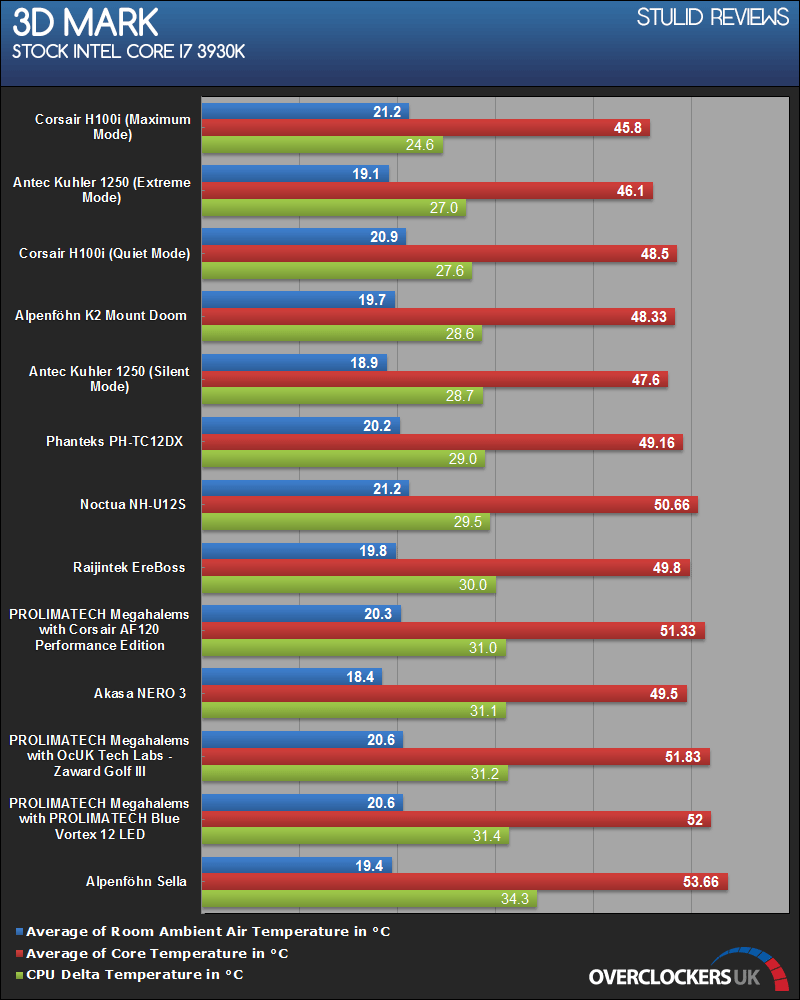
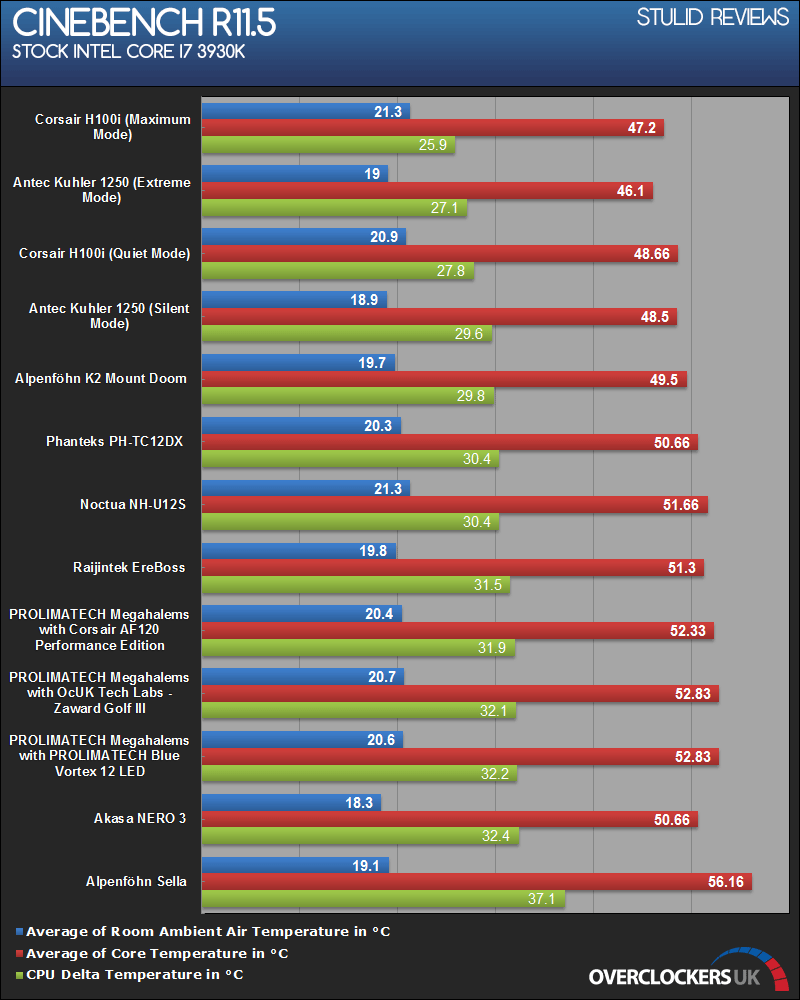
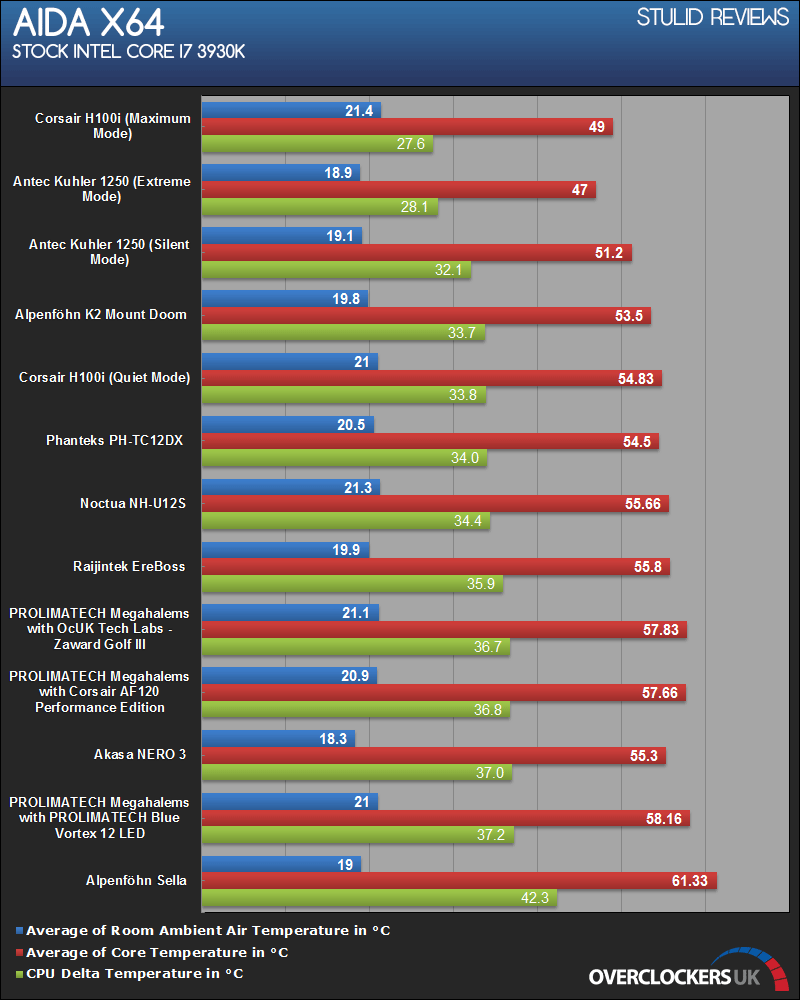
X79 Overclocked.
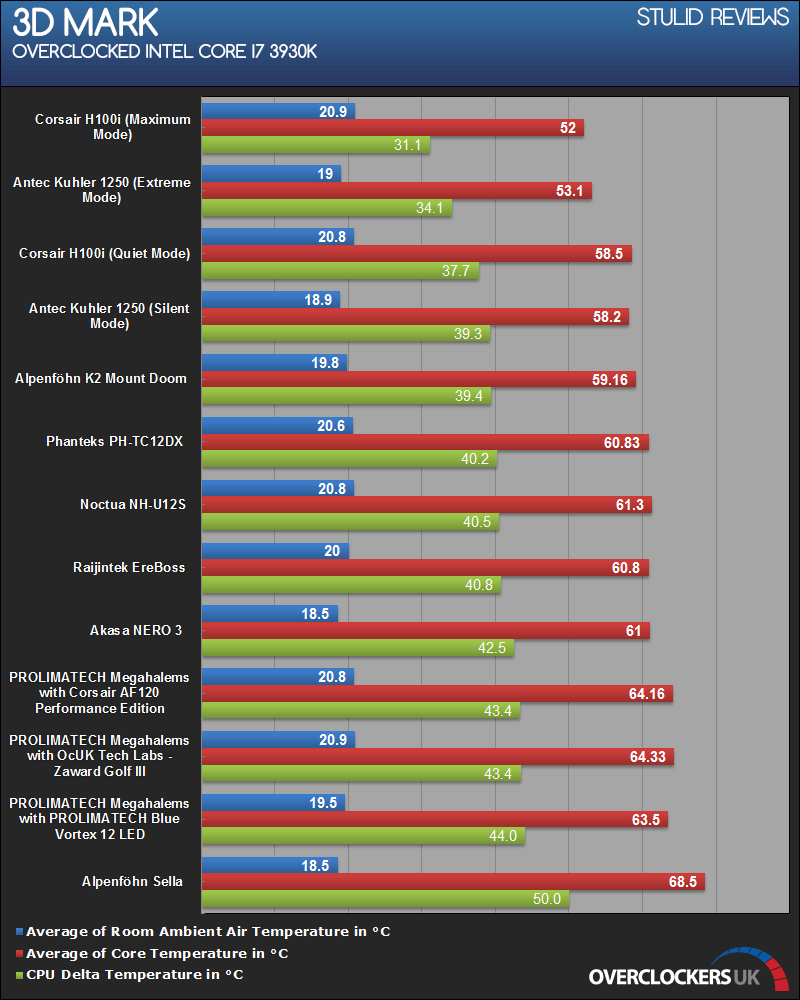
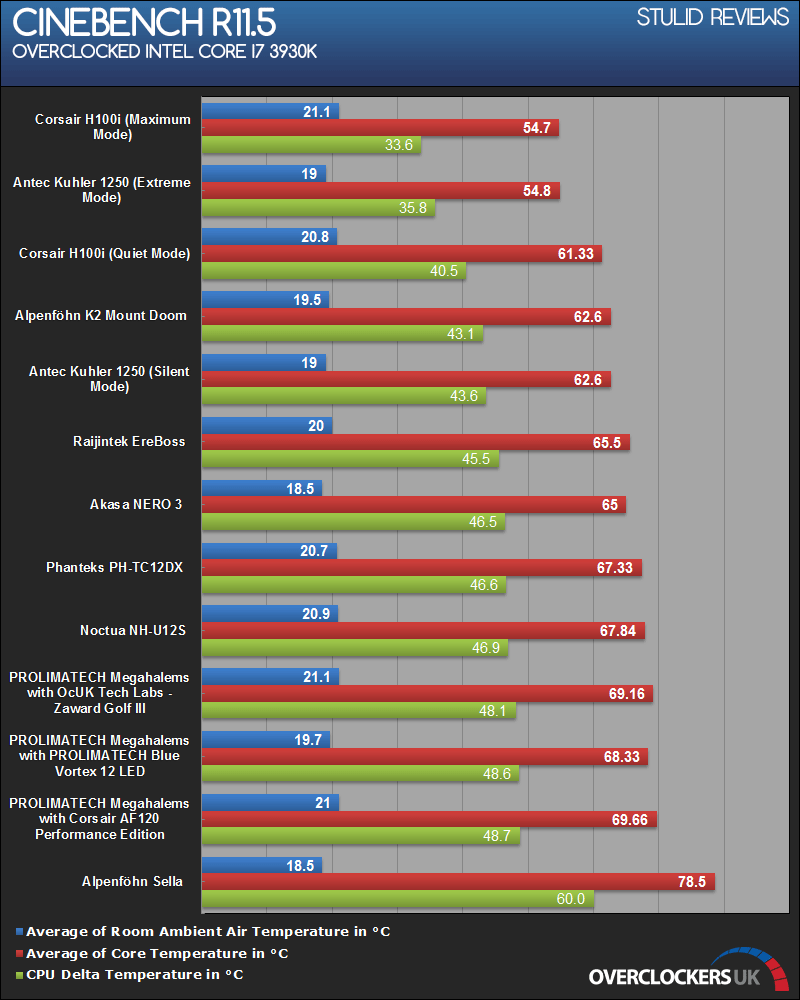
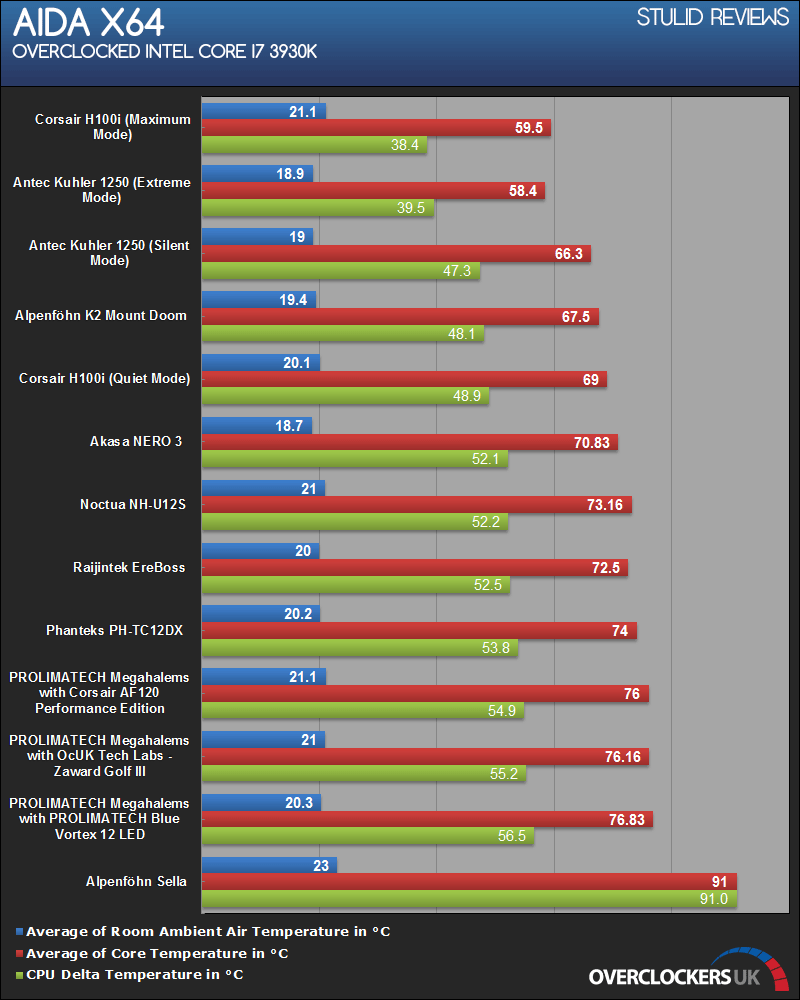
Conclusion.
Rajintek are new to the PC cooling scene and not as well known as more established manufacturers yet the Ereboss cooler left me with very positive thoughts about it. For its £32 RRP it represents wonderful value for money with performance as good as some of the £40+ coolers.
It was relatively quiet during use but not as quiet as the Noctua NH-U12S for example. Fitting was overall very easy but Rajintek really should include some sort of basic Philips headed screwdriver which will reach the two fixing screws. The size will be an issue with X79 user who will want to be able to use their top slot, but you can mount the heatsink and fan facing north to south or visa versa which may help.
Pros.
Plenty of surface area.
Solid performance.
Good fan/quiet.
Keen price.
Cons.
Fitting is impossible if you don't have a long enough screwdriver.
The fan mounts could be better positioned to stop the rubber mounts from looking like they will pop out.
RAM clearance is not the best if you need the first RAM slot.

Thanks to OcUK and Rajintek for the sample cooler.
Thanks to Ethermaster for the artwork.
*
Review amendment/update,
I have been told that Rajintek are now bundling a screwdriver long enough to reach the screws with this cooler now.
