Soldato
- Joined
- 19 Jan 2006
- Posts
- 4,621
I figured I'd share this in the SFF sub forum as the build is lost in a question thread which I originally posed in the watercooling sub-forum, about whether anyone had used 17mm thick radiators which are available from Ali Express - this thread is just a merge of all of that info so that if anyone is searching for builds in a DA2 this thread should jump out at them 
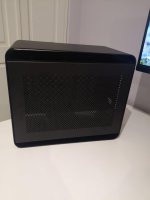
The goal was to create a minimalistic, classy looking, powerful and quiet machine which could handle anything thrown at it whilst having minimal footprint taking up desk real estate.
The build started as a dual 240mm radiator build but evolved to a triple 240mm radiator build with all radiators having 120mm active fan cooling them, unlike the more famous Streacom DA2 Sleeper Build on Reddit/IMGUR. I do have to give credit to that build though as it did act as great visual guide - Thanks DuoToasty!
https://imgur.com/gallery/hDh1JLP
https://imgur.com/a/xDZlhsa
__________________________________________________________
Just curious whether any of you have had any experience with the 17mm thick copper radiators which are available through AliExpress? https://www.aliexpress.com/item/1005001355572417.html?spm=a2g0s.9042311.0.0.591d4c4doDGu4k
The fact that they're 3.5mm thinner than the XSPC slim rads makes them quite intriguing to me! I've ordered one, along with one of the Barrow integrated waterblock/pump/reservoirs and intend to create a dual 240mm radiator setup in a Streacom DA2, slotting this rad underneath a watercooled 3080, with a couple of Noctua 120x15mm fans.
I know some have said that because they use circular heat pipes rather than flatter squarer ones they don't have the same surface area / heat dissipation of more premium radiators but I do think coupled alongside a "good" 240mm radiator I should be seeing decent temps and low noise in a very compact system.
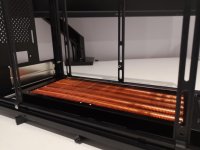
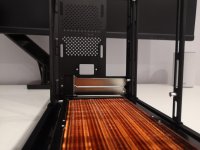
Well it's arrived, damn it's thin!!
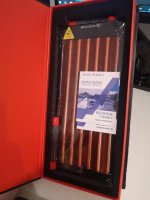
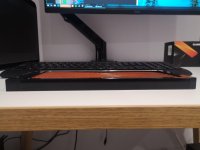
Going to have fun trying to squeeze it, plus an additional 240mm rad, and a watercooled 3080 in the Streacom DA2 case!
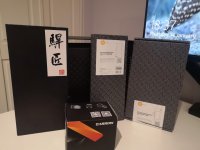
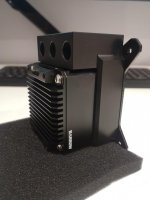
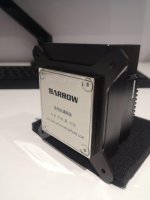
But this, the star of the show, should make it possible - a CPU block, reservoir and DDC pump all in one with fill port.
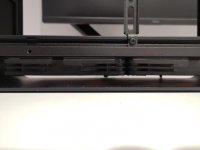
Noctua slim fans have now arrived, and there is no chance in hell I was getting the rad and fans under the graphics card inside the case - they've plenty room to breathe underneath the radiator and protruding through the bottom though.
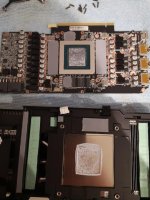
Naked 3080
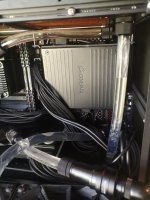
Routing of tubes
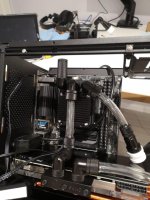
Huge 30mm reservoir
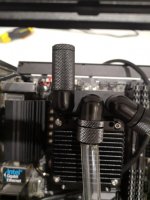
Quick connects for the radiator on the side panel, meaning I can take it in and out freely however the PSU must be removed first before I can disconnect the vertical quick connect off the rad - 1st point of failure addressed in final build
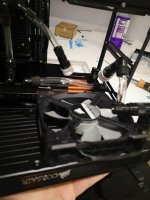
At present I can only fit 1 x 25mm fan on the side radiator, so I'm only running with 3 fans total. These are currently setup with 1 Corsair ML120 intaking on the side mounted rad and 2 x Noctua NF-A12x15 fans exhausting on the bottom. What's stopping me adding a second 25mm fan to the side mounted radiator is the routing of the tube out of the center port on the CPU block - 2nd point of failure addressed in final build
The plan is to run all Noctua 15mm fans, freeing up space for airflow inside the case and also switching the side to exhaust and the bottom fans to intake. I also am adding a 92mm 14mm thick Noctua fan to the rear fan mount as an intake - if this doesn't cure my temp "issues" (issues being 70c CPU temps and 62c 3080 temps) then as a setup I just don't think it works. - This was using a 9600k at stock clocks, I decided to add a 2nd fan to the side mounted radiator externally until the 15mm Noctuas arrived which allowed them to be mounted inside.
I plan on decluttering by removing the Molex cable from the PSU, and installing a SATA to Molex converter to run the pump - 1 less cable out of the PSU is again going to improve airflow.
At this stage I decided to change CPU from a 9600k to a 9900k, as when the build was complete I wanted to be able to leave it for a couple of years without the need to upgrade - cooling better work with the 2 15mm side Noctuas!!
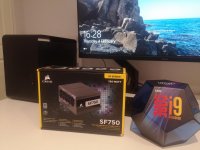
Got a fun evening ahead of me, more juice and less noise (should run more efficiently than the current SF600), more processing power, and more airflow with less restriction. Also removing the Molex cable completely from the system in favour of this little adapter block to power the pump.
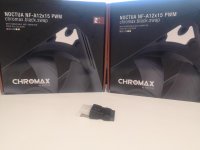
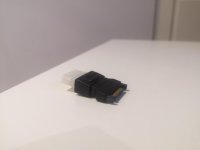
Edit: Also means I can get the side panel on by having the fans inside the case
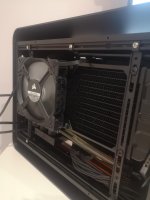
Out with the "old" PSU
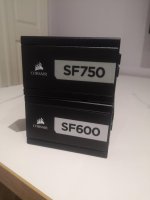
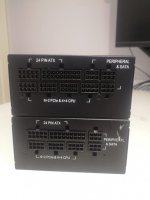
The joys of quick disconnects, majority of the loop still assembled but side radiator off with the new slim Noctuas installed
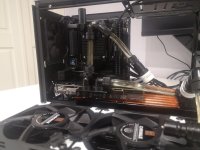
4 way PWM fan splitter, all Noctuas on the radiators run at the same speed
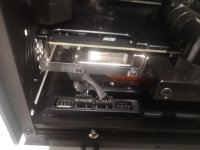
Rather than disassemble the loop, I dropped in the 9900k while everything else was in situ
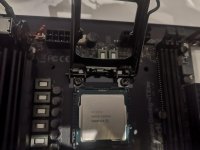
Fans now fit inbound of the case
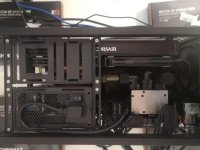
She was built and running happily but I wasn't 100% happy, so a TX240 XSPC radiator has been ordered... I won't say the 17mm radiator is a failure, moreso that I would like to reduce my fan noise further - running the radiators Noctuas at 55% is doing a fine job at cooling the 3080 and 9900k however I want more overclocking headroom and less noise. Having a denser finned radiator, with more fluid capacity and more pipes should equal more heat dissipation. The build continues!
At this stage I just wanted to switch the 17mm slim Chinese radiator with the 20.5mm slim XSPC radiator, but then had an epiphany - why not slap the 17mm thick radiator in the roof if I'm adding the 20.5mm radiator to the bottom?
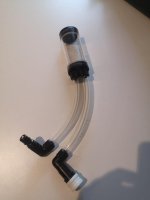
Also, per the picture below of the clear version of the Barrow block, the inlet and fill ports actually share the same reservoir within the block - this means I can remove the centre CPU tubing and gain more clearance between the side radiator and the CPU block allowing me to run 25mm thick fans instead of the 15mm thick I'm currently running.
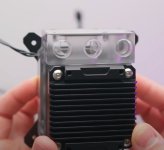
Removing this extender and tube, and then using this as my fill port will allow for the 25mm fan installation on the side radiator
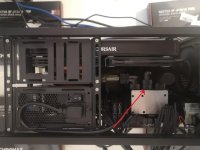
Parts arrived, so the final evolution happened!
Main parts going in to complete the build are the XSPC TX240 radiator and some Noctua NF-F12 Chromax fans.
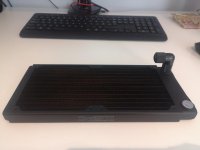
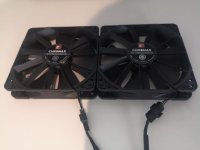
To be able to install a radiator at the top of the case I had to drop the PSU down further in to the chassis, this was done by using longer M3 screws, the PSU just kinda hangs out in the middle of space now
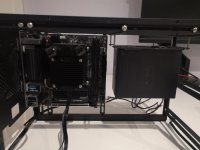
This in turn gave me access to run a tube from the top radiator above the PSU and in to the CPU Block/Pump/Res
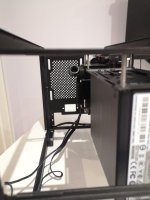
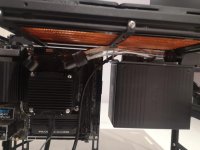
From there we loop round to the graphics card, with the fill port now capped
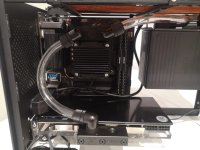
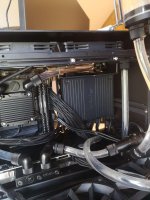
Having the capped fill port allowed me to install the 25mm thick Noctuas on the side mounted radiator, and those fans can blow air far more freely on to the pumps heatsink - it's a snug fit but 2nd point of failure of the original build fixed!
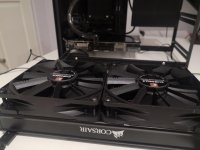
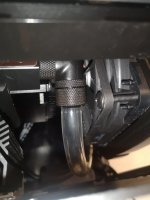
From the graphics card we go in to the bottom port of the side radiator, via quick connect, and from the top port of the side radiator we go to the far port of the bottom rad. The loop is completed with a vertical run from the closer port of the bottom rad to the other port on the top radiator.
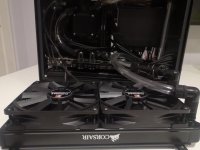
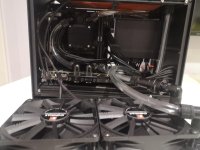
I can now remove the side radiator now without having to mess around removing the PSU and any chassis parts which made removing the PSU possible - big win and 1st point of failure of the original build fixed!
Popping off the quick disconnect I can pop on the EK pressure tester which has another quick disconnect male end fitted, and we're holding pressure well.
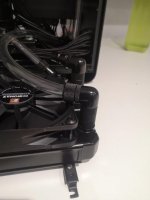
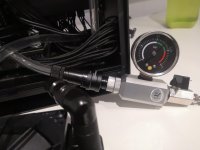
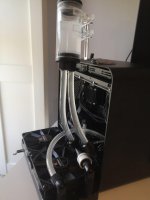
I have to admit, I did have a hard time filling the loop and there's too much air in it for my liking currently but I have ordered an external reservoir which will allow me to get it filled properly. The original fill was done with funnels and tubing held at funky angles and, due to a lack of compression fittings, wasn't sealed properly so did have a few leaks around the filling tubes / funnel.
That being said it's performing a lot better than the dual radiator setup already! Graphics card boosting to 1995mhz (haven't touched mem clocks yet) @ 55c and the 9900k at stock running 60c. The 4 slim Noctuas on top and bottom rads running @~960rpm, the 2 thicker Noctuas on side radiator running @~900rpm and a pump speed of ~2,200rpm leave me with a quiet and powerful machine - very happy with this build now!

Isn't she pretty!?
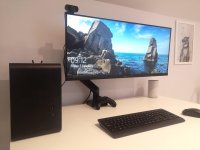

The goal was to create a minimalistic, classy looking, powerful and quiet machine which could handle anything thrown at it whilst having minimal footprint taking up desk real estate.
The build started as a dual 240mm radiator build but evolved to a triple 240mm radiator build with all radiators having 120mm active fan cooling them, unlike the more famous Streacom DA2 Sleeper Build on Reddit/IMGUR. I do have to give credit to that build though as it did act as great visual guide - Thanks DuoToasty!
https://imgur.com/gallery/hDh1JLP
https://imgur.com/a/xDZlhsa
__________________________________________________________
Just curious whether any of you have had any experience with the 17mm thick copper radiators which are available through AliExpress? https://www.aliexpress.com/item/1005001355572417.html?spm=a2g0s.9042311.0.0.591d4c4doDGu4k
The fact that they're 3.5mm thinner than the XSPC slim rads makes them quite intriguing to me! I've ordered one, along with one of the Barrow integrated waterblock/pump/reservoirs and intend to create a dual 240mm radiator setup in a Streacom DA2, slotting this rad underneath a watercooled 3080, with a couple of Noctua 120x15mm fans.
I know some have said that because they use circular heat pipes rather than flatter squarer ones they don't have the same surface area / heat dissipation of more premium radiators but I do think coupled alongside a "good" 240mm radiator I should be seeing decent temps and low noise in a very compact system.
Well it's arrived, damn it's thin!!


Going to have fun trying to squeeze it, plus an additional 240mm rad, and a watercooled 3080 in the Streacom DA2 case!


But this, the star of the show, should make it possible - a CPU block, reservoir and DDC pump all in one with fill port.


Noctua slim fans have now arrived, and there is no chance in hell I was getting the rad and fans under the graphics card inside the case - they've plenty room to breathe underneath the radiator and protruding through the bottom though.


Naked 3080

Routing of tubes

Huge 30mm reservoir


Quick connects for the radiator on the side panel, meaning I can take it in and out freely however the PSU must be removed first before I can disconnect the vertical quick connect off the rad - 1st point of failure addressed in final build

At present I can only fit 1 x 25mm fan on the side radiator, so I'm only running with 3 fans total. These are currently setup with 1 Corsair ML120 intaking on the side mounted rad and 2 x Noctua NF-A12x15 fans exhausting on the bottom. What's stopping me adding a second 25mm fan to the side mounted radiator is the routing of the tube out of the center port on the CPU block - 2nd point of failure addressed in final build
The plan is to run all Noctua 15mm fans, freeing up space for airflow inside the case and also switching the side to exhaust and the bottom fans to intake. I also am adding a 92mm 14mm thick Noctua fan to the rear fan mount as an intake - if this doesn't cure my temp "issues" (issues being 70c CPU temps and 62c 3080 temps) then as a setup I just don't think it works. - This was using a 9600k at stock clocks, I decided to add a 2nd fan to the side mounted radiator externally until the 15mm Noctuas arrived which allowed them to be mounted inside.
I plan on decluttering by removing the Molex cable from the PSU, and installing a SATA to Molex converter to run the pump - 1 less cable out of the PSU is again going to improve airflow.
At this stage I decided to change CPU from a 9600k to a 9900k, as when the build was complete I wanted to be able to leave it for a couple of years without the need to upgrade - cooling better work with the 2 15mm side Noctuas!!
Got a fun evening ahead of me, more juice and less noise (should run more efficiently than the current SF600), more processing power, and more airflow with less restriction. Also removing the Molex cable completely from the system in favour of this little adapter block to power the pump.


Edit: Also means I can get the side panel on by having the fans inside the case


Out with the "old" PSU


The joys of quick disconnects, majority of the loop still assembled but side radiator off with the new slim Noctuas installed

4 way PWM fan splitter, all Noctuas on the radiators run at the same speed

Rather than disassemble the loop, I dropped in the 9900k while everything else was in situ

Fans now fit inbound of the case

She was built and running happily but I wasn't 100% happy, so a TX240 XSPC radiator has been ordered... I won't say the 17mm radiator is a failure, moreso that I would like to reduce my fan noise further - running the radiators Noctuas at 55% is doing a fine job at cooling the 3080 and 9900k however I want more overclocking headroom and less noise. Having a denser finned radiator, with more fluid capacity and more pipes should equal more heat dissipation. The build continues!
At this stage I just wanted to switch the 17mm slim Chinese radiator with the 20.5mm slim XSPC radiator, but then had an epiphany - why not slap the 17mm thick radiator in the roof if I'm adding the 20.5mm radiator to the bottom?
Also, per the picture below of the clear version of the Barrow block, the inlet and fill ports actually share the same reservoir within the block - this means I can remove the centre CPU tubing and gain more clearance between the side radiator and the CPU block allowing me to run 25mm thick fans instead of the 15mm thick I'm currently running.

Removing this extender and tube, and then using this as my fill port will allow for the 25mm fan installation on the side radiator

Parts arrived, so the final evolution happened!
Main parts going in to complete the build are the XSPC TX240 radiator and some Noctua NF-F12 Chromax fans.


To be able to install a radiator at the top of the case I had to drop the PSU down further in to the chassis, this was done by using longer M3 screws, the PSU just kinda hangs out in the middle of space now


This in turn gave me access to run a tube from the top radiator above the PSU and in to the CPU Block/Pump/Res


From there we loop round to the graphics card, with the fill port now capped

Having the capped fill port allowed me to install the 25mm thick Noctuas on the side mounted radiator, and those fans can blow air far more freely on to the pumps heatsink - it's a snug fit but 2nd point of failure of the original build fixed!


From the graphics card we go in to the bottom port of the side radiator, via quick connect, and from the top port of the side radiator we go to the far port of the bottom rad. The loop is completed with a vertical run from the closer port of the bottom rad to the other port on the top radiator.


I can now remove the side radiator now without having to mess around removing the PSU and any chassis parts which made removing the PSU possible - big win and 1st point of failure of the original build fixed!
Popping off the quick disconnect I can pop on the EK pressure tester which has another quick disconnect male end fitted, and we're holding pressure well.


I have to admit, I did have a hard time filling the loop and there's too much air in it for my liking currently but I have ordered an external reservoir which will allow me to get it filled properly. The original fill was done with funnels and tubing held at funky angles and, due to a lack of compression fittings, wasn't sealed properly so did have a few leaks around the filling tubes / funnel.
That being said it's performing a lot better than the dual radiator setup already! Graphics card boosting to 1995mhz (haven't touched mem clocks yet) @ 55c and the 9900k at stock running 60c. The 4 slim Noctuas on top and bottom rads running @~960rpm, the 2 thicker Noctuas on side radiator running @~900rpm and a pump speed of ~2,200rpm leave me with a quiet and powerful machine - very happy with this build now!

Isn't she pretty!?

Last edited:


