

Associate
- Joined
- 13 Feb 2009
- Posts
- 17
- Location
- Hampshire
Hi folks, not been on here in a while. Cant see a subforum for builds etc so I shall put it here. Mods, feel free to shift it.....
Thought I'd start a little log to keep track of things and perhaps provide others with a bit of inspiration etc
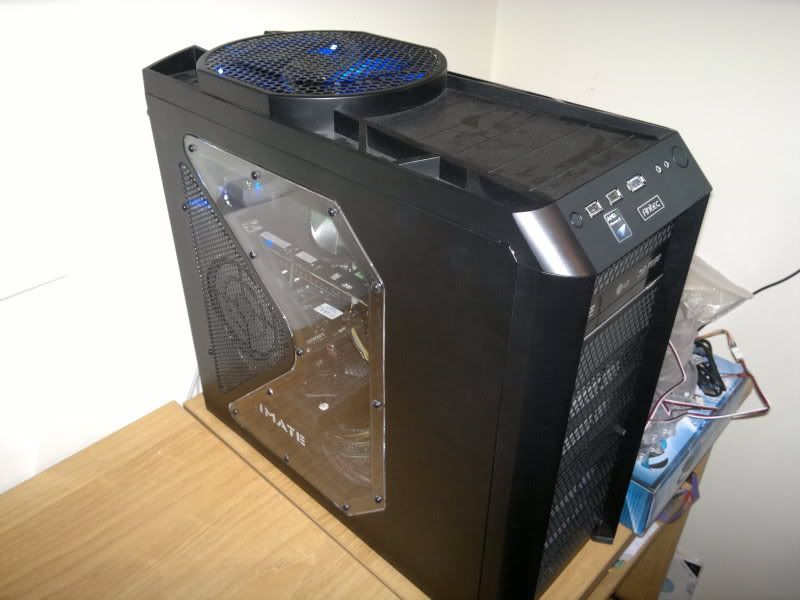
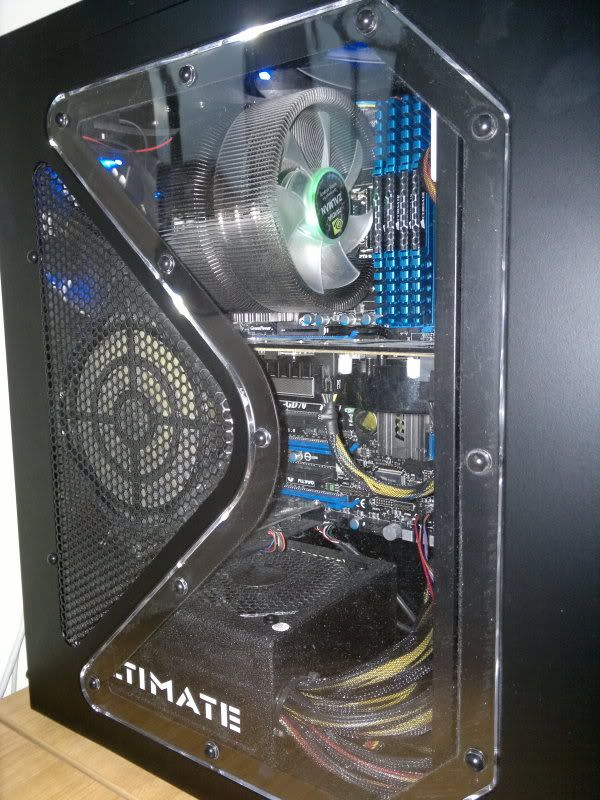
Not new to building PC's but new to w/cooling. Before I decided to use water the PC consisted of this...
Antec Nine Hundred 2 Case
Coolermaster Ultimate 1100W PSU
MSI 790FX-GD70 Motherboard
Corsair Vengeance DDR3 RAM 16GB (CMZ8GX3M2A1600C9B)
AMD PhenomII X6 1100T 3.3Ghz Processor
Zalman CPU Cooler CNPS9700NT
Powercolor HD4870X2 Graphics Card
Creative Soundblaster Fatal1ty Edition
OCZ 120Gb SSD
WD 320Gb HDD
LG BDRW Optical Drive
All pretty standard stuff....Heres how it looks....
Then decided to buy....
Phobya Balancer 450 Black Nickel Reservoir
Kolance PMP-450S Water Pump
Koolance CTR-SPD24X2 Dual 24V Pump Controller
Lamptron FC5V2 4 Channel Fan Controller
Masterkleer 13/19mm tubing
Phobya 13/19 compression fittings
Coolermaster Megaflow 200mm Fans x 4
Koolance CPU-370 CPU Block
XSPC 4870x2 waterblock
Koolance INS-FM18 Flow Meter
Koolance Flow Meter Frequency Adapter
1/4" Thread Inline Temperature Sensor with LCD Display
Dell 200W secondary PSU
ATX Bridging block
Which will be joined by a Phobya Supernova 1260 Radiator and some Phobya ZuperZero UV Green fluid.
Going to fabricate a small aluminium enclosure to house the second PSU, pump, pump controller, fan controller and frequency adapter. Idea is to wire the PSU's together via a relay so they both start up with a single button.
Whay I have noticed so far in my build is that the Balancer and fittings I bought (supposedly Phobya) are NOT compatible out of the box. Unfortunately when I test fitted the fittings the shoulders would bottom out on the surrounding material on the reservoir before the o-ring could get a seal....
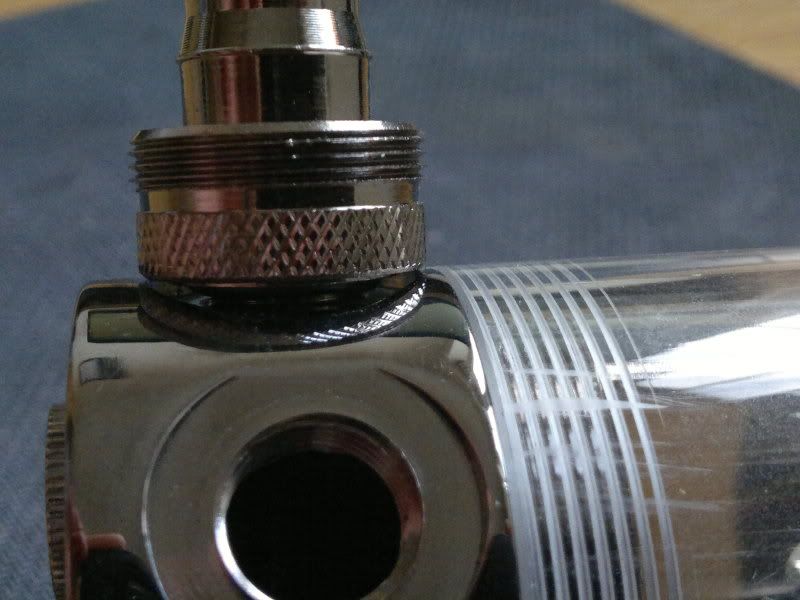
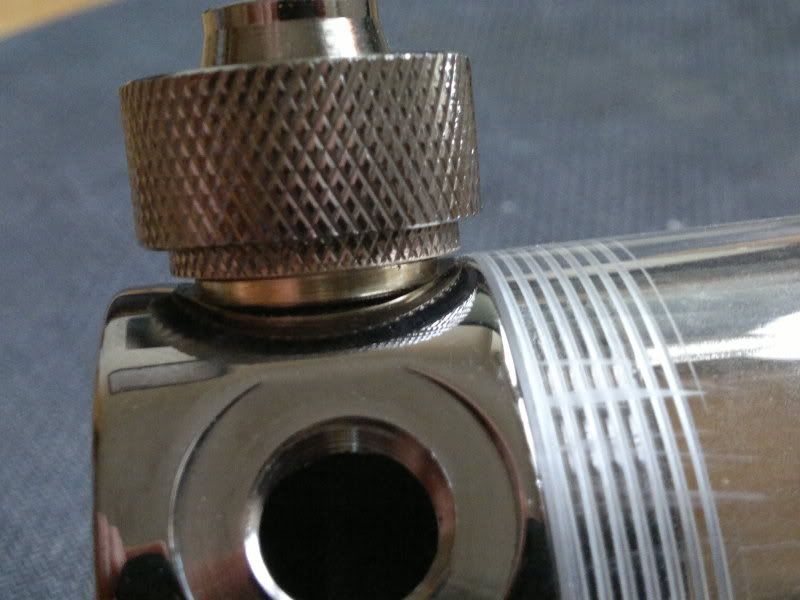
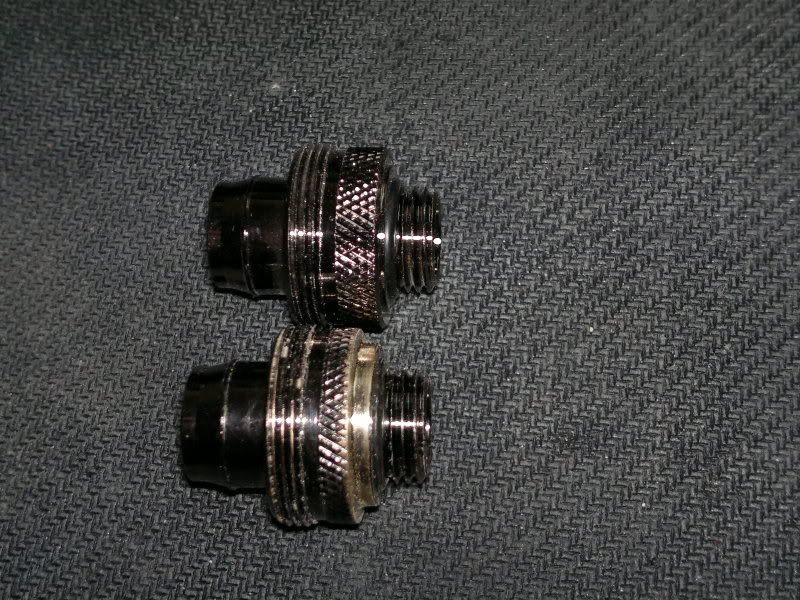
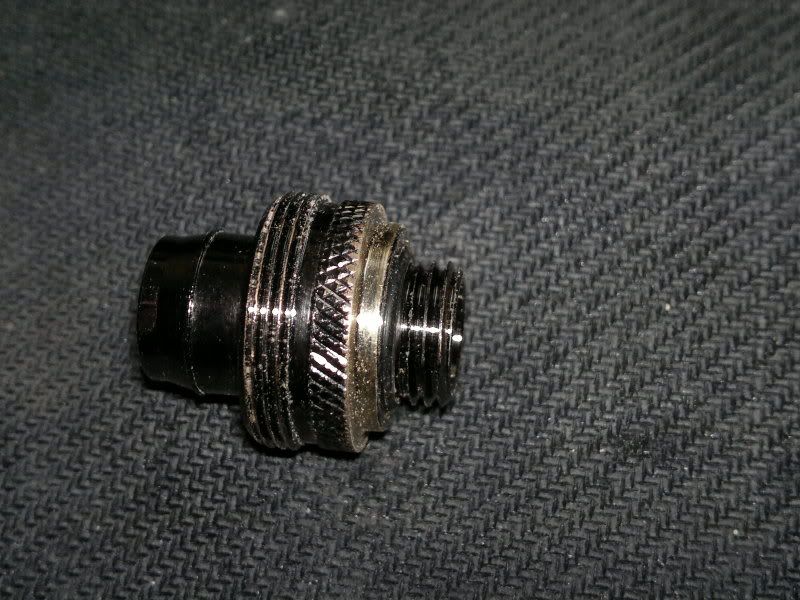
Problem solved!!
Next up is to make the enclosure so I have used some 1.5mm aluminium and drawn up a design which I think will work.....Please bear in mind its not finished yet!!
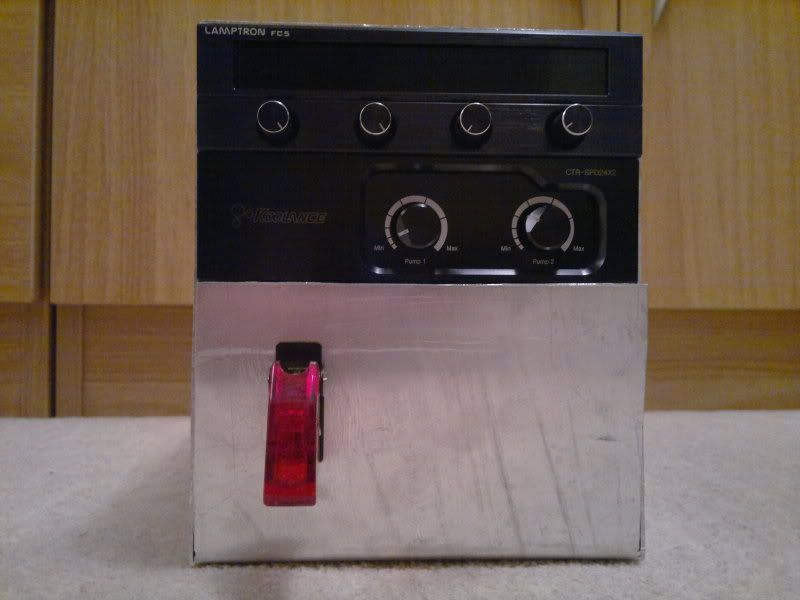
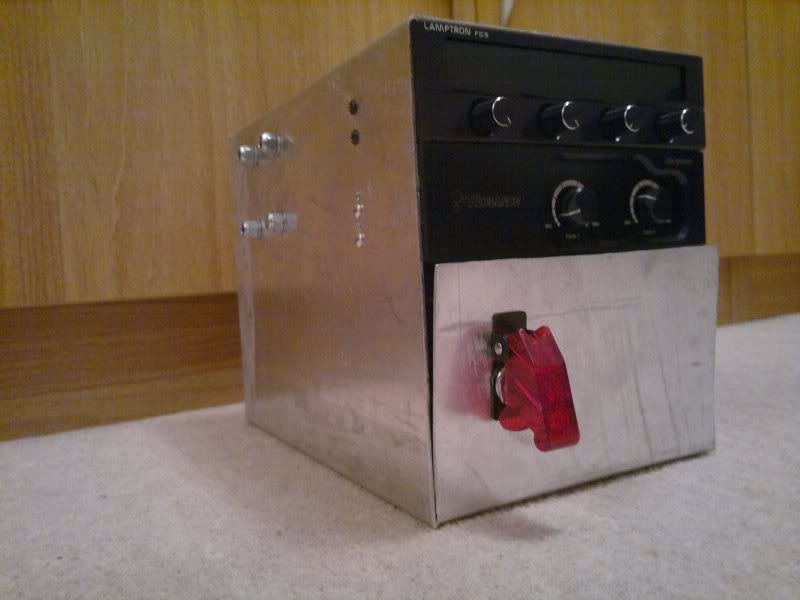

The doomsday switch I had lyiing around and is connected to green/black on the PSU and acts as the watercooling ON/OFF switch...toyed with the idea of removing the red cover but I think it gives it a bit more presence LOL. As you can see, the fan and pump controllers are mounted inside as well as the second PSU and the pump. Also to be fitted is the LCD display for the inline water temp sensor (which will be fittted to the right of the switch) and the Koolance Flow Meter Frequency Adapter which will be tucked away inside.
I HAD intended to place the pump slightly differently so I could fit a second next to it if required. Unfortunately I had evr so slightly misjudged the required height for the enclosure and ended up mounting the pump on the left side panel (the 4 nuts you can see in the second pic are the pump mountings). Pump base bracket only came with 2 holes for fittings so I added another 2 and used some plywood as a spacer which I'm hoping will also act as a damper for both noise and vibration)
Will give it a rub down, primer it and spray it satin black to match my case. Will also fit some form of latch to secure the front panel.
Really only waiting to order my rad and fluid and that, as they say, will be that!!
Hopefully I can get the Phenom to go a bit higher on the clocks with ease using the above setup. Also, the intention is to swap out the 4870X2 at some point with an HD6990 and run 3 x 24" Iiyama monitors in Eyefinity
TT
Thought I'd start a little log to keep track of things and perhaps provide others with a bit of inspiration etc
Not new to building PC's but new to w/cooling. Before I decided to use water the PC consisted of this...
Antec Nine Hundred 2 Case
Coolermaster Ultimate 1100W PSU
MSI 790FX-GD70 Motherboard
Corsair Vengeance DDR3 RAM 16GB (CMZ8GX3M2A1600C9B)
AMD PhenomII X6 1100T 3.3Ghz Processor
Zalman CPU Cooler CNPS9700NT
Powercolor HD4870X2 Graphics Card
Creative Soundblaster Fatal1ty Edition
OCZ 120Gb SSD
WD 320Gb HDD
LG BDRW Optical Drive
All pretty standard stuff....Heres how it looks....
Then decided to buy....
Phobya Balancer 450 Black Nickel Reservoir
Kolance PMP-450S Water Pump
Koolance CTR-SPD24X2 Dual 24V Pump Controller
Lamptron FC5V2 4 Channel Fan Controller
Masterkleer 13/19mm tubing
Phobya 13/19 compression fittings
Coolermaster Megaflow 200mm Fans x 4
Koolance CPU-370 CPU Block
XSPC 4870x2 waterblock
Koolance INS-FM18 Flow Meter
Koolance Flow Meter Frequency Adapter
1/4" Thread Inline Temperature Sensor with LCD Display
Dell 200W secondary PSU
ATX Bridging block
Which will be joined by a Phobya Supernova 1260 Radiator and some Phobya ZuperZero UV Green fluid.
Going to fabricate a small aluminium enclosure to house the second PSU, pump, pump controller, fan controller and frequency adapter. Idea is to wire the PSU's together via a relay so they both start up with a single button.
Whay I have noticed so far in my build is that the Balancer and fittings I bought (supposedly Phobya) are NOT compatible out of the box. Unfortunately when I test fitted the fittings the shoulders would bottom out on the surrounding material on the reservoir before the o-ring could get a seal....
Problem solved!!
Next up is to make the enclosure so I have used some 1.5mm aluminium and drawn up a design which I think will work.....Please bear in mind its not finished yet!!
The doomsday switch I had lyiing around and is connected to green/black on the PSU and acts as the watercooling ON/OFF switch...toyed with the idea of removing the red cover but I think it gives it a bit more presence LOL. As you can see, the fan and pump controllers are mounted inside as well as the second PSU and the pump. Also to be fitted is the LCD display for the inline water temp sensor (which will be fittted to the right of the switch) and the Koolance Flow Meter Frequency Adapter which will be tucked away inside.
I HAD intended to place the pump slightly differently so I could fit a second next to it if required. Unfortunately I had evr so slightly misjudged the required height for the enclosure and ended up mounting the pump on the left side panel (the 4 nuts you can see in the second pic are the pump mountings). Pump base bracket only came with 2 holes for fittings so I added another 2 and used some plywood as a spacer which I'm hoping will also act as a damper for both noise and vibration)
Will give it a rub down, primer it and spray it satin black to match my case. Will also fit some form of latch to secure the front panel.
Really only waiting to order my rad and fluid and that, as they say, will be that!!
Hopefully I can get the Phenom to go a bit higher on the clocks with ease using the above setup. Also, the intention is to swap out the 4870X2 at some point with an HD6990 and run 3 x 24" Iiyama monitors in Eyefinity
TT